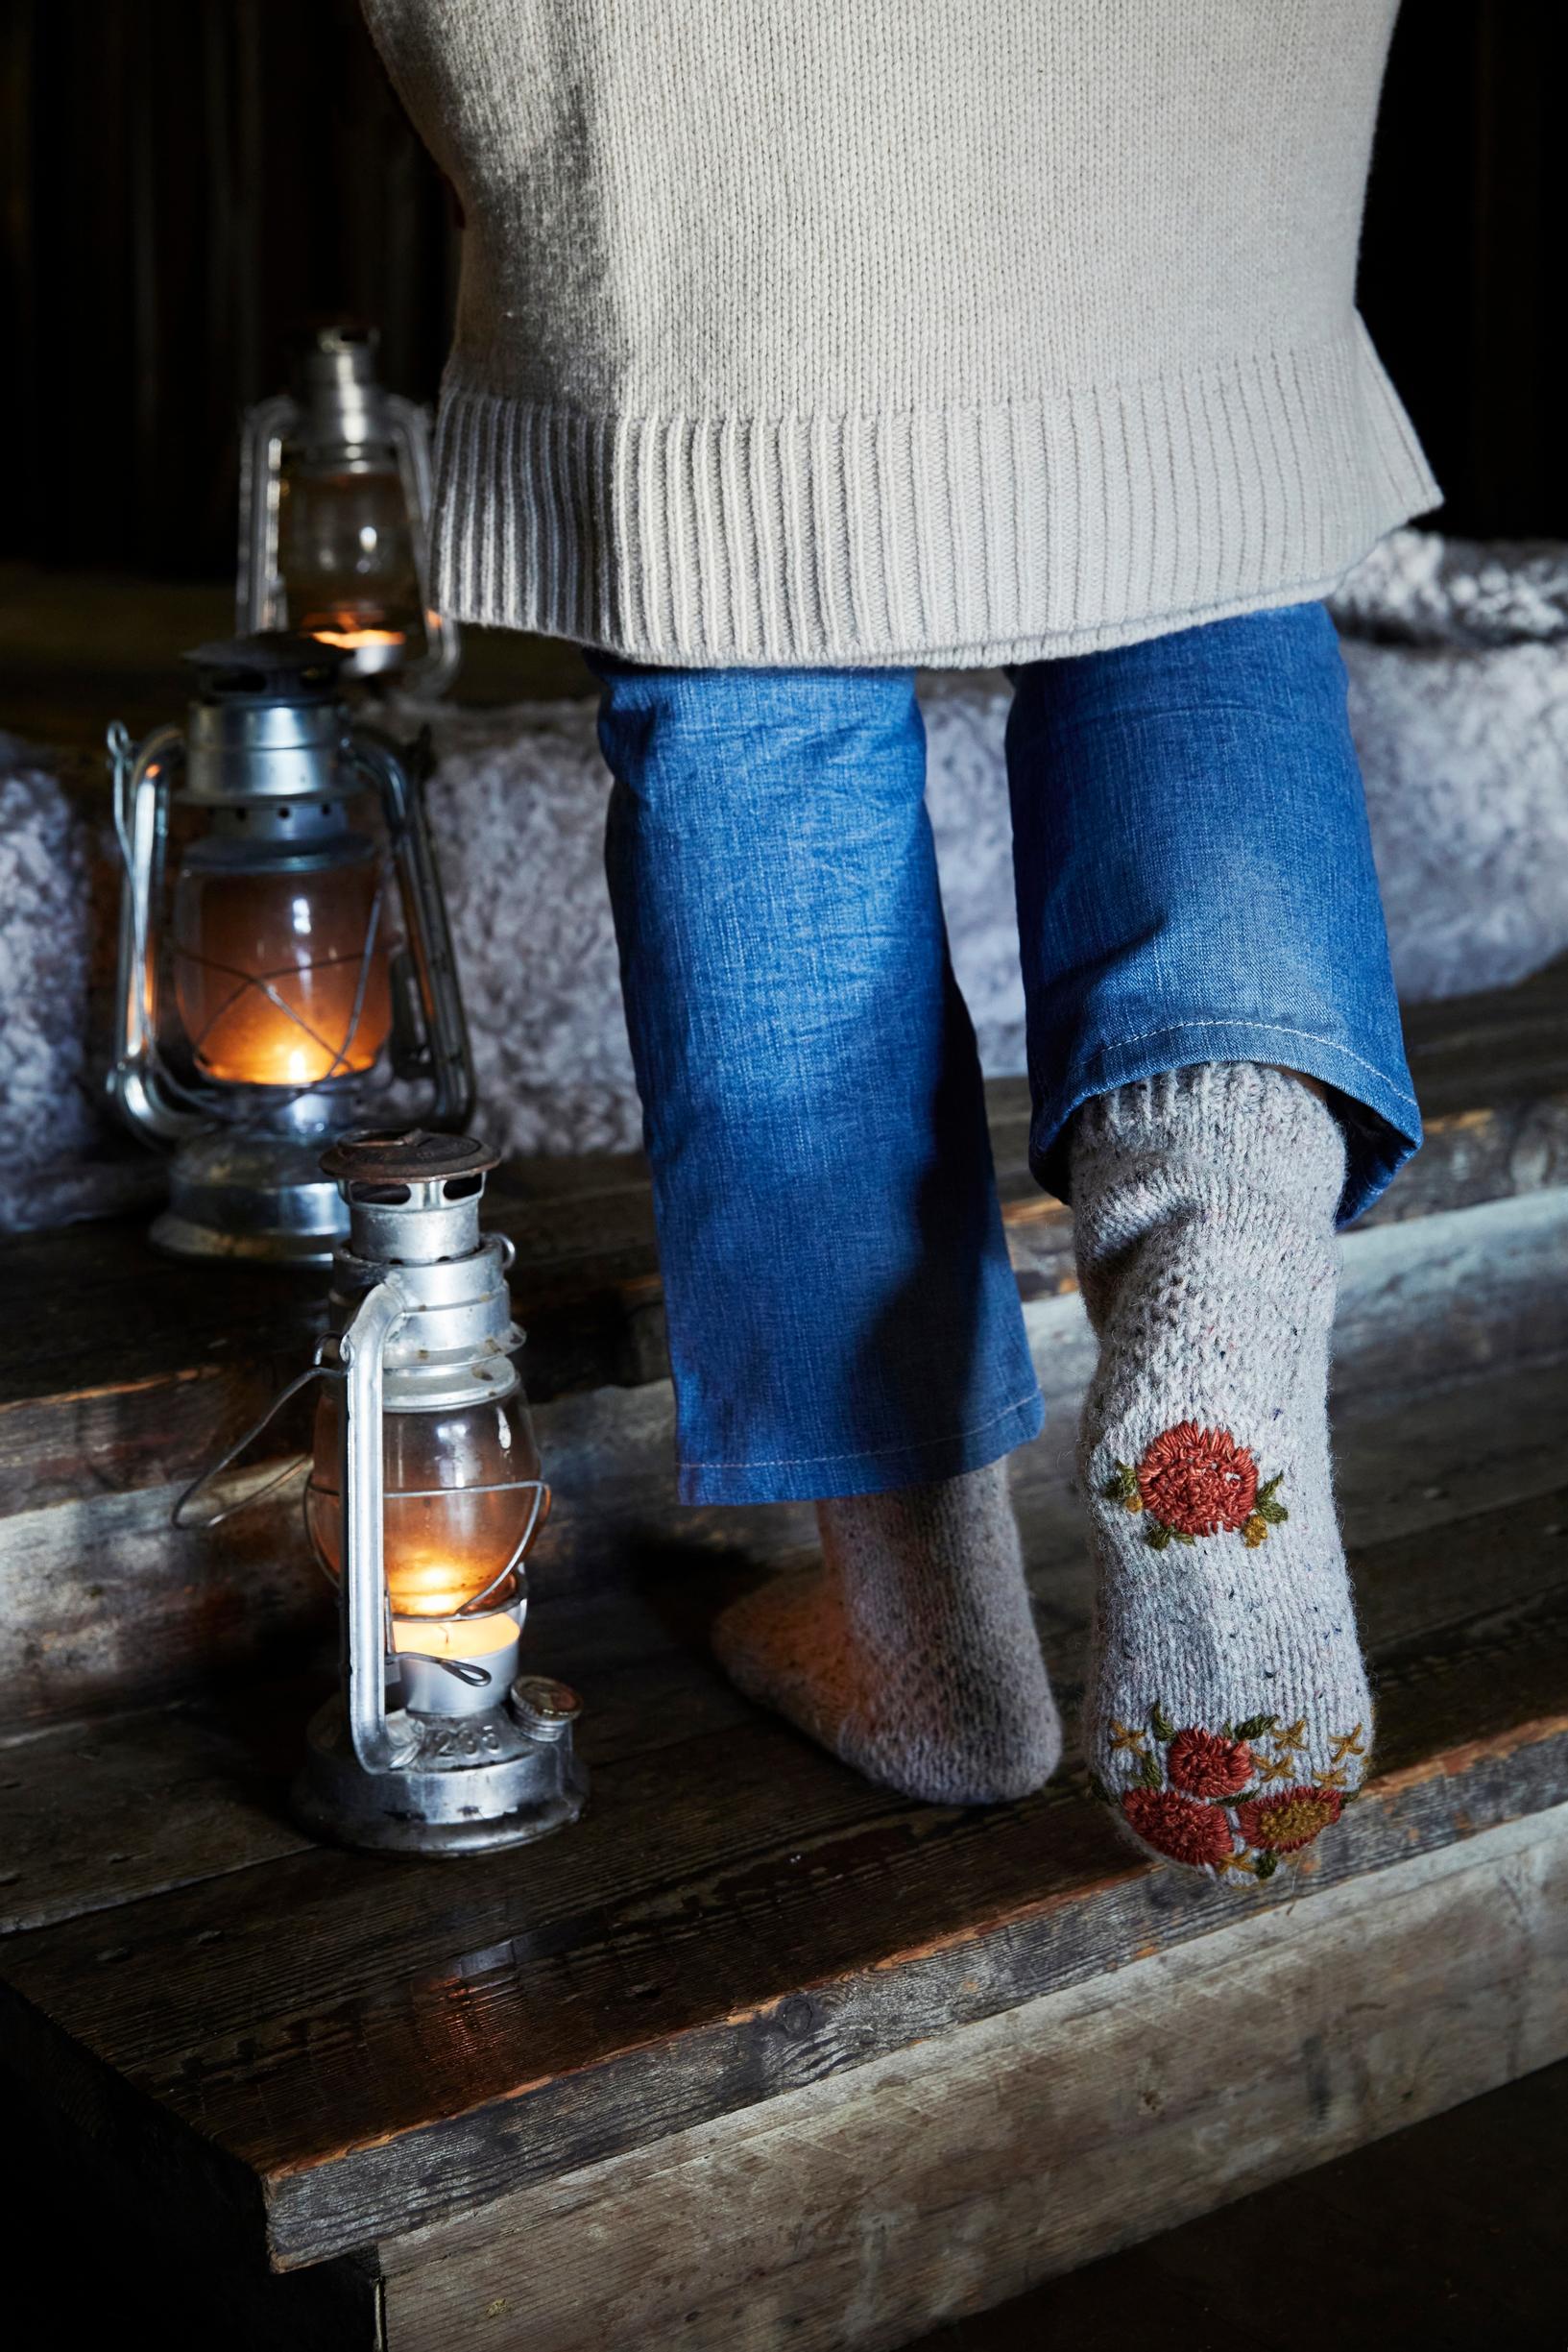
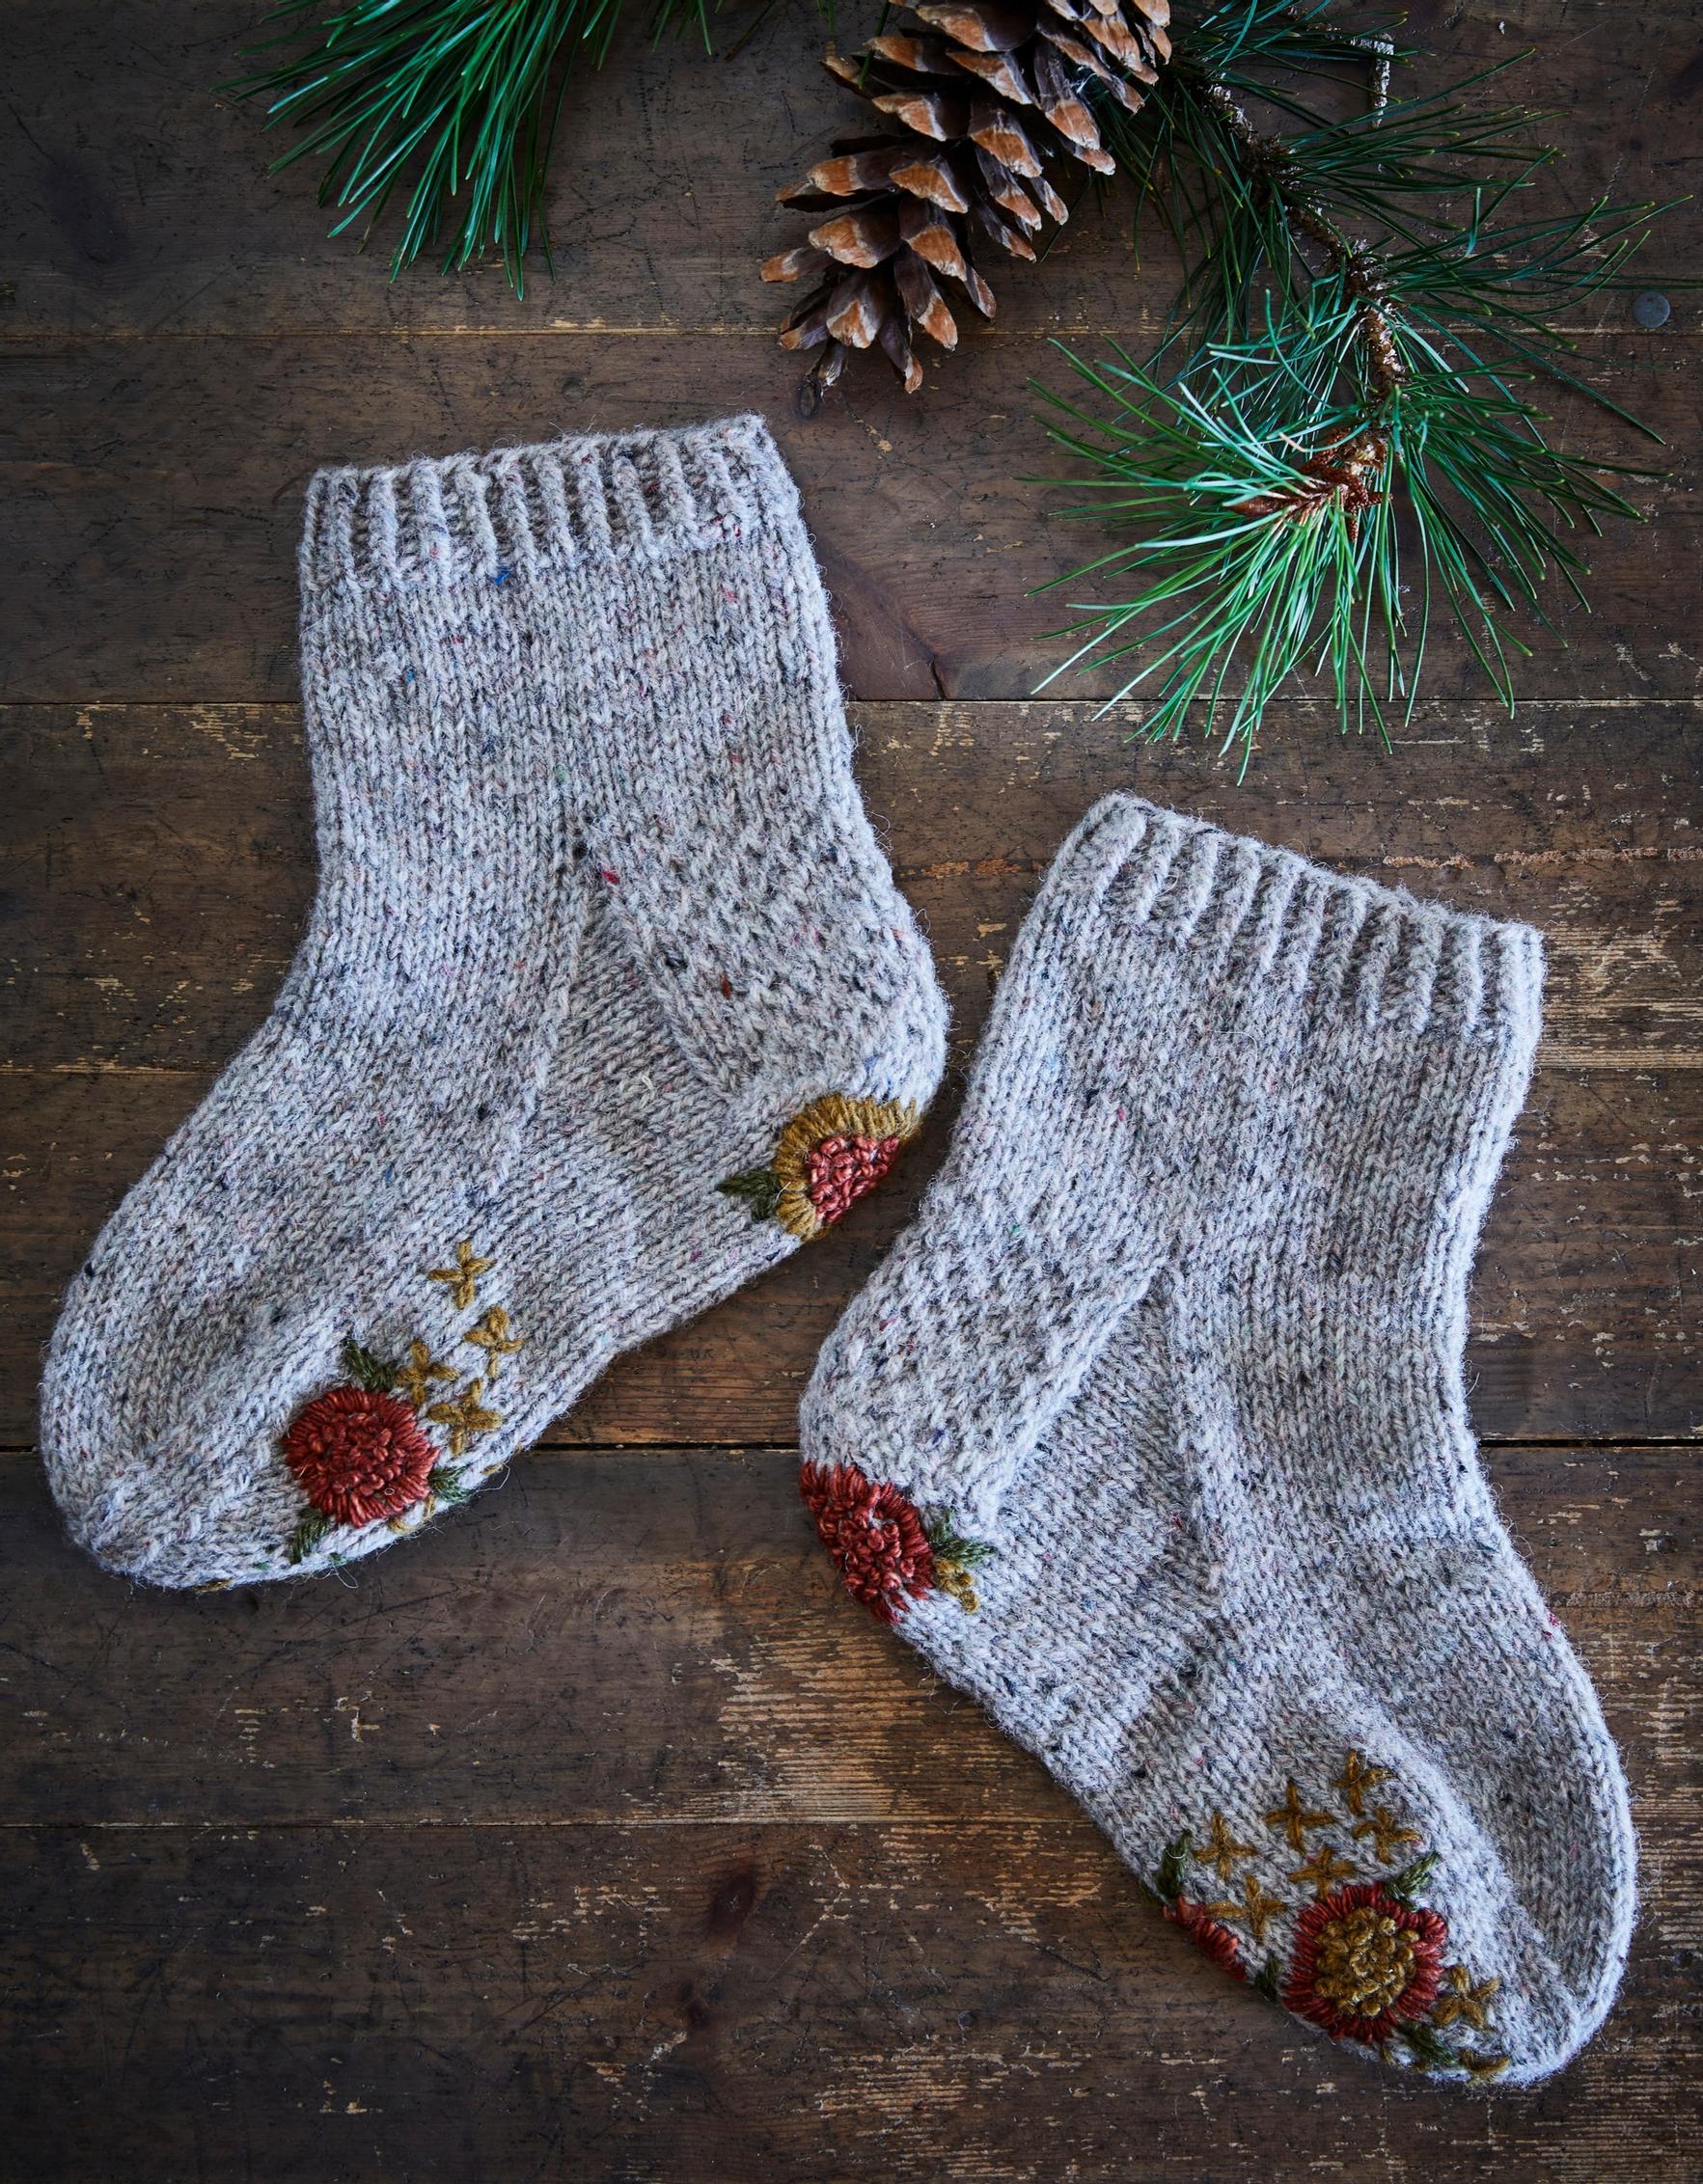
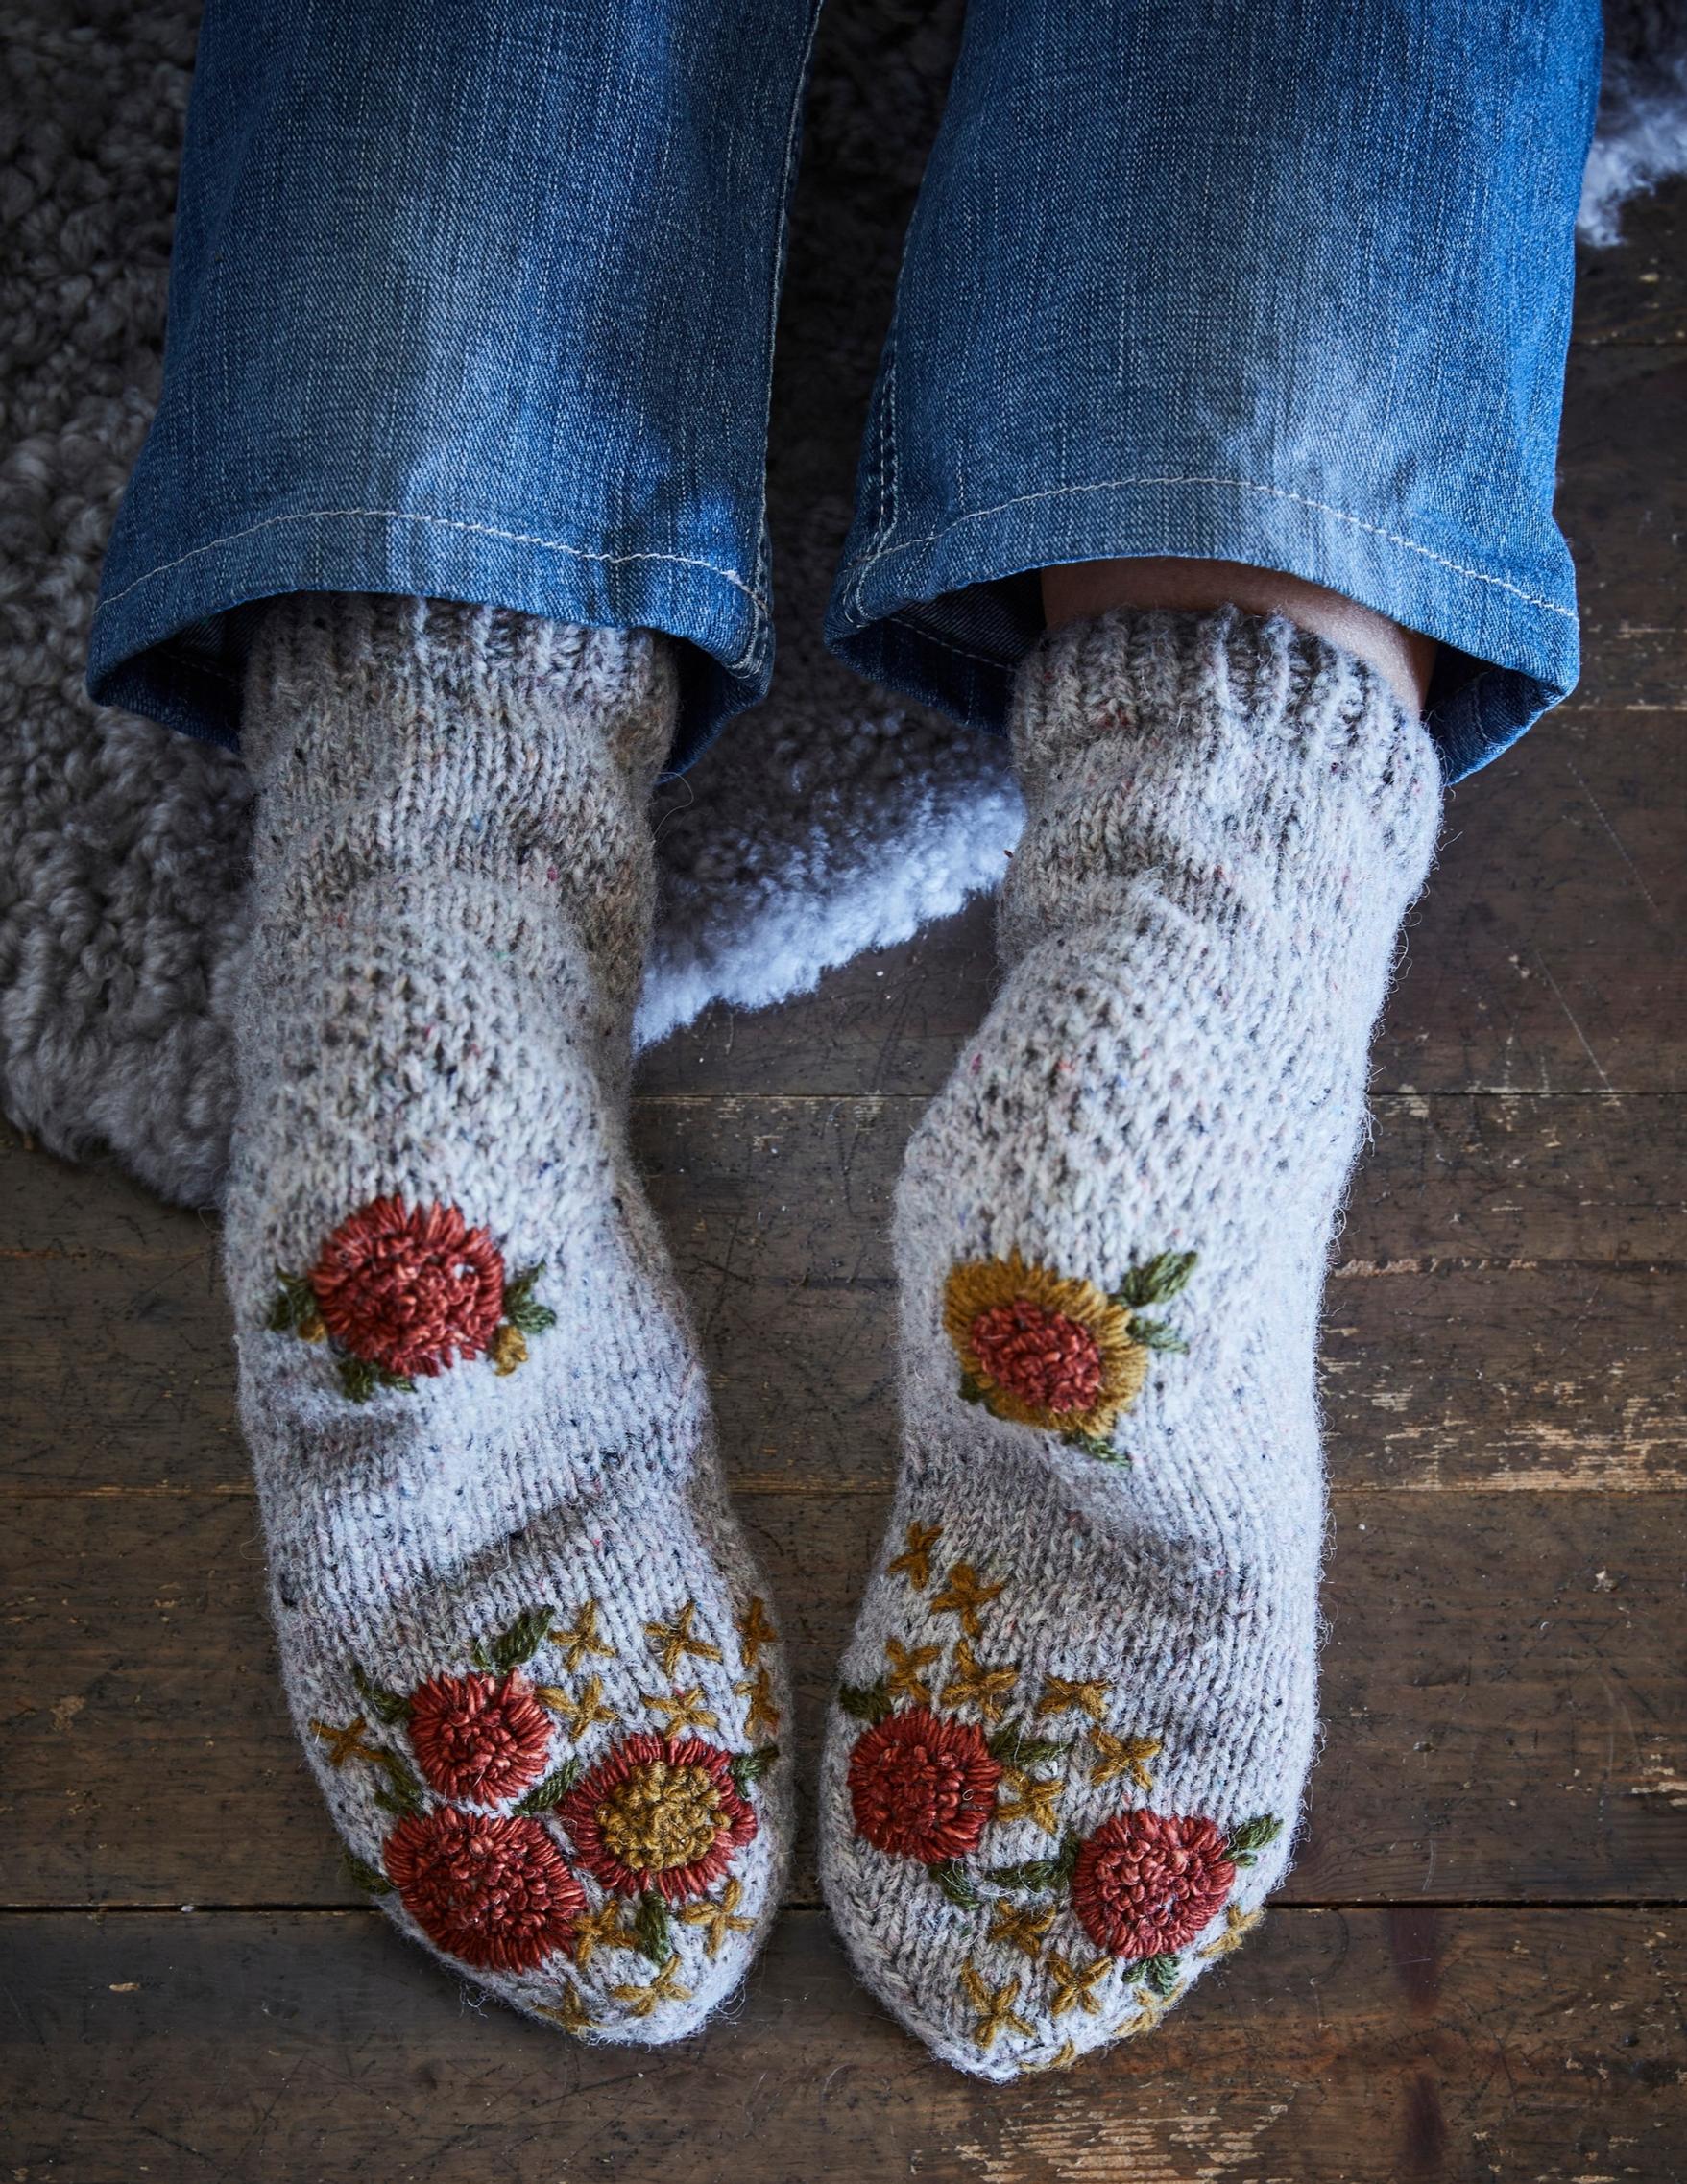
Massage-effect wool socks: stroll like you’re on a forest path
Turn your wool socks into massage socks by embroidering flowers and leaves onto the soles with leftover yarn. You can also mend old, worn-out socks with decorative embroidery.
Size: EU 38–39.
Forest path wool socks: materials
85 g of Aran-weight yarn; we used Pirtin Kehräämö’s recycled wool yarn (210 m/100 g) in these sample socks
reinforced sock yarn for embroidery
Double-pointed needles, 3.5 mm (US 4) or size to obtain gauge.
Gauge: 20 sts = 10 cm in stockinette stitch on 3.5 mm (US 4) needles.

Massage-effect wool socks: instructions
Cuff
1. The socks are knitted from the cuff down. Cast on 48 sts on double-pointed needles and distribute them evenly, 12 sts on each needle. The beginning of the round is always between needles I and IV.
2. Work twisted rib in the round: *p1, then k1 through the back loop*, repeat from * to * until the work measures 3 cm. Continue in stockinette stitch in the round for 7 cm.
Heel flap
1. Begin the heel flap by knitting the sts from needle I onto needle IV [= 24 sts]. Leave the other sts on hold. Turn the work and proceed as follows:
Row 1 (wrong side): Slip the first st with yarn in front, then purl the remaining sts. Turn work.
Row 2 (right side): *Slip 1 st with yarn in back, knit 1 st*. Repeat from * to * until end of row. Turn work.
Row 3: Slip the first st with yarn in front, then purl the remaining sts. Turn work.
Row 4: Slip 1 st, k2, *slip 1 st, k1*. Repeat from * to * and knit the last st. Turn work.
2. Repeat rows 1–4 a total of 6 times [= 24 rows]. Then purl one more wrong side row as before, and turn work.
Heel turn
1. Row 1: K14, then knit the next 2 sts together through their back loops, k1. Turn work.
Row 2: Slip 1 st, p5, purl the next 2 sts together, then p1. Turn work.
Row 3: Slip 1 st, k6, knit the next 2 sts together through their back loops, k1. Turn work.
Row 4: Slip 1 st, p7, purl the next 2 sts together, then p1. Turn work.
2. Continue these decreases so that the number of sts in the middle grows with each row, until you make the final decreases at both the right side and wrong side edges of the heel flap. Knit one more row and simultaneously divide the sts onto two needles.
3. Pick up and knit 12 sts along the left edge of the heel flap and 1 st through the back loop between the heel flap and needle II. Continue knitting stockinette stitch on needles II and III. Pick up 1 st between needle III and the heel flap and knit it through the back loop, then pick up and knit 12 sts along the right edge of the heel flap. Knit the heel-flap sts.
Gusset decreases
1.Continue in stockinette stitch on all needles and begin gusset decreases: On needle I, knit the last 2 sts together, and on needle IV knit the first 2 sts together through their back loops. Repeat these decreases on every other round until 12 sts remain on needles I and IV. There are now 48 sts in total.
Foot and toe decreases
1.Continue knitting in stockinette stitch until the foot measures about 20 cm, or until the little toe is covered.
2.Begin wedge decreases: On needles I and III, knit until 2 sts remain, then knit 2 sts together, k1. On needles II and IV, k1, then work an skp decrease (= slip 1 knitwise, k1 and pass the slipped st over). Work these decreases every other round until 20 sts remain. After that, make the decreases on every round. When 8 sts remain, break the yarn, thread it through the sts, and fasten securely.
Finishing
Weave in ends and carefully dampen the socks. Dry them flat.

Embroidery
1. Select scrap yarn in your preferred color combinations. Test with a few stitches if the embroidery yarn stands out from the base color; for instance, light pink may not show clearly against a gray base. The test stitches also help you estimate how thick the embroidery will be. Thinner yarn can be held double.
2. To make the embroidery easier, place a darning mushroom, insole, or a piece of cardboard cut to fit the shape of the sock sole inside the sock.
3. Choose the spots on the sock where you want the thickest, massaging areas under the foot. Make knots on the surface of the sole in a circular formation. This will be the center of a flower.

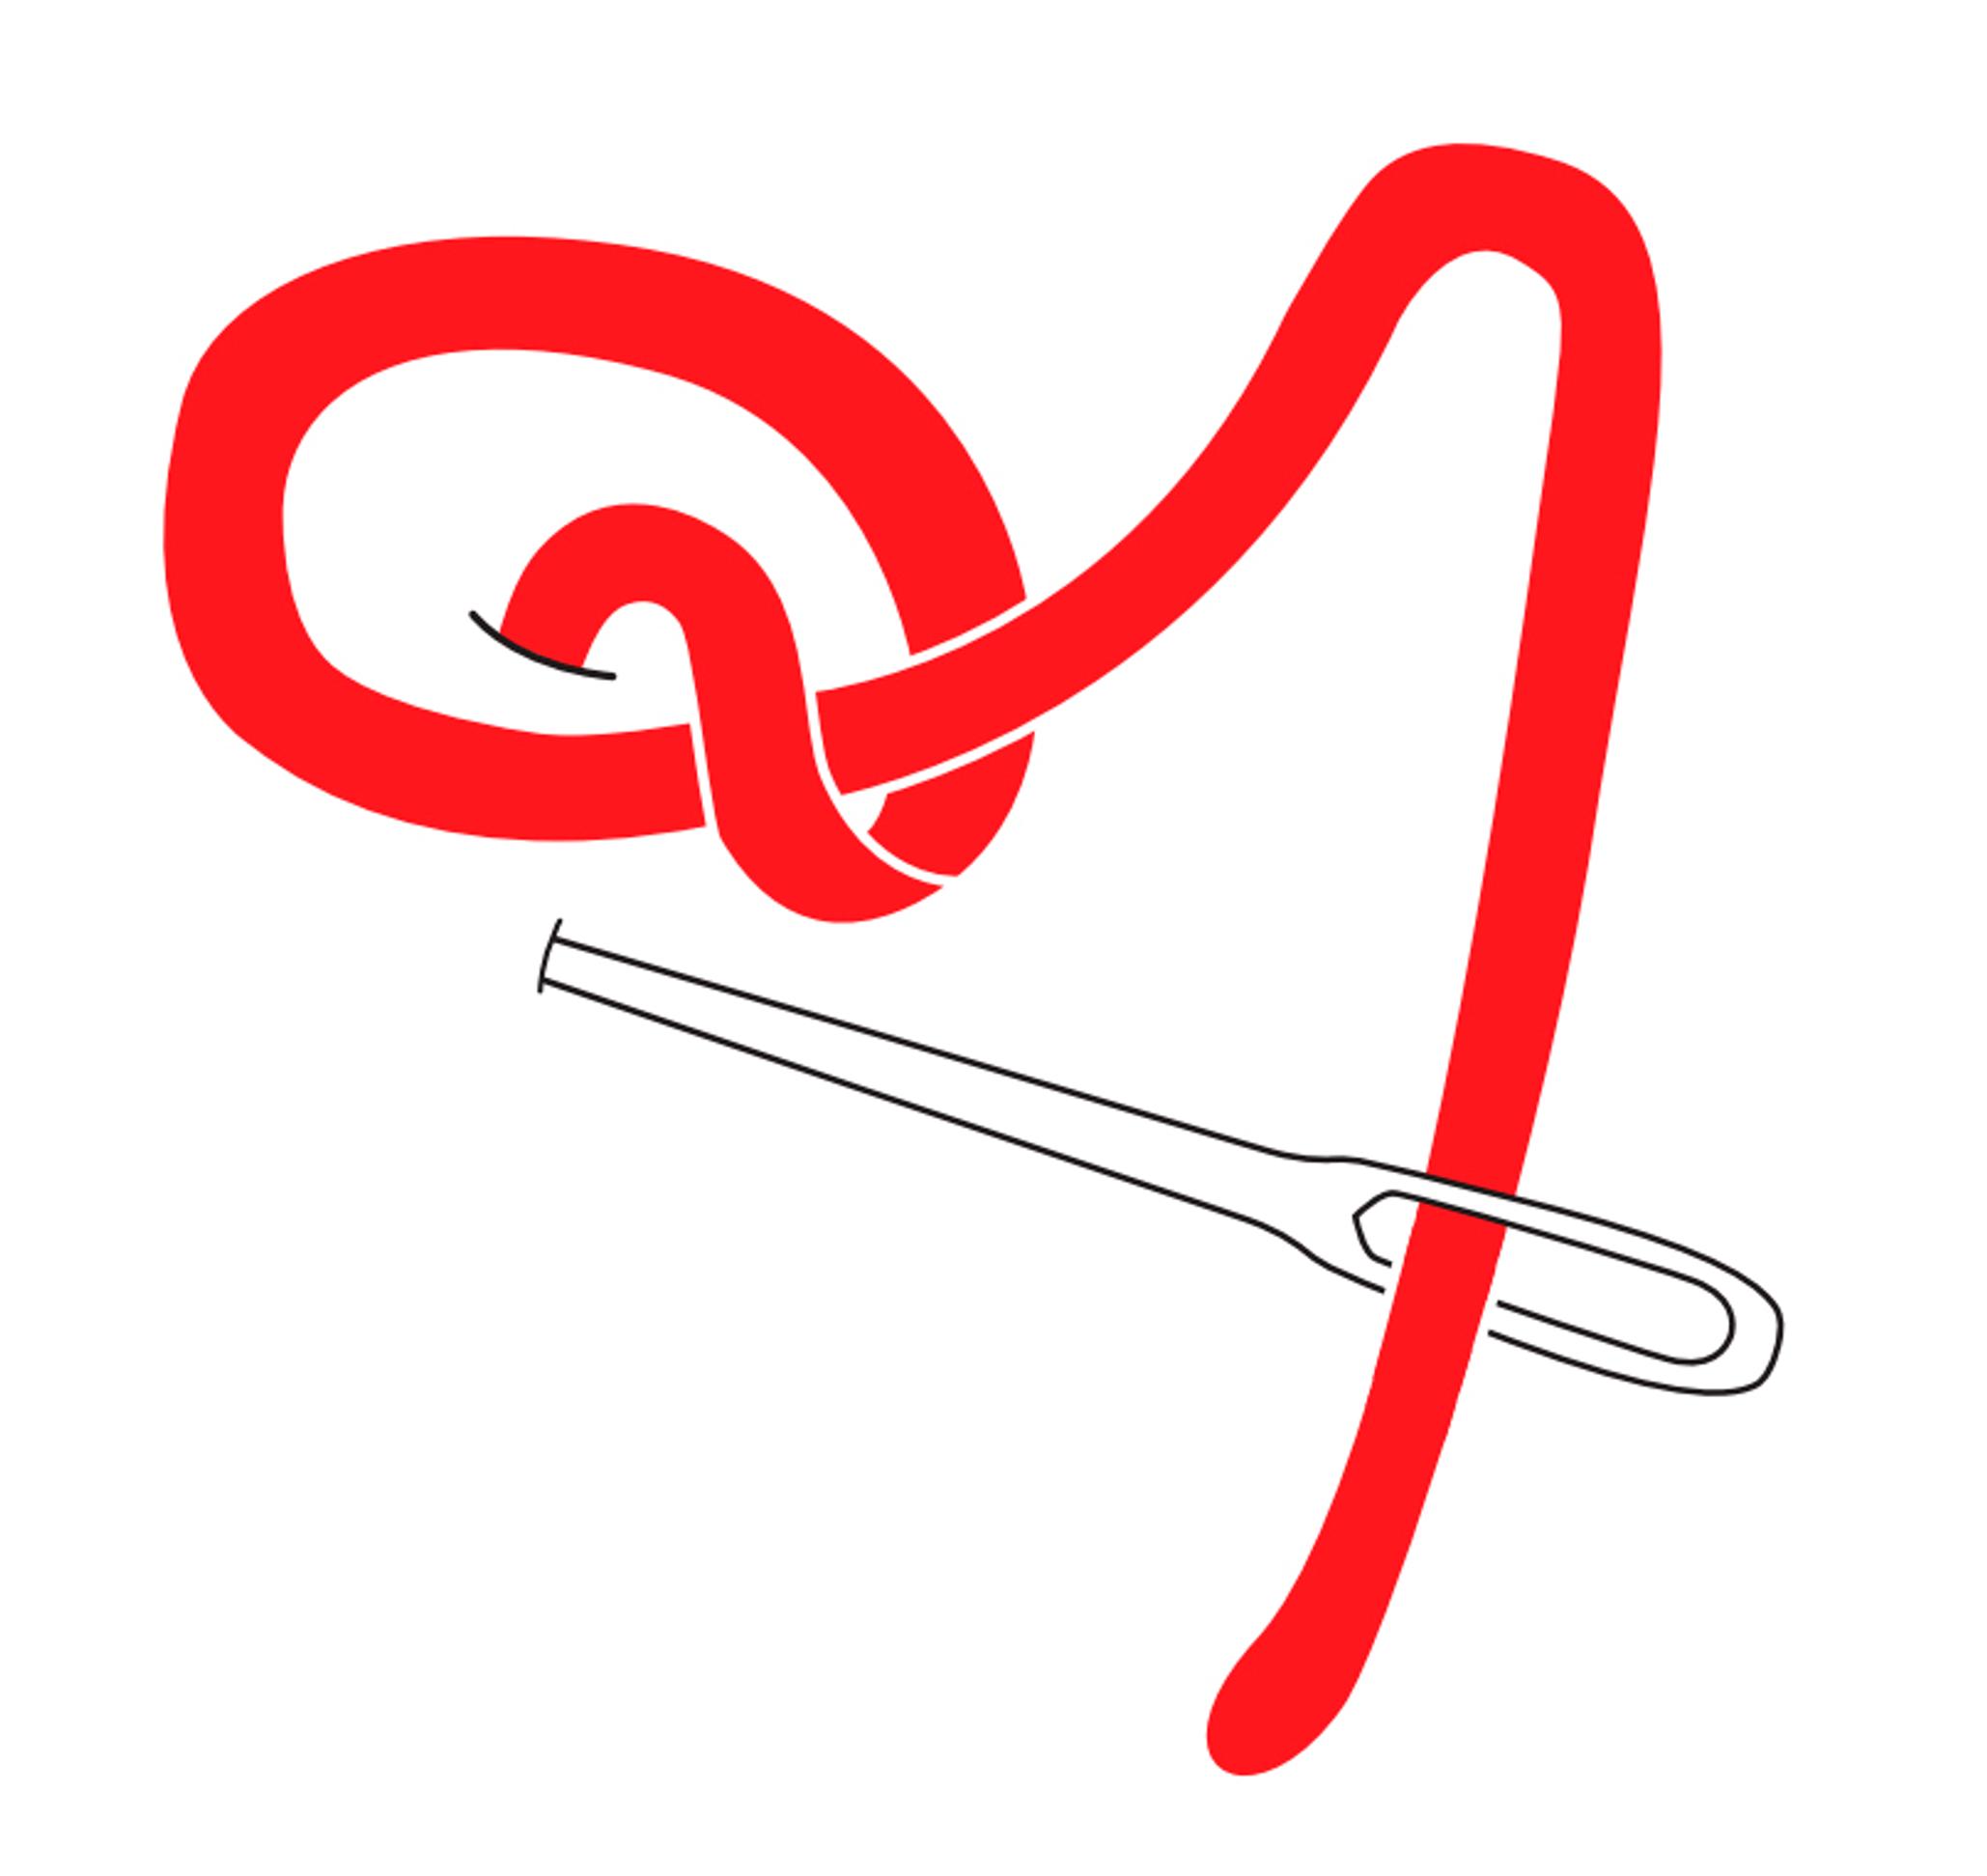
4. French knot stitch: Bring the yarn from inside the sock up to the surface of the fabric. Tie a simple, loose knot in the yarn and tighten it with your needle against the sock. Then take the yarn back inside the sock. Embroider flower petals using straight stitch around the knot clusters.

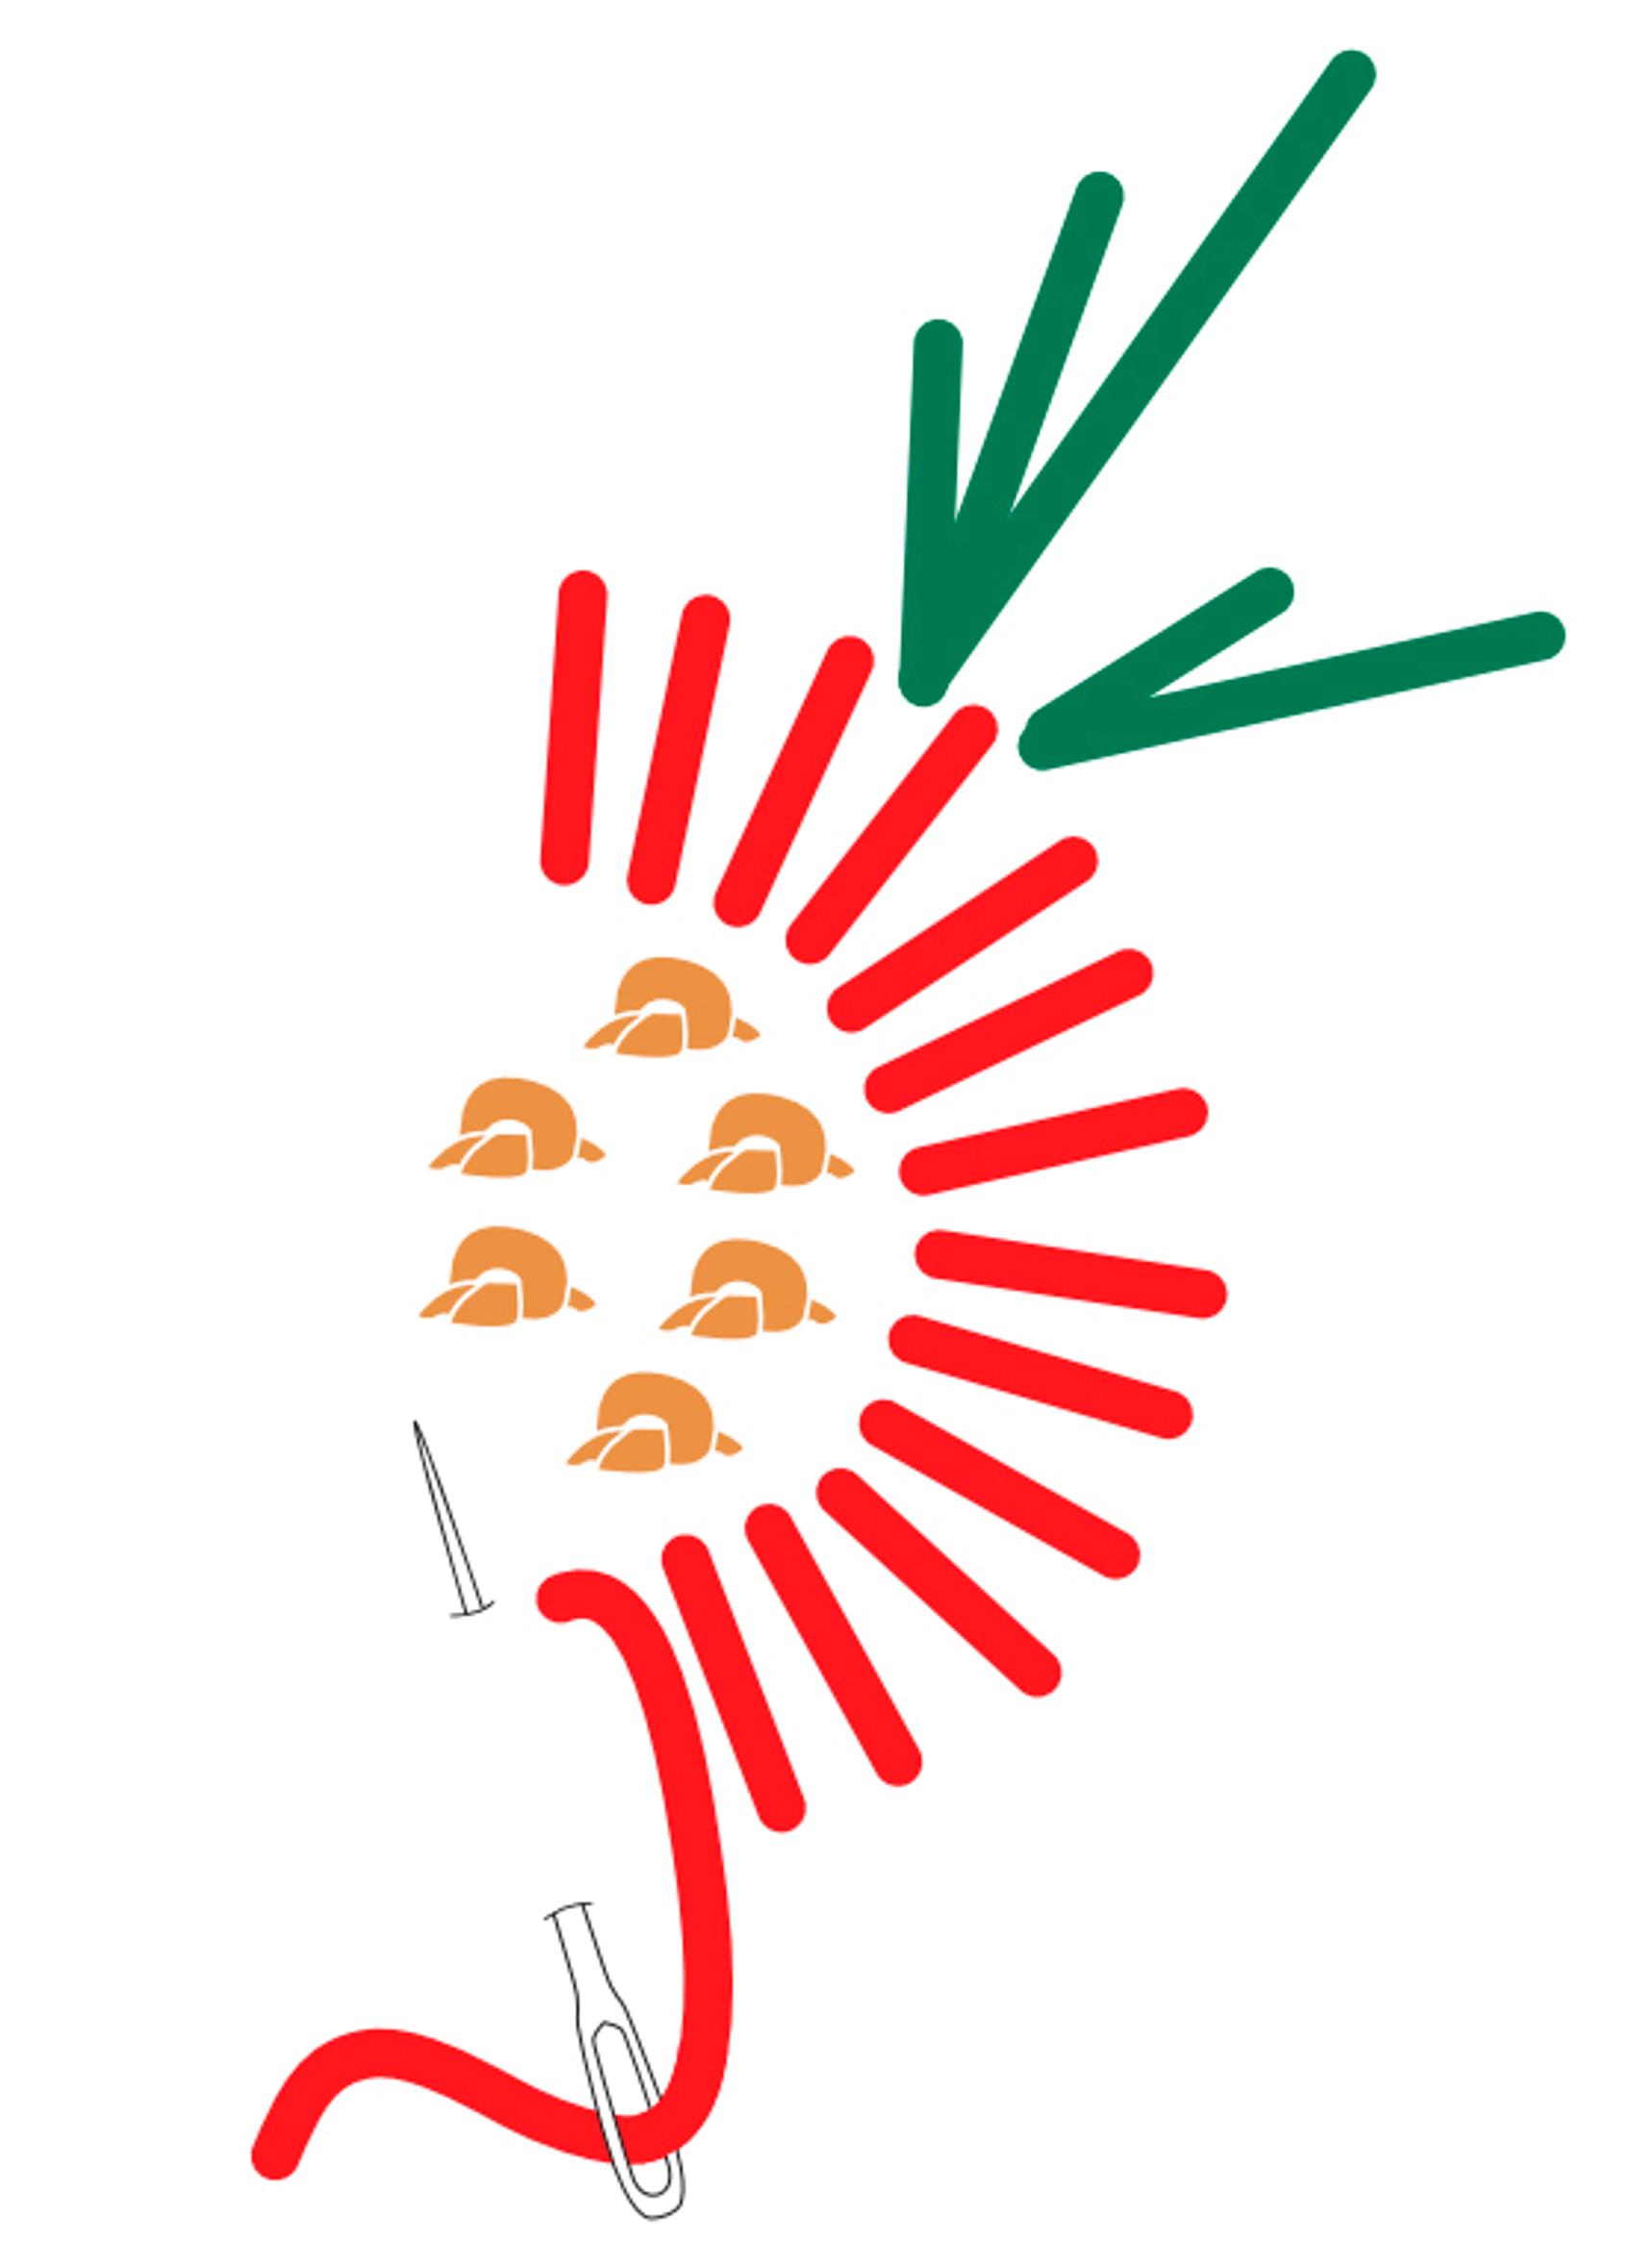
5. Next, embroider a few leaves around the flower with straight stitch. Straight stitch: Bring the yarn from inside the sock to the surface, and then take it back in again, leaving the desired distance between stitches.
6. Embroider X-shapes with straight stitch between the flowers.

