
11 easy, budget-friendly Halloween decorations: tips from a thrifty Halloween lover!
According to Kotona’s Art Director Elina Henttonen, Halloween is the second-best holiday, right after Christmas. “We decorate our home as much as possible with supplies we already have on hand,” she says. See Elina’s spooky season ideas on a budget!
I attended my first Halloween costume party in 1998, back when I was a student. Even then, visually minded students pulled out all the stops on their outfits! For many years afterward, I didn’t celebrate Halloween at all, until some friends started throwing costume parties for adults.
I put my costumes together by adapting what’s already in my closet and hunting for accessories at flea markets. For instance, a red dress makes a great base for many looks. I might buy something small yet essential from a costume shop, like white face paint. I’ve dressed up as Edward Scissorhands, Vampira, Cruella de Vil, and Frida Kahlo, among others. This year, I’m inspired by the new Beetlejuice movie and its mother-figure Lydia Deetz—or maybe I’ll go as Marie Curie, since Matilda called me that because of my Victorian-style black dress.
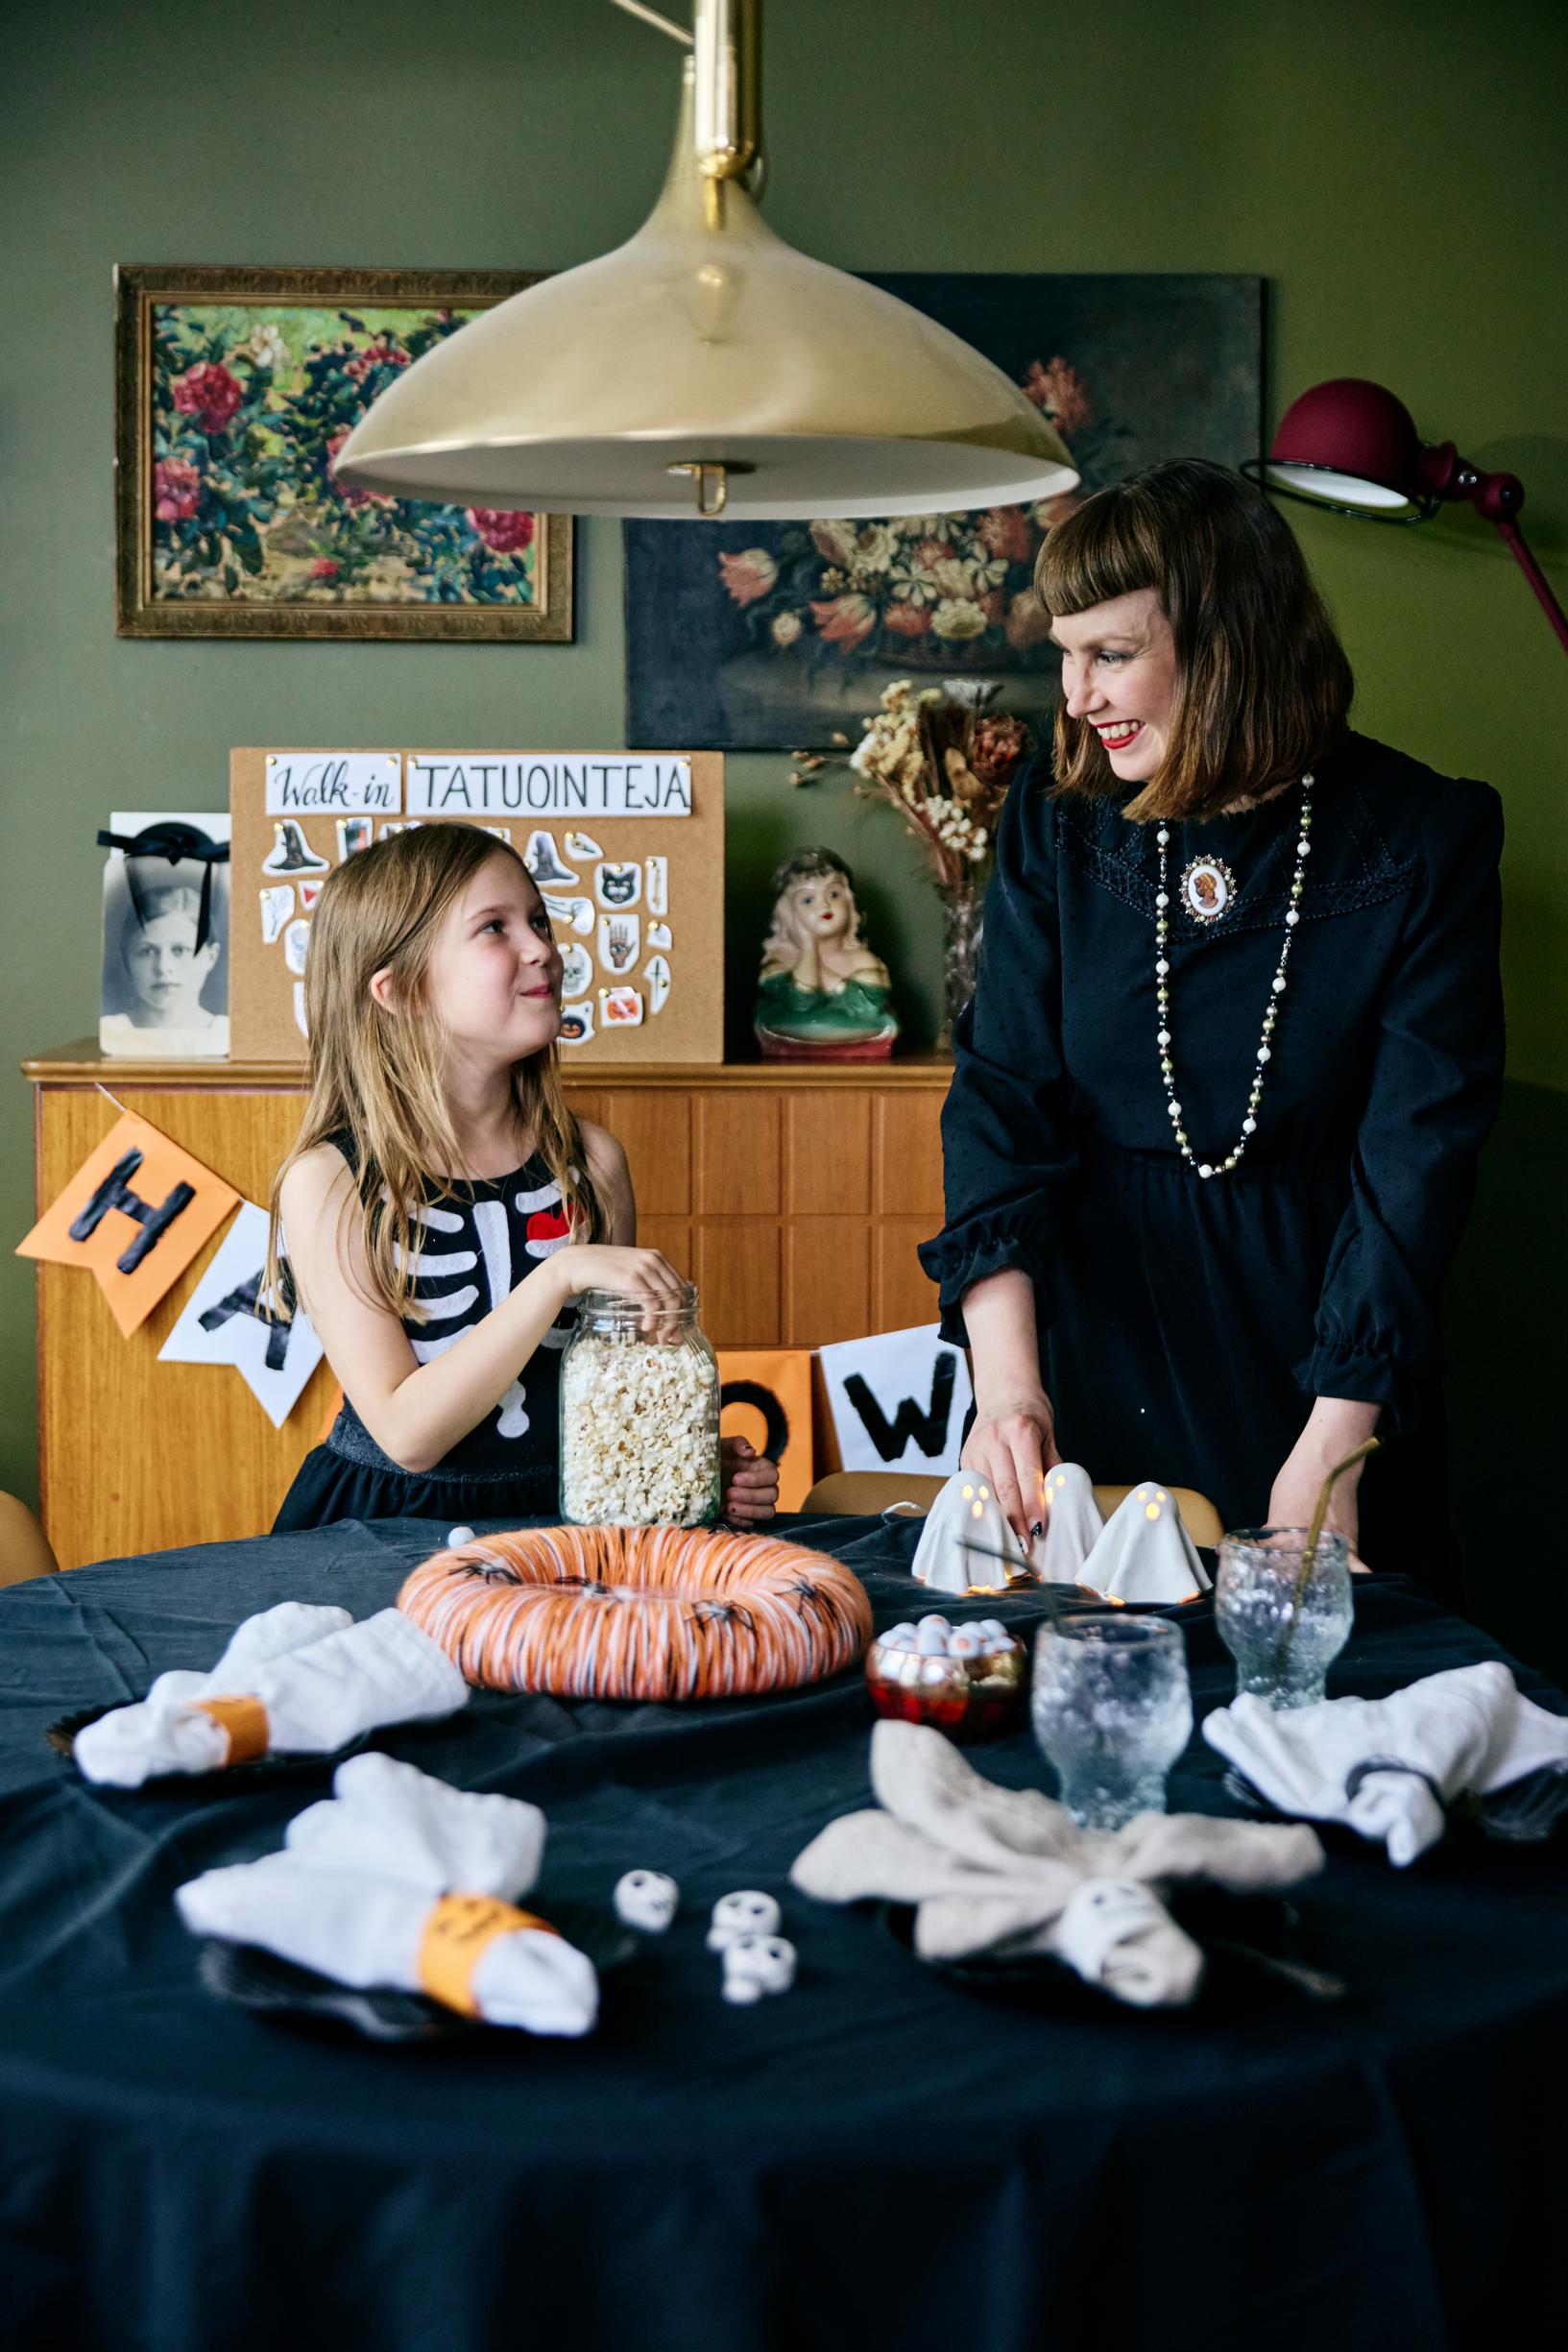
My daughter Matilda is now eight years old, and she loves Halloween too. We start planning our party and making easy, cute decorations weeks in advance. We only buy Halloween-themed treats.
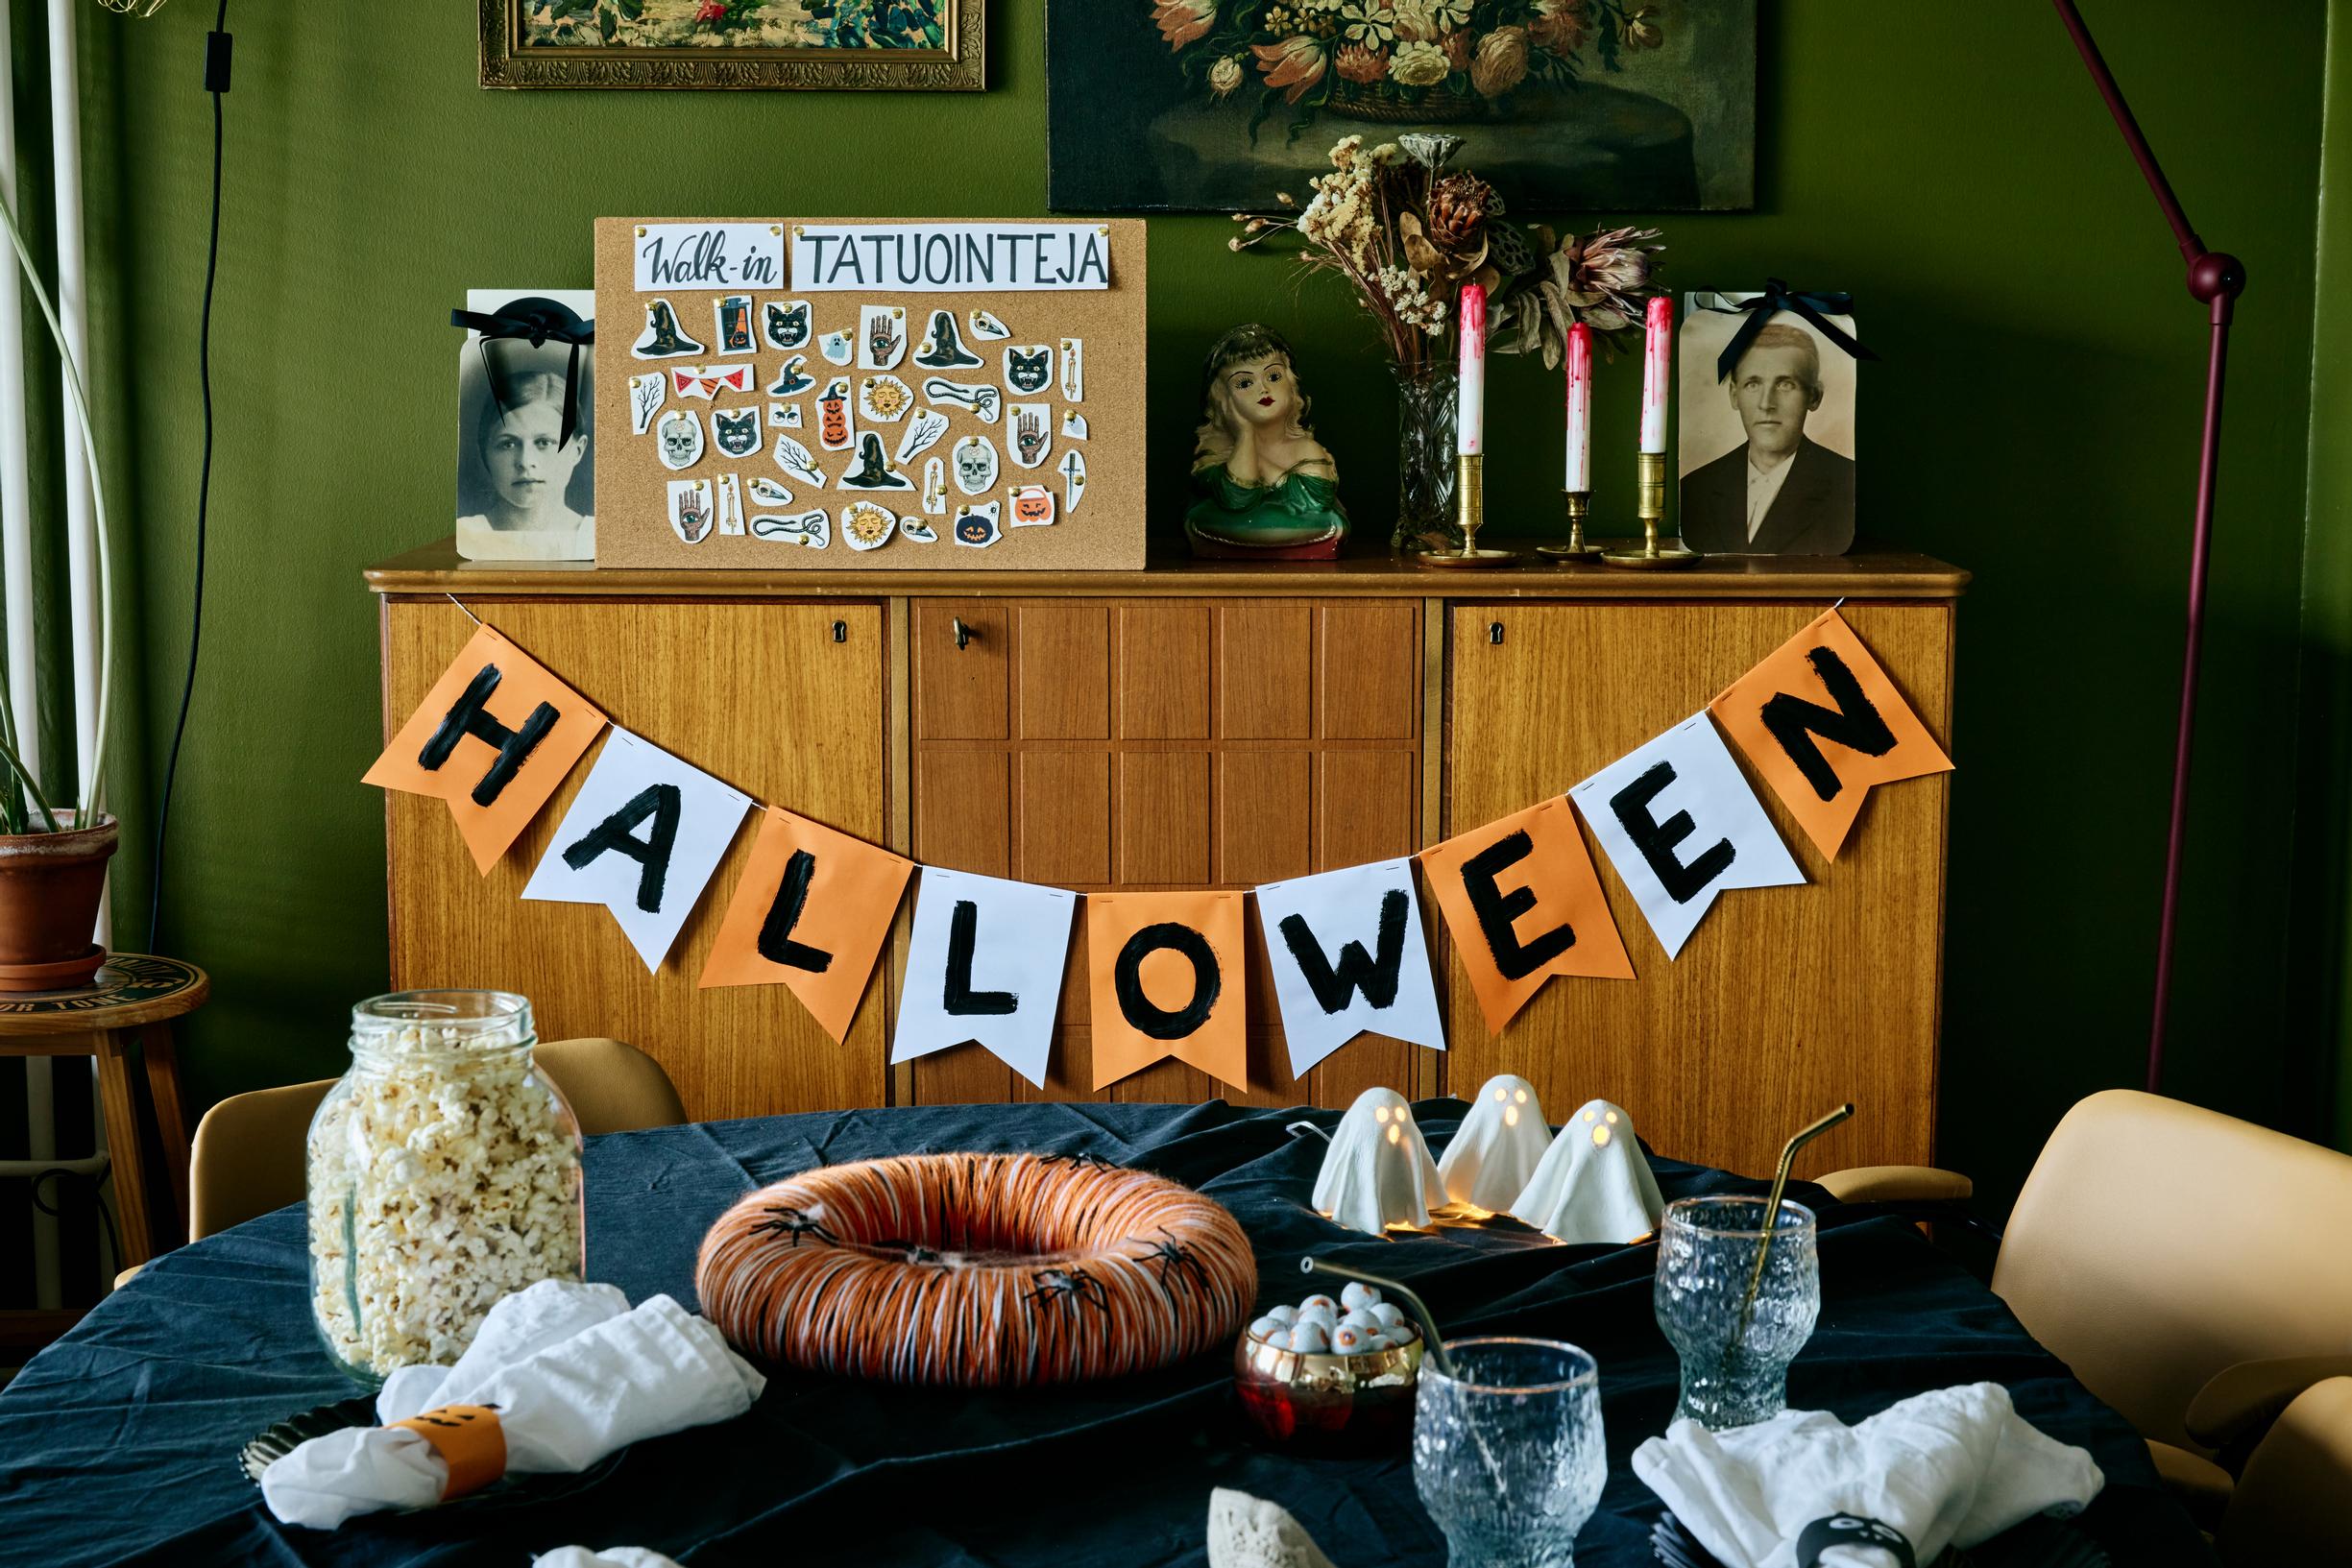
We decorate our home with supplies we already have on hand, like black dishes, sheets, candleholders, LED candles, and party lights. I collect antiques and vintage items, so I already have plenty of Halloween-worthy pieces. We set the table in dark tones and turn down the lights. We also put together a Halloween playlist on Spotify and turn on a disco ball.

1. A skeleton costume that lasts year after year

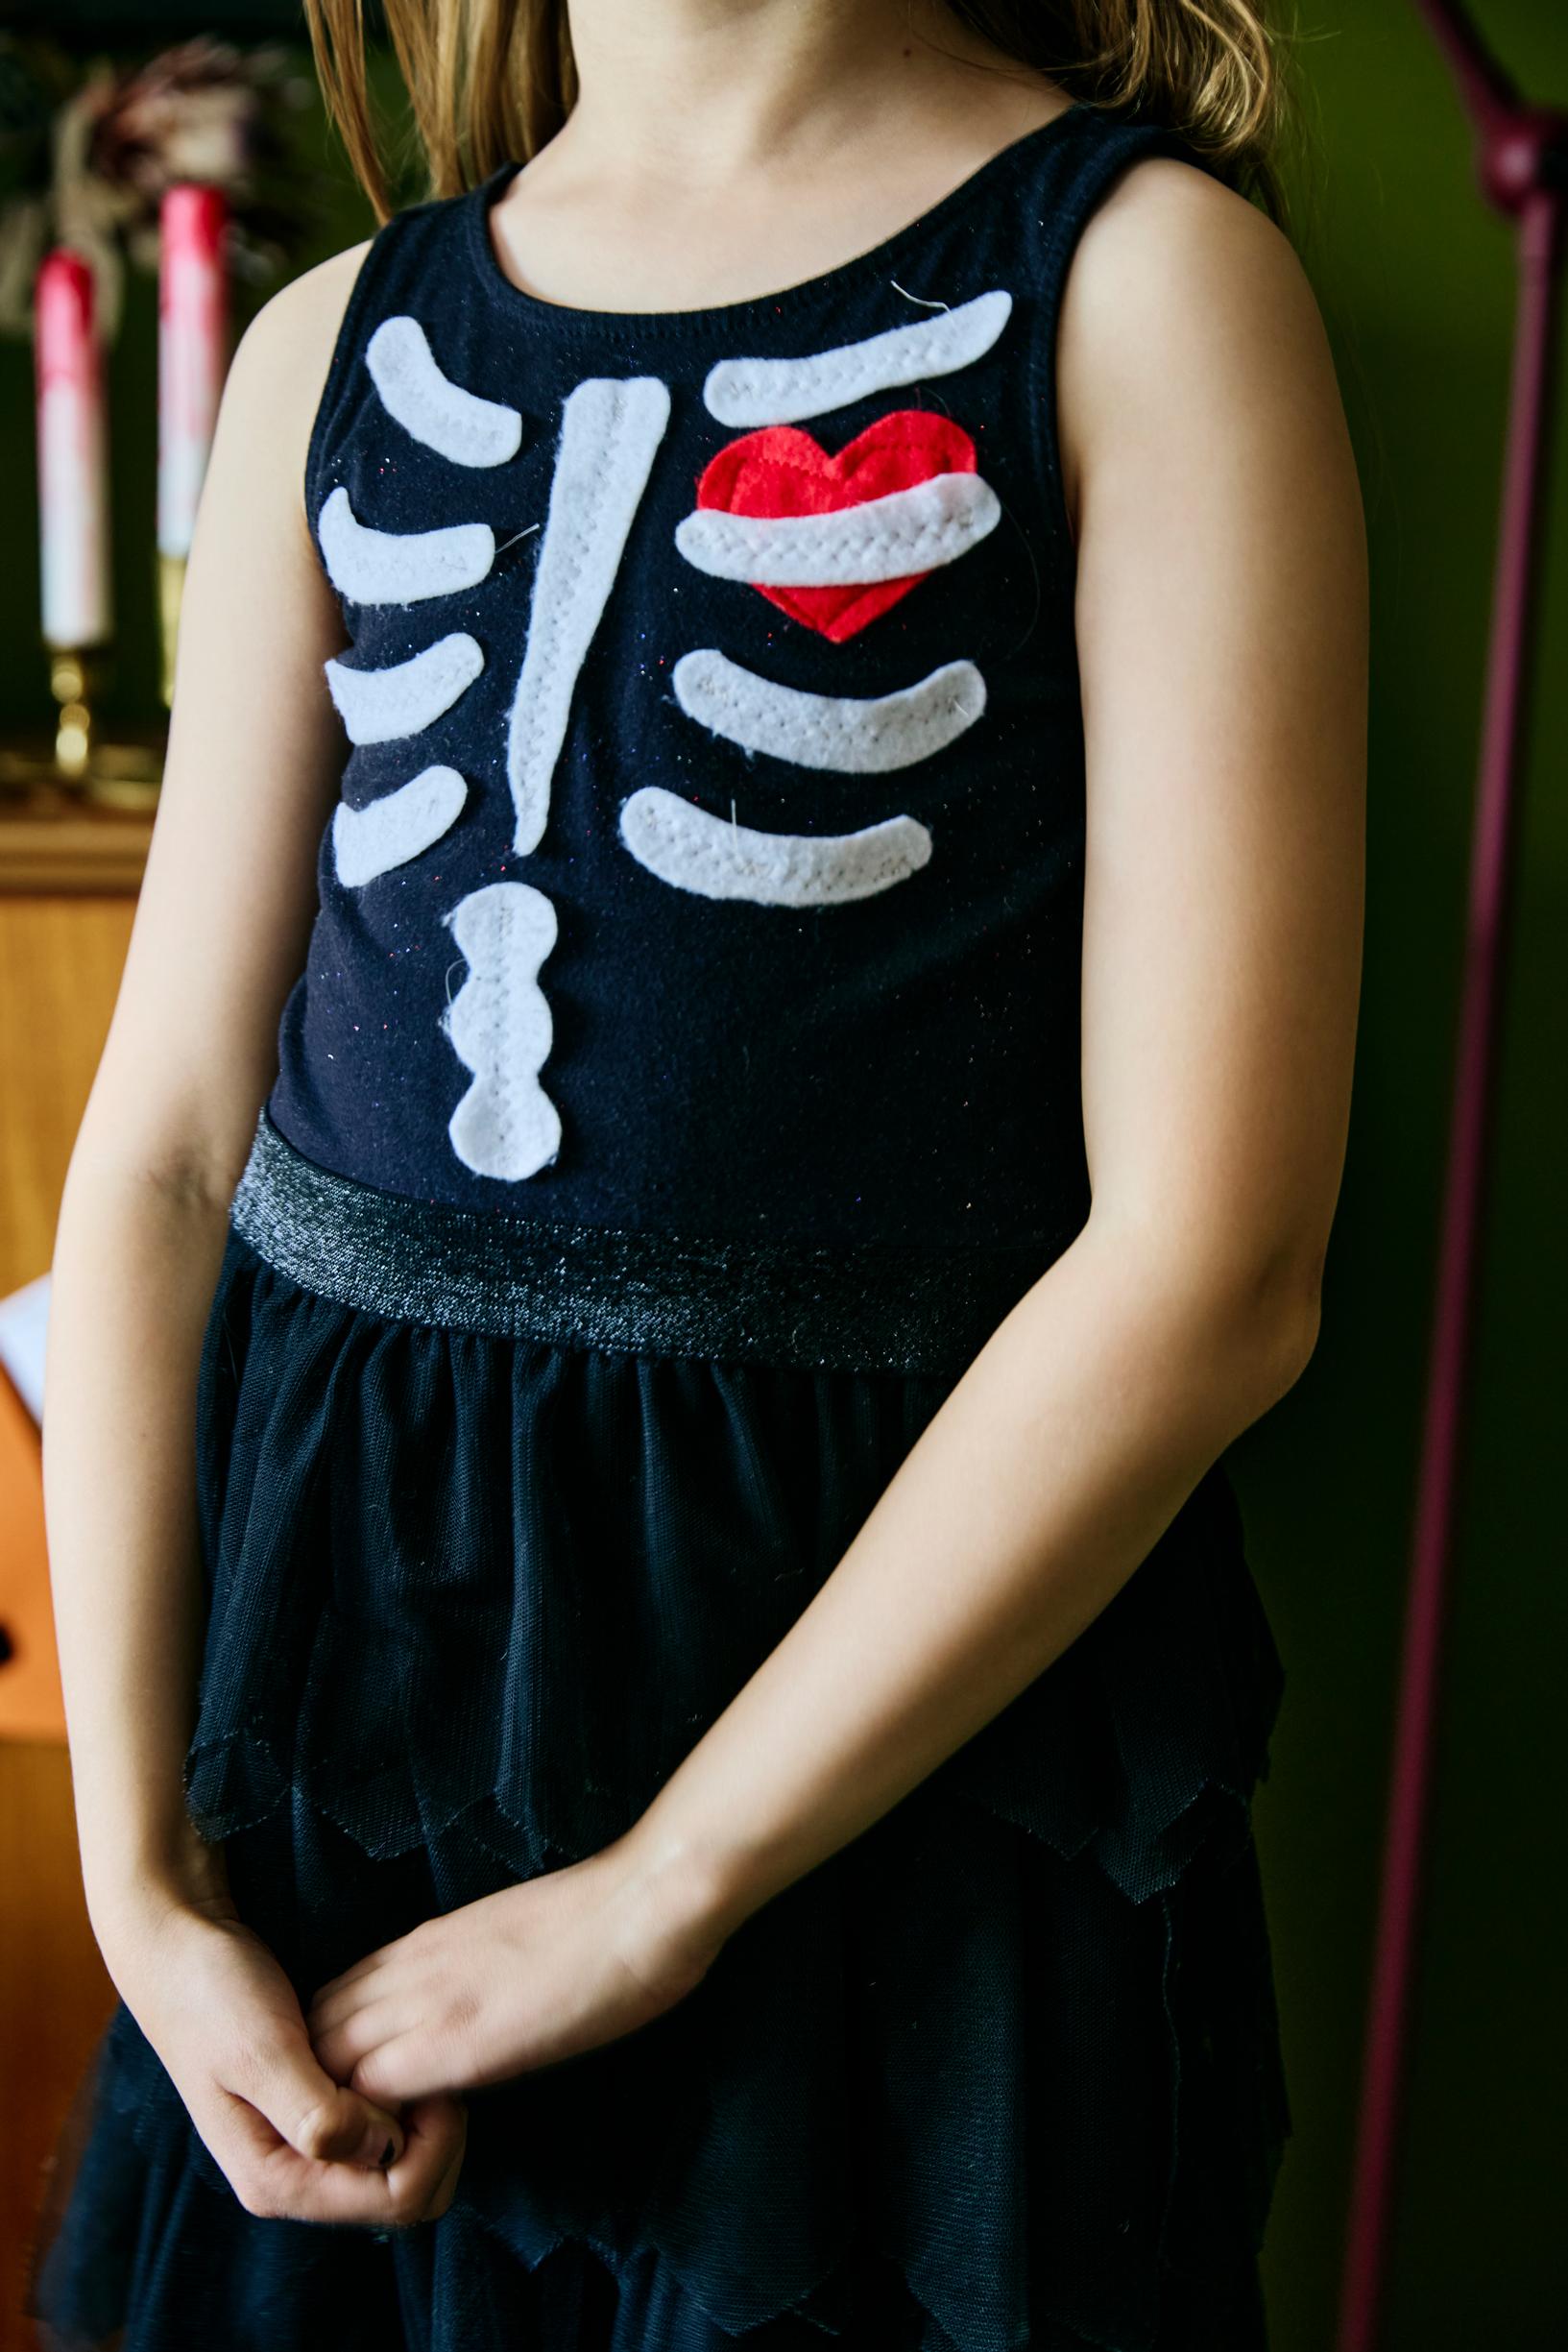
I found a black dress at a thrift store for just a couple of euros and turned it into a Mexican-style skeleton costume for my child. All I needed was a small piece of white polyester felt, some red felt, sewing thread, and a sewing machine. I cut a heart from the red felt and stylized ribs from the white felt, then stitched them on with a relaxed zigzag, letting the edges stay loose for a fun three-dimensional effect.
Because the dress is sleeveless, kids don’t grow out of it so quickly. We’ve used it for years, and the felt still holds up in the washing machine. You could use the same concept to make skeleton costumes for the whole family!

2. A wreath from leftover yarn

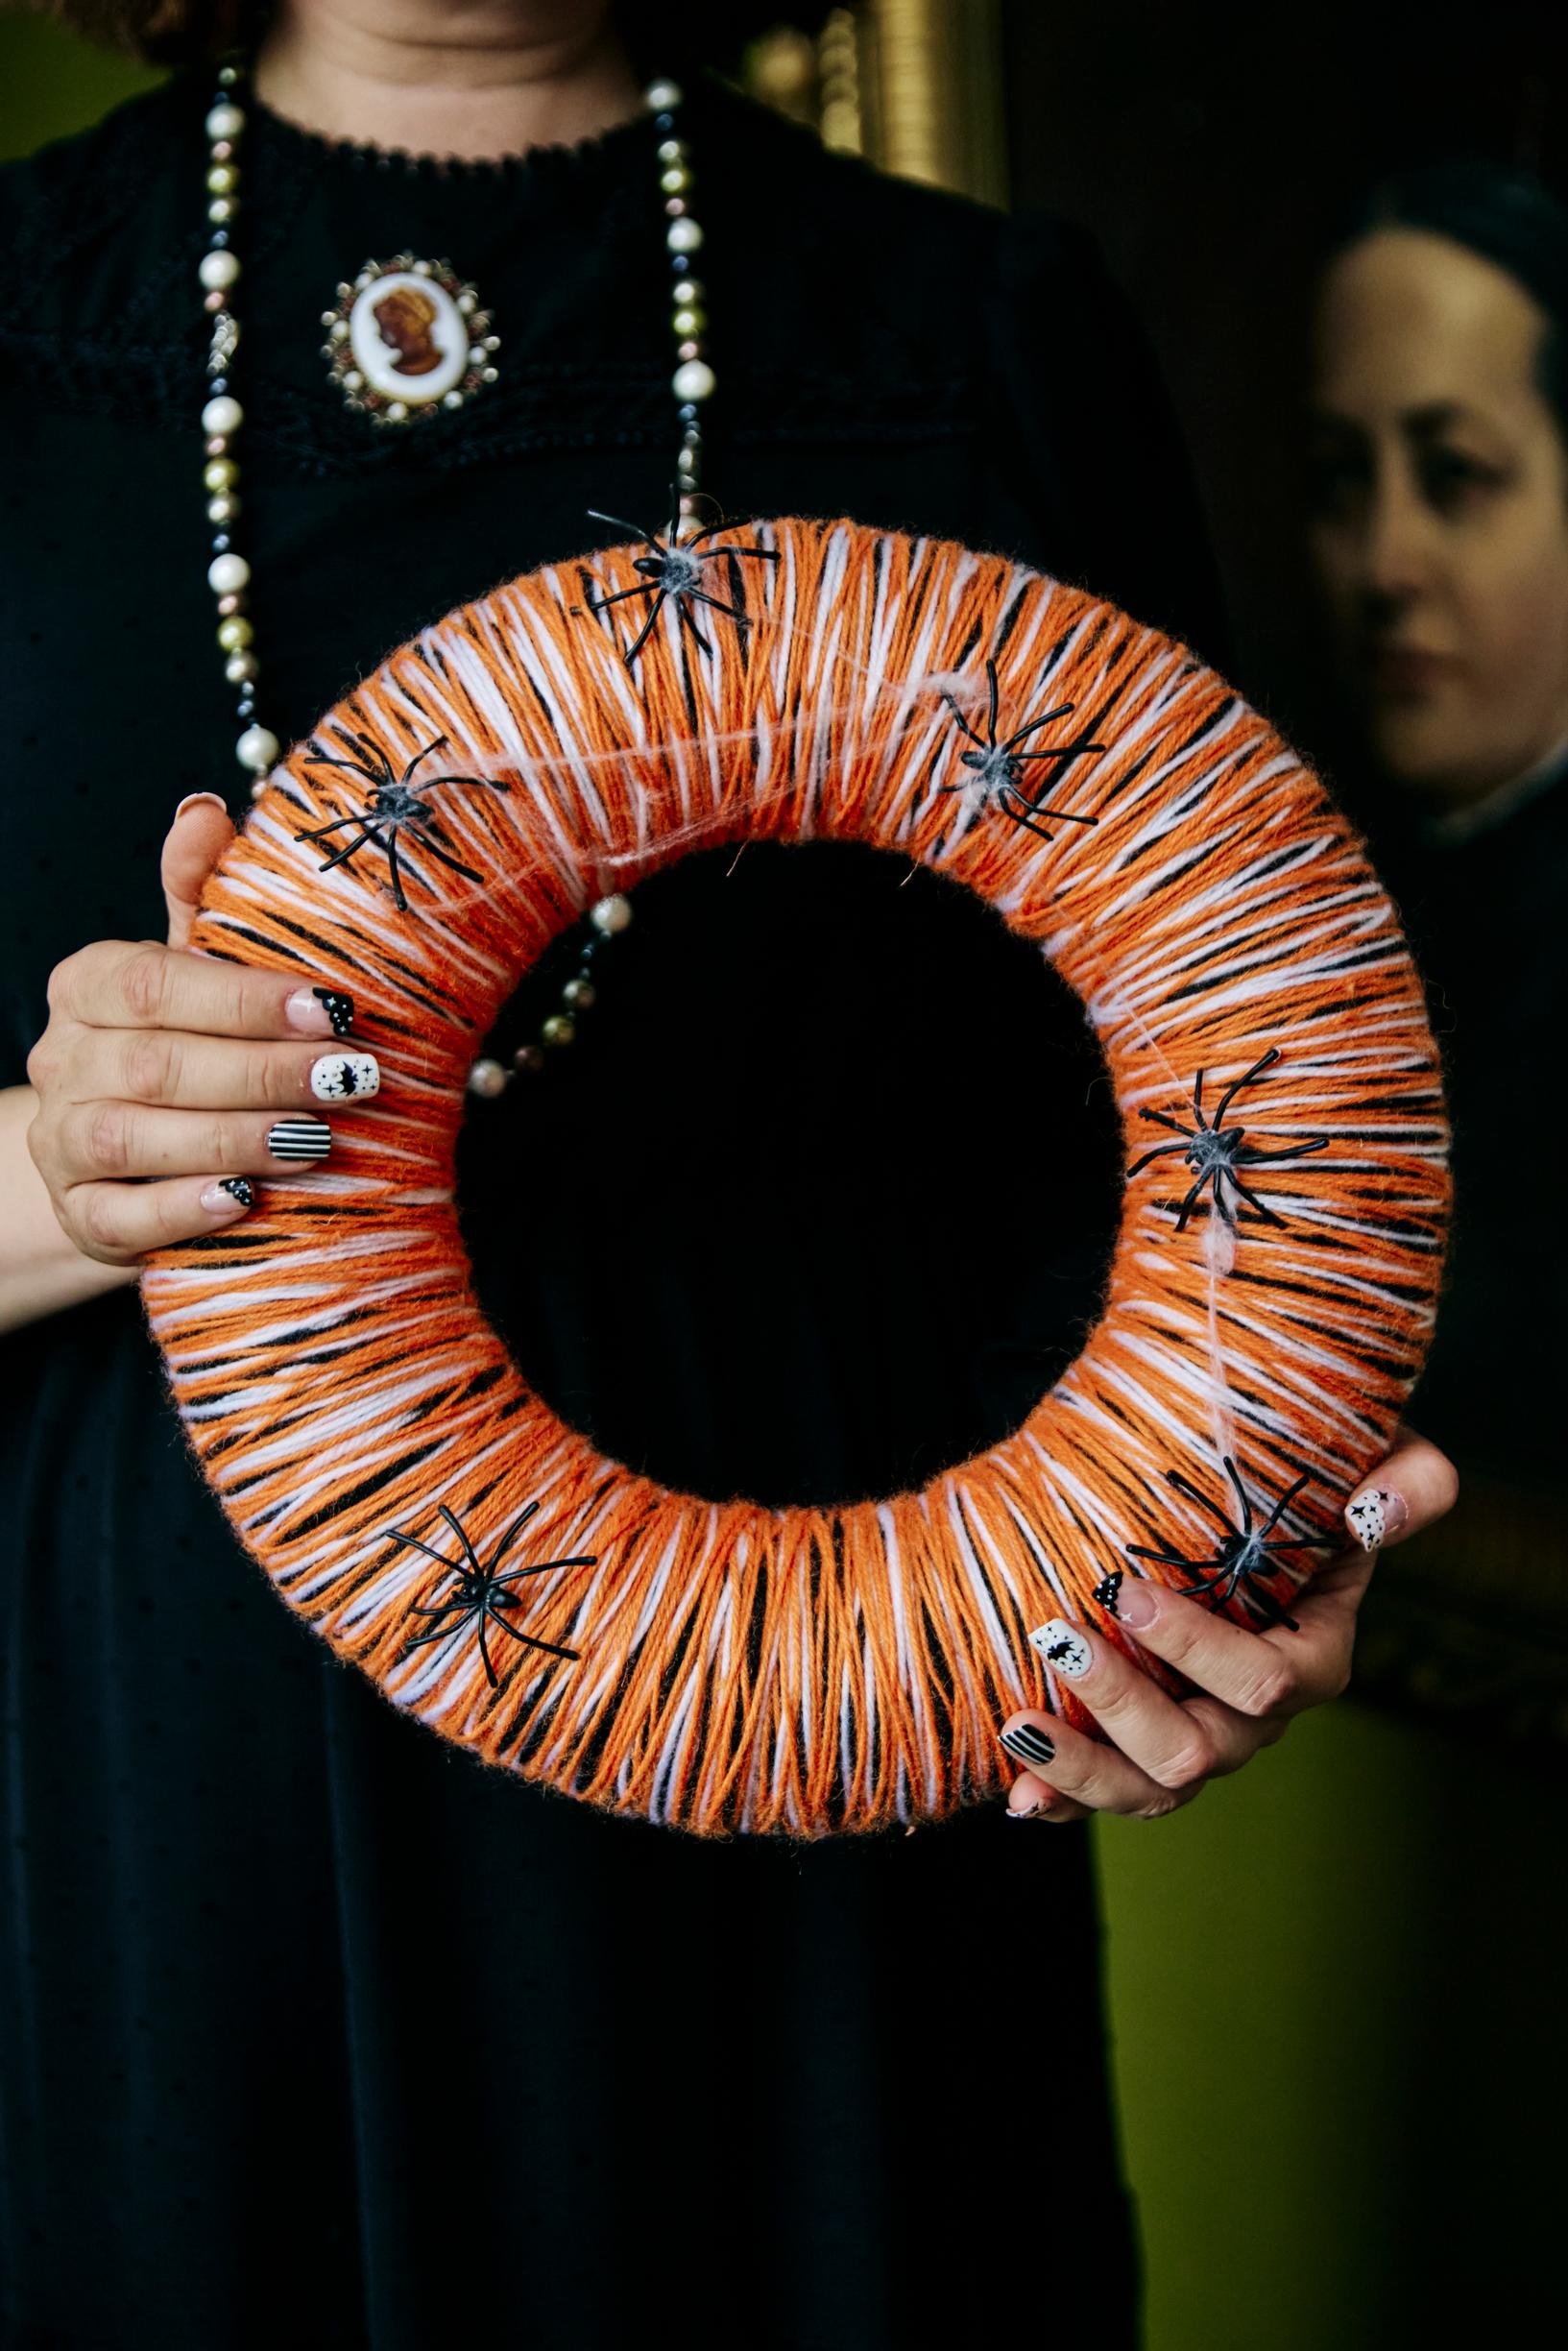
I once made a Christmas wreath out of wool yarn, and the same technique works perfectly for Halloween. I wrapped a foam wreath in black, white, and orange yarn. The thicker the yarn, the faster the project goes! If you have old Halloween ornaments lying around—like plastic spiders or a bit of fake spiderweb—you can attach them. Cardstock bats or orange maple leaves would also look great!
3. Glowing ghost tealights from craft clay

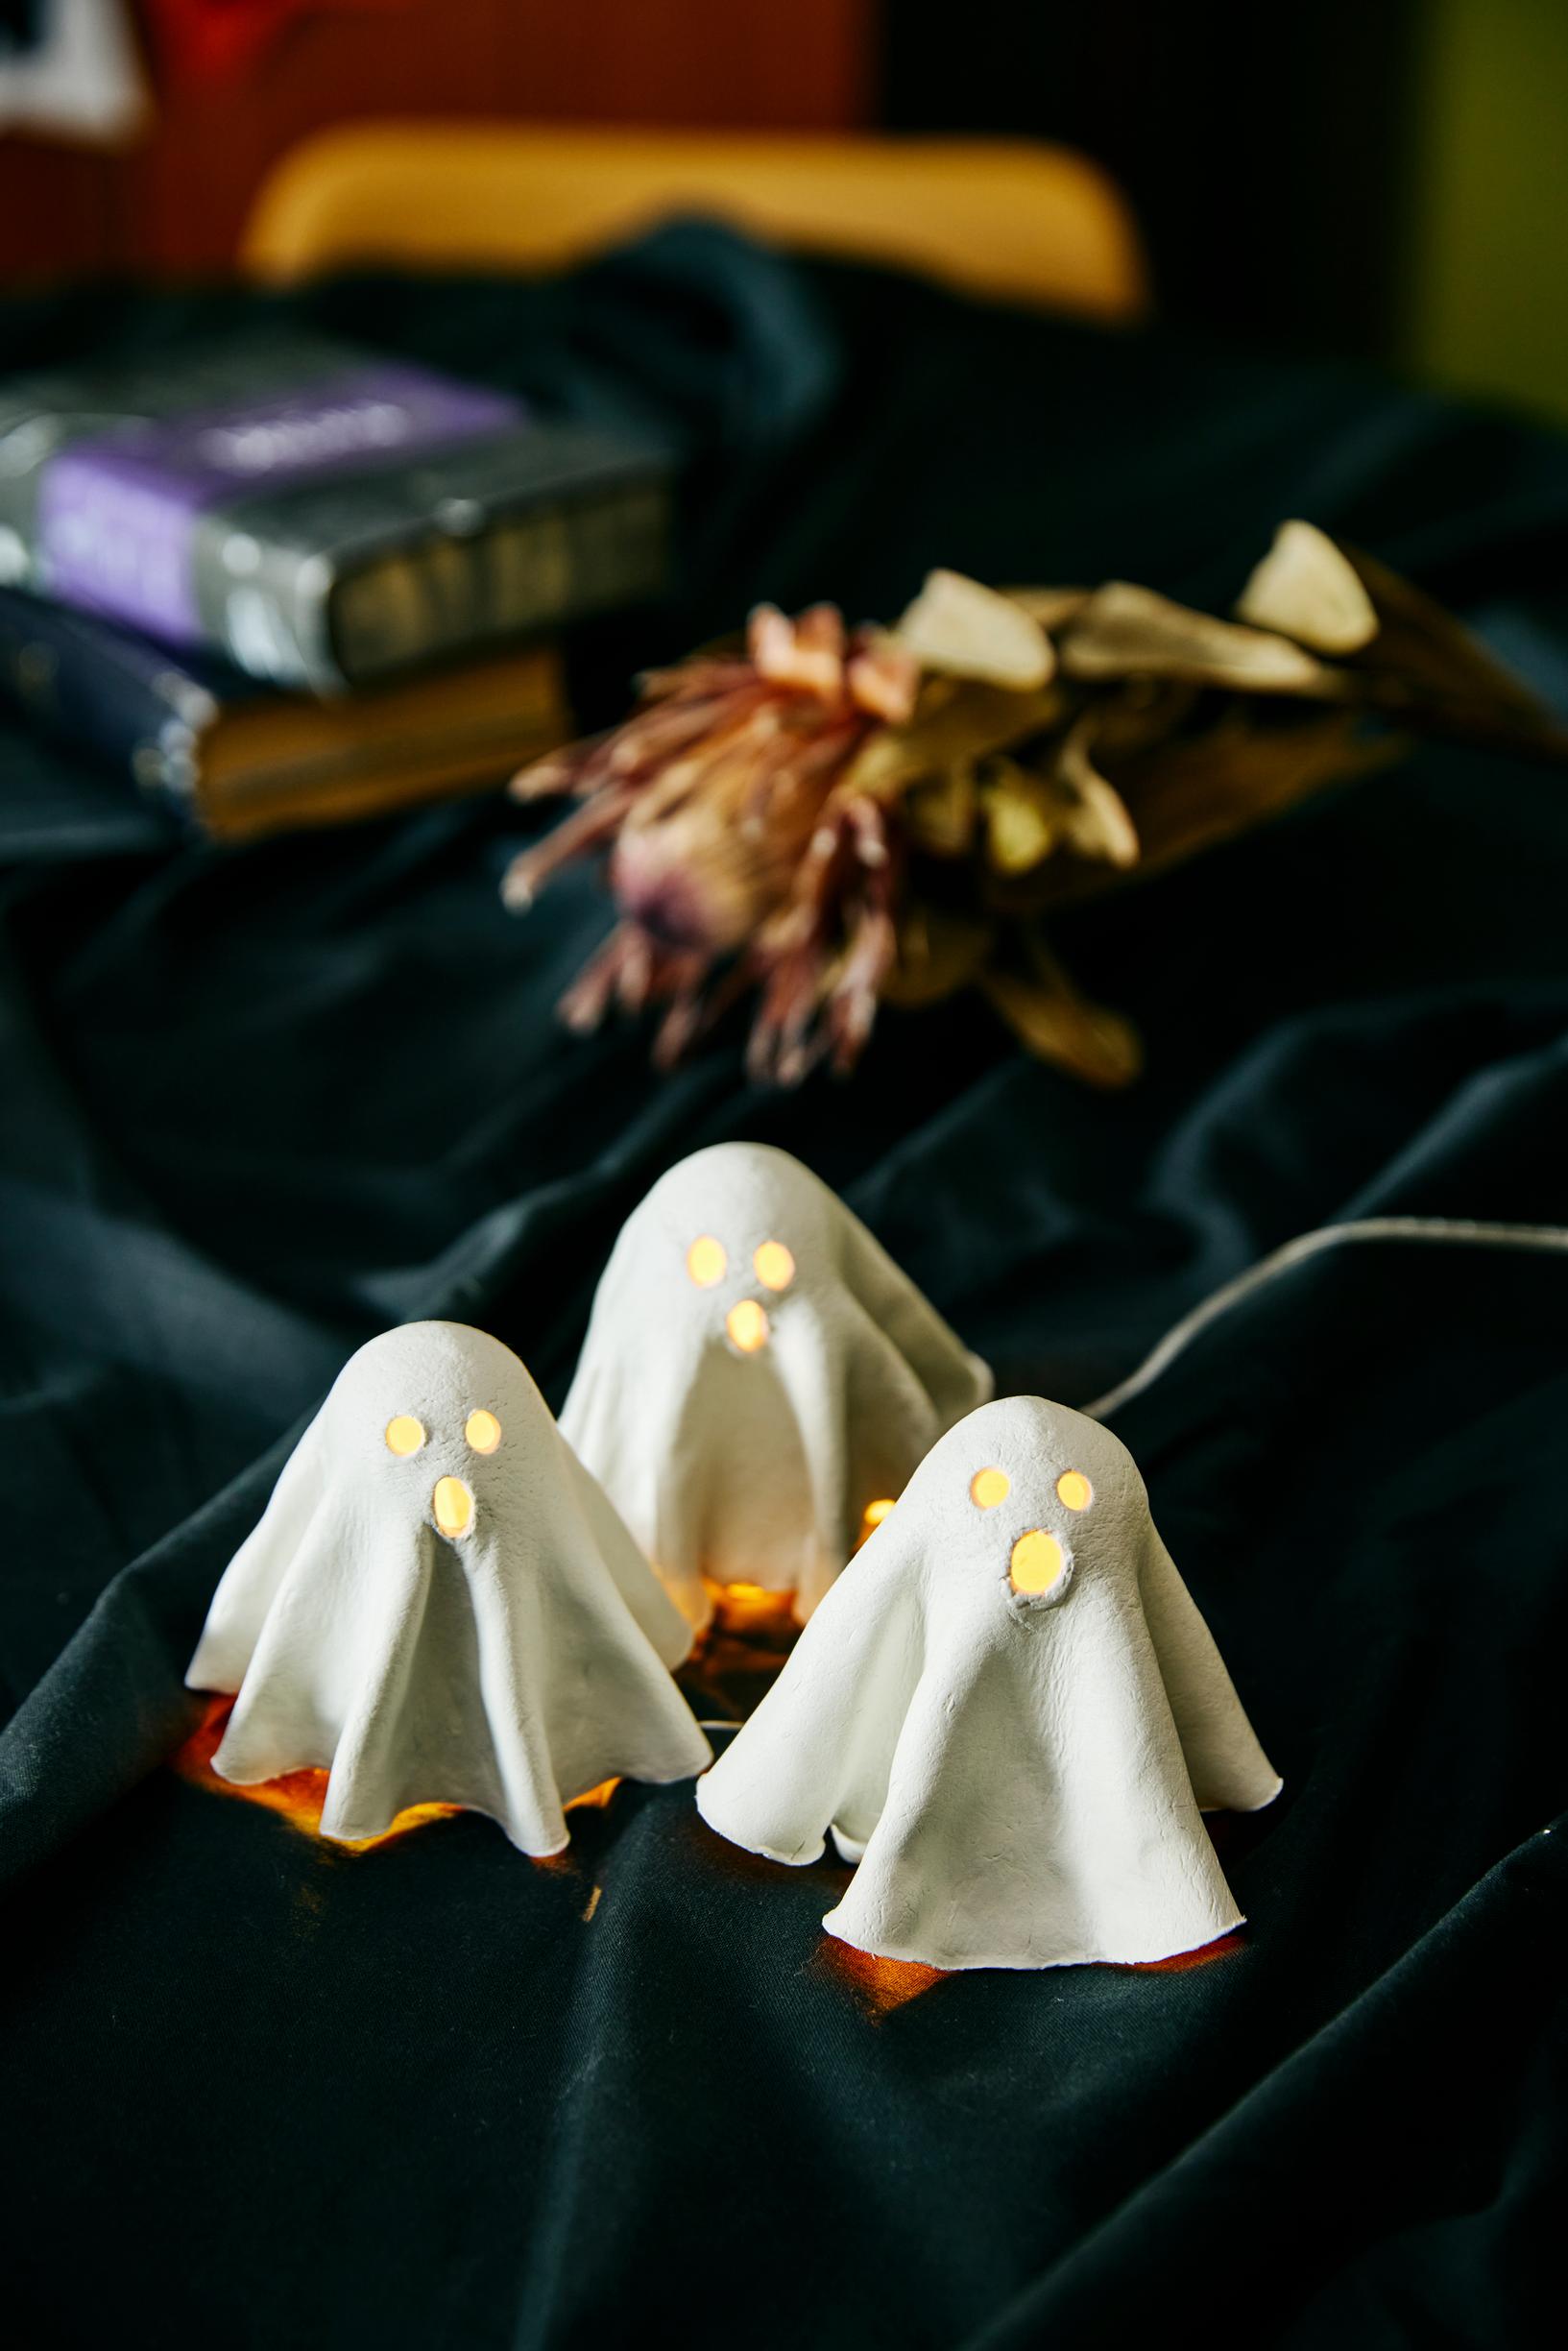
You can make almost anything from air-dry clay or craft clay! The rest of the supplies you likely already have at home. I folded pieces of rolled clay into a draped ghost shape and let them dry. You can use something as simple as a toilet paper roll and foil to shape them. Once the ghosts are done, tuck an LED tealight or a string of lights inside. Check out the video and the full instructions for these ghost tealights here.
4. Skull decorations from craft clay

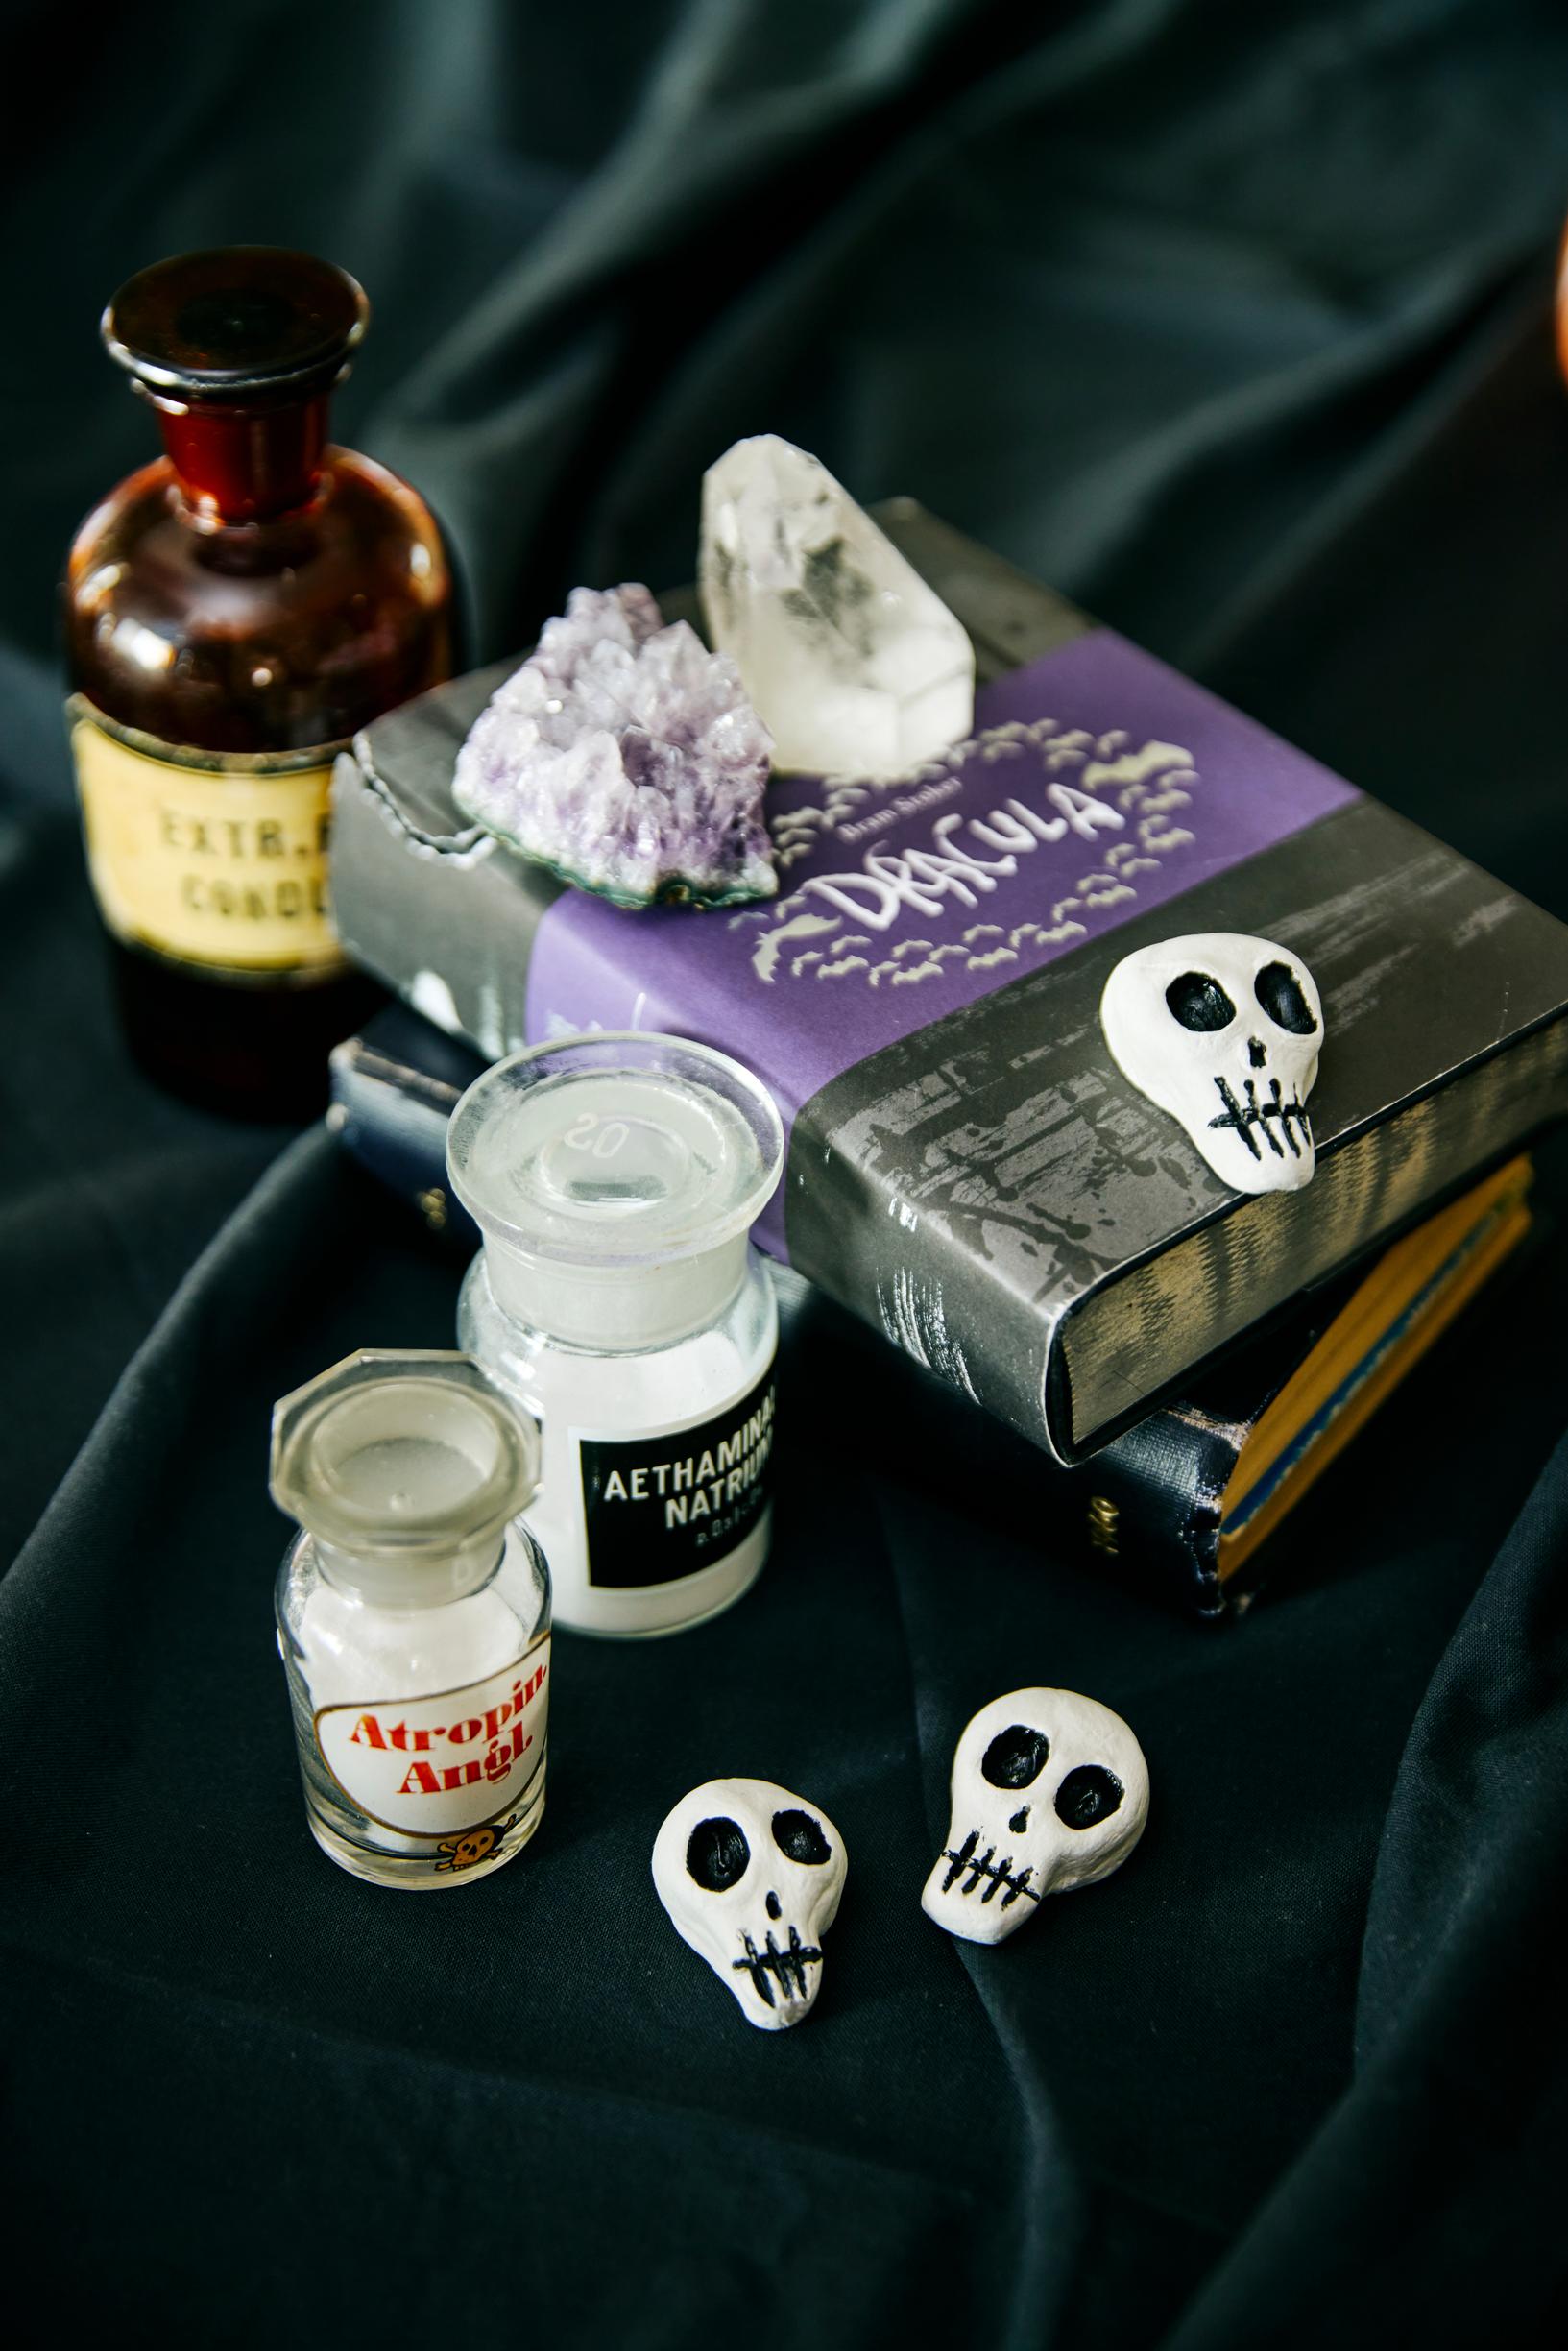
While making the ghosts, I also crafted some small skulls, which work as fun table ornaments. I made the eye sockets with a round-tipped pen and shaped the nose and teeth with a toothpick. You could even carve a horizontal line on the forehead for a place card. I let the skulls dry for about three days, then painted details using a fine brush and black acrylic paint.
Watch the tutorial video!
5. Dripping blood candles

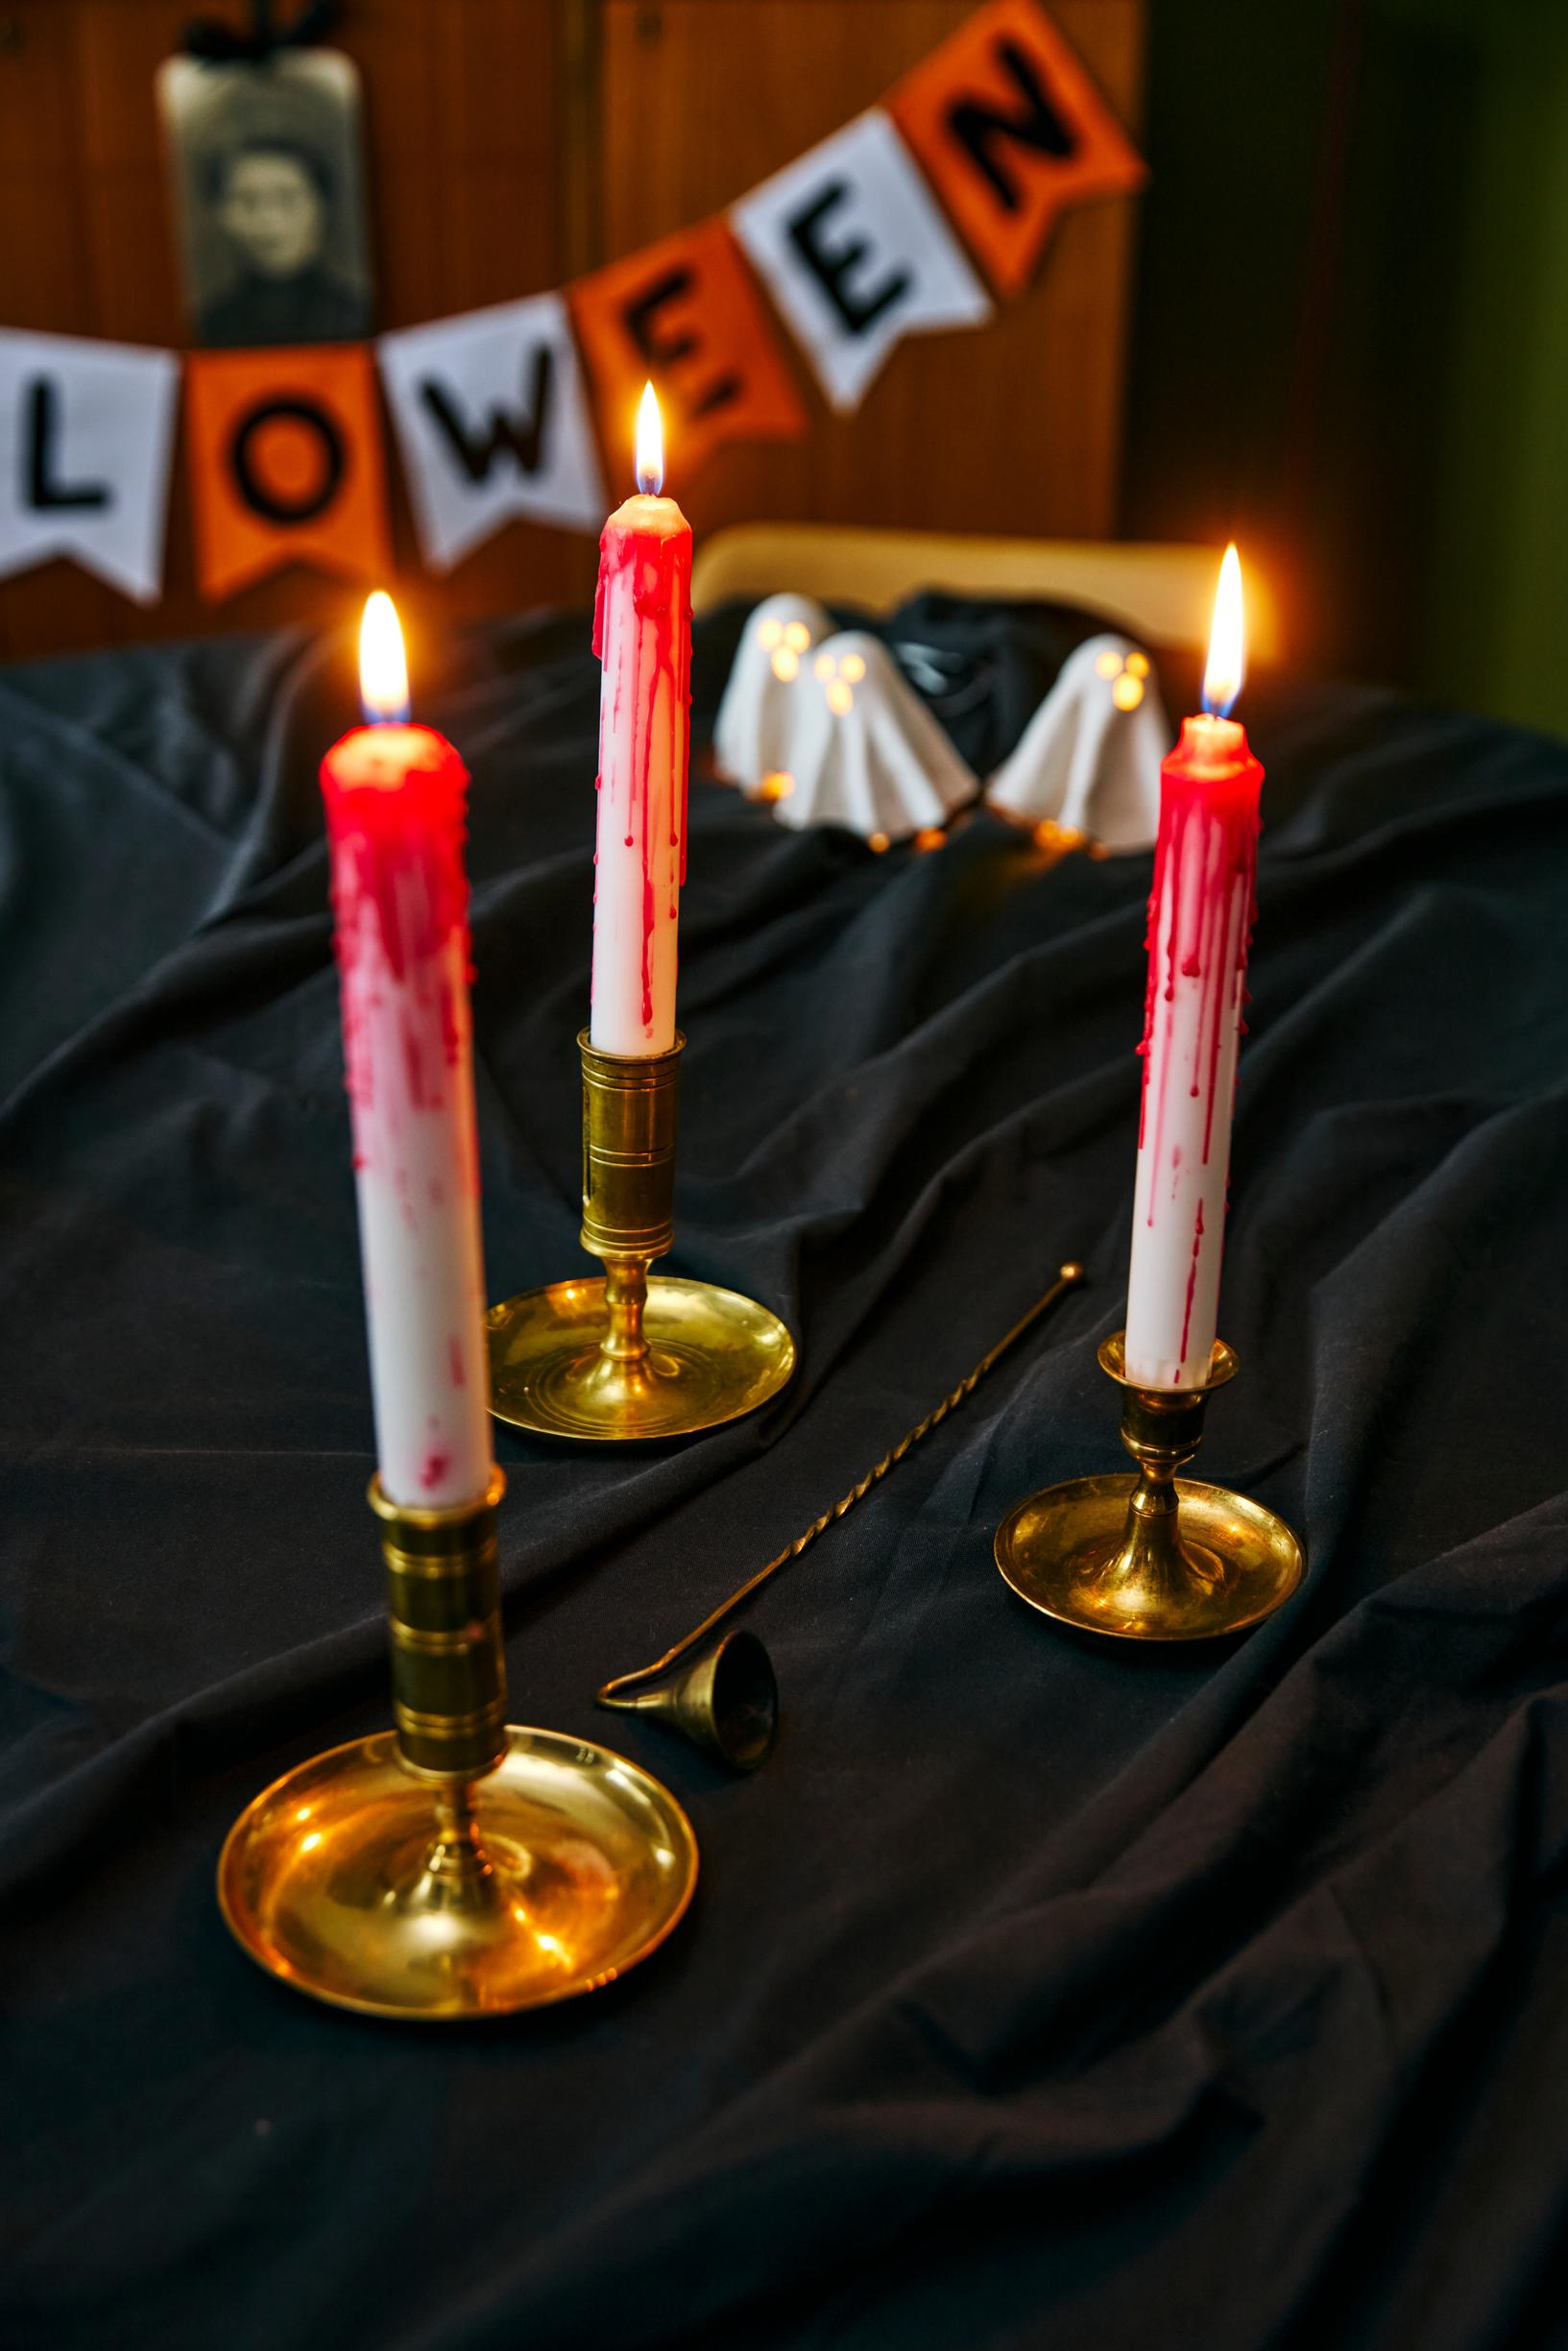
These disturbingly bloody candles look like they’ve come straight from a haunted mansion! All you need are white taper candles, one red candle, a match, a candleholder, and some protective paper. Cover your surface, place the white candle in the holder (one that can handle drips), light the red candle, and let the red wax drip over the white one.
6. Cute ghost lollipops

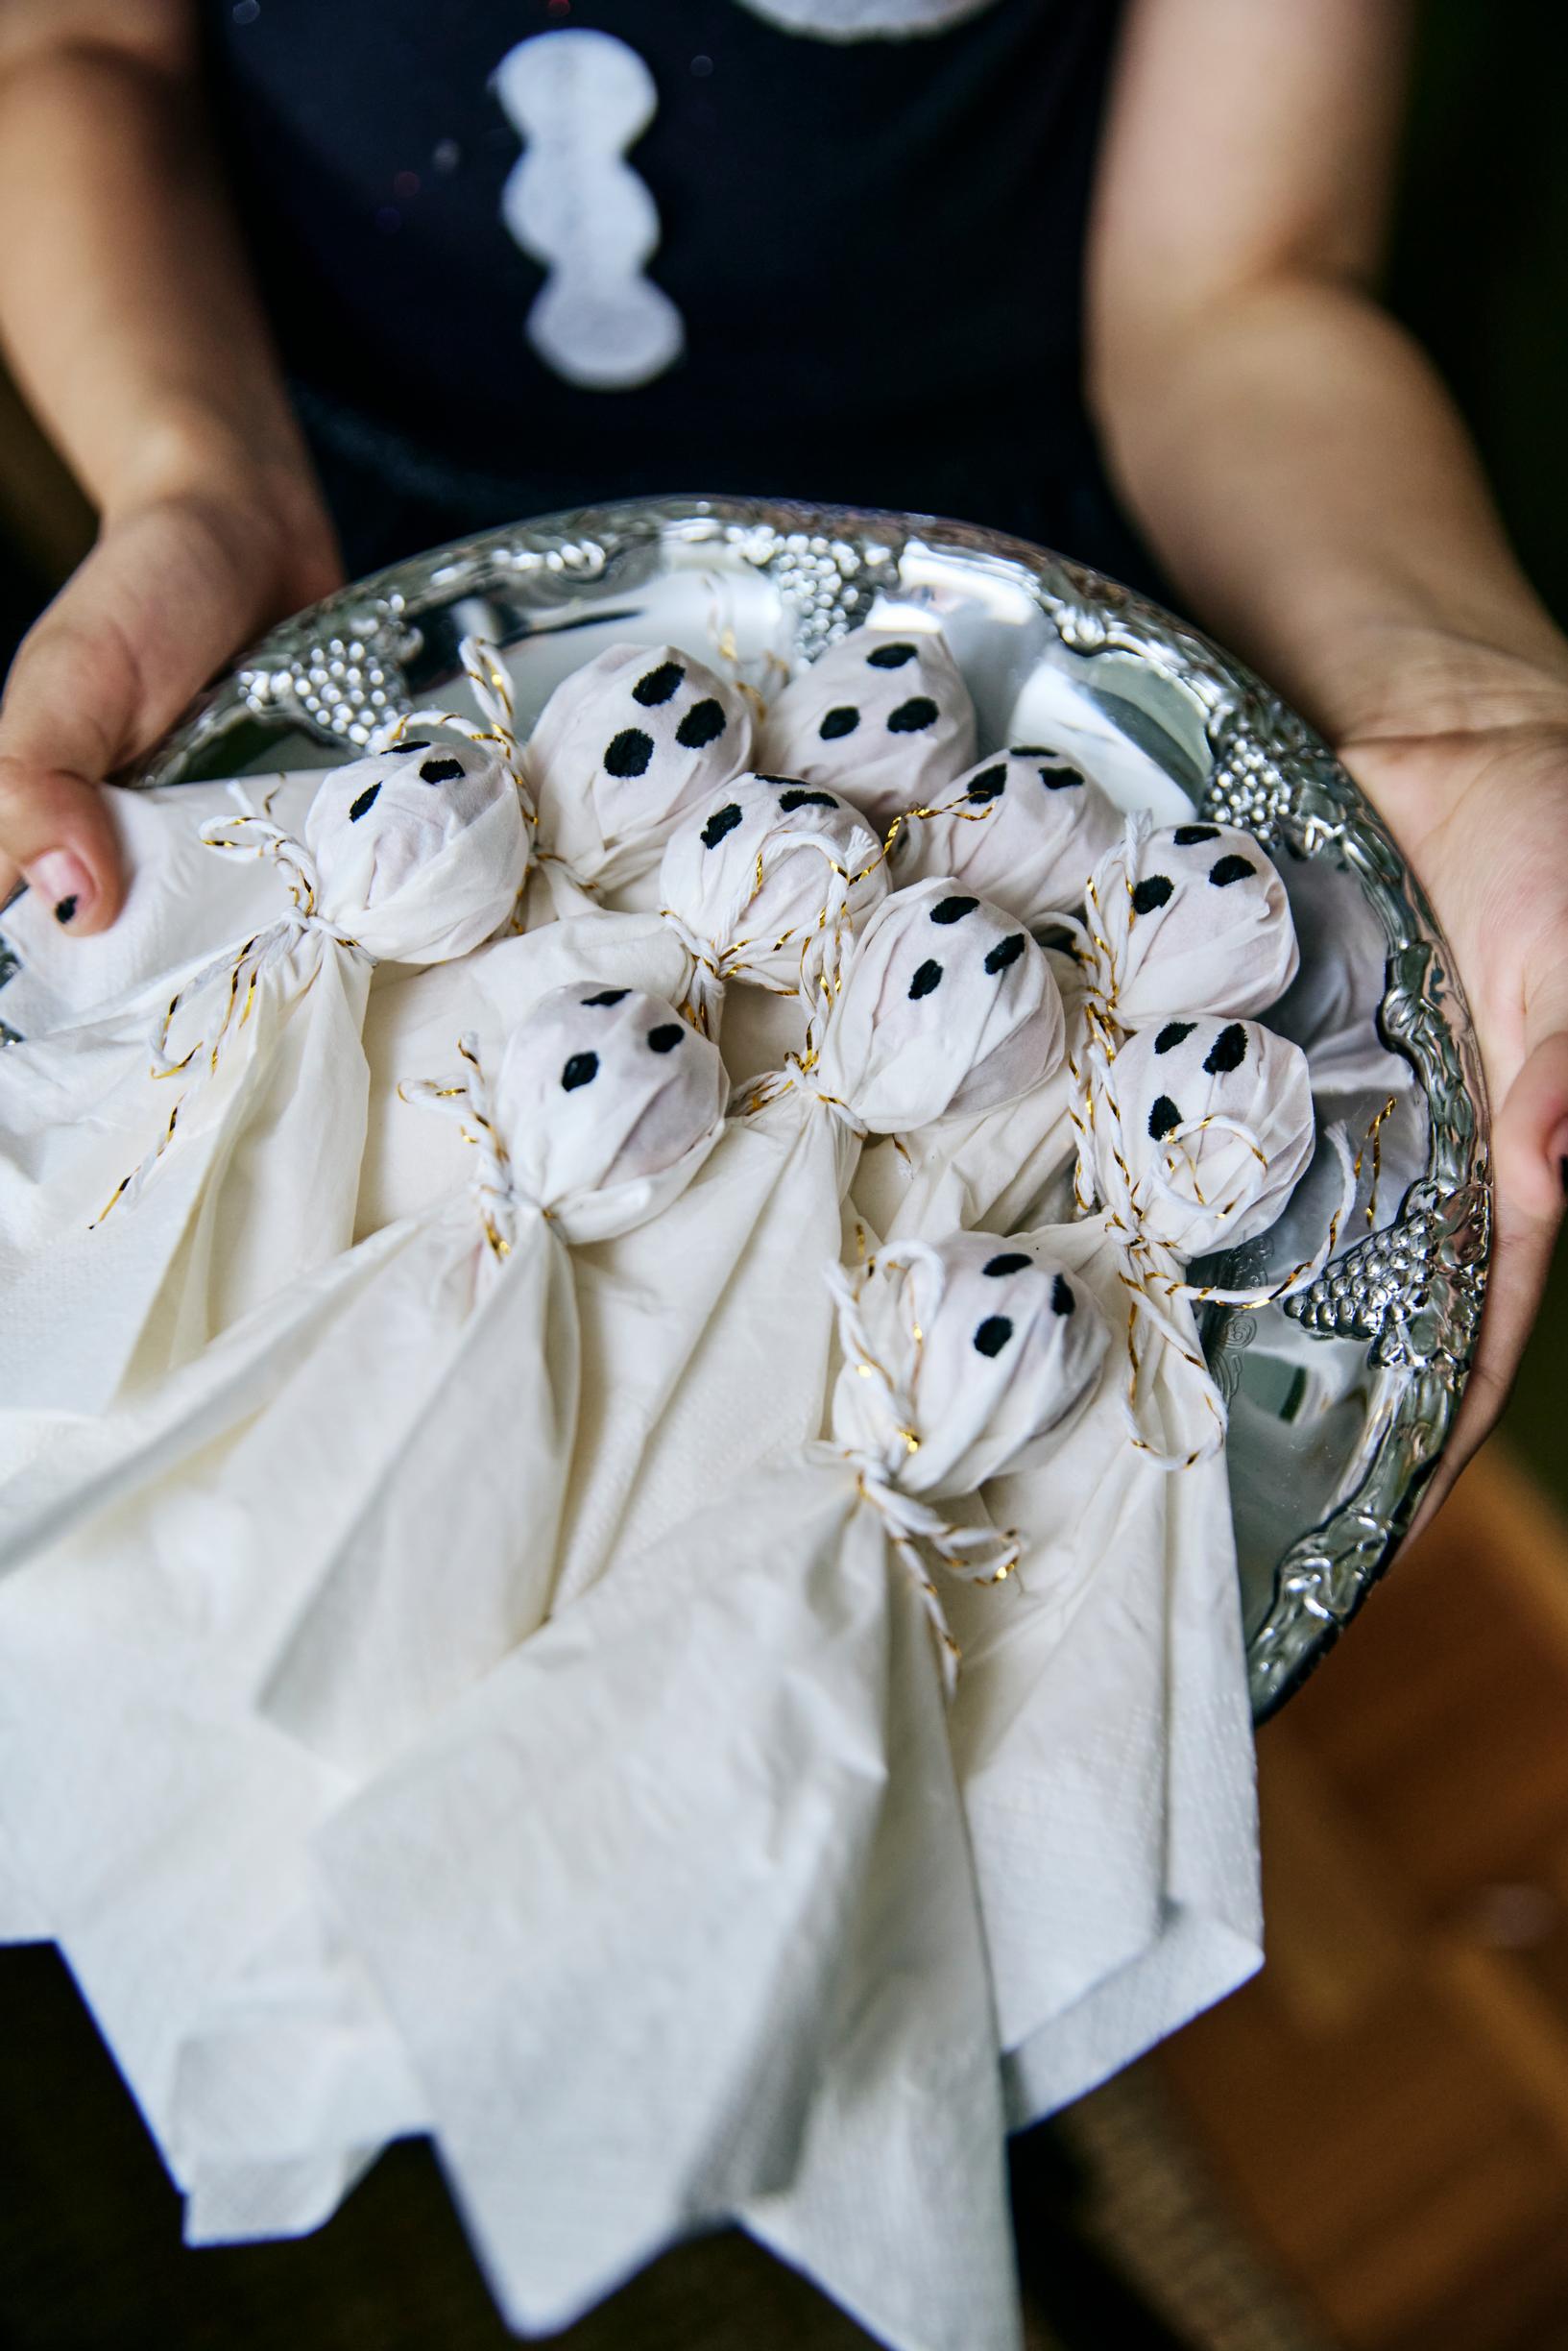
This is a fun, easy way to spruce up lollipops for trick-or-treaters knocking at your door. I draped a tissue over round lollipops, tied it closed with a bit of string, then drew on eyes and a mouth in black marker—an adorably spooky little treat!
7. Creepy portraits

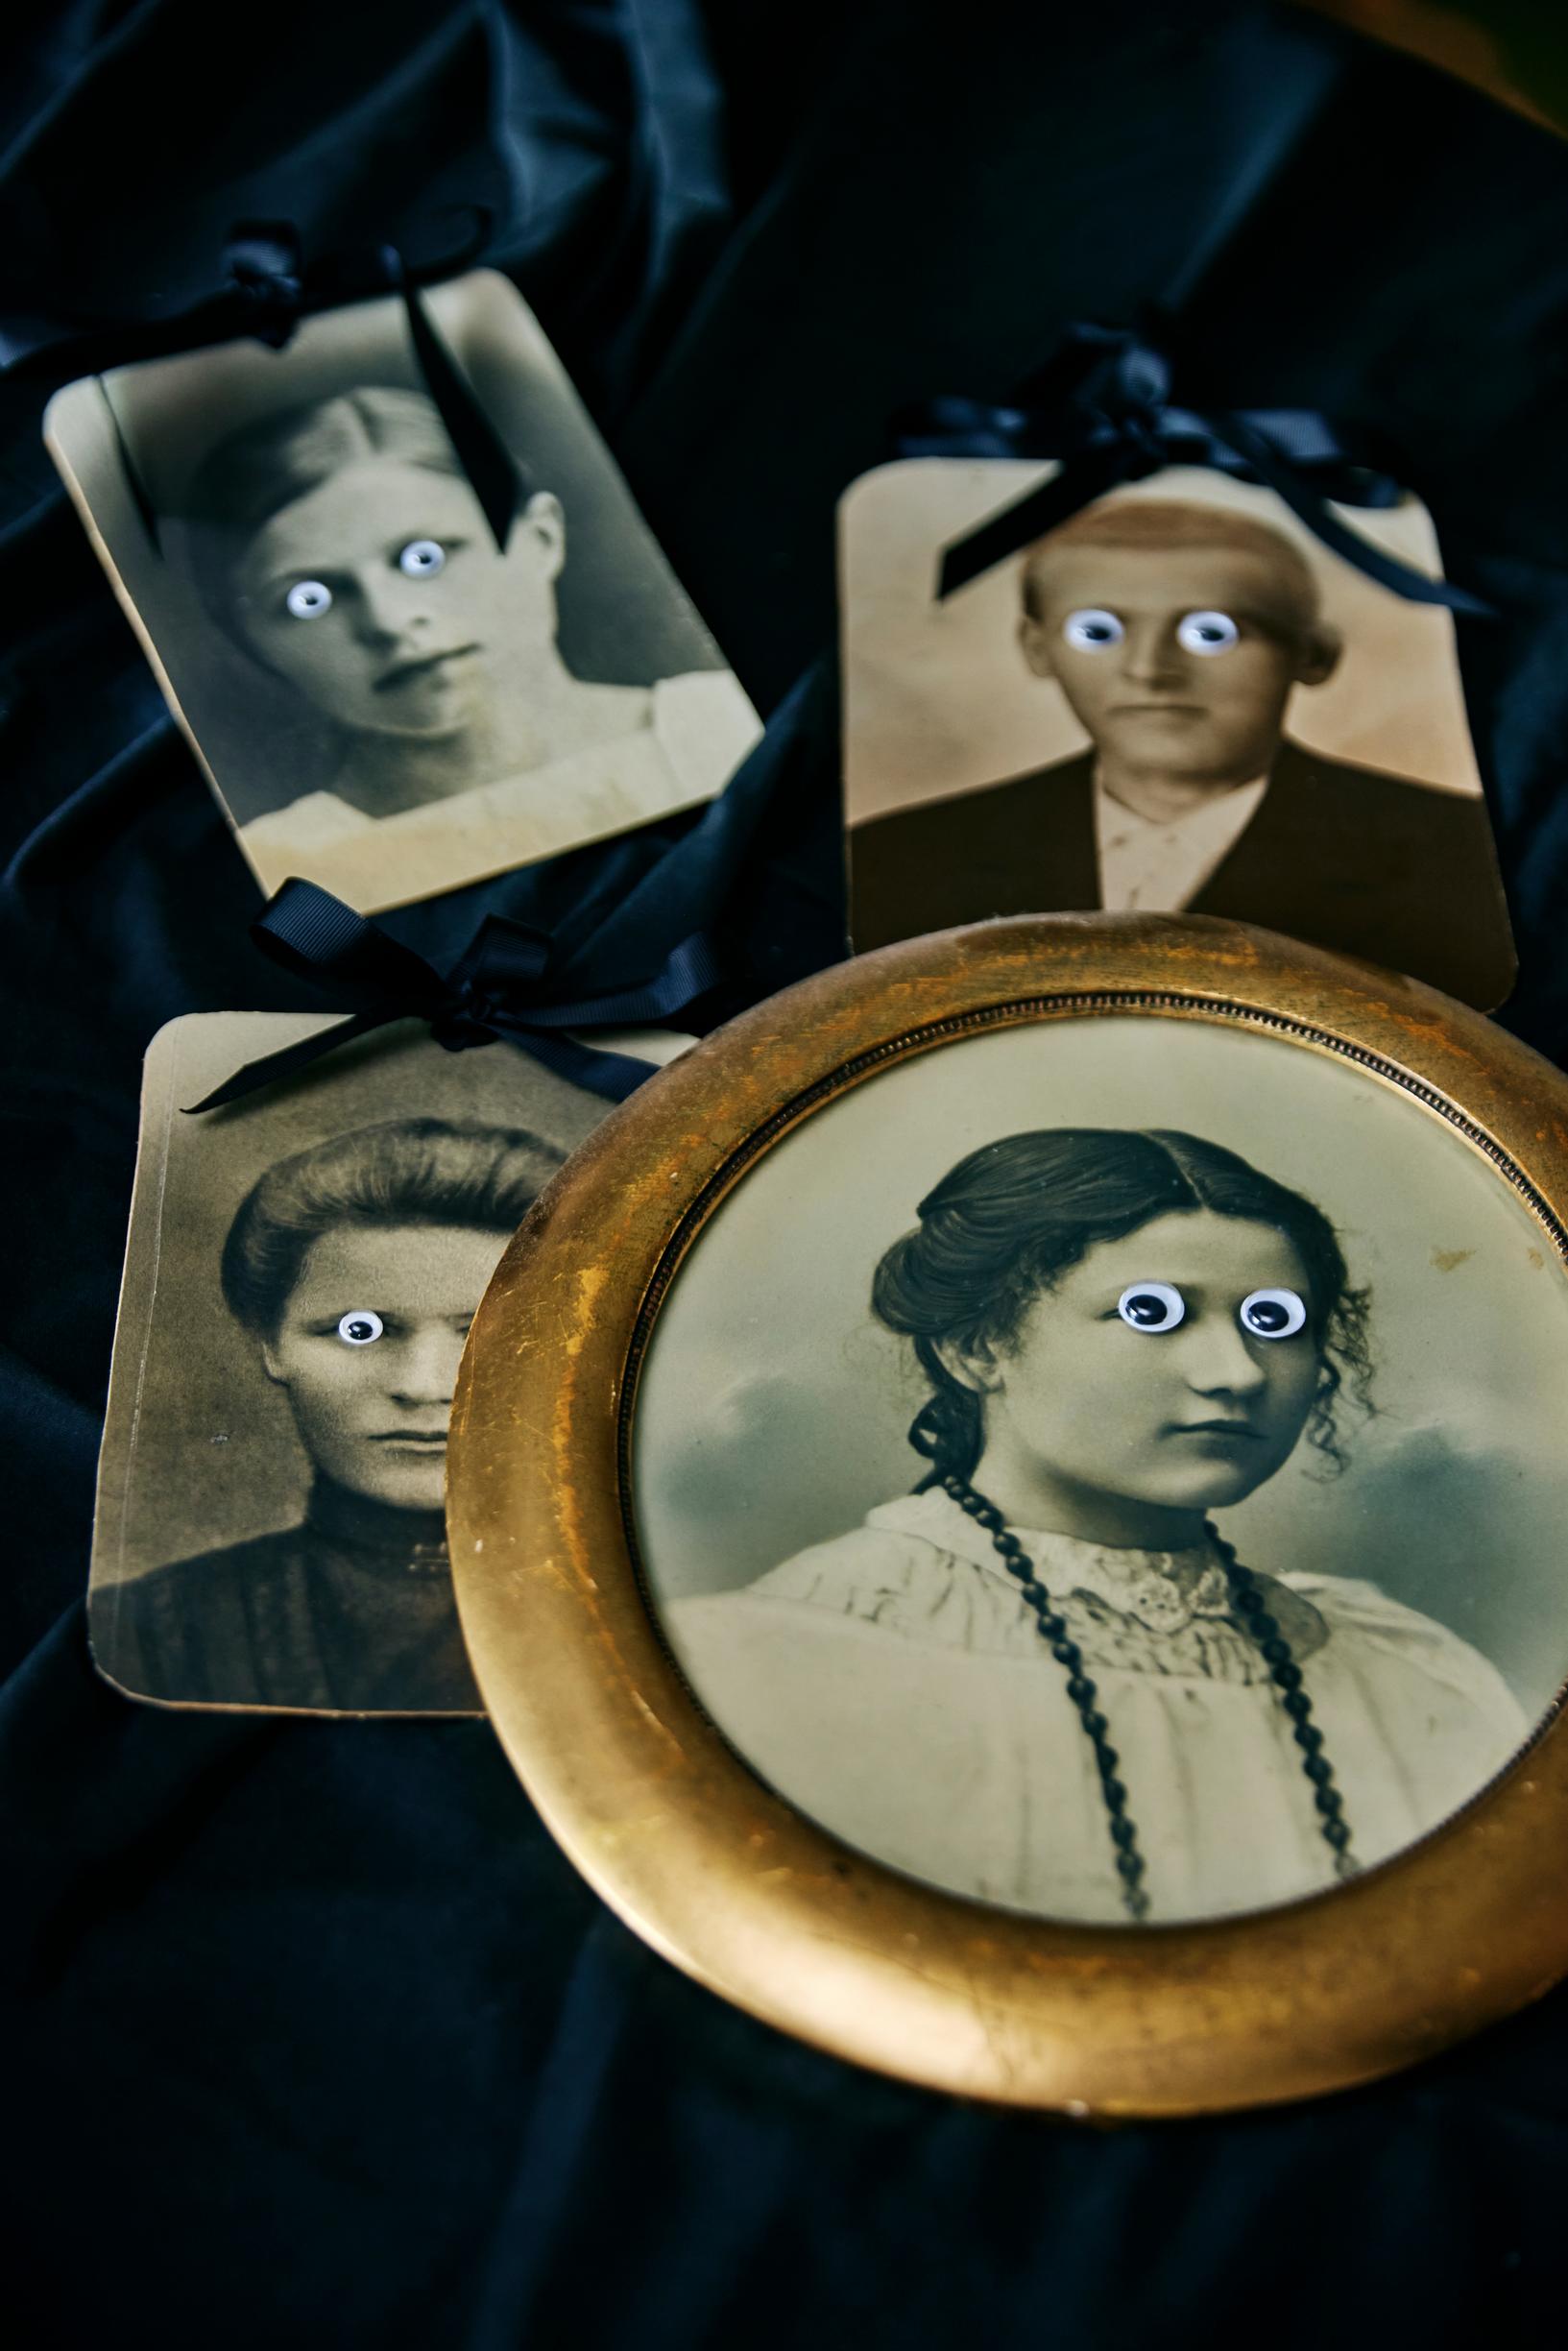
I discovered some old portrait enlargements mounted on cardboard in my grandmother’s stash. Early 1900s portraits are already a bit haunting. I taped a small hanger on the back and used a length of ribbon to create a bow. You can also copy old portraits and glue them onto cardboard. If you’re adding sticker eyes, attach them to the copies or on the glass of a framed photo—for easy removal.
Give a pair of eyes to other decorations, posters, pumpkins, or even rocks brought in from outside—those eyes bring everything to life in a playful way!
8. Cardstock napkin rings

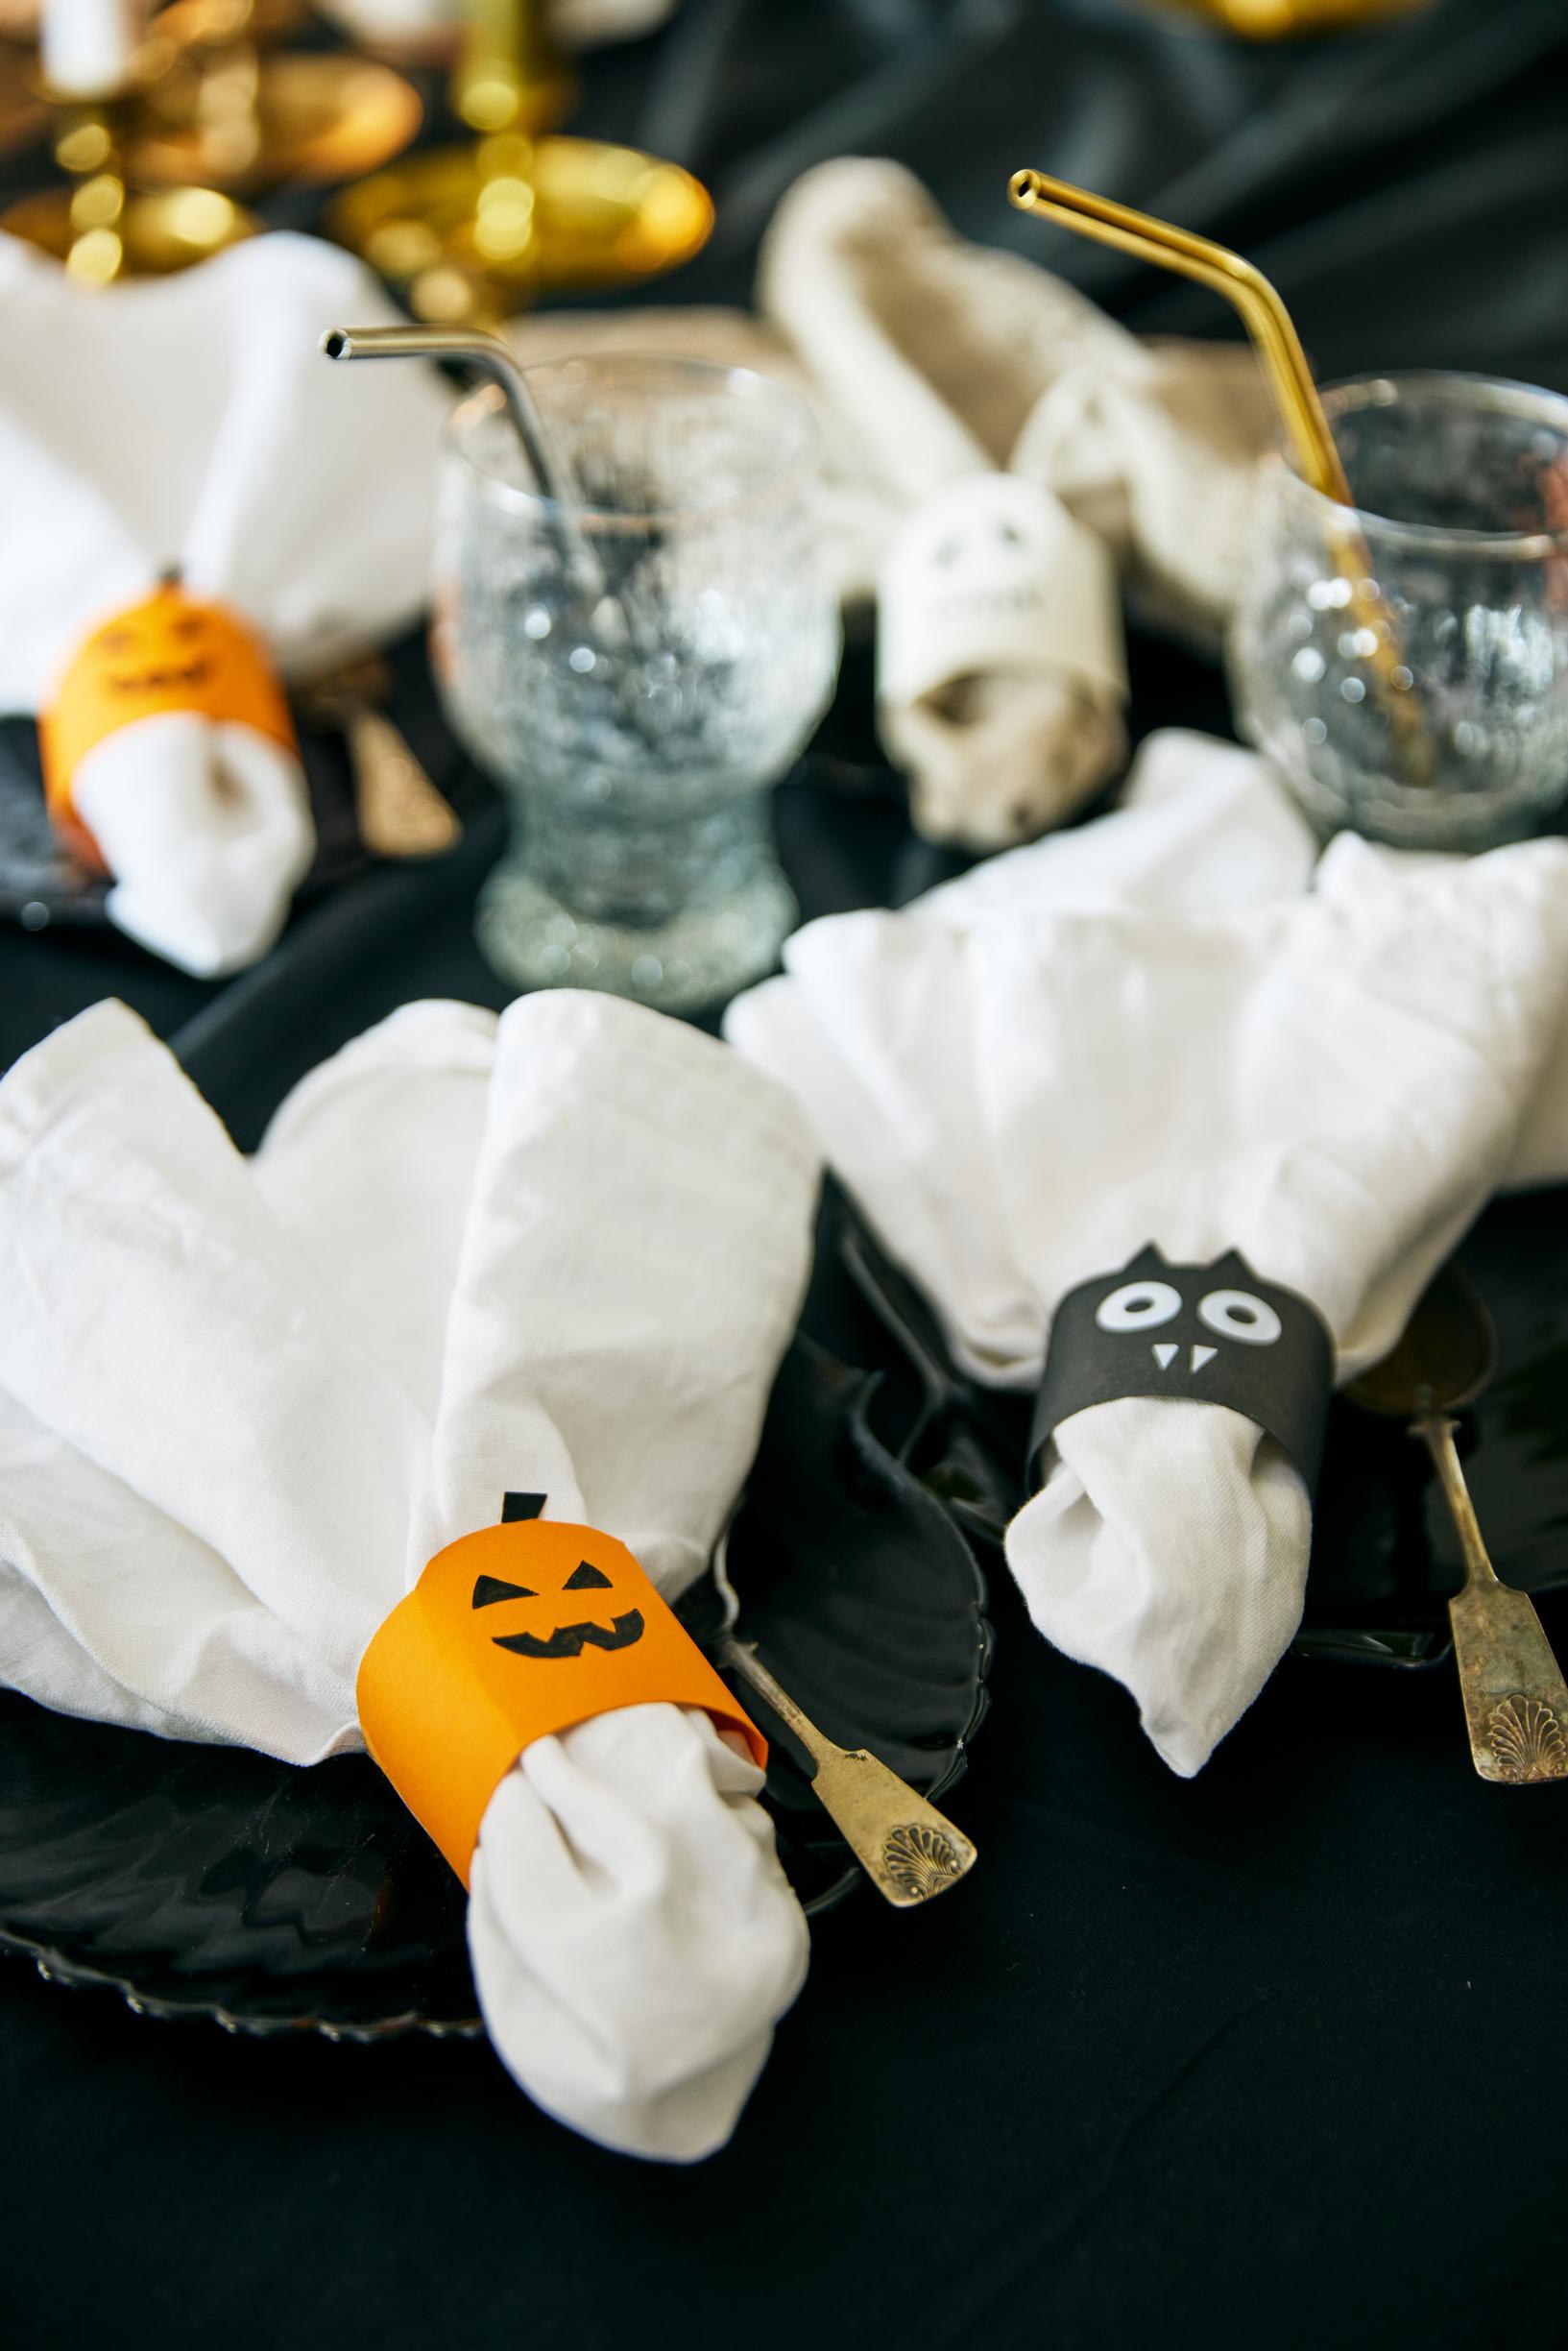
Easy napkin rings add a stylish yet spooky final touch to your table. Cut 4.5 × 17 cm (1.8 × 6.7 in) strips of cardstock. In the middle of each strip, shape a pumpkin stem, the top of a ghost’s head, or bat ears. Draw in details with a marker, curve each strip into a ring, and tape it closed. Afterward, just remove the tape and store the rings flat for next time.
Watch the tutorial video!
9. A ghostly table lamp

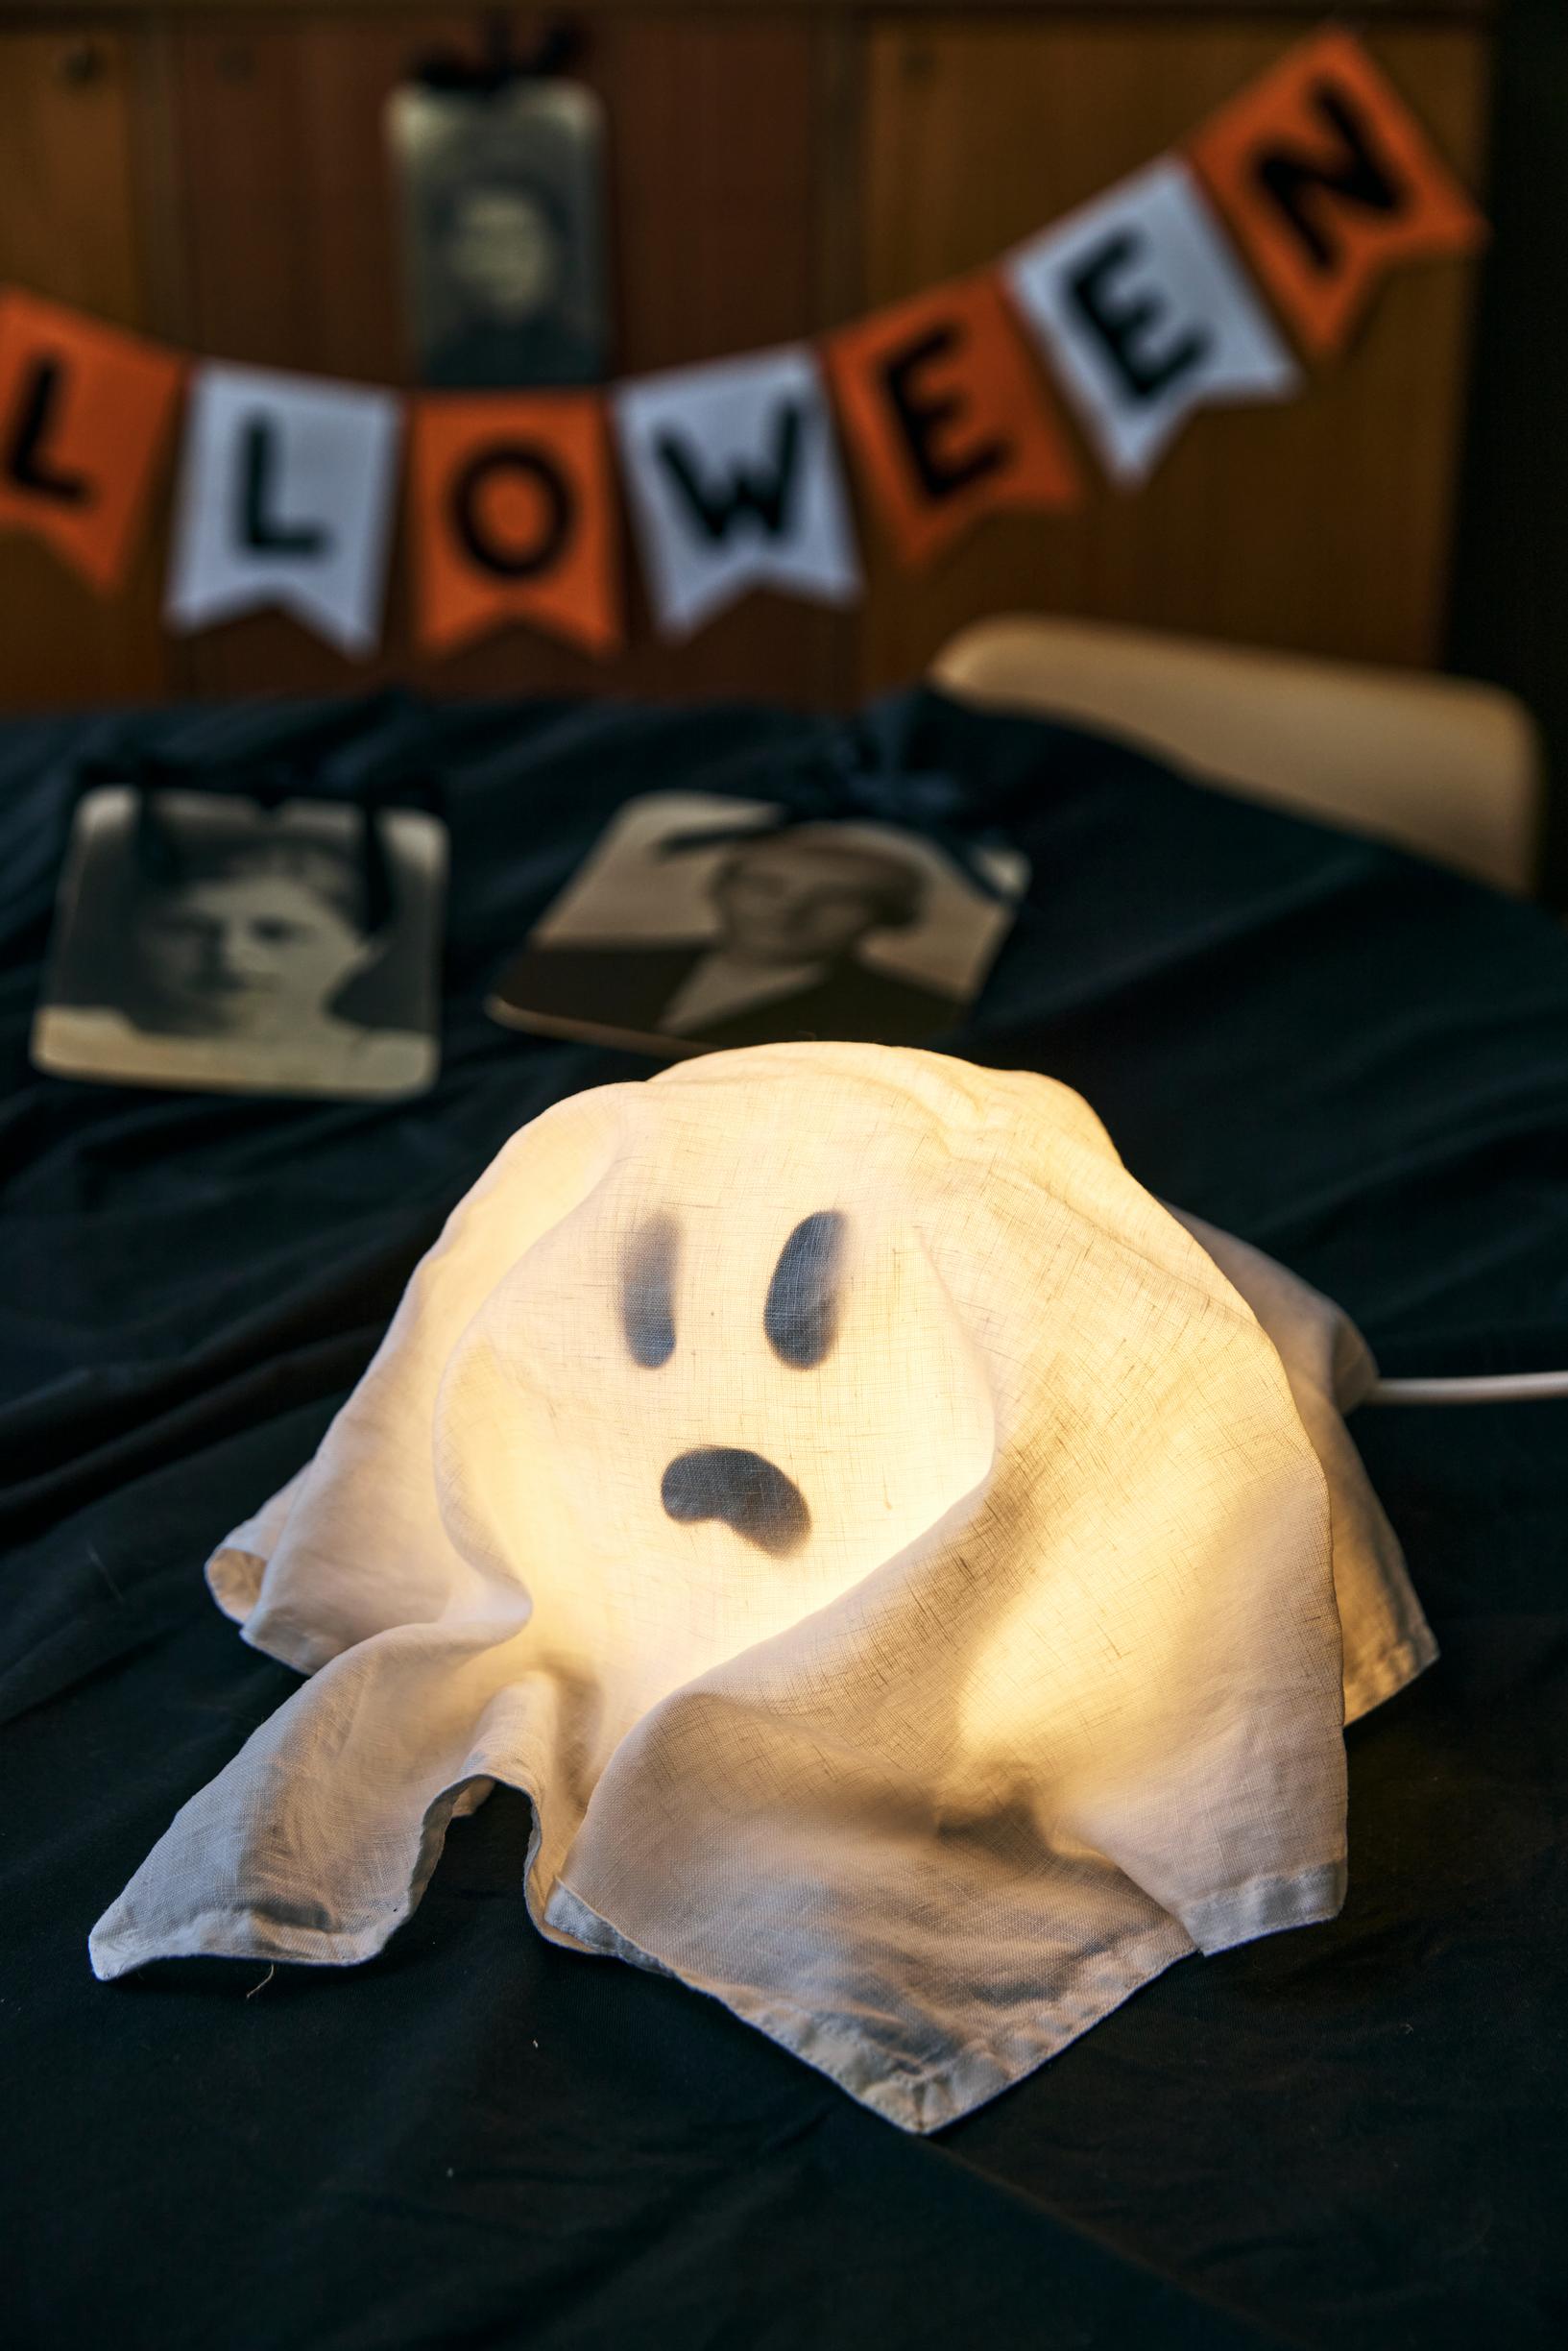
Creating a ghost lamp takes just a couple of minutes. I cut eyes and a mouth from black adhesive vinyl and stuck them onto the round glass shade of the lamp. Then I draped it with a white cloth. An LED bulb doesn’t heat up, so it’s safe for the lamp to be covered temporarily.
10. An eerily easy Halloween banner

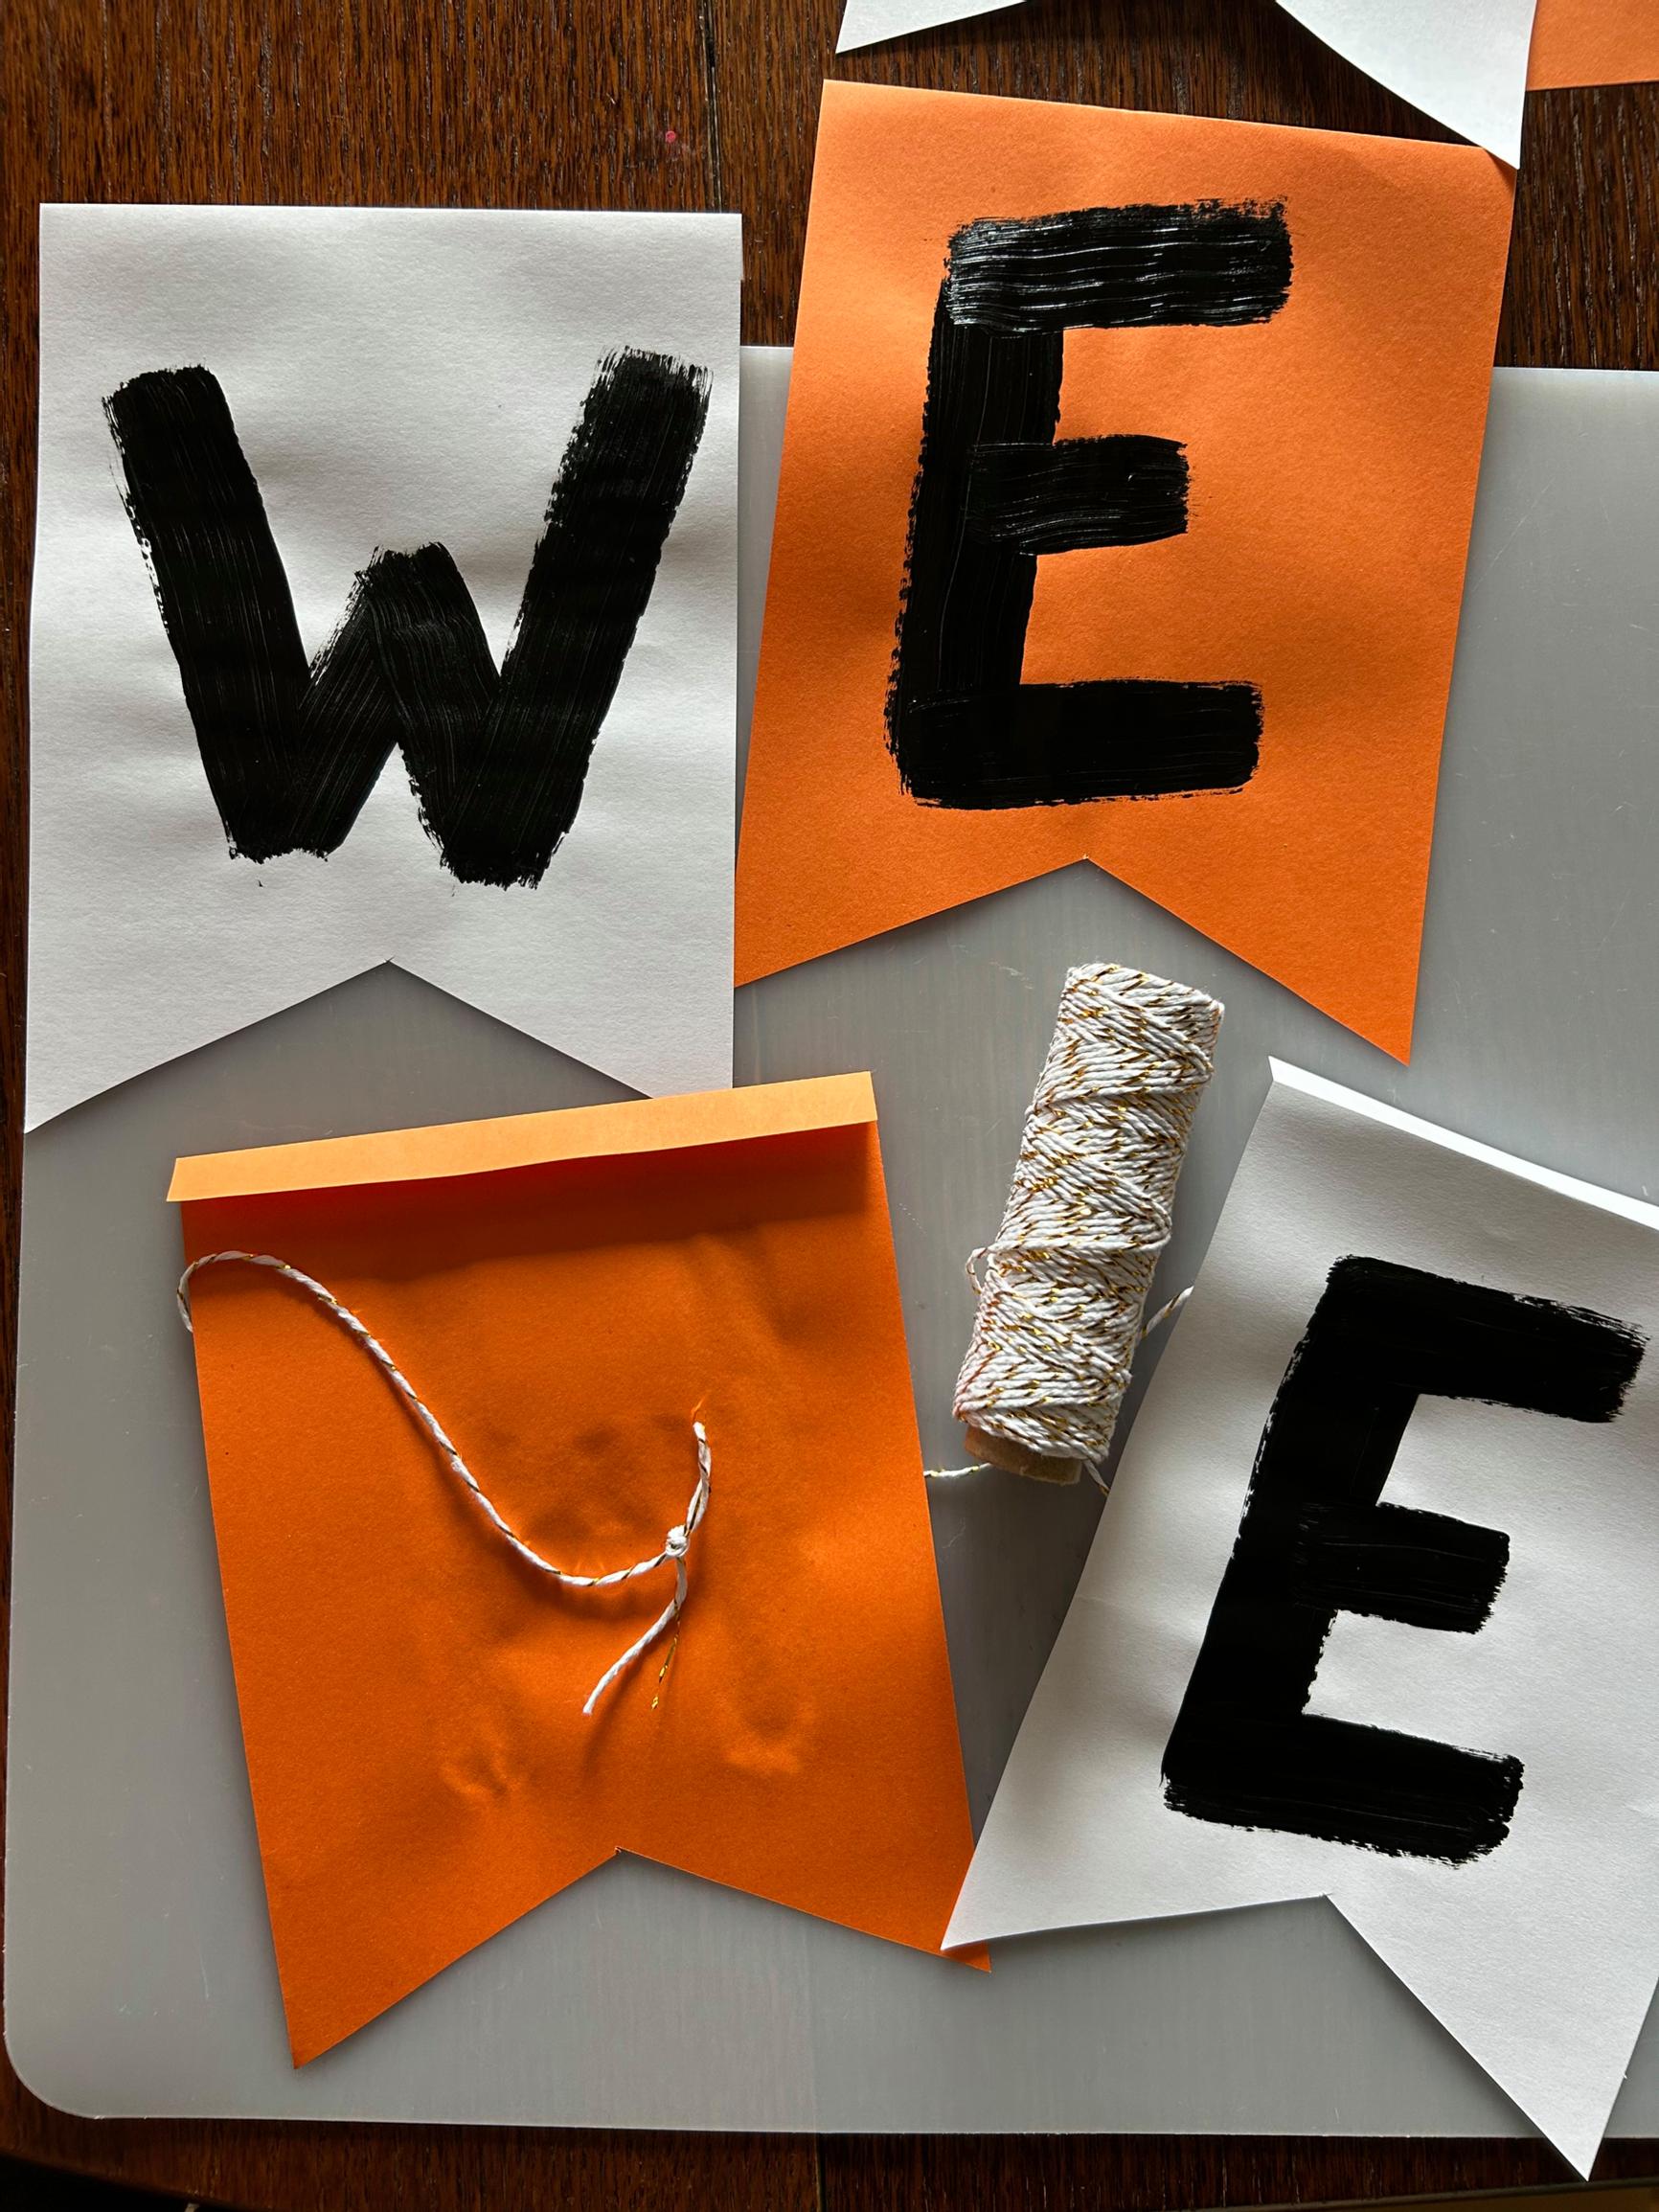
A pennant banner is also quick to make. All I needed were five white and five orange A4 or Letter size sheets of paper (21 × 29.7 cm / 8.3 × 11.7 in), black acrylic paint, a flat wide brush, a stapler, and some string. I cut each A4 in half lengthwise for A5 or about Half Letter size (about 14.8 × 21 cm / 5.8 × 8.3 in) pieces, then cut out a small triangle on one short side. I swiftly painted “Halloween” letters on each piece and let them dry. Next, I folded about 1 cm (0.4 in) on the other short side and stapled the string in place with two staples for each pennant. These fold flat for easy storage.
11. Do you dare to get a tattoo?

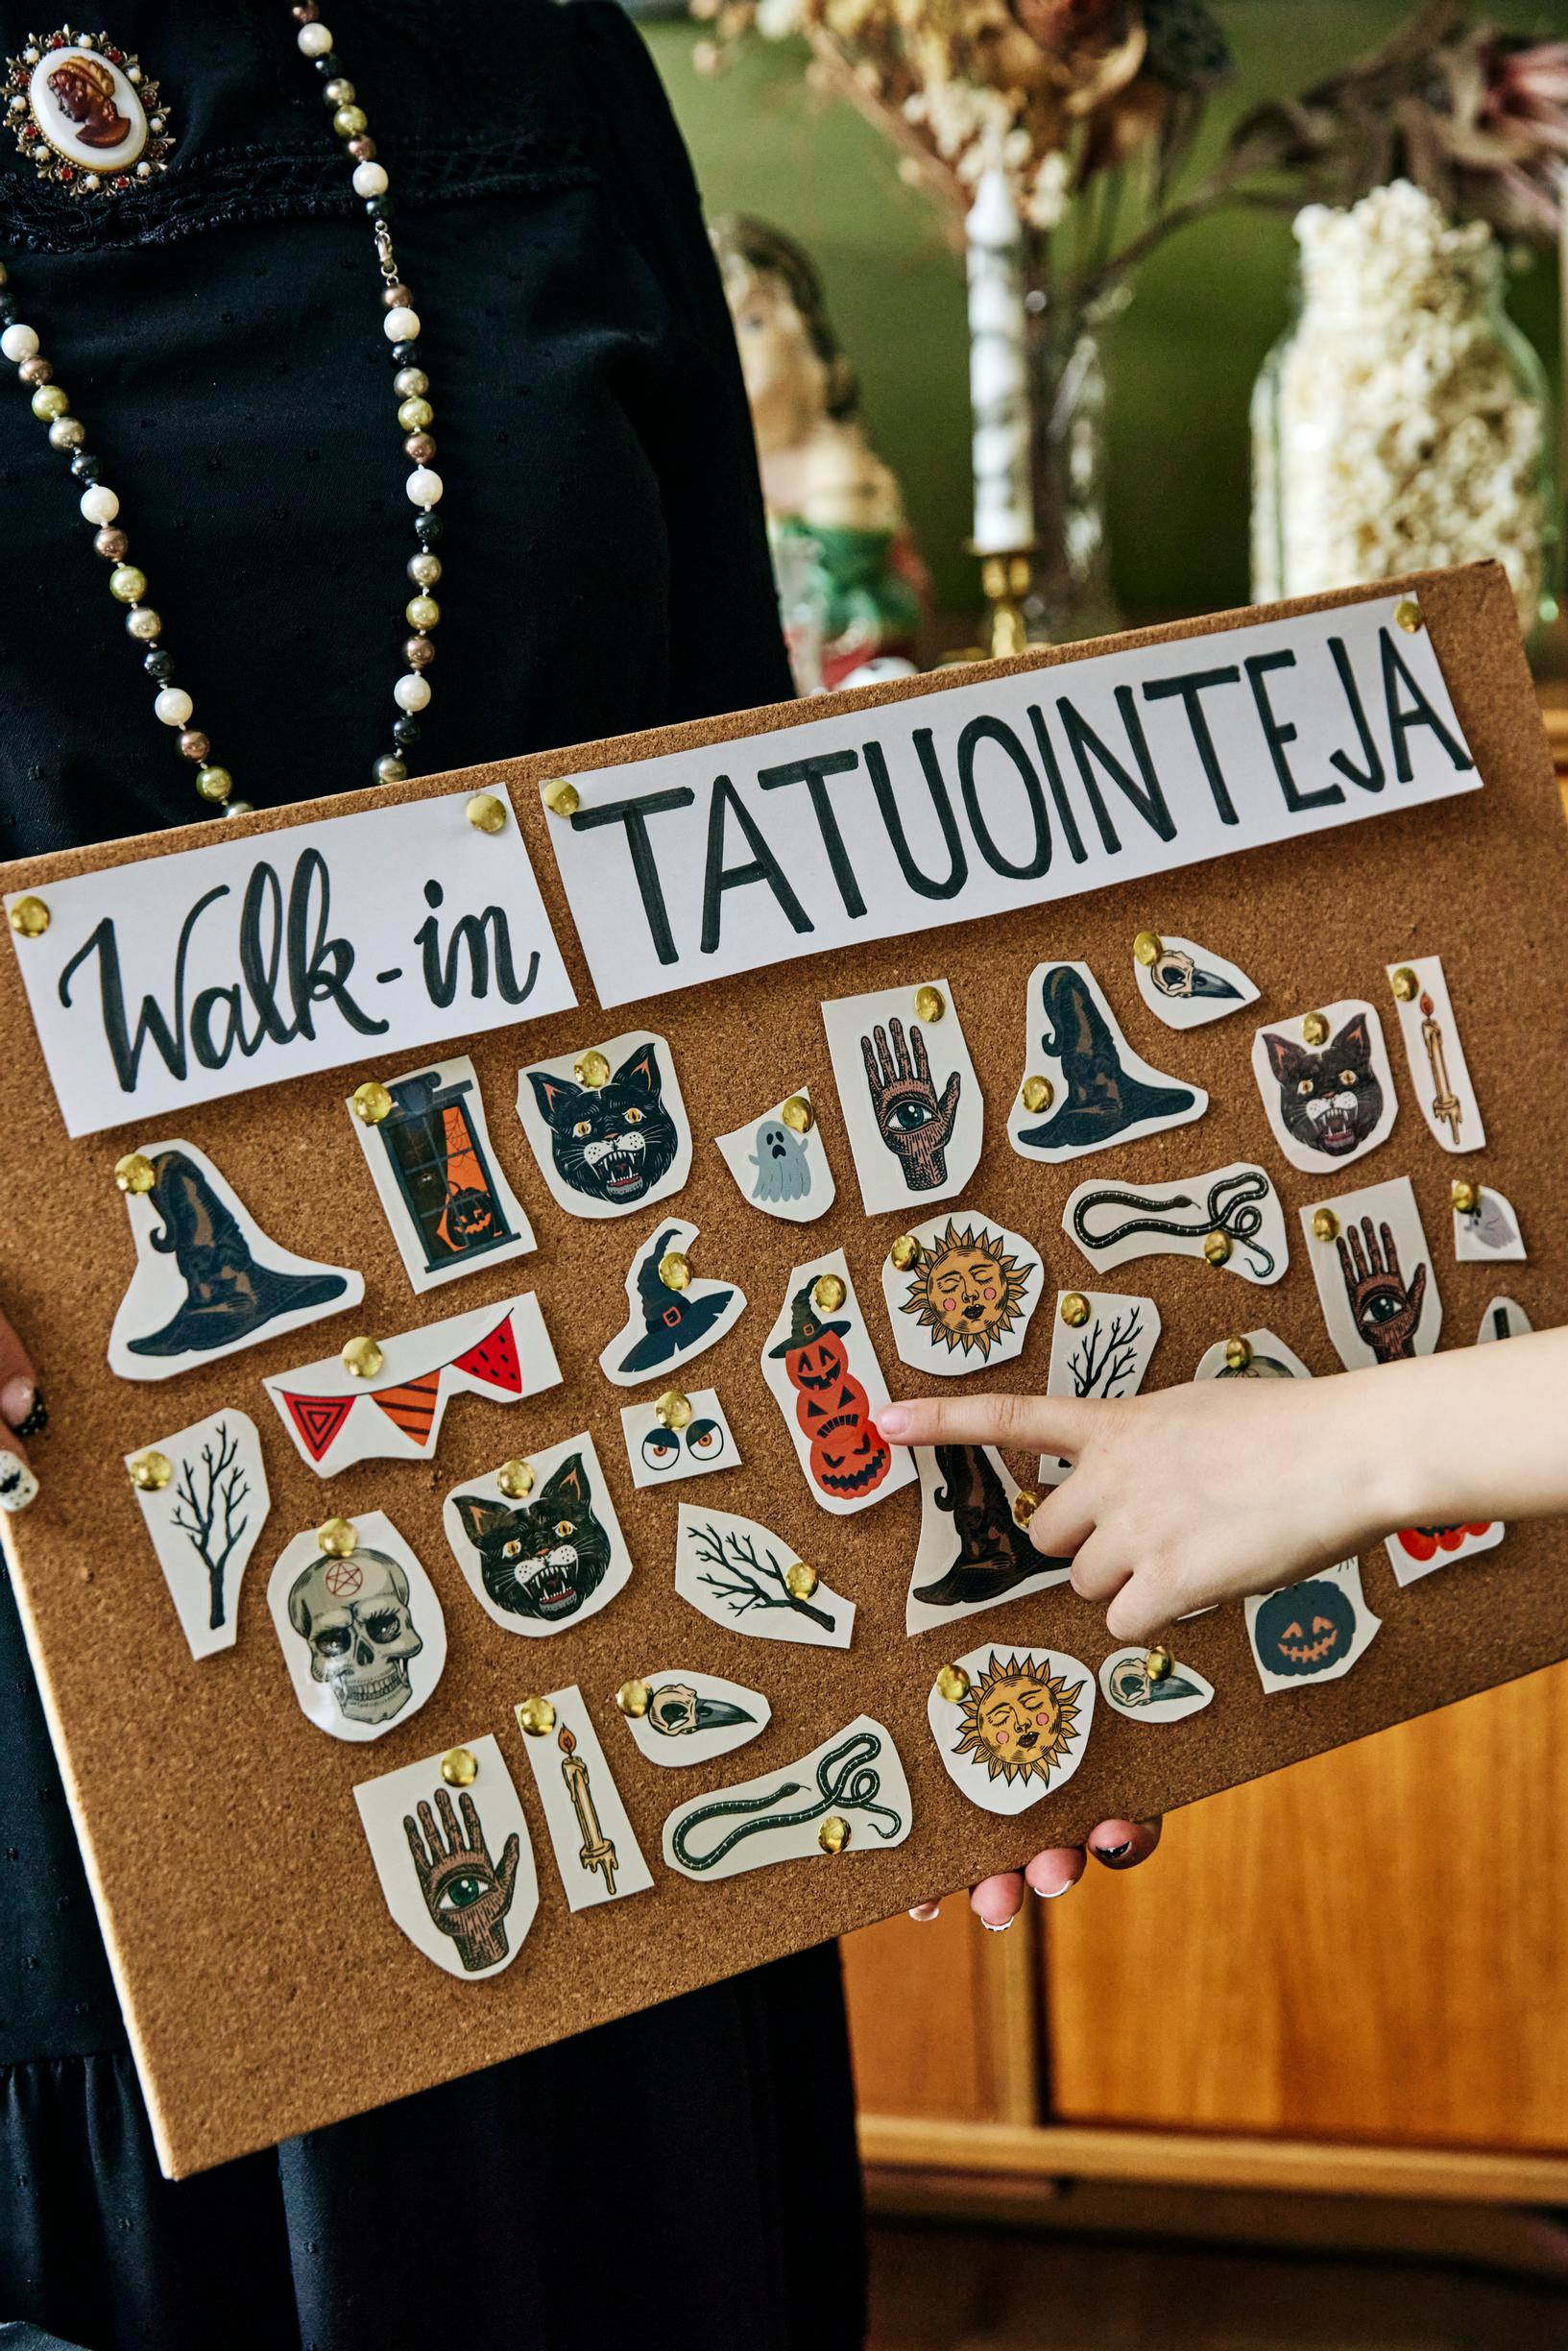
A timeless highlight at children’s parties is the walk-in tattoo studio. I cut out designs from Halloween-themed temporary tattoo sheets and pinned them onto a corkboard. Then kids can choose their favorite tattoos—just like at a real walk-in day.
Budget-friendly and easy Halloween decorating—Elina’s tips
- All you really need is white copy paper, a black marker, and scissors. A ghost figure is super simple to make! See if you have anything orange at home, like yarn or copy paper—both are perfect for crafting.
- Look around your home for Halloween-friendly props: textiles, dishes, you name it. Make black your main color with white as an accent, then highlight with orange, purple, or neon green. A black sheet as a tablecloth and white dishes on top only need a few ghosts and bats to finish the look. A wilted old bouquet or dried branches from outside makes the perfect spooky centerpiece, and of course, real pumpkins are a must!
- Halloween colors and themes don’t really change—pumpkins, ghosts, and bats are always in style. There’s no need to buy new decorations every year. For me, it’s essential that the decorations flatten and take little storage space.
- You can pick up air-dry craft clay at many supermarkets for cheap. Use it to create ghosts, skulls, little pumpkins, or tombstones—or even a Halloween-style door scene. Once they’ve dried, you can finish them with markers, acrylic paints, or cutouts from napkins sealed with decoupage glue.