The granny square is a versatile classic that’s surprisingly easy to learn—check out our clear photo instructions
The granny square is quick to crochet once you’ve mastered the basics. You can create all kinds of items using these squares, from clothing and accessories to blankets and pillow covers. By selecting different yarns and colors, you can create a wonderful variety of granny squares.
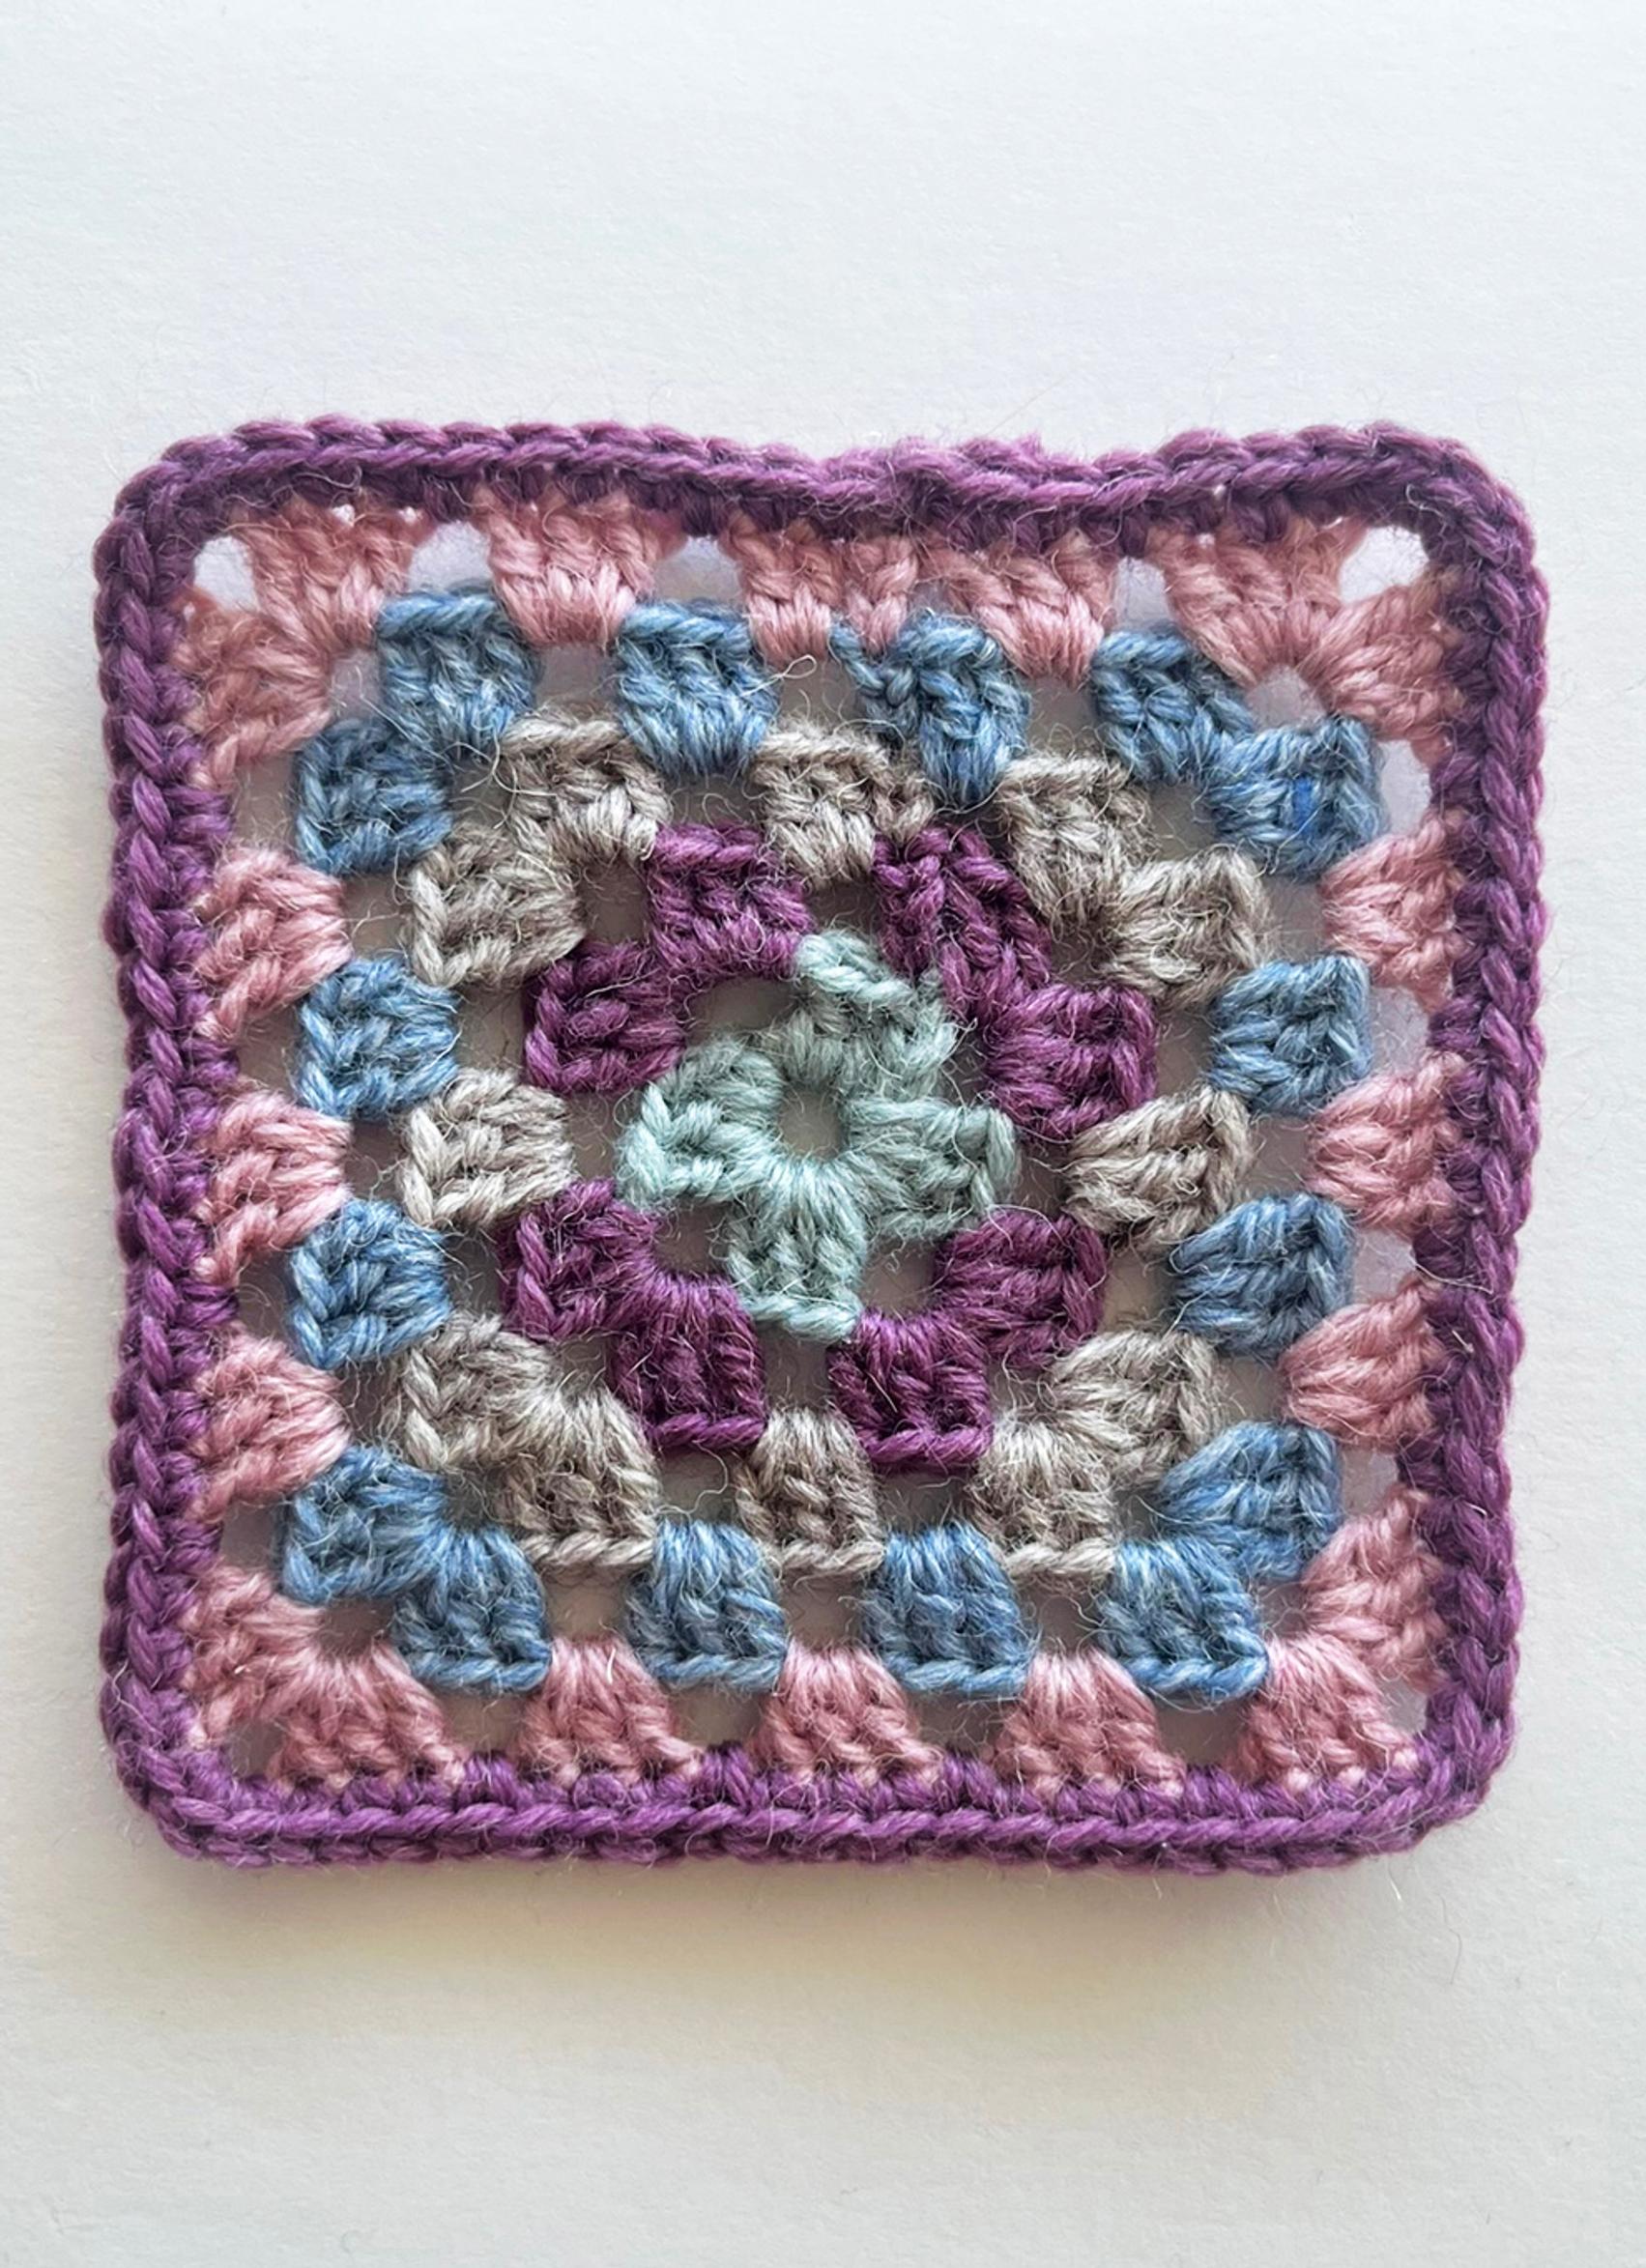
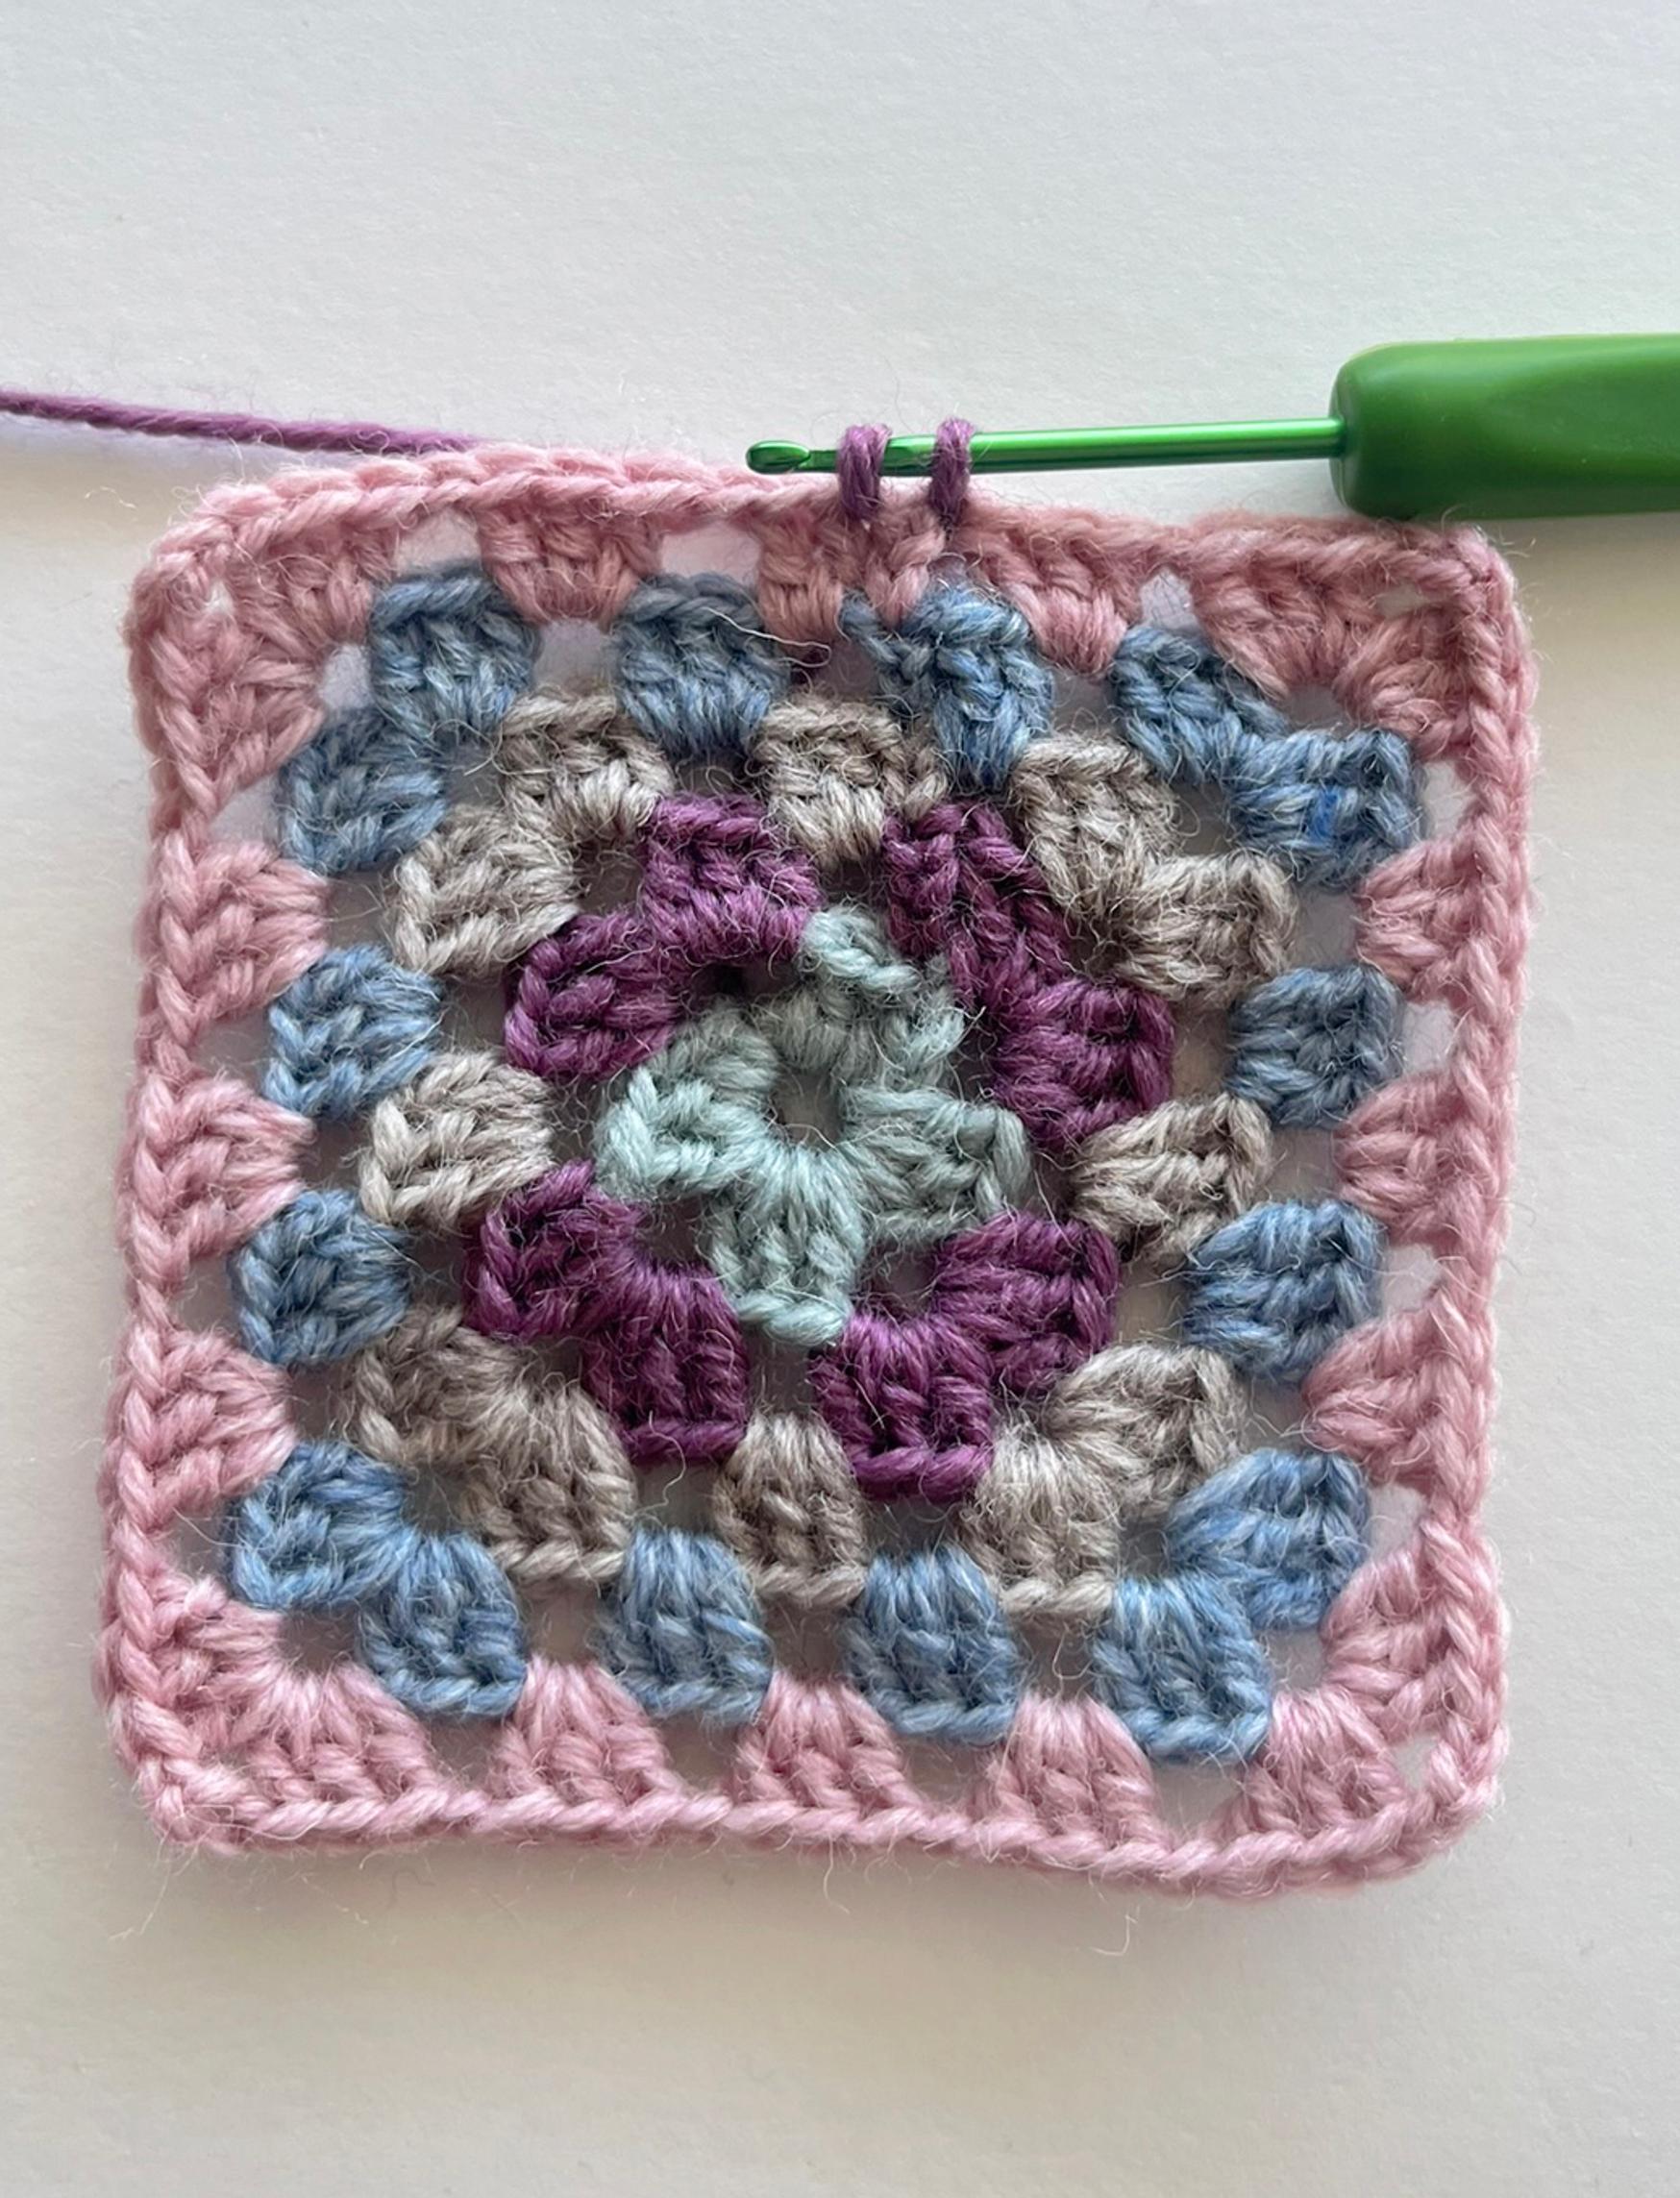
The granny square is a timeless favorite that inspires both new and experienced crocheters decade after decade. Its basic pattern uses chain stitches and double crochet, creating a beautiful, lacy texture.
It’s easy to adjust the size of granny squares, so you can make them as large or as small as you want. However, crochet at least three rounds so the square has that familiar granny-square look. Once you’ve mastered the technique, they work up quickly, and your project grows piece by piece.
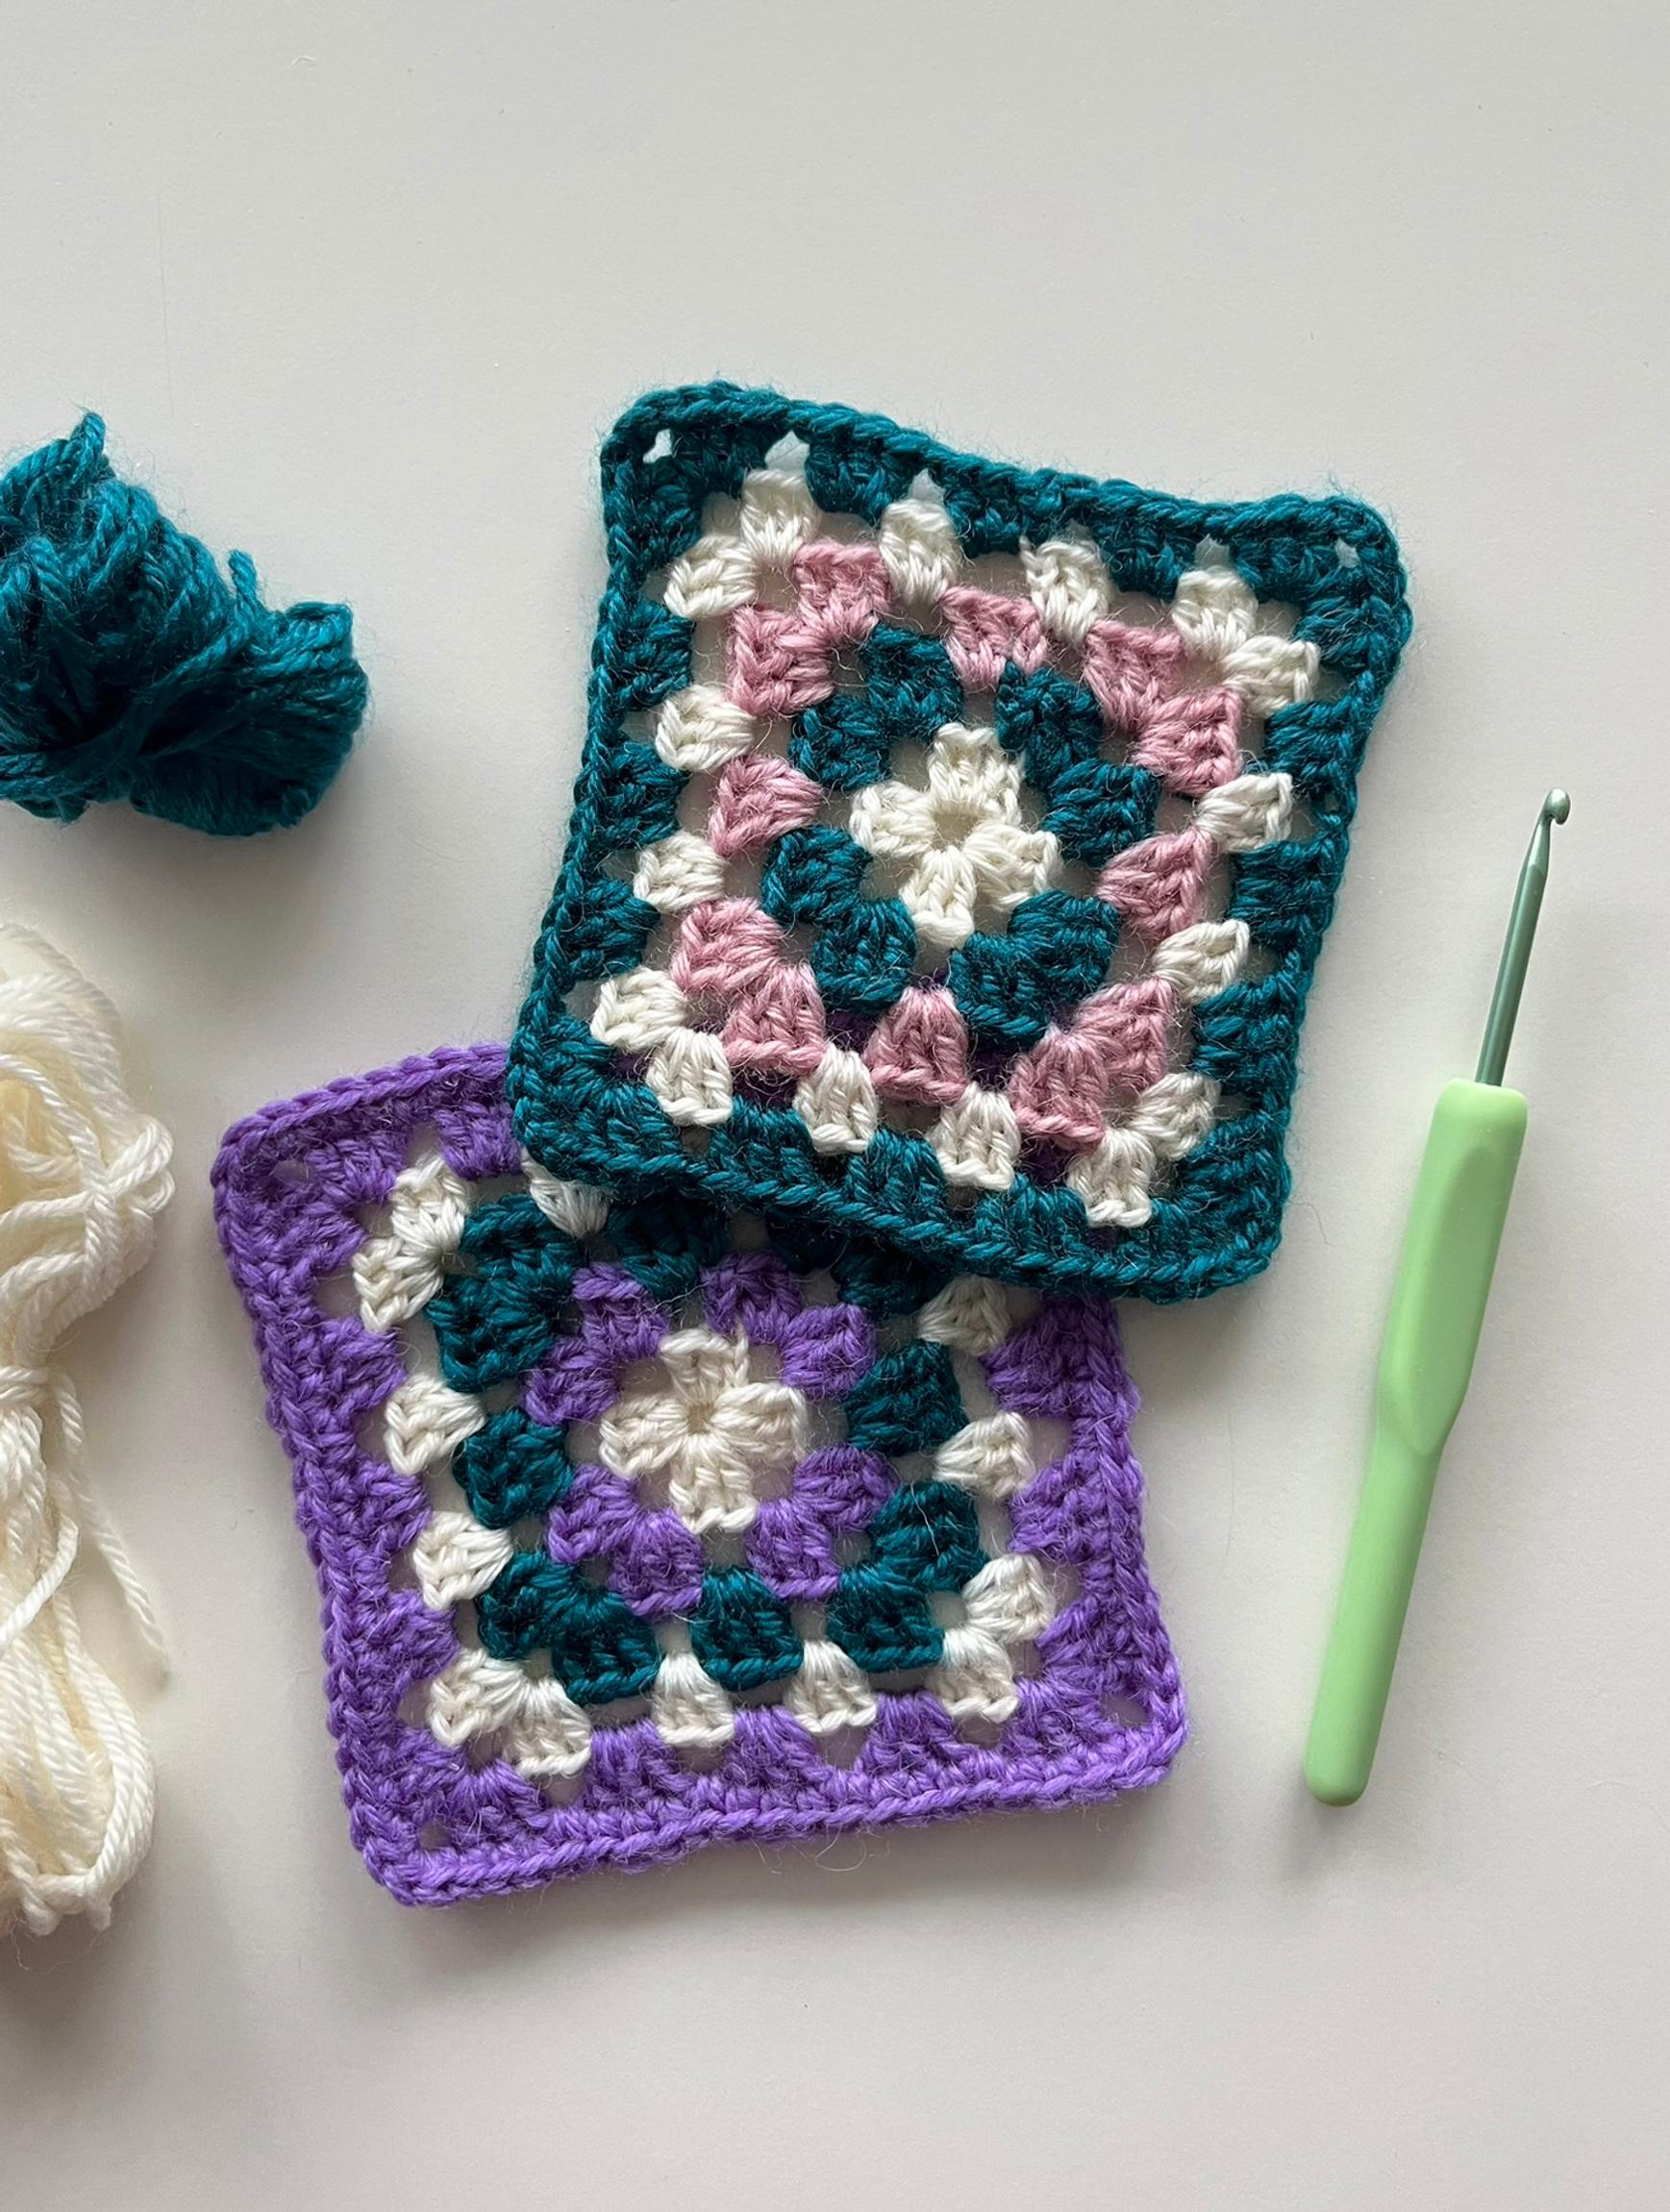
Almost any type of yarn works well for granny squares. Many people use leftover yarn, as each one only requires a little. You can crochet every square in different colors and combine them into many types of projects.
One reason for the granny square’s popularity is its versatility: You can create colorful garments, scarves, bags, throws, and pillow covers. A single square can serve as a potholder, coaster, or a fun little wall hanging.
Granny square—supplies:
- yarn (for example, wool, cotton, or blended yarn)
- crochet hook (choose according to yarn weight)
- scissors
- a blunt tapestry needle (for weaving in ends and joining squares)
Granny square—instructions:

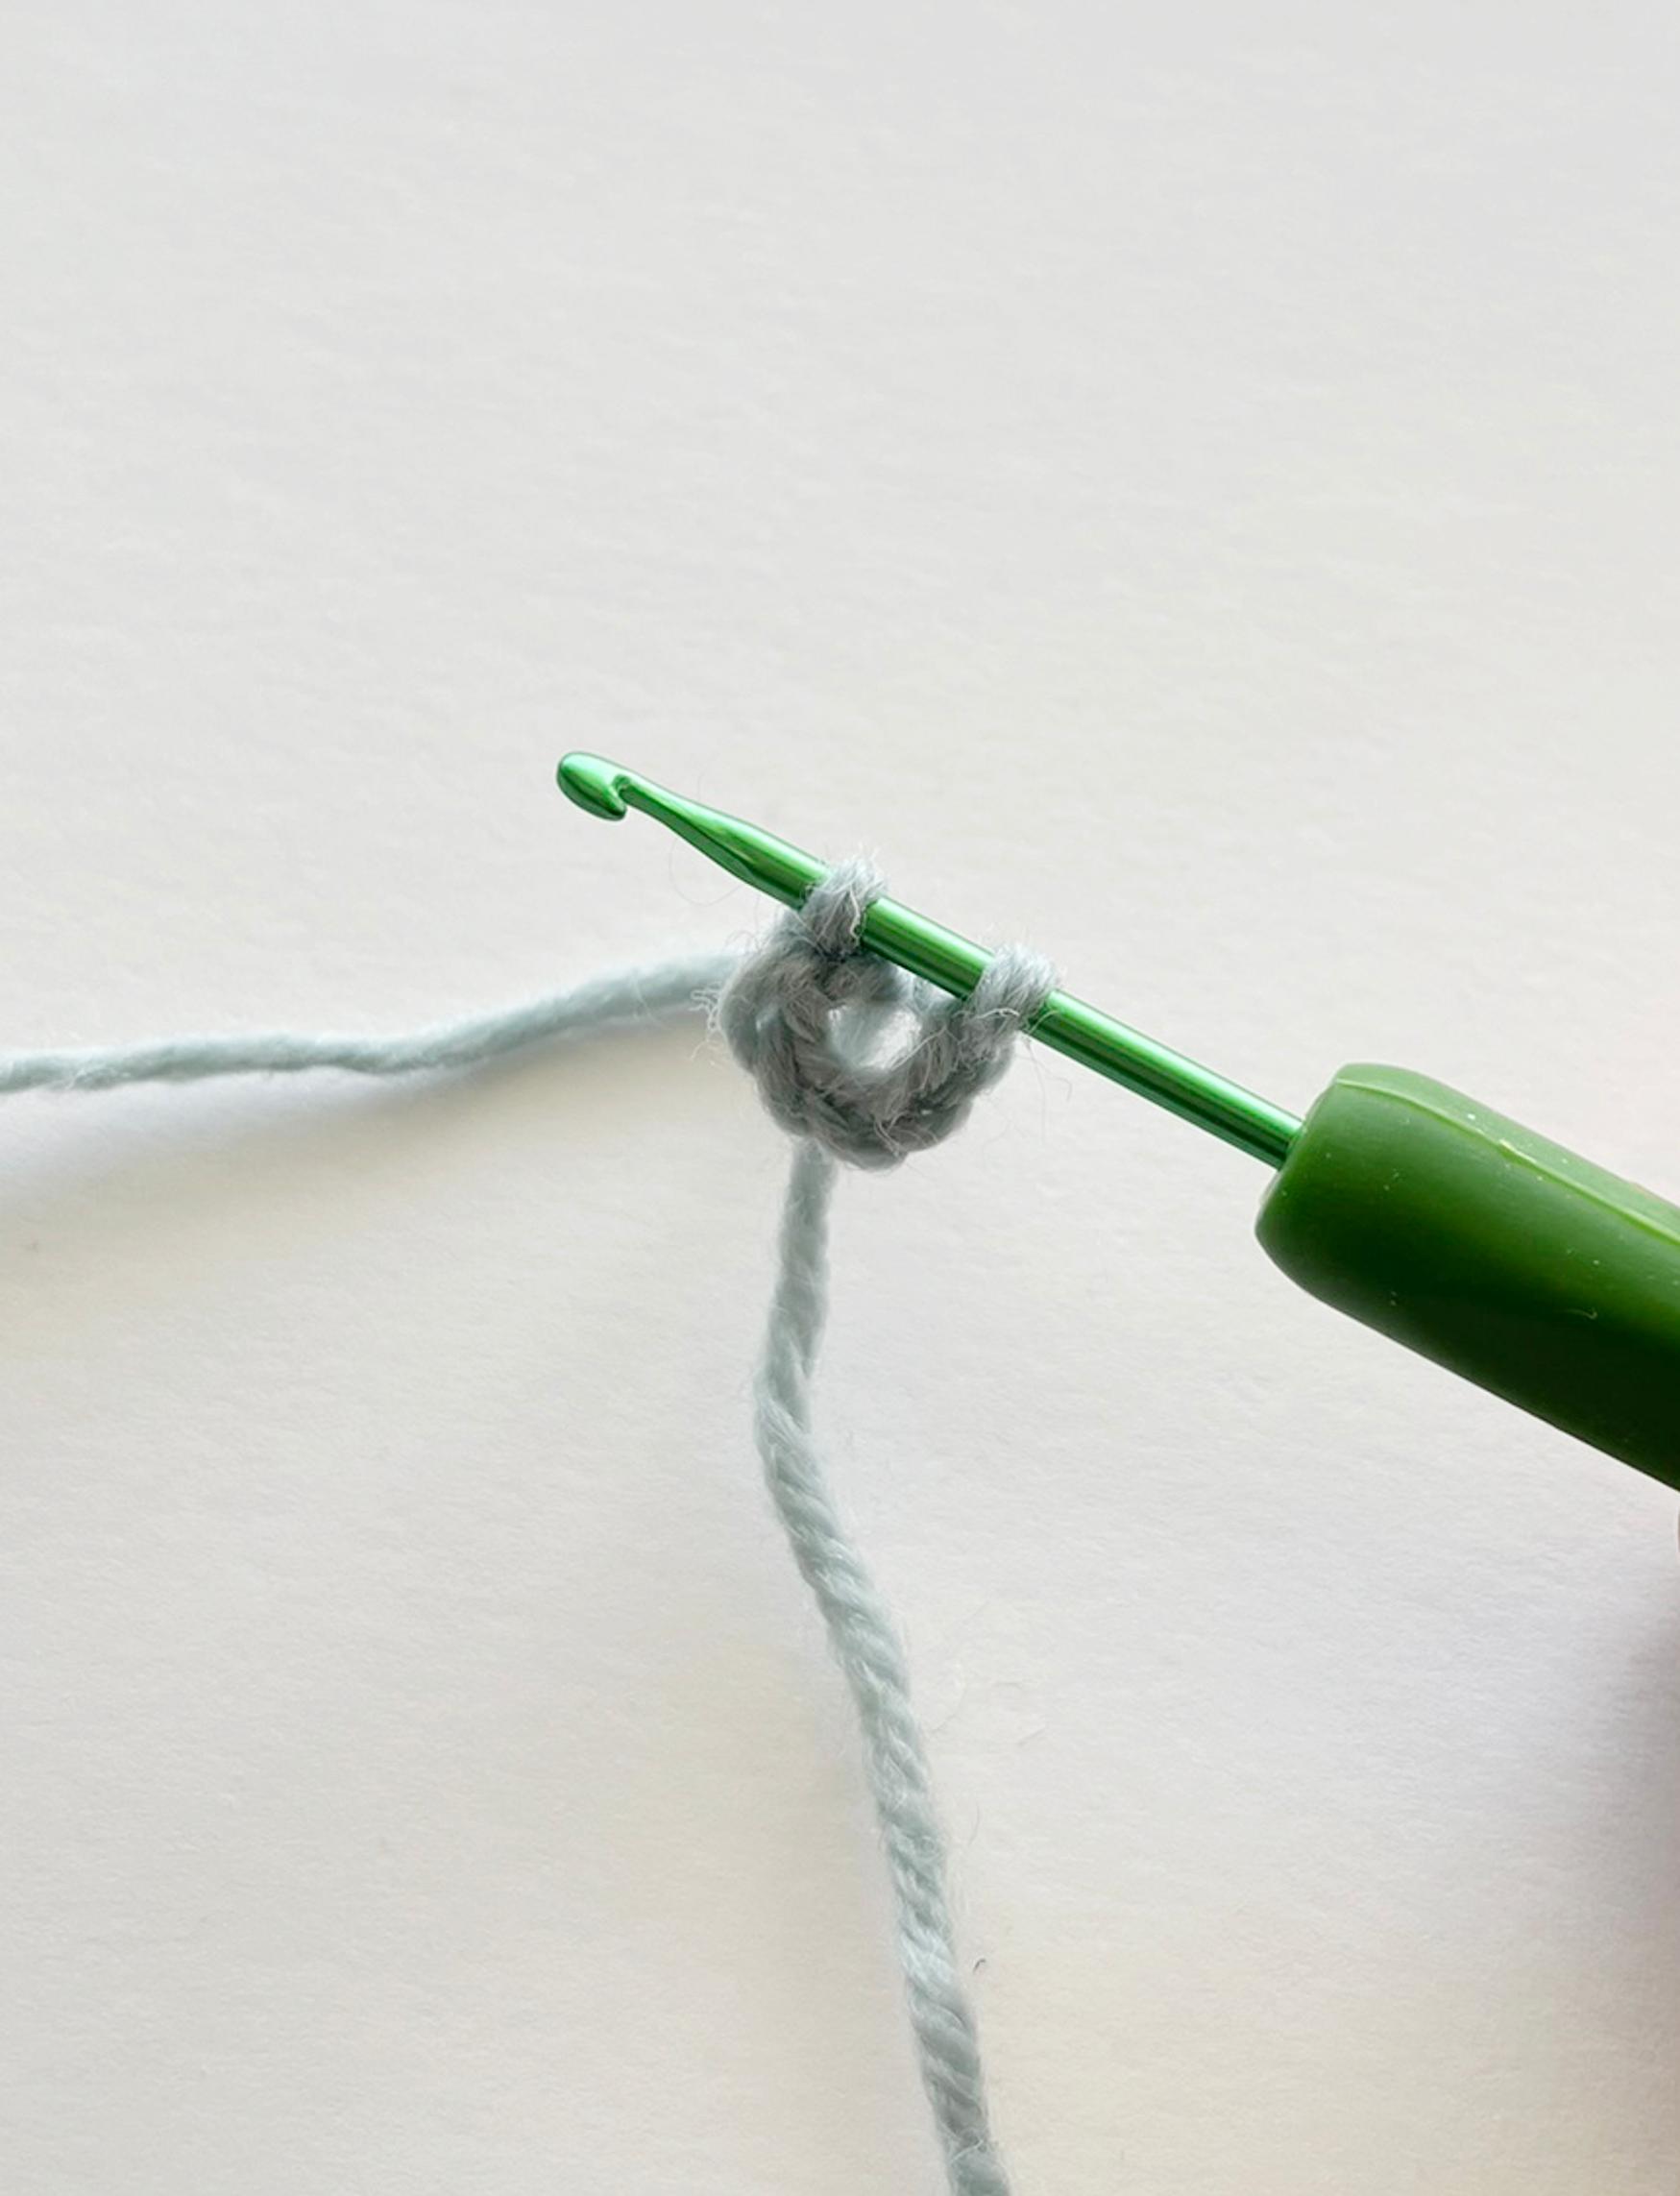

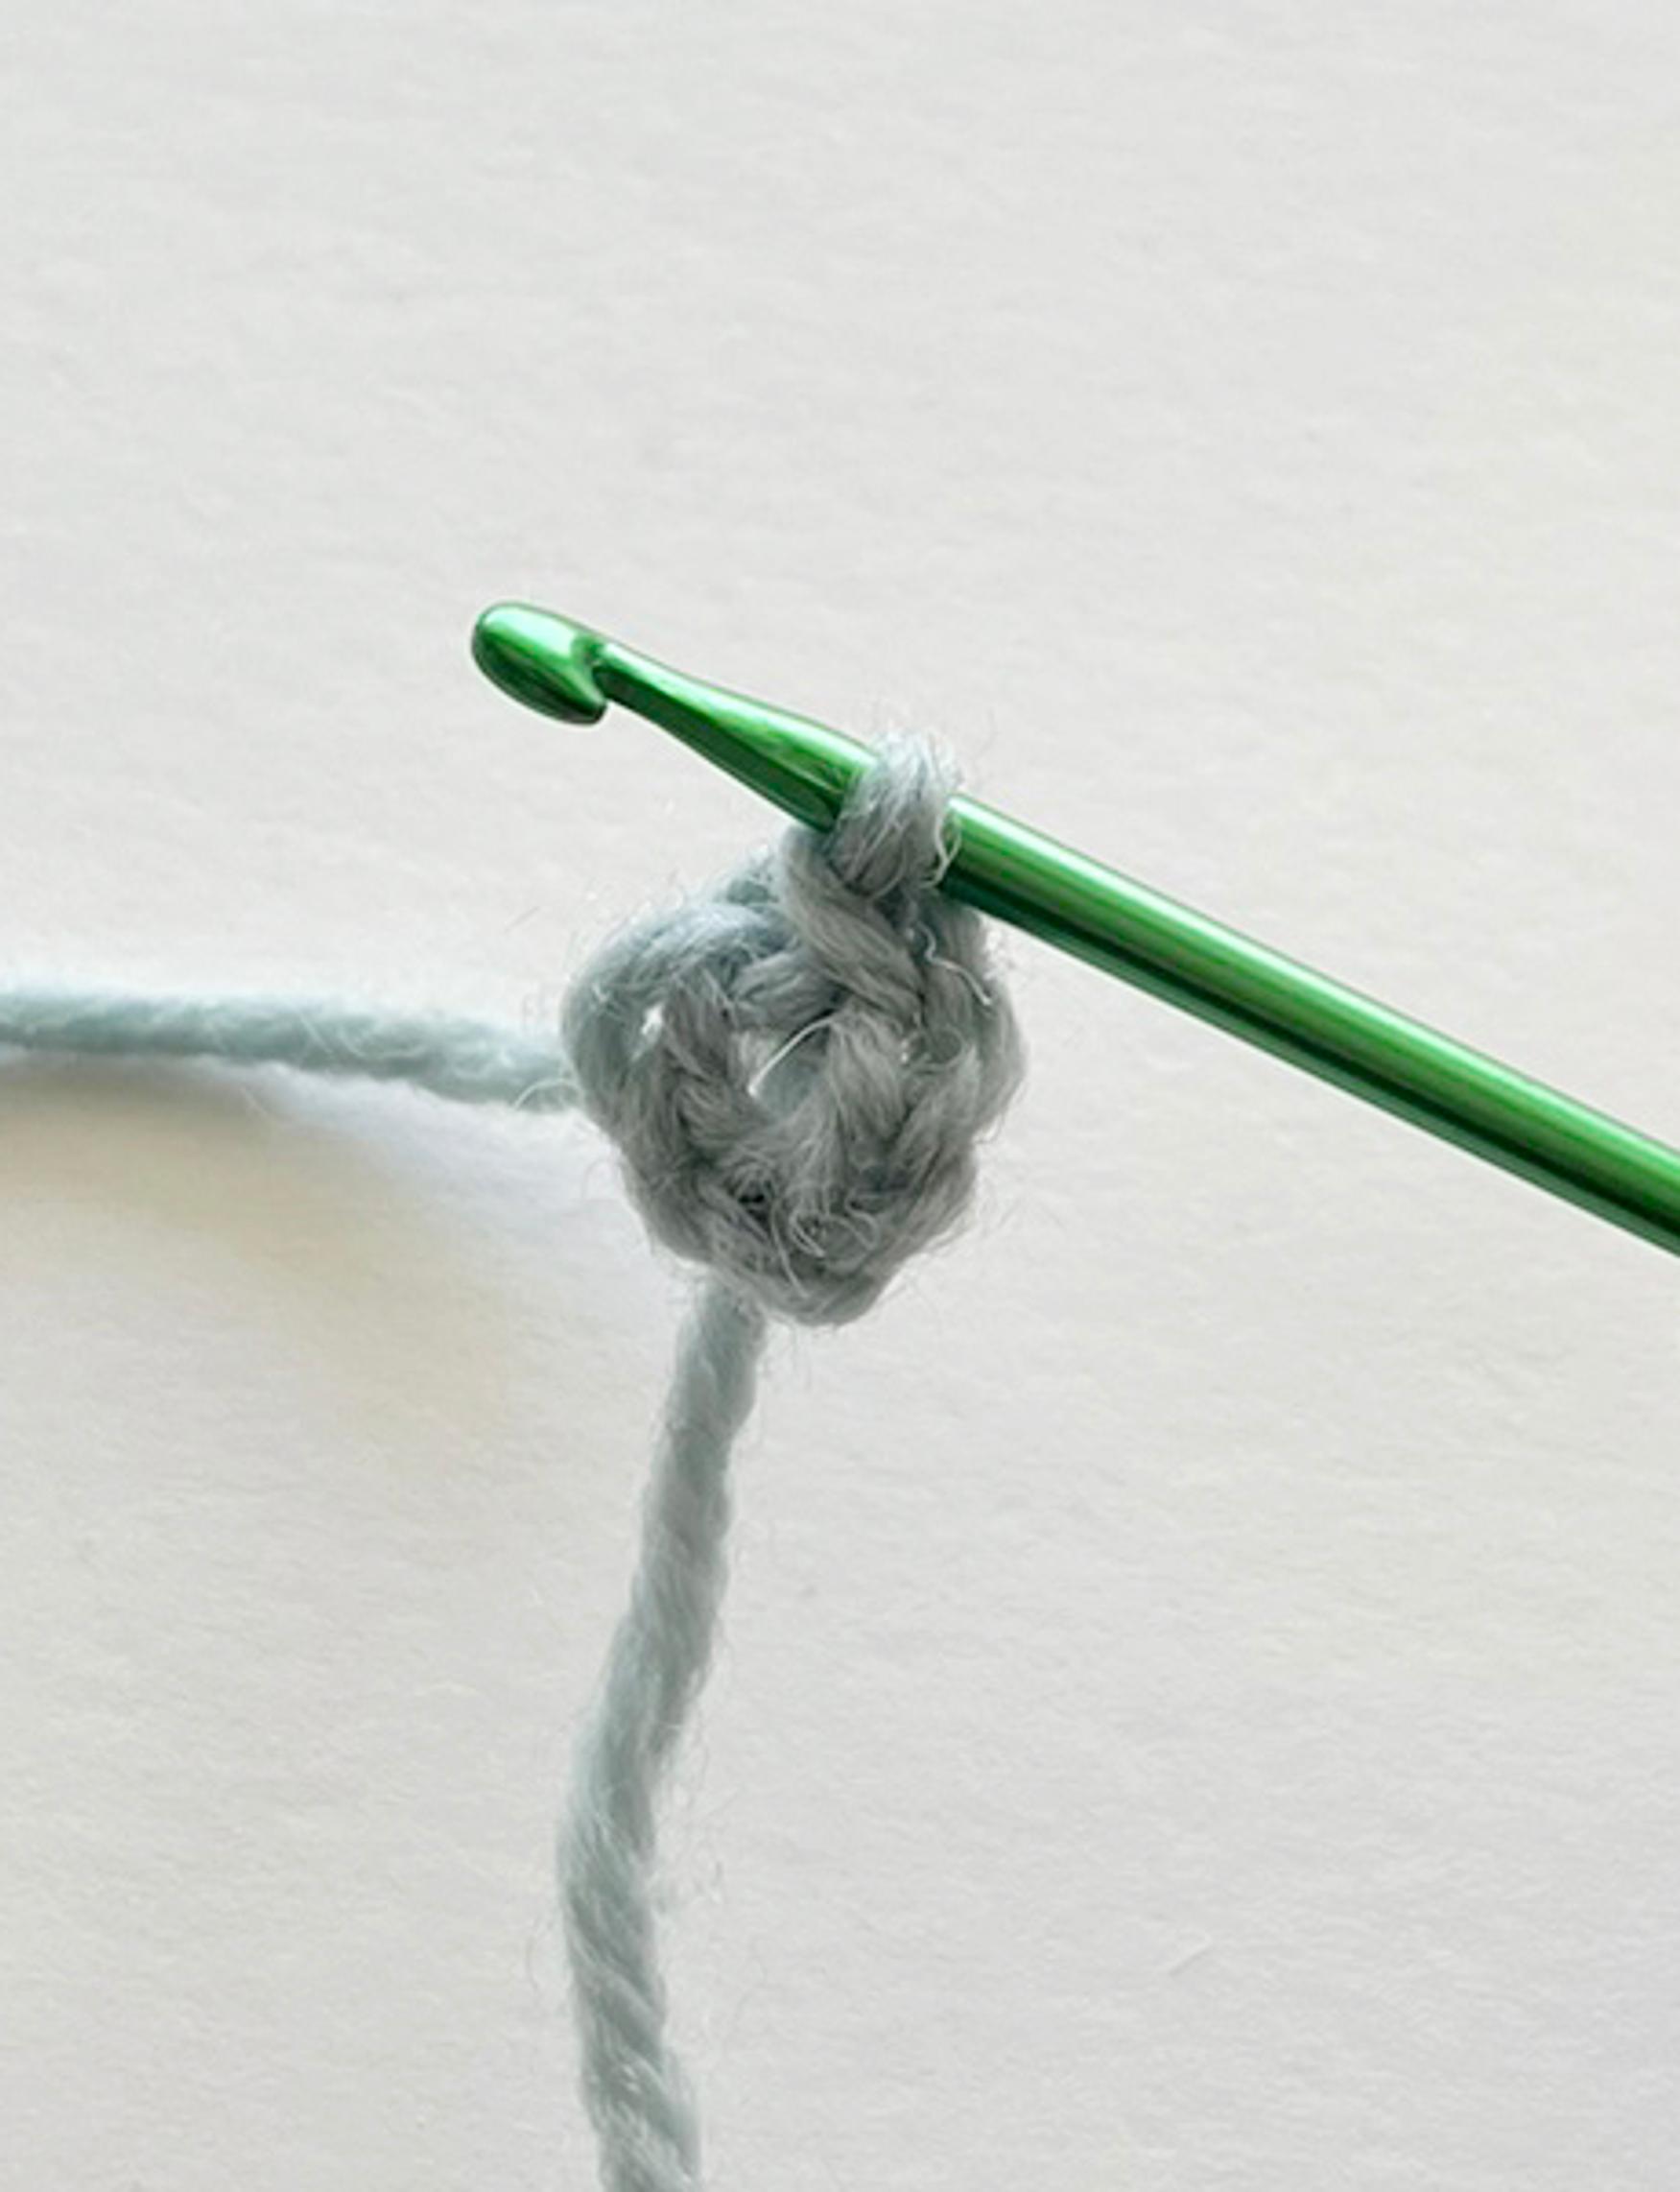
1. Crochet the starting chain for the granny square. Make a slip knot, then chain 6. Join them into a ring with a slip stitch in the first chain.
Note!
Step-by-step photos for the slip knot, chain stitch, and single crochet are at the end of the article.

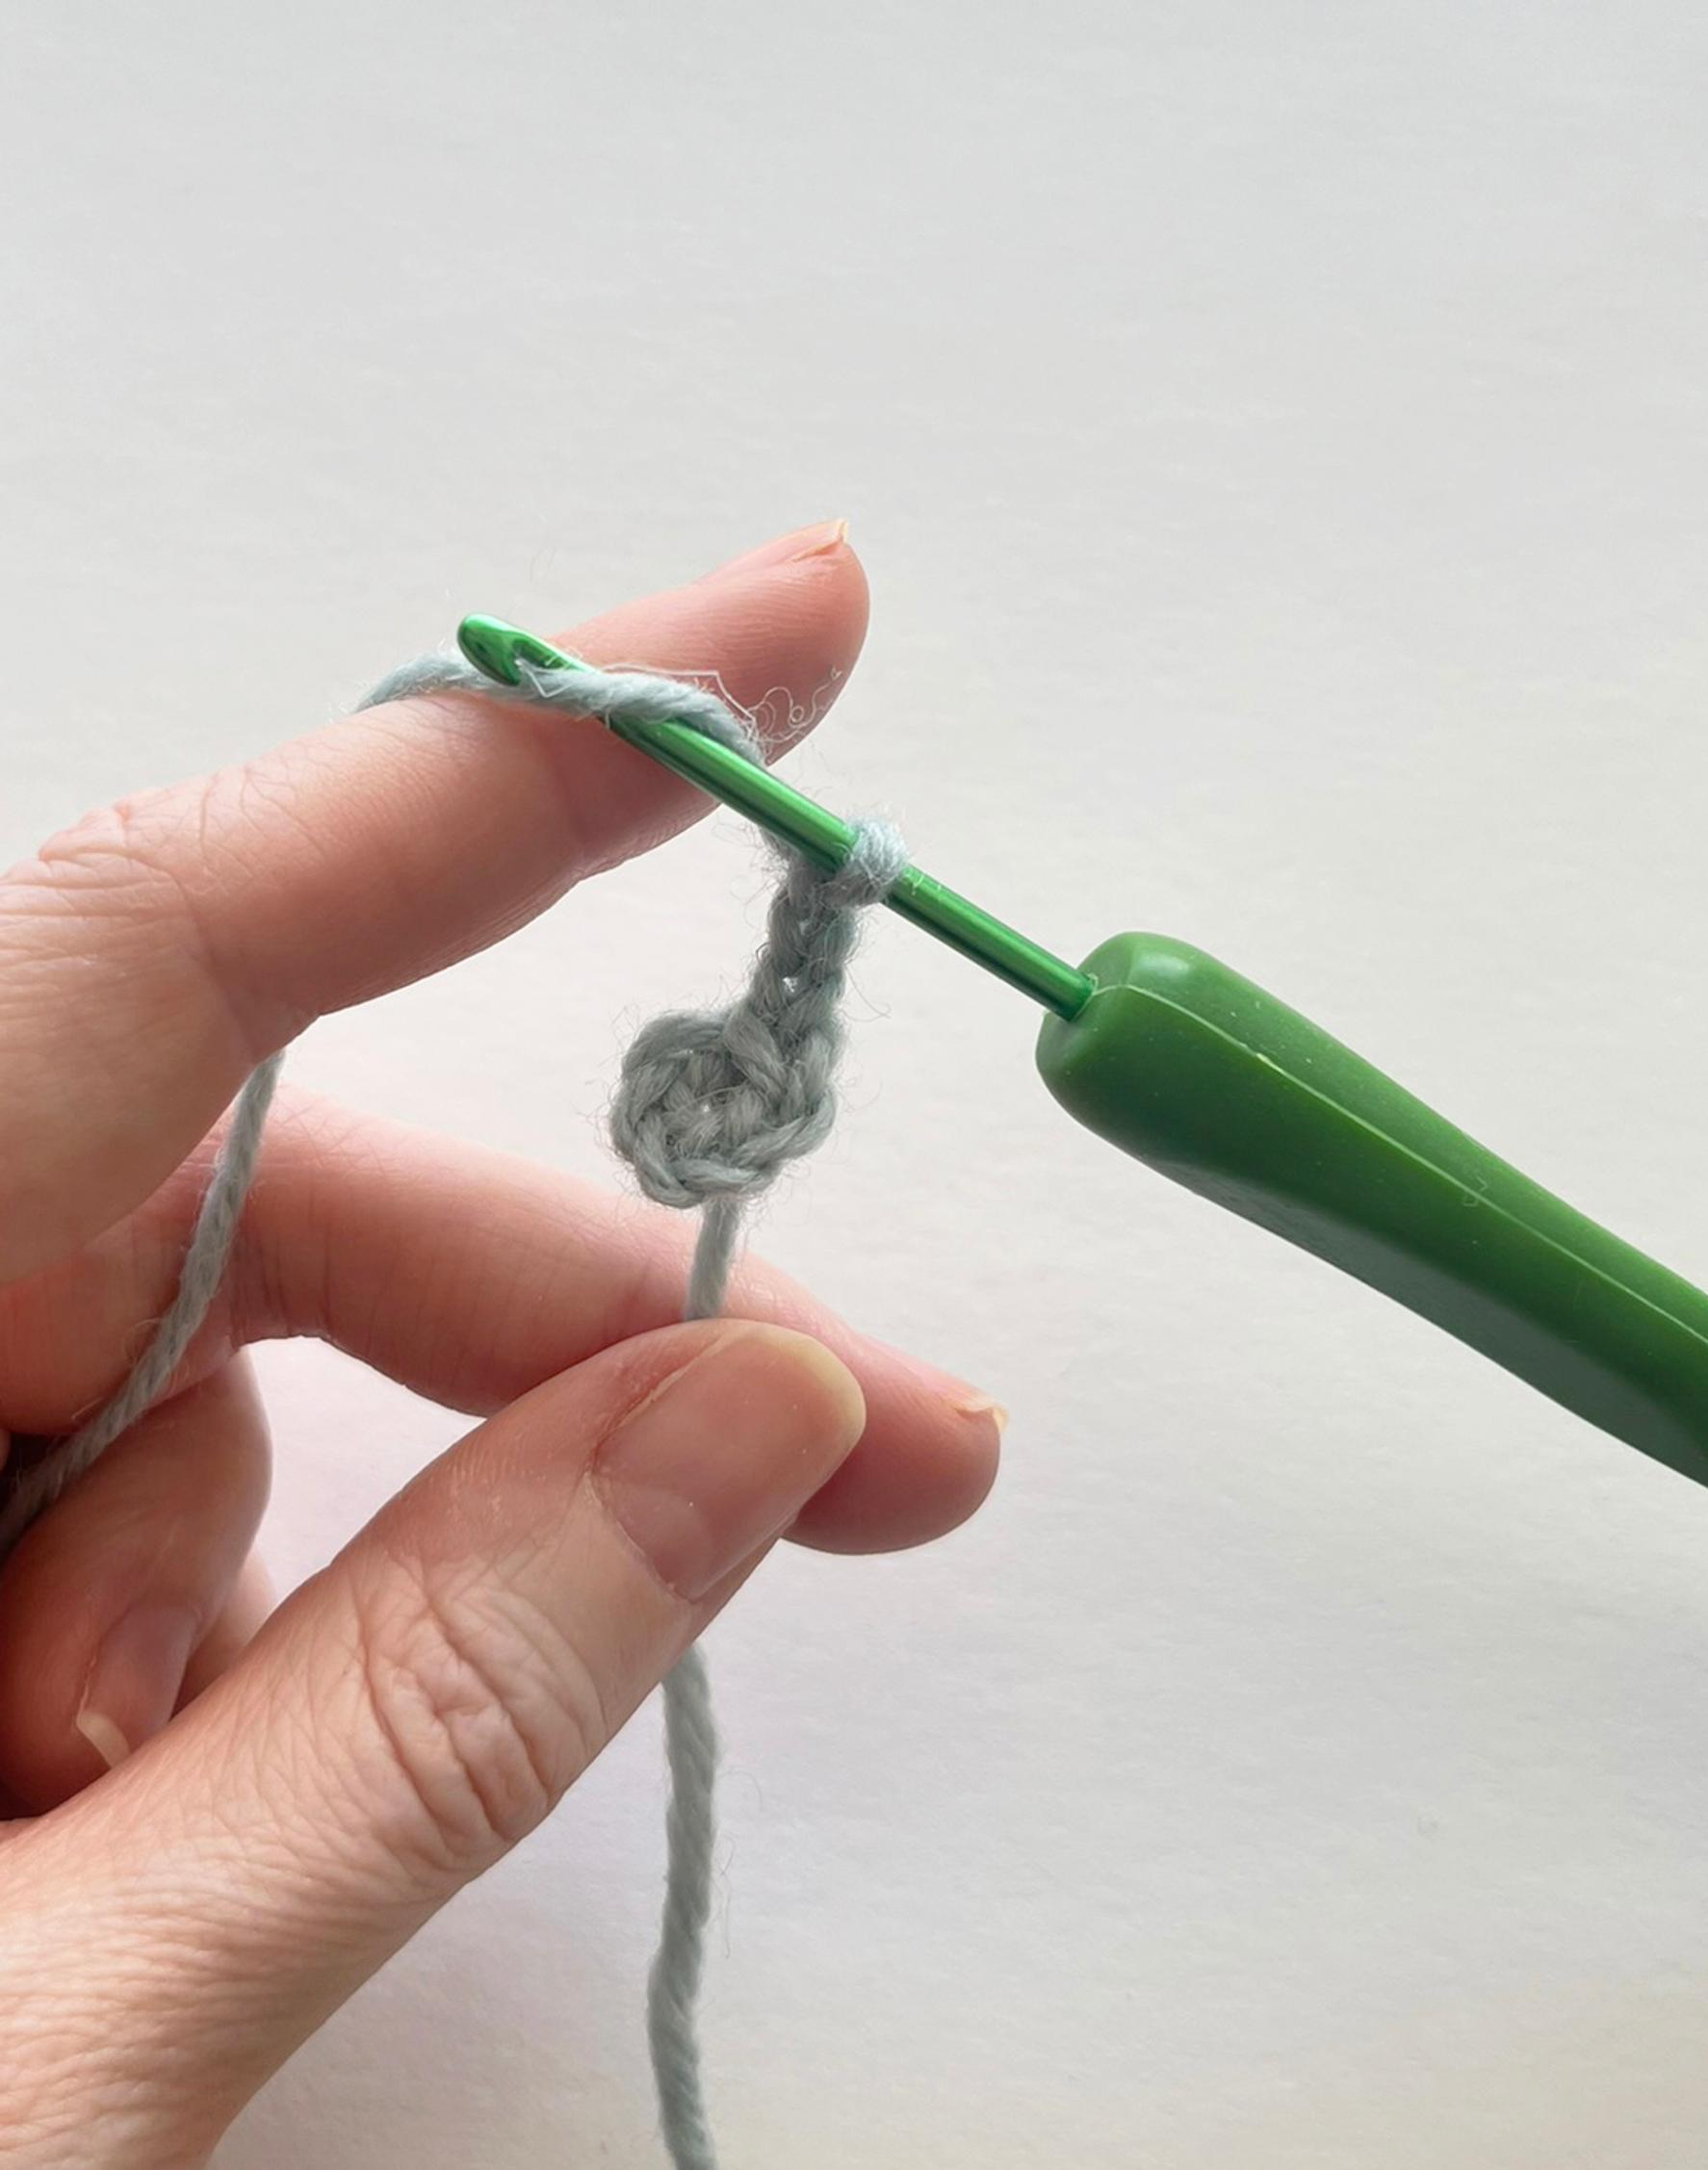

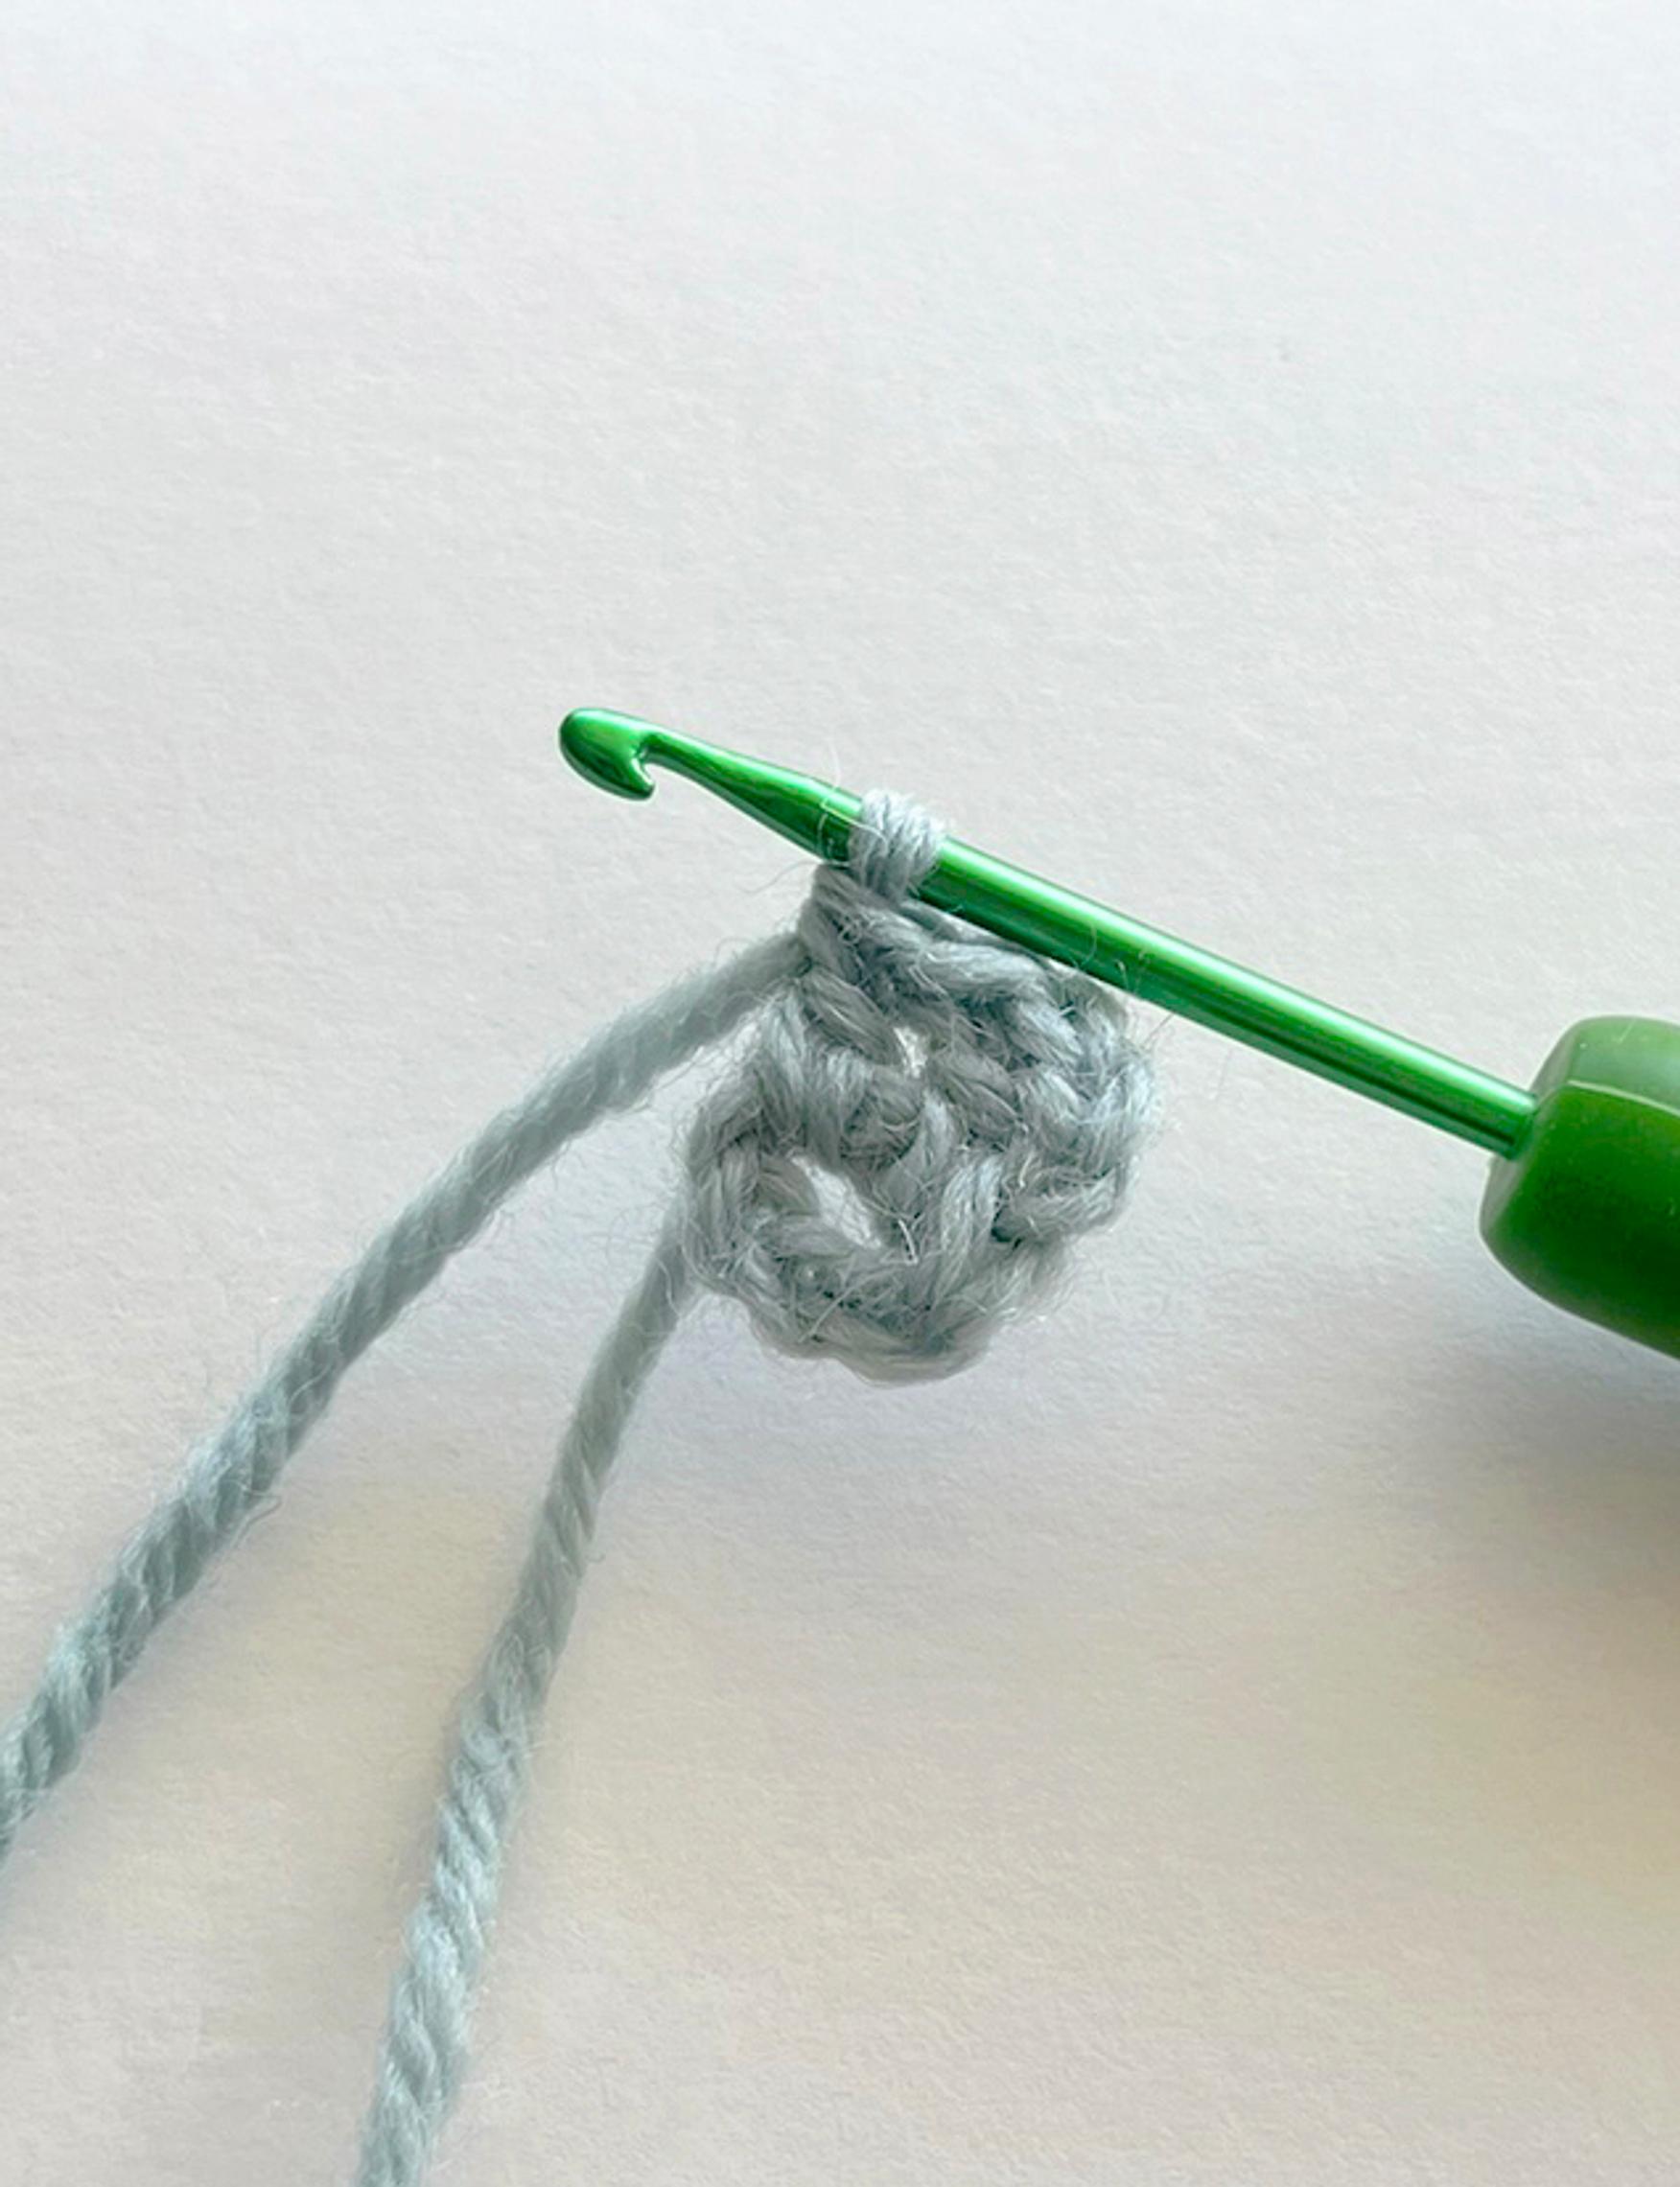
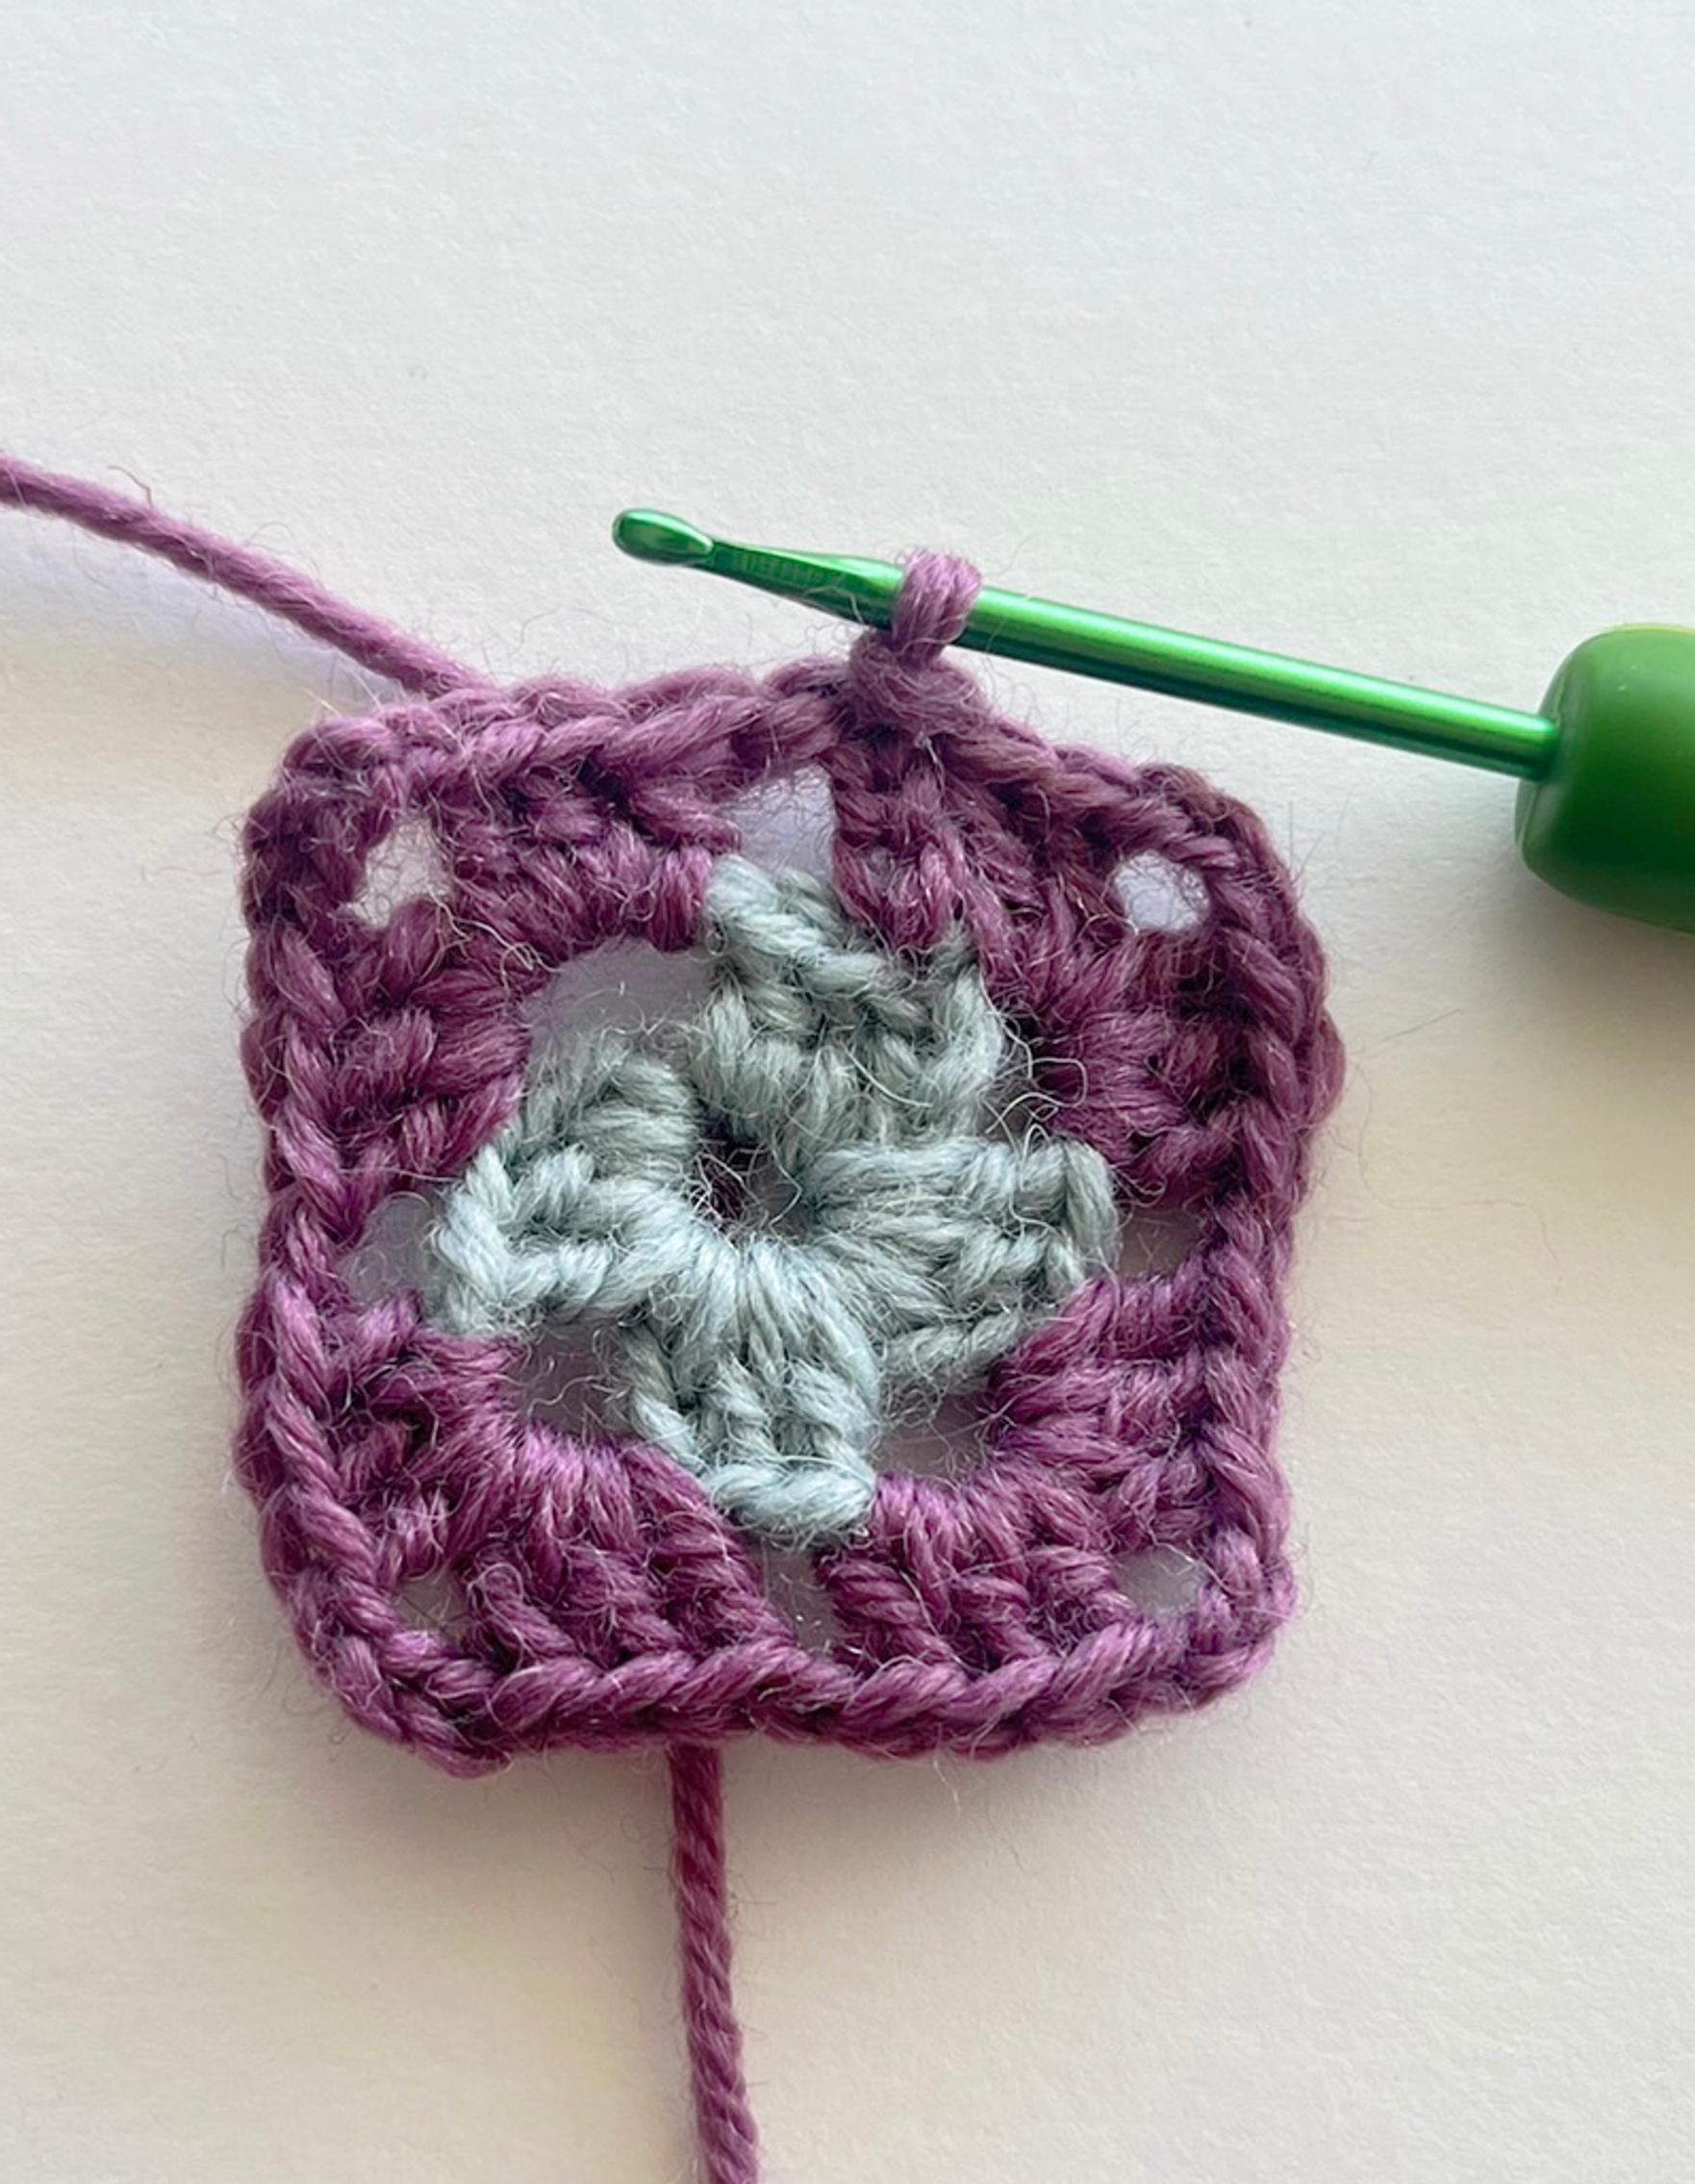
2. Crochet round 1 of double crochet: Start by chaining 3, which counts as the first double crochet of the round. Then work 2 double crochets into the ring. This completes the first group of double crochets.

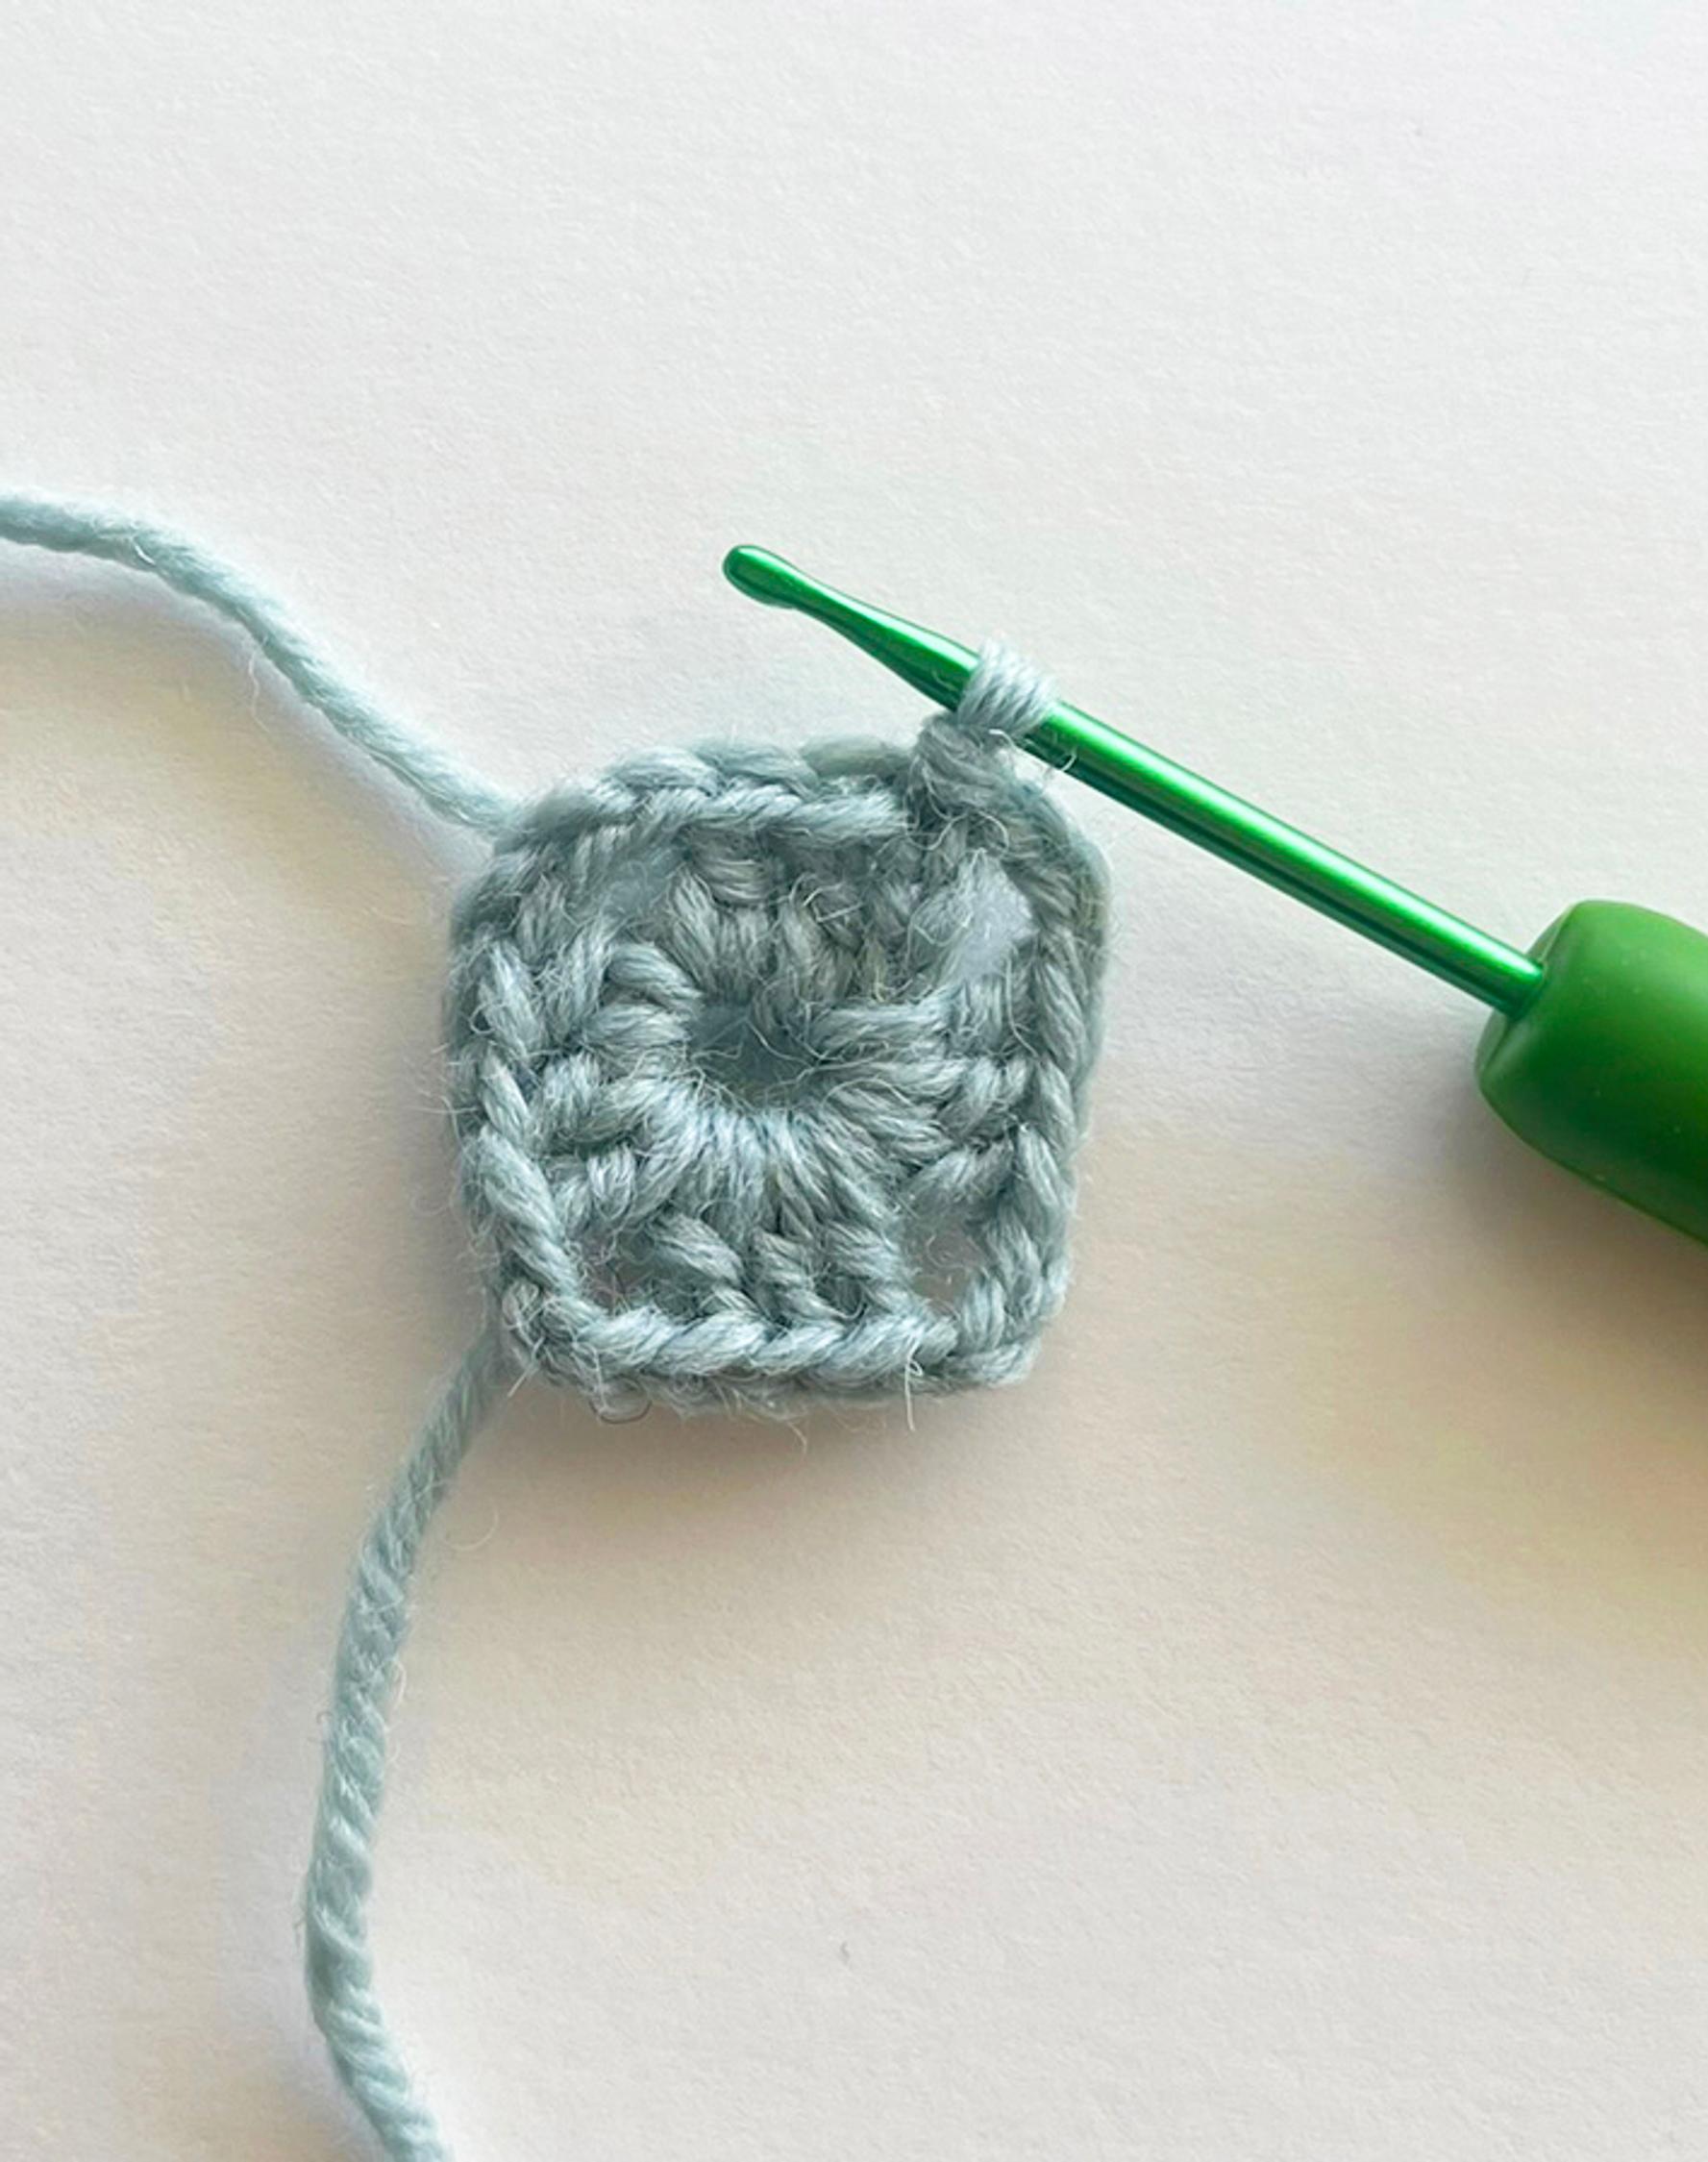
You’ll need three more groups of double crochets, so continue the round as follows: *Chain 3, then work 3 double crochets*, repeat *—* two more times, and end with a chain 3. Fasten off the yarn and close the round by making a slip stitch in the third chain of the first double crochet.
Need help with double crochet? See the step-by-step photos for how to crochet a double crochet!

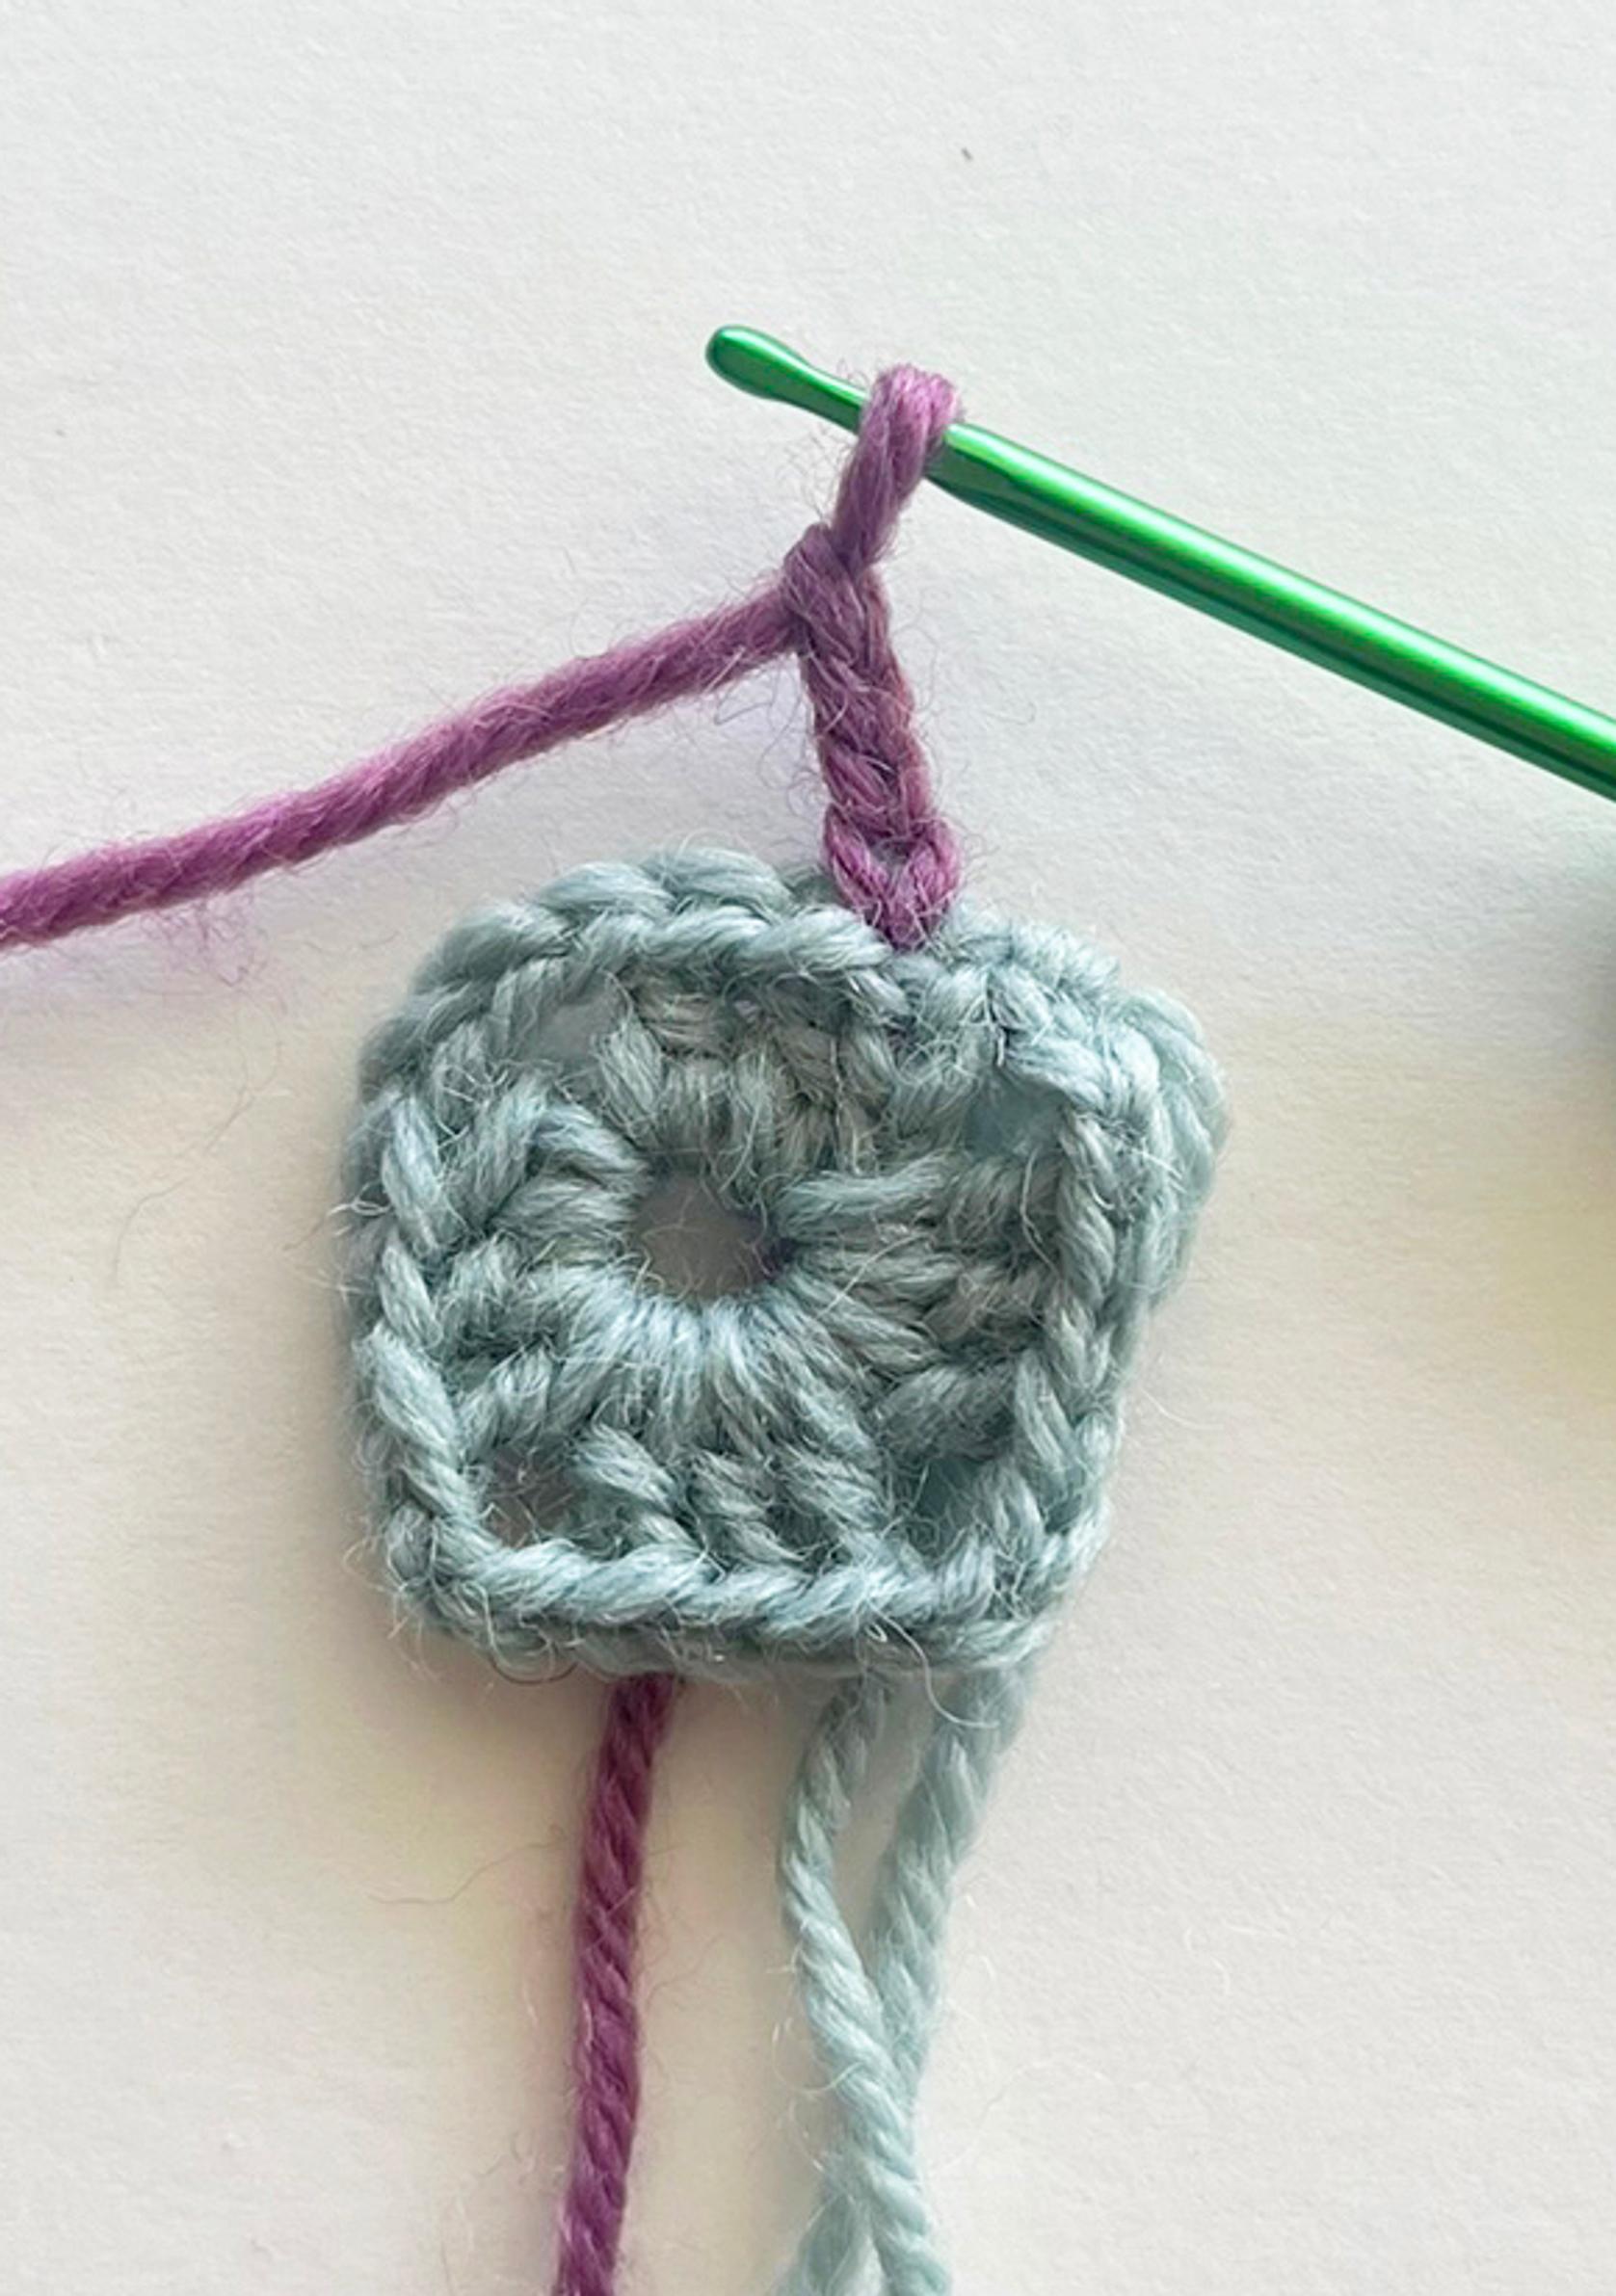

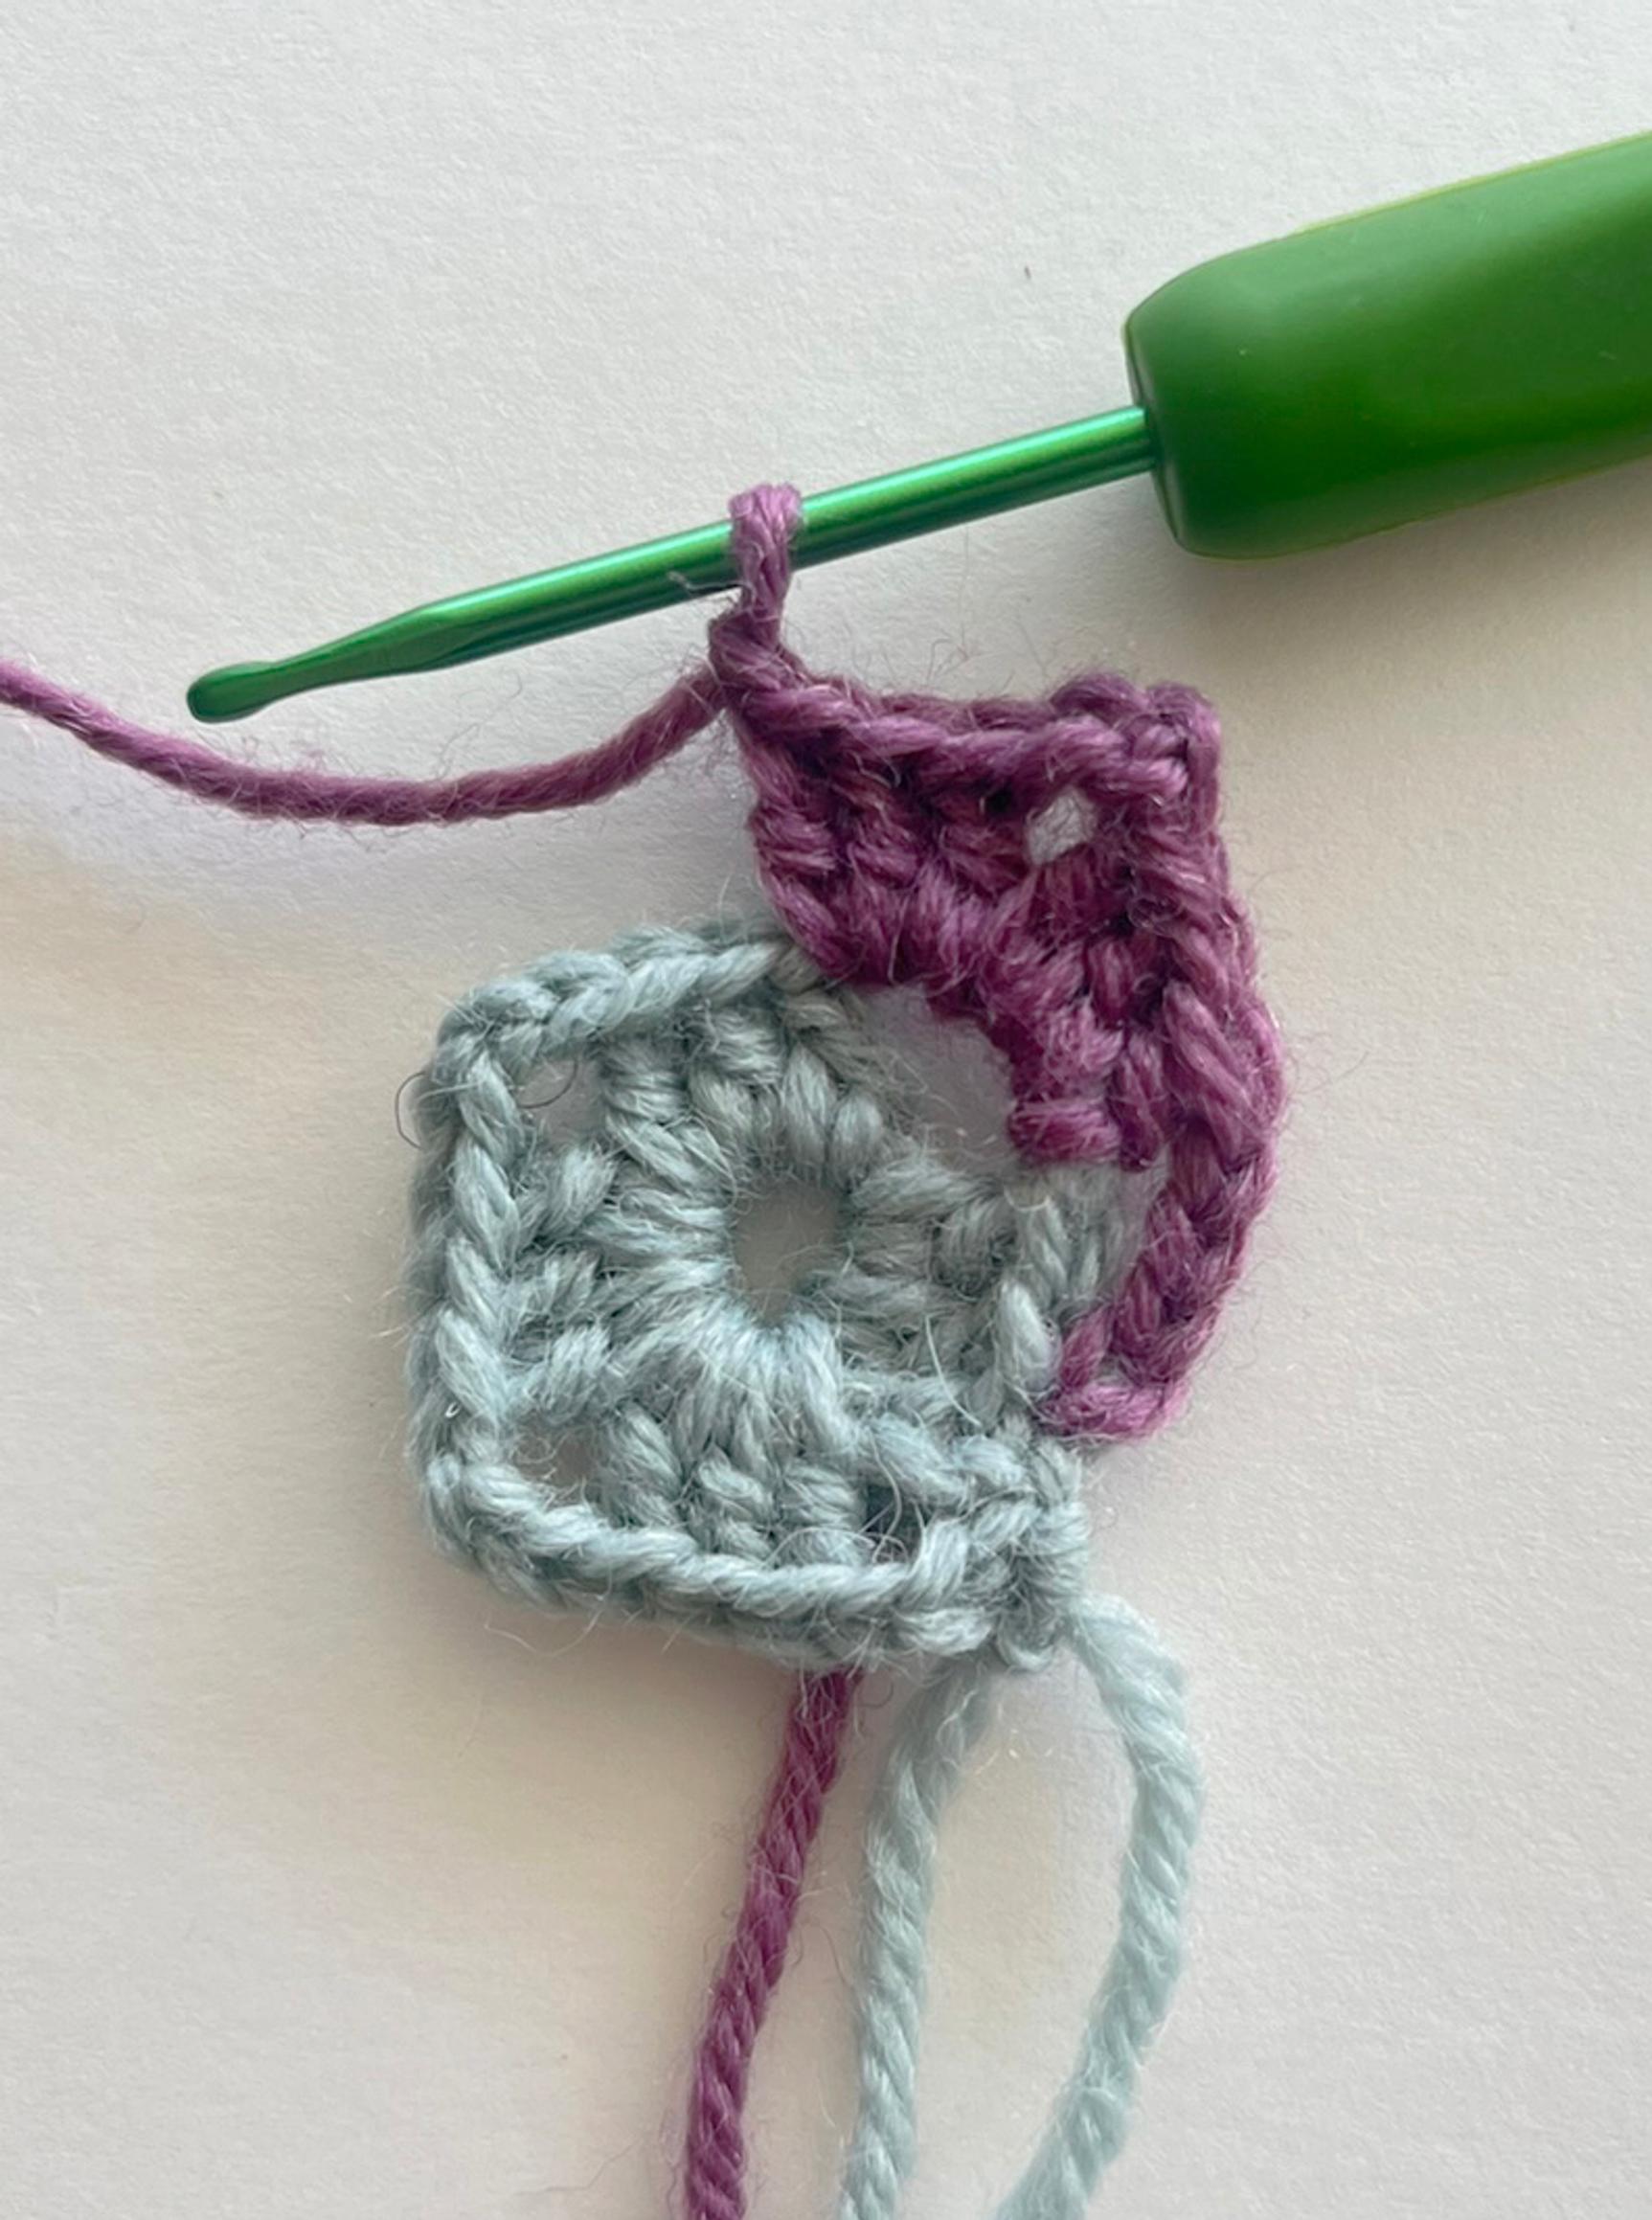

3. Change the yarn color and crochet round 2 of double crochet: Begin by chaining 4. In each corner chain space, make two groups of double crochets as follows: *Work 3 double crochets + chain 3 + 3 double crochets in the corner space, then chain 1* and repeat *—* two more times. In the final corner, work 3 double crochets + chain 3 + 2 double crochets. Fasten off and close the round with a slip stitch in the third chain of the first double crochet. There are 8 groups of double crochet triplets in this round.

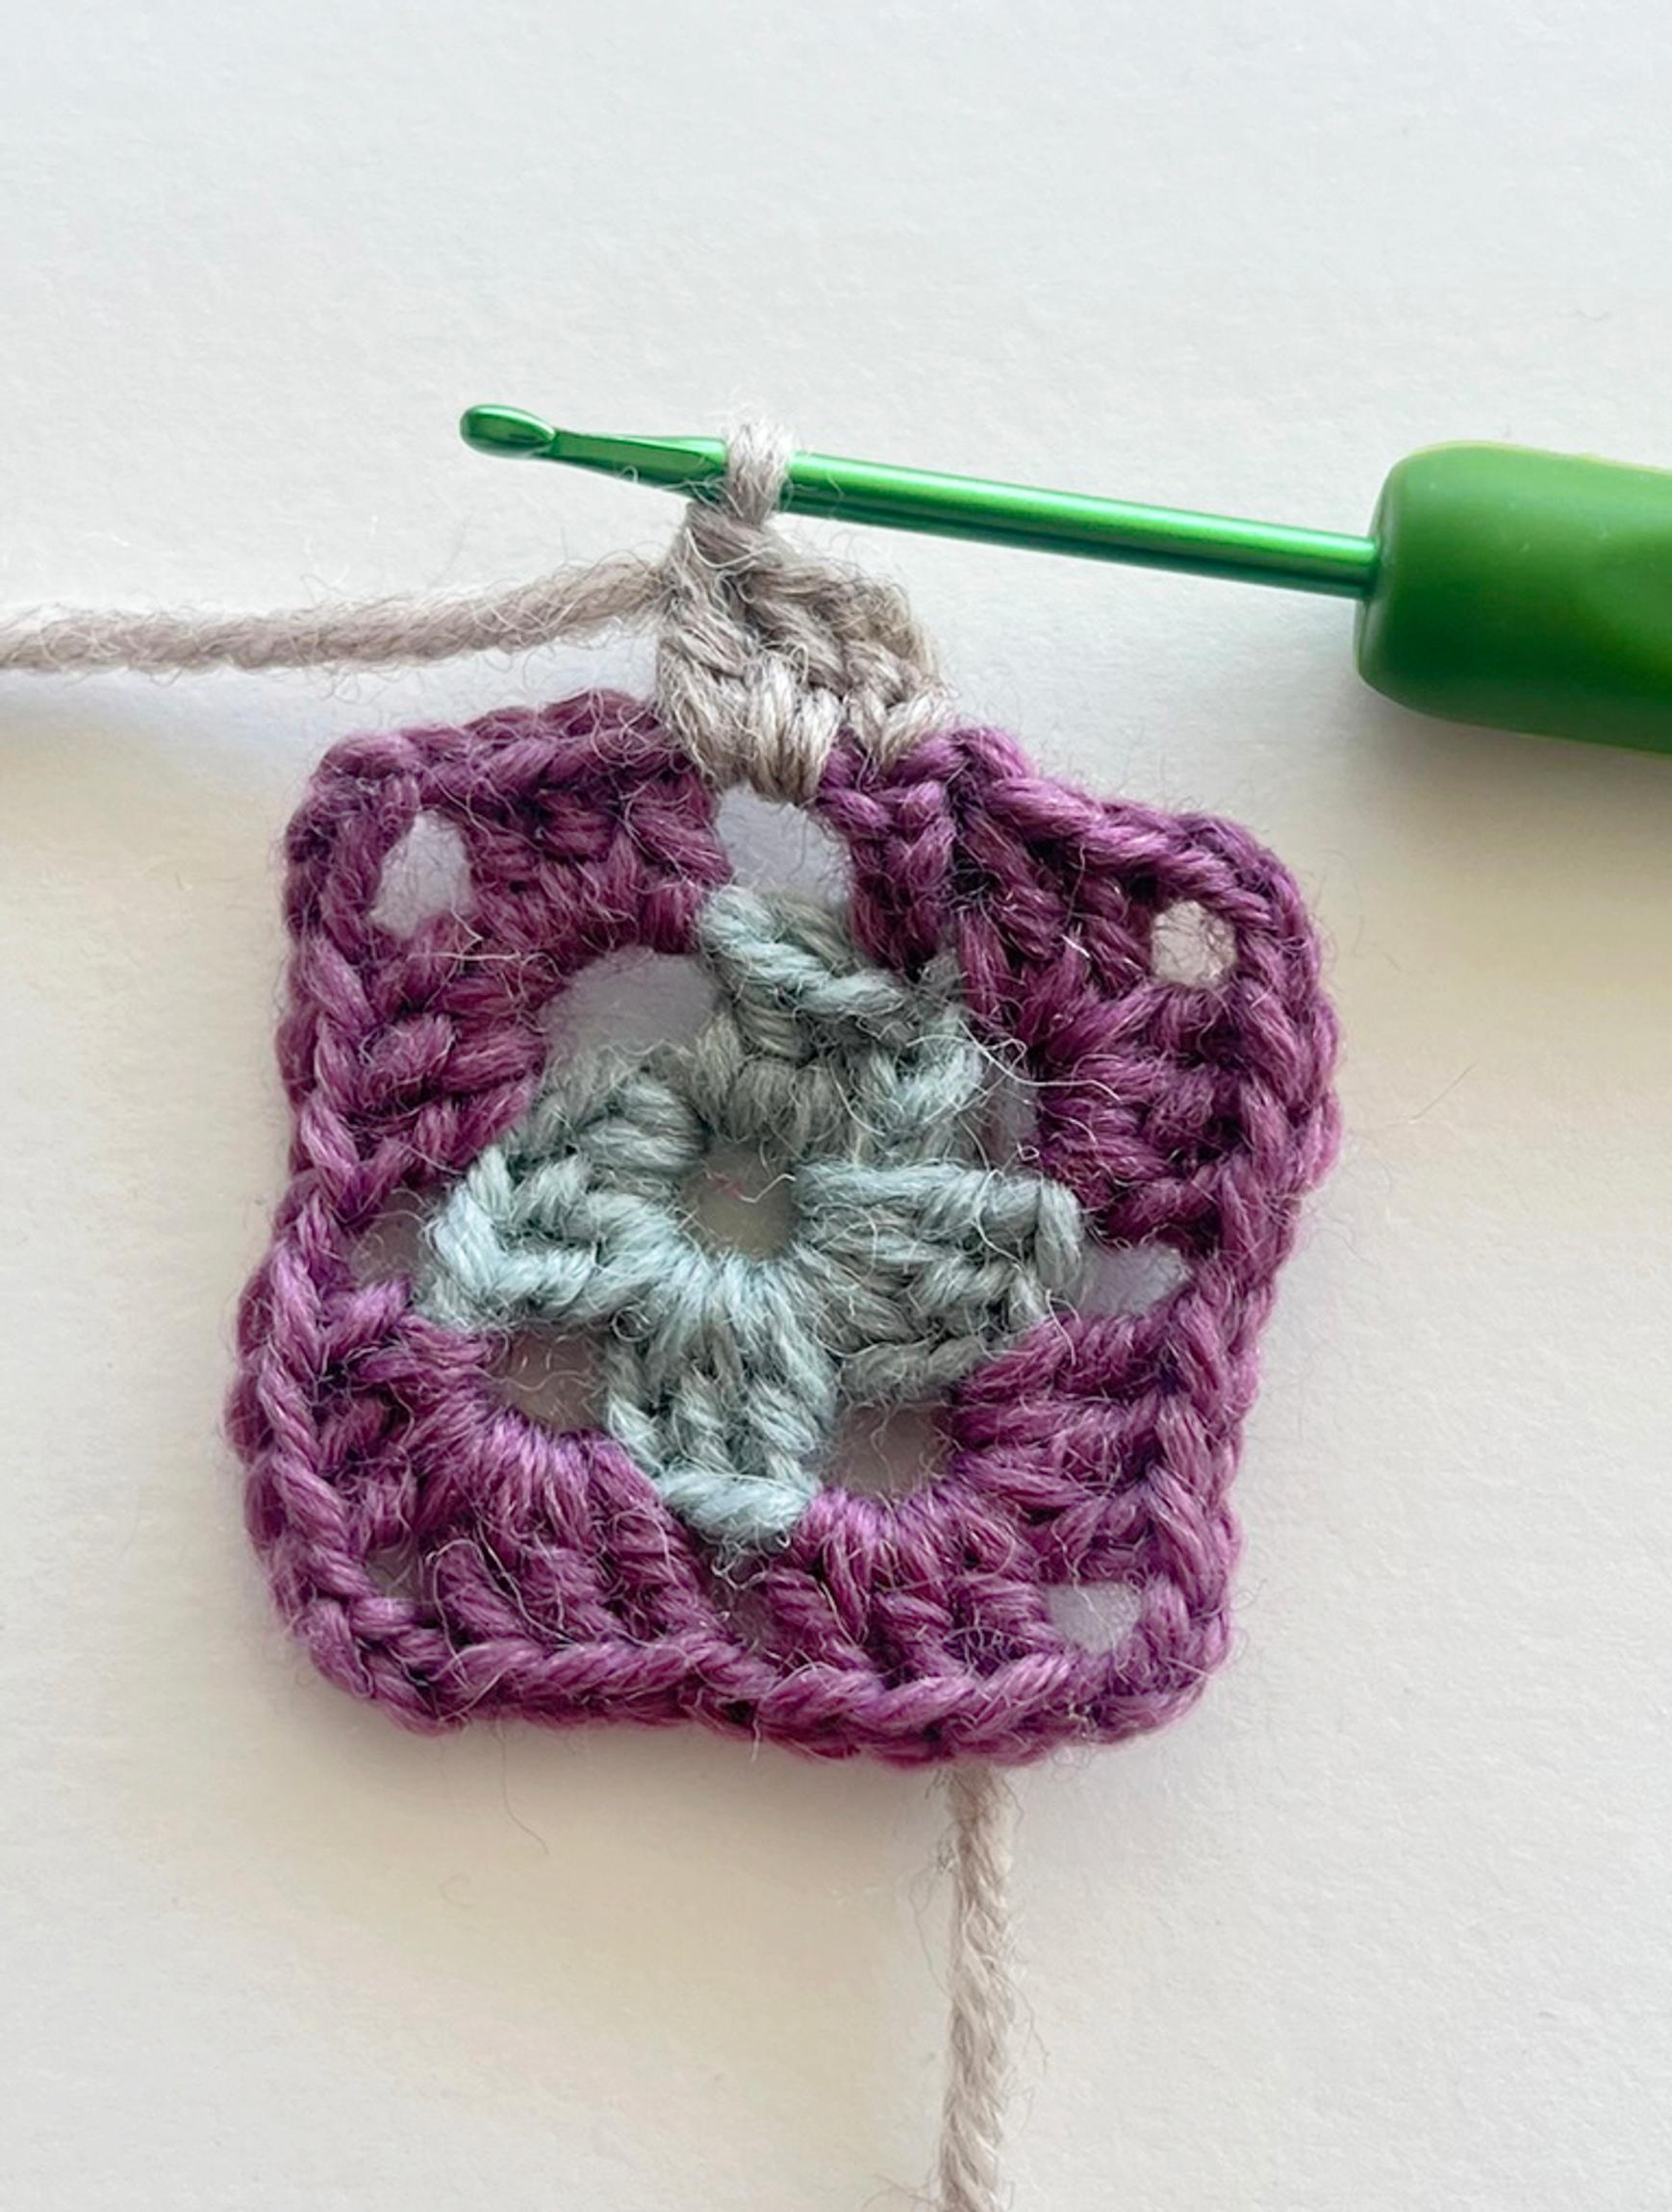

4. Change color again and crochet round 3 of double crochet: Chain 3, which counts as the first double crochet. Make 2 double crochets in the next space, chain 1, and continue with double crochets at each corner. *Work 3 double crochets + chain 3 + 3 double crochets + chain 1 + 3 double crochets + chain 1.* Repeat *—* three more times around the square. Fasten off and close with a slip stitch.

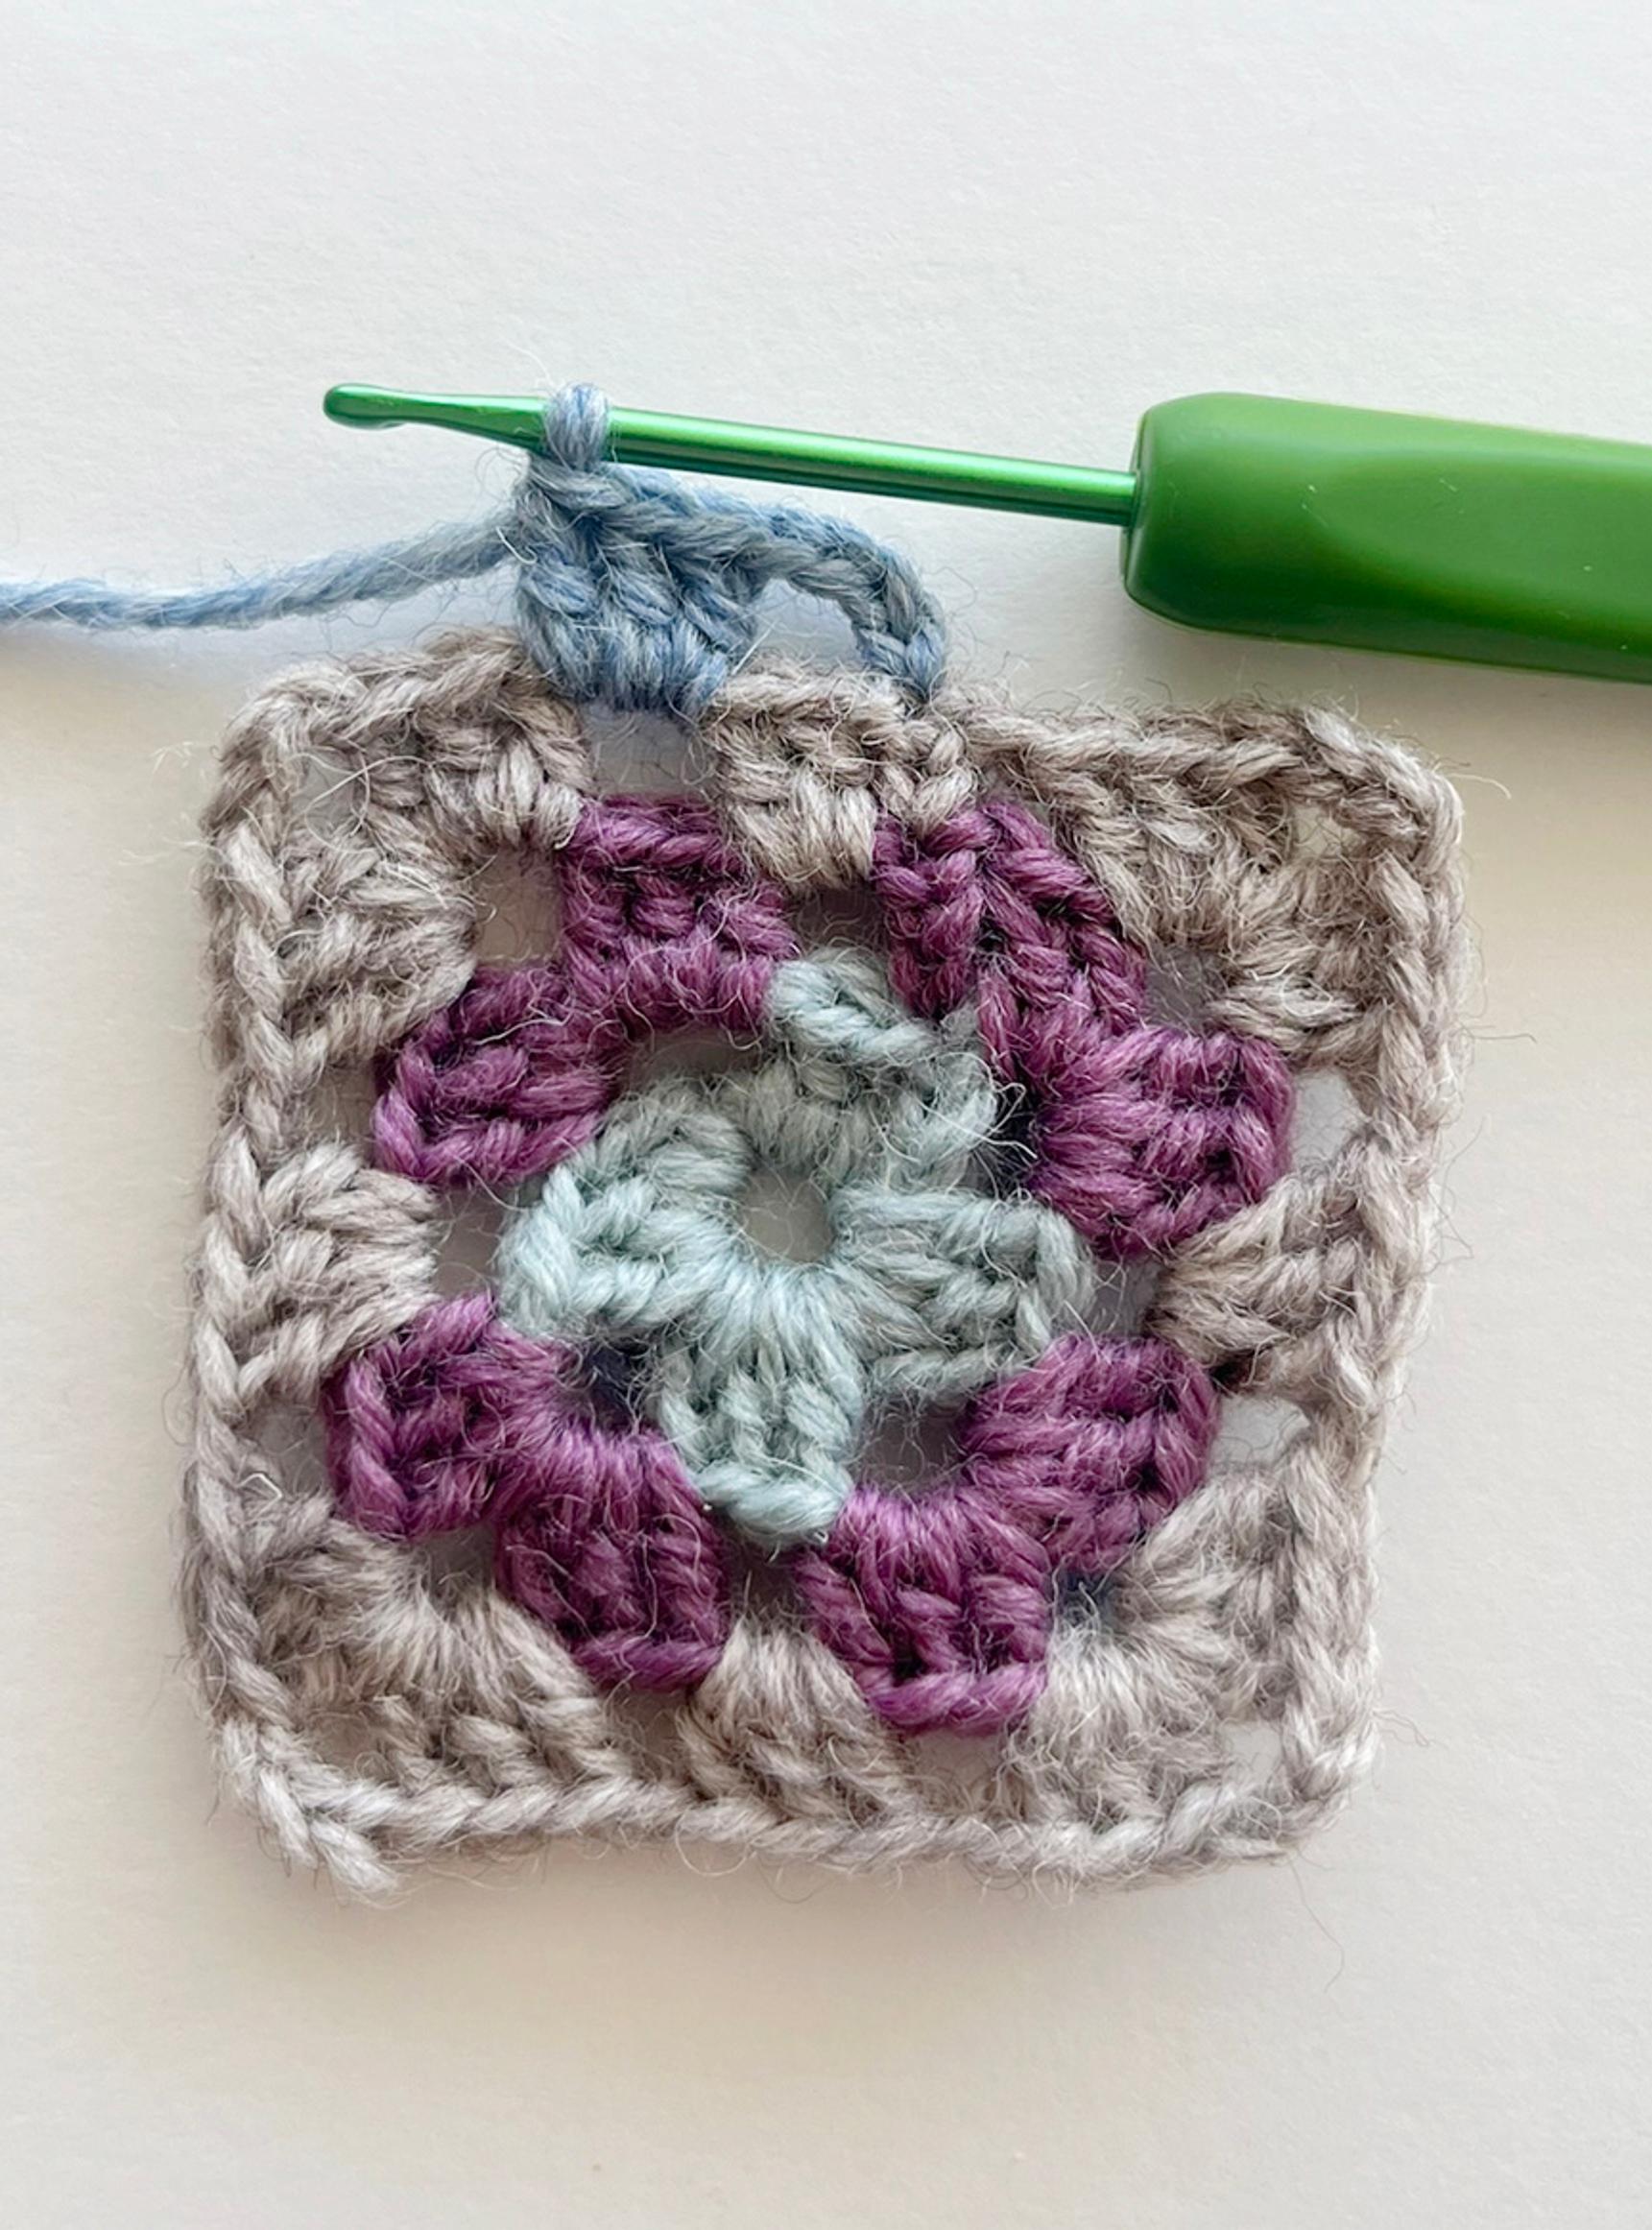

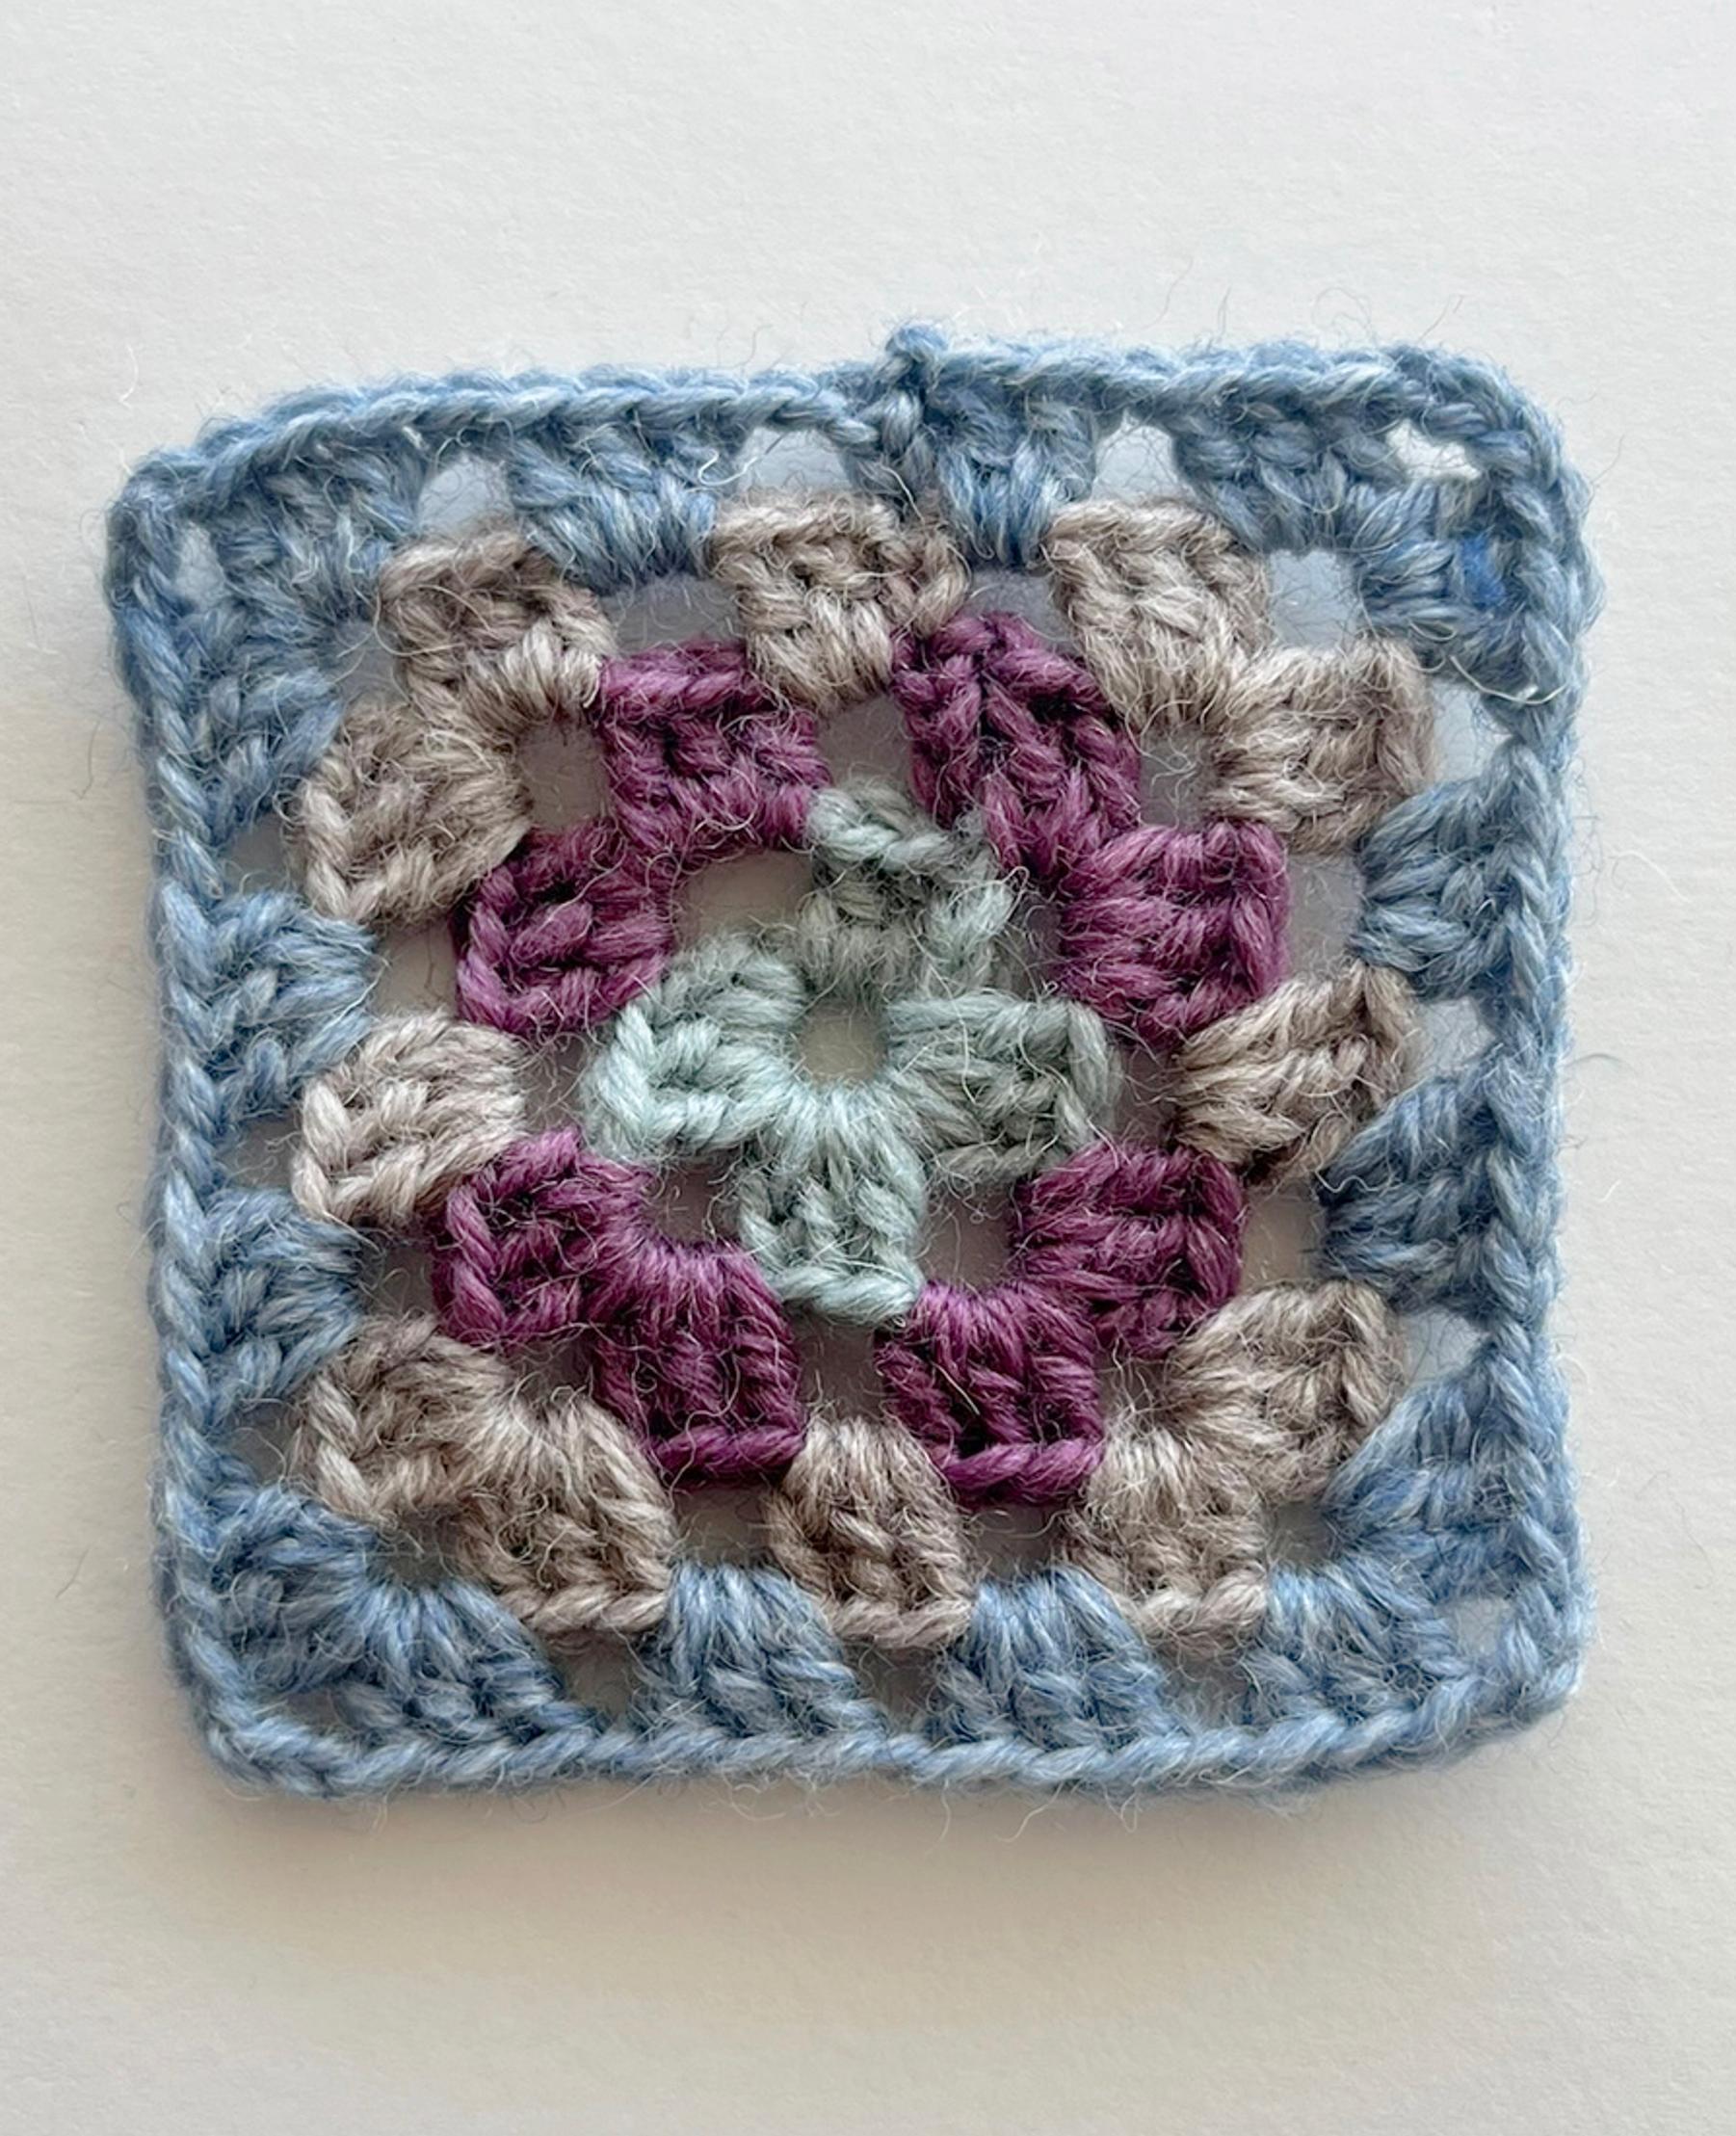
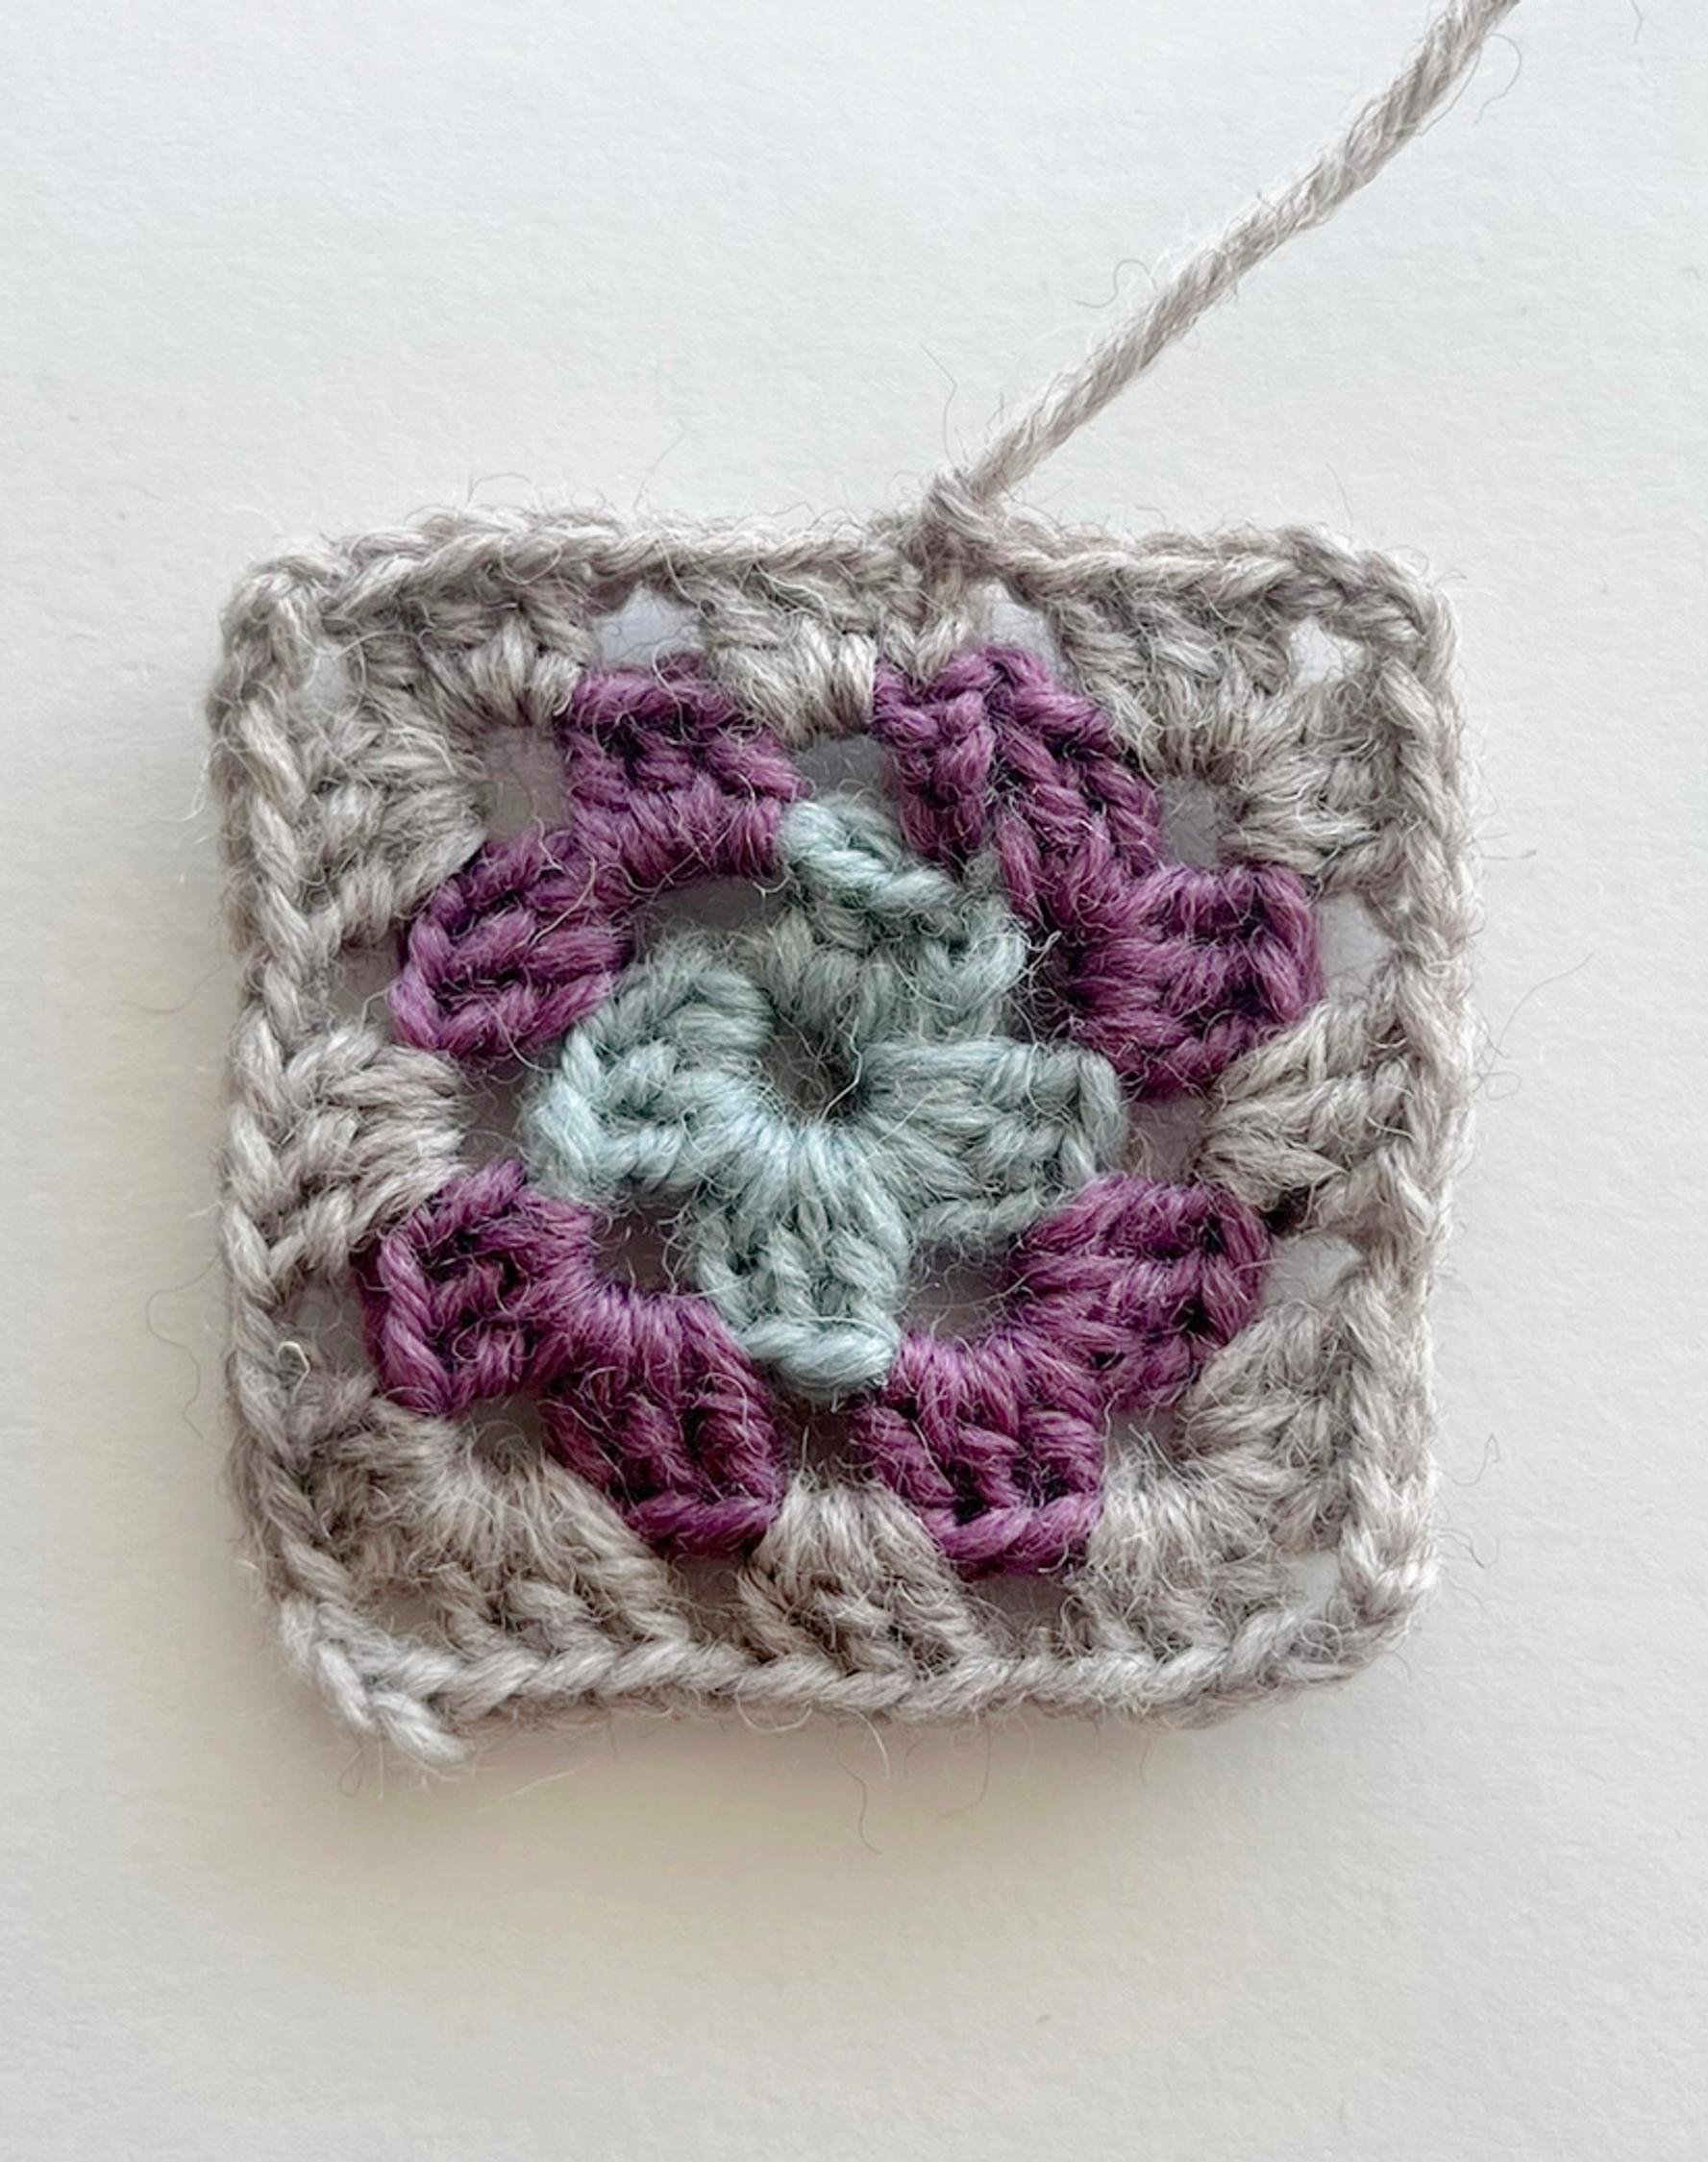
5. Change color and crochet round 4 of double crochet: Start by chaining 4. Then continue as usual: 3 double crochets in each space along the sides, chain 1 between groups, and 3 double crochets + chain 3 + 3 double crochets at each corner. At the end of the round, make 2 double crochets, fasten off, and close with a slip stitch in the third chain of the first double crochet.

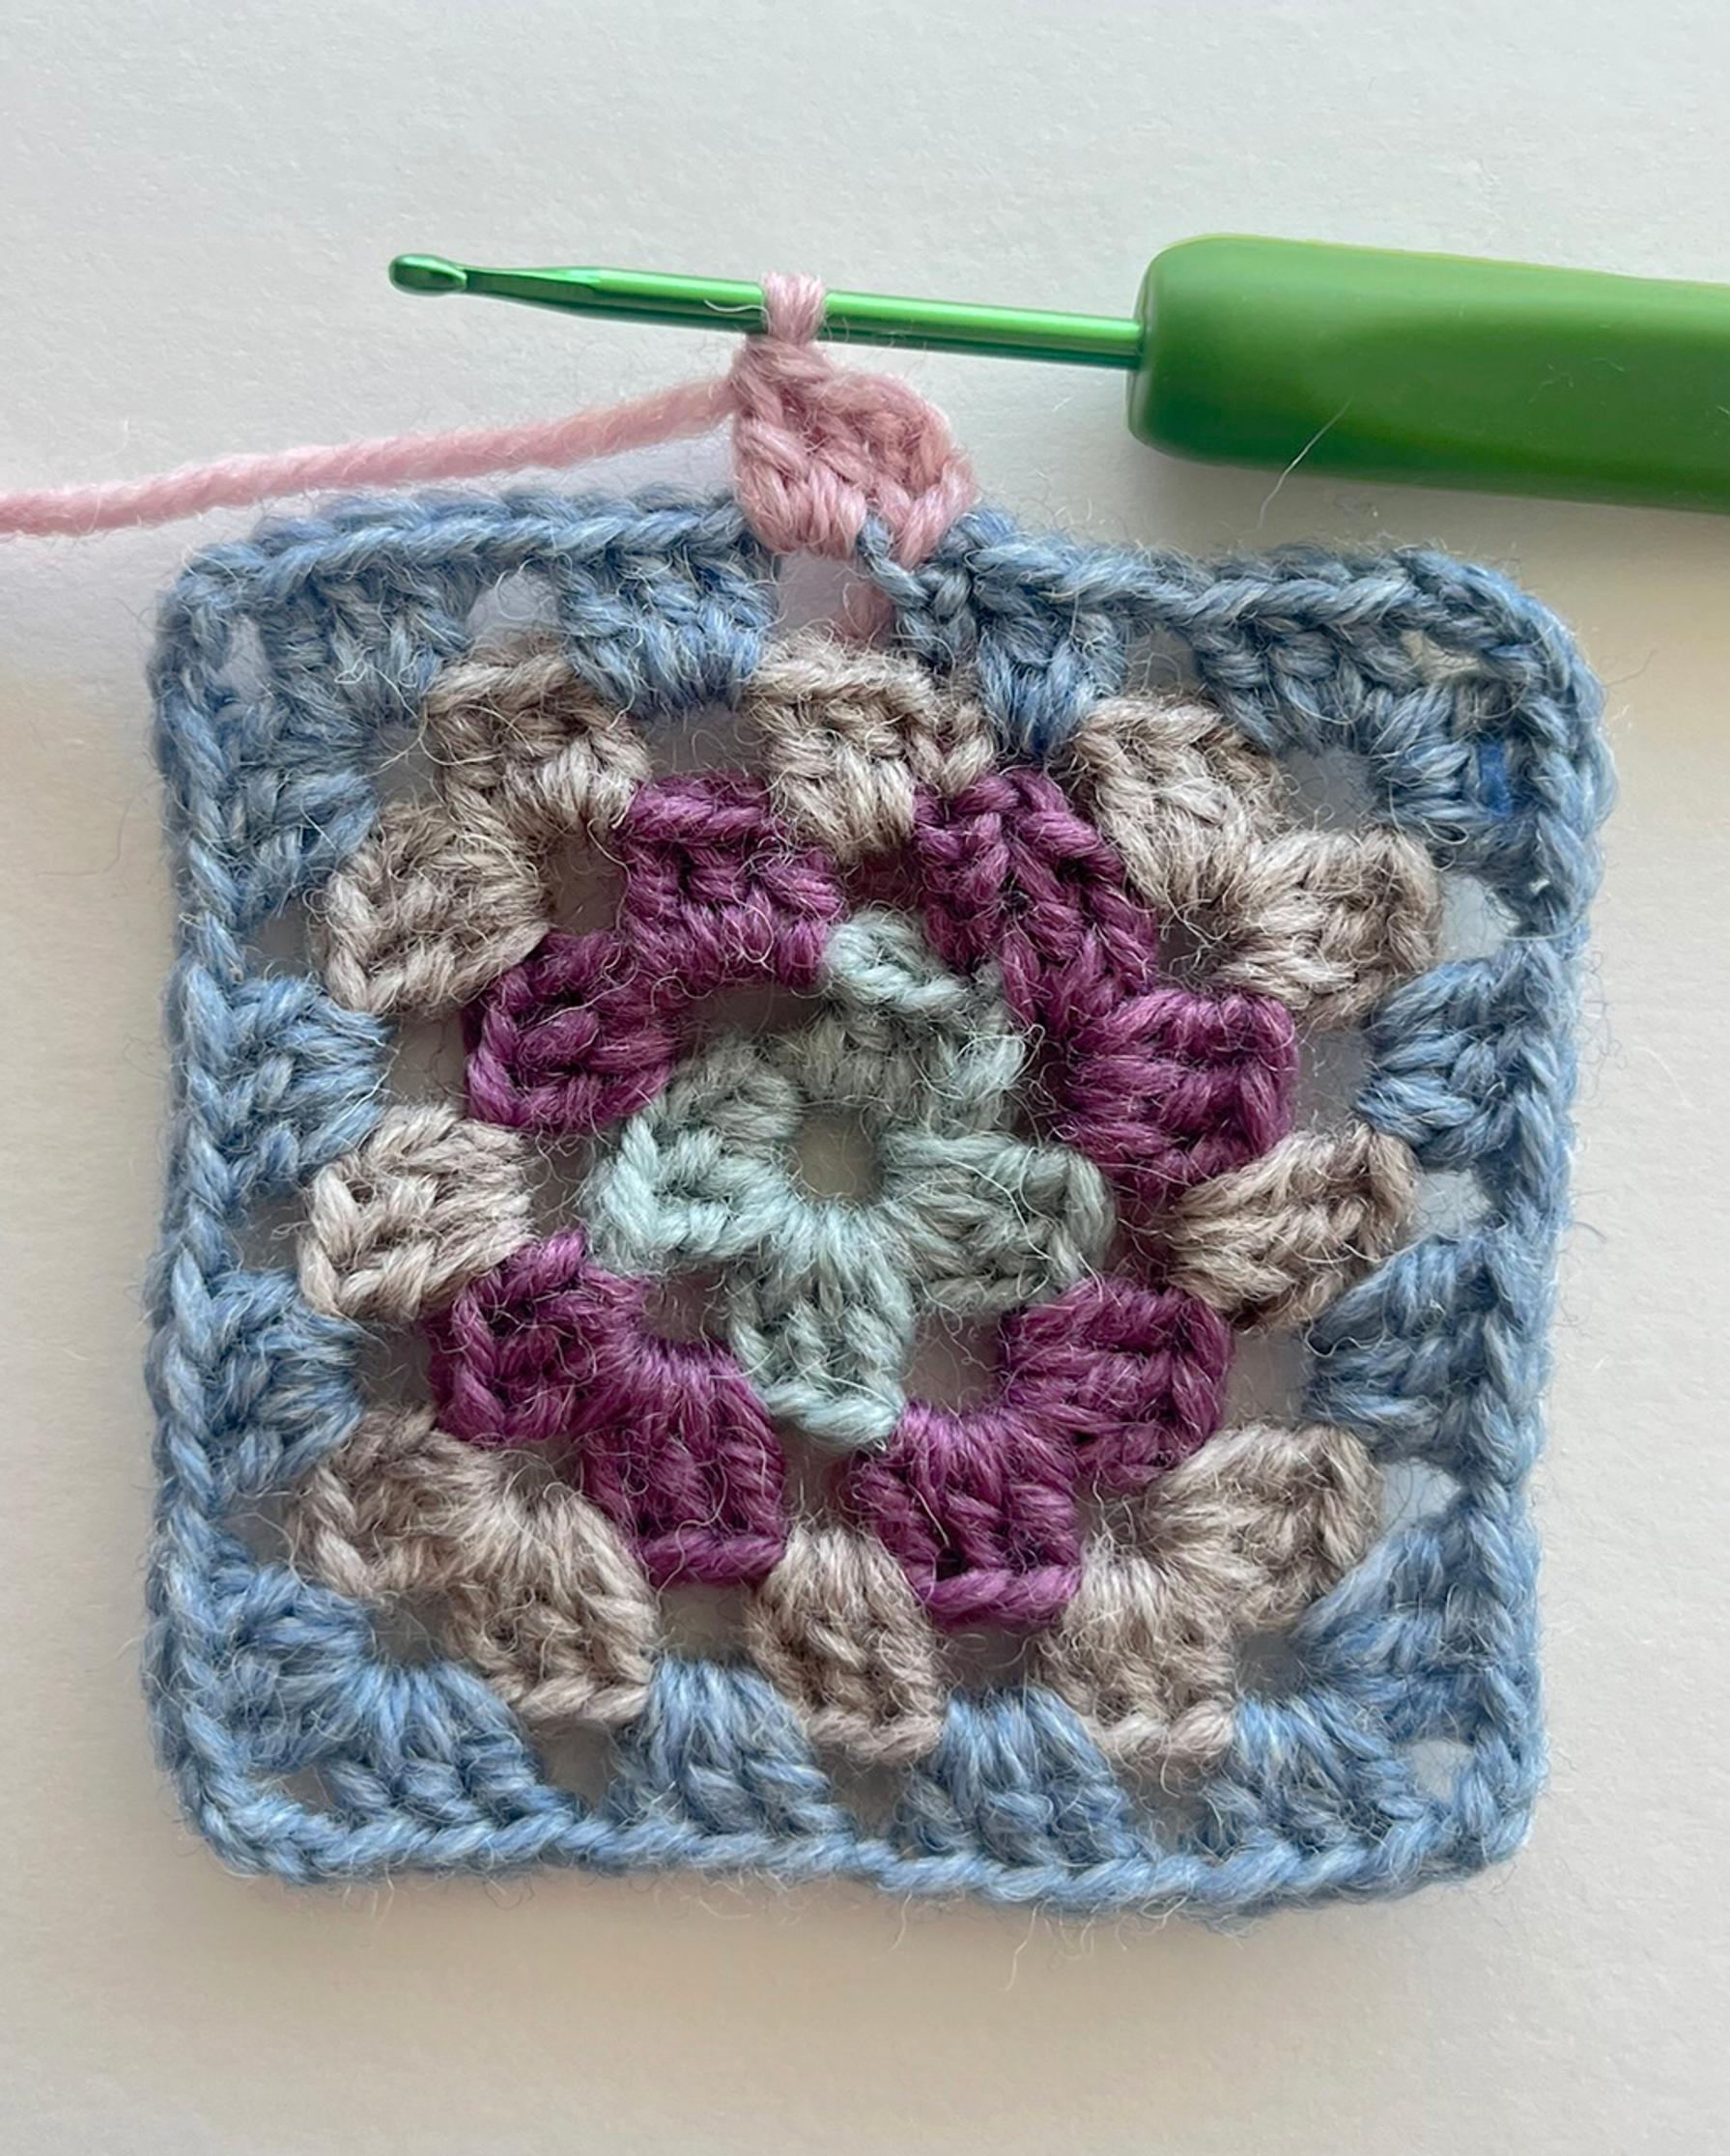

6. Change color and crochet round 5 of double crochet: Chain 3, counting as the first double crochet, then make 2 double crochets in the next space and continue as usual until you finish the round.

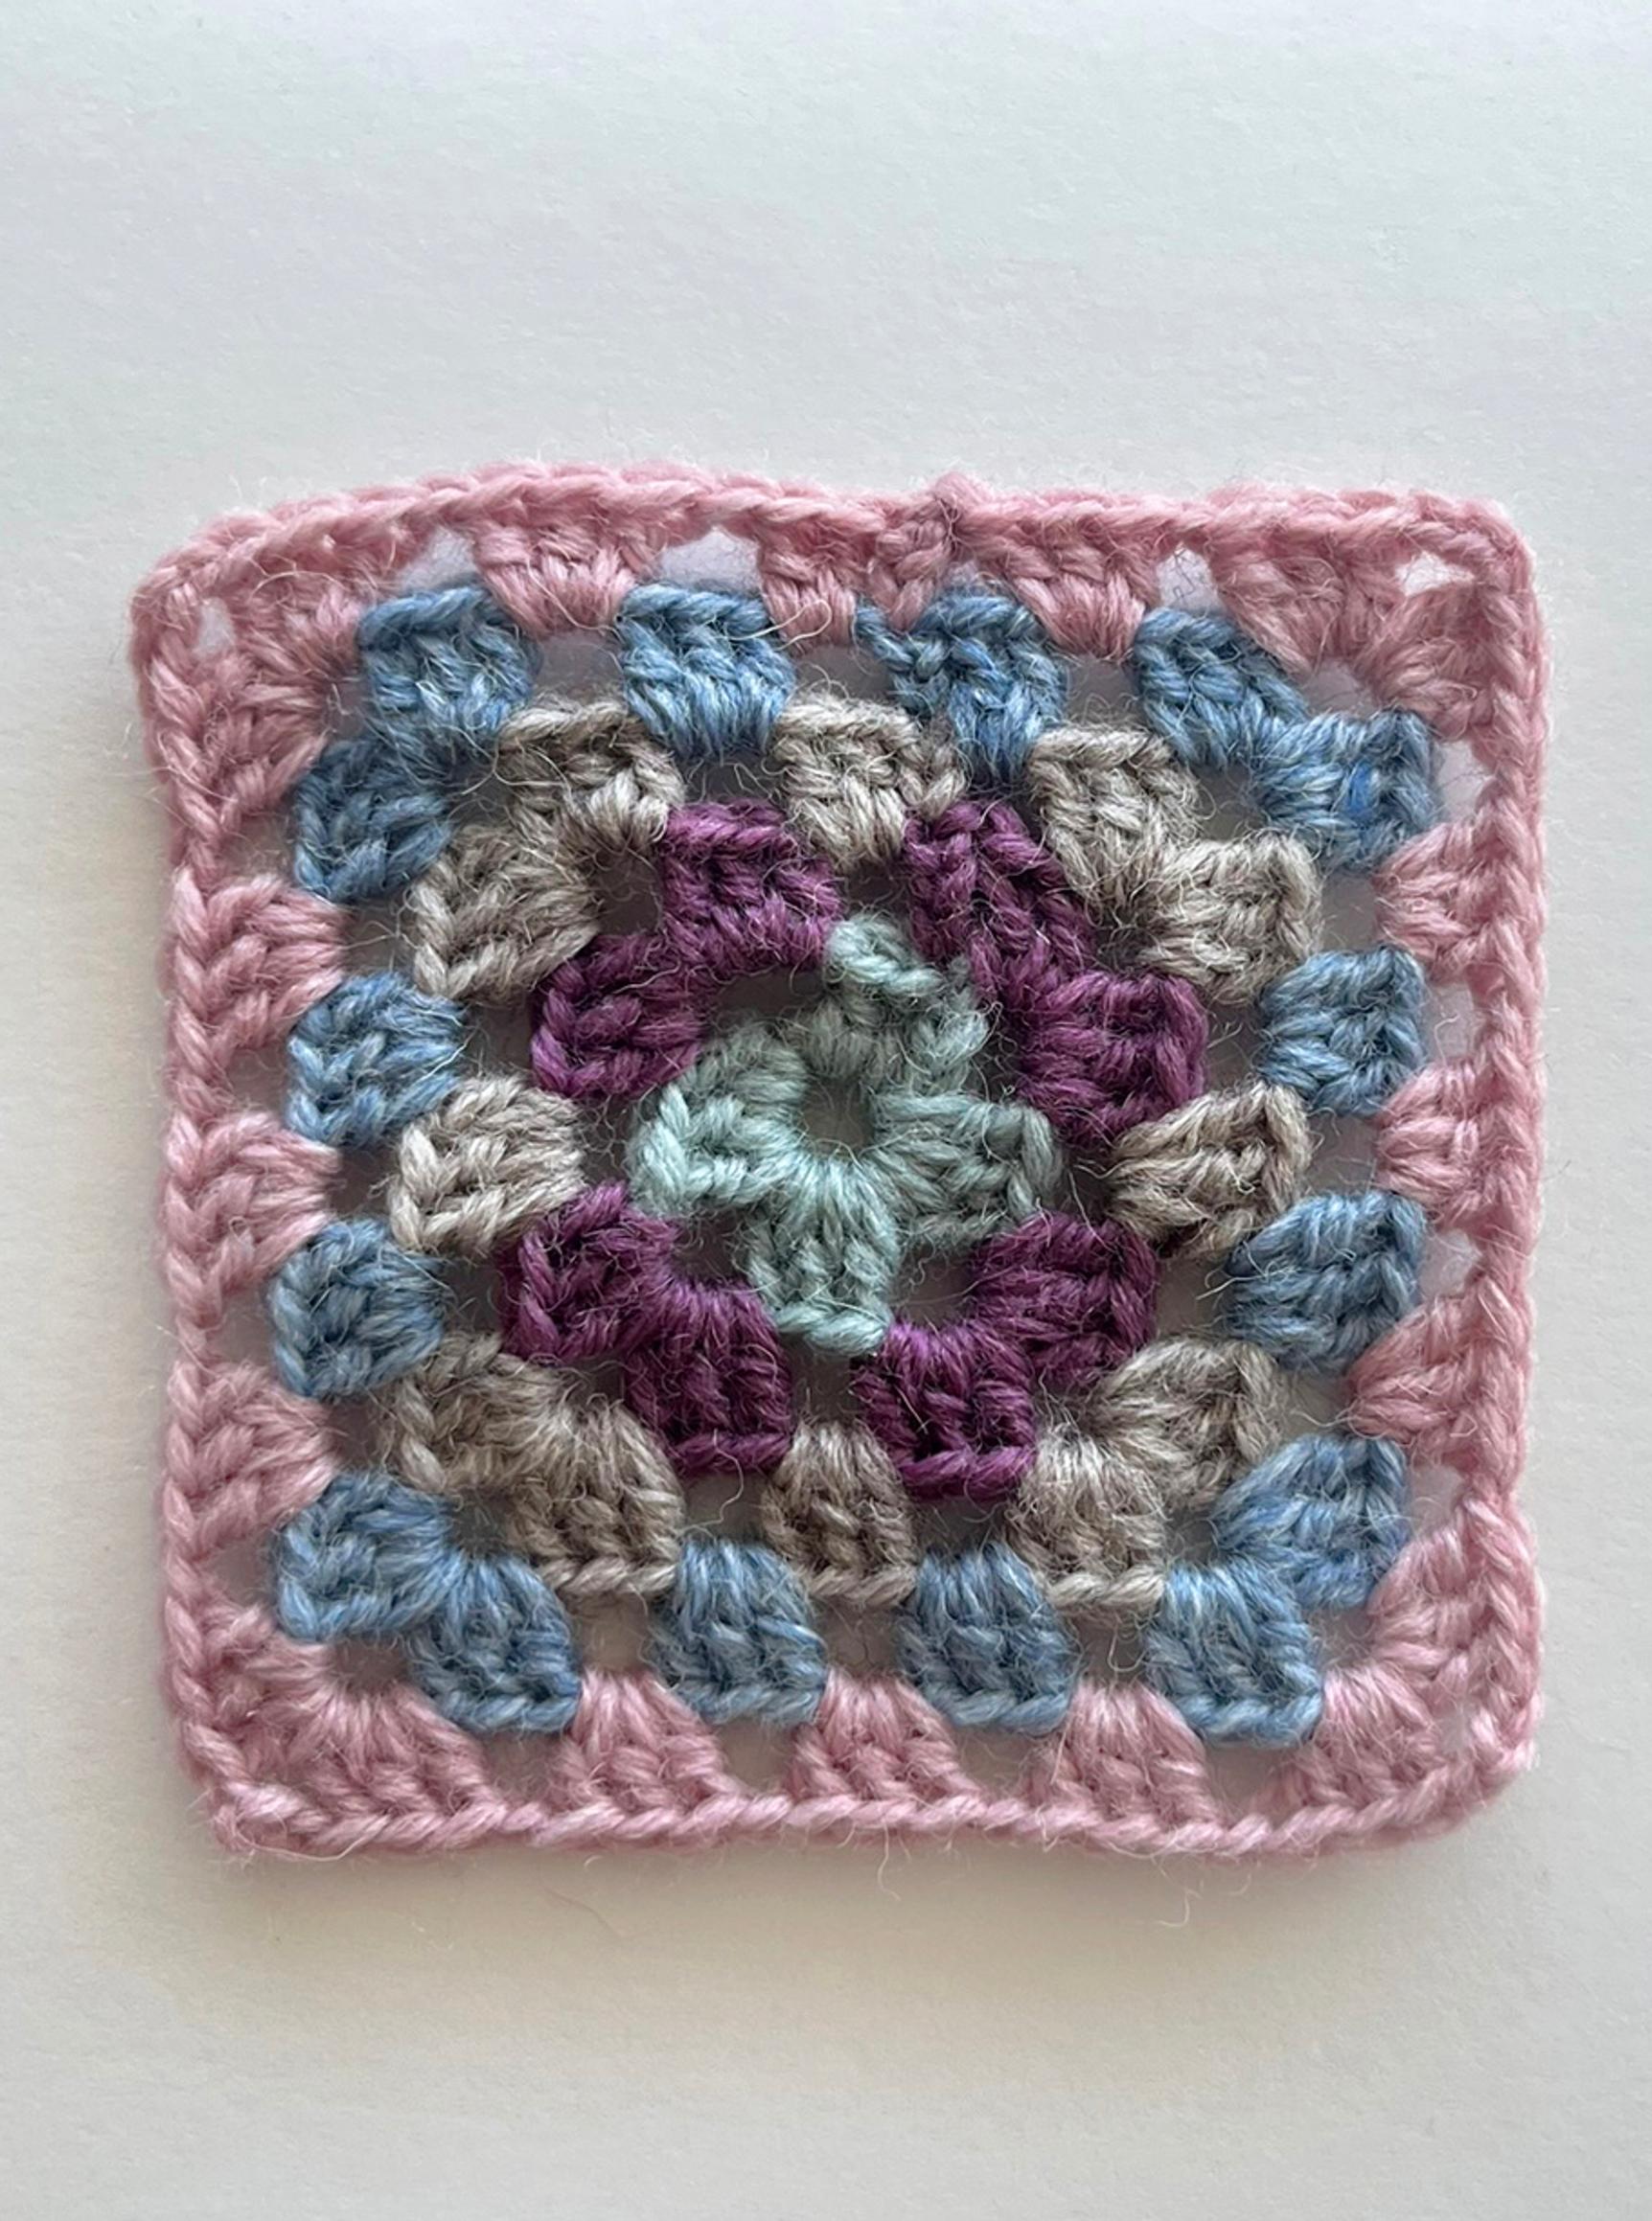
7. Work round 6, finishing the edges of the granny square with single crochet. Work one single crochet in each stitch and chain 3 in each corner. You can use the same color or switch to a new one.
You can also add more double-crochet rounds to make the granny square as large as you like. Each additional round follows the same principle: work 3 double crochets plus 1 chain in each space along the sides, and make two sets of 3 double crochets with chain-3 in each corner. Finally, finish with a round of single crochet.
8. Weave in all yarn ends. Wet or steam your granny square and pin it into shape.
Tip!
When changing colors, you can crochet over the yarn tails within the double crochets so you won’t have to weave them in later.