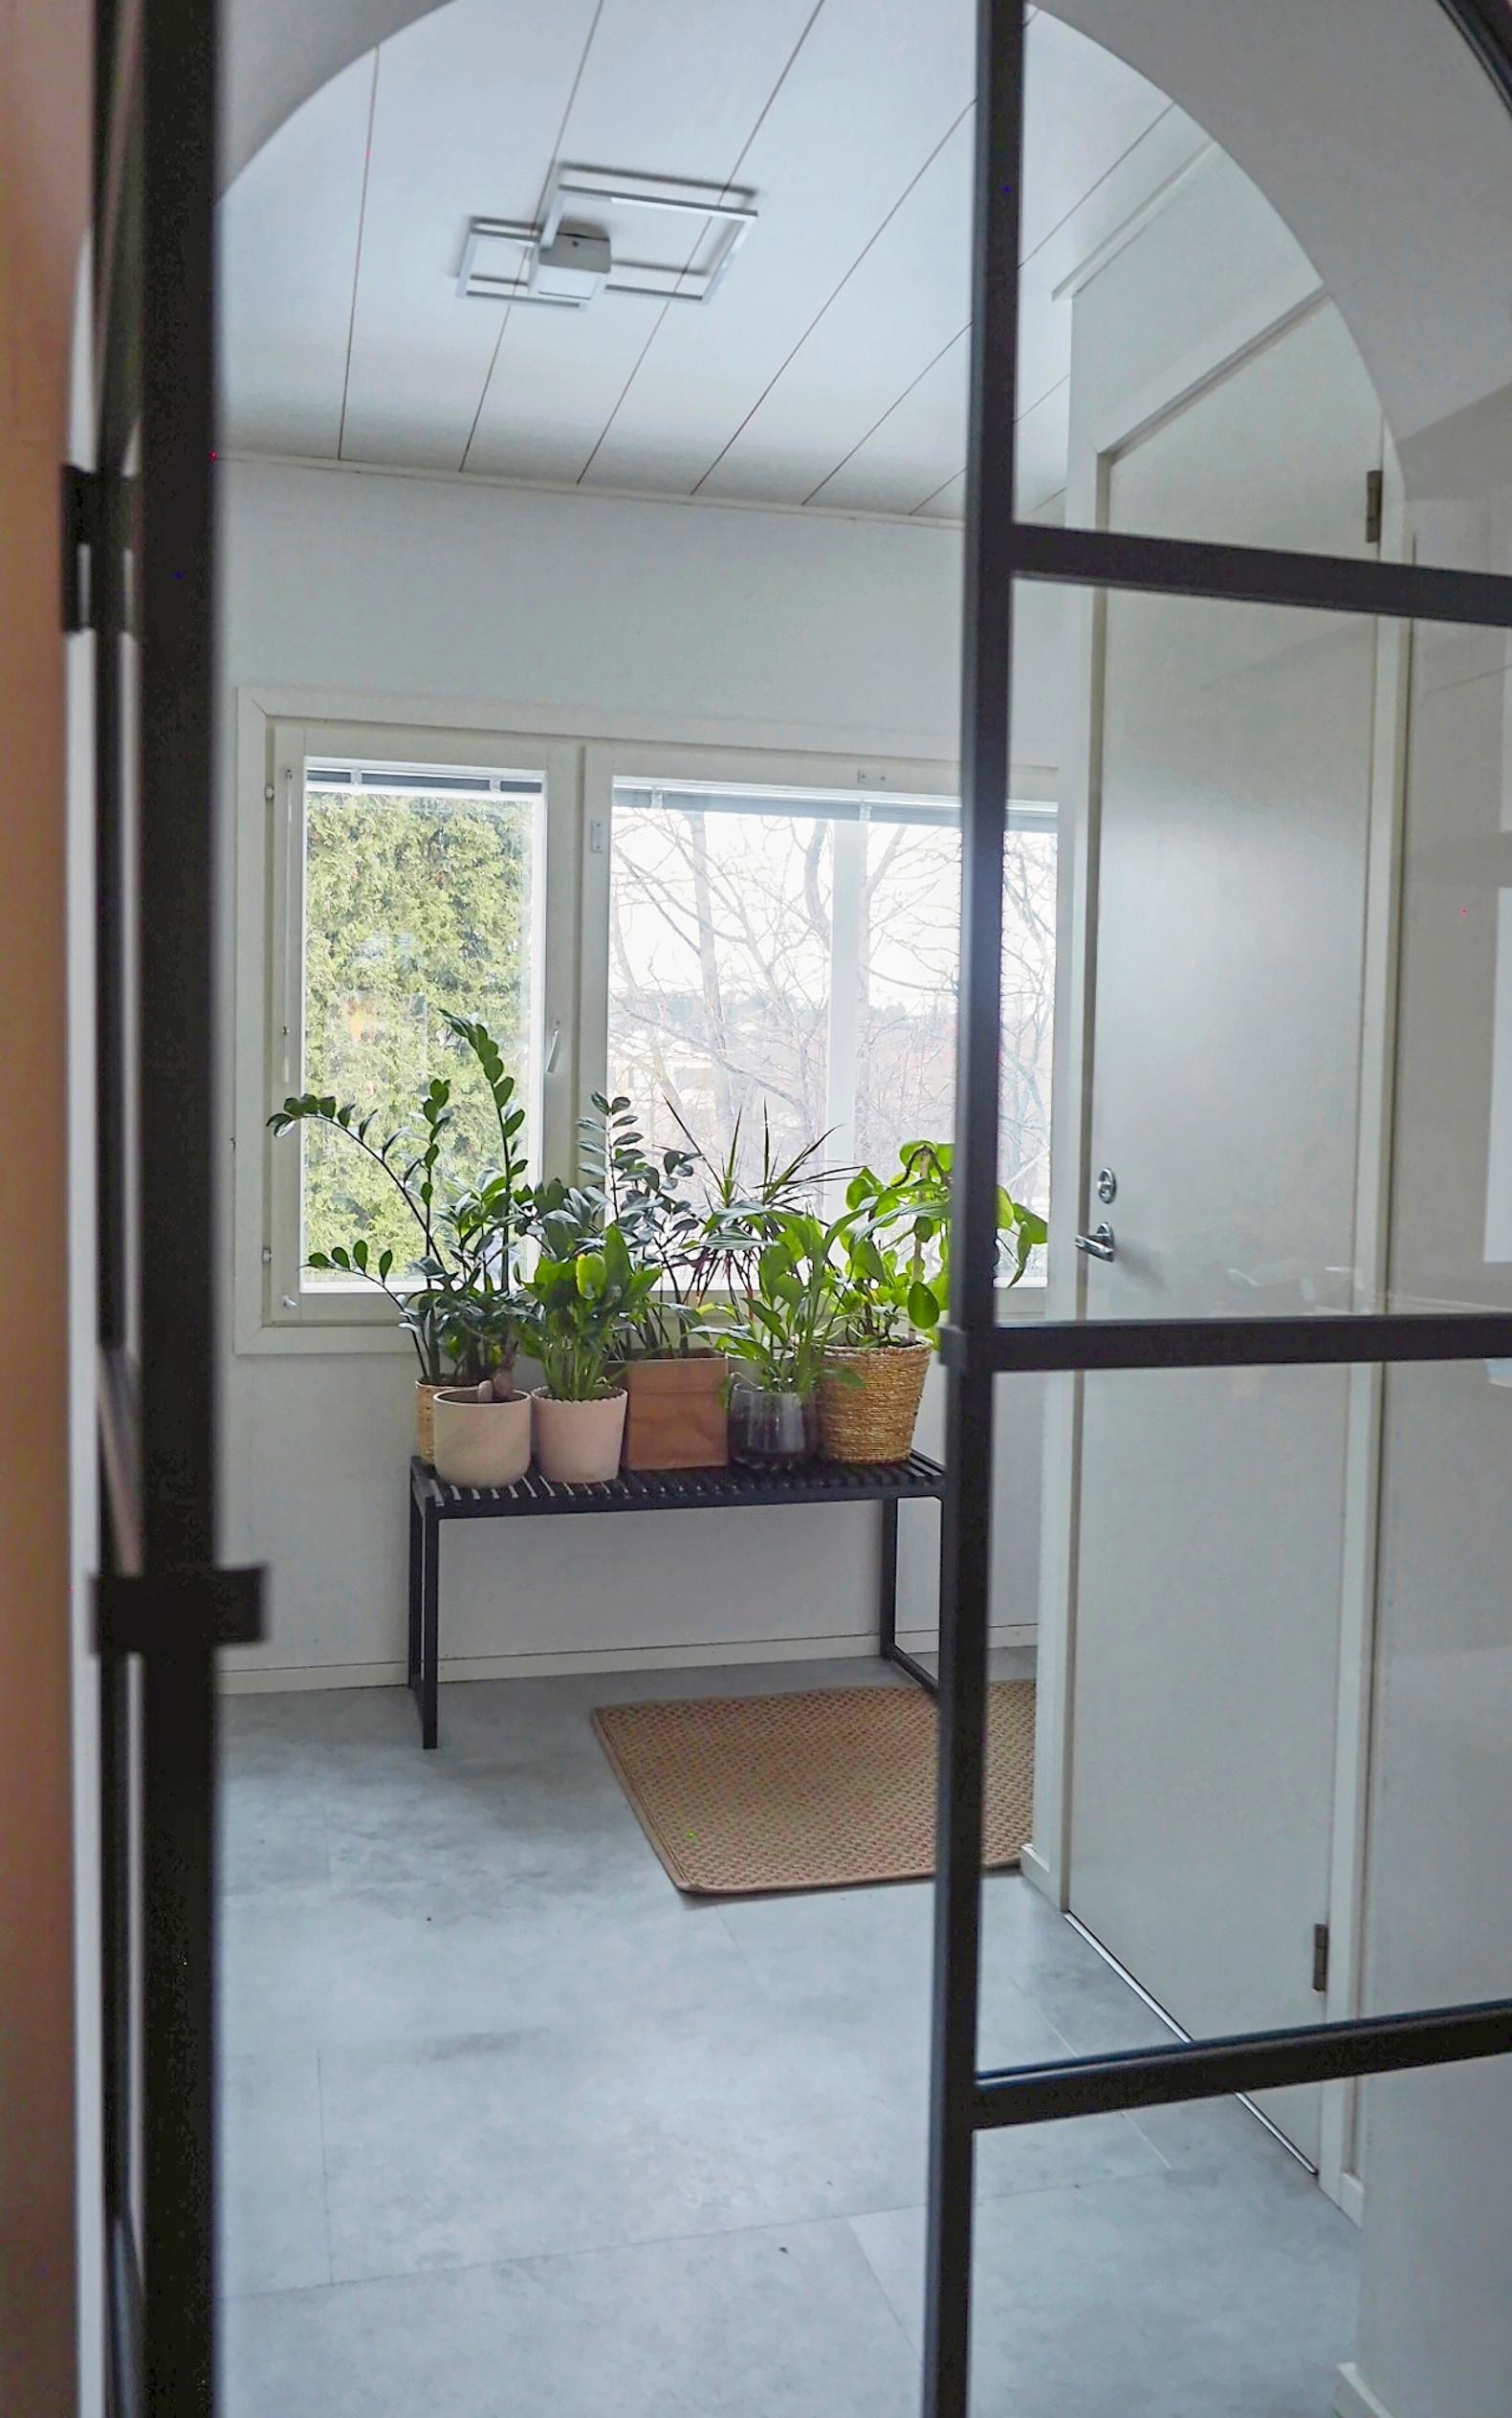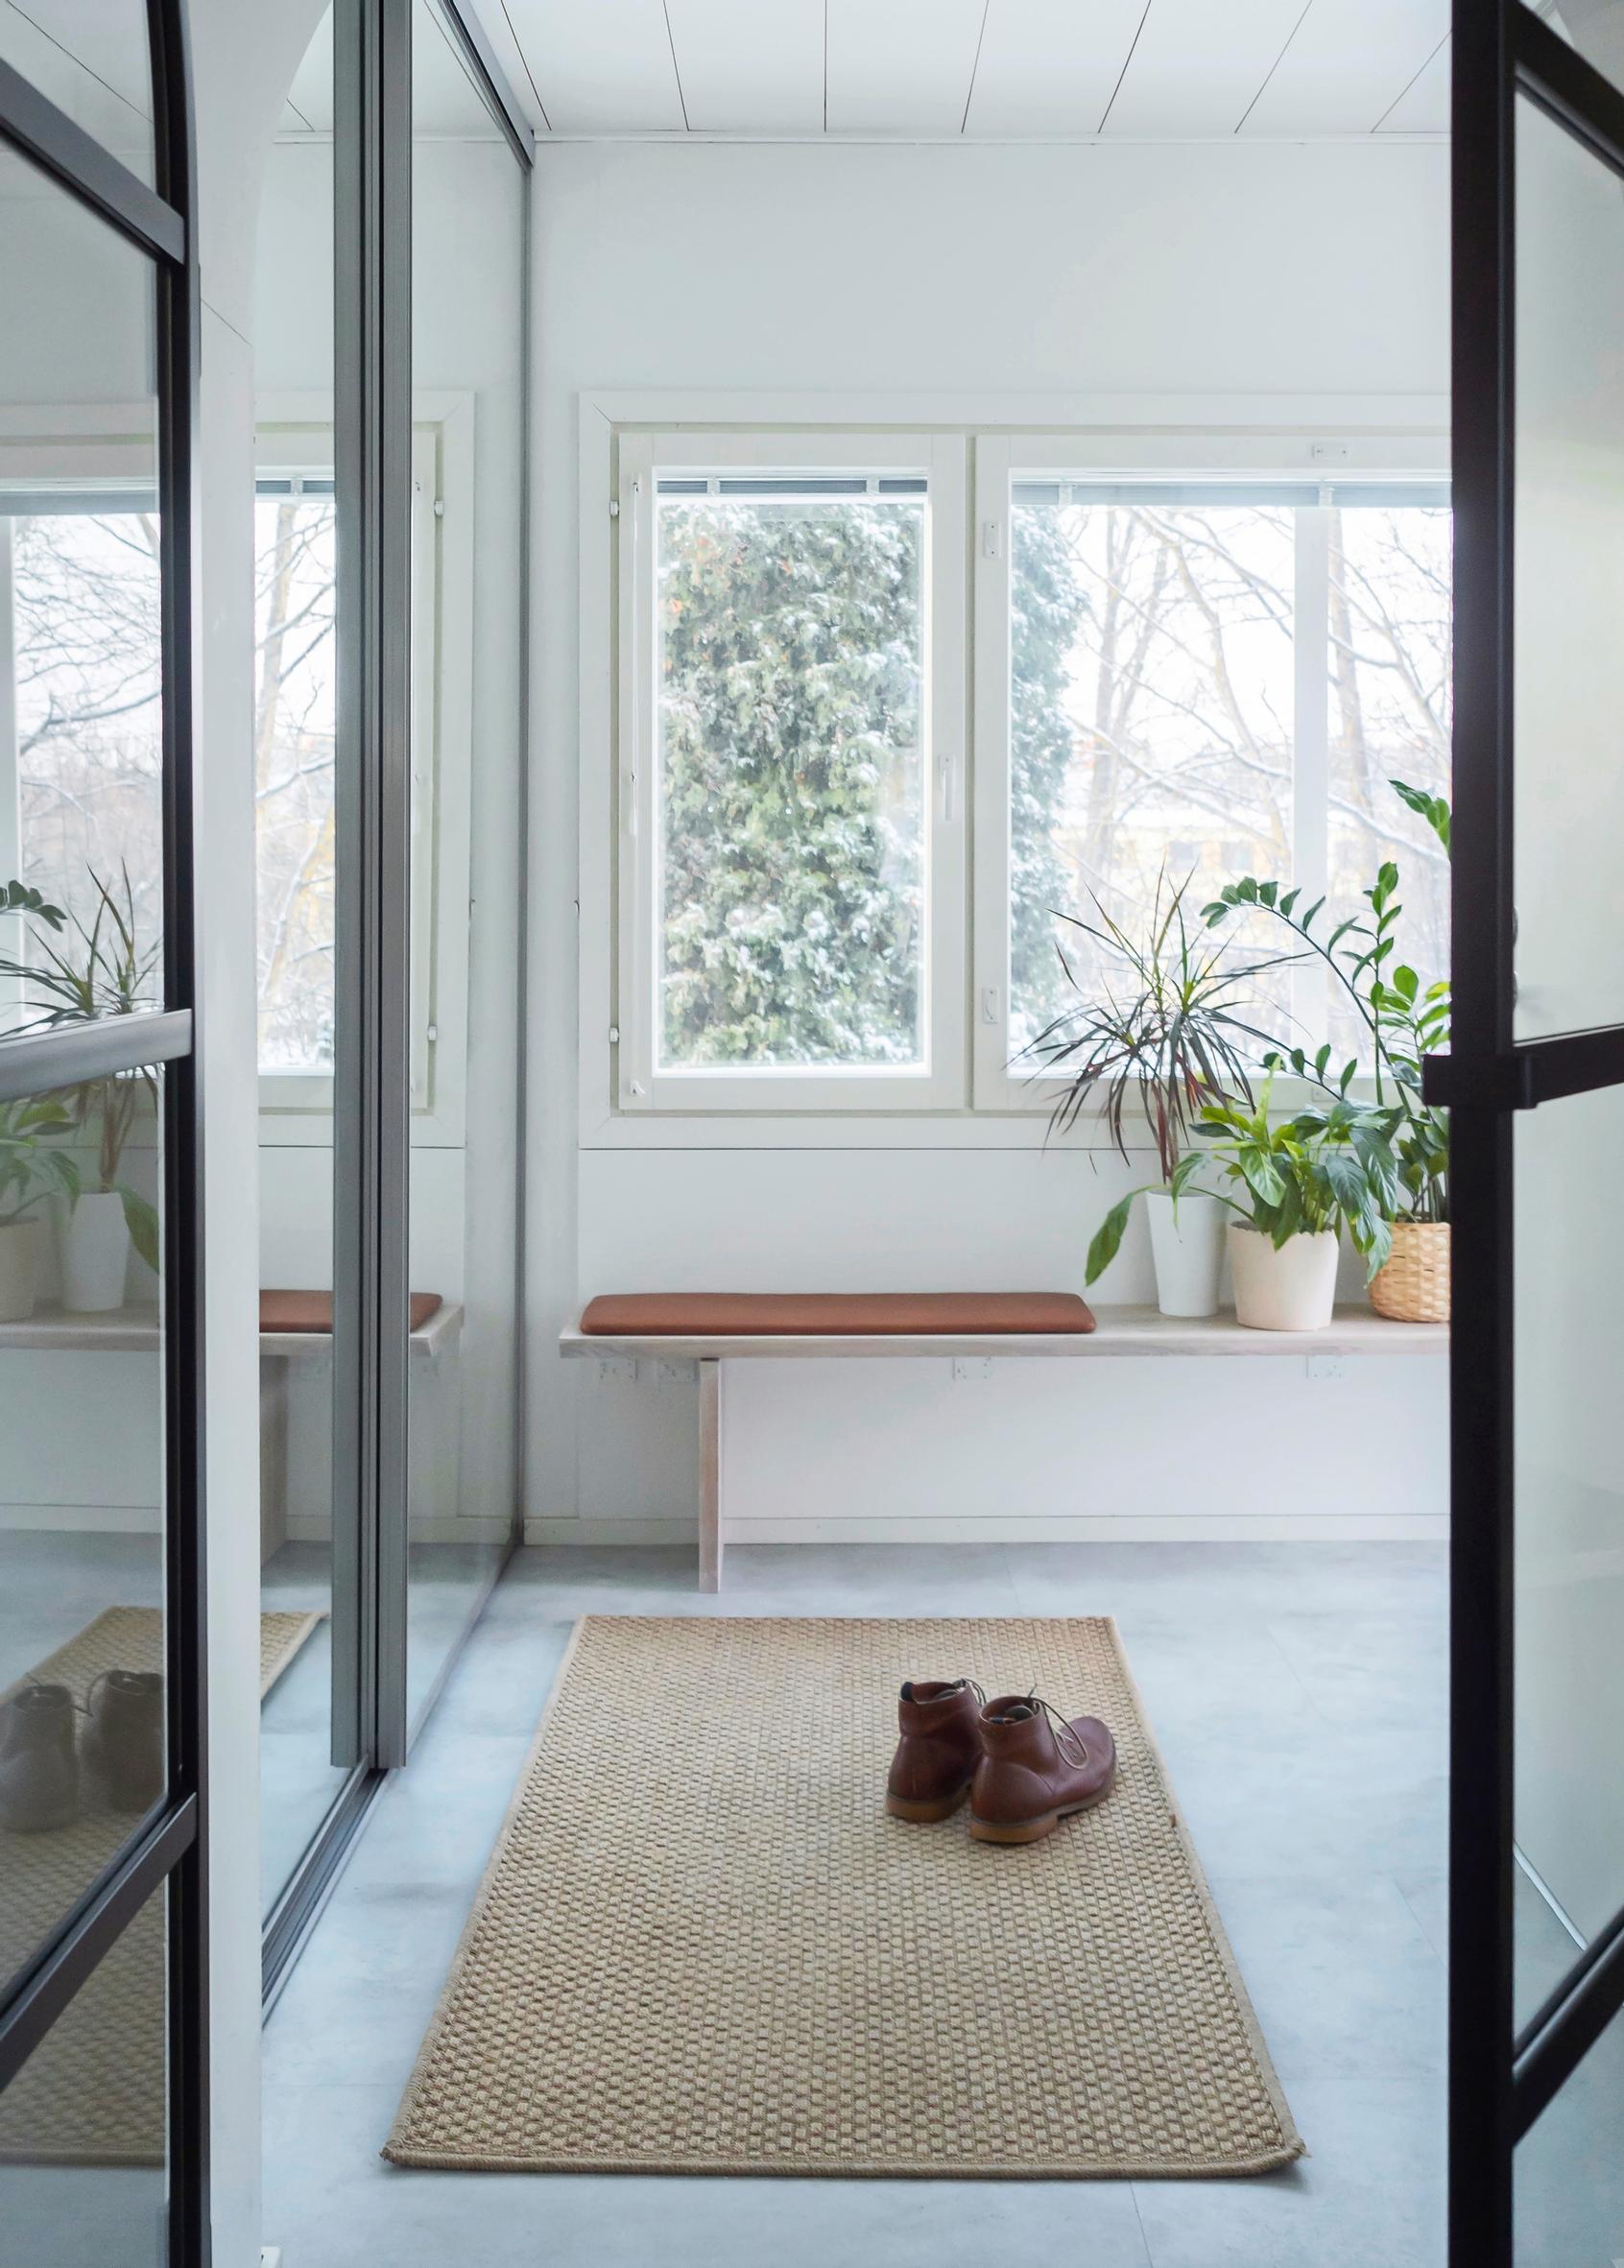
More surface space and seating for your entryway—build a wall-mounted bench with our step-by-step guide
A wall-mounted bench is both a beautiful design element and a practical surface for important items or even houseplants.
Wall-mounted bench—supplies:
- Wood supplies, such as oak boards
- Fabric and batting
- Plywood (at least 12 mm (1/2″) thick)
- Lint-free application cloth
- Surface treatment wax
- Screws sized 5 × 80 mm (3/16 × 3 1/8″) and 4 × 30 mm (5/32 × 1 3/16″)
- Staple gun, staples (10 mm (3/8″)) and scissors
- Sandpaper (P180 and P320)
- Spray contact adhesive
- Protective gloves
- Construction adhesive
- Corner braces
- A sander or sanding block
- Respiratory mask and hearing protection
- Tape measure and stud finder
- Jigsaw
Wall-mounted bench—instructions:


1.Start by deciding the style of bench you’d like to build. Measure your space carefully. If the bench is fitted between two walls, leave about 5 mm (3/16″) of clearance so you can slide it into place. Make a paper template of the bench shape if needed. In this project, the angled corner called for very precise measurements.

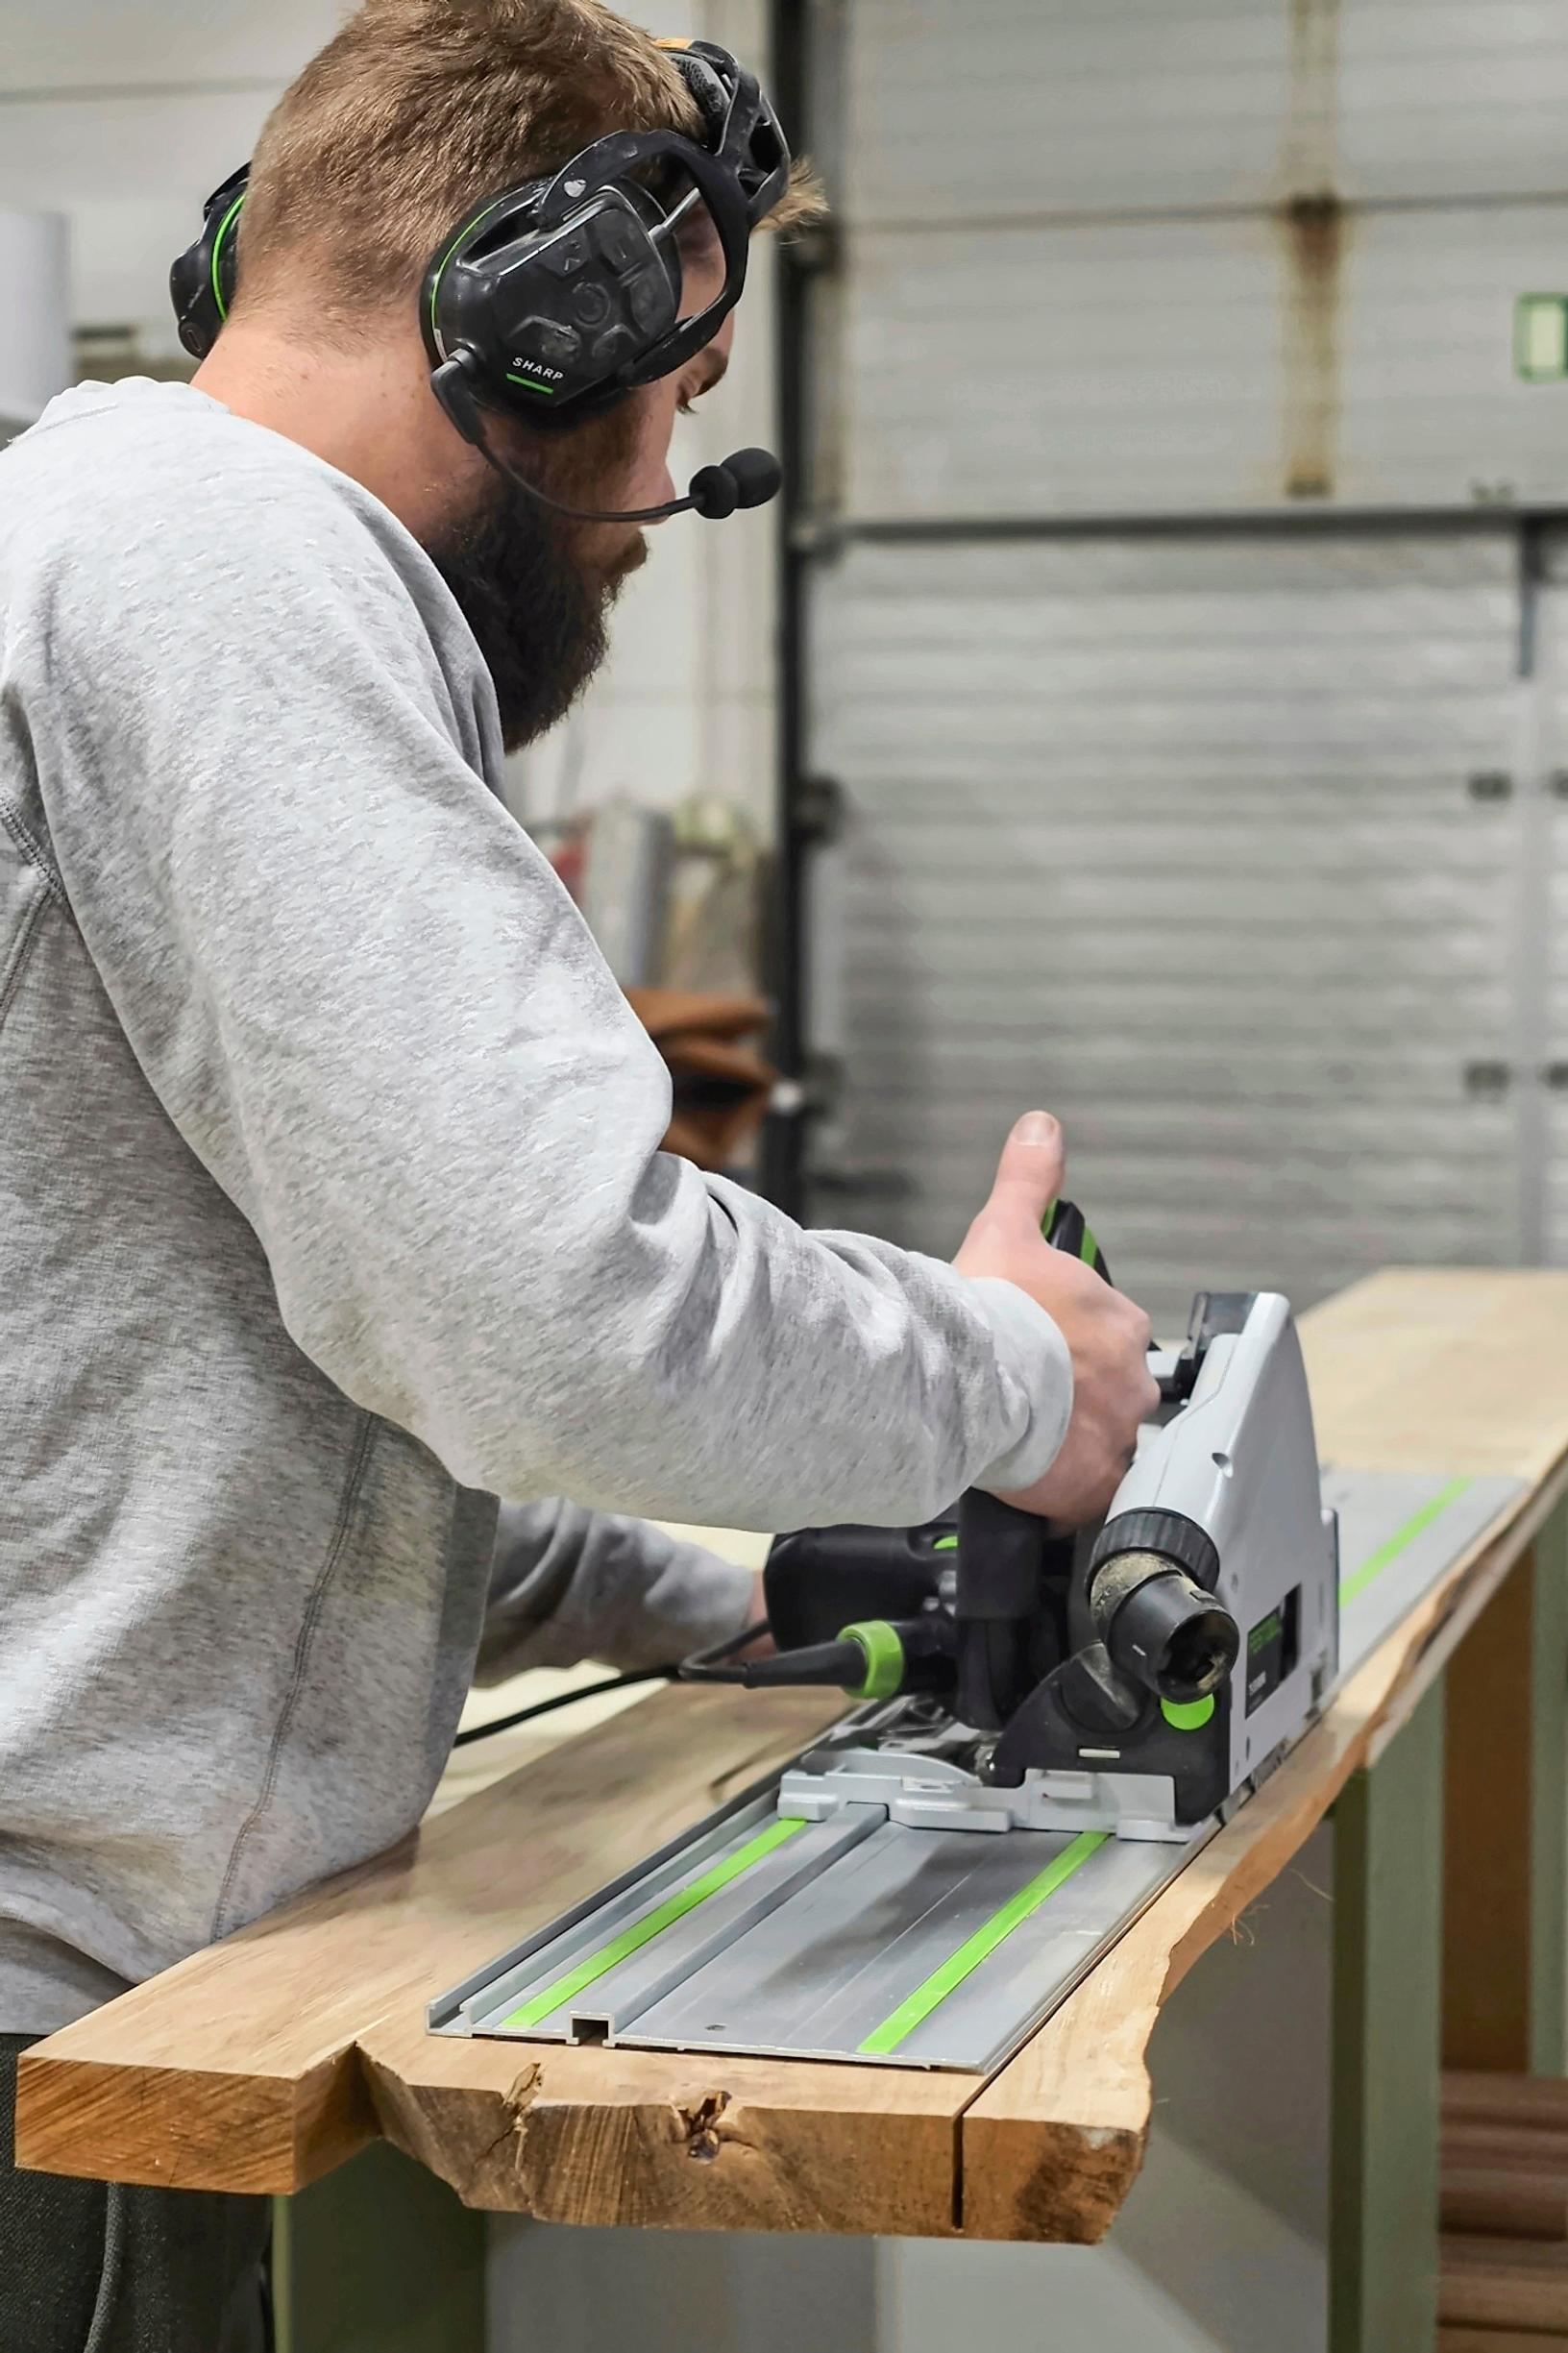
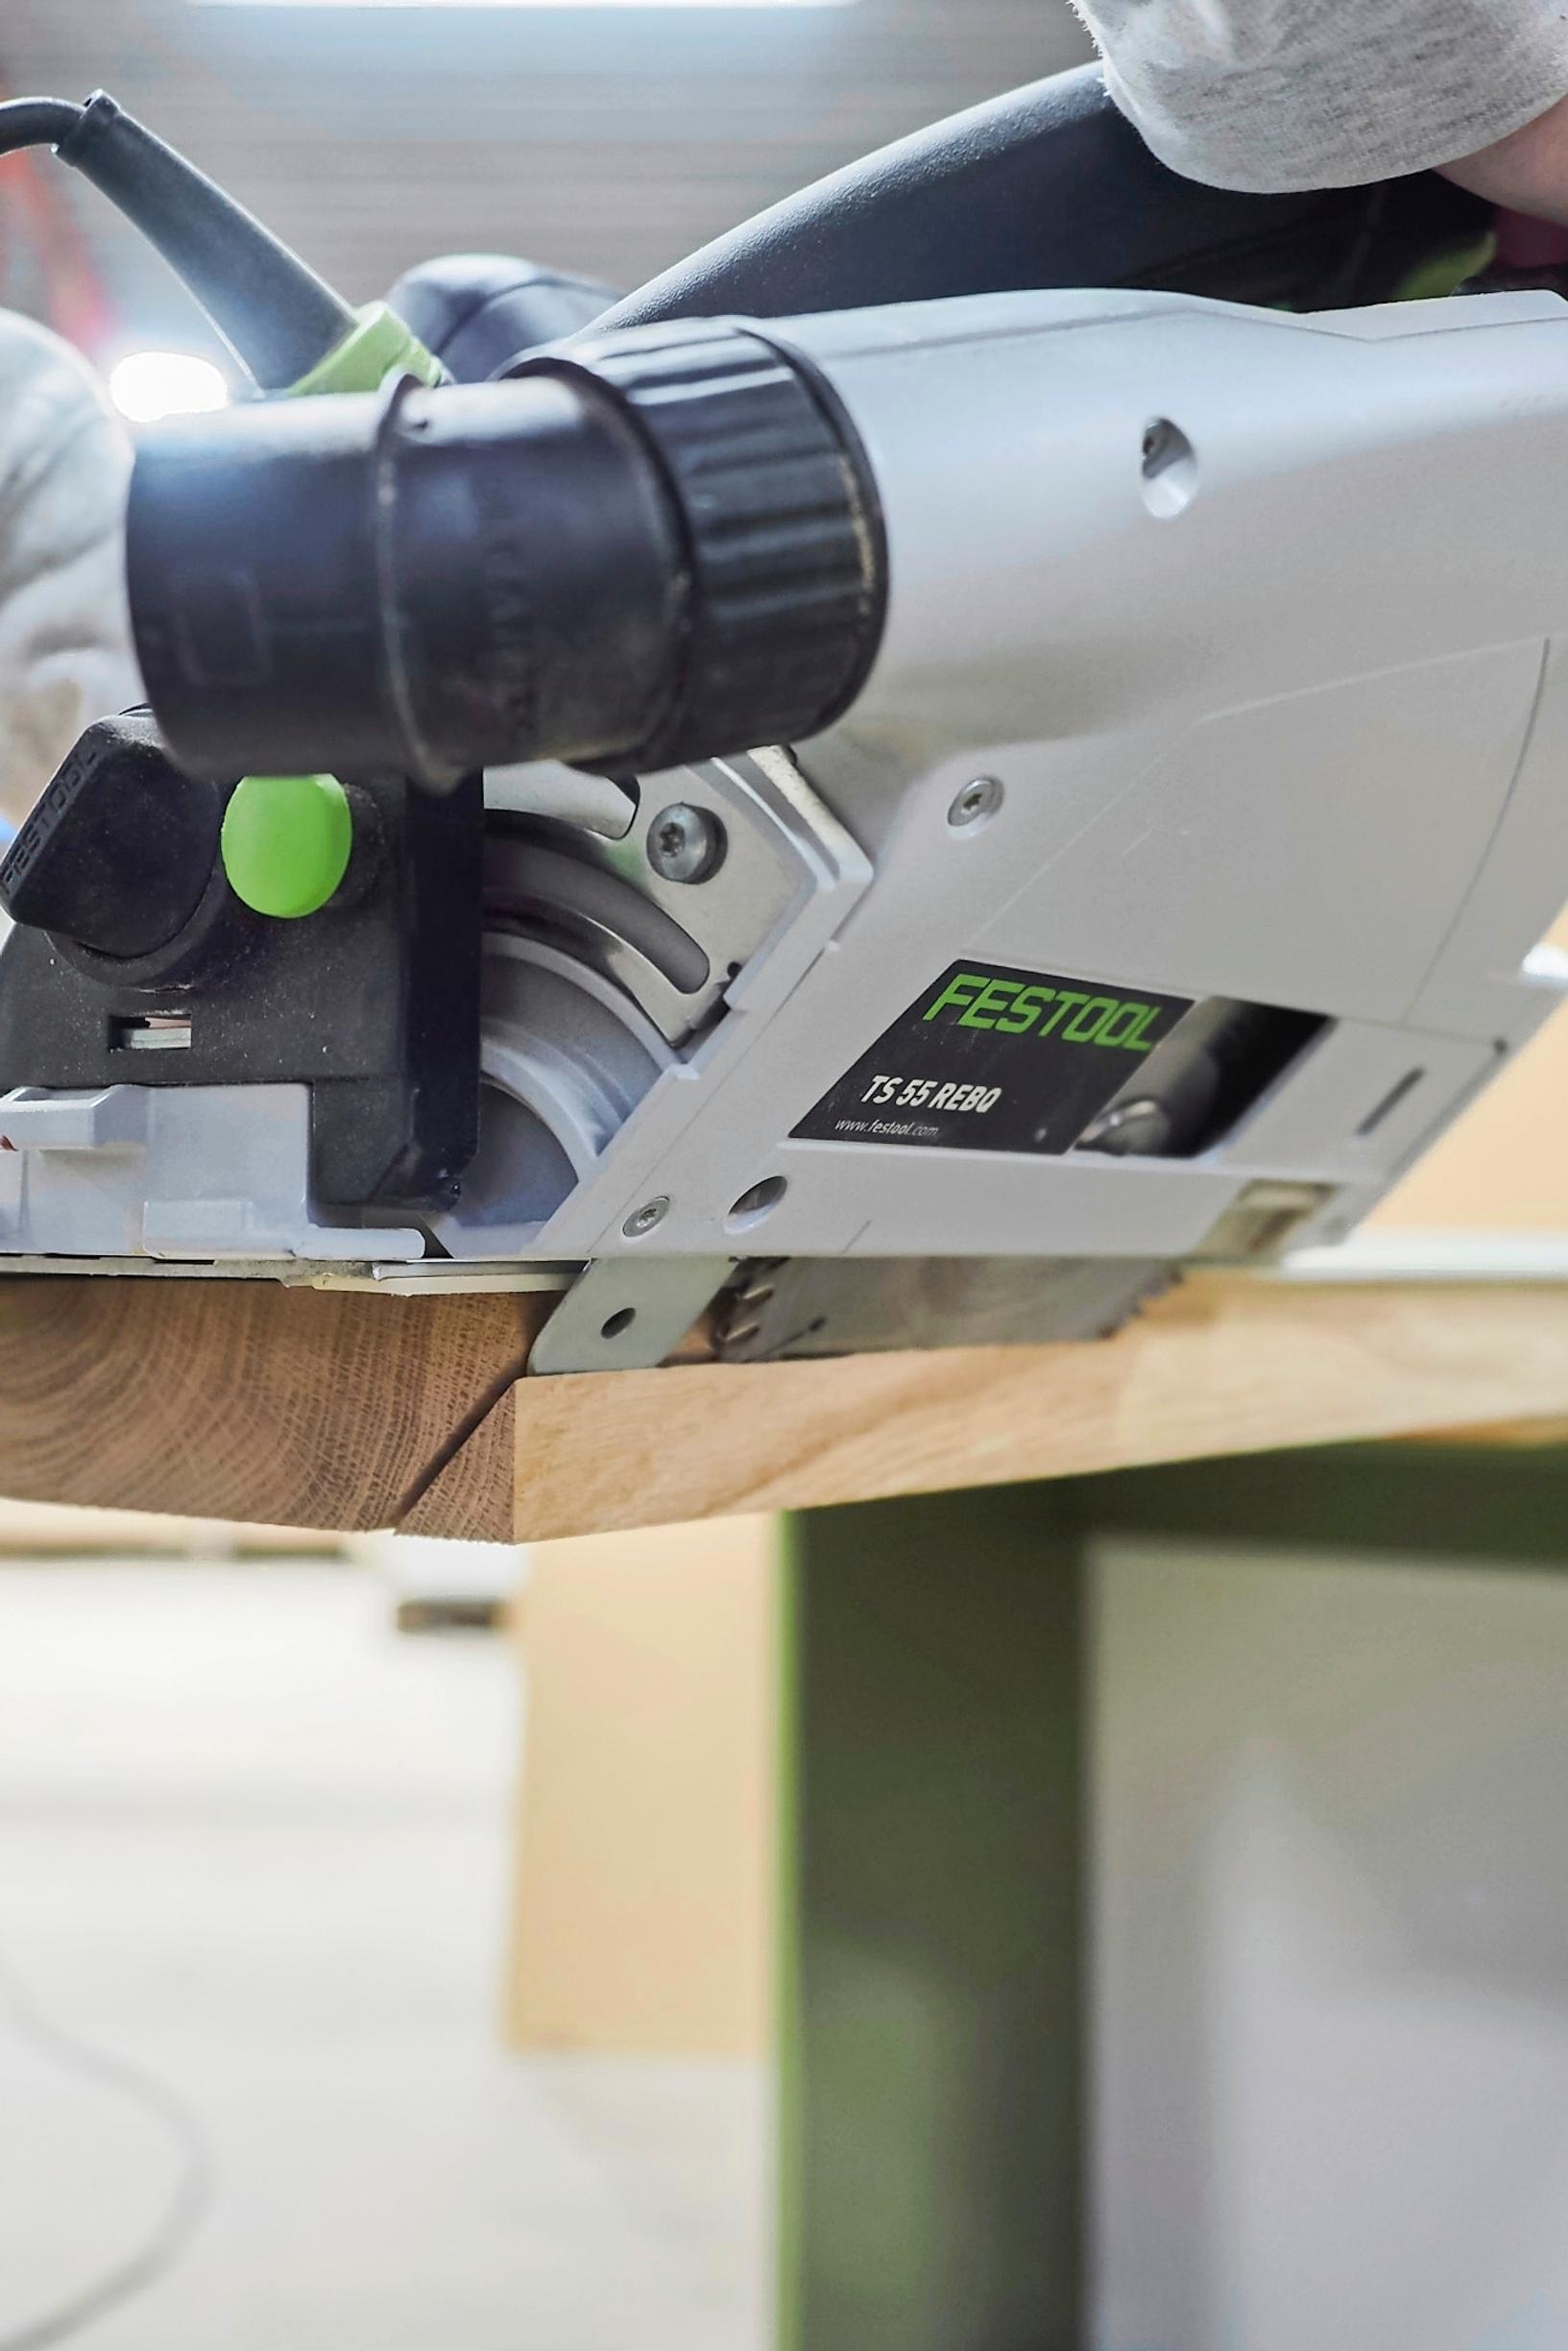
2. Gather all the materials you’ll need. We used oak boards and plywood for the seat. Measure and cut the board to the correct width using a plunge saw with a guide rail. If you want to show off the live edge in front, don’t cut it. However, be sure to saw the back edge so the bench sits flush against the wall.

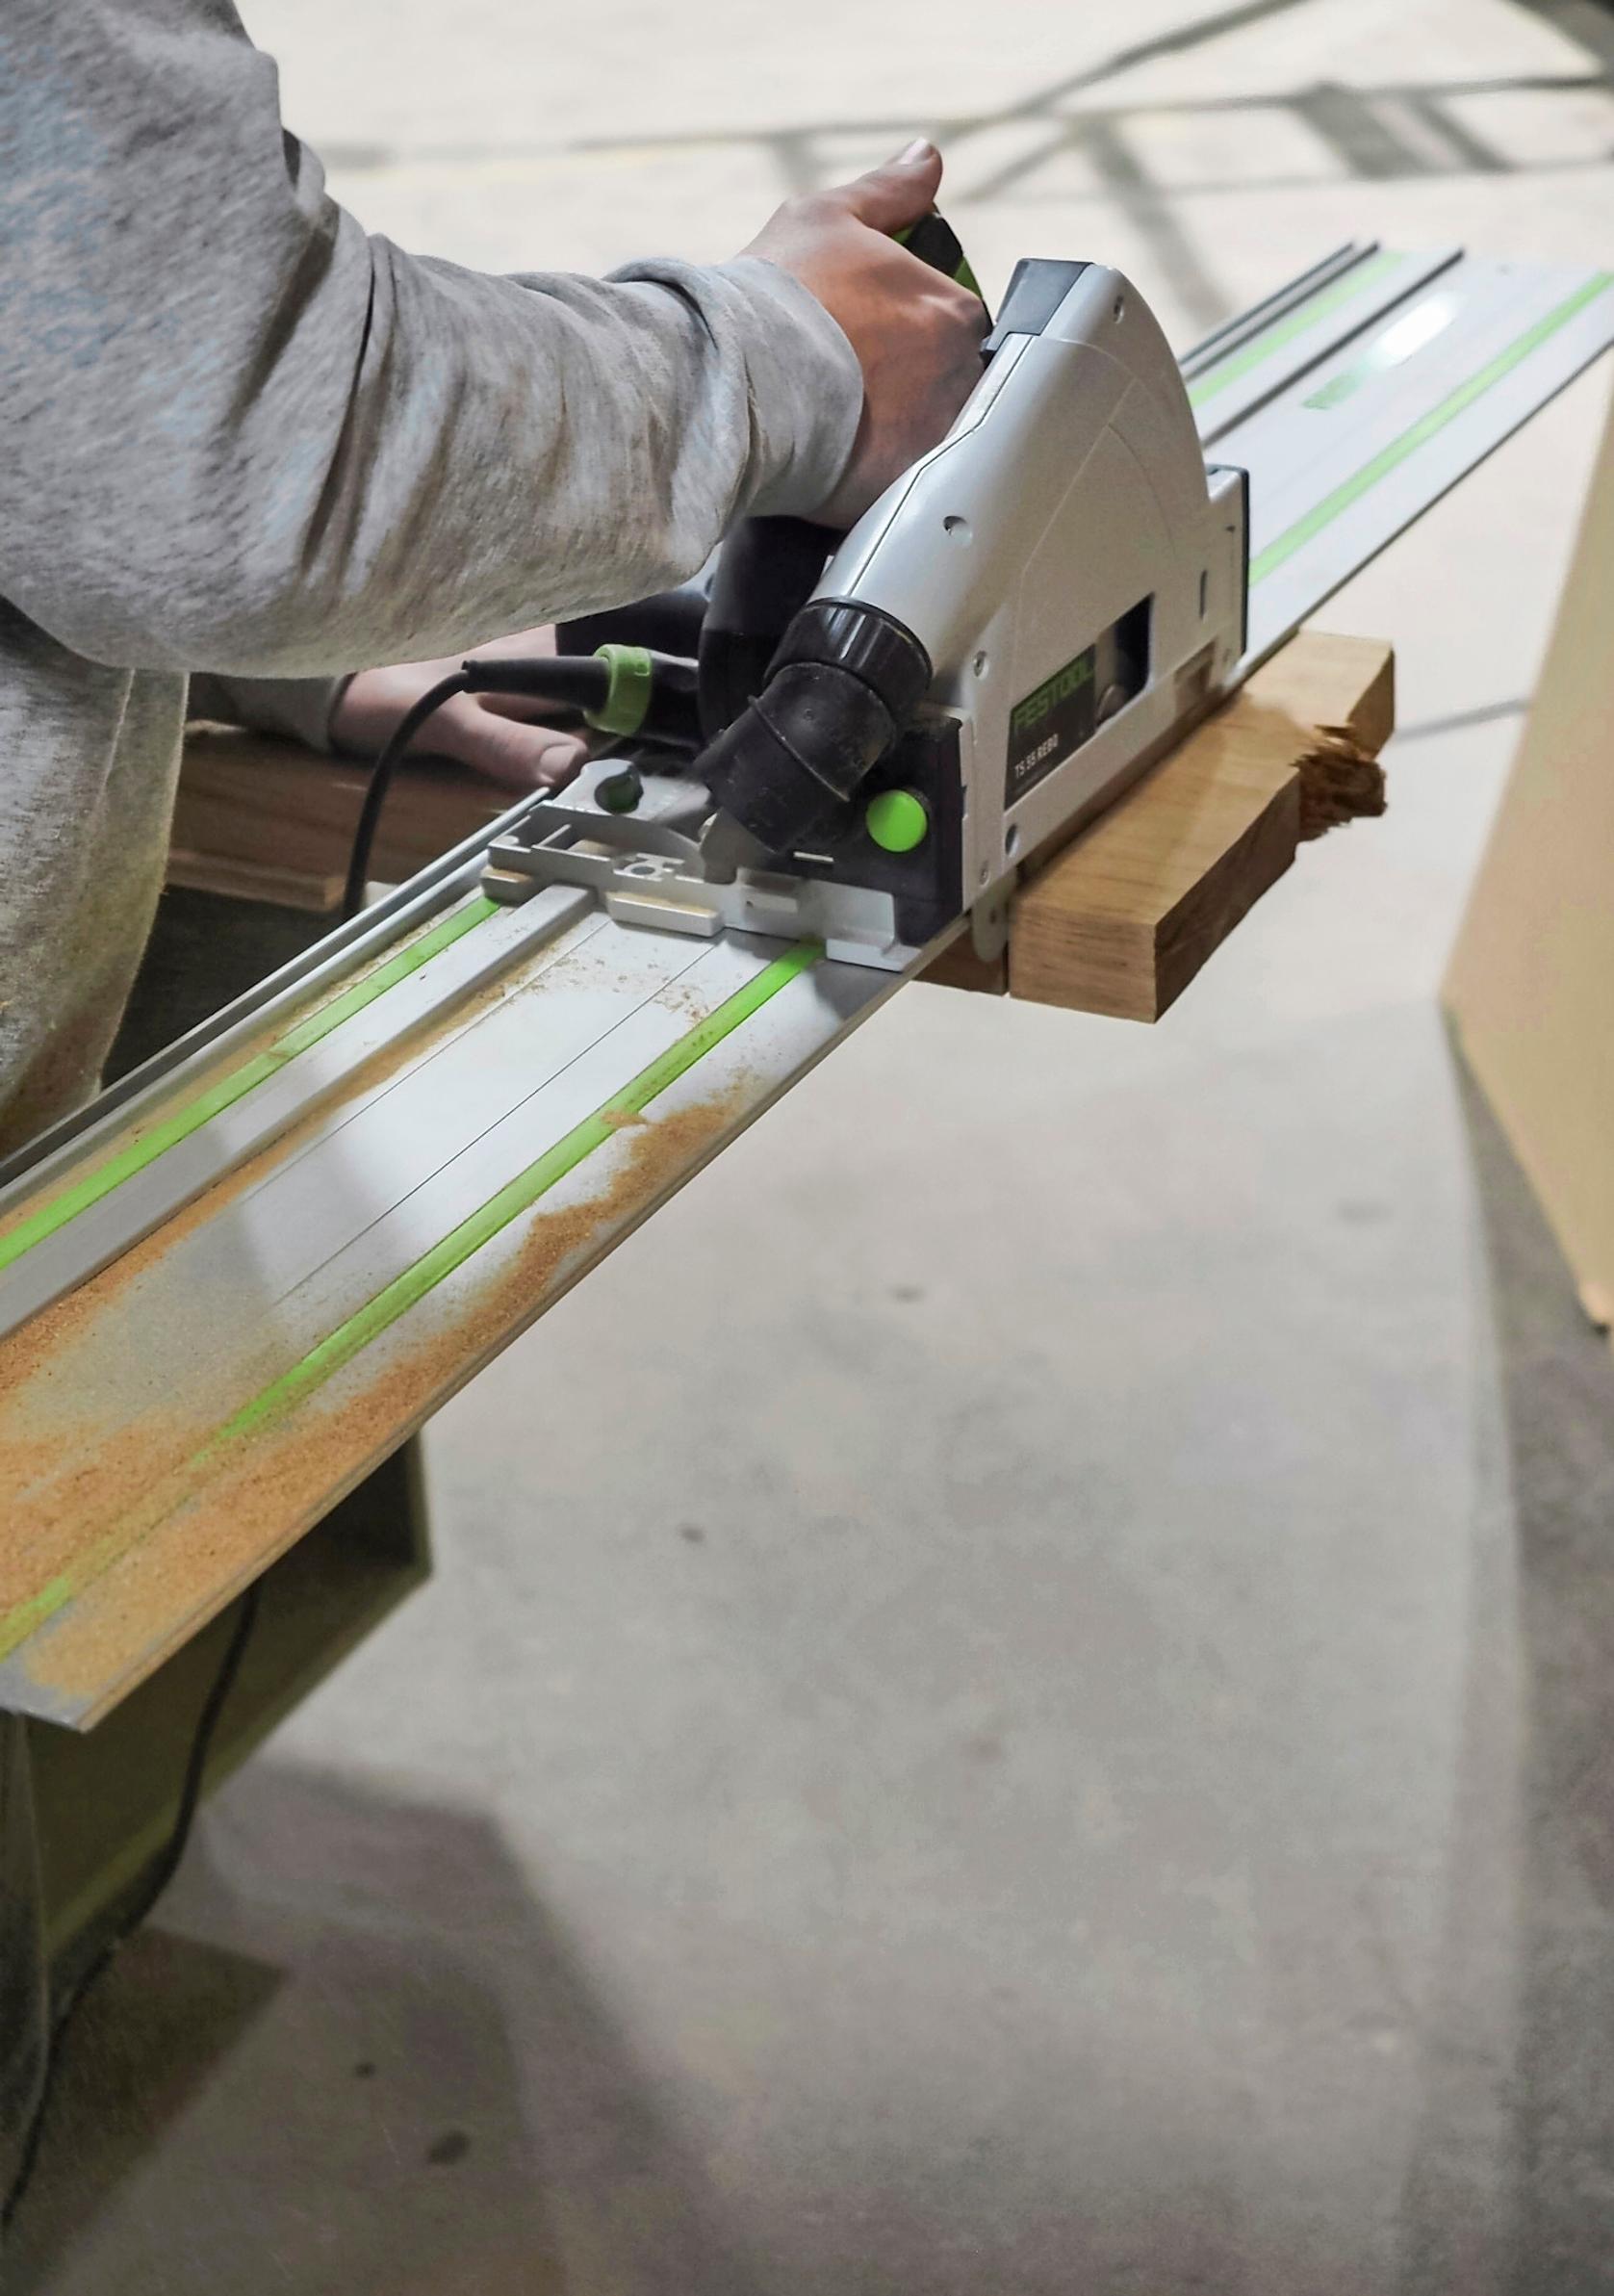
3. Measure and cut the board to the correct length. We used the same plunge saw as before, but you could also use a crosscut and miter saw for this step. At this point, also cut the bench leg or legs.

4. Bevel the front edge by setting your plunge saw to a 45-degree angle and running it along the board’s length with a guide rail. Although this step is optional, the bevel—especially on a longer bench—makes it look lighter.

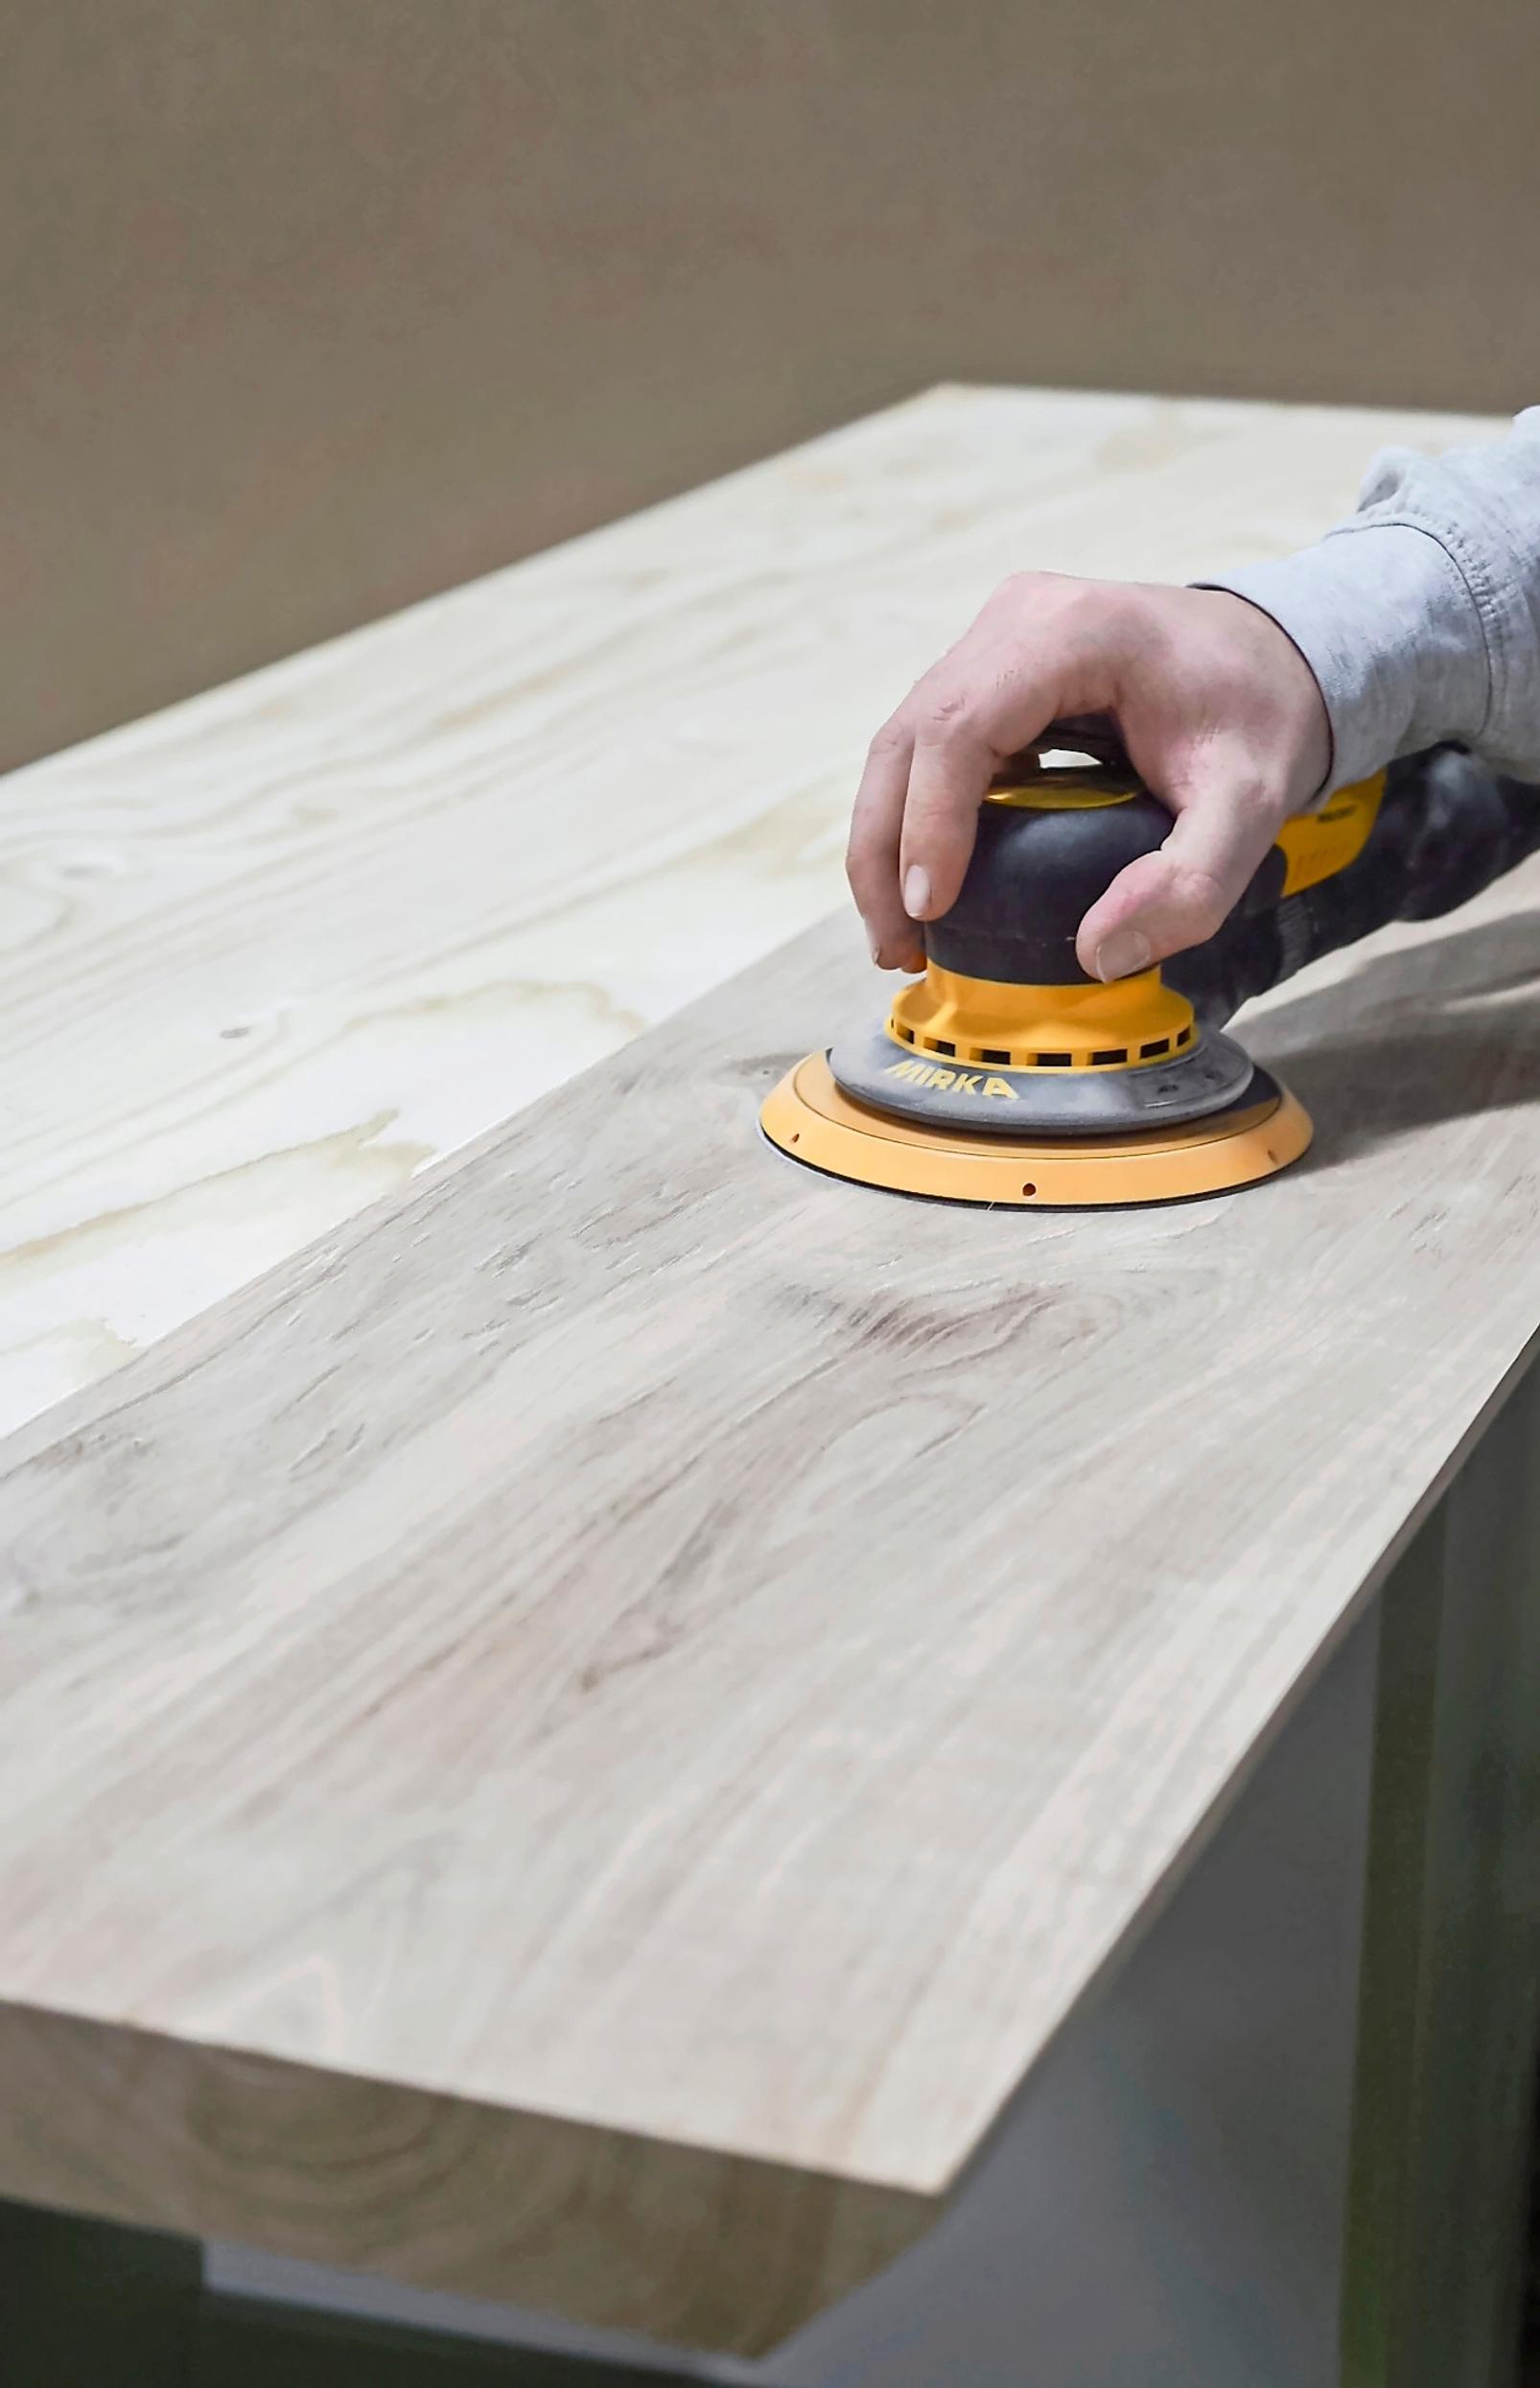
5. Sand the board using a sander or P180 paper. Round off any sharp edges slightly. Blow away dust with compressed air or wipe with a dry cloth. Begin finishing. We applied one coat of Osmo Color spruce wax, then sanded with P320 paper after it dried. Finally, we applied Osmo Color clear oil wax for the second coat.

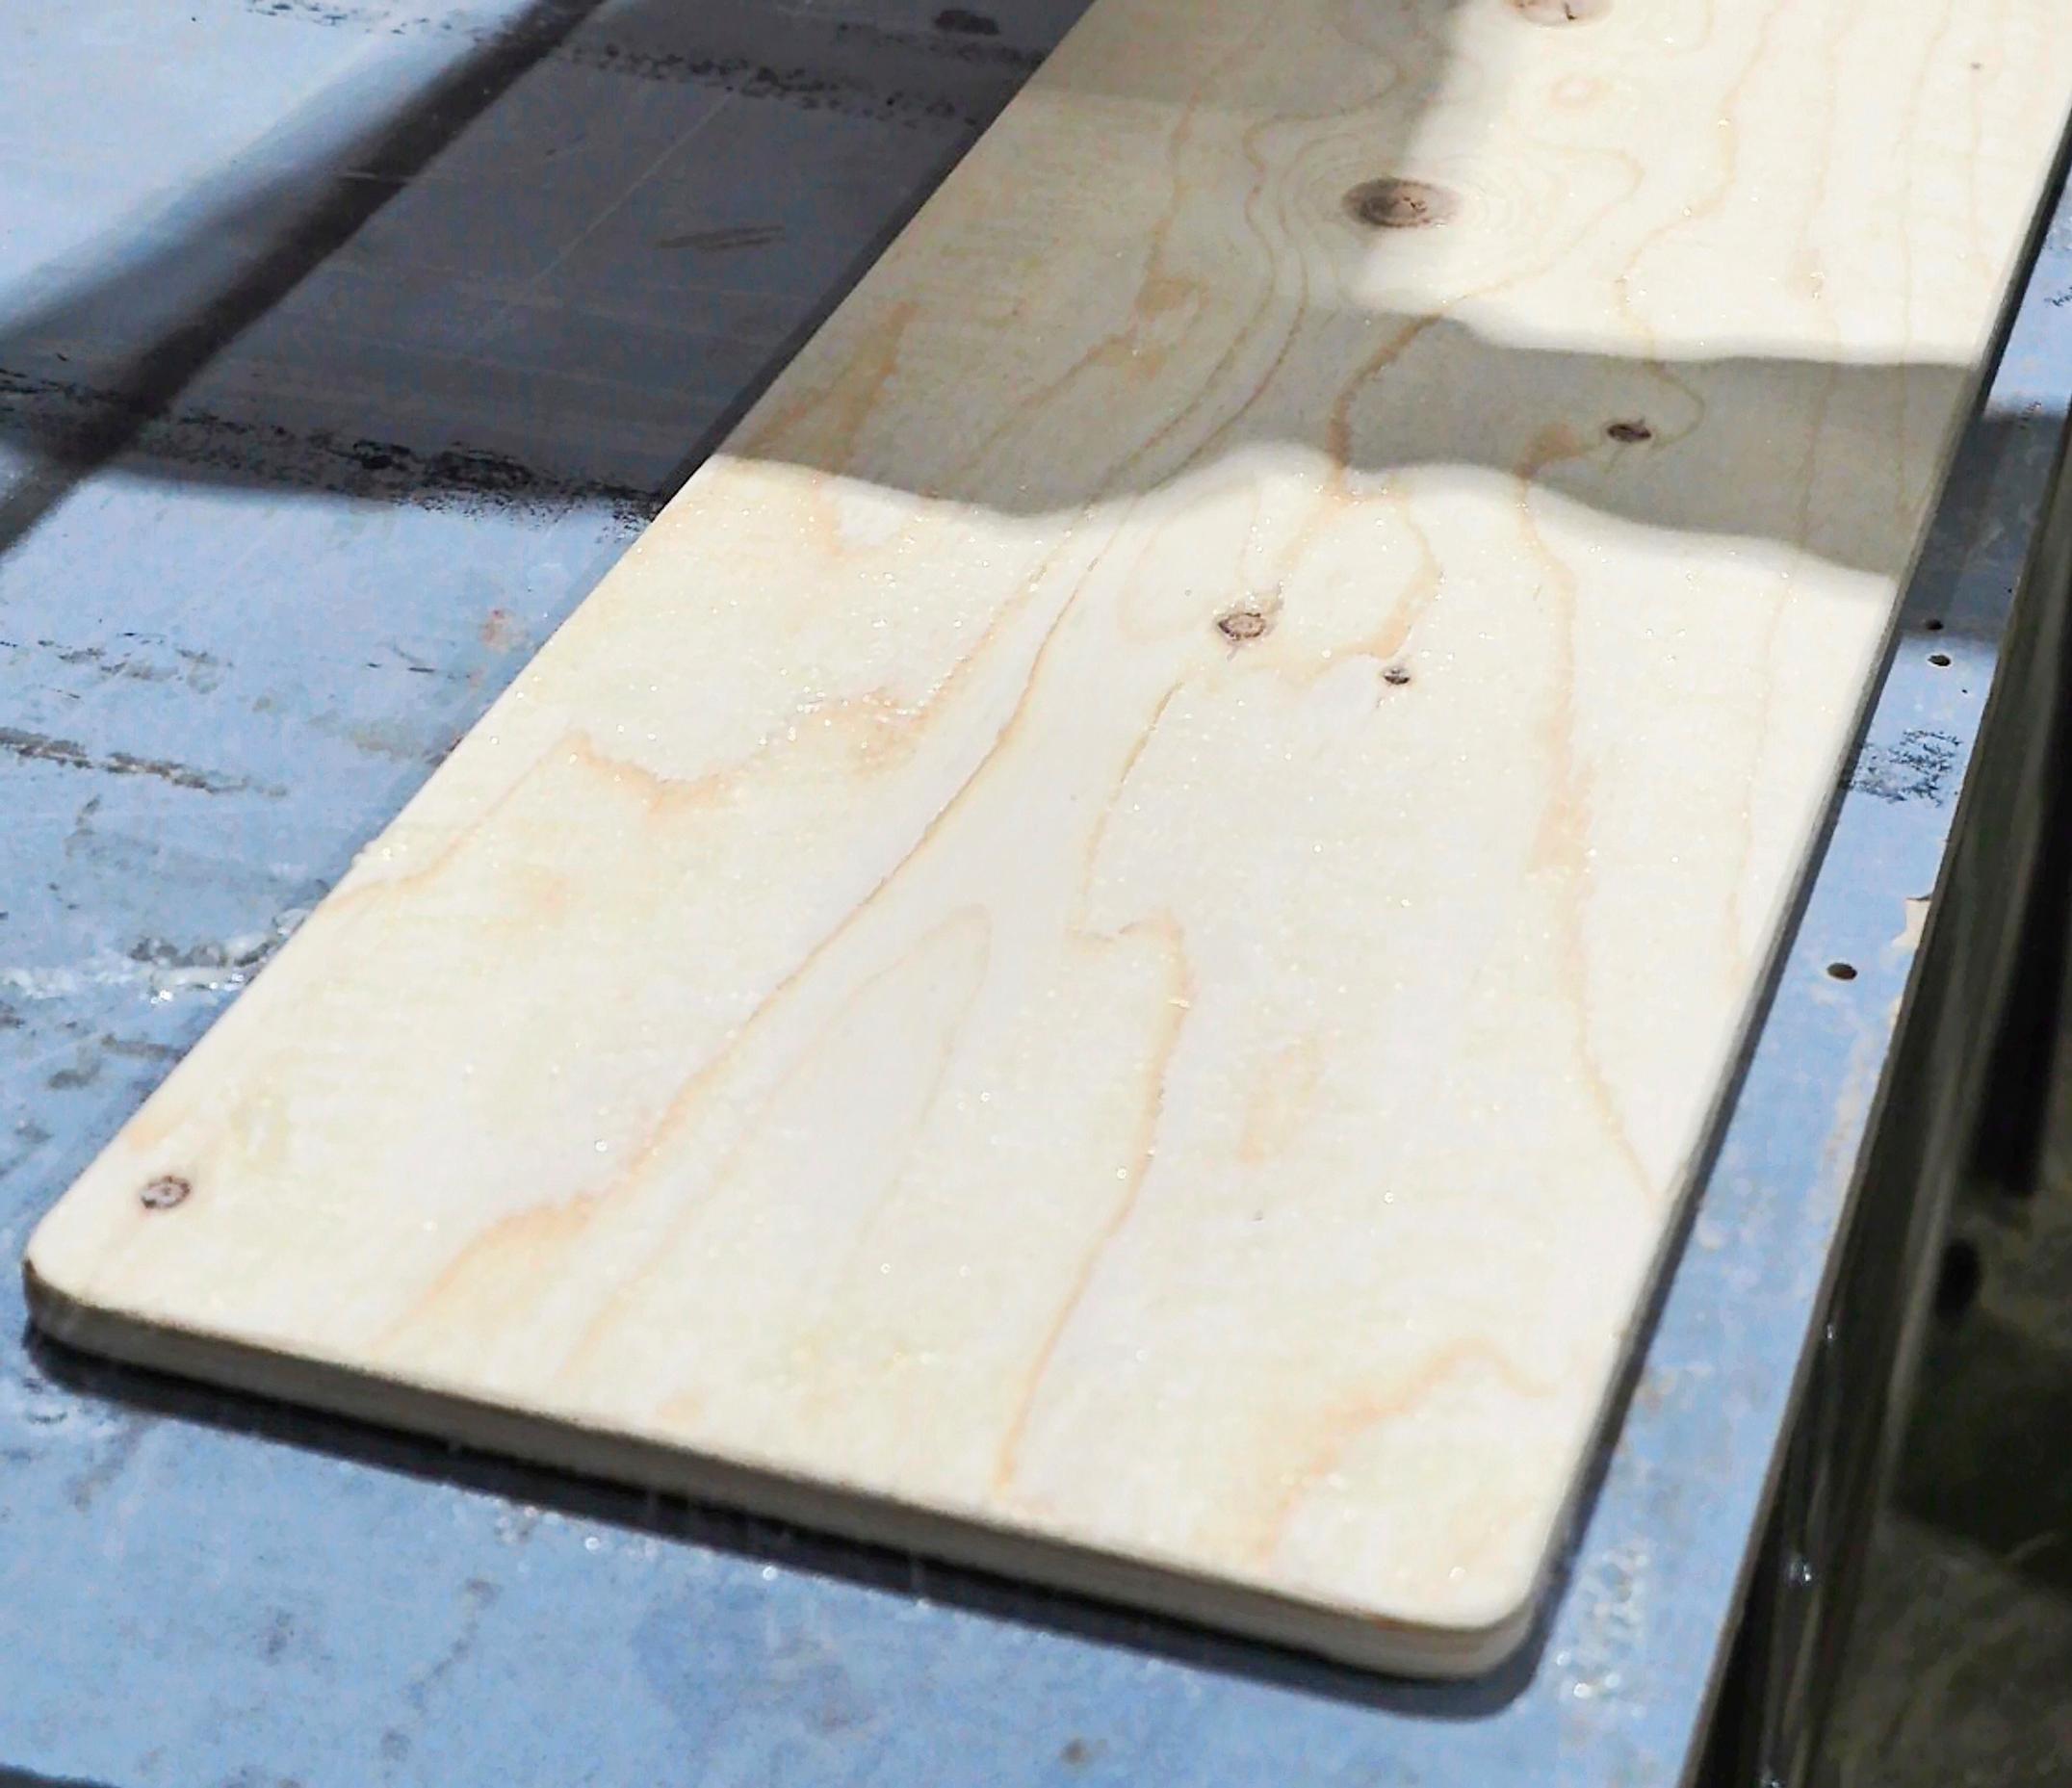
6.To make the seat cushion, decide how big you want it to be. Cut the plywood to size using a crosscut and miter saw. Sand the corners with P180 paper so the stretched fabric won’t tear on sharp edges. Gently round the plywood corners as well—this helps when attaching the fabric, plus it looks more polished.

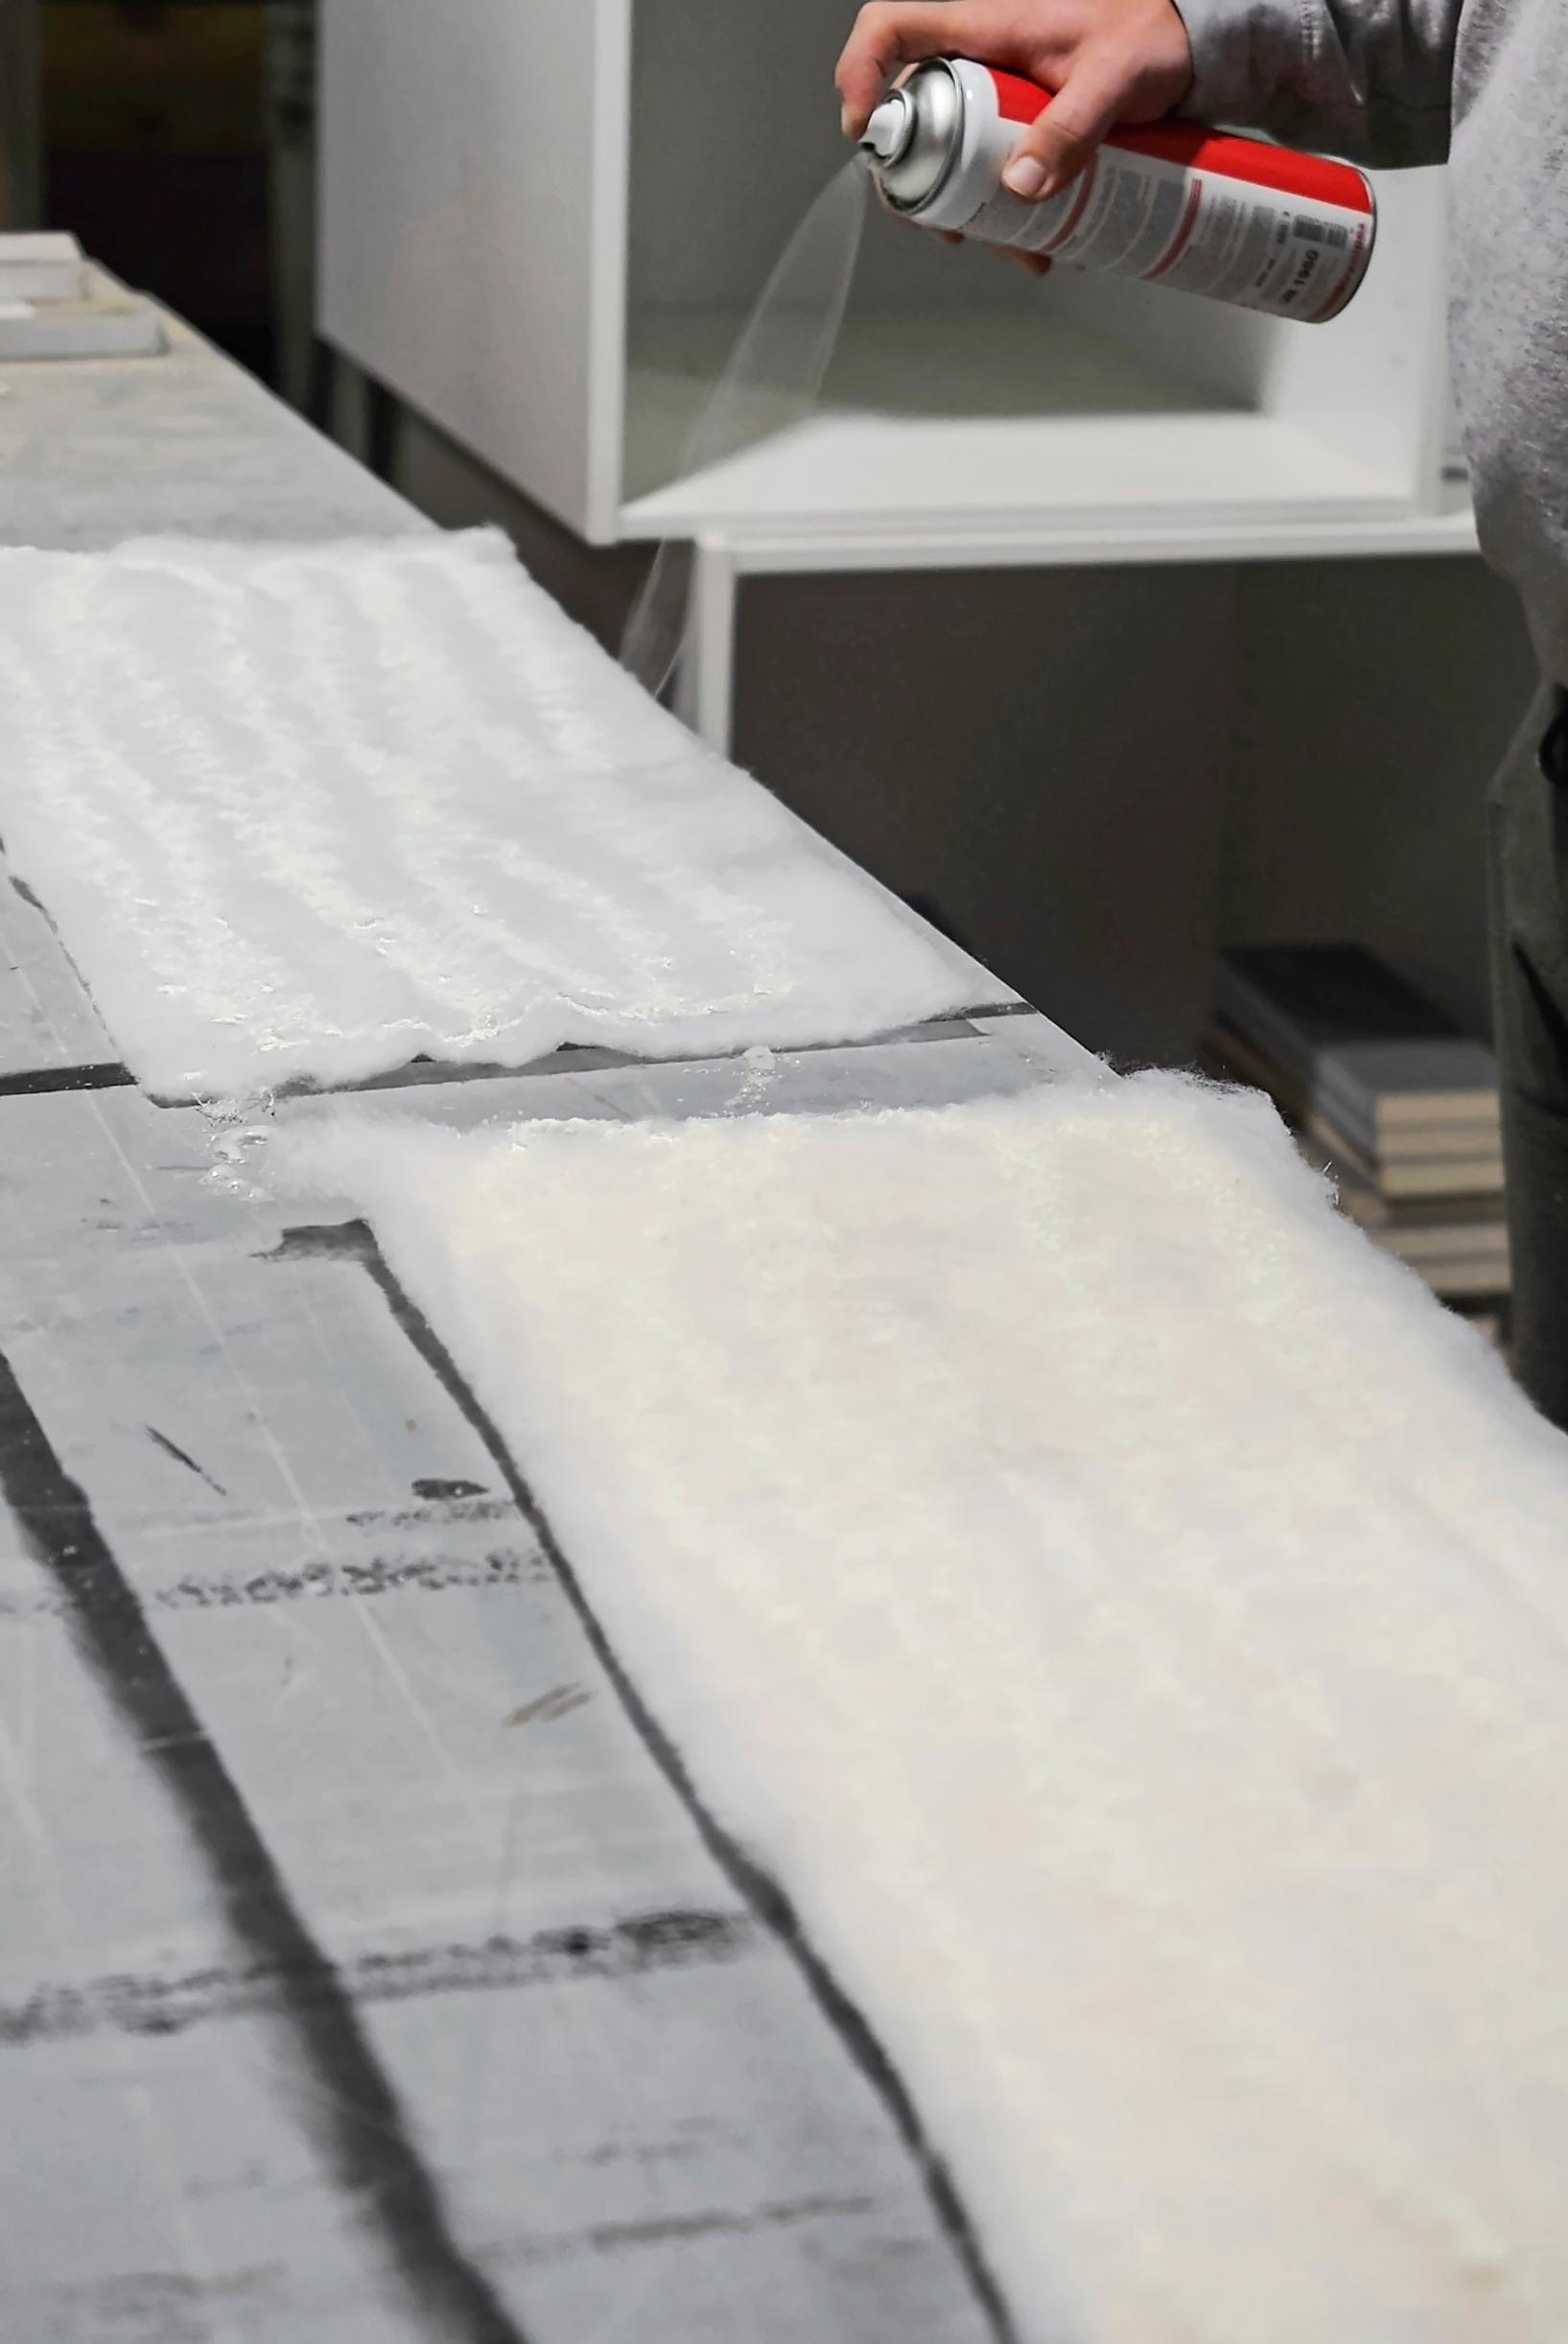
7. Measure the batting needed for the seat cushion and cut it. The batting should be slightly larger than the plywood so you can fold it around the edges. That way, the edges won’t feel hard when you’re sitting down. Fabric stores carry various thicknesses of batting.
Tip!
Attach the batting to the plywood with spray contact adhesive so it doesn’t roll or shift underneath once the cover fabric is in place. If you’d like a thicker cushion, add foam along with the batting.

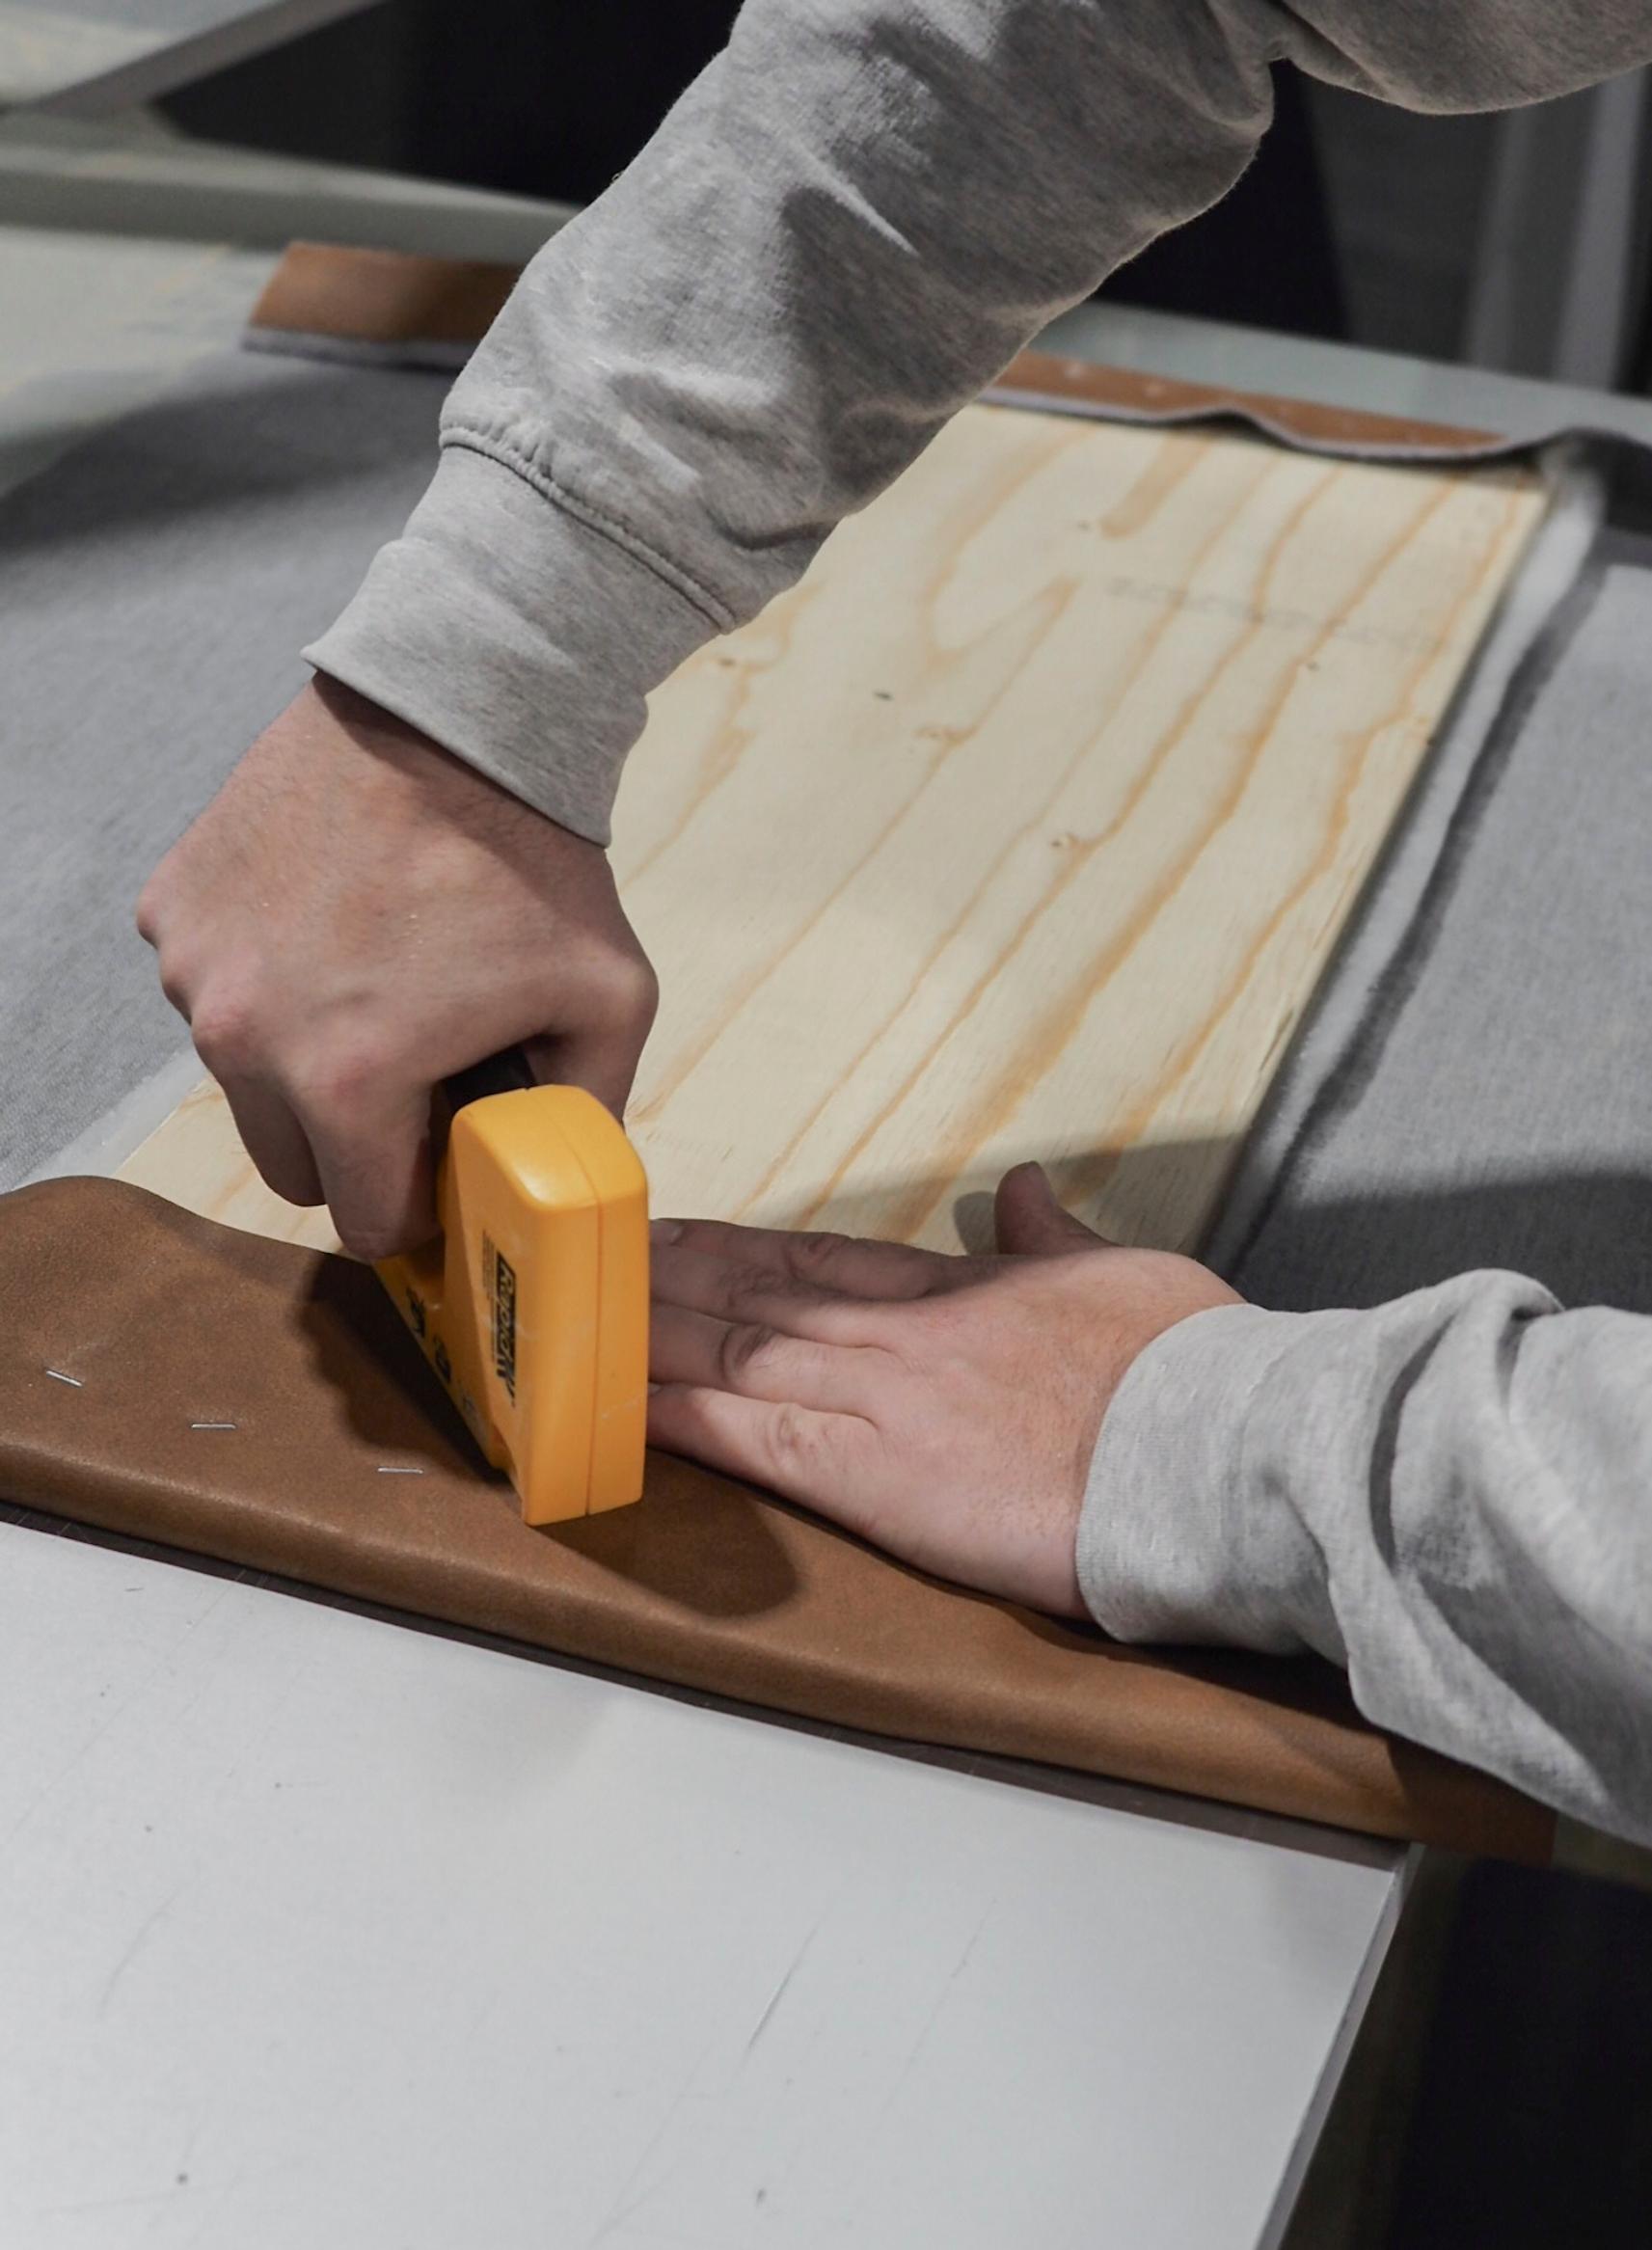
8. Cut the cover fabric to the right size. We used faux leather. Lay the fabric wrong side up on a table, place the plywood on top, and pull the fabric taut. Before stapling, make sure any visible sides look neat. Staple at close intervals, every few centimeters.

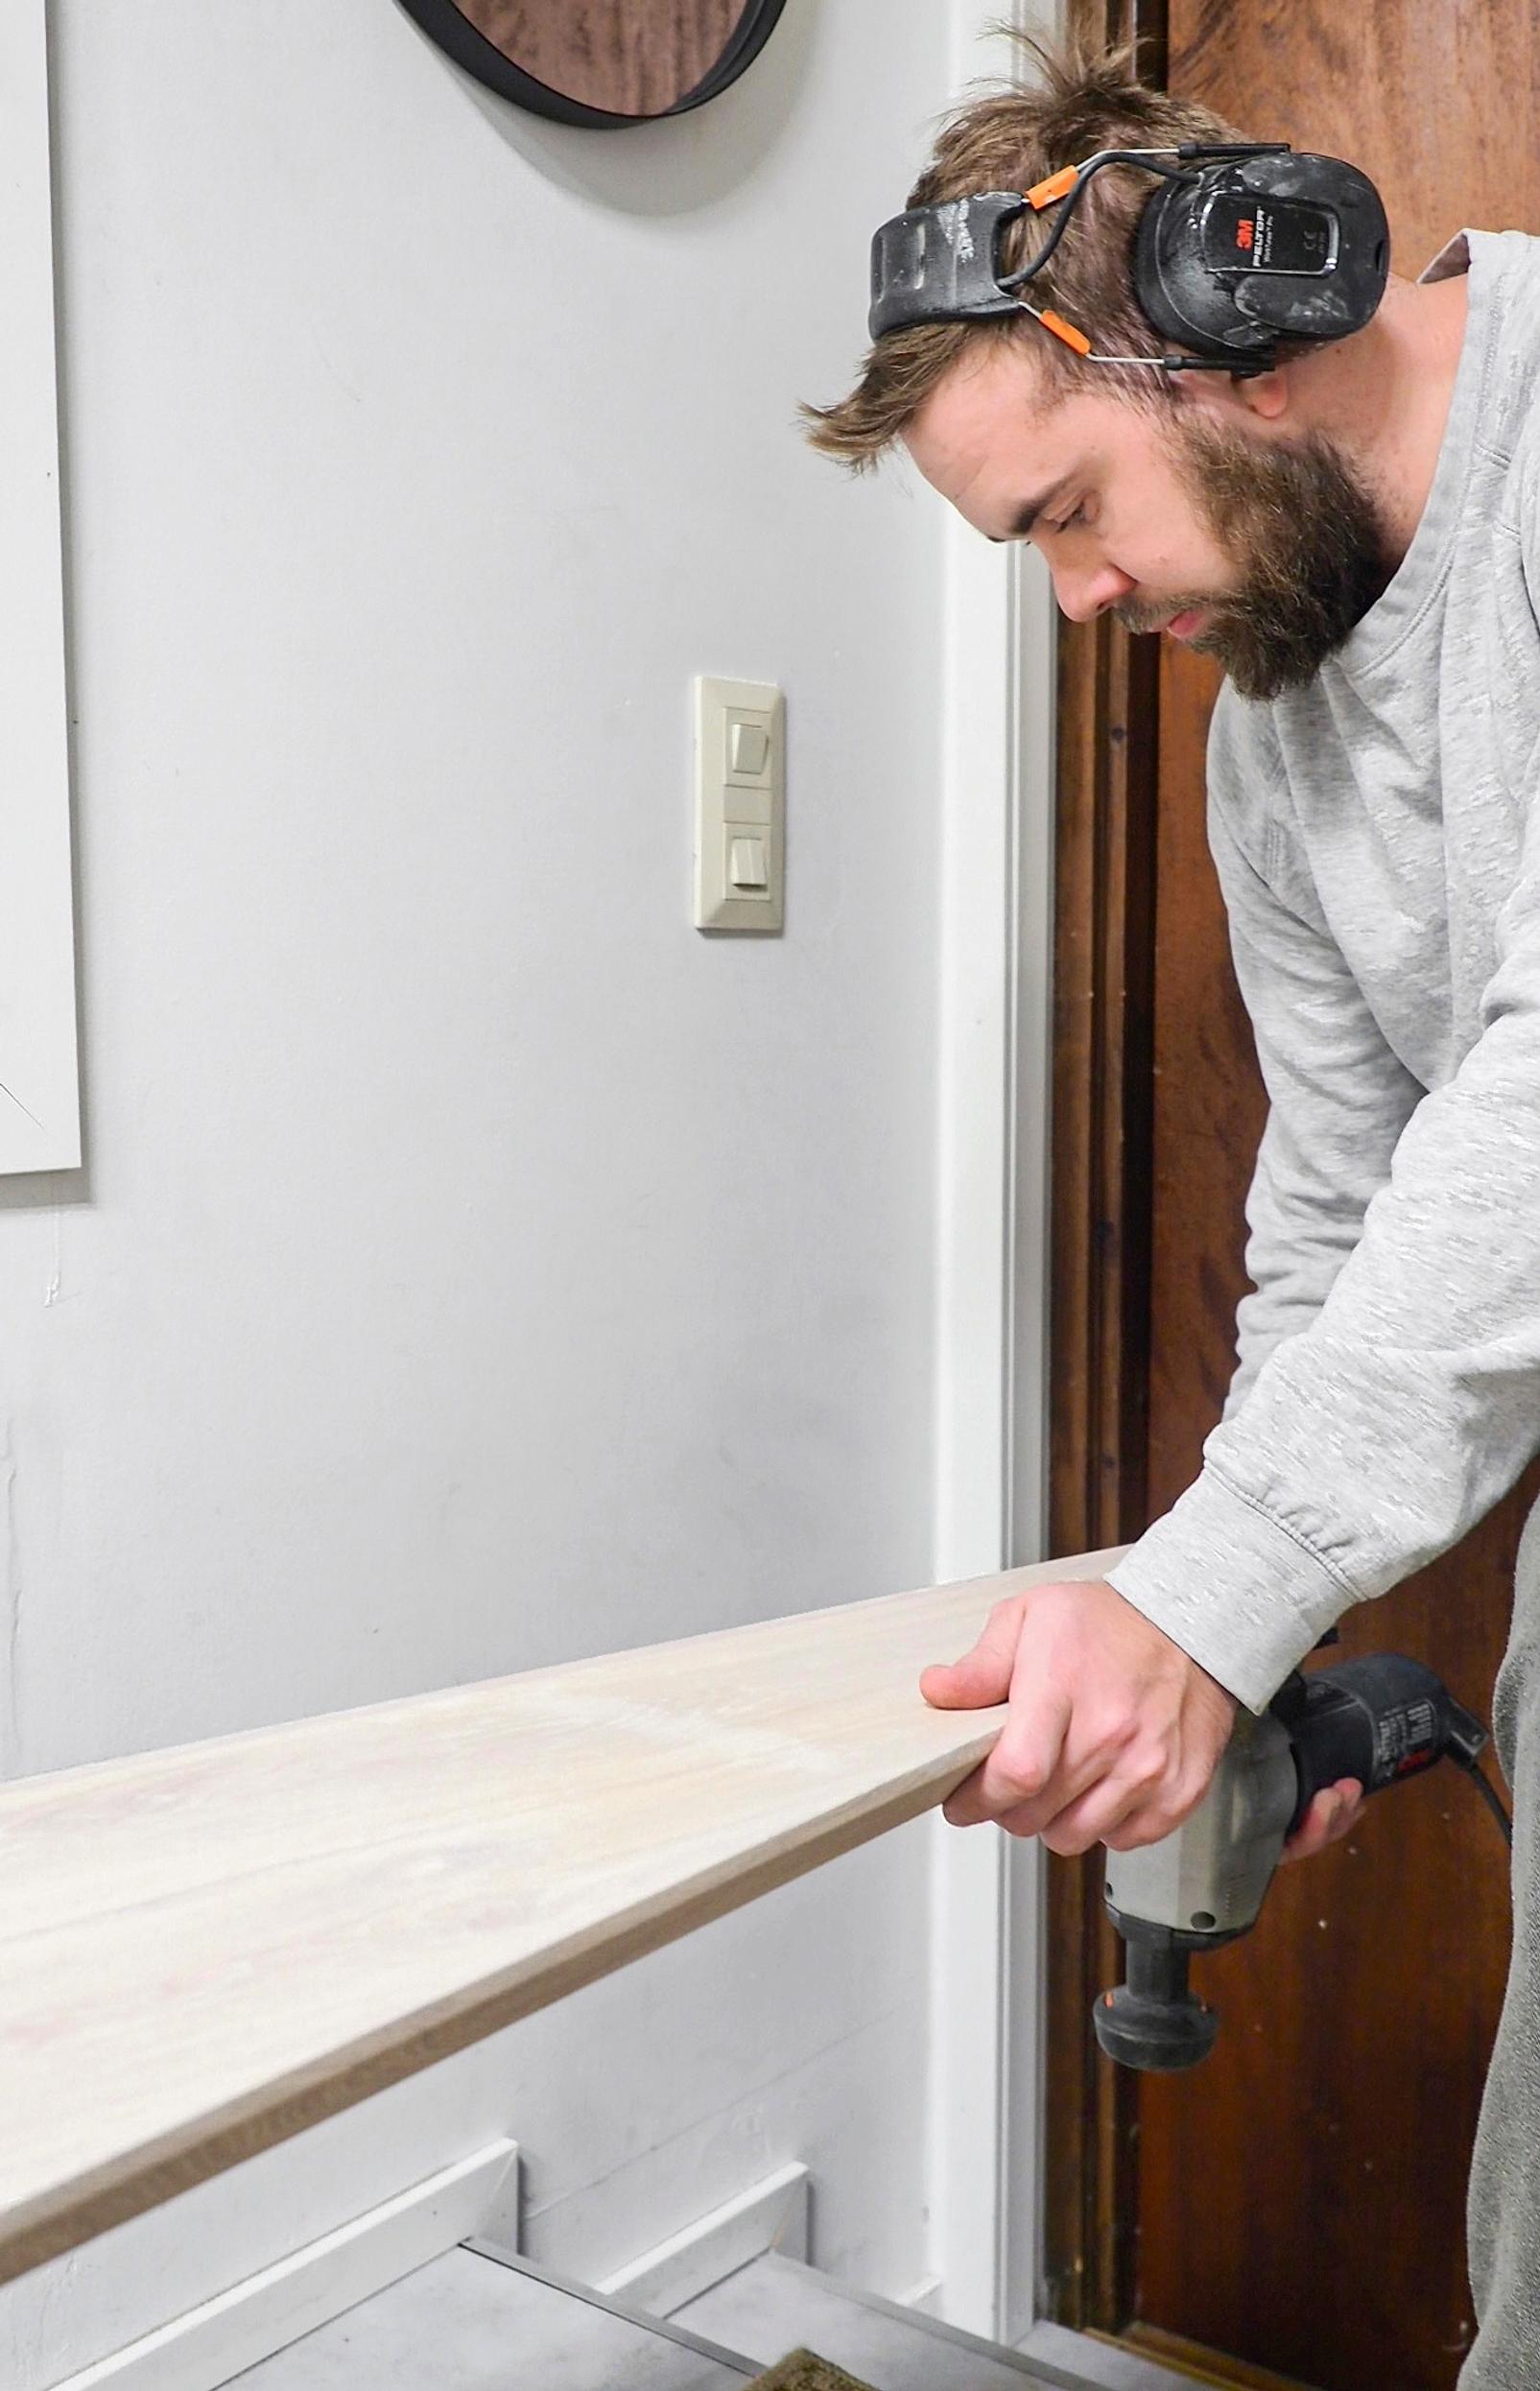
9. If the bench needs to fit tightly against the wall, cut any necessary notches with a jigsaw. Mark your cut lines in pencil, using a square for neat corners.
Tip!
Use a jigsaw blade that cuts on the upstroke so you can easily follow the line.

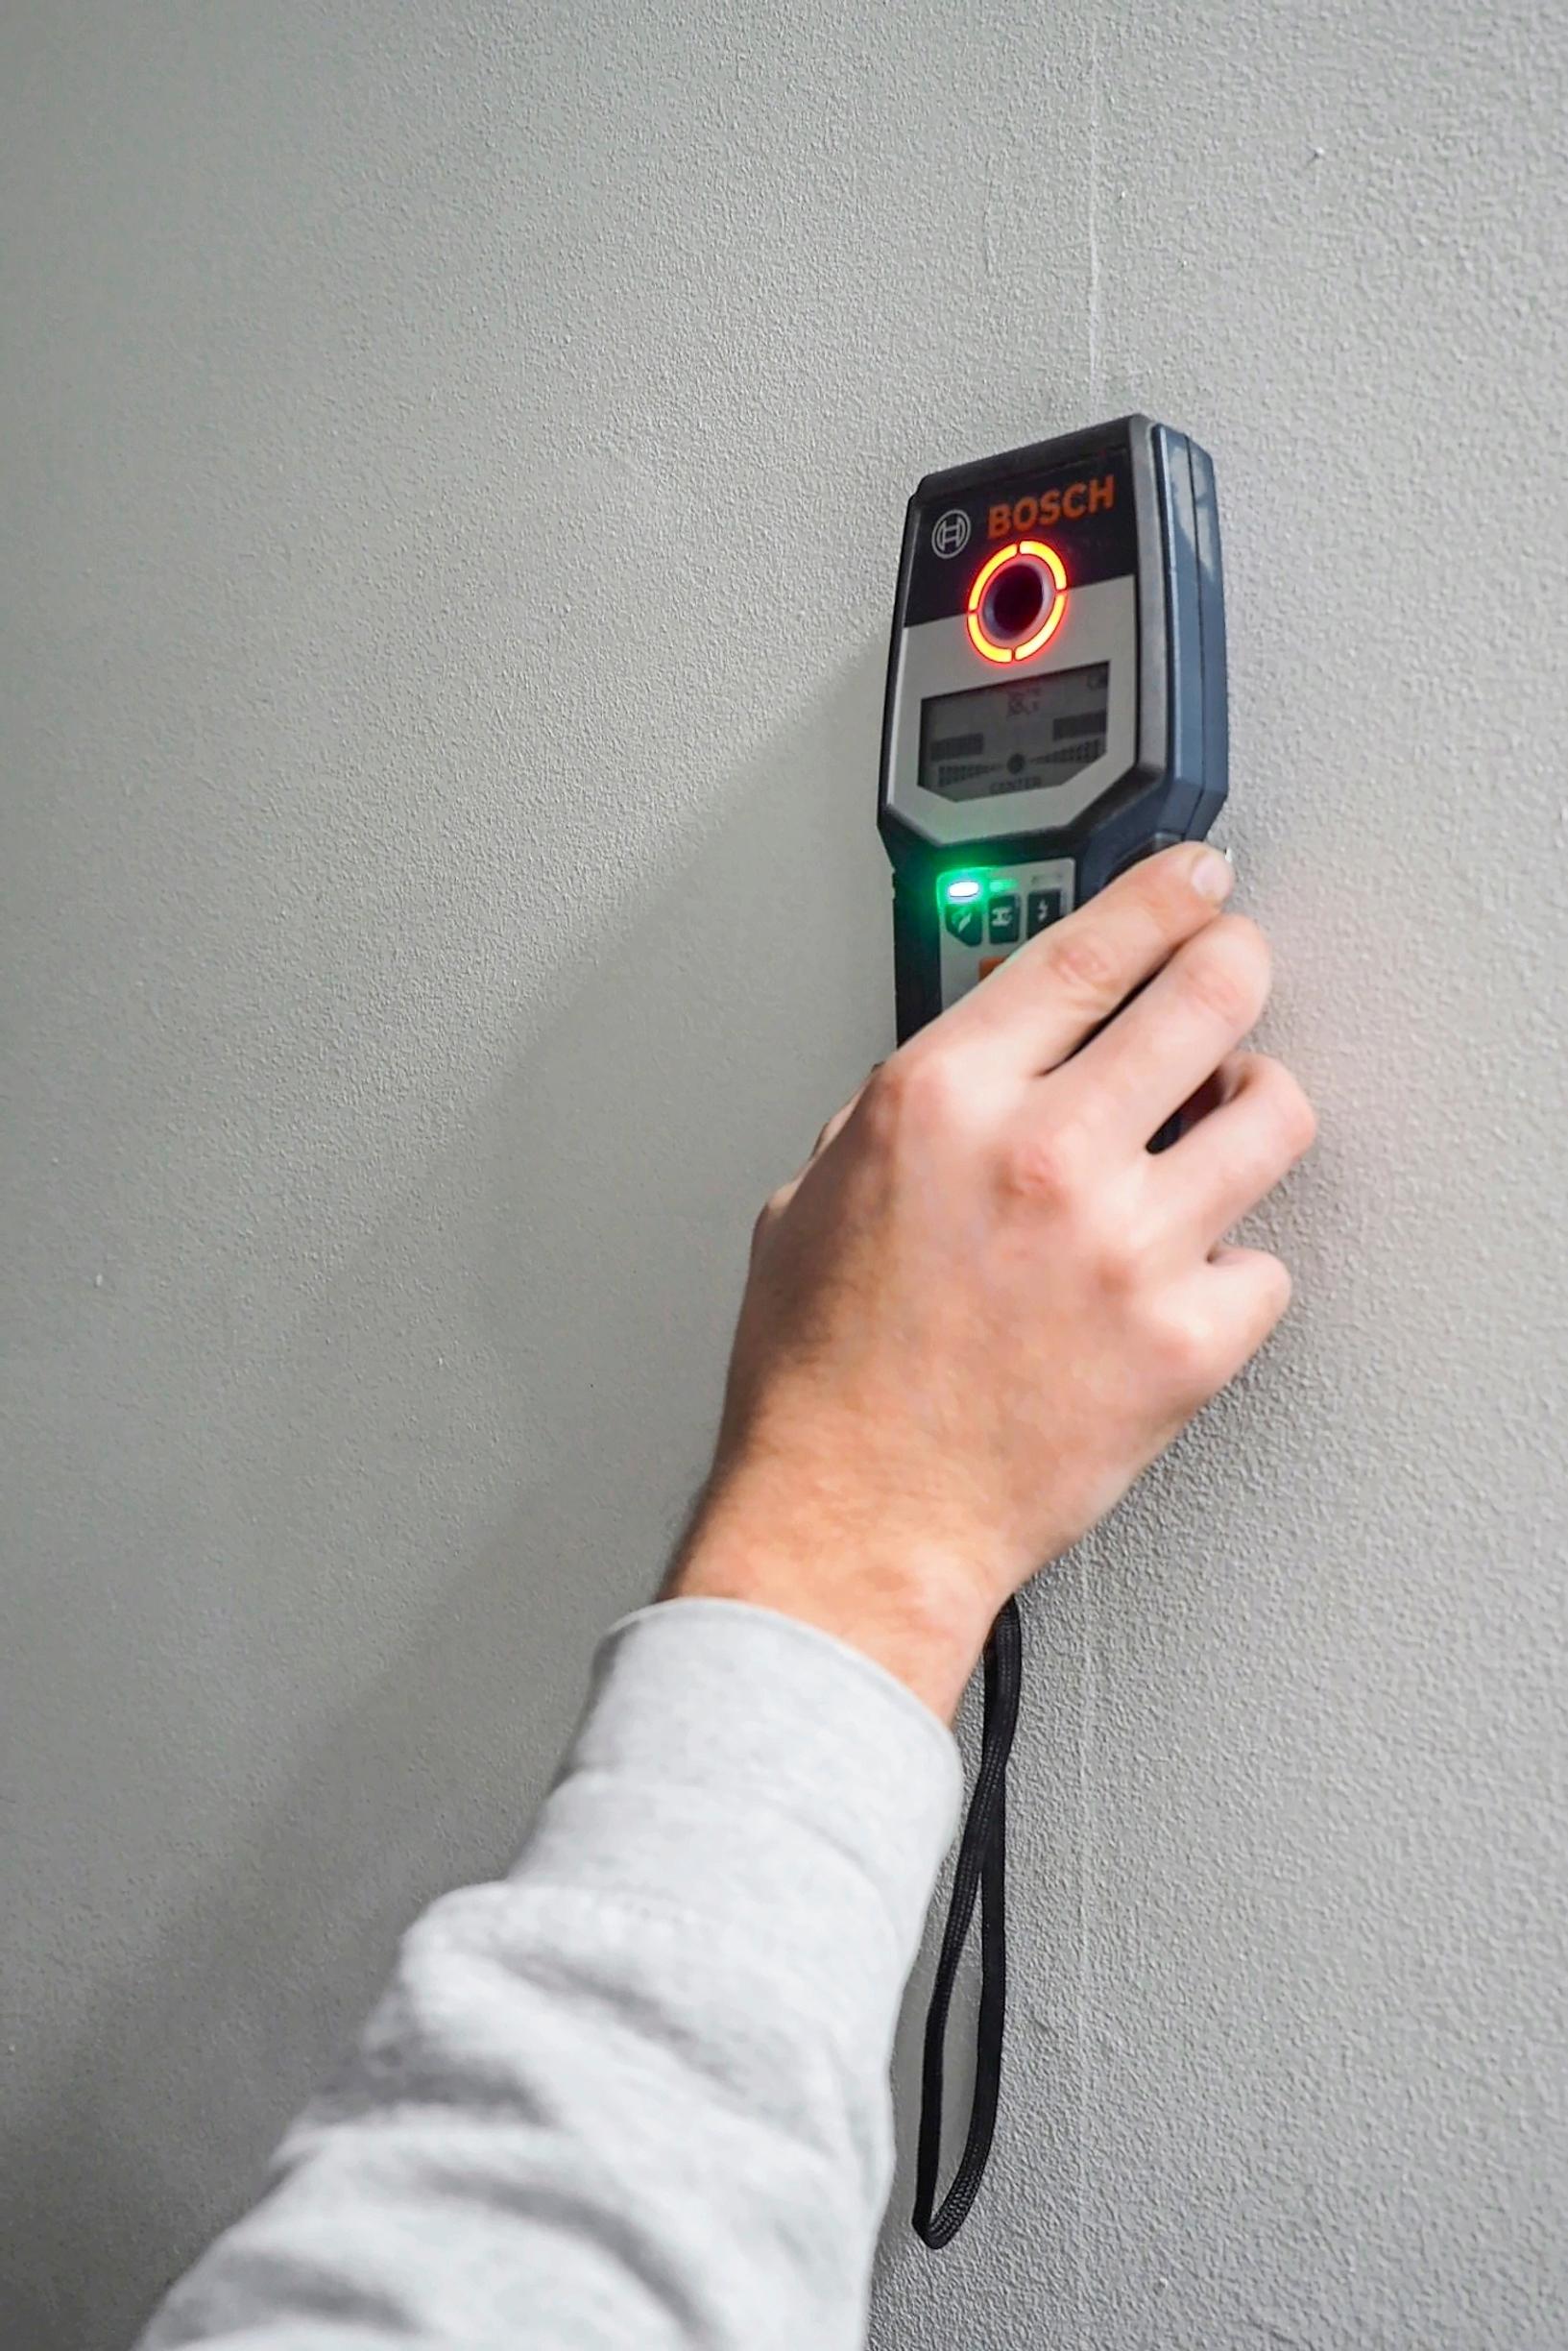
10. Attach the bench. Find the studs using a stud finder or by tapping on the wall, and mark them. If needed, set up a support that matches the bench leg’s height to hold the bench in place while you attach it.

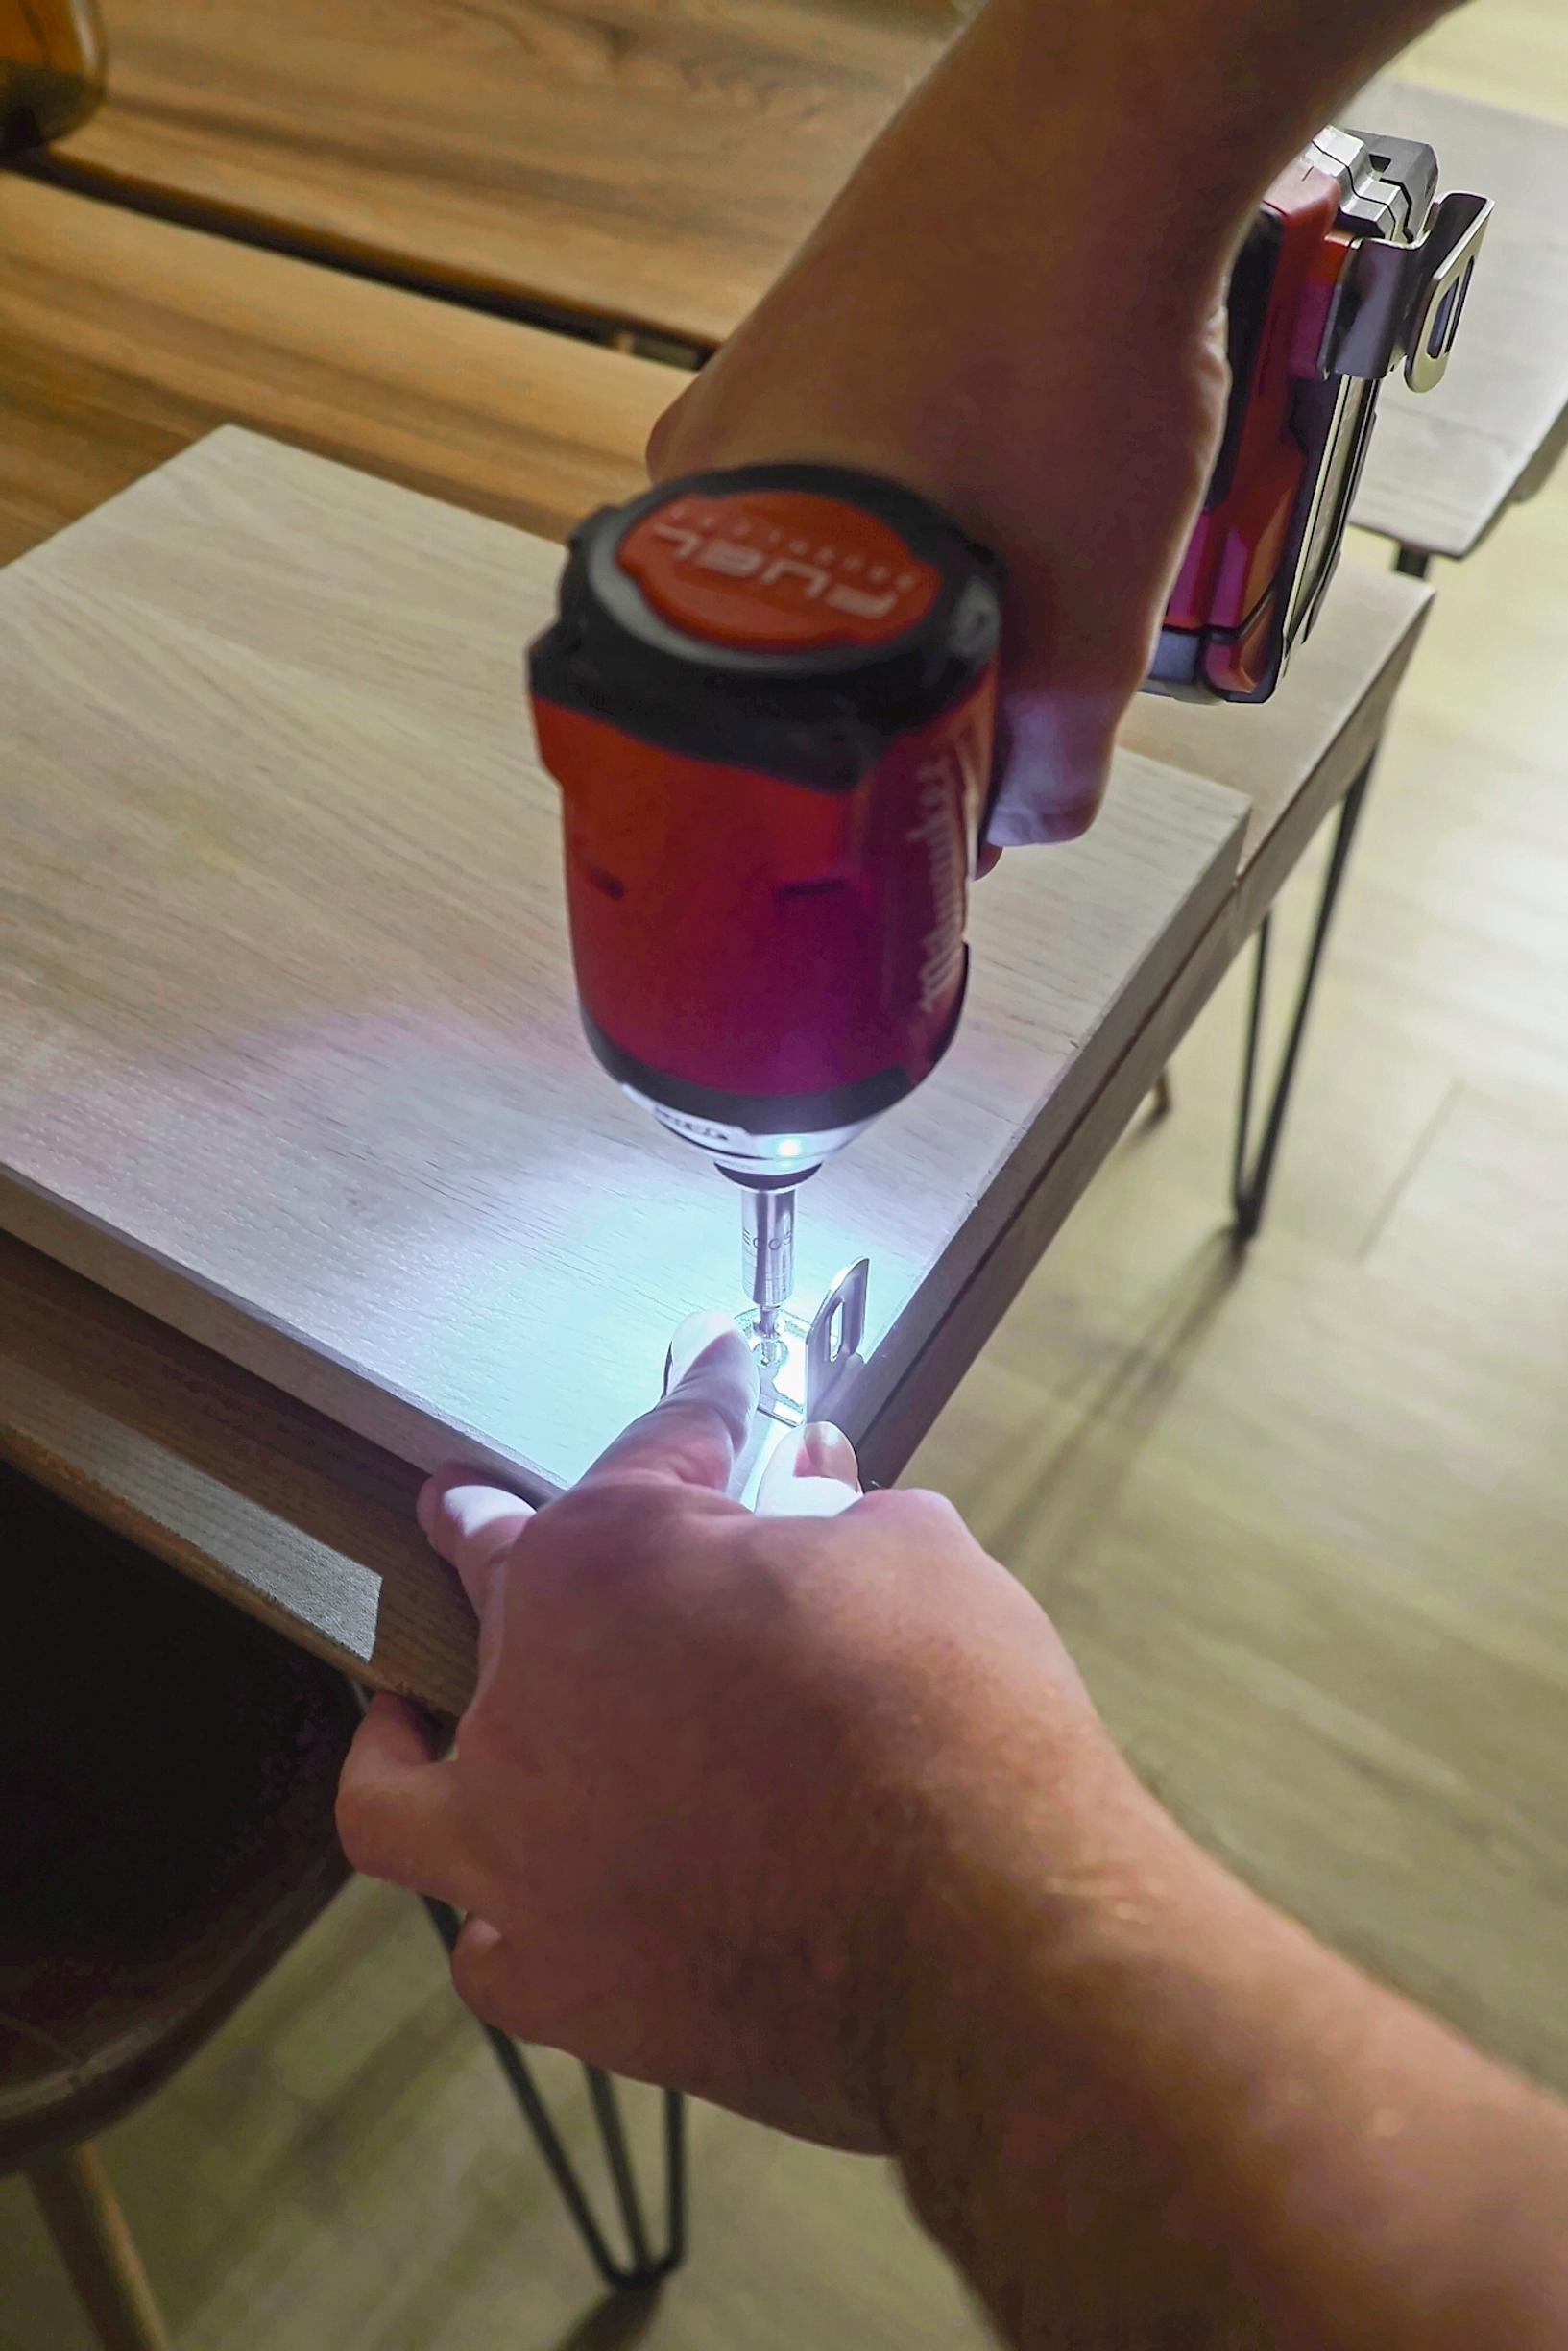
11. Attach a corner brace to the leg with a screwdriver before lifting the bench. Then place the bench on the leg and support. Fasten the braces on the leg to the bench underside.

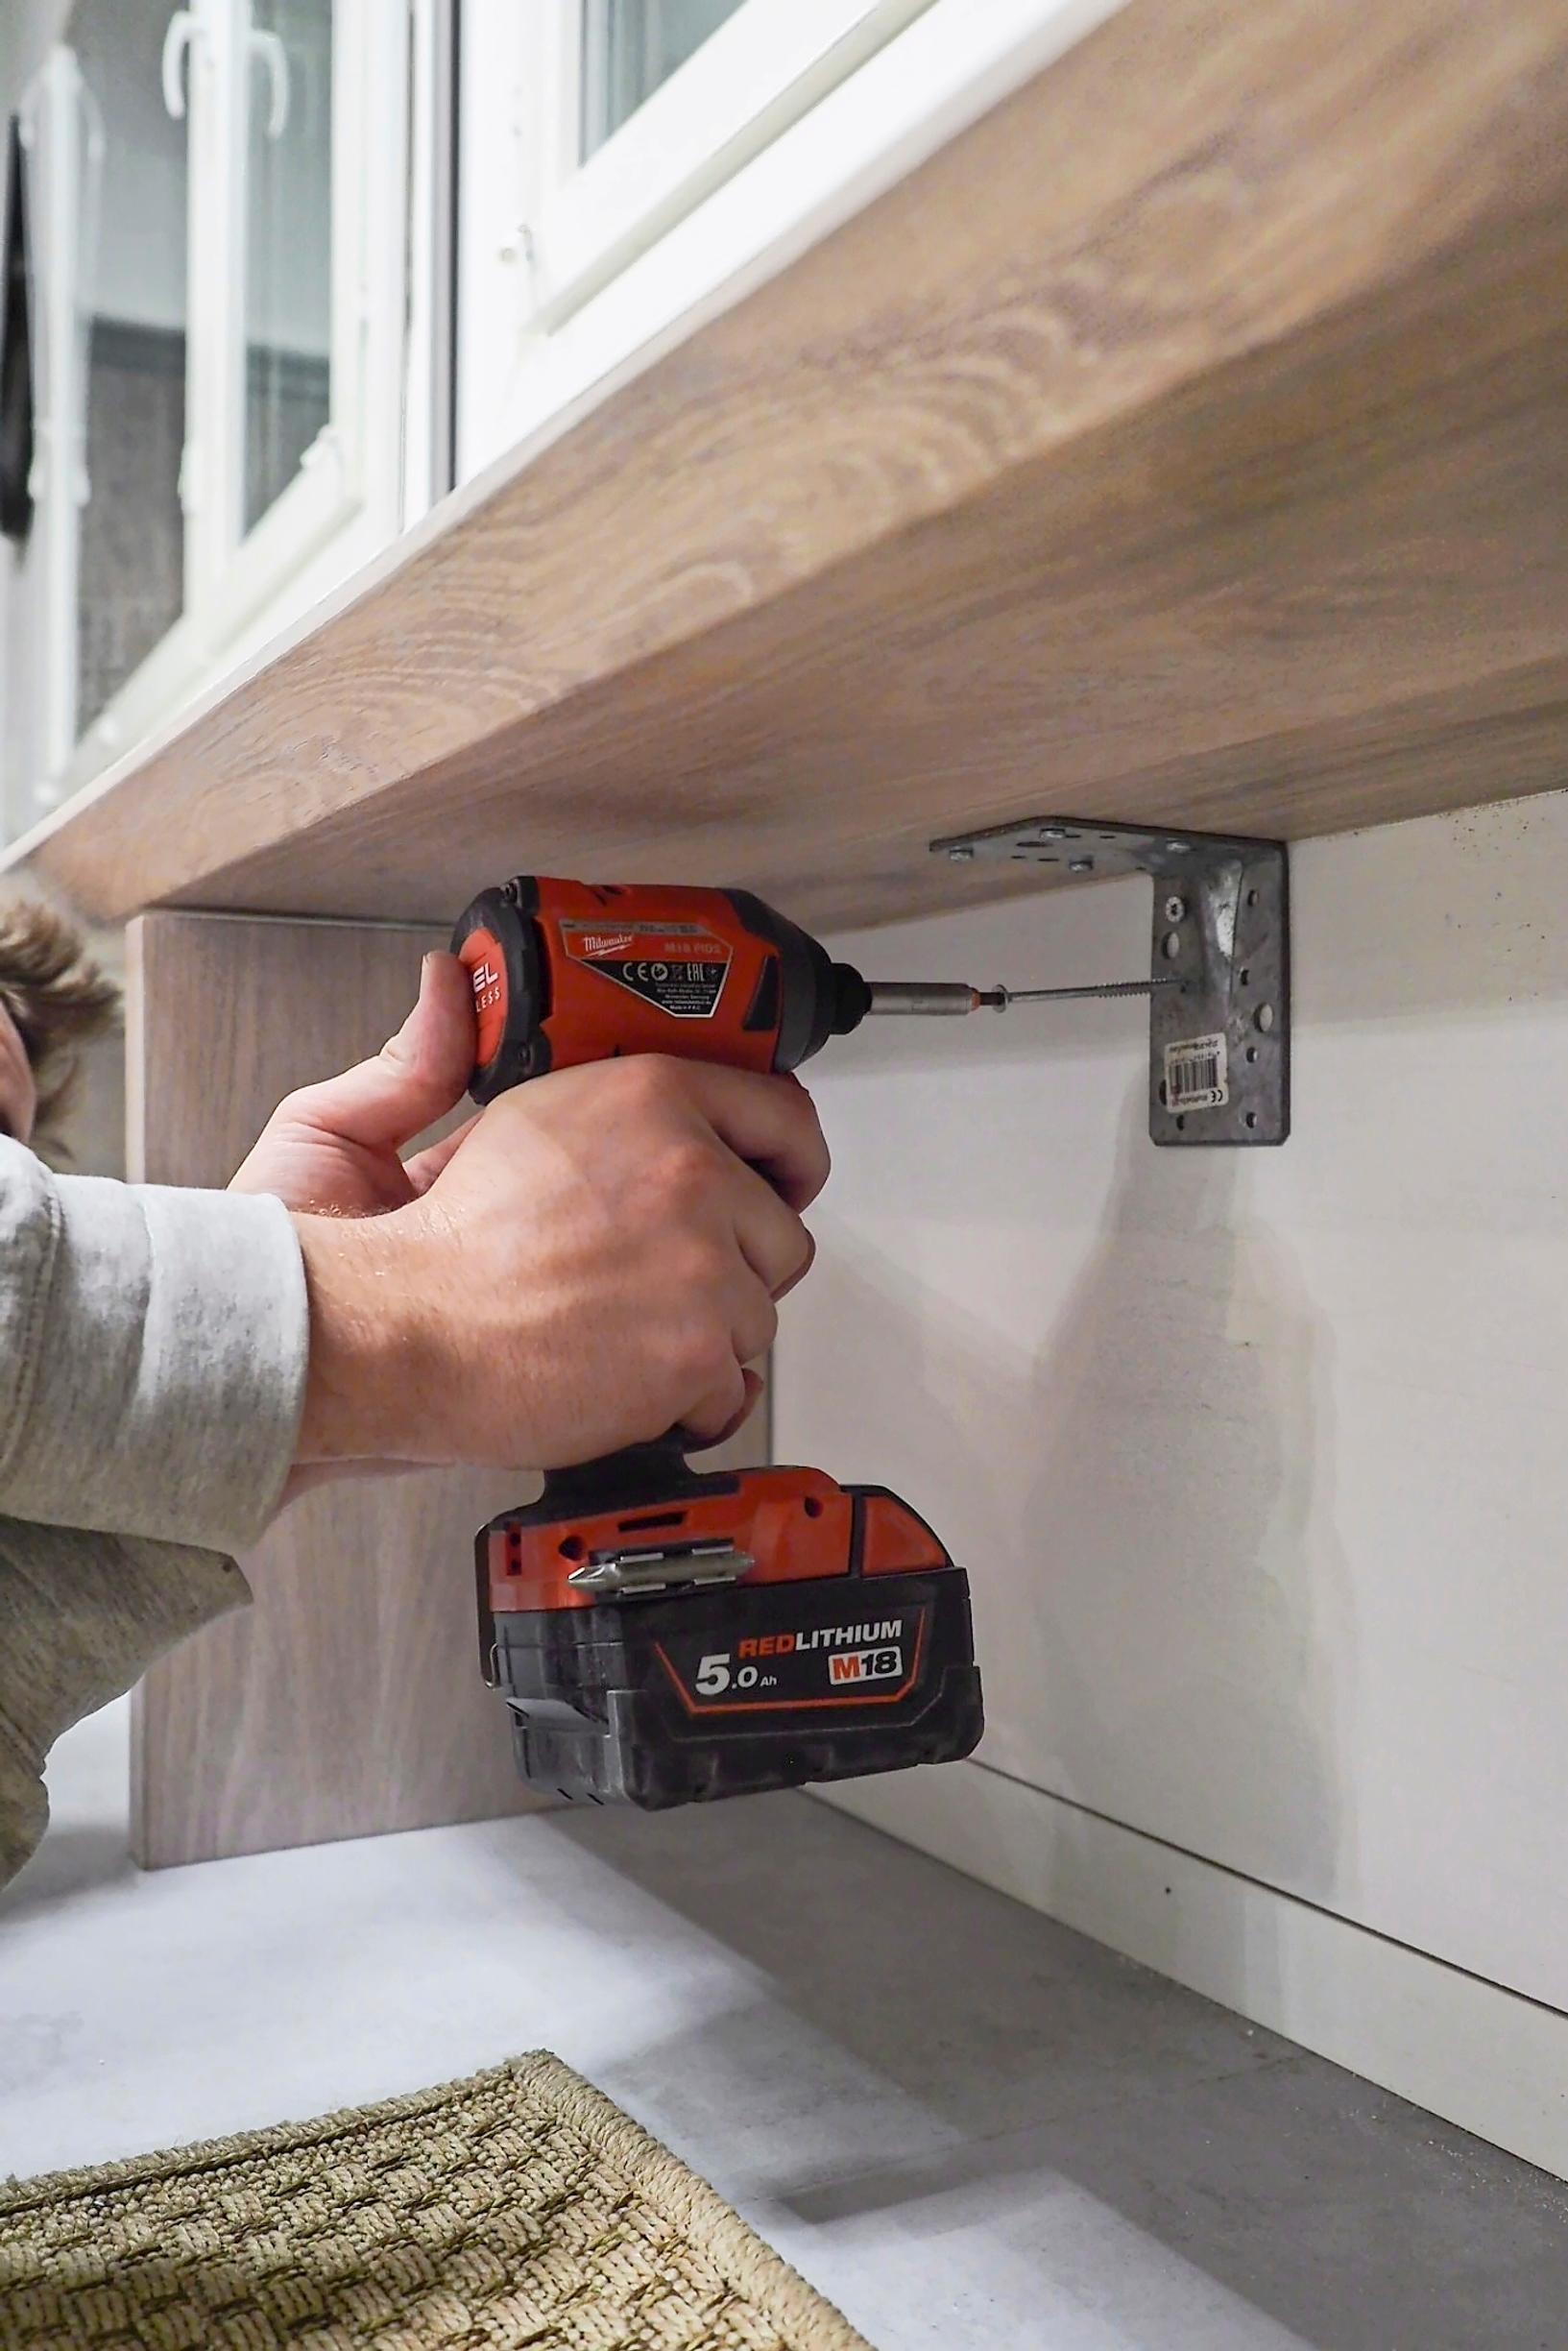
12.Use large reinforced corner braces to screw the bench to the wall. We used five for reliable support. If you need the bench to carry more weight, choose even bigger braces. If you’d prefer not to show long braces, you can support the bench with legs.