
A wall-embedded shelf is a modern and practical solution—see our step by step guide
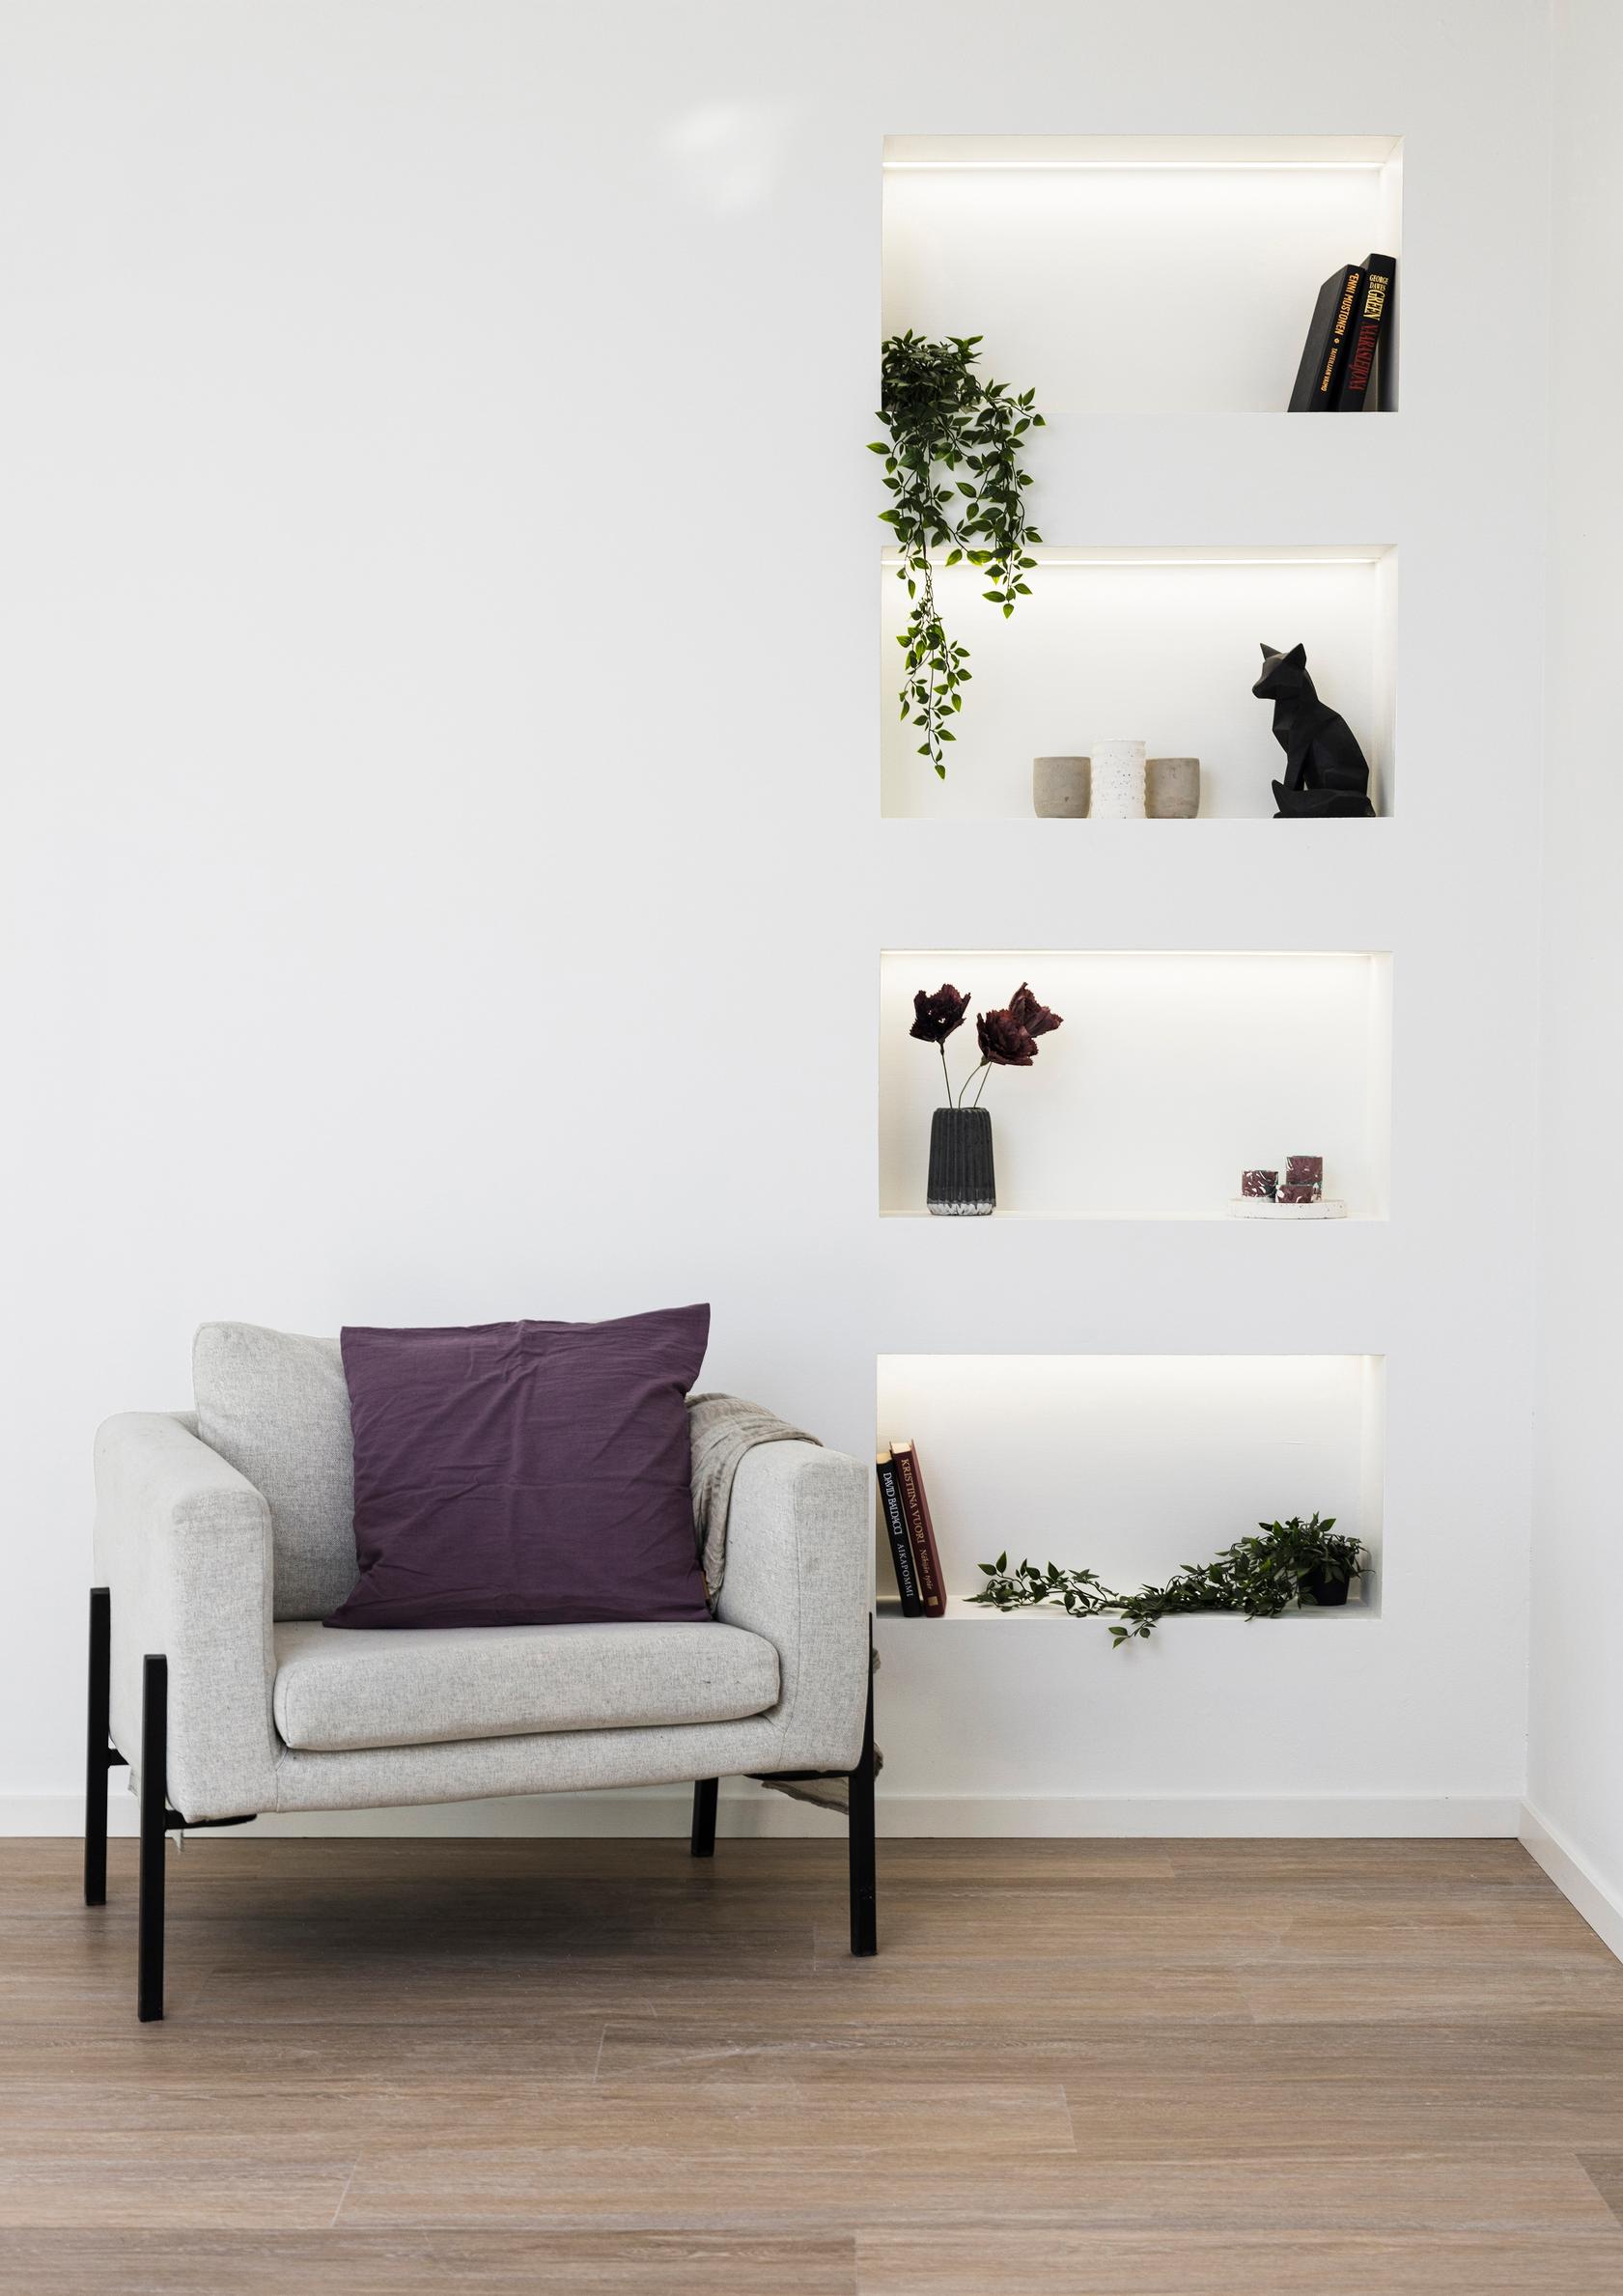
A wall-embedded shelf can complete the look of a room. Shelves around twenty centimeters deep are great for books and small houseplants. You can build yours with or without lights.
Wall-embedded shelf—supplies:
- Particle board
- Screws
- Laminated veneer lumber (LVL)
- Joint compound
- Joint tape
- Glue
- Paint and painting supplies
- Measuring tape
- Line laser
- Jigsaw
- Drill/driver
- Countersink bit
- Drill
- Router
- Furniture roller
- Guide rail
- (Lights)
Wall-embedded shelf—instructions:
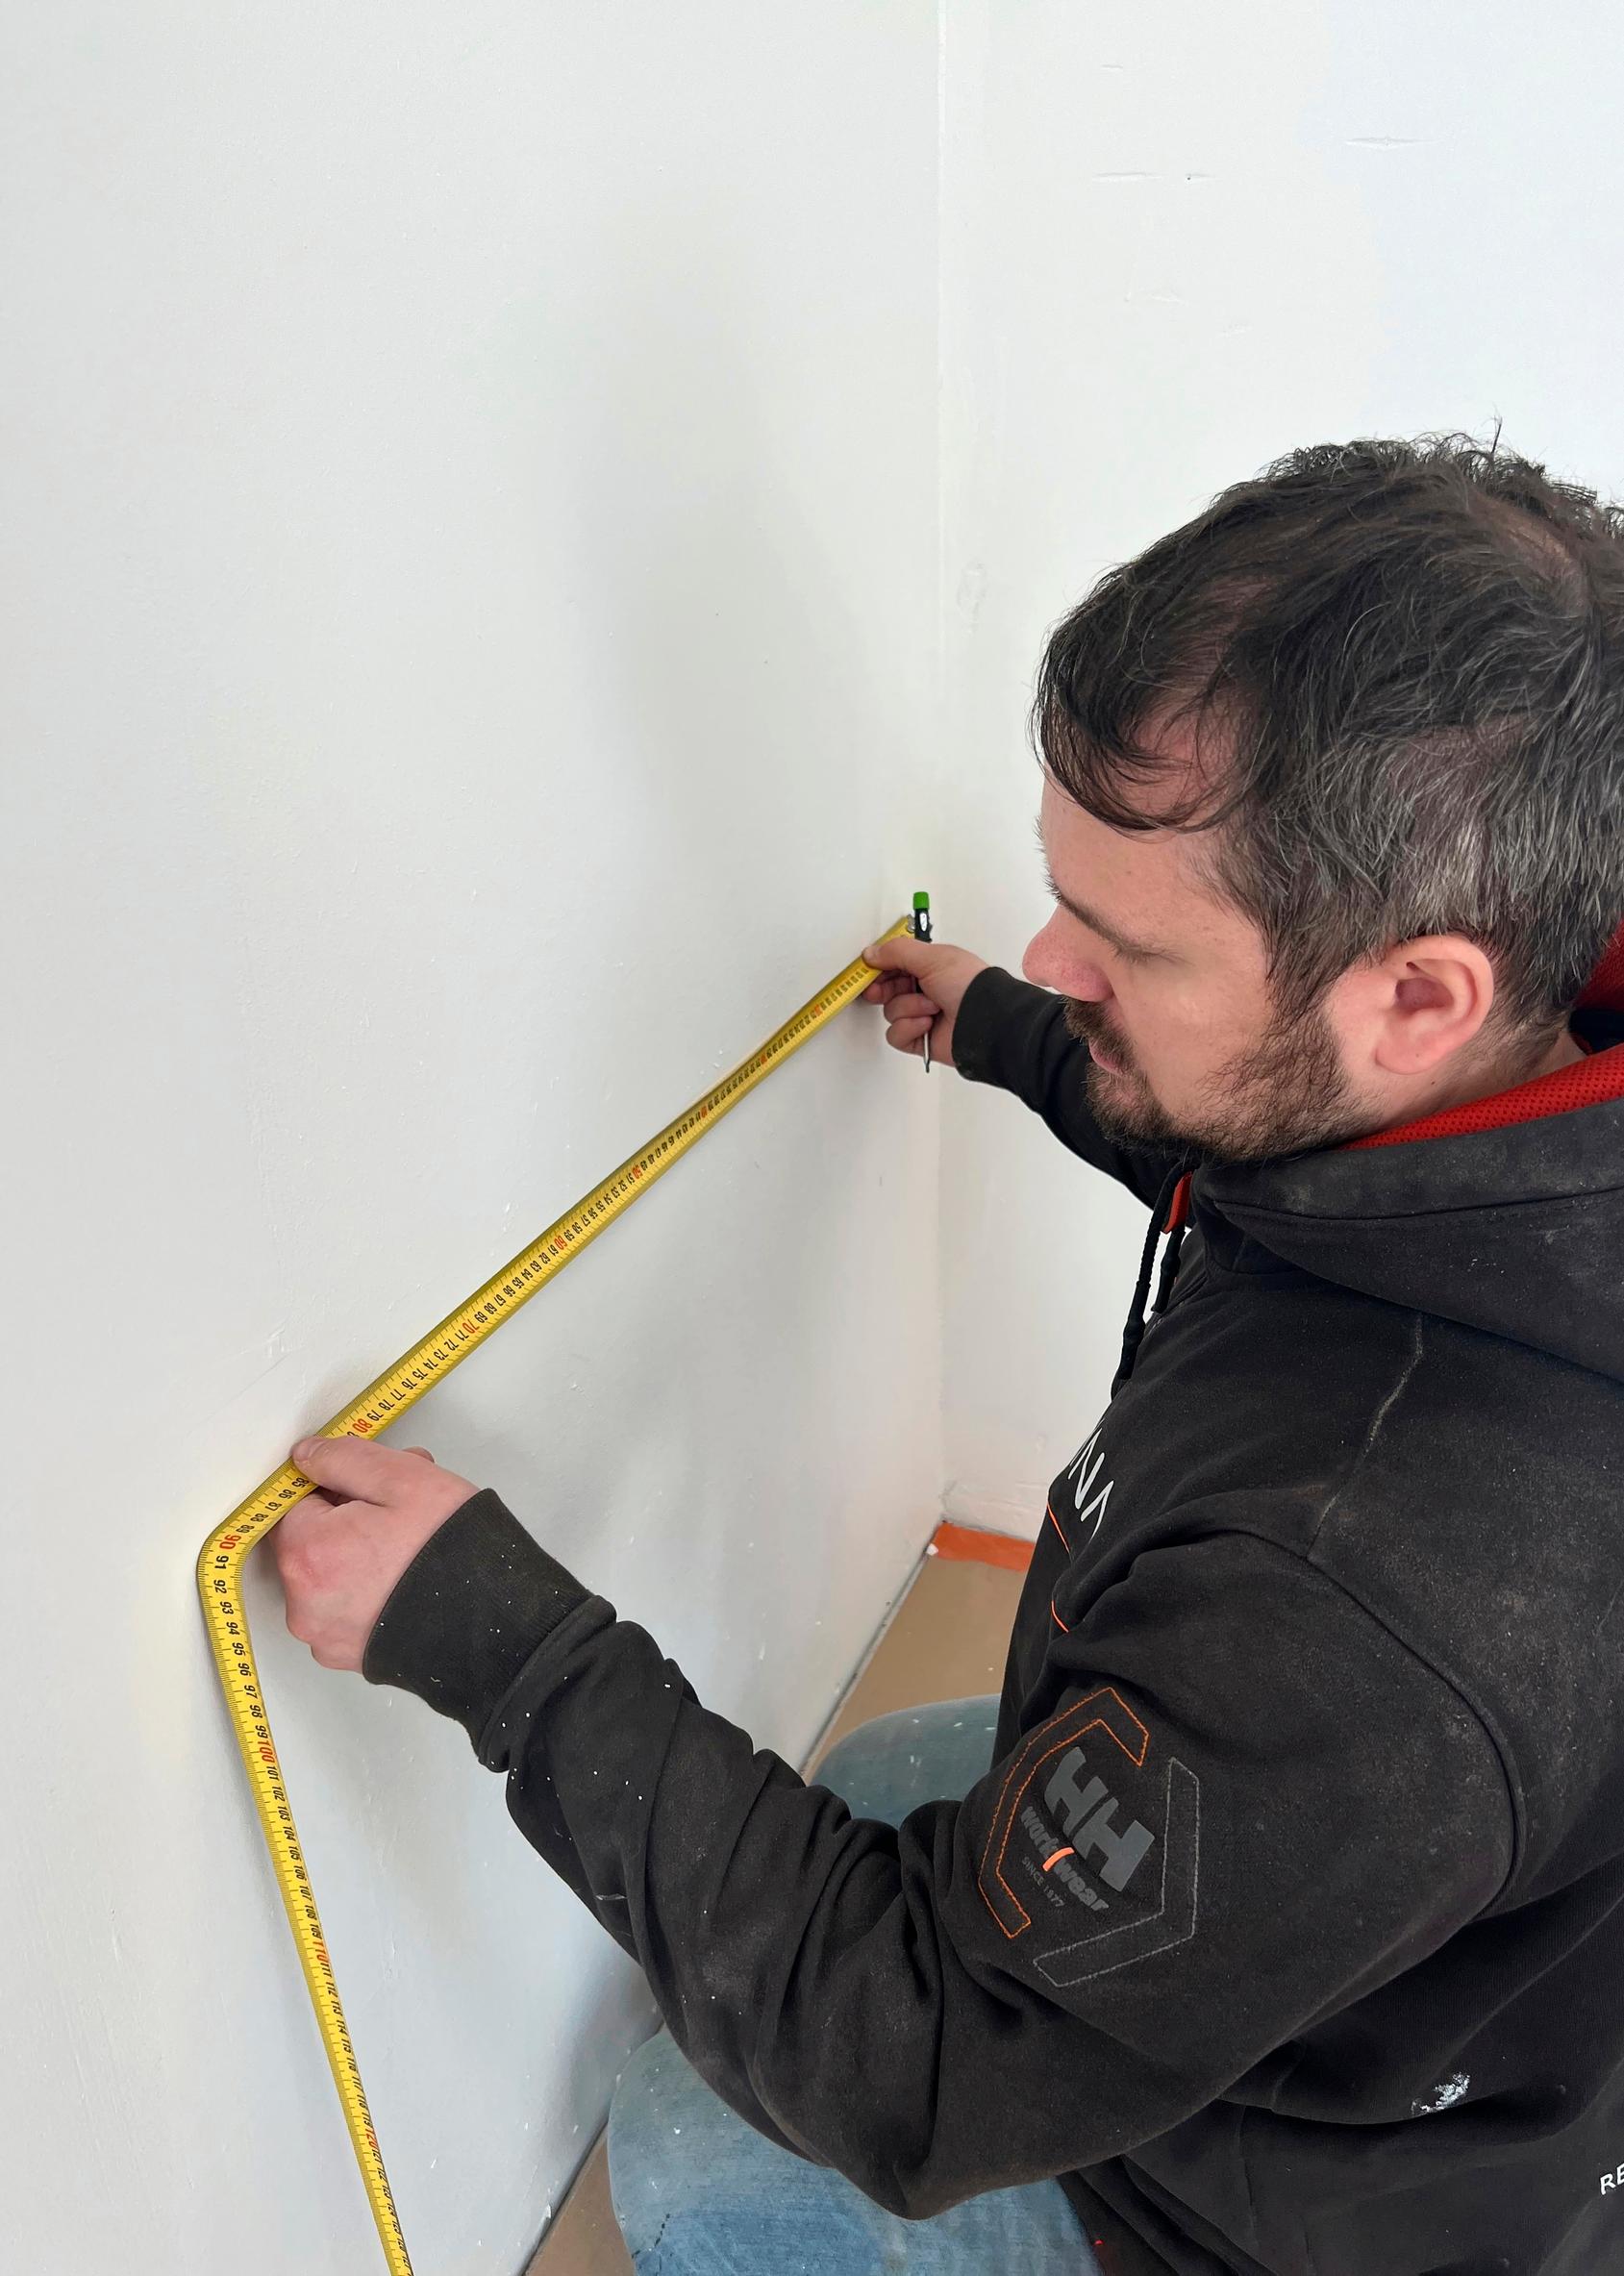
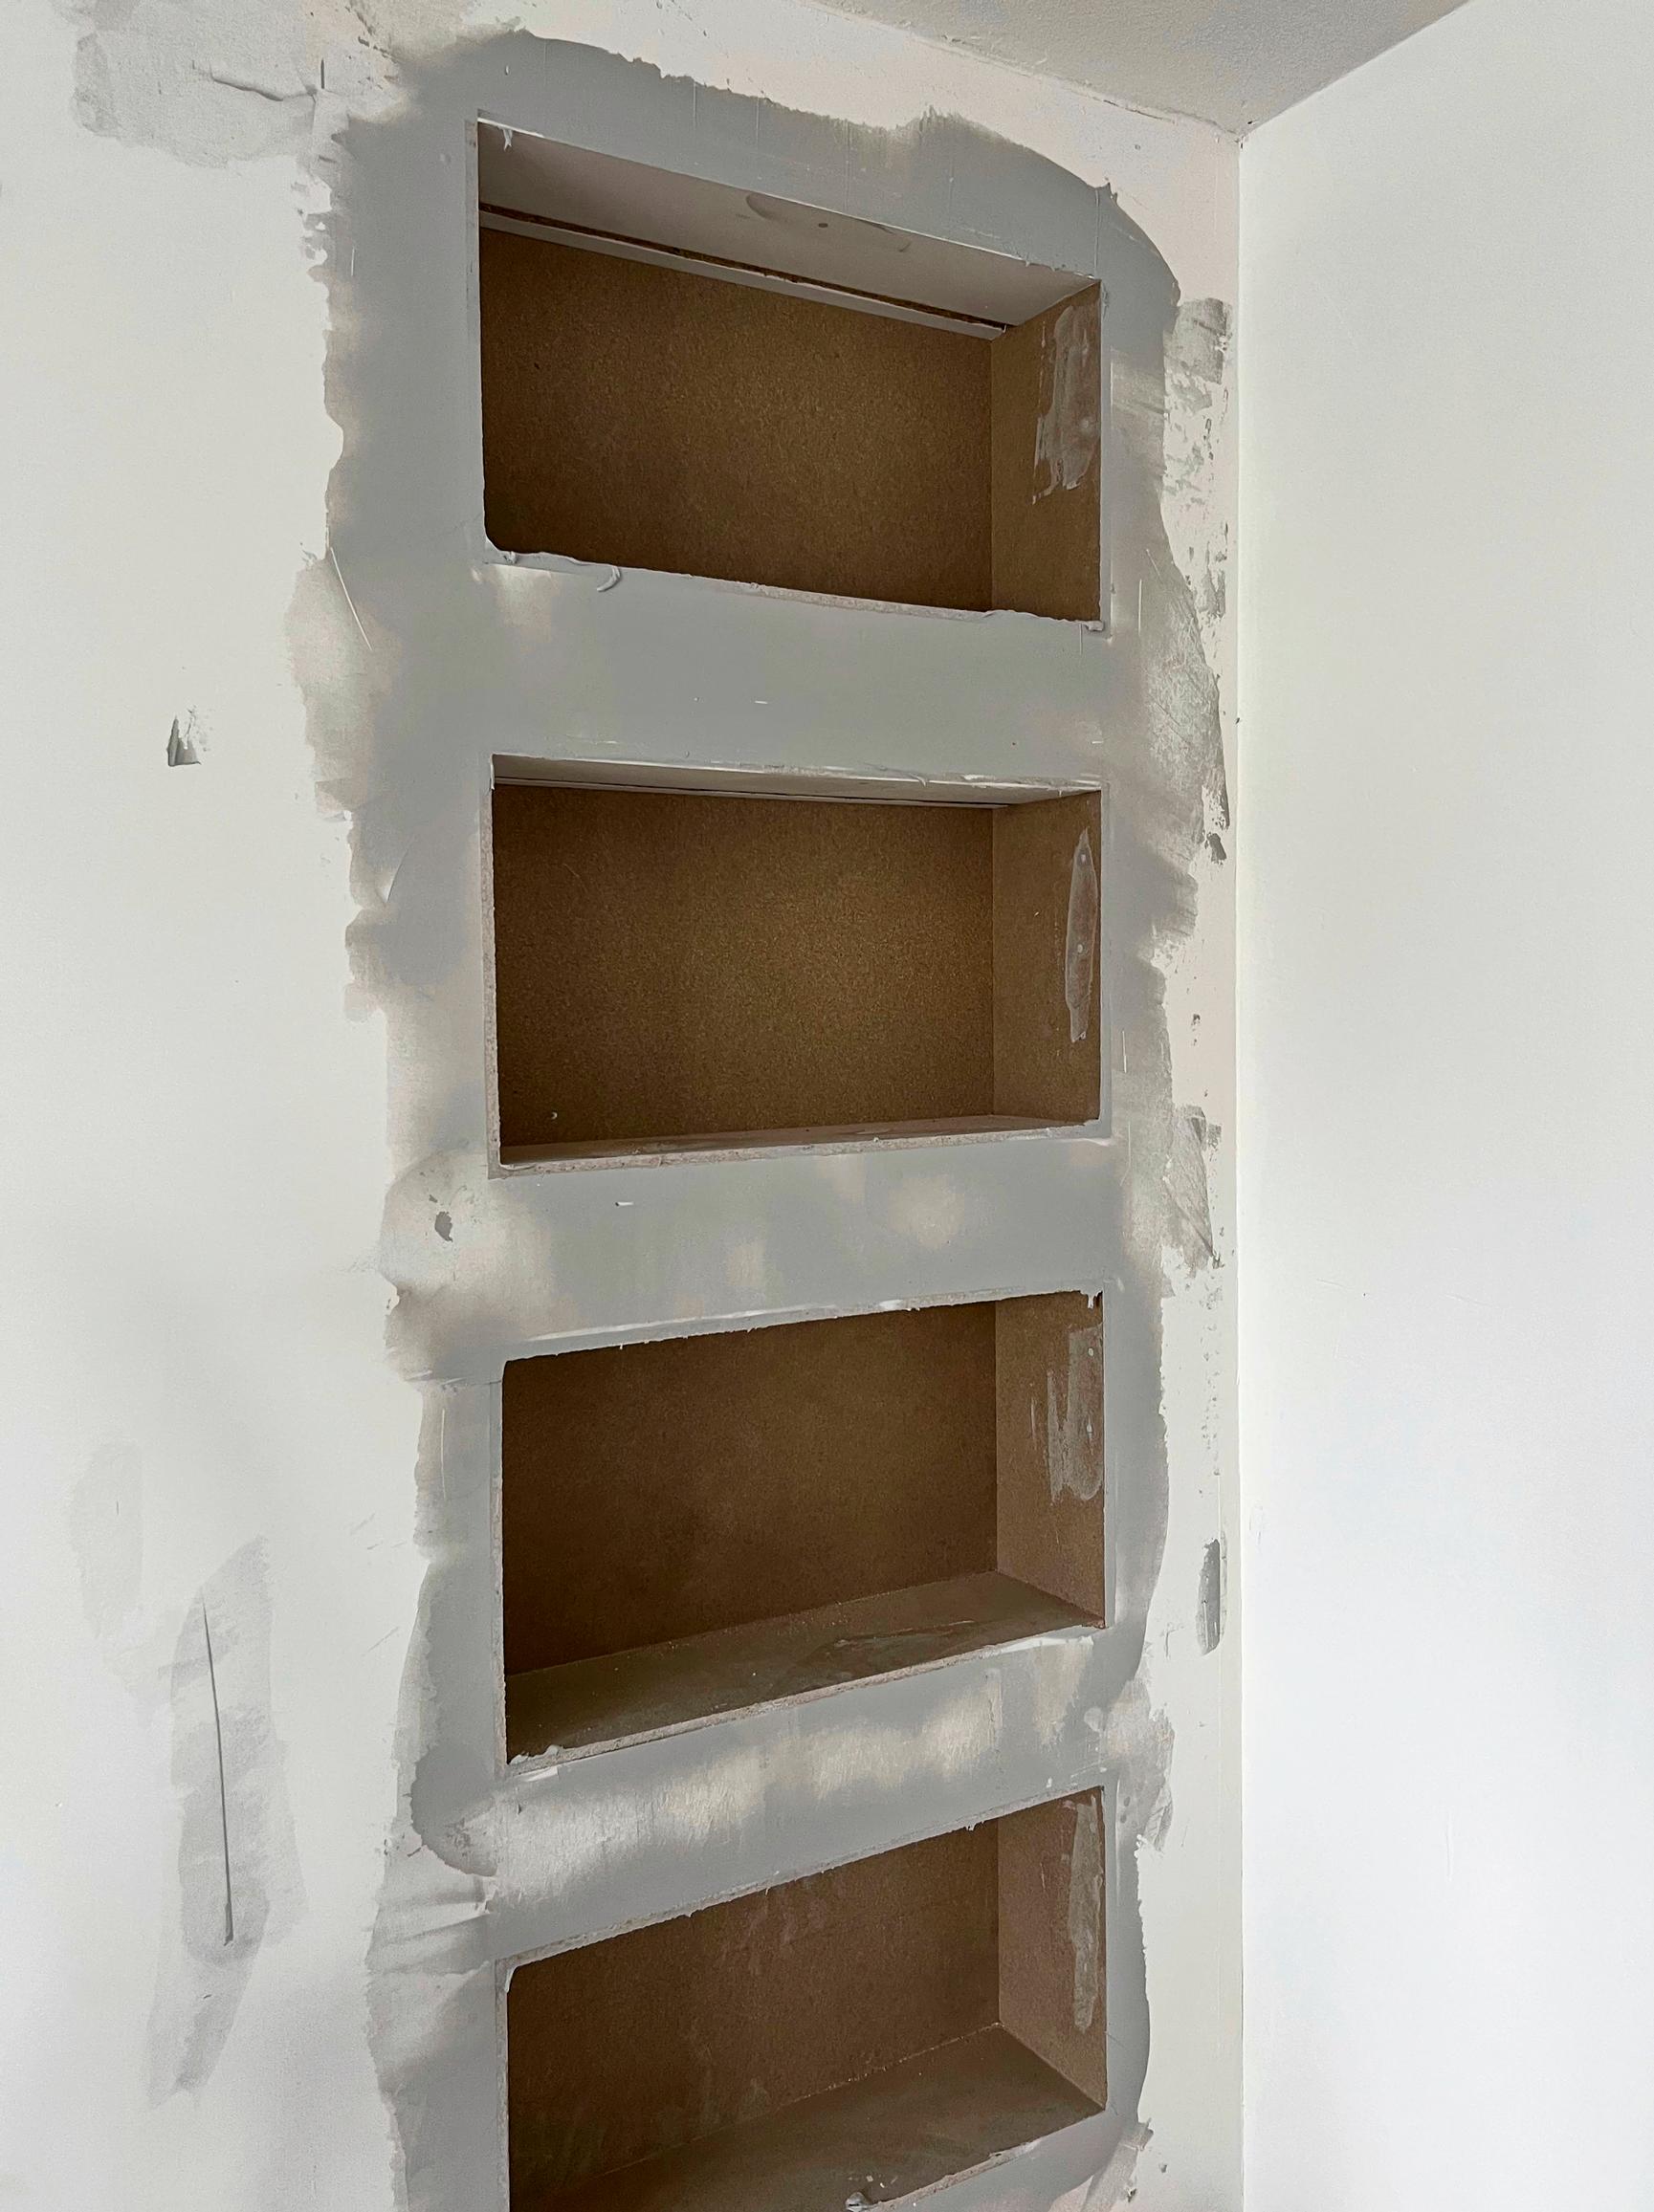
1. Begin by marking where the shelf will go on the wall. If you want a unit that’s deeper than the thickness of the partition wall, choose a spot that allows the shelf to extend into the next room. Check the wall structure to ensure there are no mechanicals, like electrical wiring or pipes, where you’ll cut. Protect the area. In this example, the shelf is 200 mm deep and extends into a walk-in closet. The walls are made of drywall.
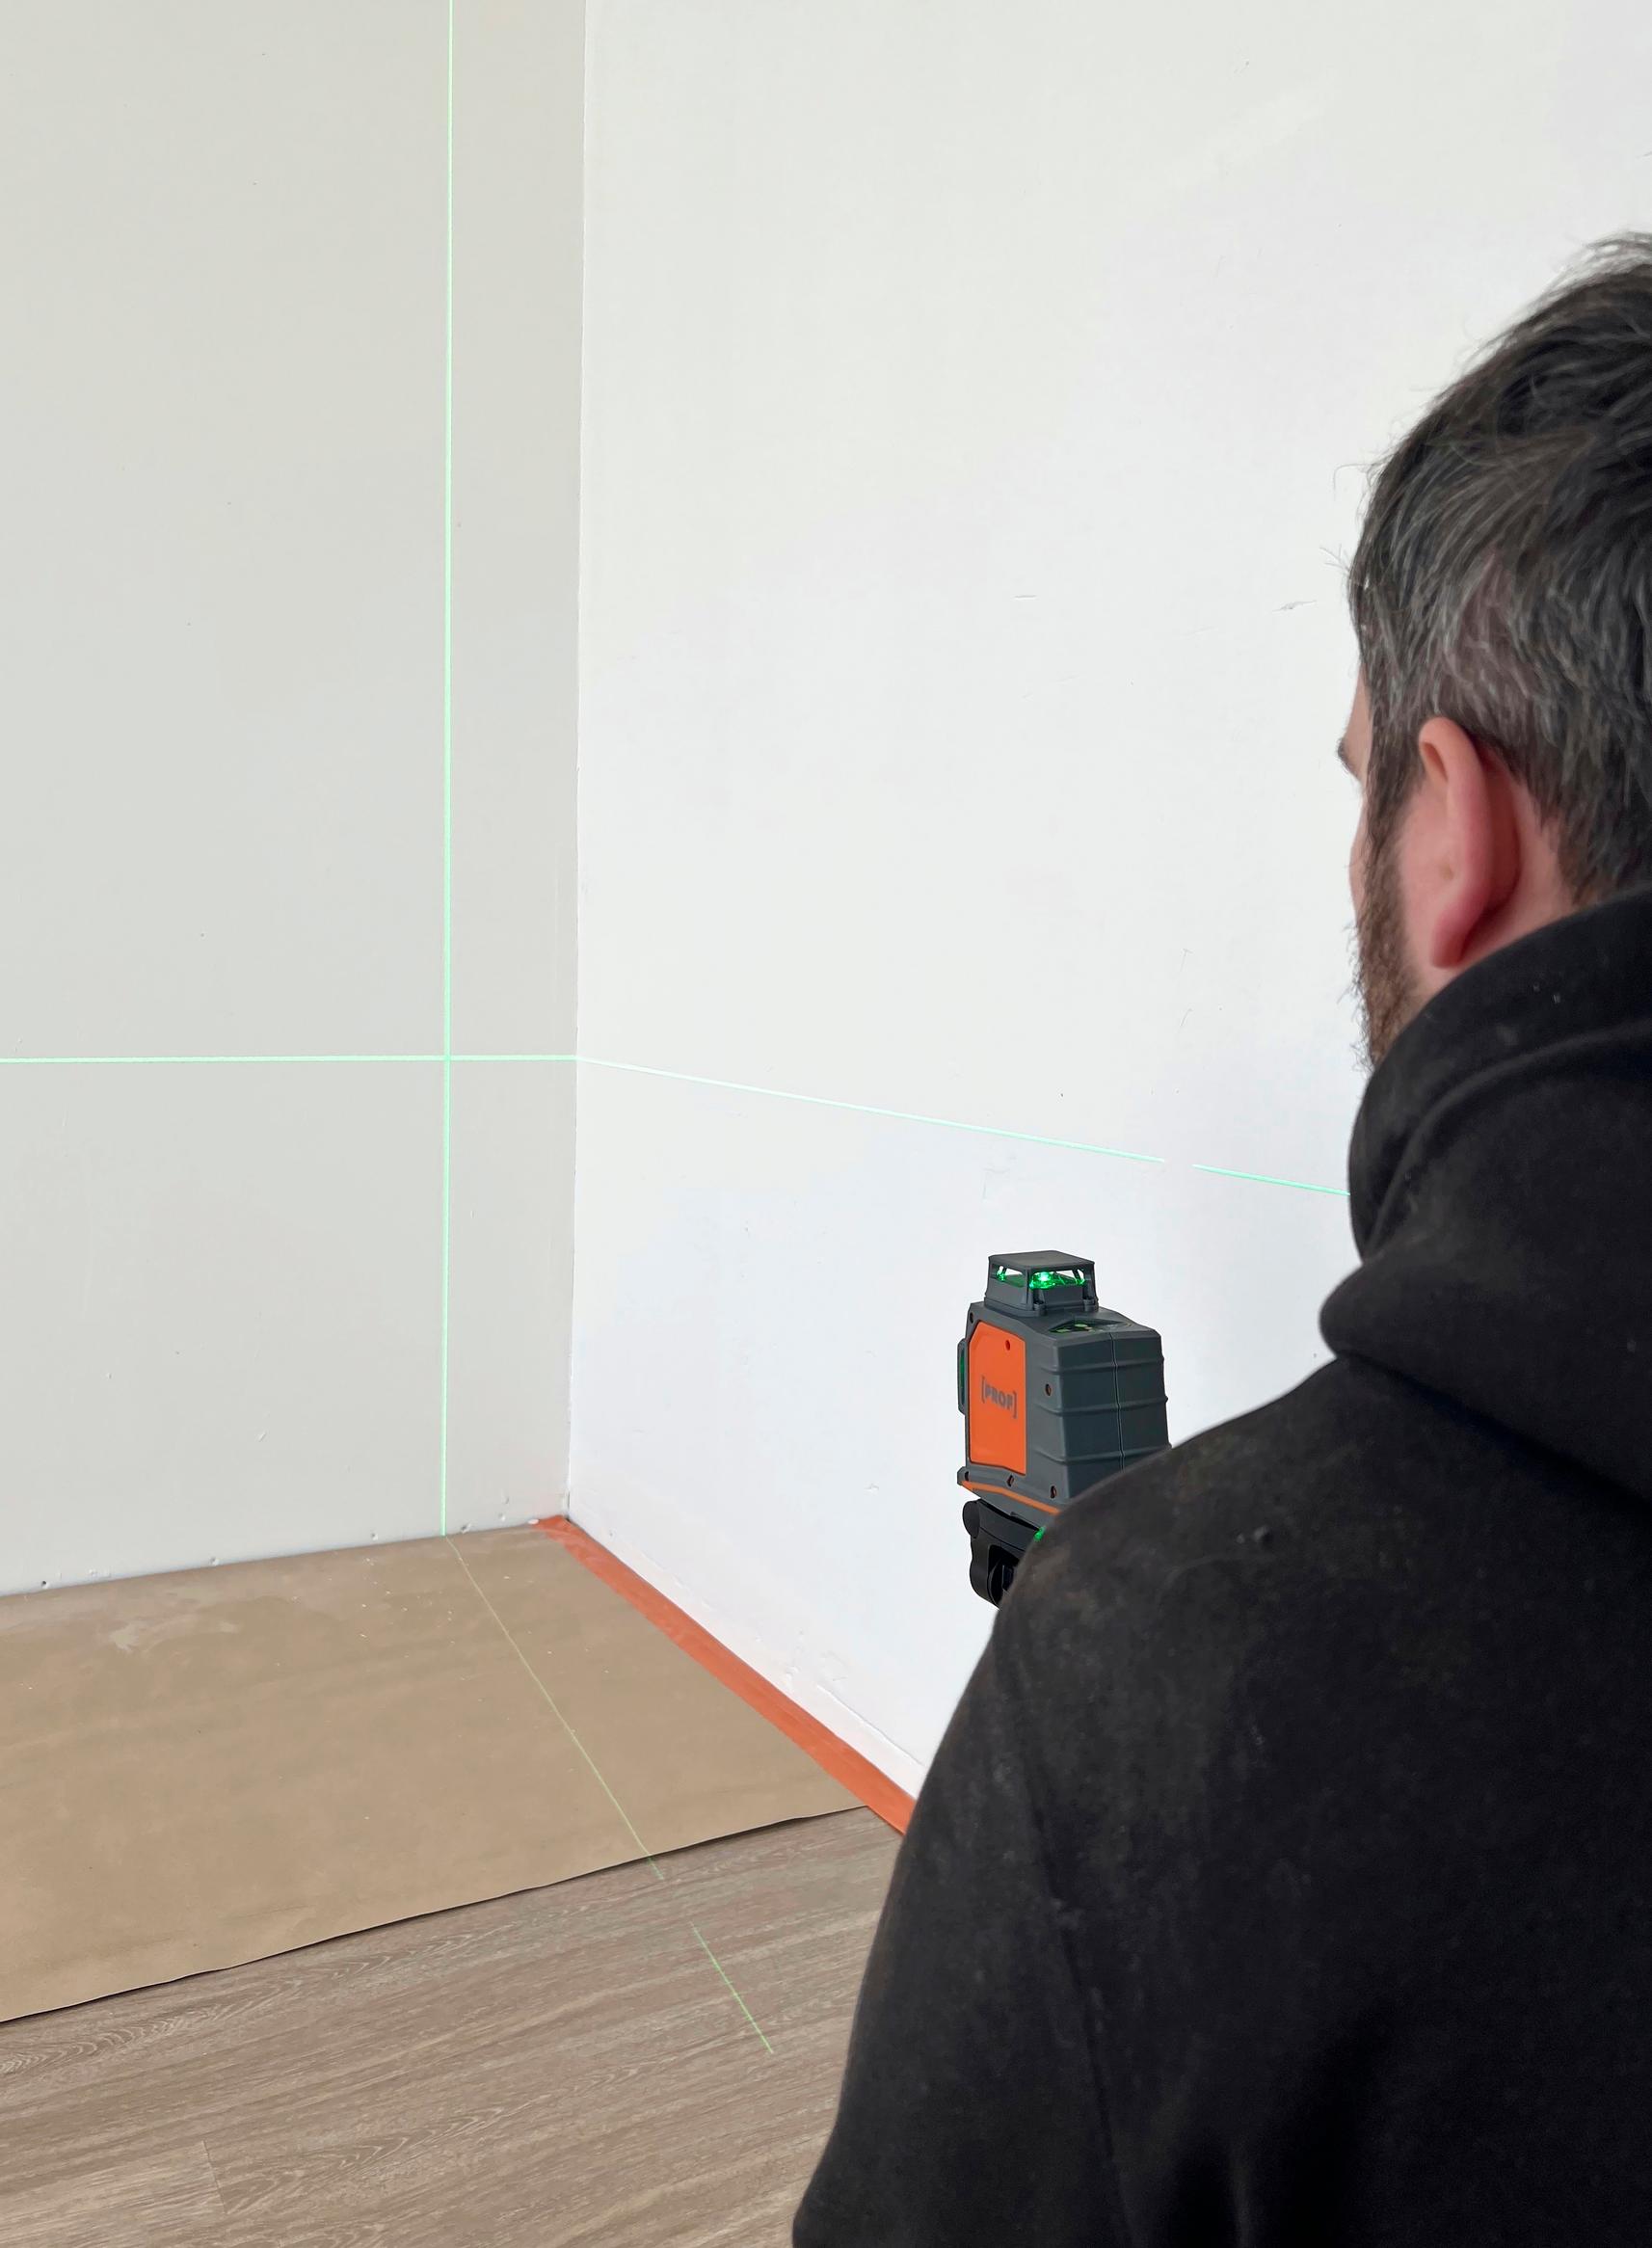
2. Draw the openings on the wall and make sure they’re straight. Remember, the opening isn’t the shelf’s inner measurement but the box’s outer measurement. In this example, each shelf is 700 mm wide and 370 mm high. The particleboard was 11 mm thick, which means the marked openings were 722 mm by 392 mm.
Tip!
A line laser is great for checking alignment and positioning.
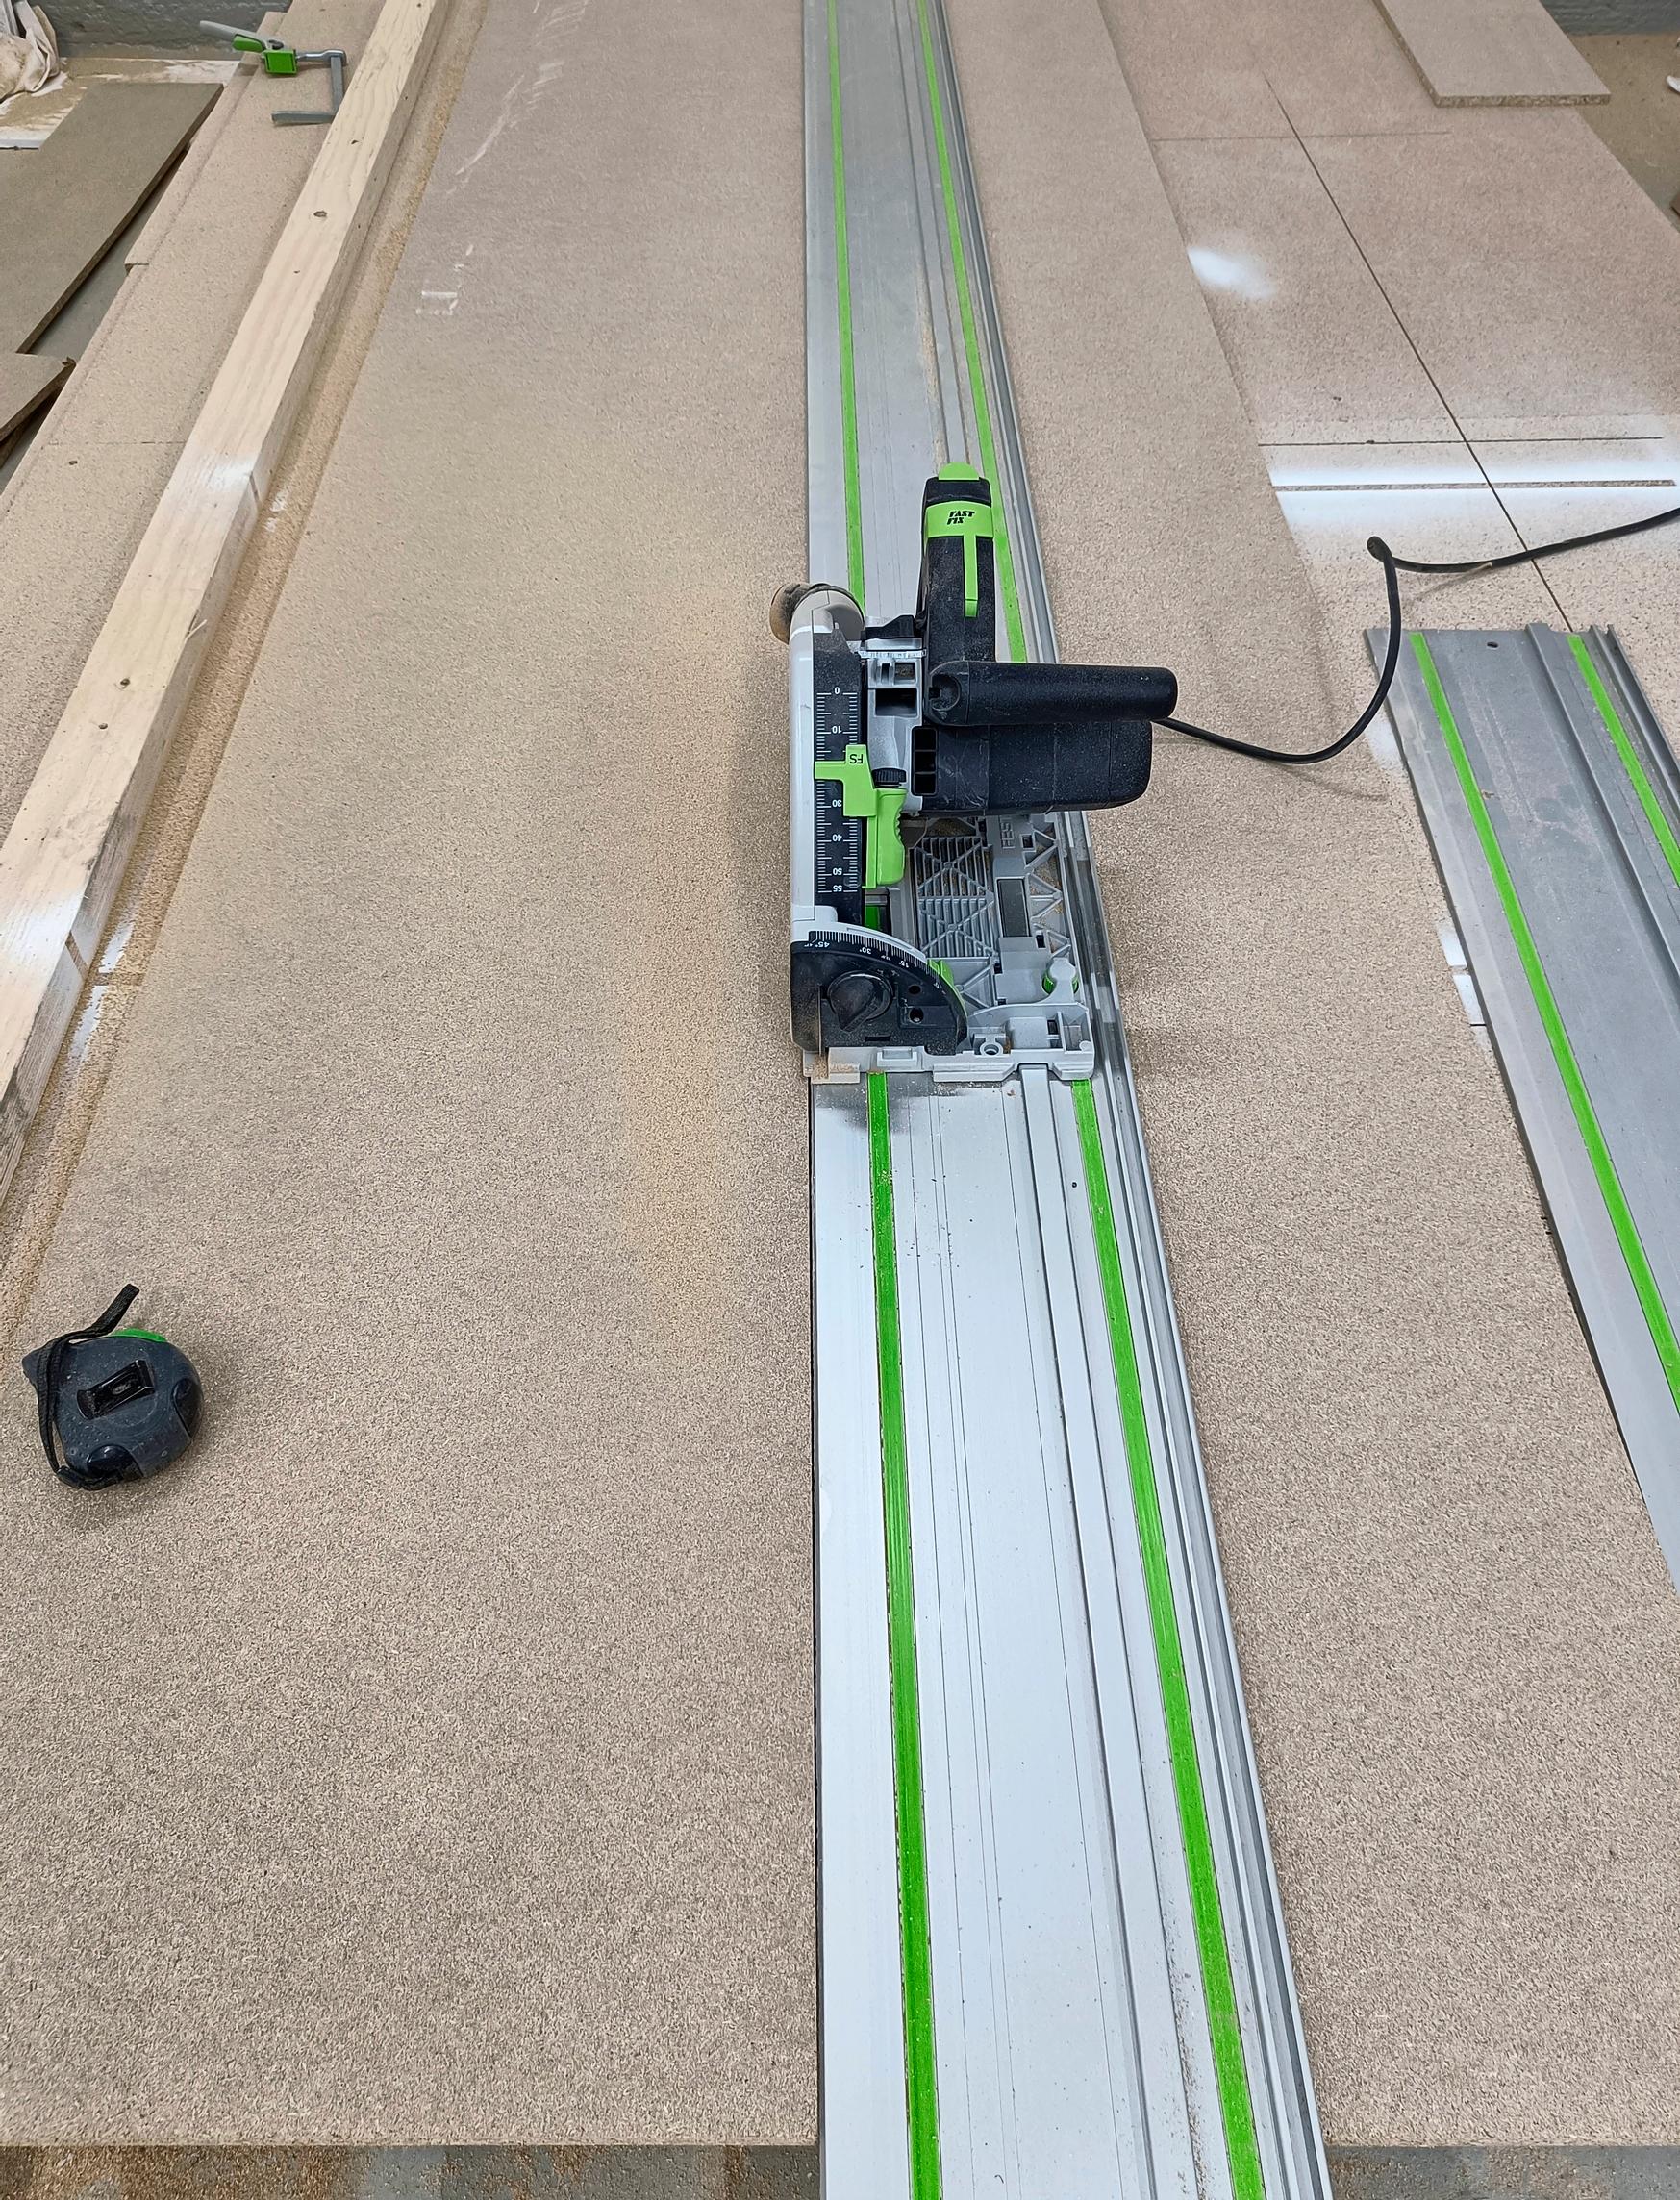
3. Cut the necessary parts for the boxes from the particleboard. Each box needs two side pieces for the shelf’s interior height and box depth. The top and bottom pieces are the interior width plus 2 x the particleboard thickness, with the same width as the sides. You also need a back panel that is the interior width plus 2 x the thickness of the particle board, and the interior height plus 2 x the thickness of the particle board.
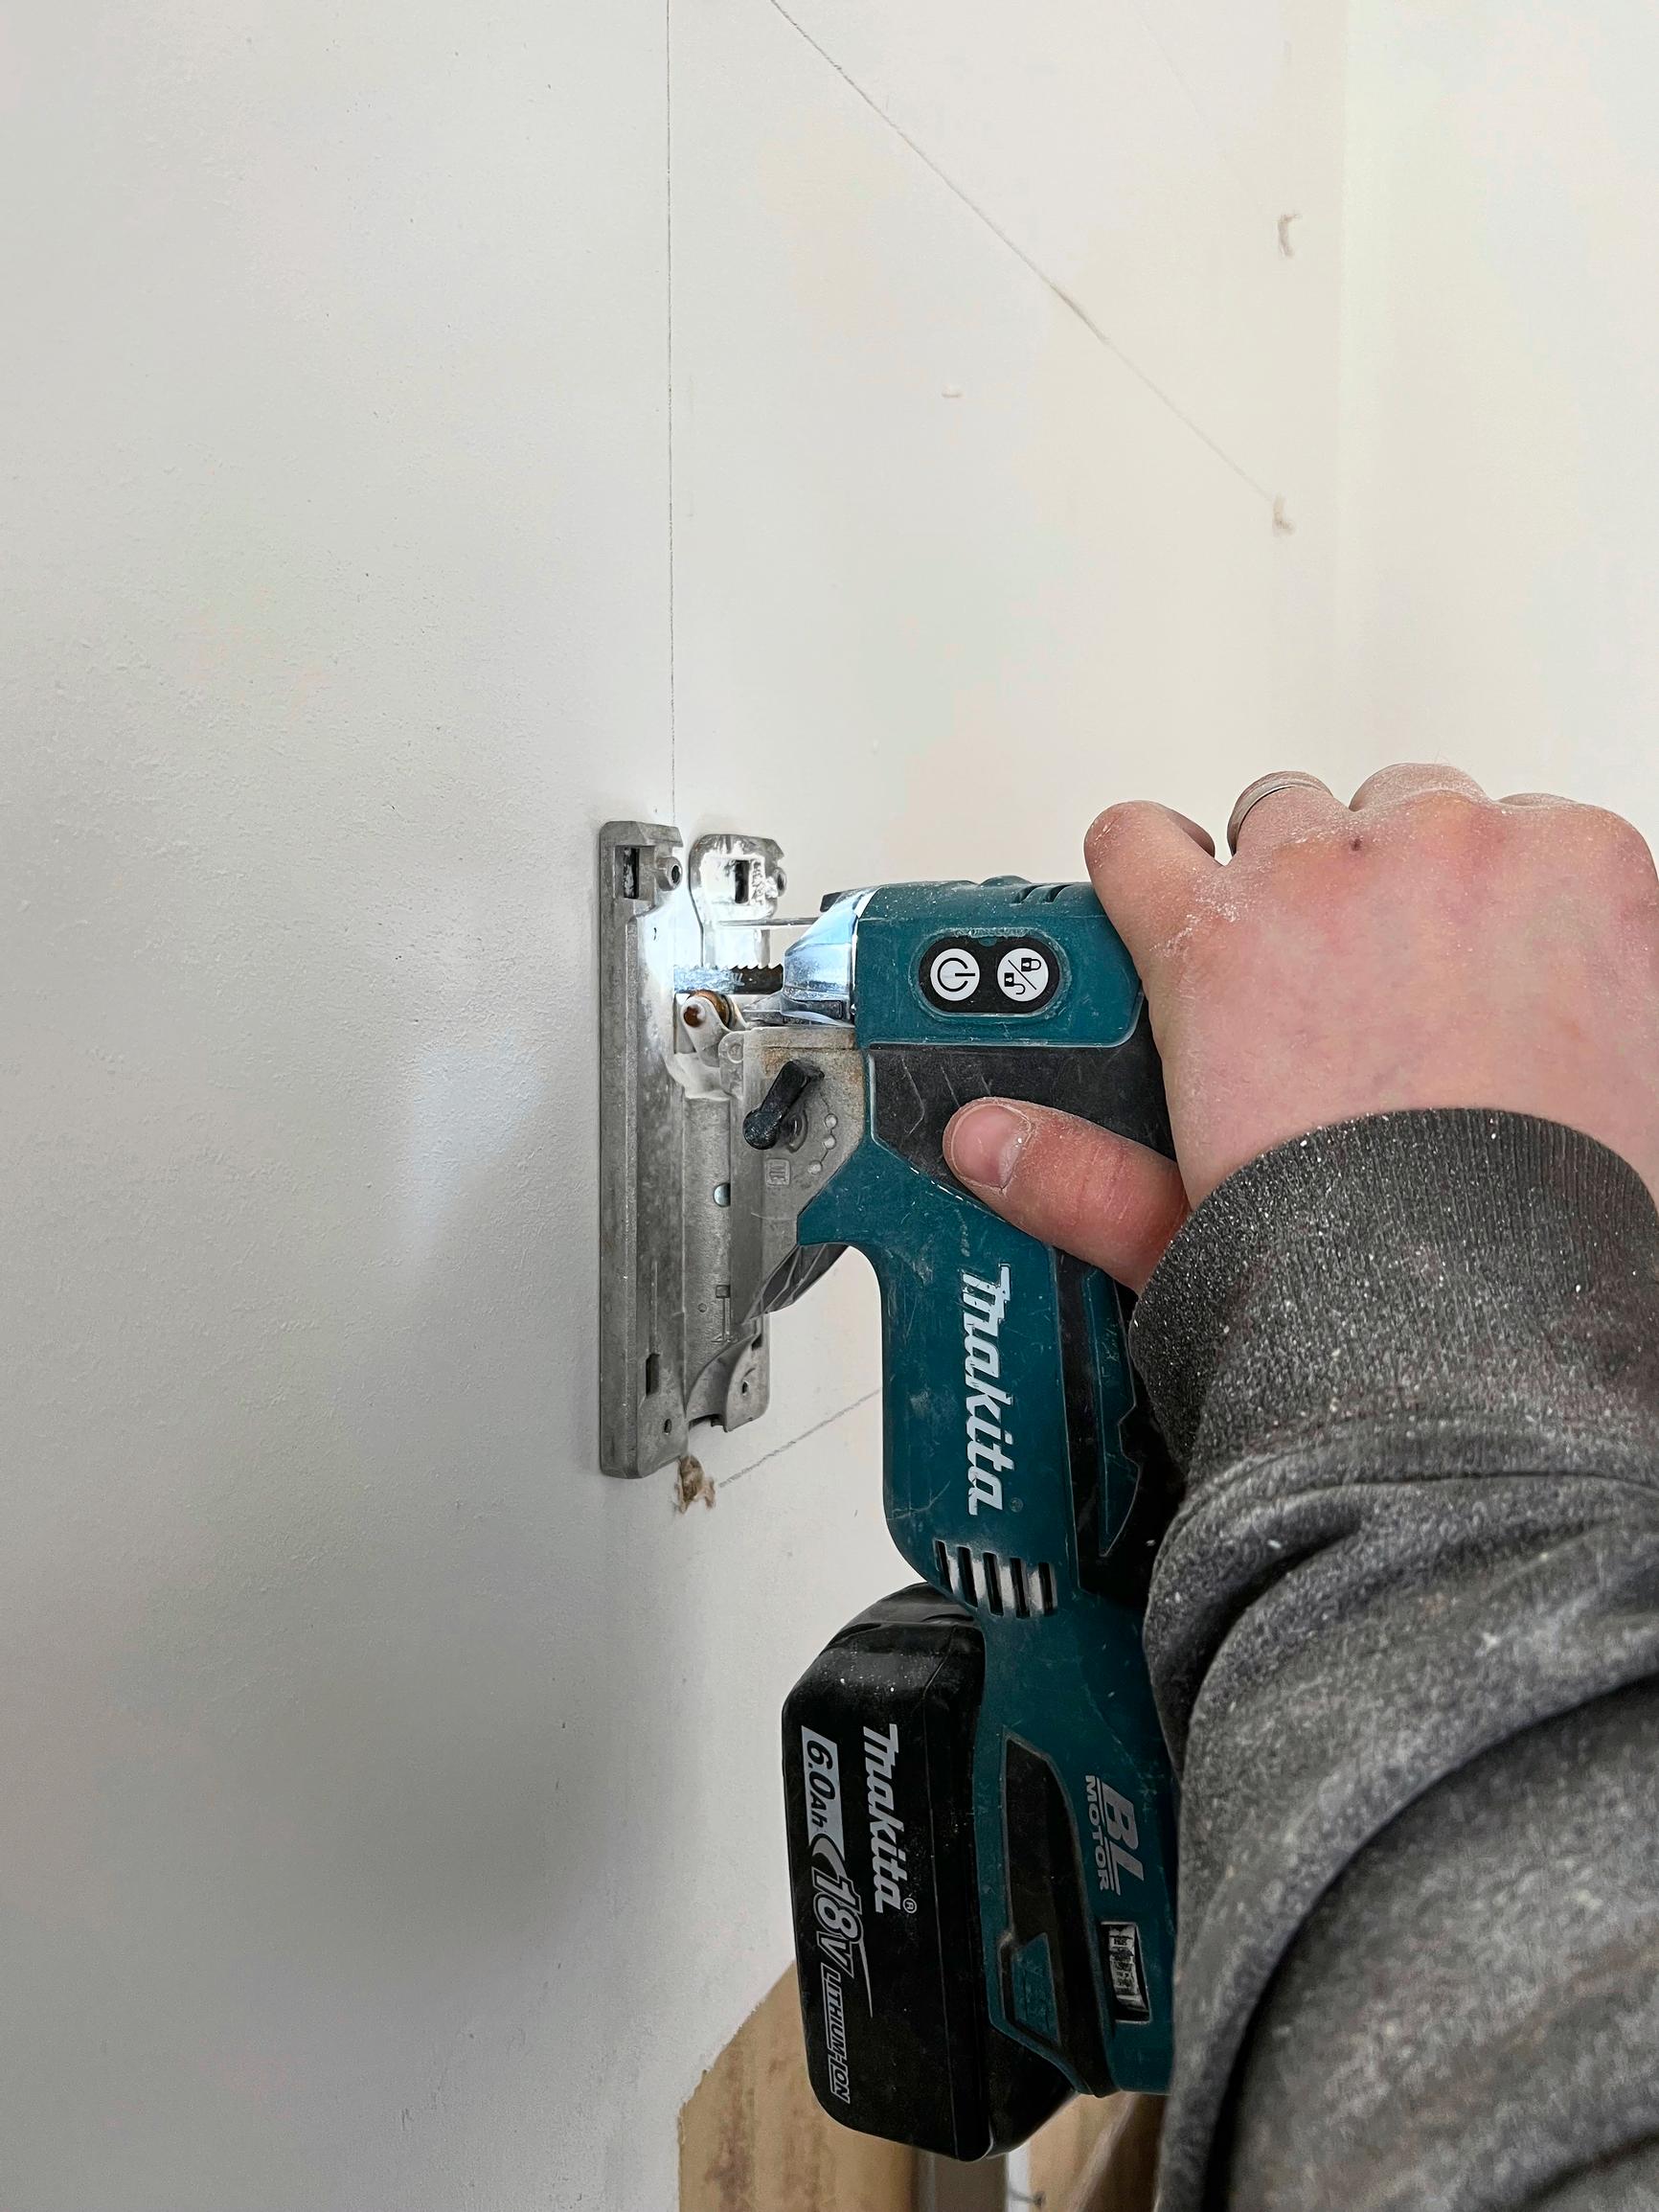
4. Cut the openings in the wall along the lines you marked. You can use any tool, but be careful not to damage the surrounding area. If you’re unsure about the wall structure, start with a small opening to inspect the inside.
Tip!
A jigsaw is a good option for making the opening.

5. After removing the drywall, take out any insulation between the wall panels. Then cut an opening on the opposite panel, using the existing opening as a template. Slide the box’s back panel sideways through the hole from one edge to the other to confirm the hole is large enough. If it gets stuck, adjust the opening.
6. Prepare the top panel of each box if you plan to add lighting. Drill a hole so the wires can pass through to the other side. Test-fit the fixture, but don’t install it yet.

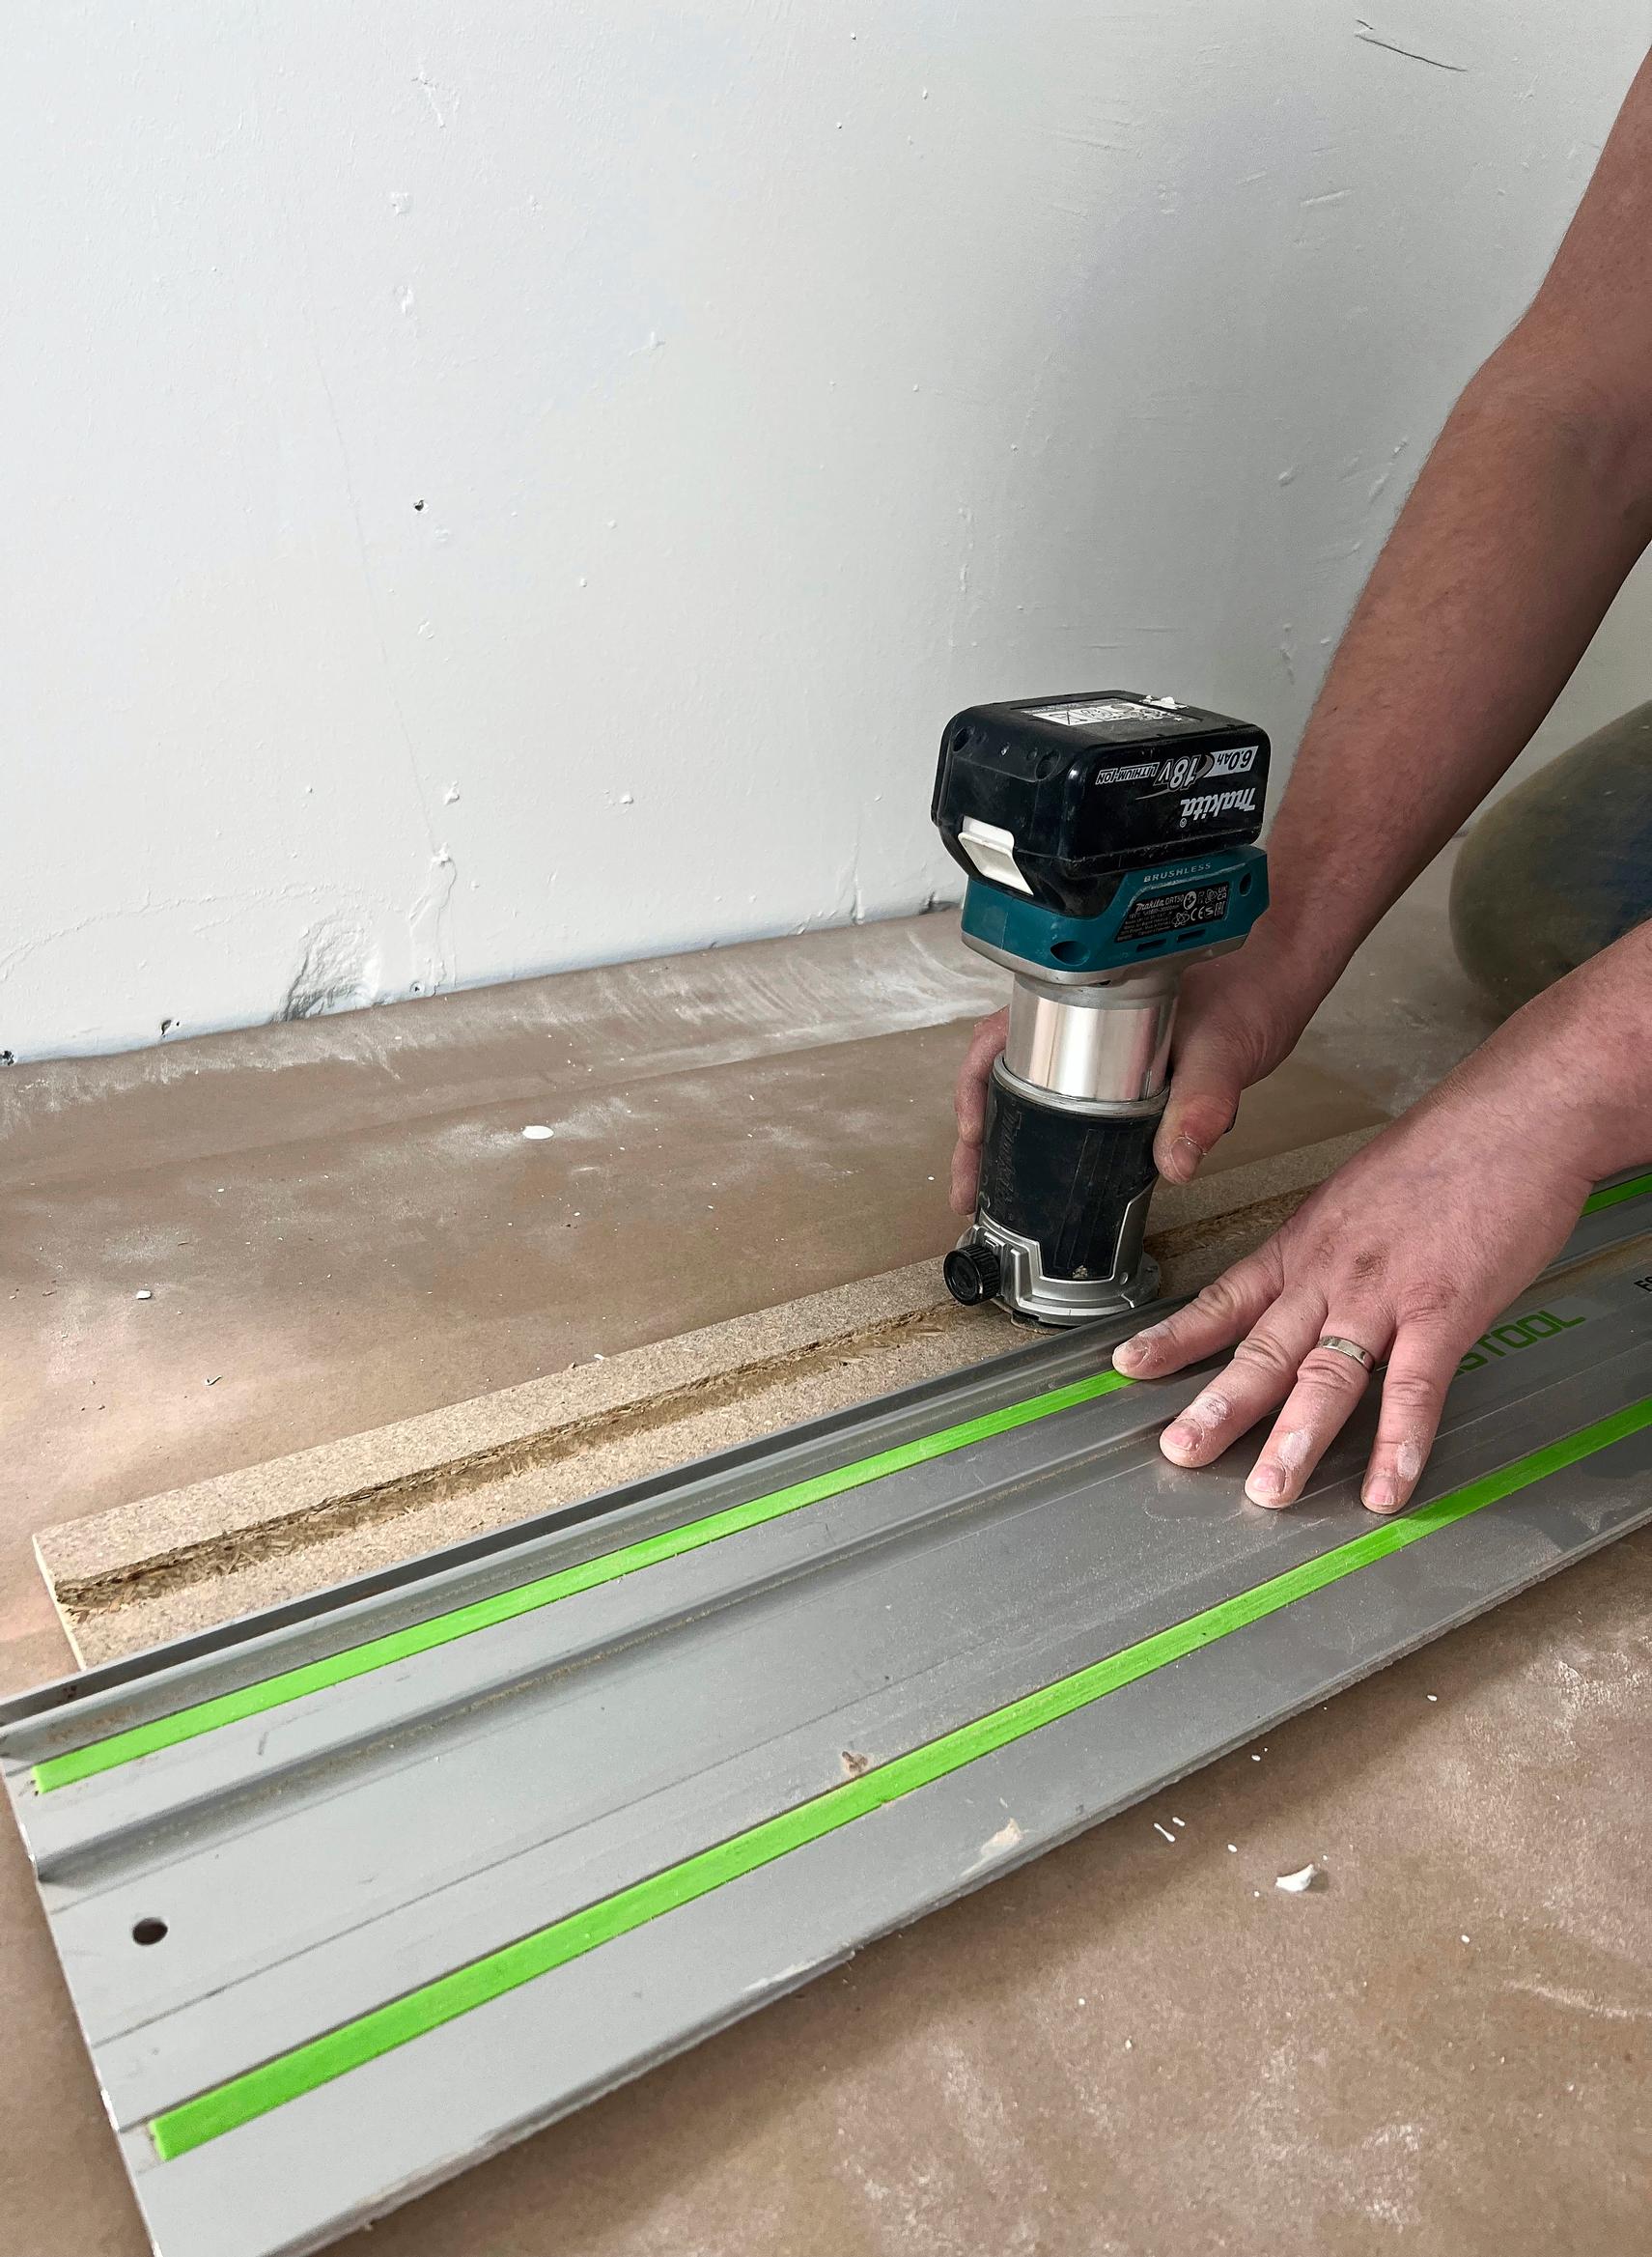
7. Recessed, dimmable LED profiles go into each top panel, about 30 mm from the back edge. A router is ideal for creating the recesses. Use a guide rail for straight grooves.
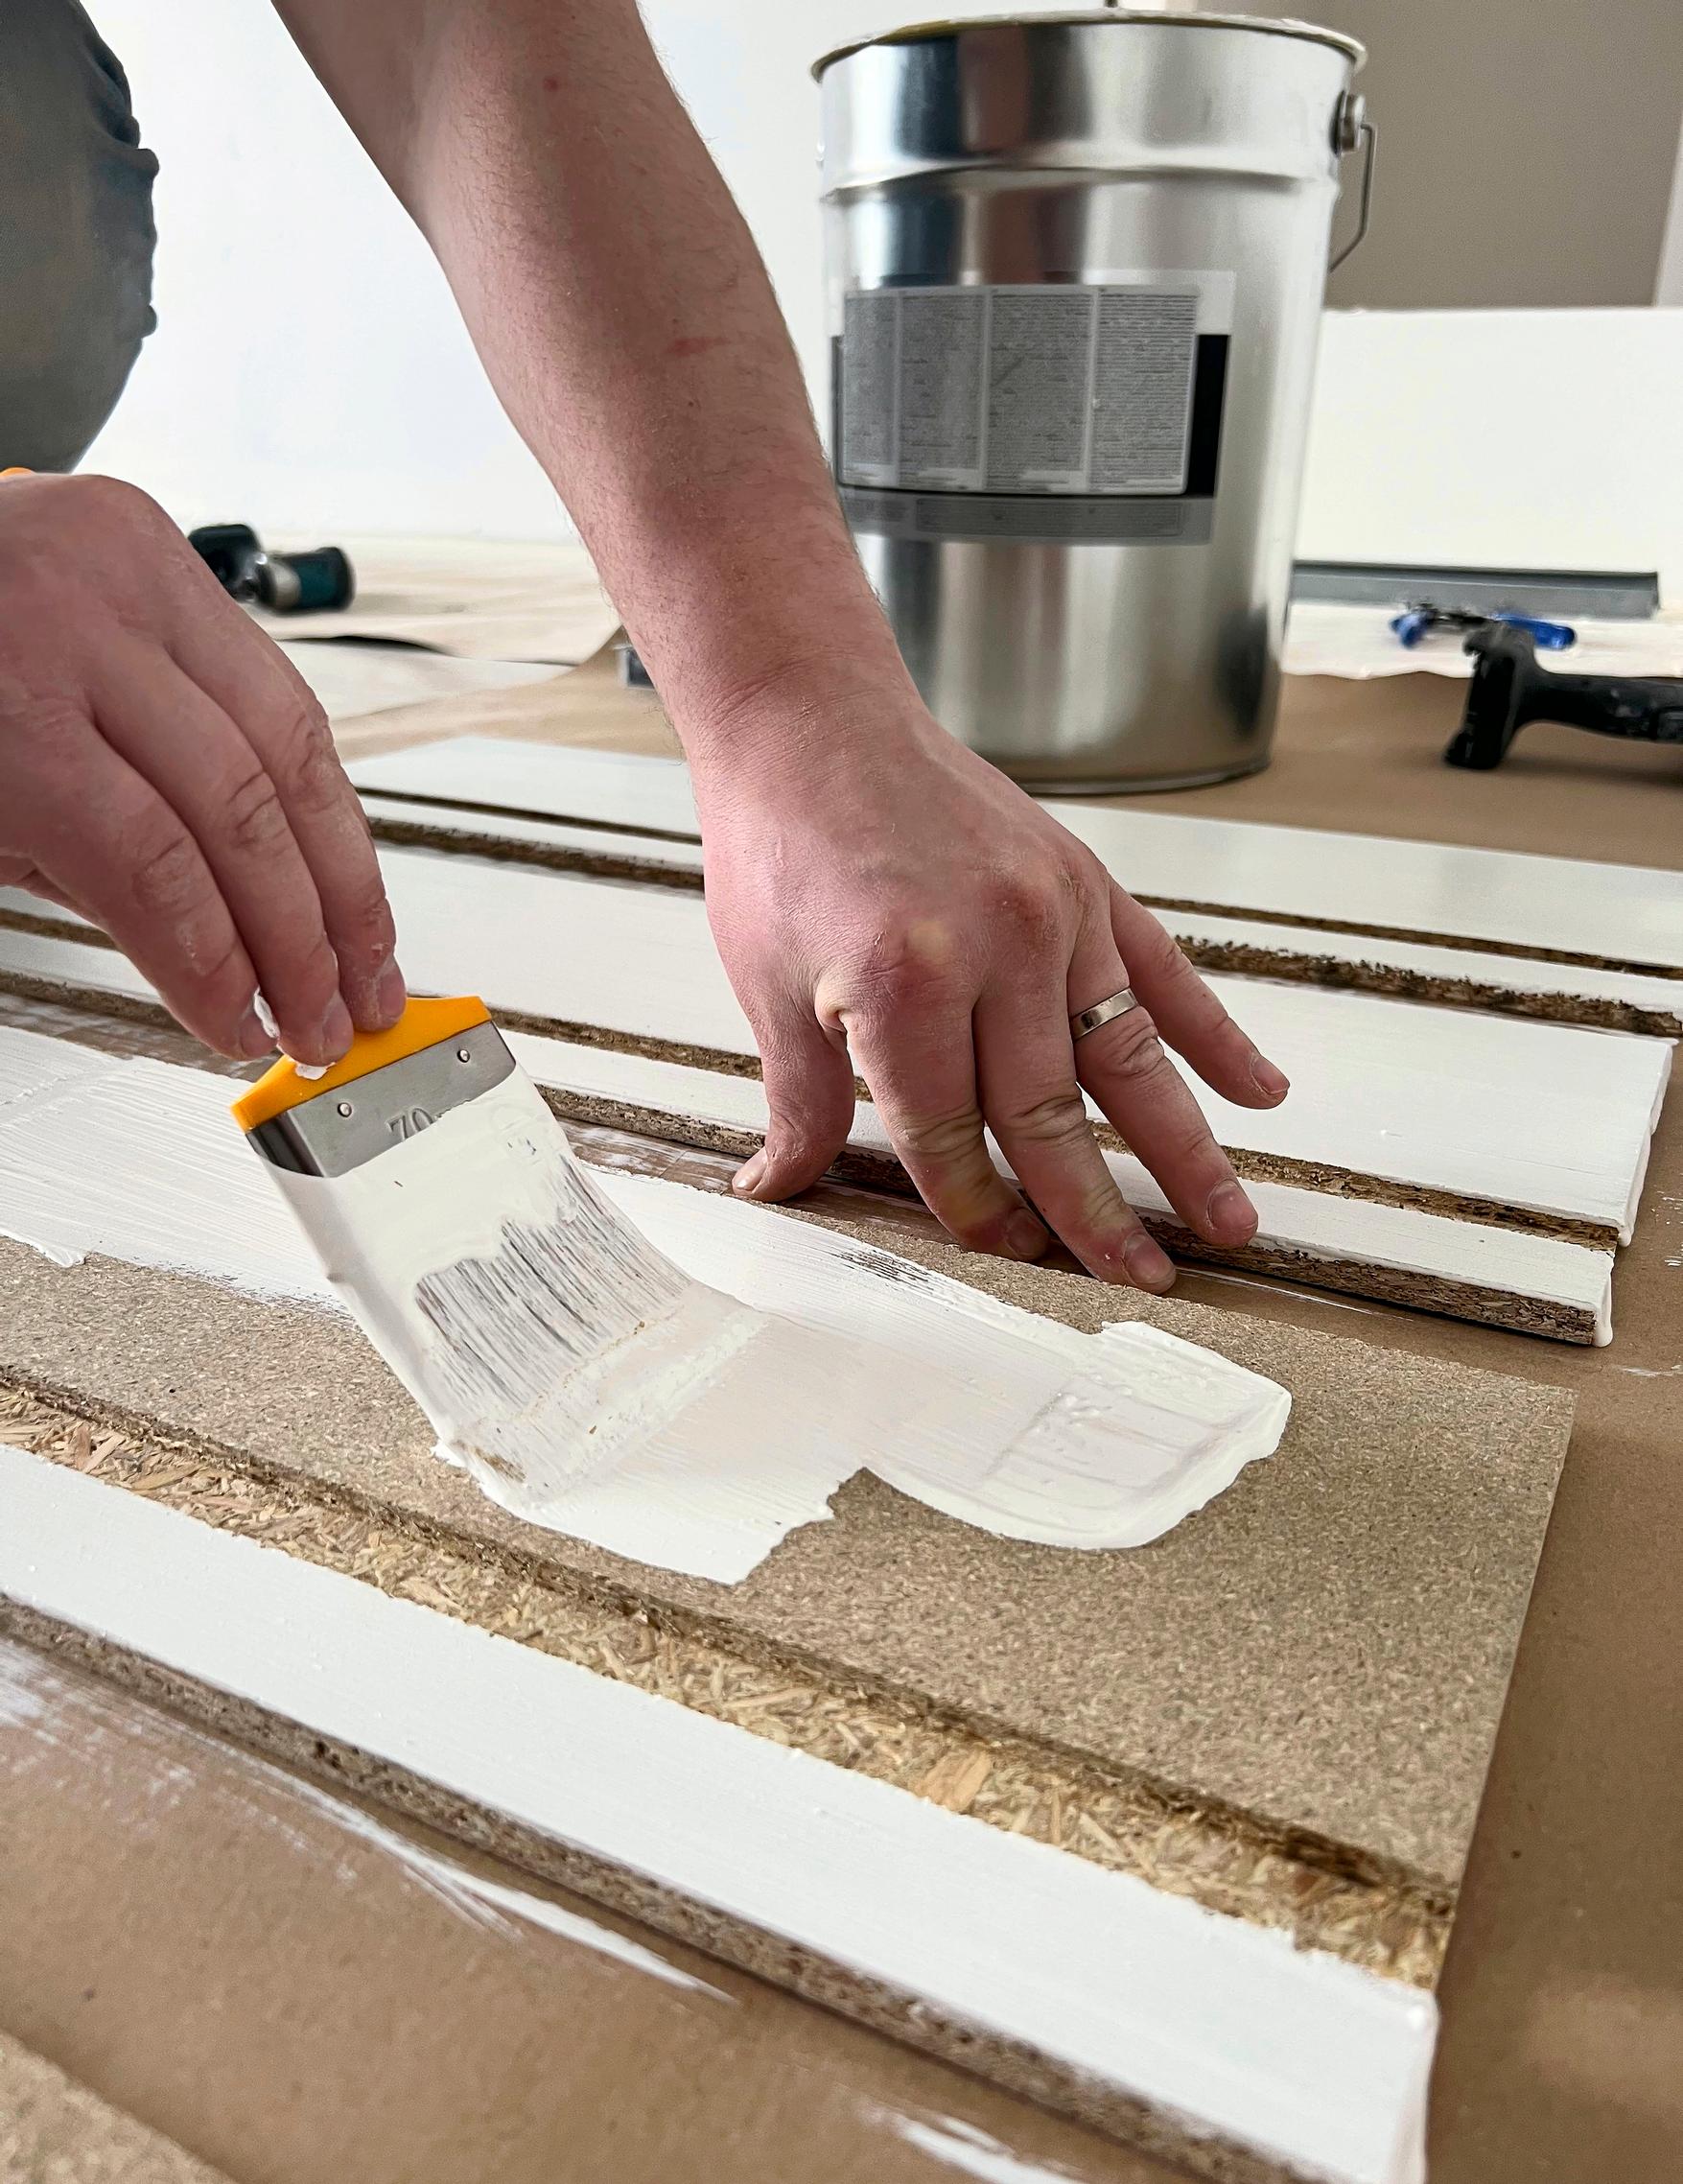
8. Paint the top panels in your chosen color. Use the same paint you plan to use for the whole wall. It helps to give the other parts a first coat before assembling to make the final painting easier. If you want to avoid brush marks, finish with a furniture roller.
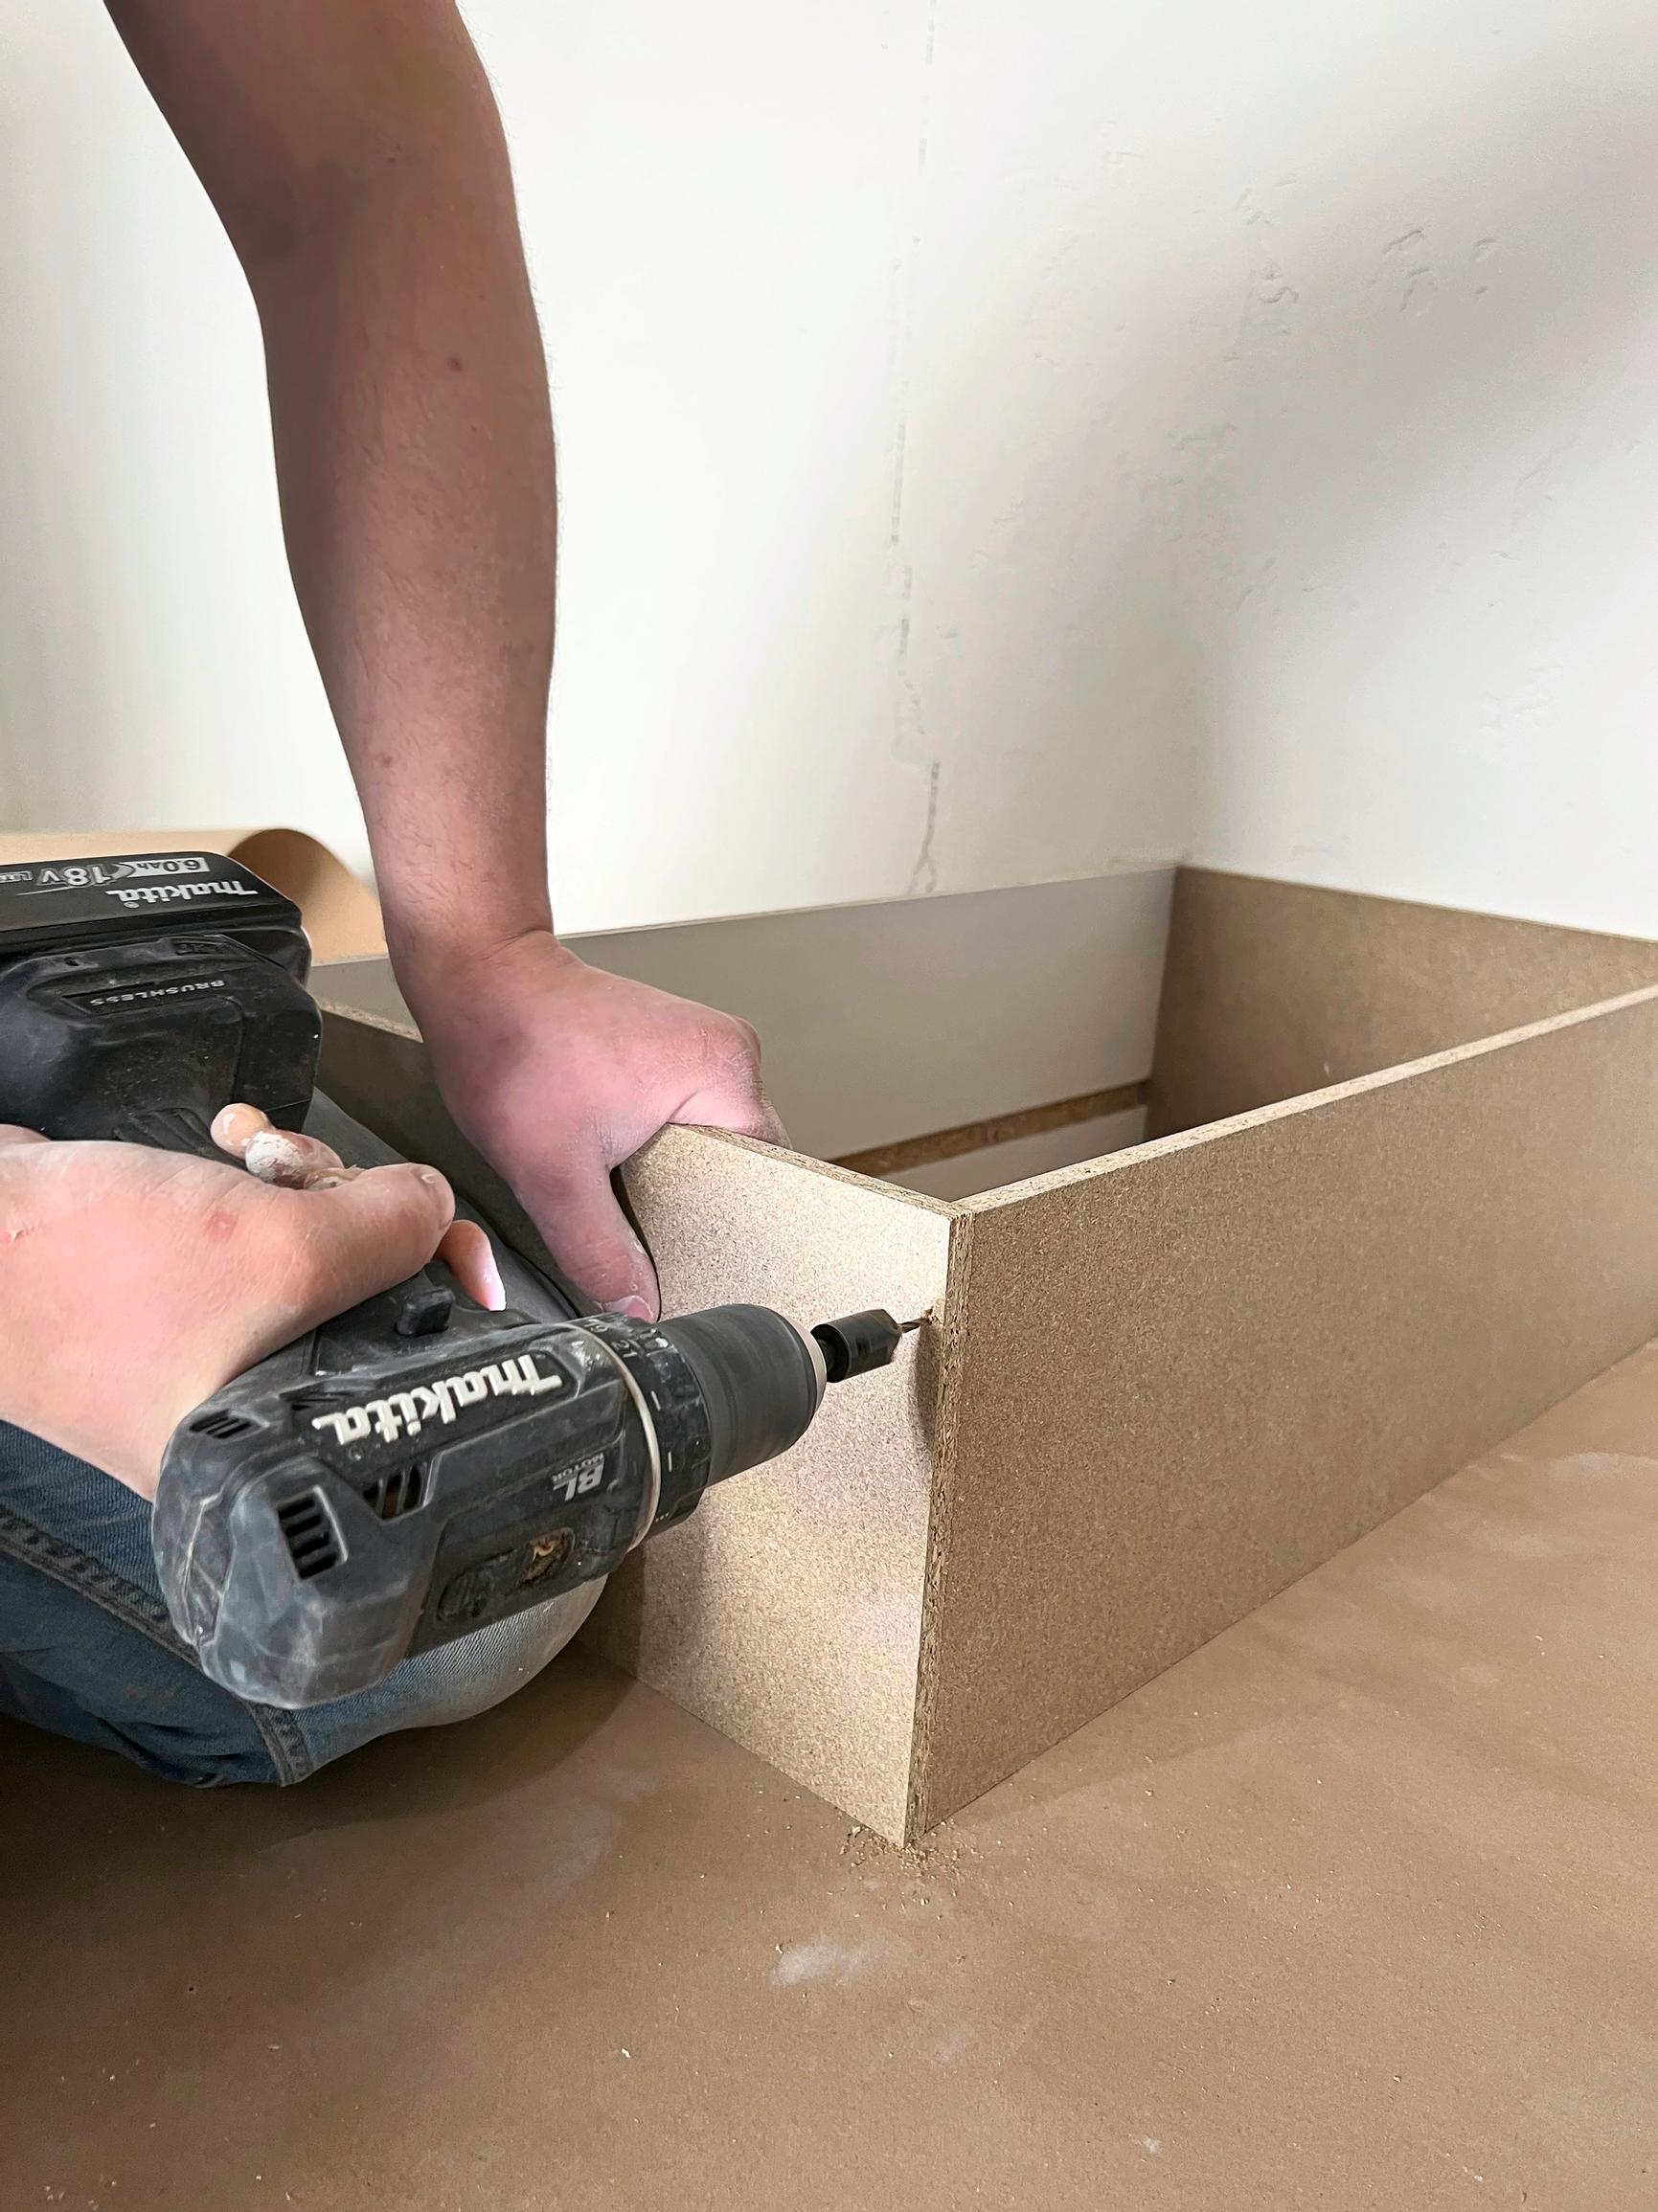
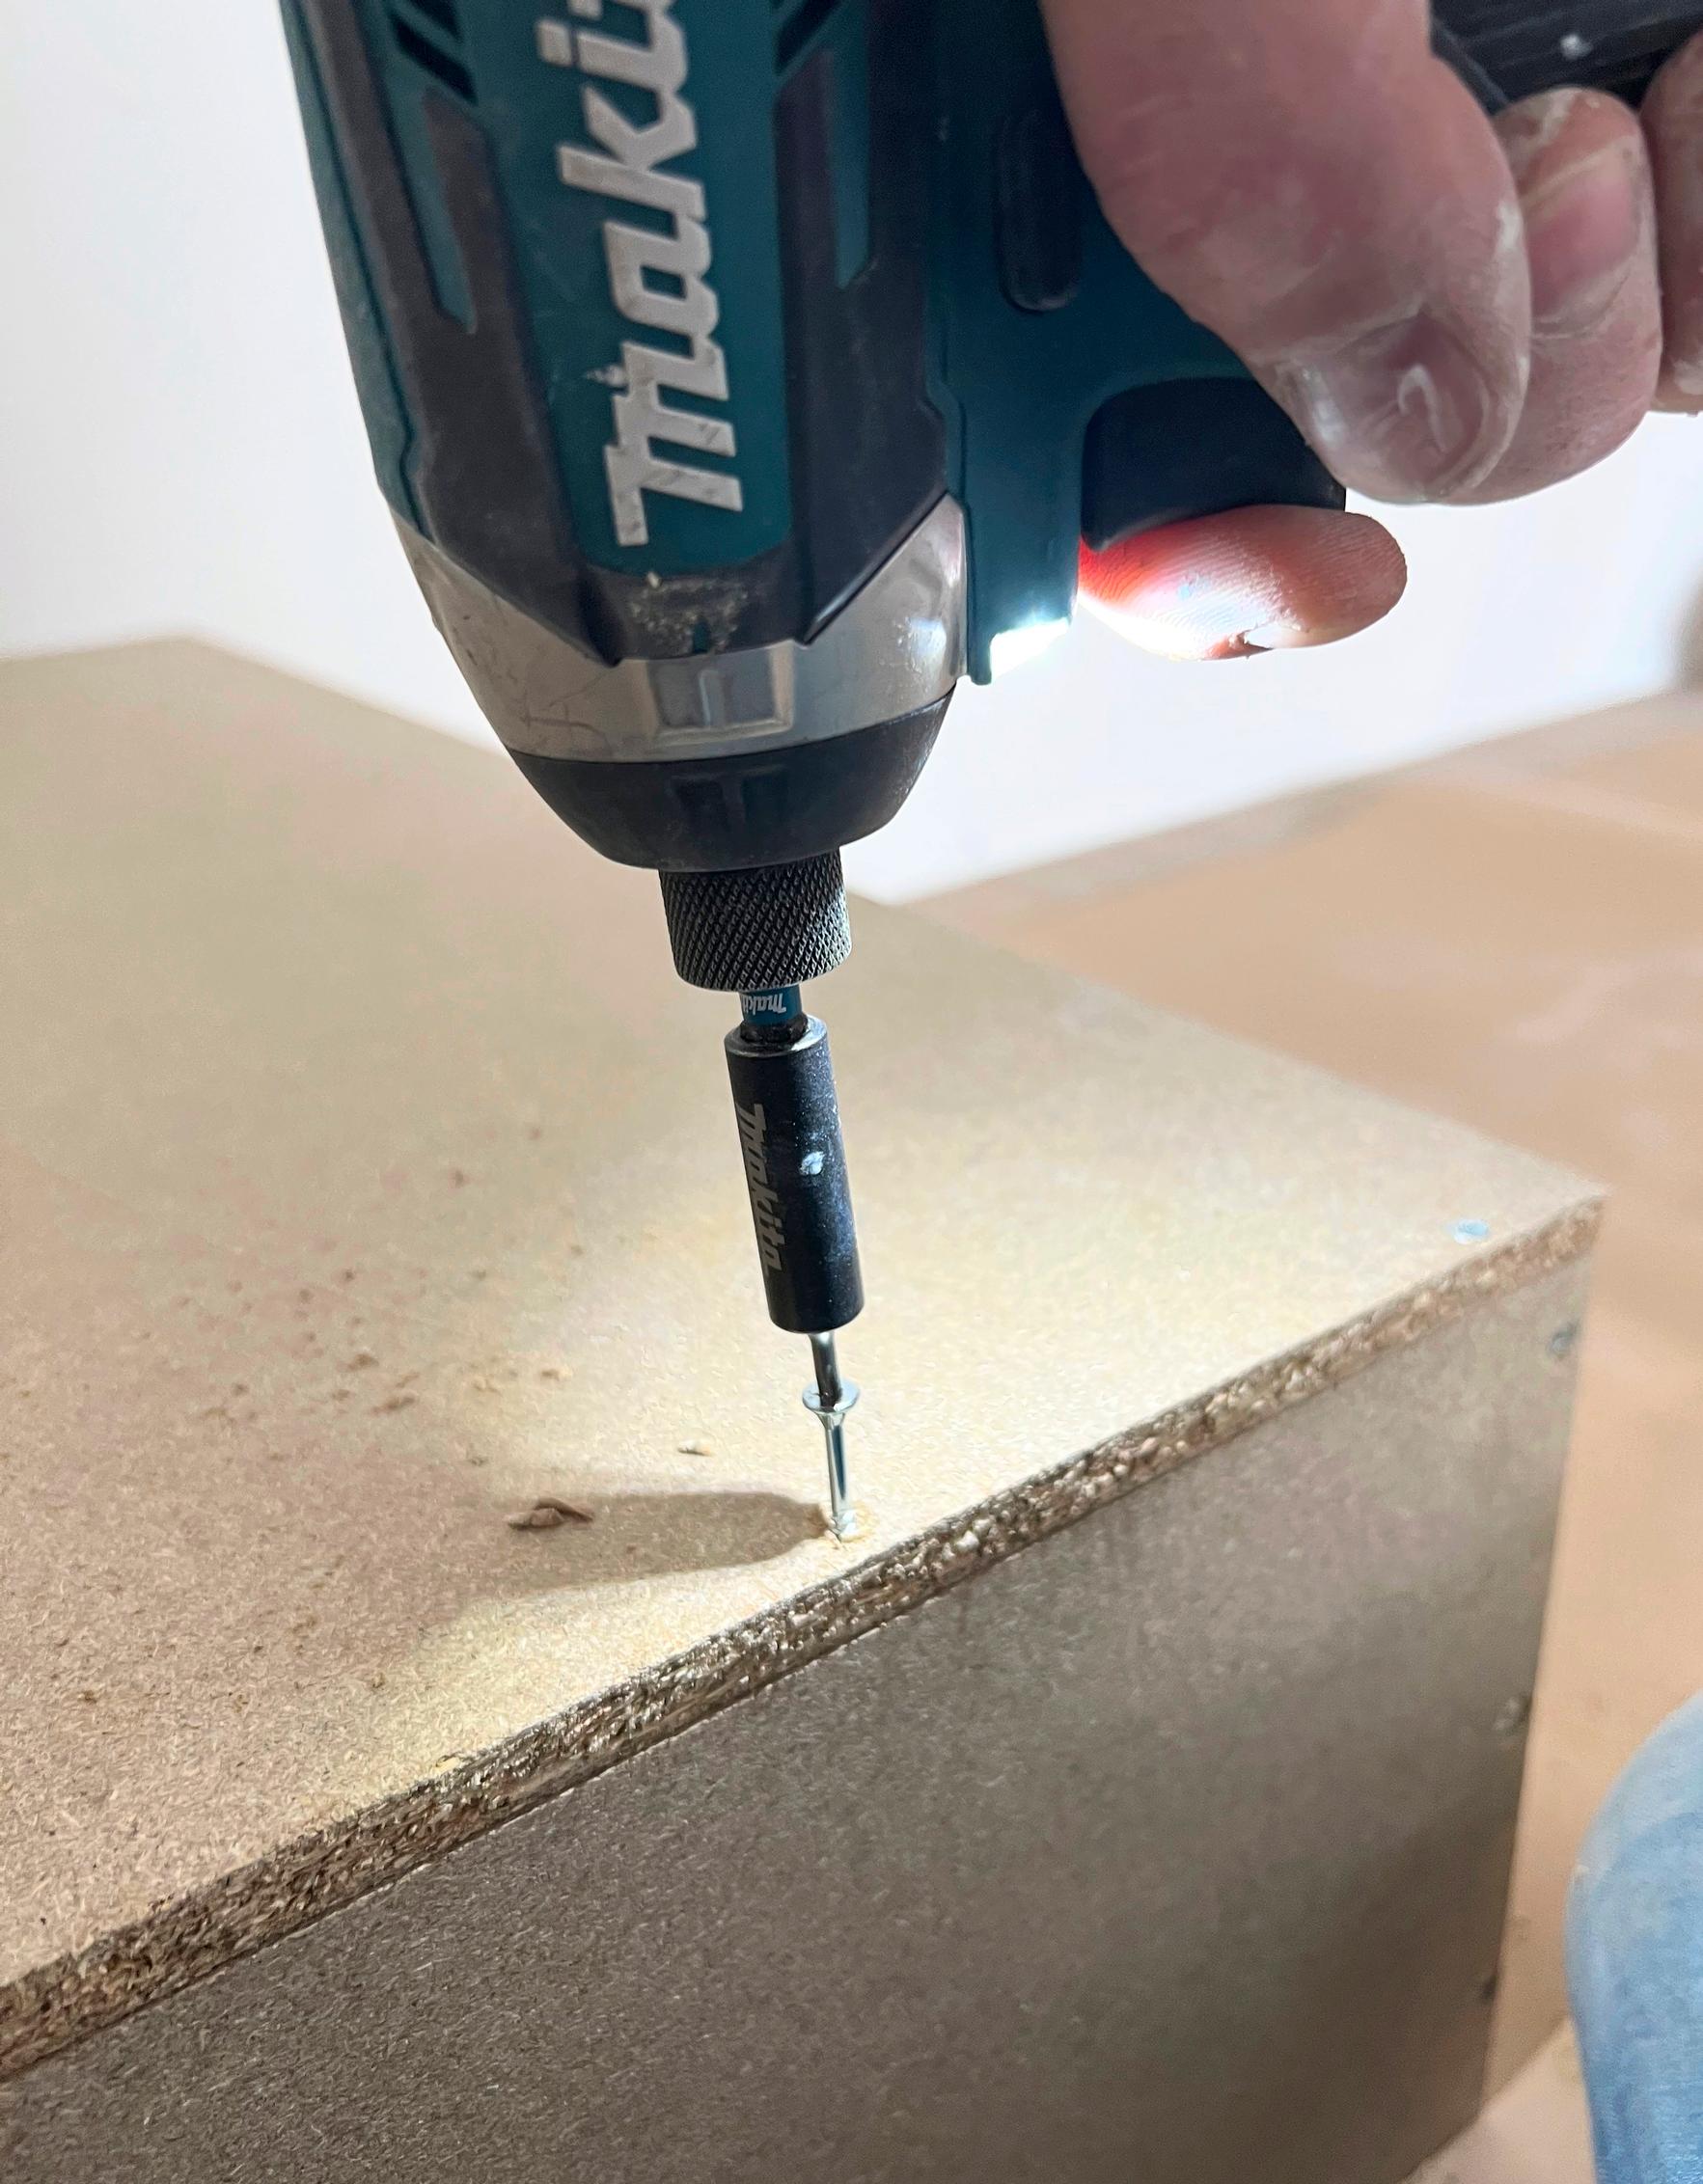
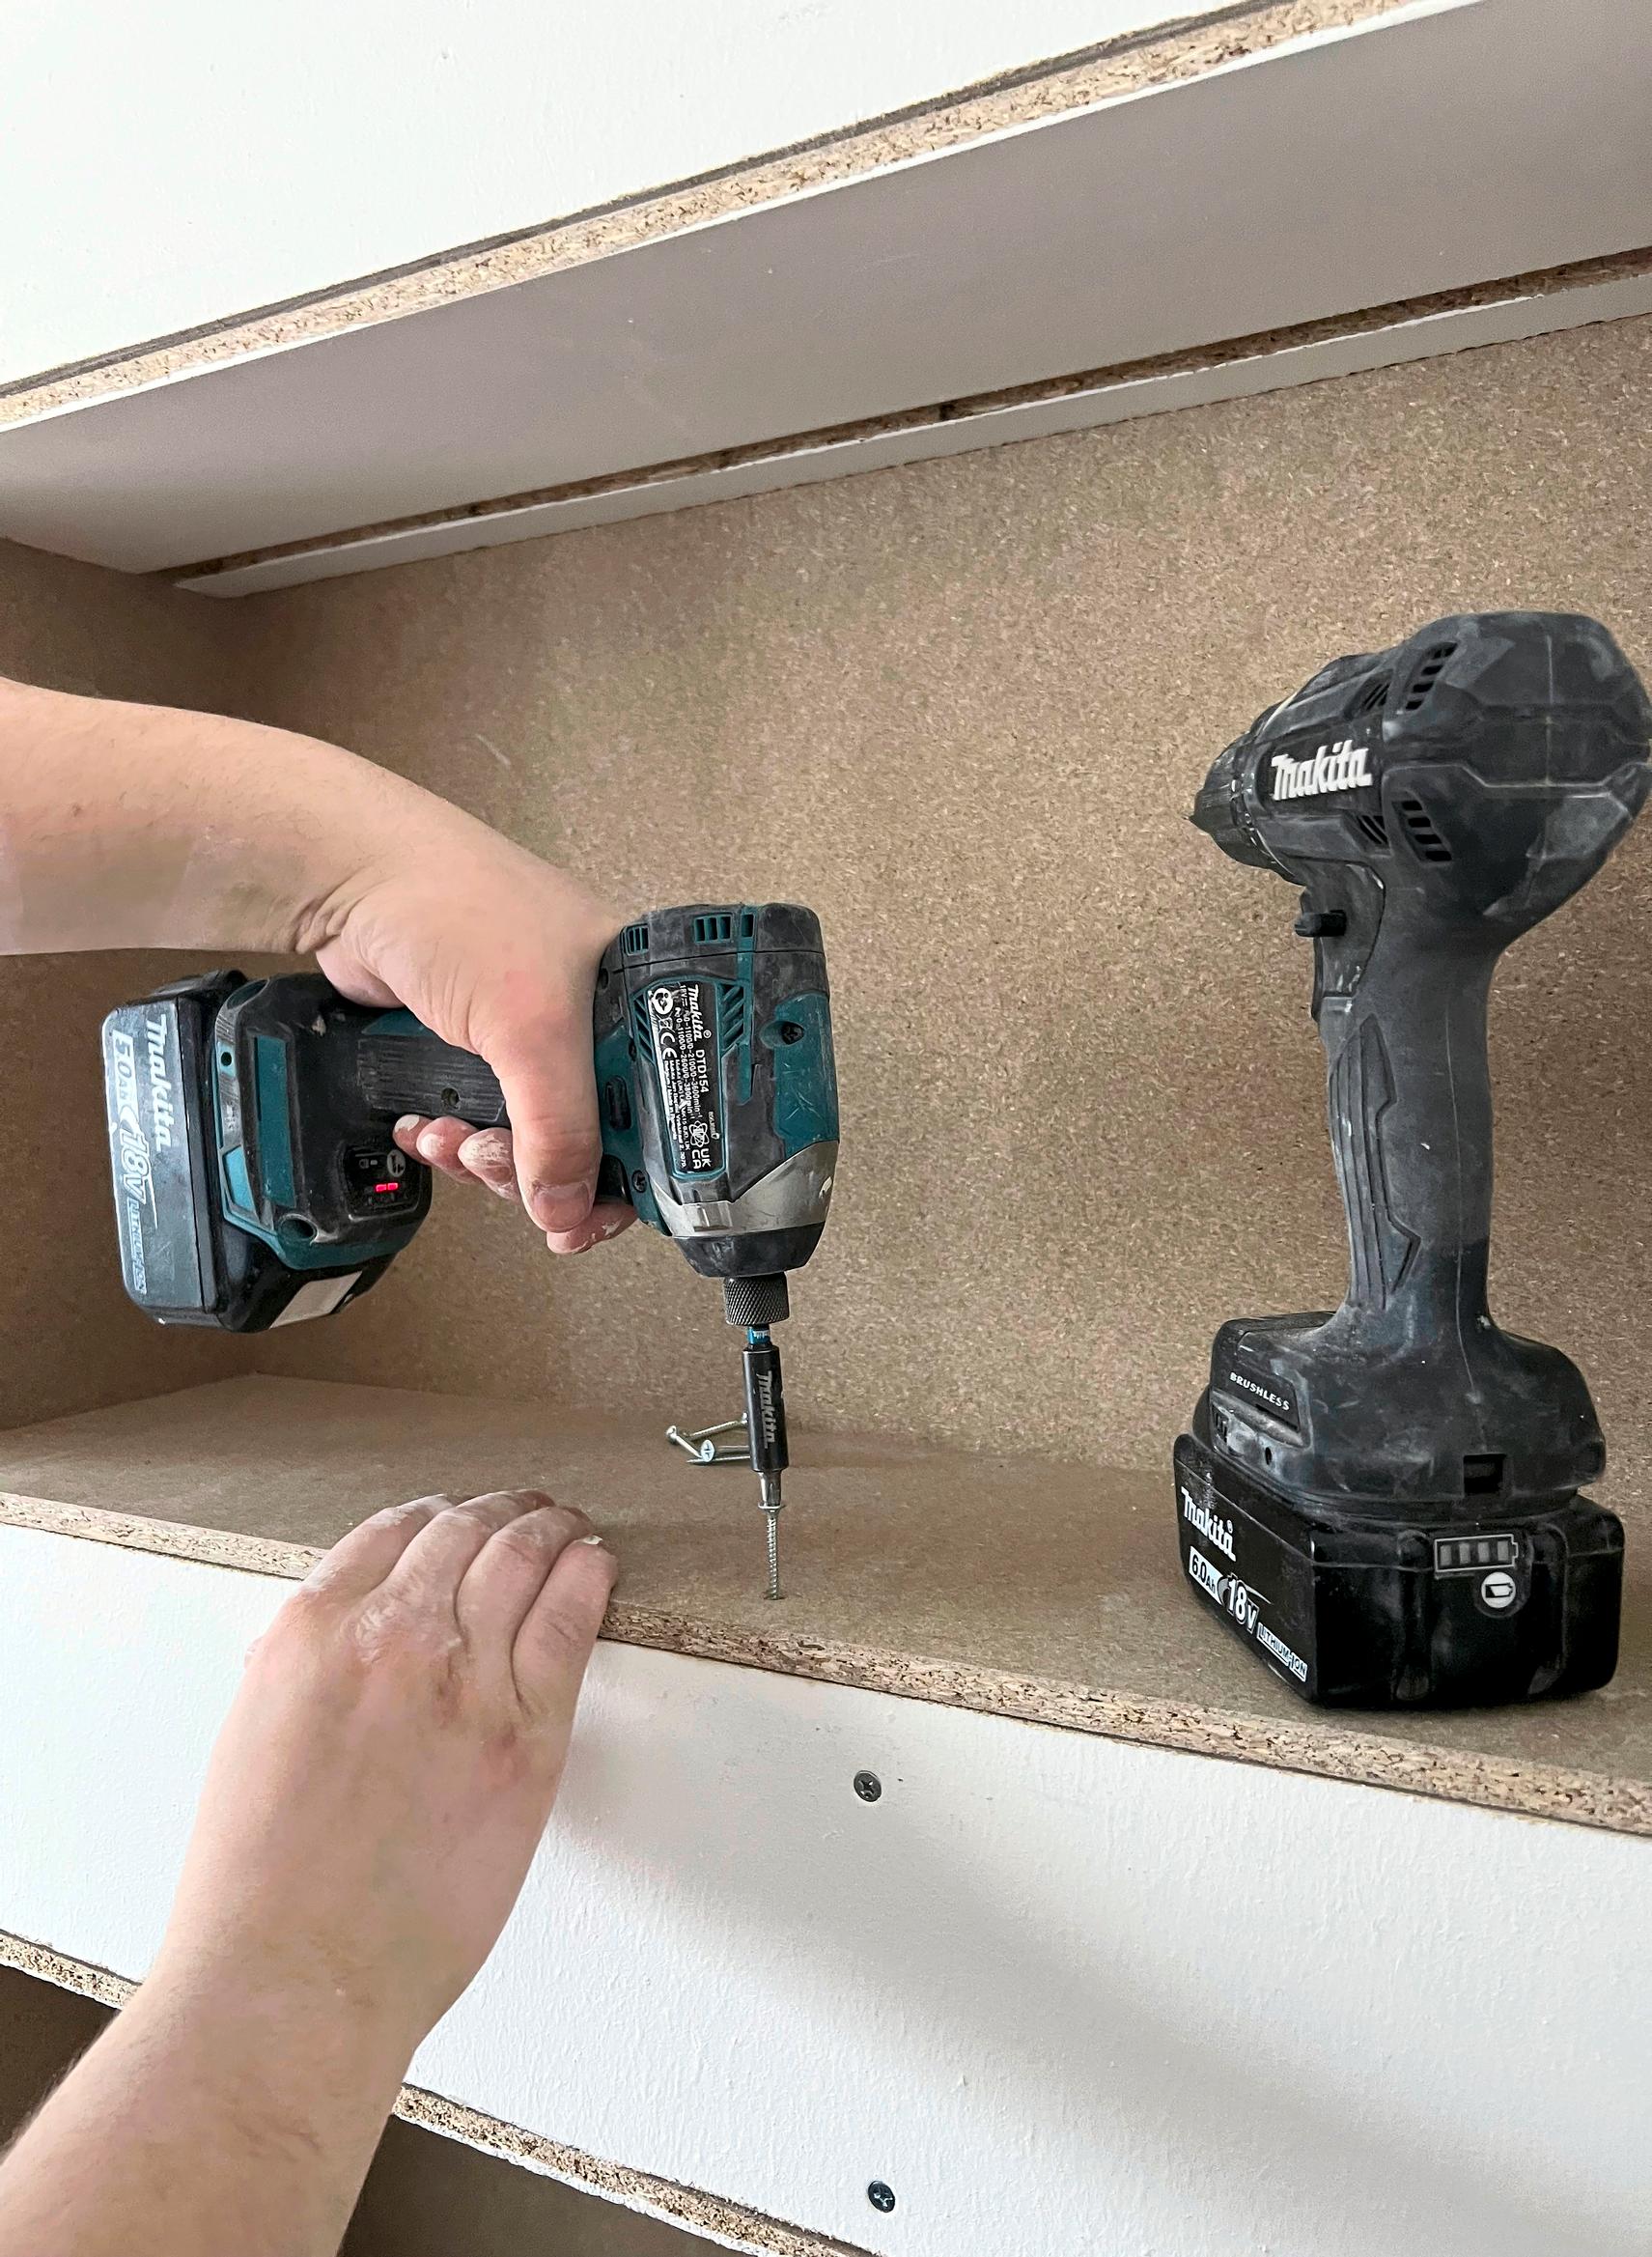
9. Assemble the box using screws. Drill a pilot hole and countersink for each screw head. Brace the box against a straight wall during assembly. If needed, use a square and diagonal measurements to confirm everything is aligned.
10. Attach the box’s back panel firmly with screws. If you’re adding lighting, make sure the top panel is oriented correctly.
Tip!
Draw a guide line on the back panel for the screws. This ensures the screws go into the box sides. In this example, the particleboard is 11 mm thick, so we drew the line 5.5 mm from the panel edge.
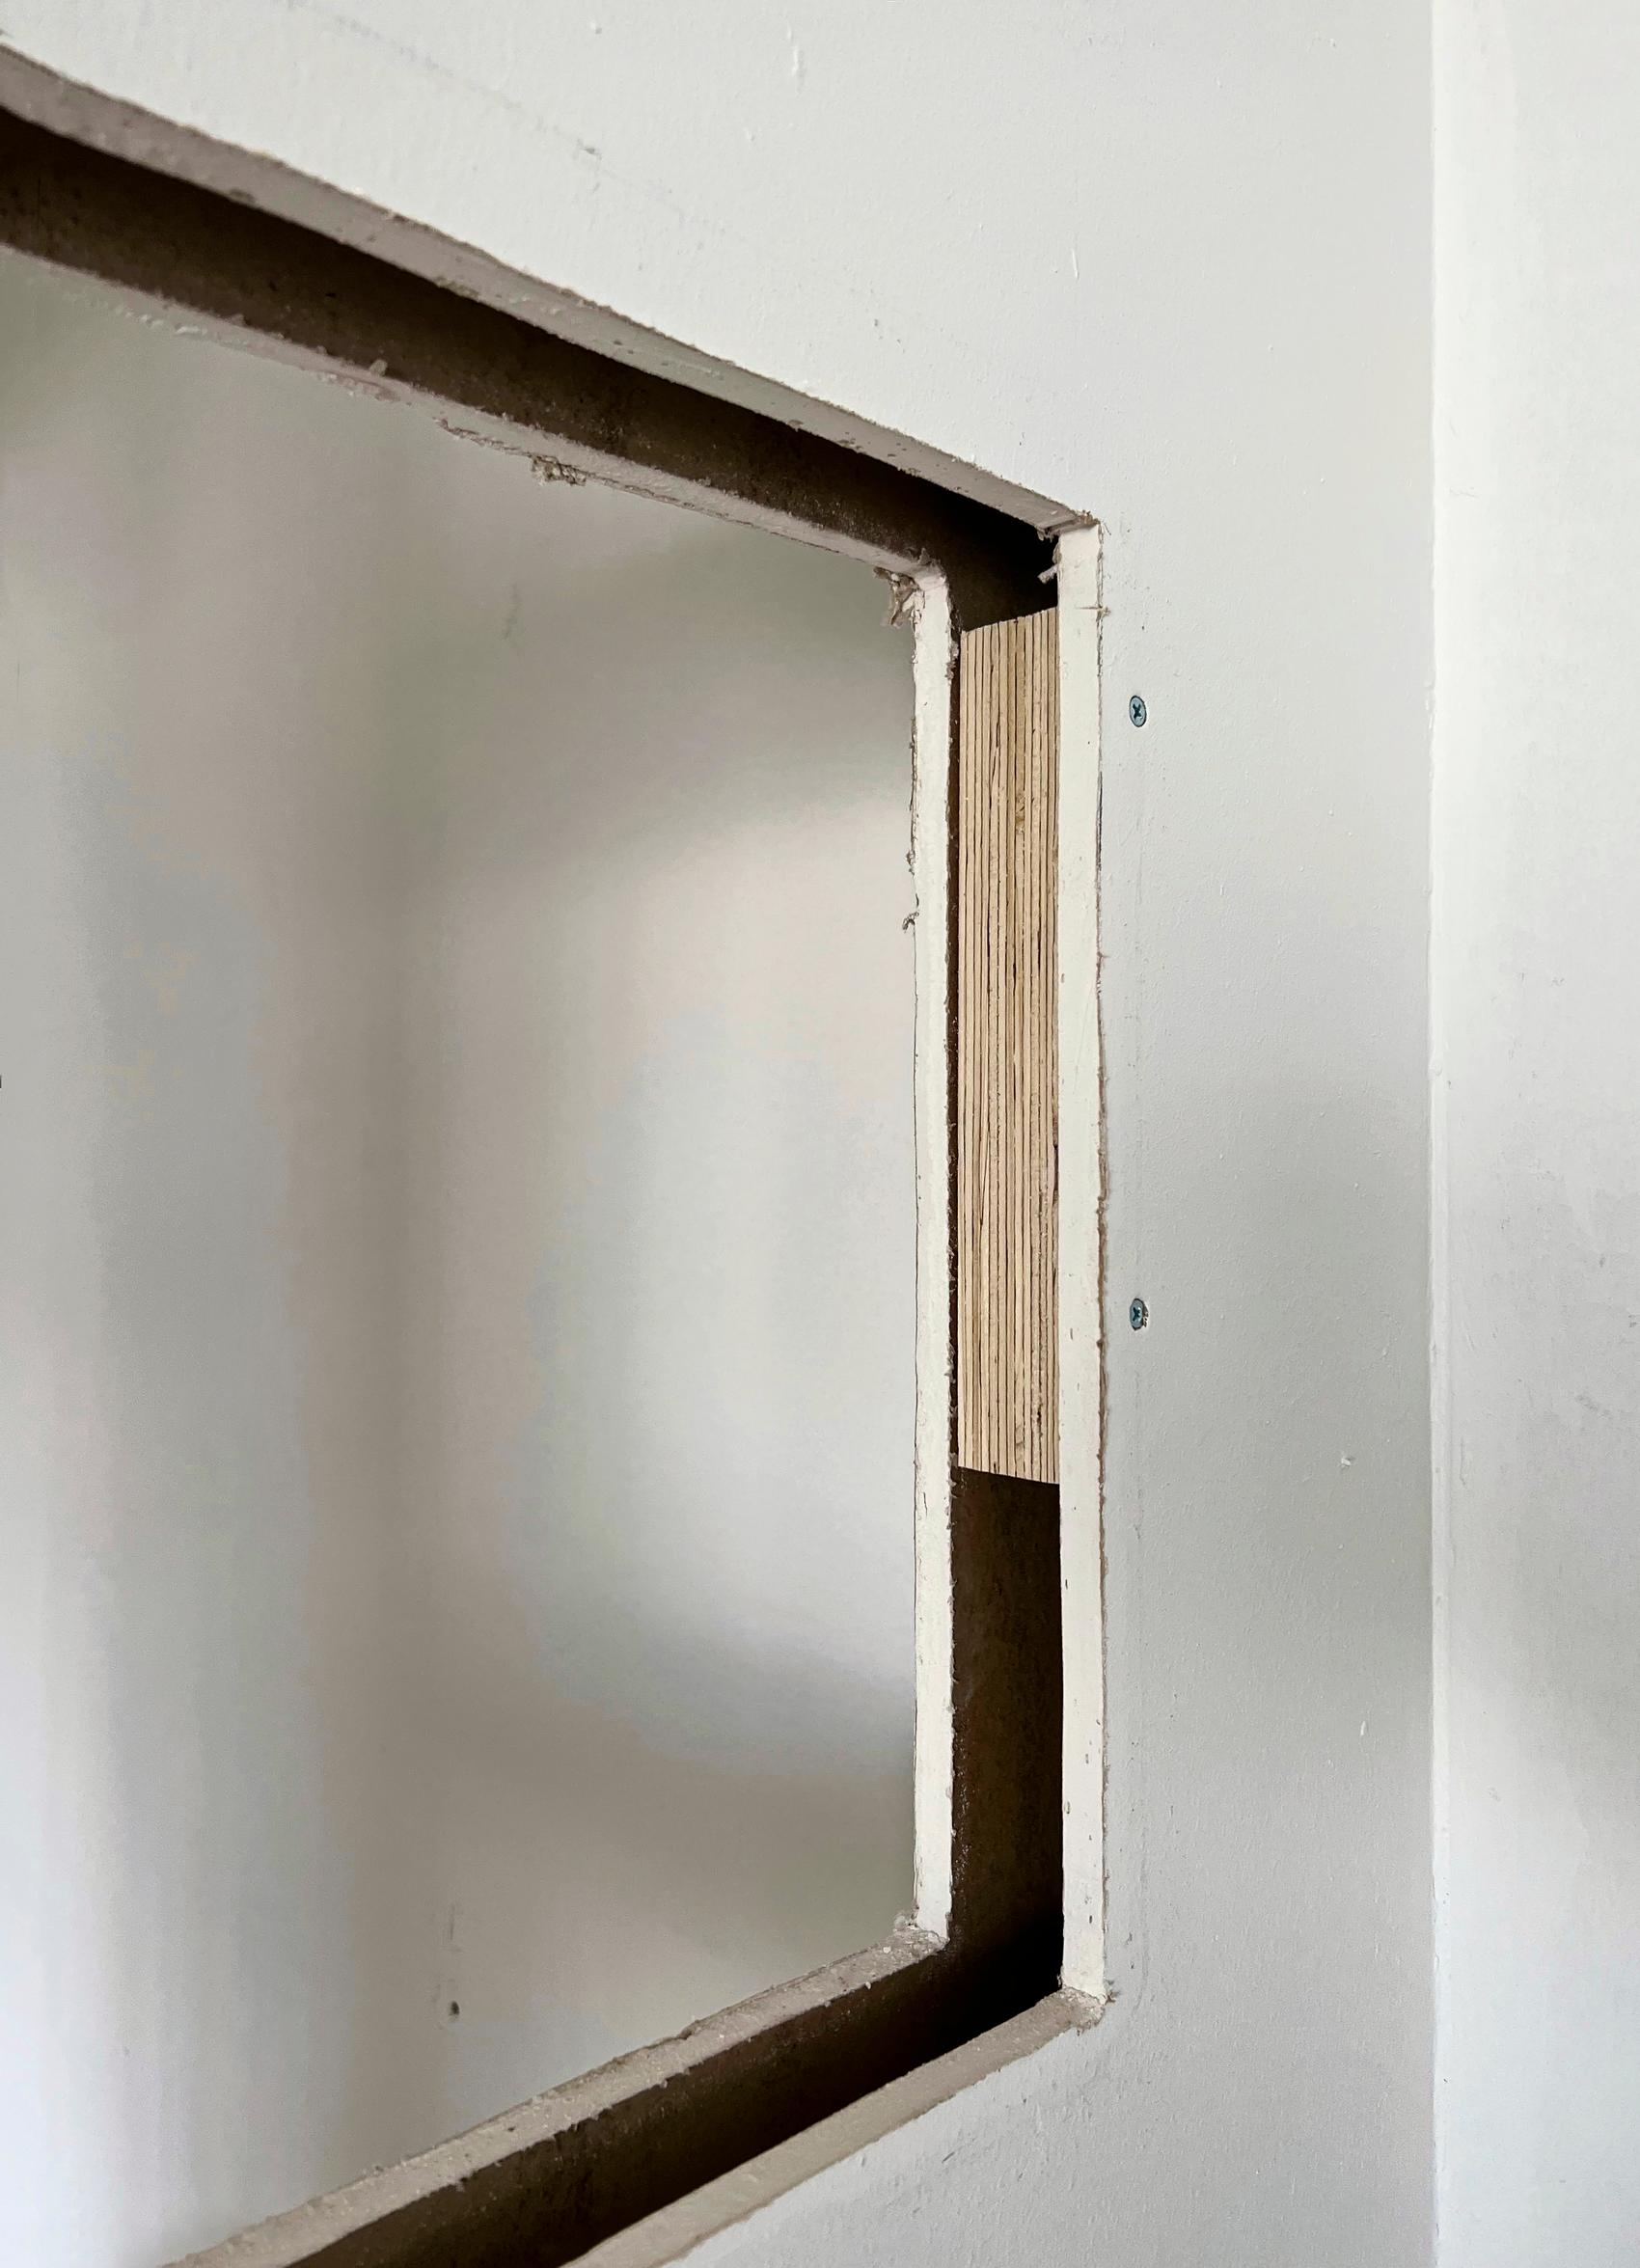
11. Reinforce around the opening if the wall isn’t sturdy. Secure short pieces of laminated veneer lumber along each side of the opening with screws. This provides a solid anchoring surface for the box and keeps the opening from flexing.
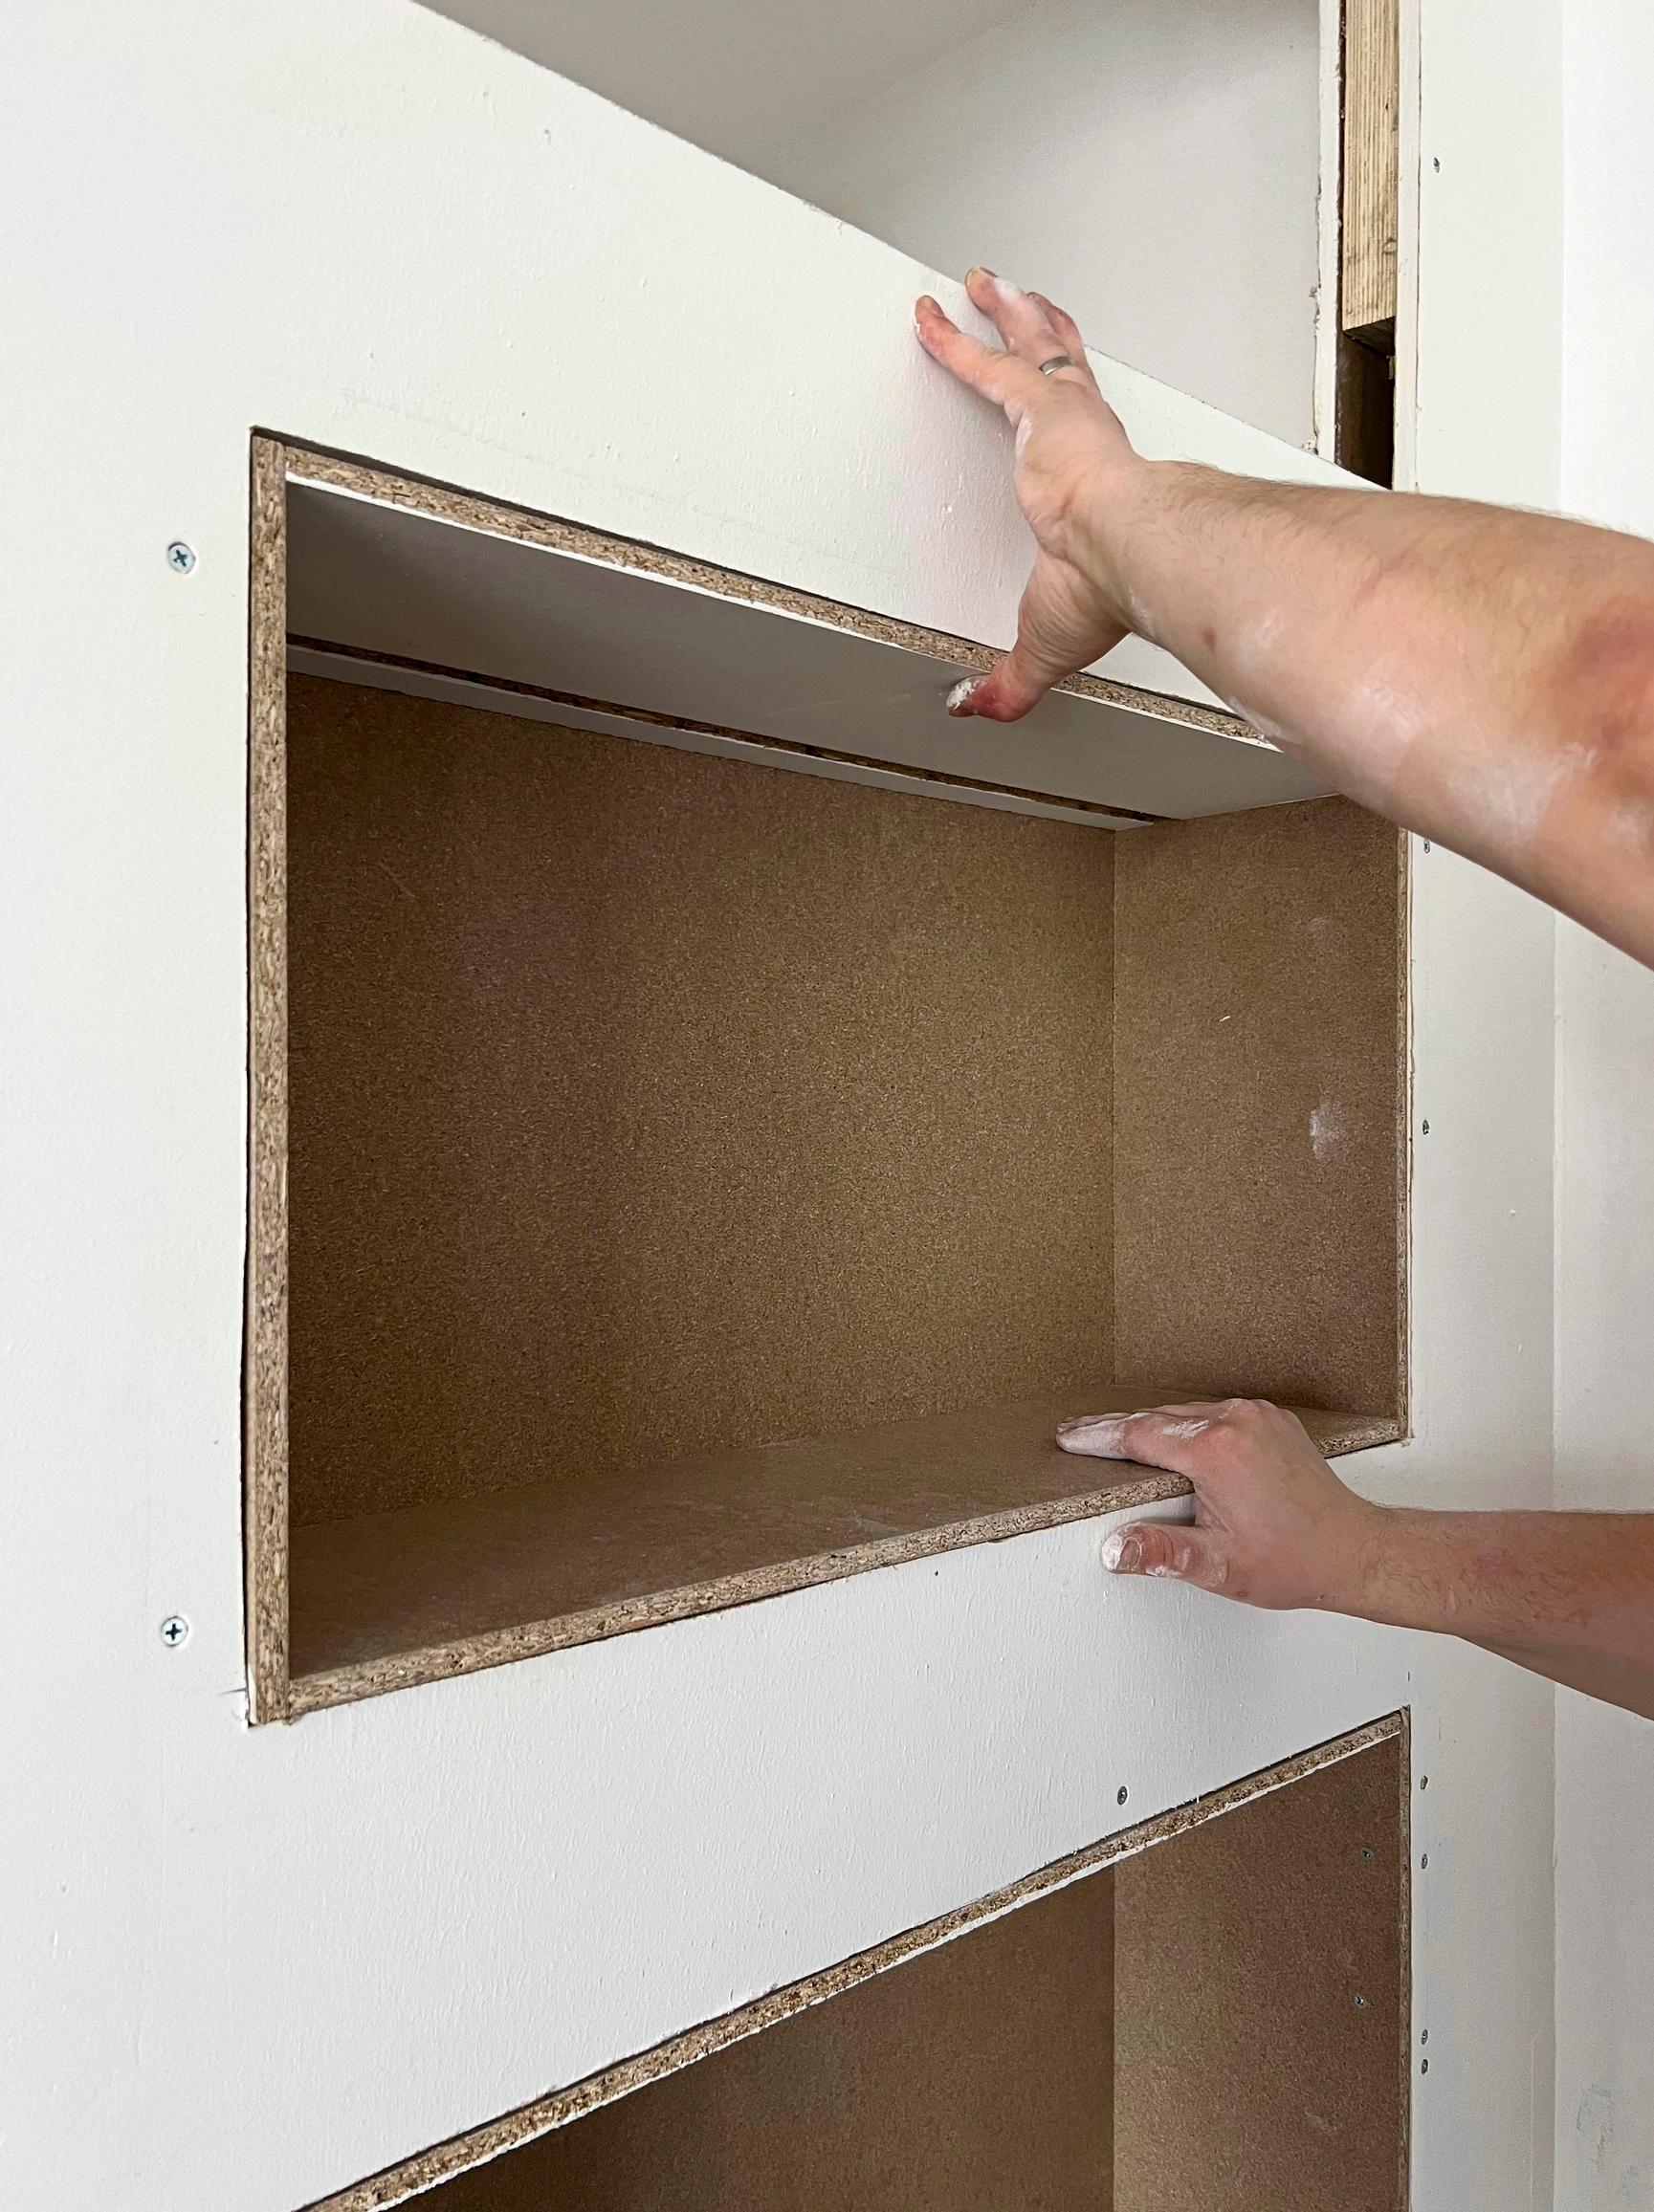
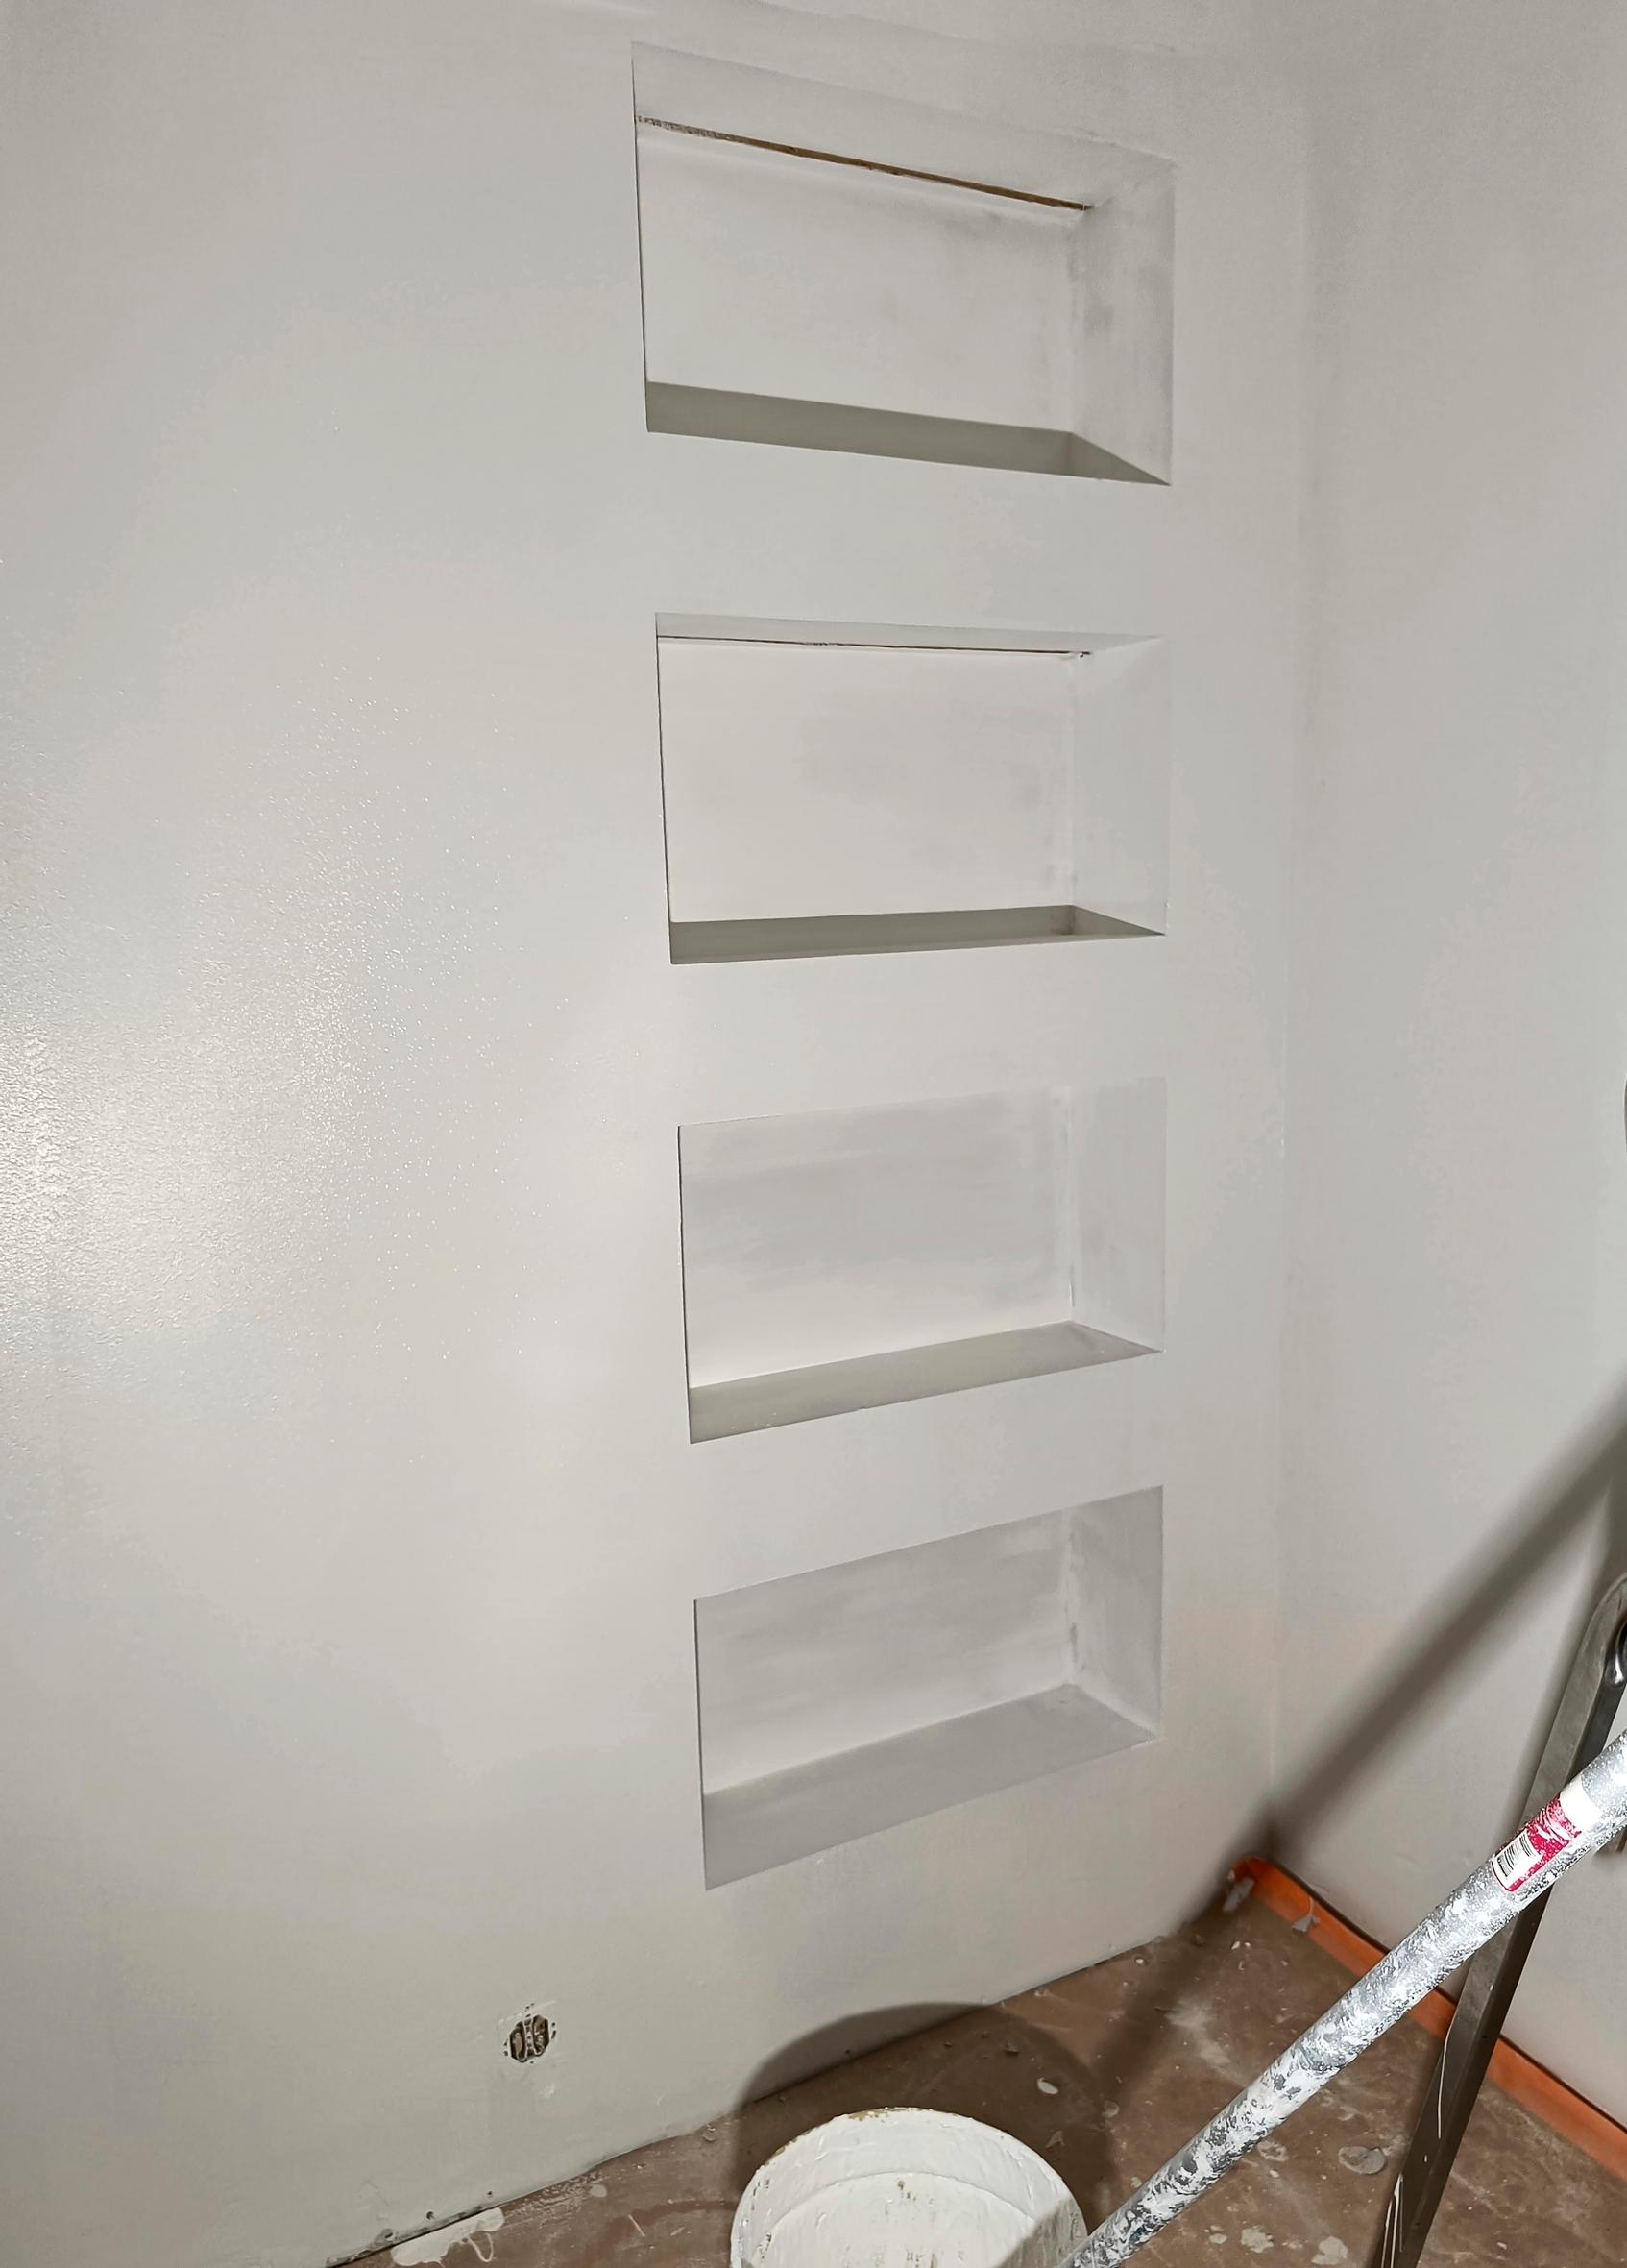
12. Lift the assembled boxes into place. Carefully slide each box into the opening. Align the front edge of the box flush with the wall.
13. Fasten the box from each side. Usually 2–3 screws per side are plenty. Use a level to make sure it’s straight horizontally and in depth.
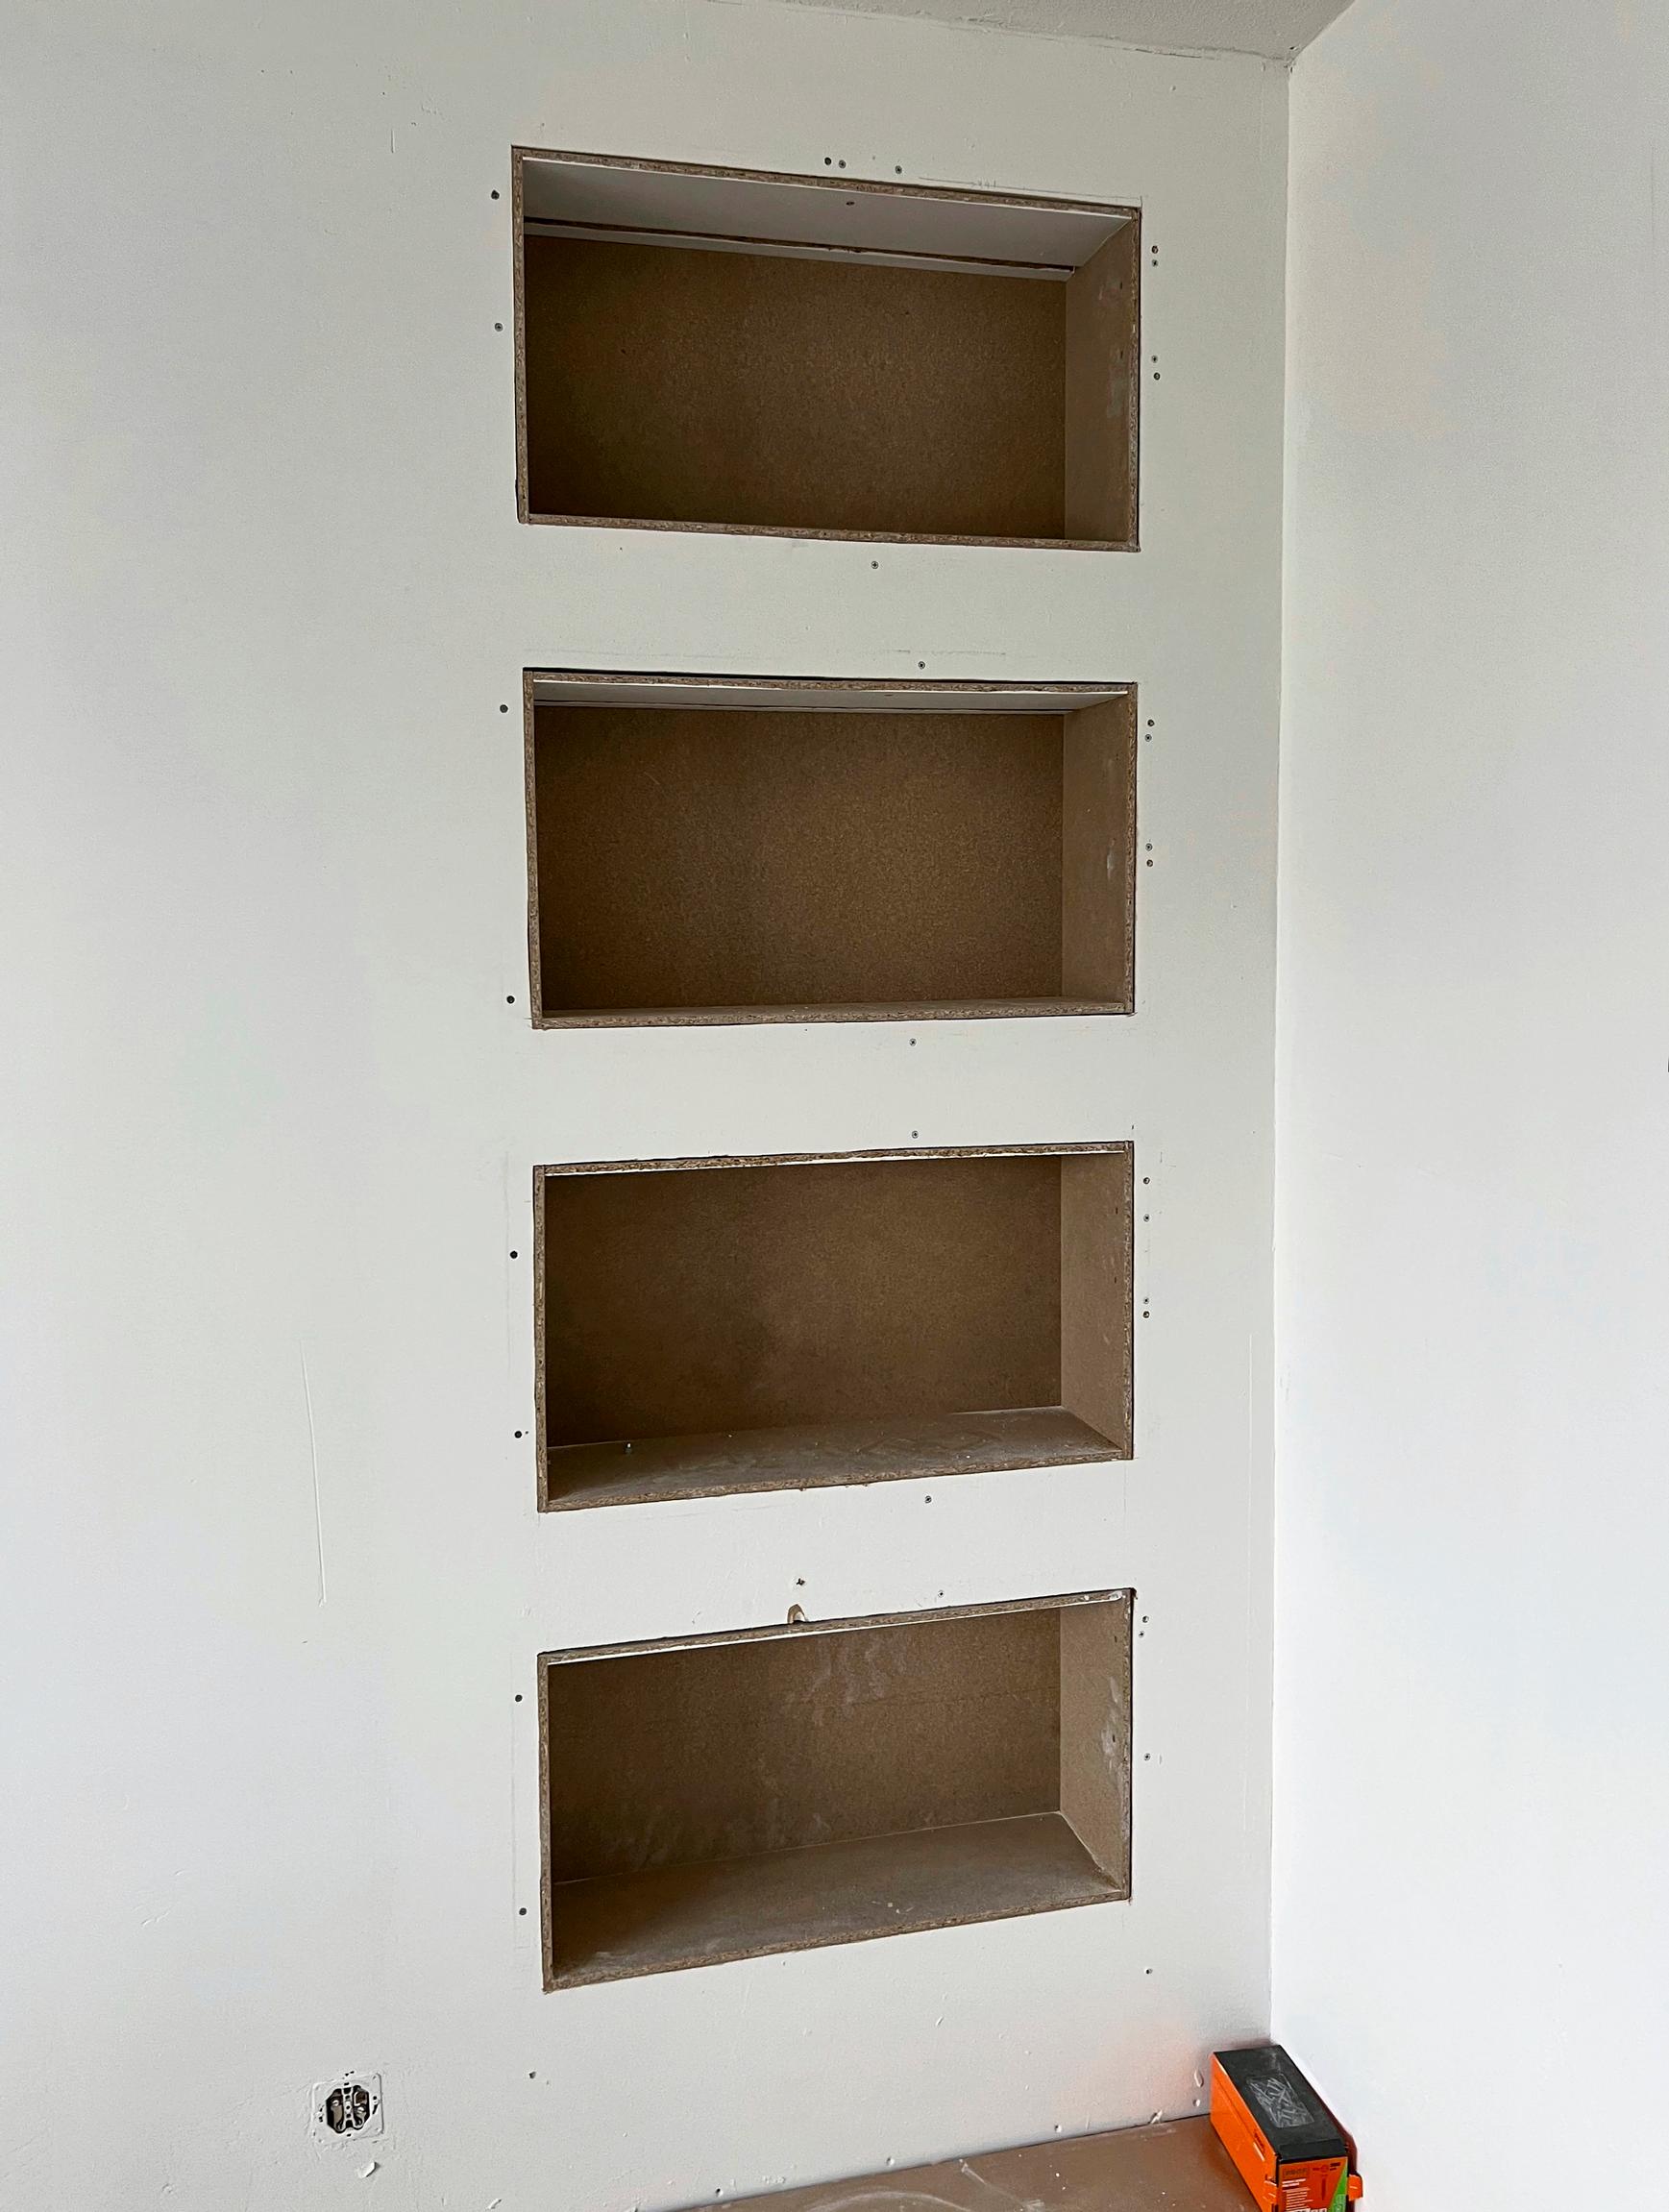
14. After installing all the boxes, check their alignment again. Because the openings might be slightly larger than the boxes, make sure everything lines up perfectly in a vertical row.
15. Use joint tape where the boxes meet the wall. Fill the screw holes inside and out with joint compound. Also fill carefully around the openings. Let the compound dry, then sand until smooth. Repeat as needed until there are no visible edges or holes. Make sure the joint compound you choose is suitable for use with tape.
16. Paint the boxes and the surrounding wall. After the first coat, you may spot uneven areas that need extra compound.
Tip!
A matte paint is more forgiving because brush or roller marks are less noticeable.

17. Install the transformer on the other side of the wall, and guide the wires from the front through the pre-drilled holes to the back. Connect them to the transformer with a quick connector. Position the fixtures in their places. You can attach the LED profiles easily with construction adhesive.
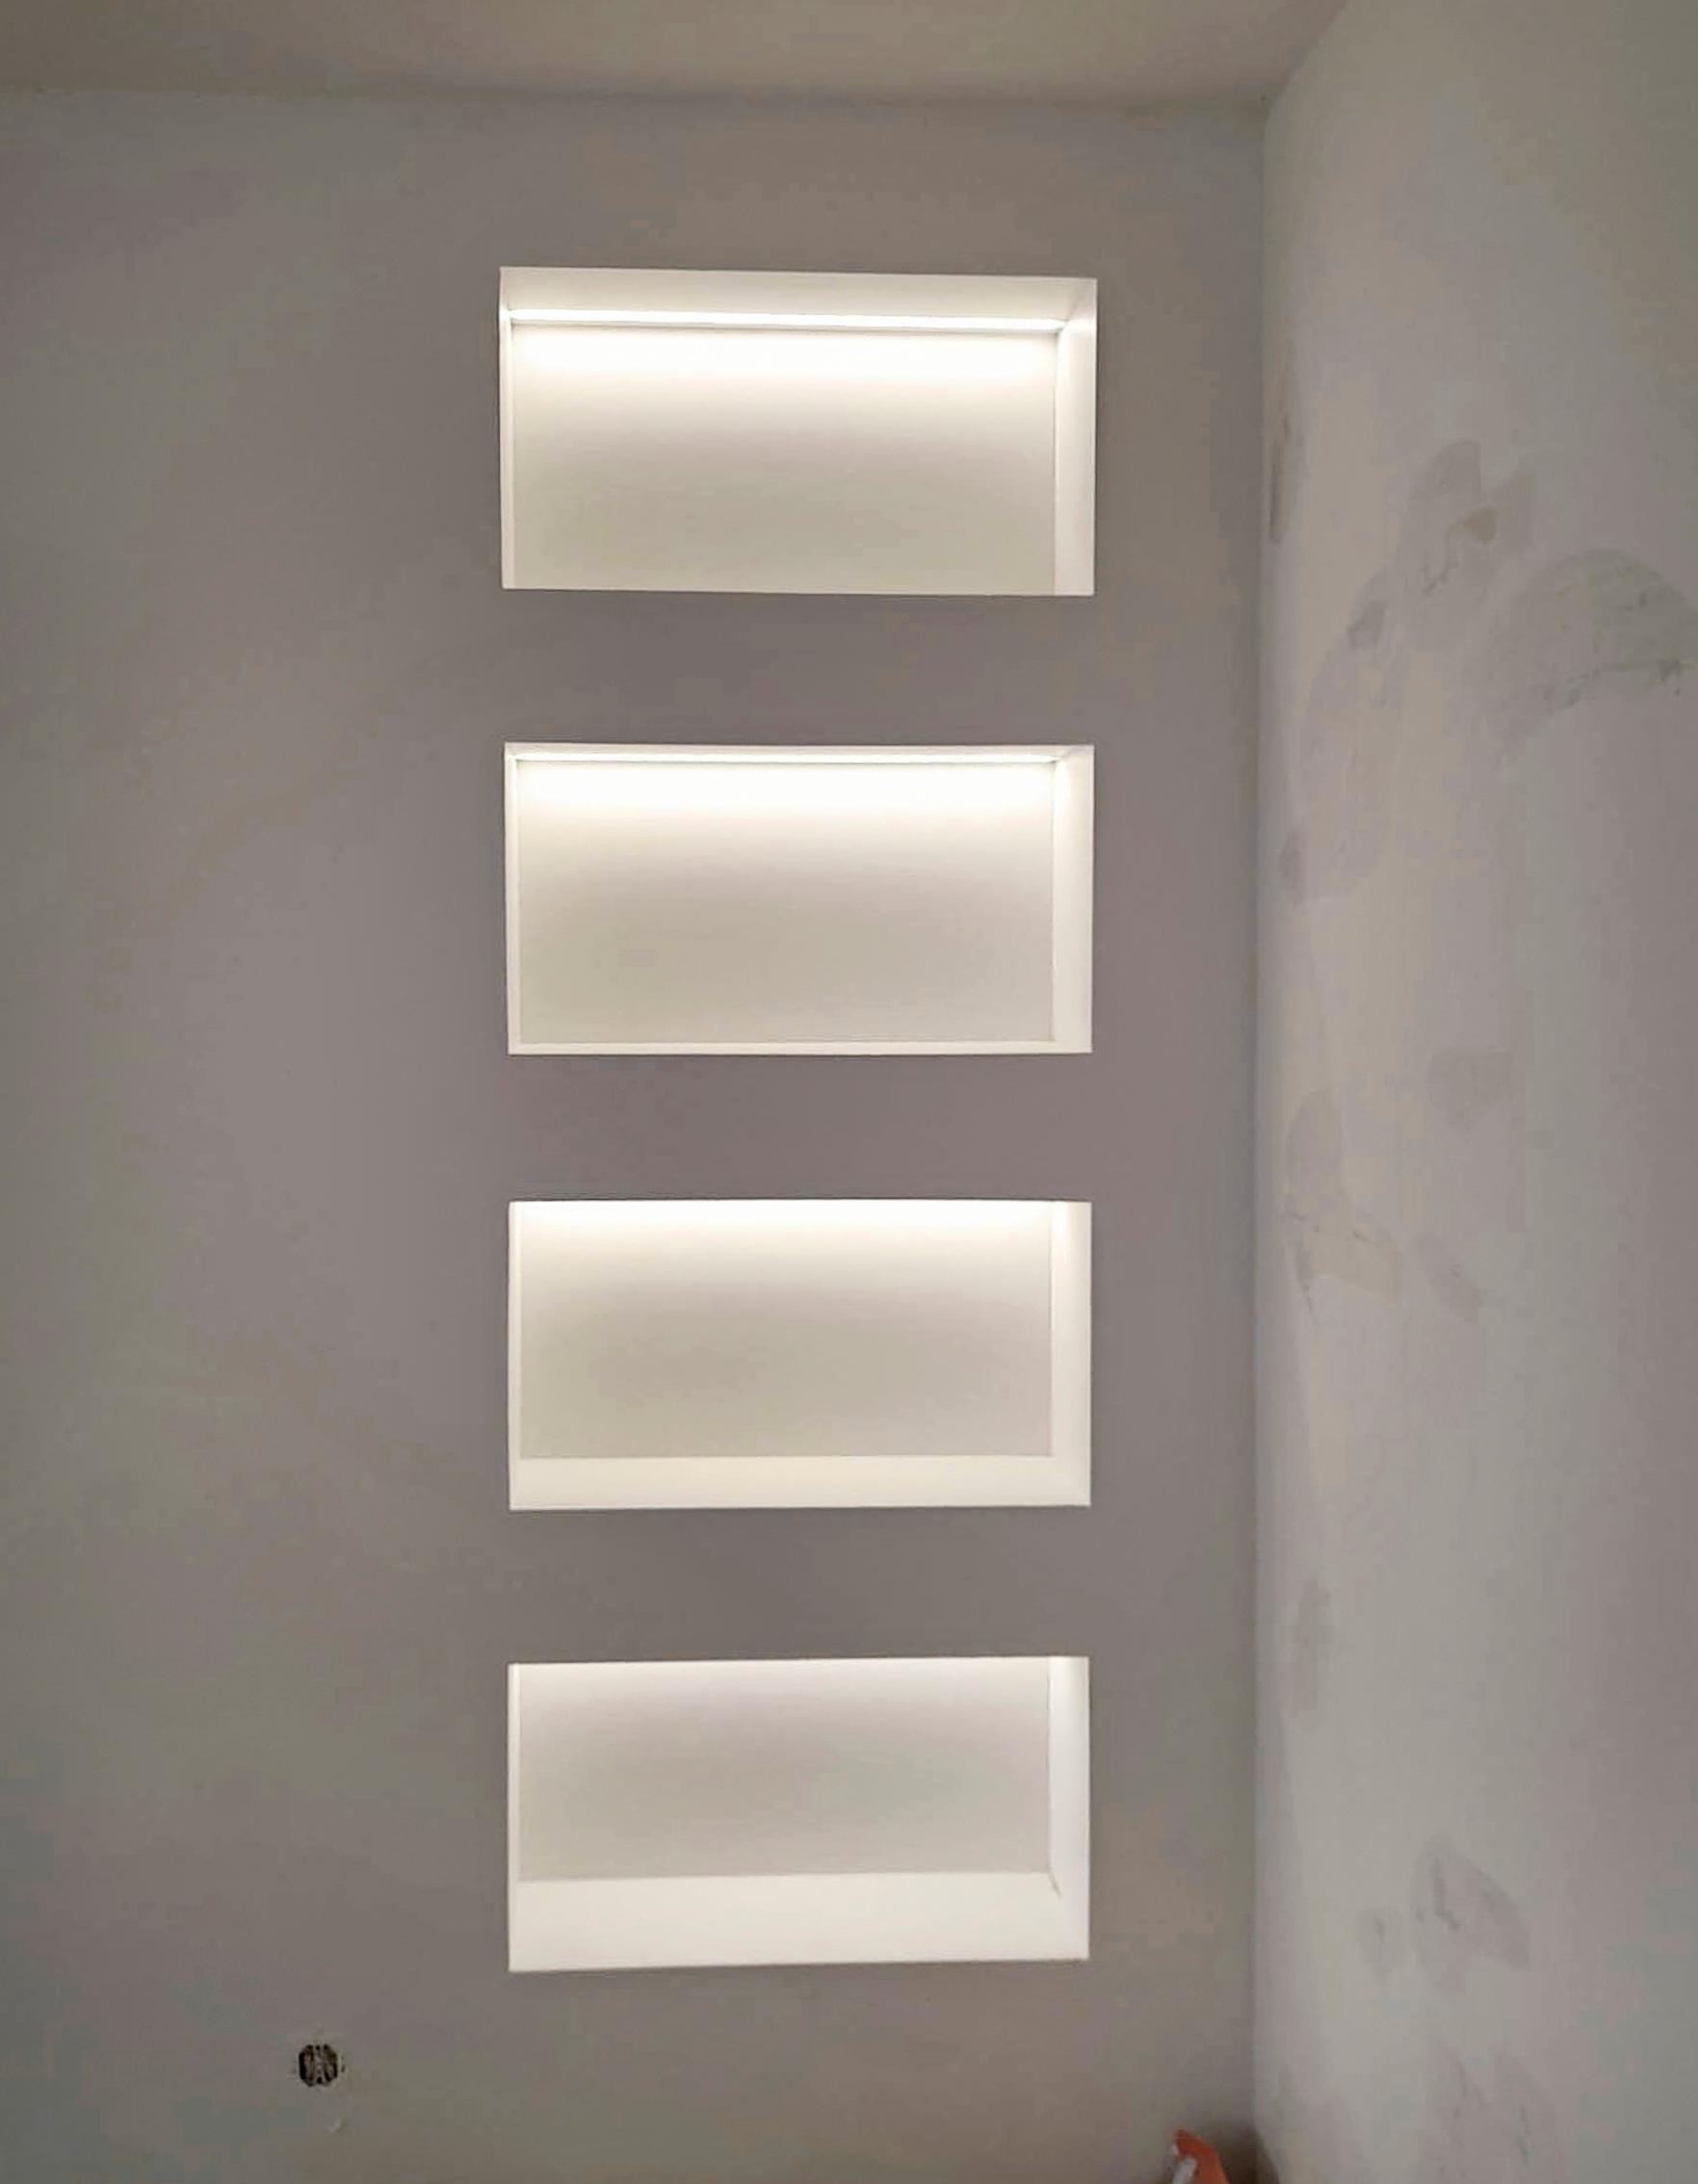
18. Lighting is the finishing touch for these built-in shelves. You’ll have the most flexibility by using dimmable lighting. In this example, the lights switch on and off through the shelf surface, just by touch.
Installing lighting in the shelves
If you want lighting in your shelves, plan it in advance. You can order fixtures that are pre-measured and pre-wired so you don’t need an electrician. The lighting can also be controlled wirelessly or, as here, with a through-surface switch that activates when you touch the shelf. If any electrical work is needed, consult a professional right from the start.
Pro tips:
- If you want a deeper shelf, build a separate support structure on the other side of the wall. One option for material is laminated veneer lumber.
- You can build the shelves by yourself, but it helps to have a friend when inserting the boxes. An extra pair of hands on the other side of the wall makes the job easier.
- Paint the entire wall. Even if you use the same color, painting just a small area can leave visible lines.
- Give yourself at least a few days to finish. While the box parts go together quickly, compound and paint need time to dry.
- You might need permission from the housing association to install a shelf system. File your renovation notice early, as processing can take weeks.