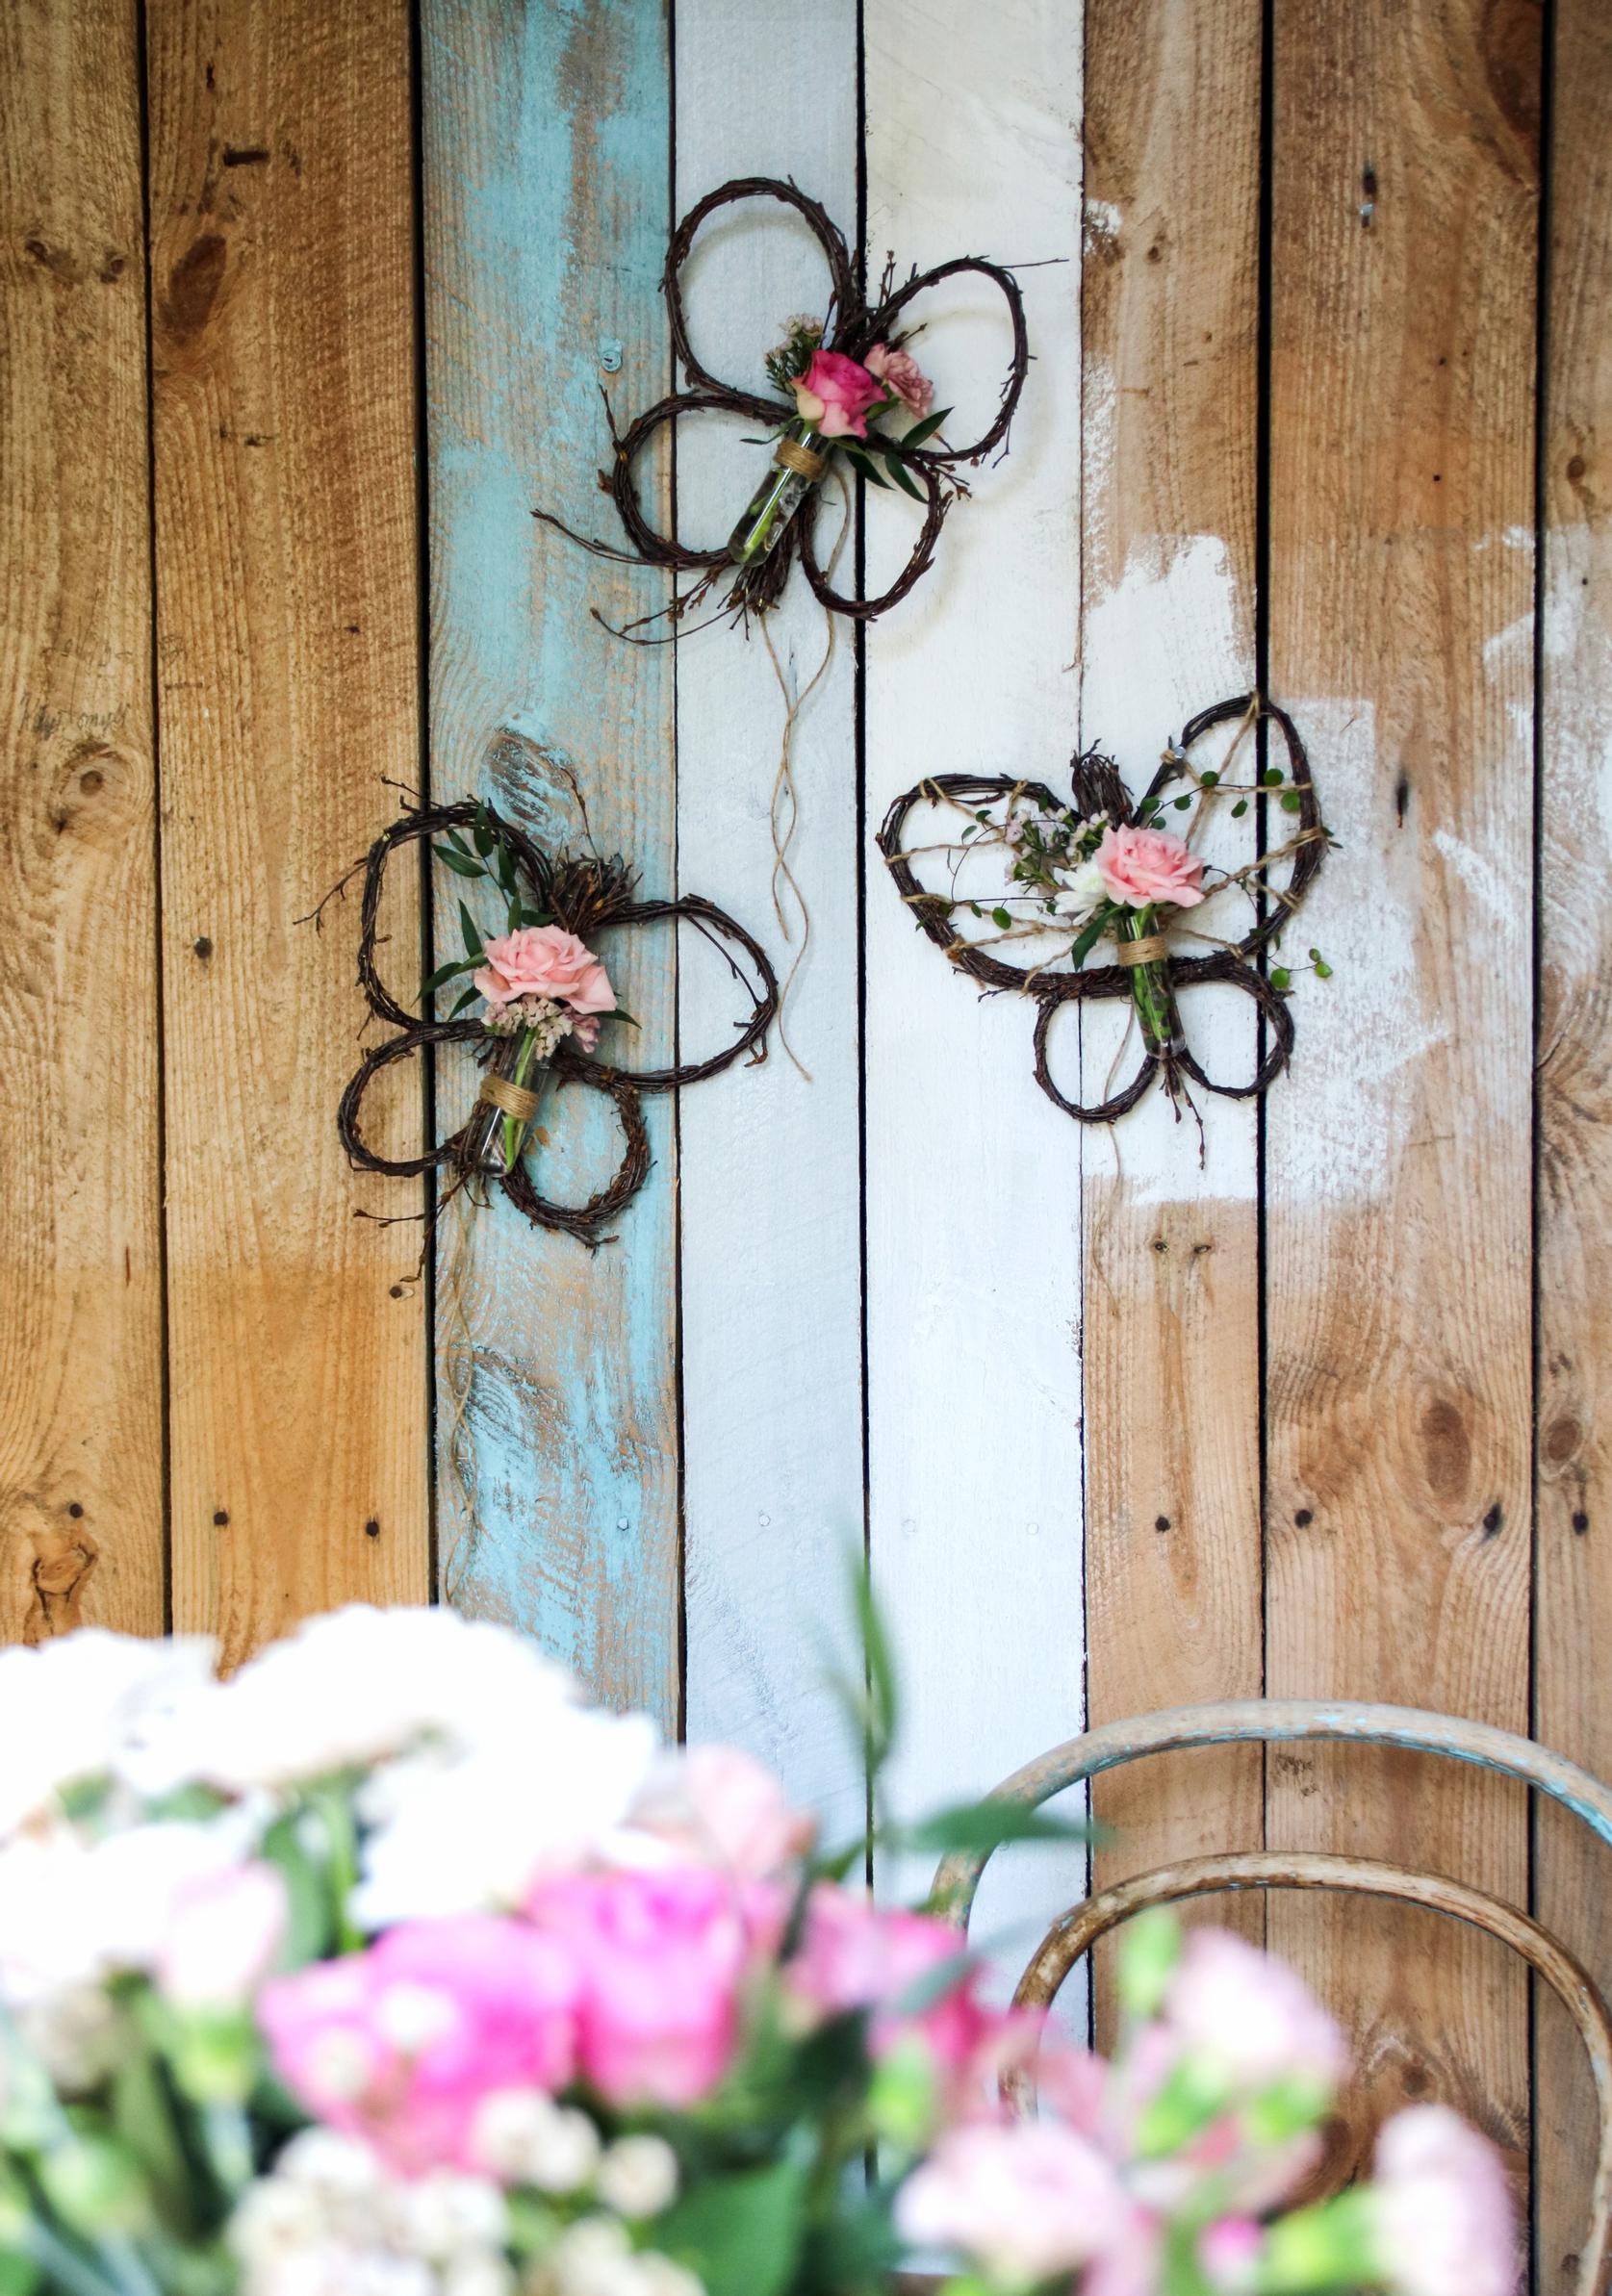
These twig butterflies bring eternal summer to your home—decorate the adorable winged creations with flowers and natural materials
These twig butterflies are perfect as wall decorations, as alternatives to door wreaths, or as garden stake toppers and plant supports. Use them as is or decorate with fresh or dried flowers and other natural materials to match your own taste and style.
Twig butterflies—materials
- fresh branches from deciduous trees
- pruning shears
- wire
- wire cutters
Collecting twigs
- Remember that you may need the landowner’s permission to gather materials from nature—follow your local regulations.
- The best time for twig or weaving projects is when trees have no leaves, but you can make small decorative pieces in summer, too, by removing the leaves.
- You can also find good material from trees cut down in spring before leaves appear. The branches stay flexible for a good while.
- Try using trimmings from shrubs in your garden, too—some varieties of spirea, for example, make excellent material.

Twig butterflies—instructions
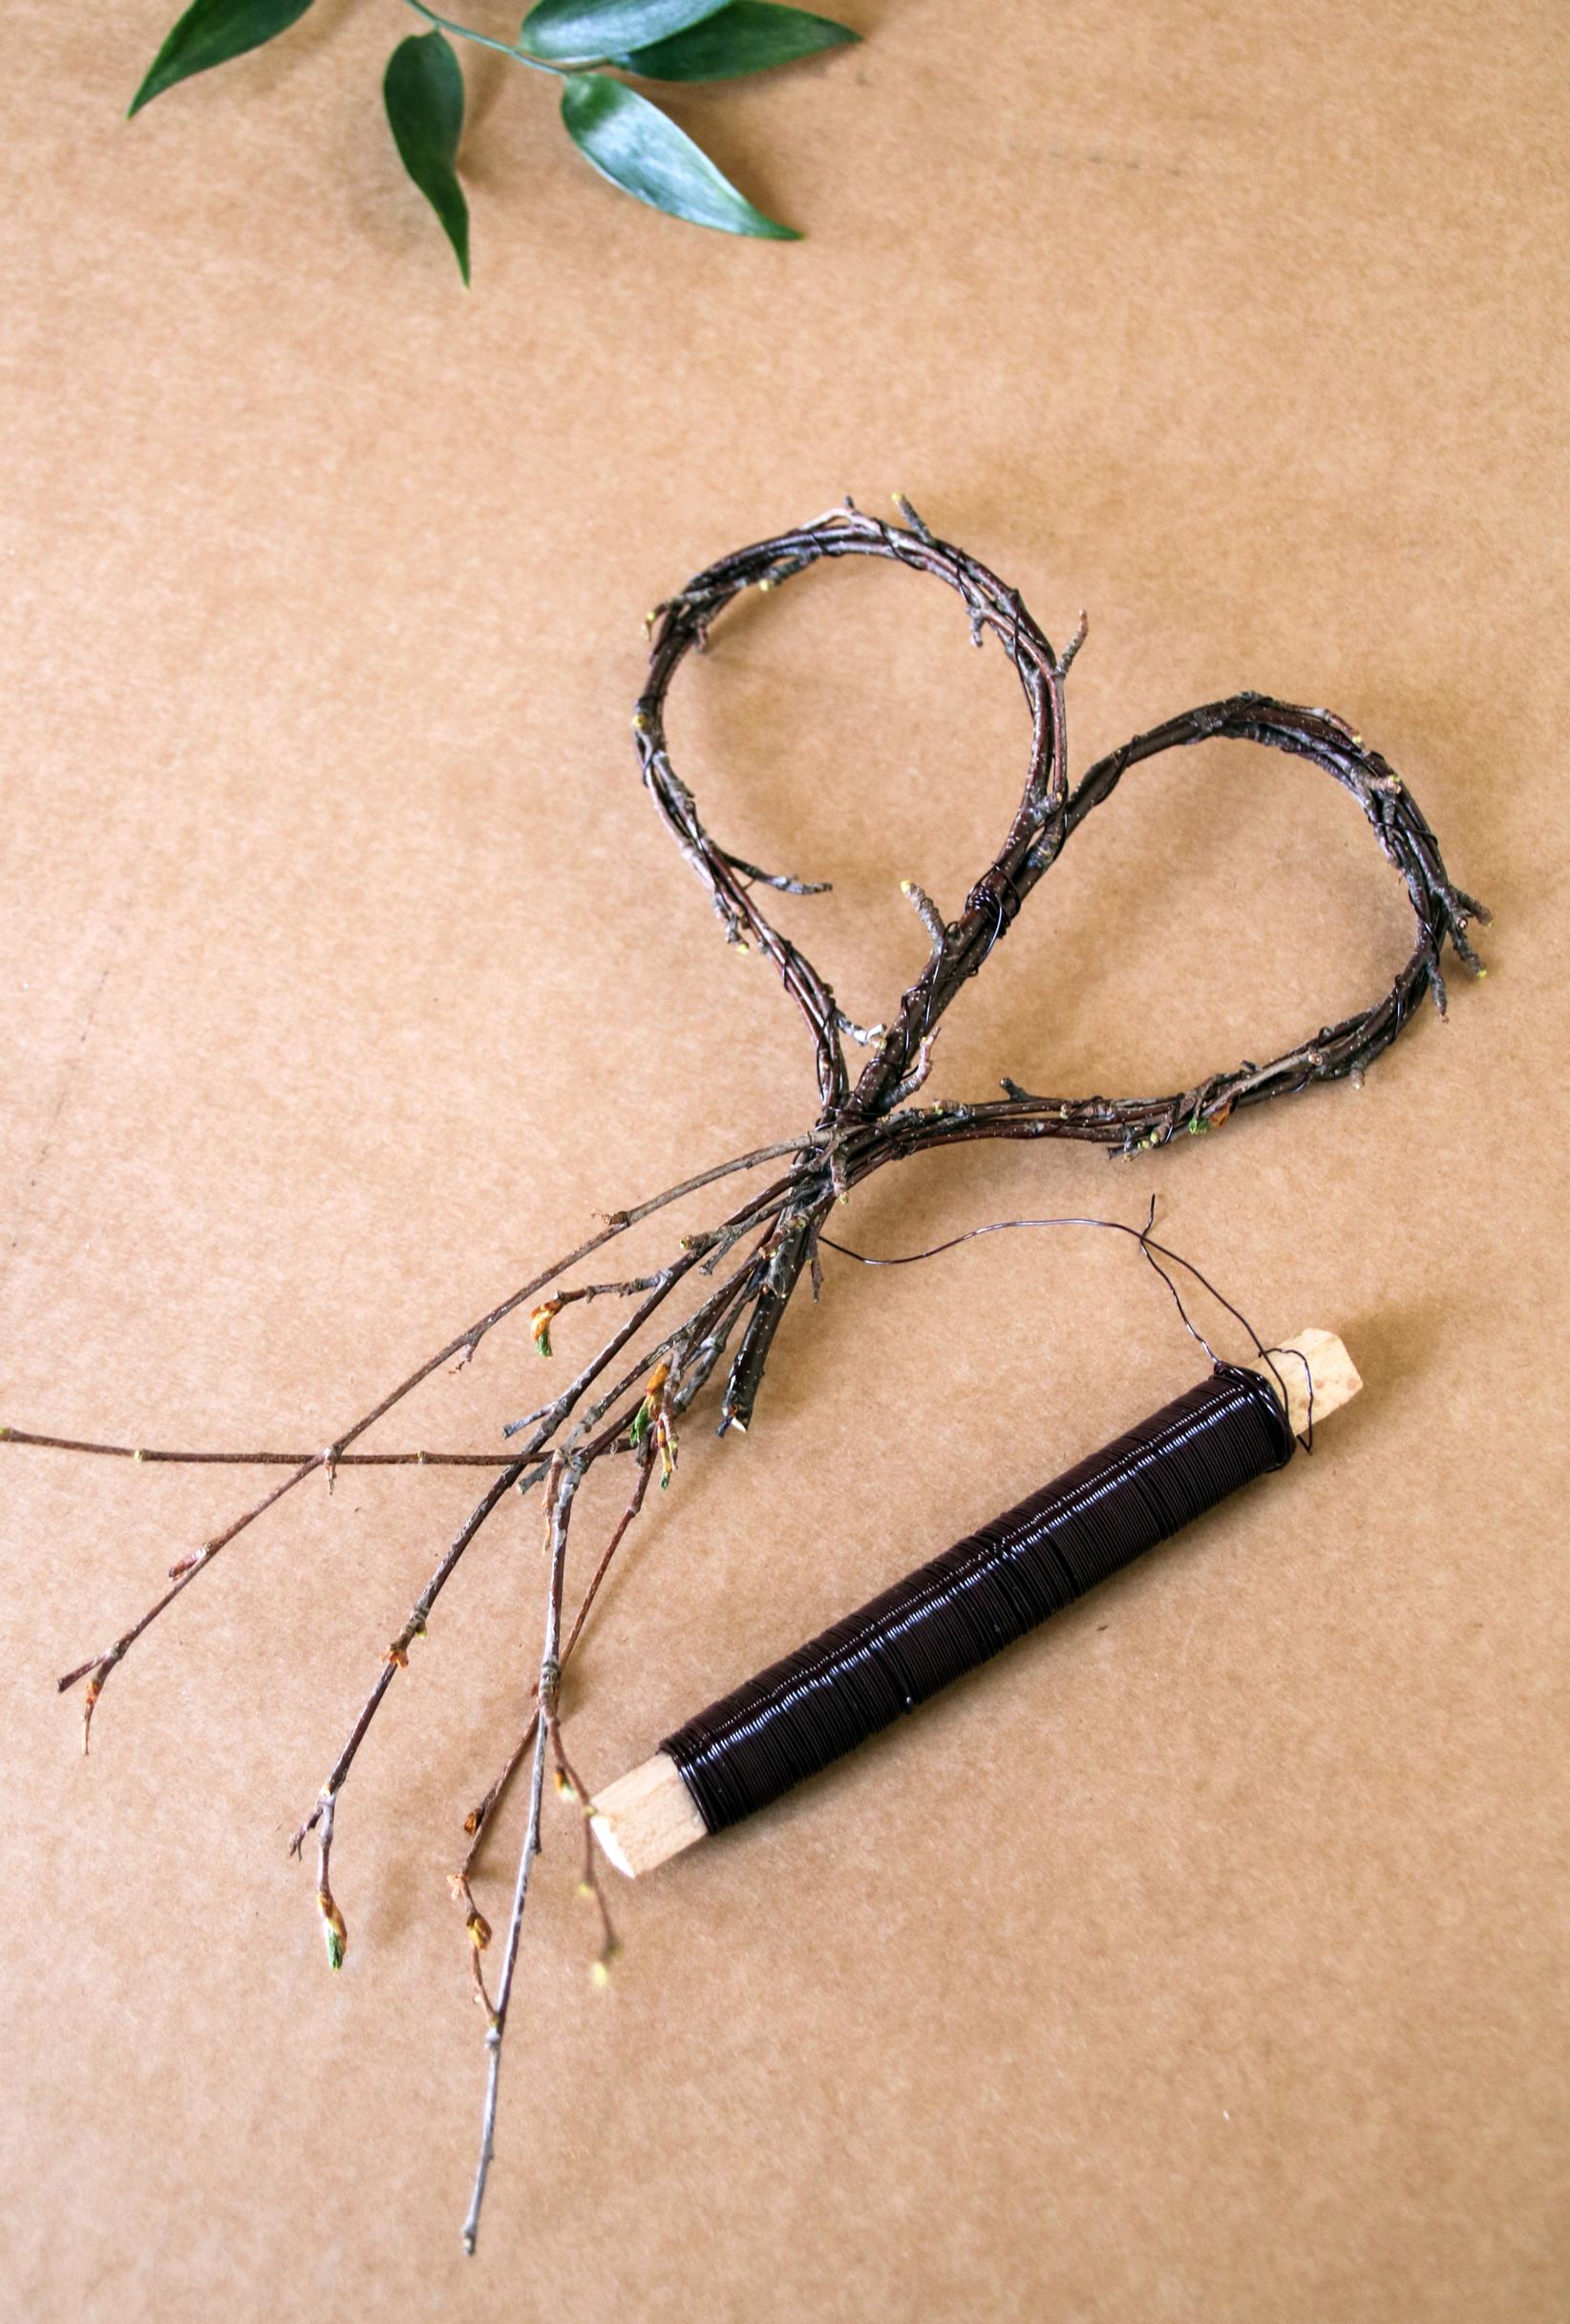
1. Plan the size of your butterfly. Keep in mind that the finished piece consists of four wing sections, so it might turn out larger than you think!
2. Using pruning shears, cut two bundles of similar length and thickness, preferably from bird cherry or birch twigs. Secure the bottom of the bundle tightly with wire by wrapping it around several times along about 5–10 cm (2–4 inches) of the bundle.
3. Carefully shape and bend the twig bundle into a loop resembling the letter P or a half-note. It’s best to bend just a little at a time to prevent the twigs from breaking. Forceful bends and rough handling will easily snap the material. Reinforce with wire as you go, and finally wrap inconspicuous wire around the attachment point several times to make the frame sturdy and firm. Brown, black, or completely untreated wire blends best with the twigs. Shape a second wing of exactly the same size for symmetry.

4. Make two smaller loops for the butterfly’s lower wing pair. Attach the two, somewhat heart-shaped, pieces to each other so that the wings connect in the center of the design.

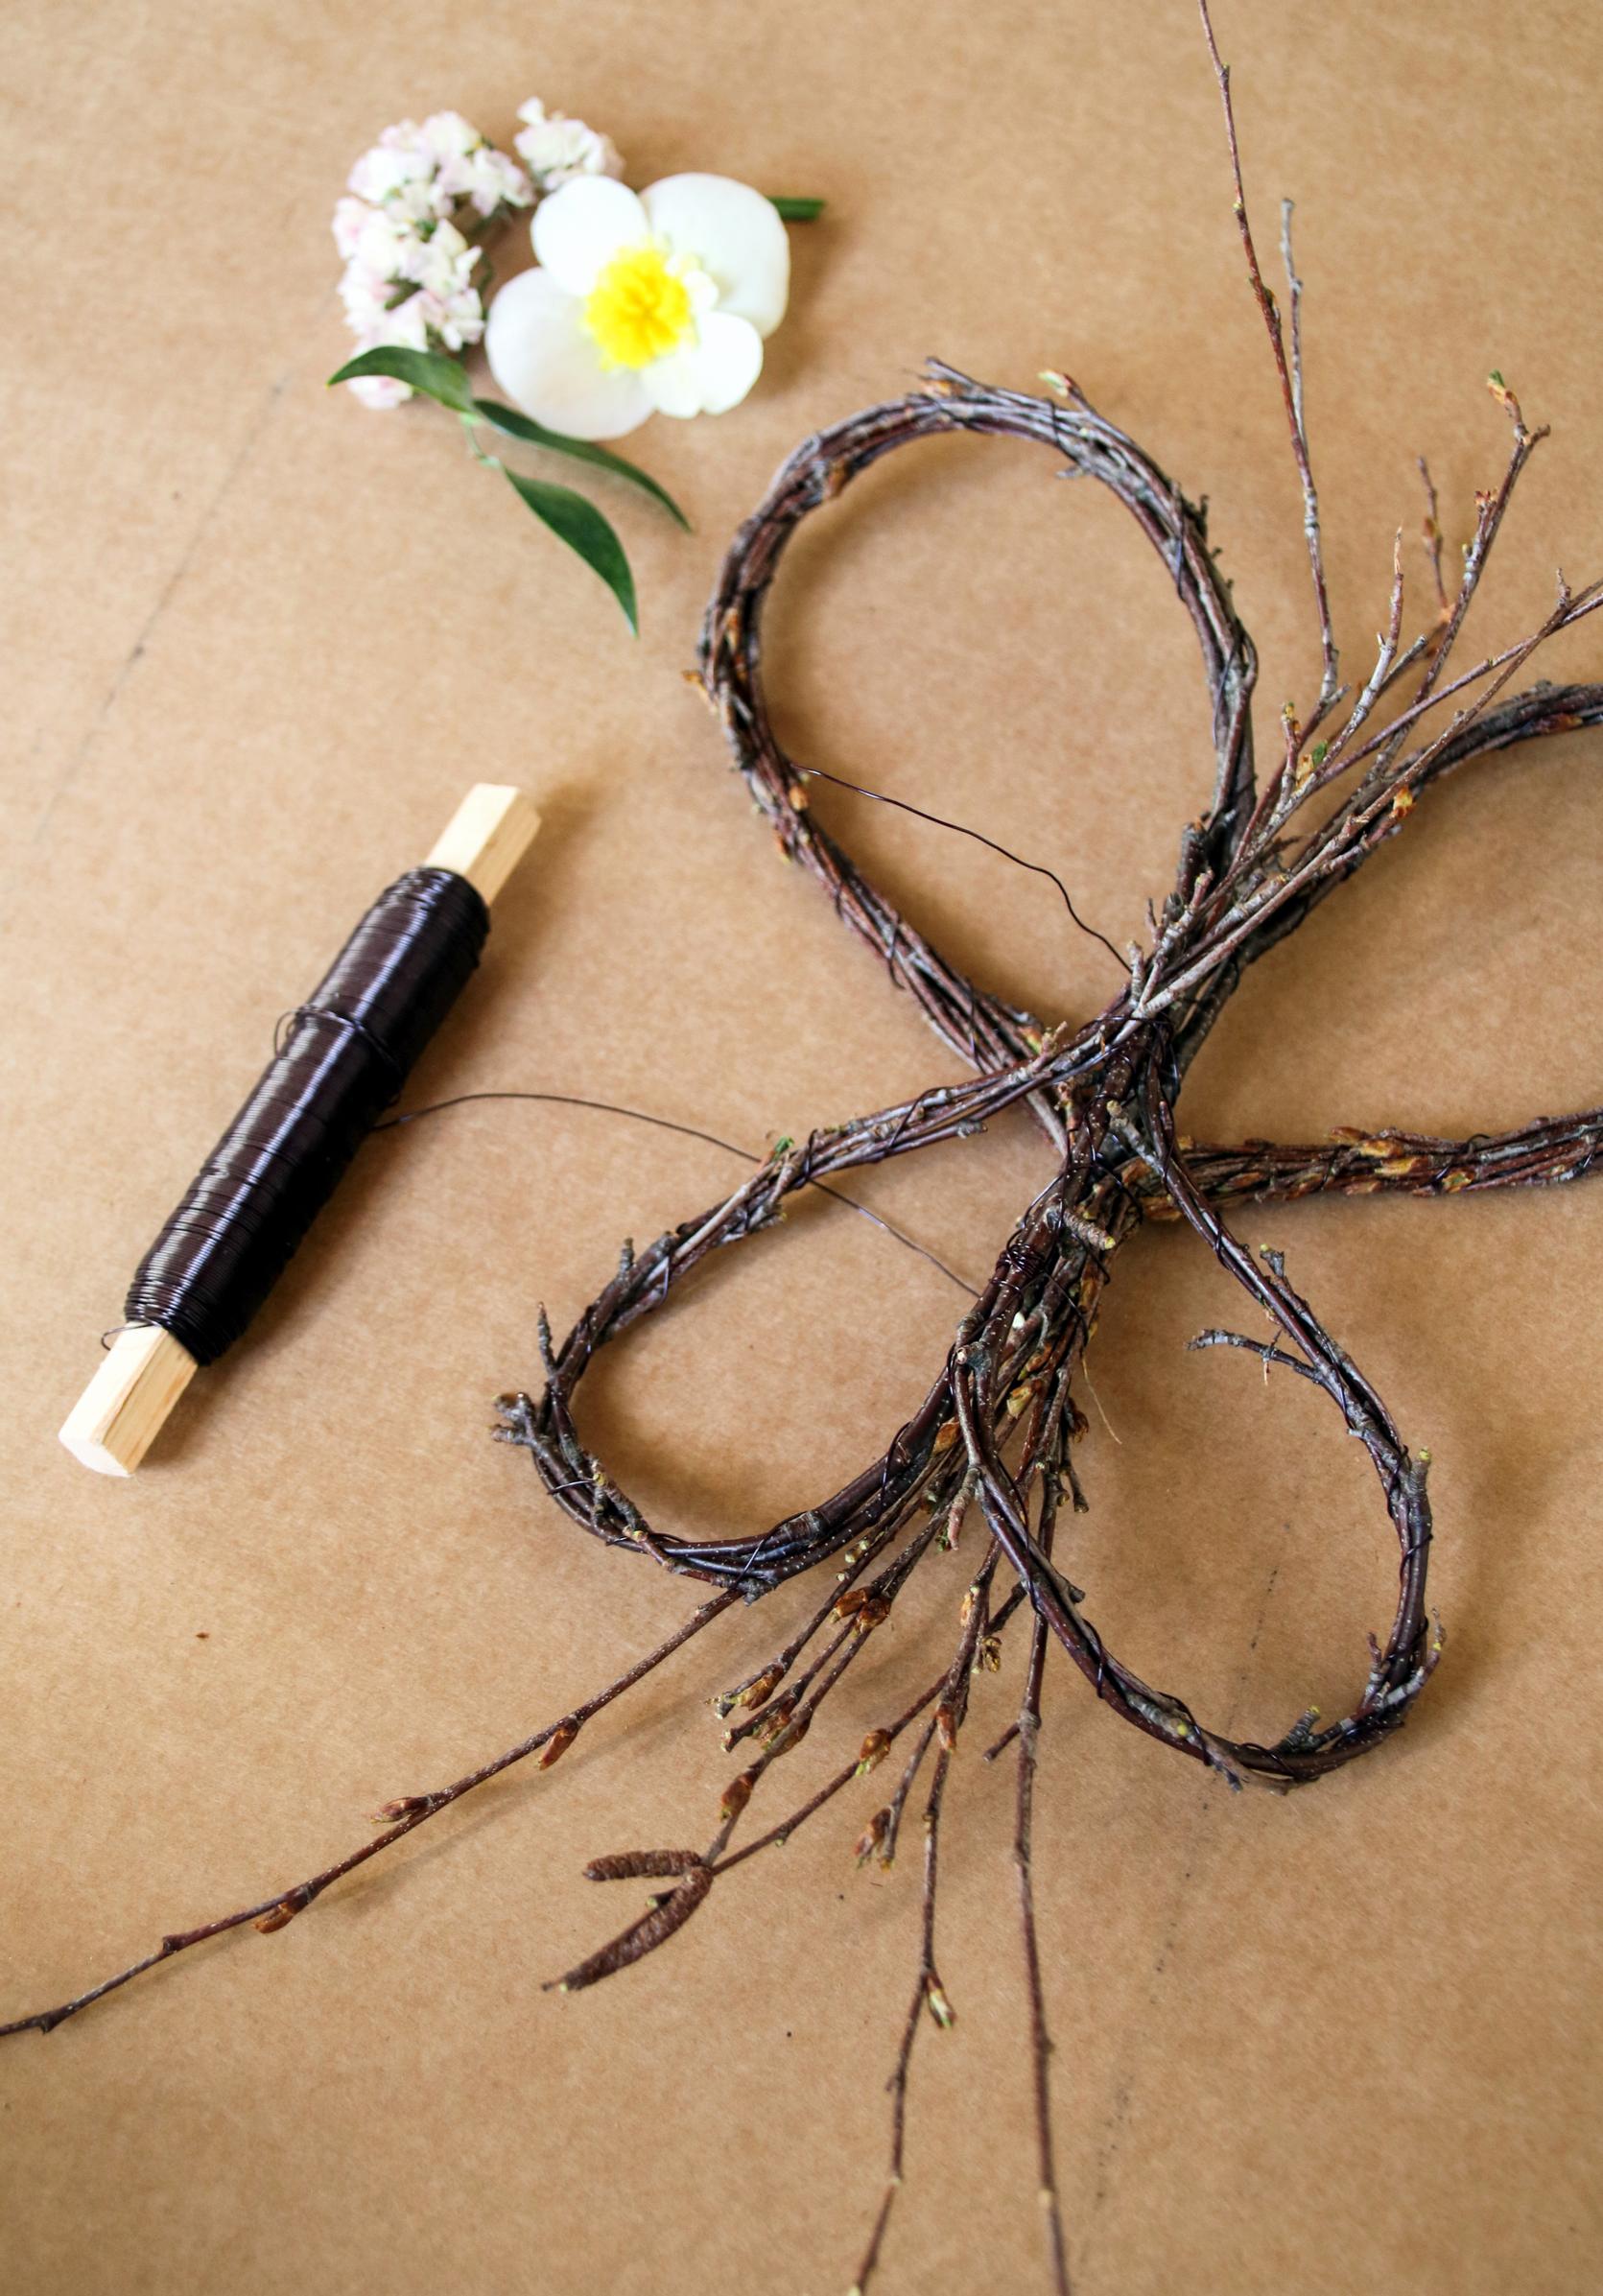
5. Fold any protruding twigs into the butterfly’s body and wrap wire around the center part, as well as between the upper and lower wings. If you’re adding floral foam later (instructions below), try to keep the center as flat and even as possible.

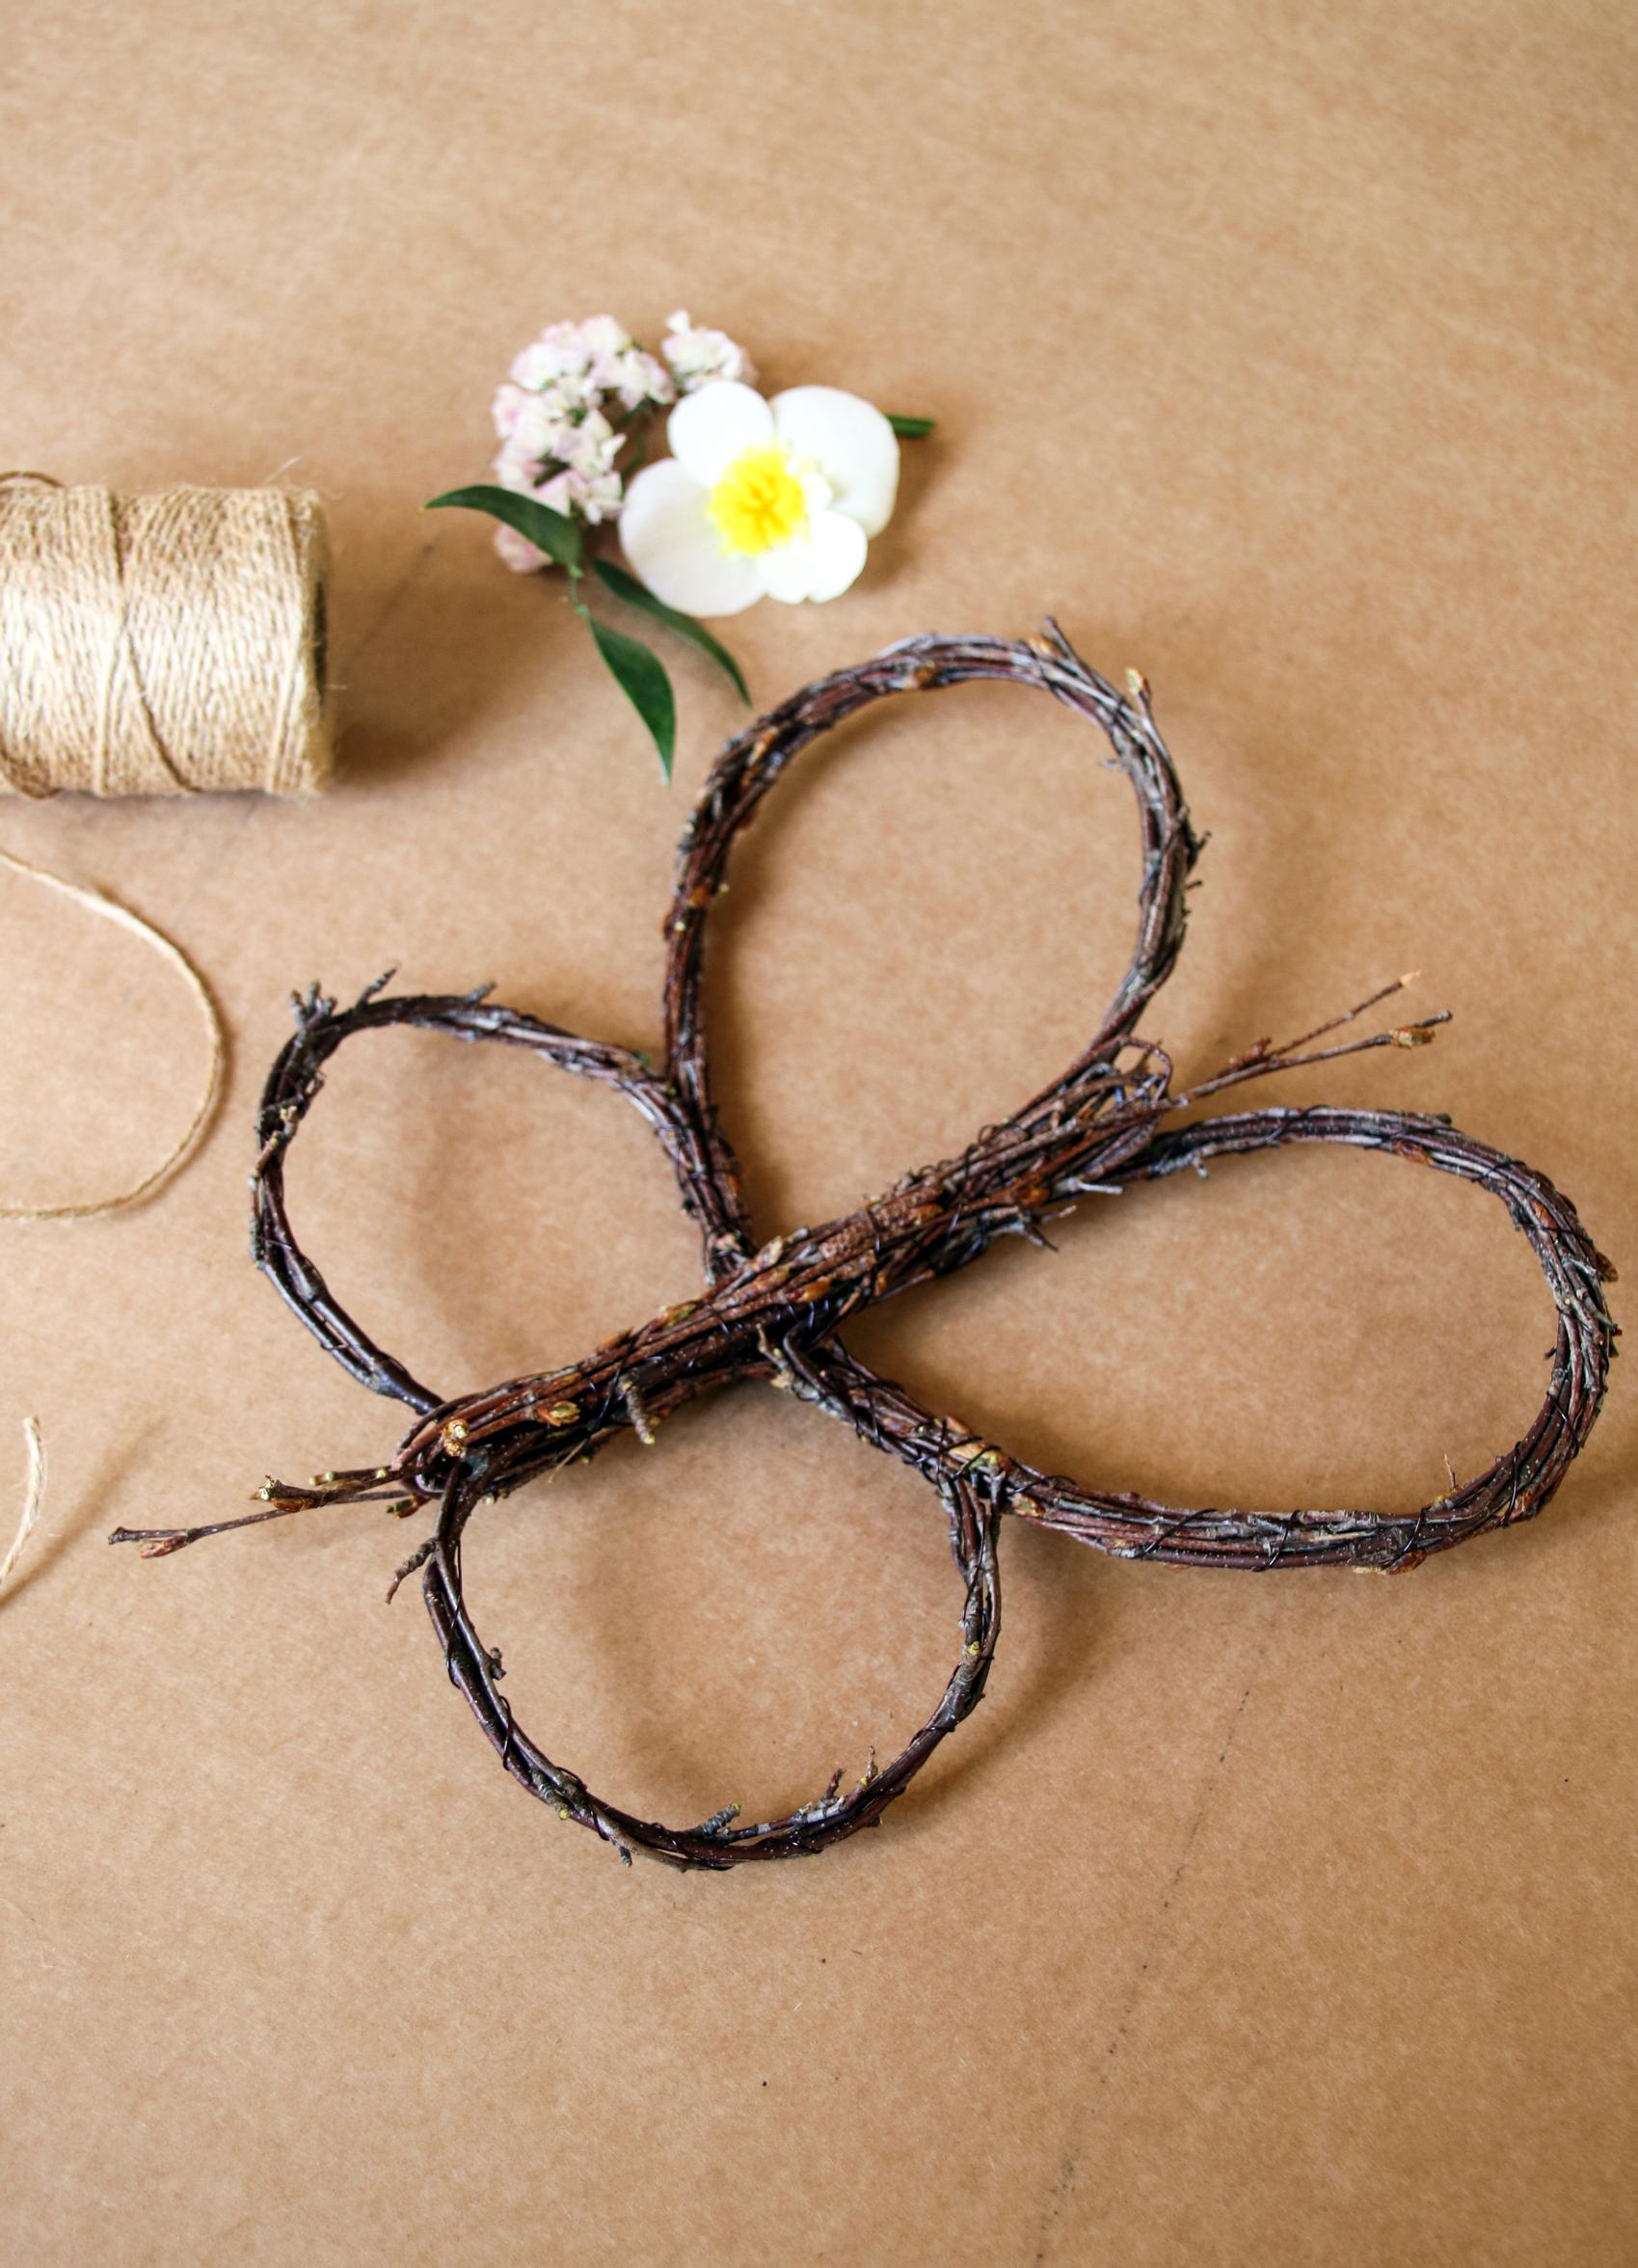
6. Finish off any stray branches by weaving them into the frame or trimming if needed. Little stray twigs add charm and create an impression of movement.
7. Finally, make a sturdy wire loop at the back of the piece for hanging. Alternatively, you can hang the butterfly directly from a wing loop on a sturdy nail.

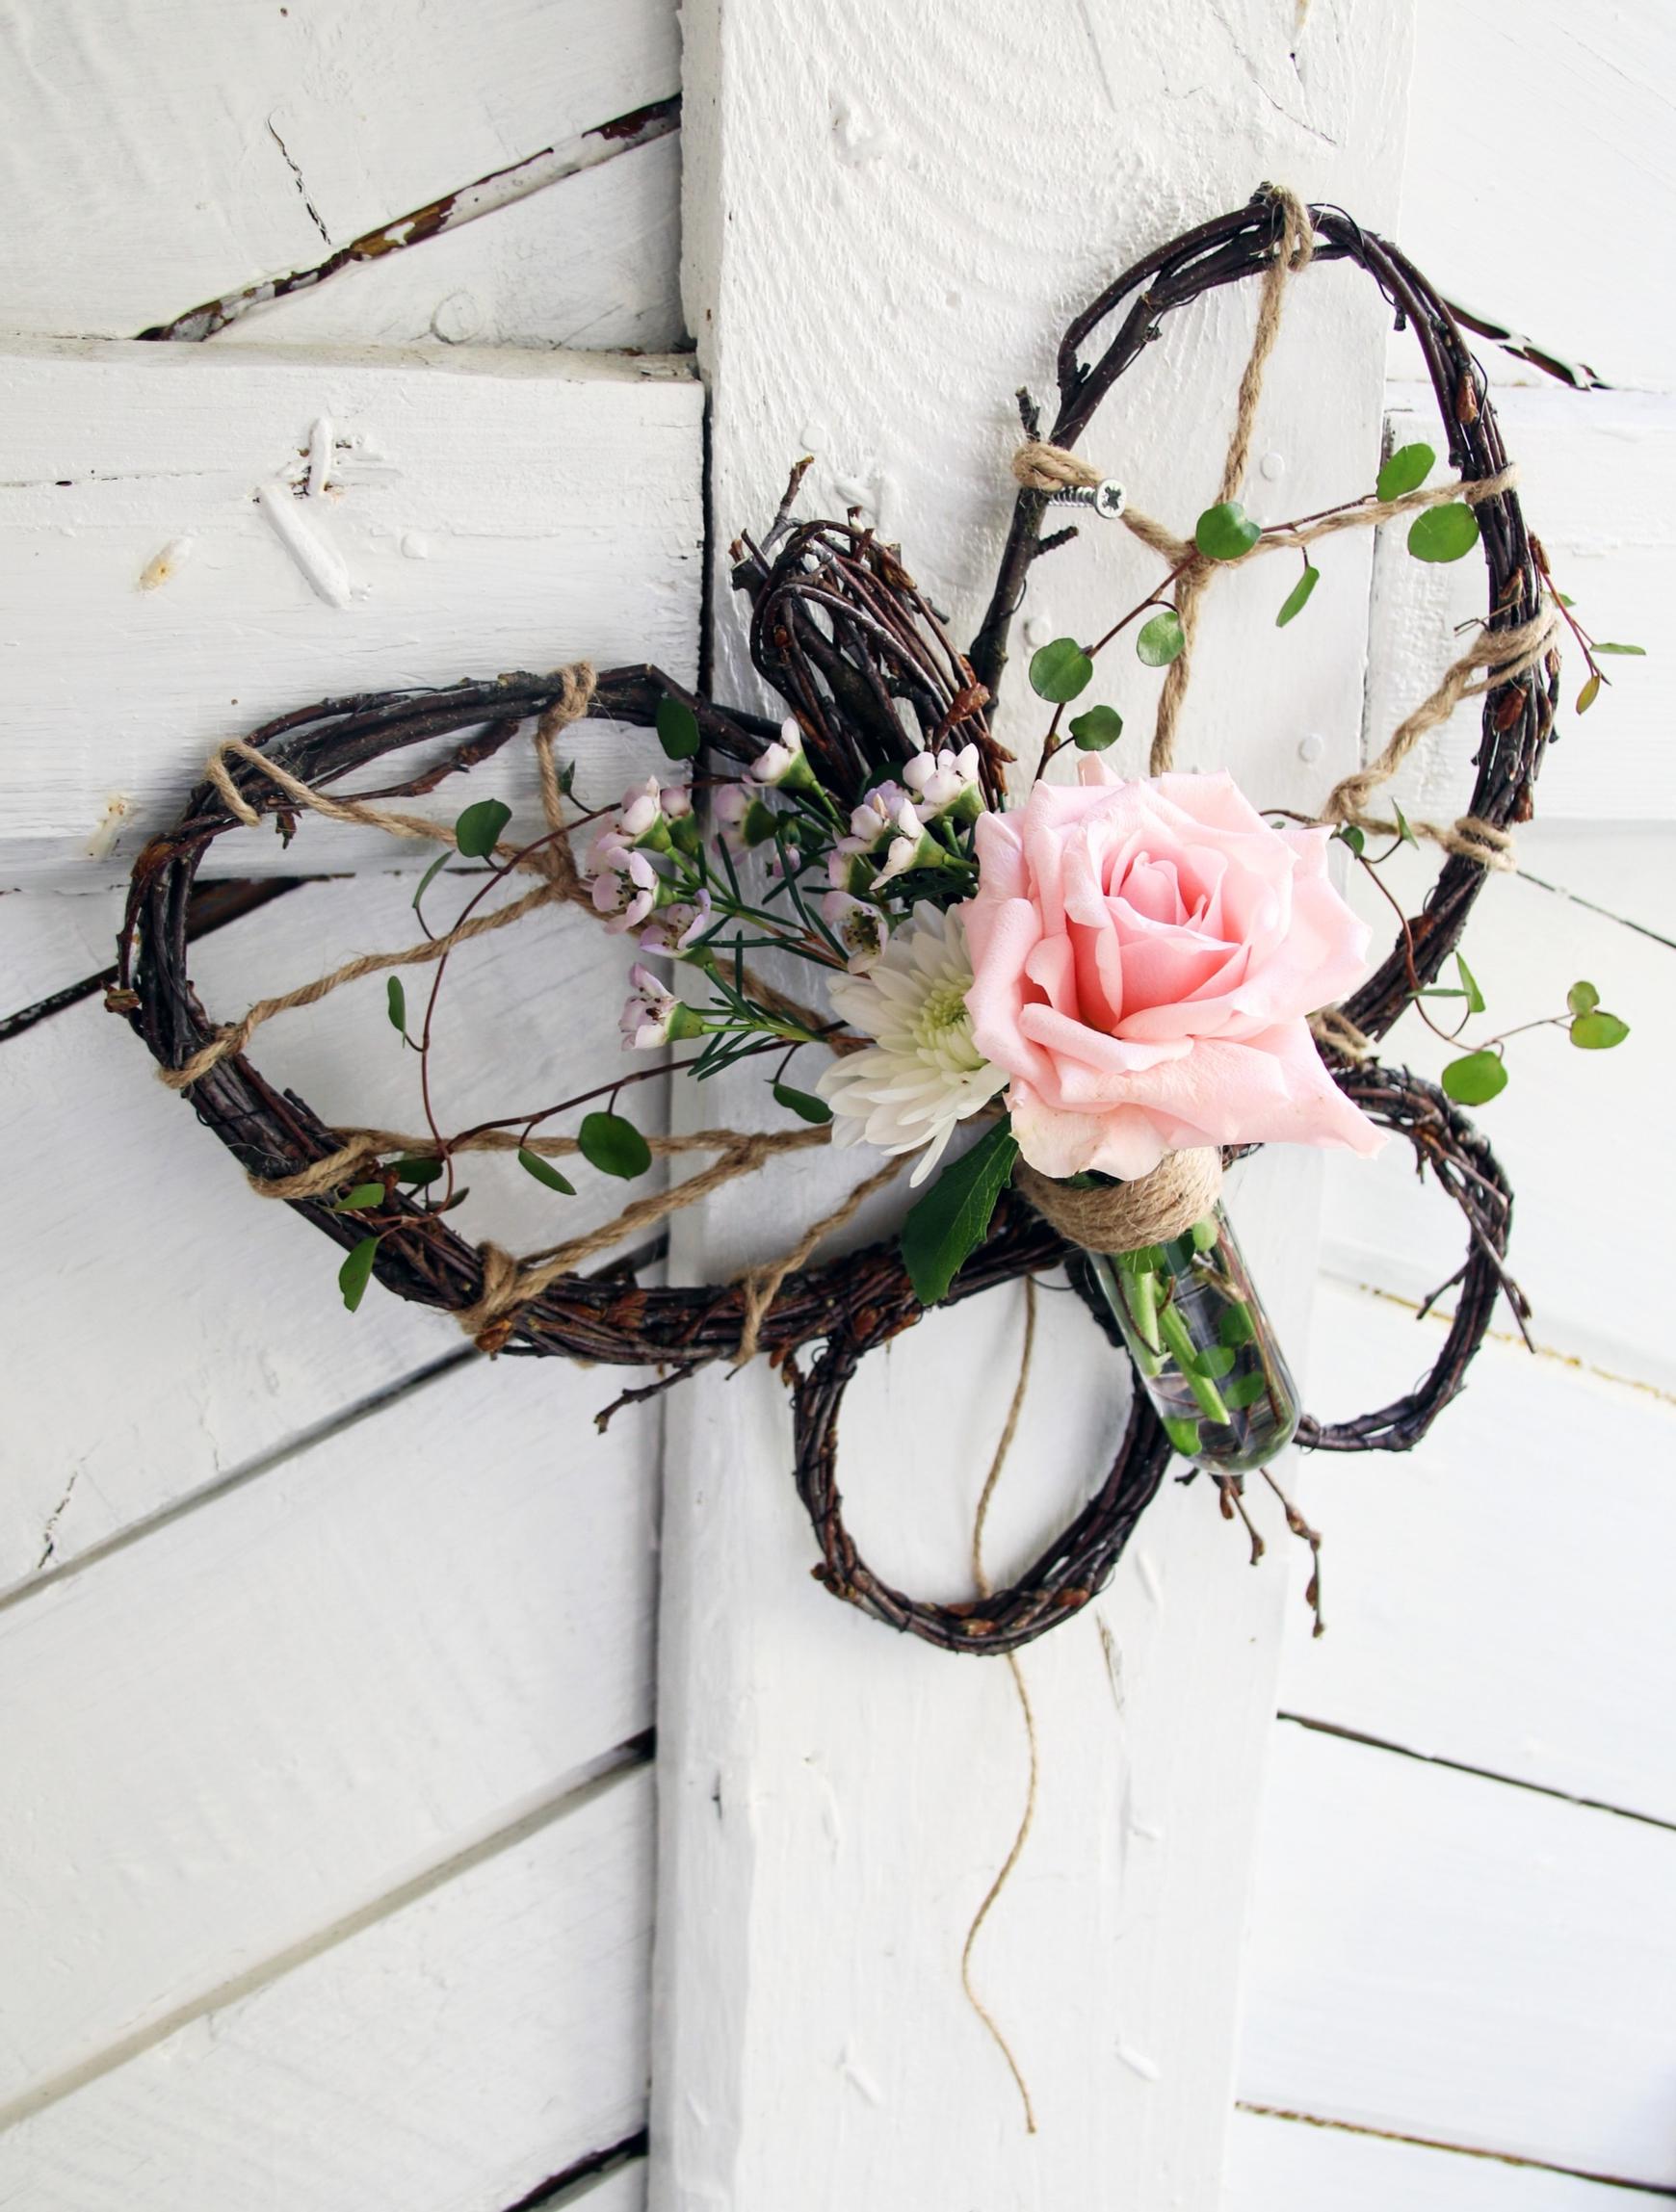
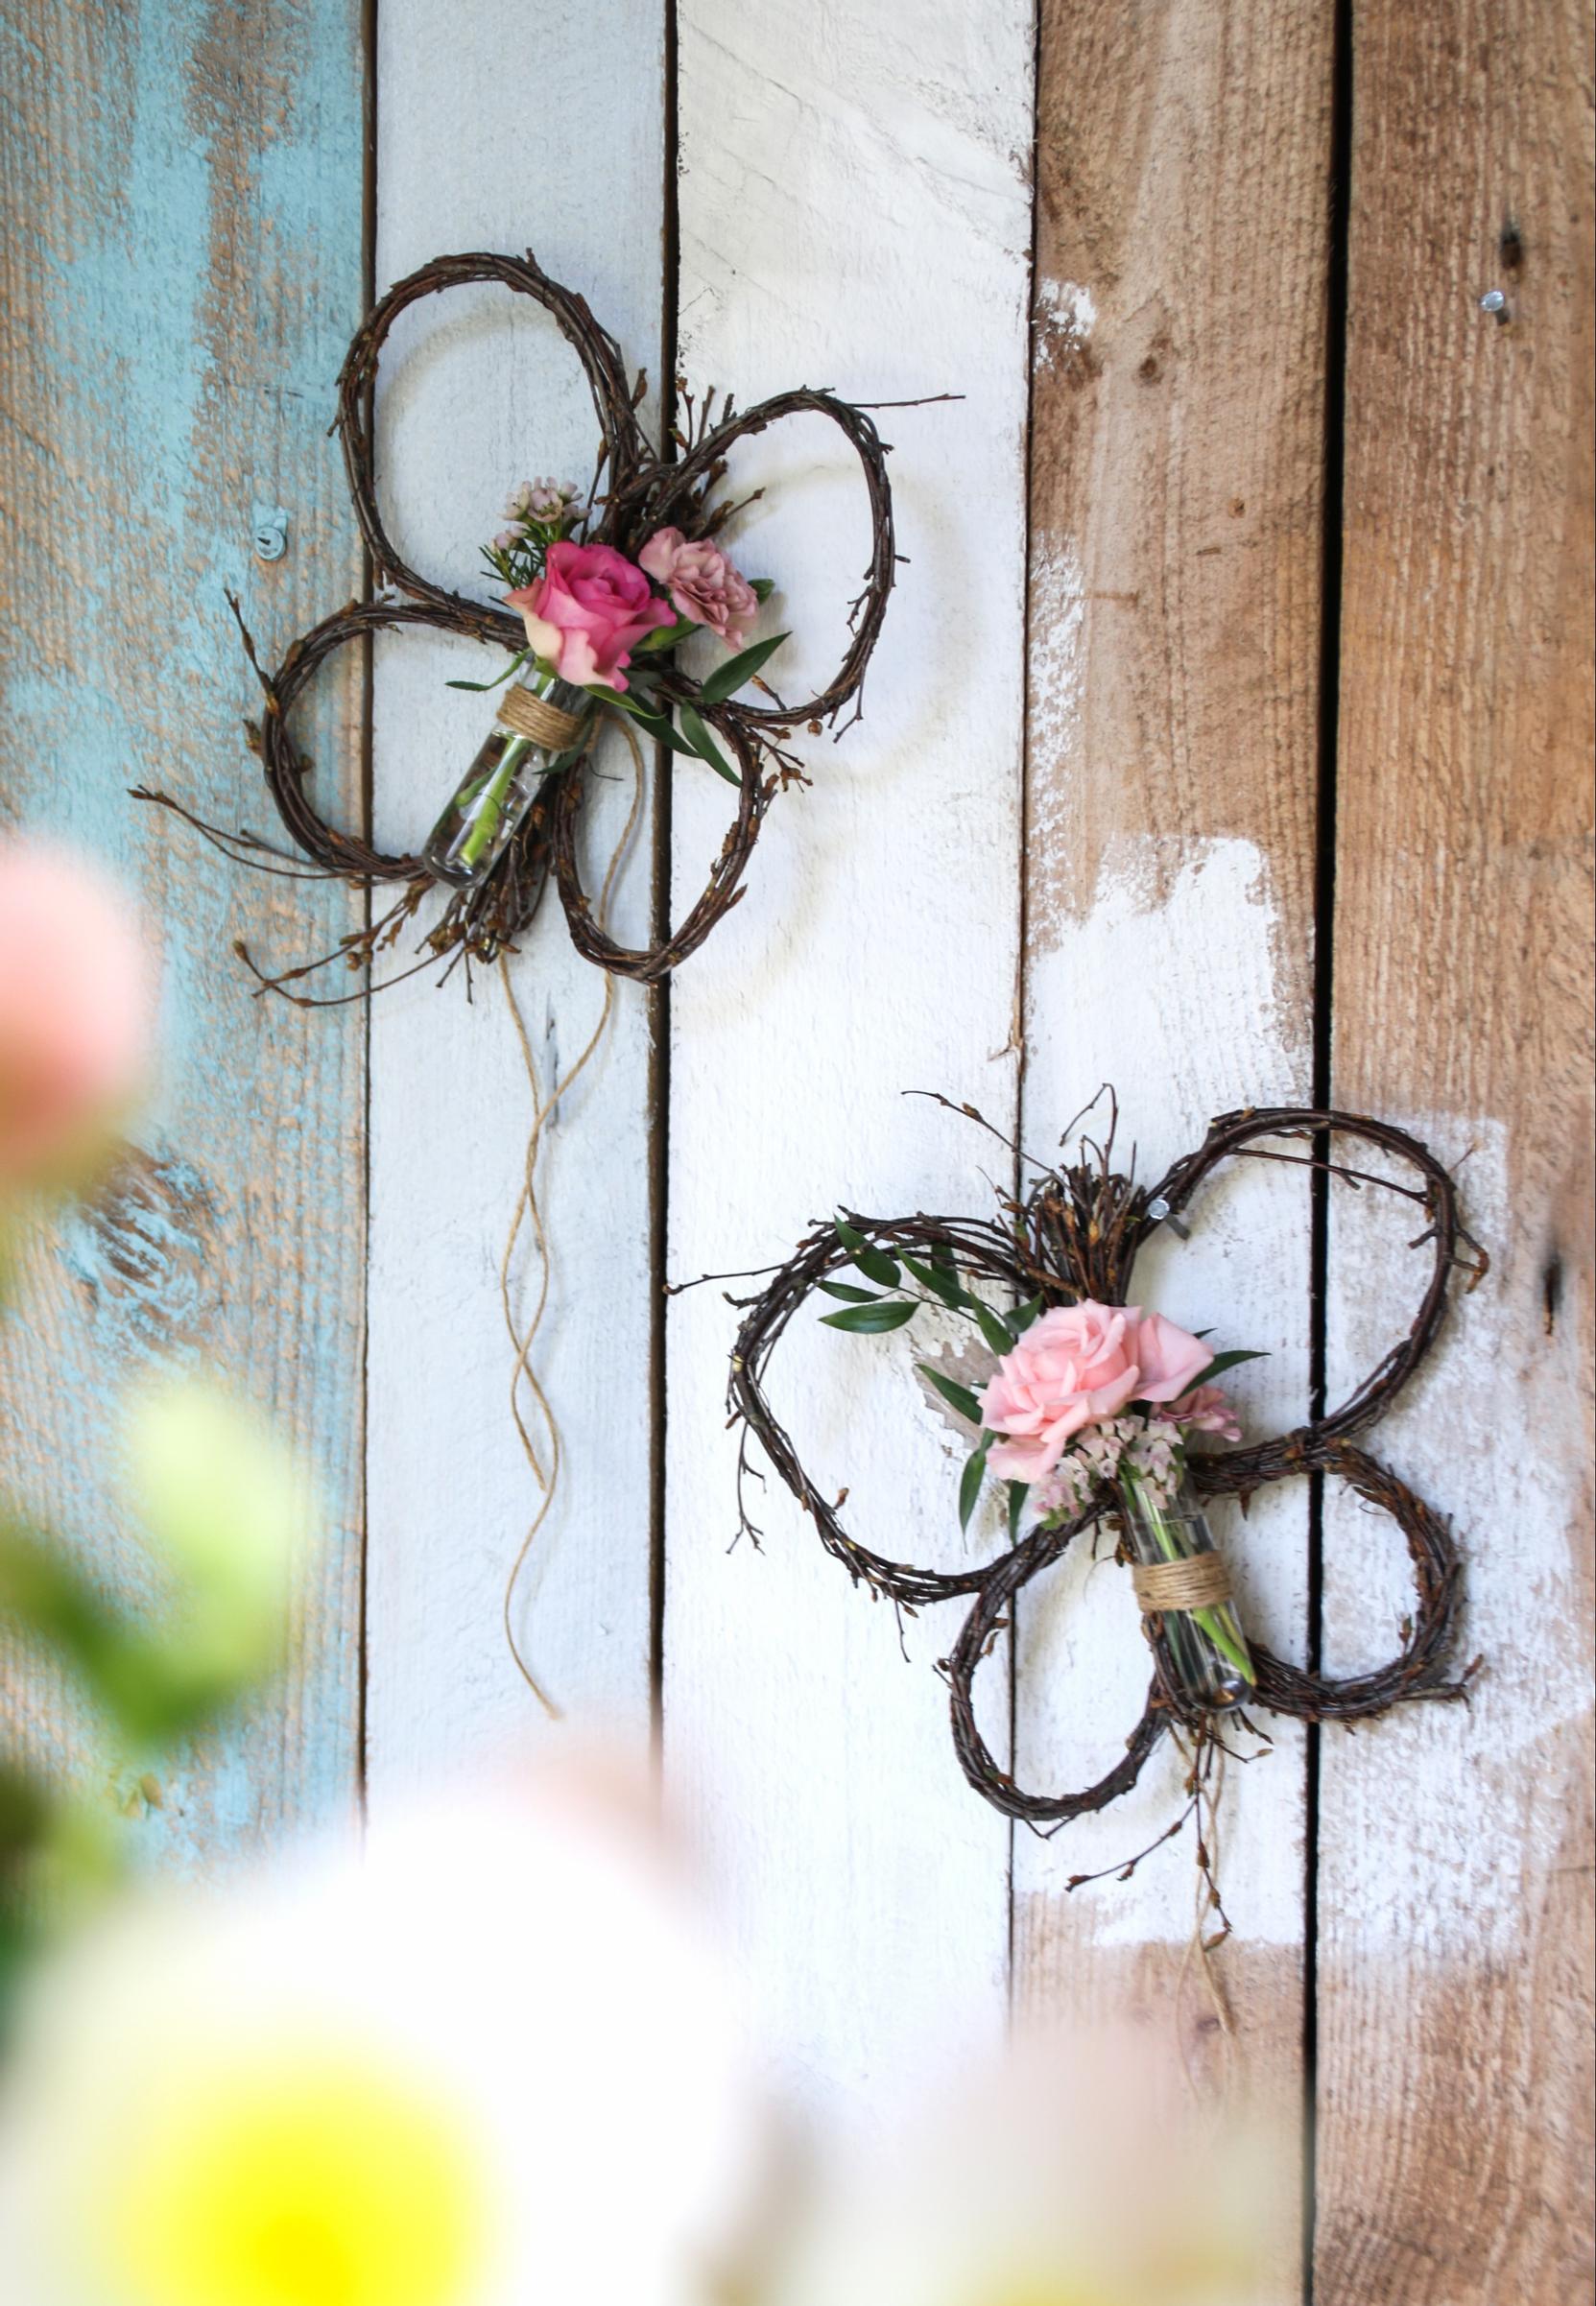
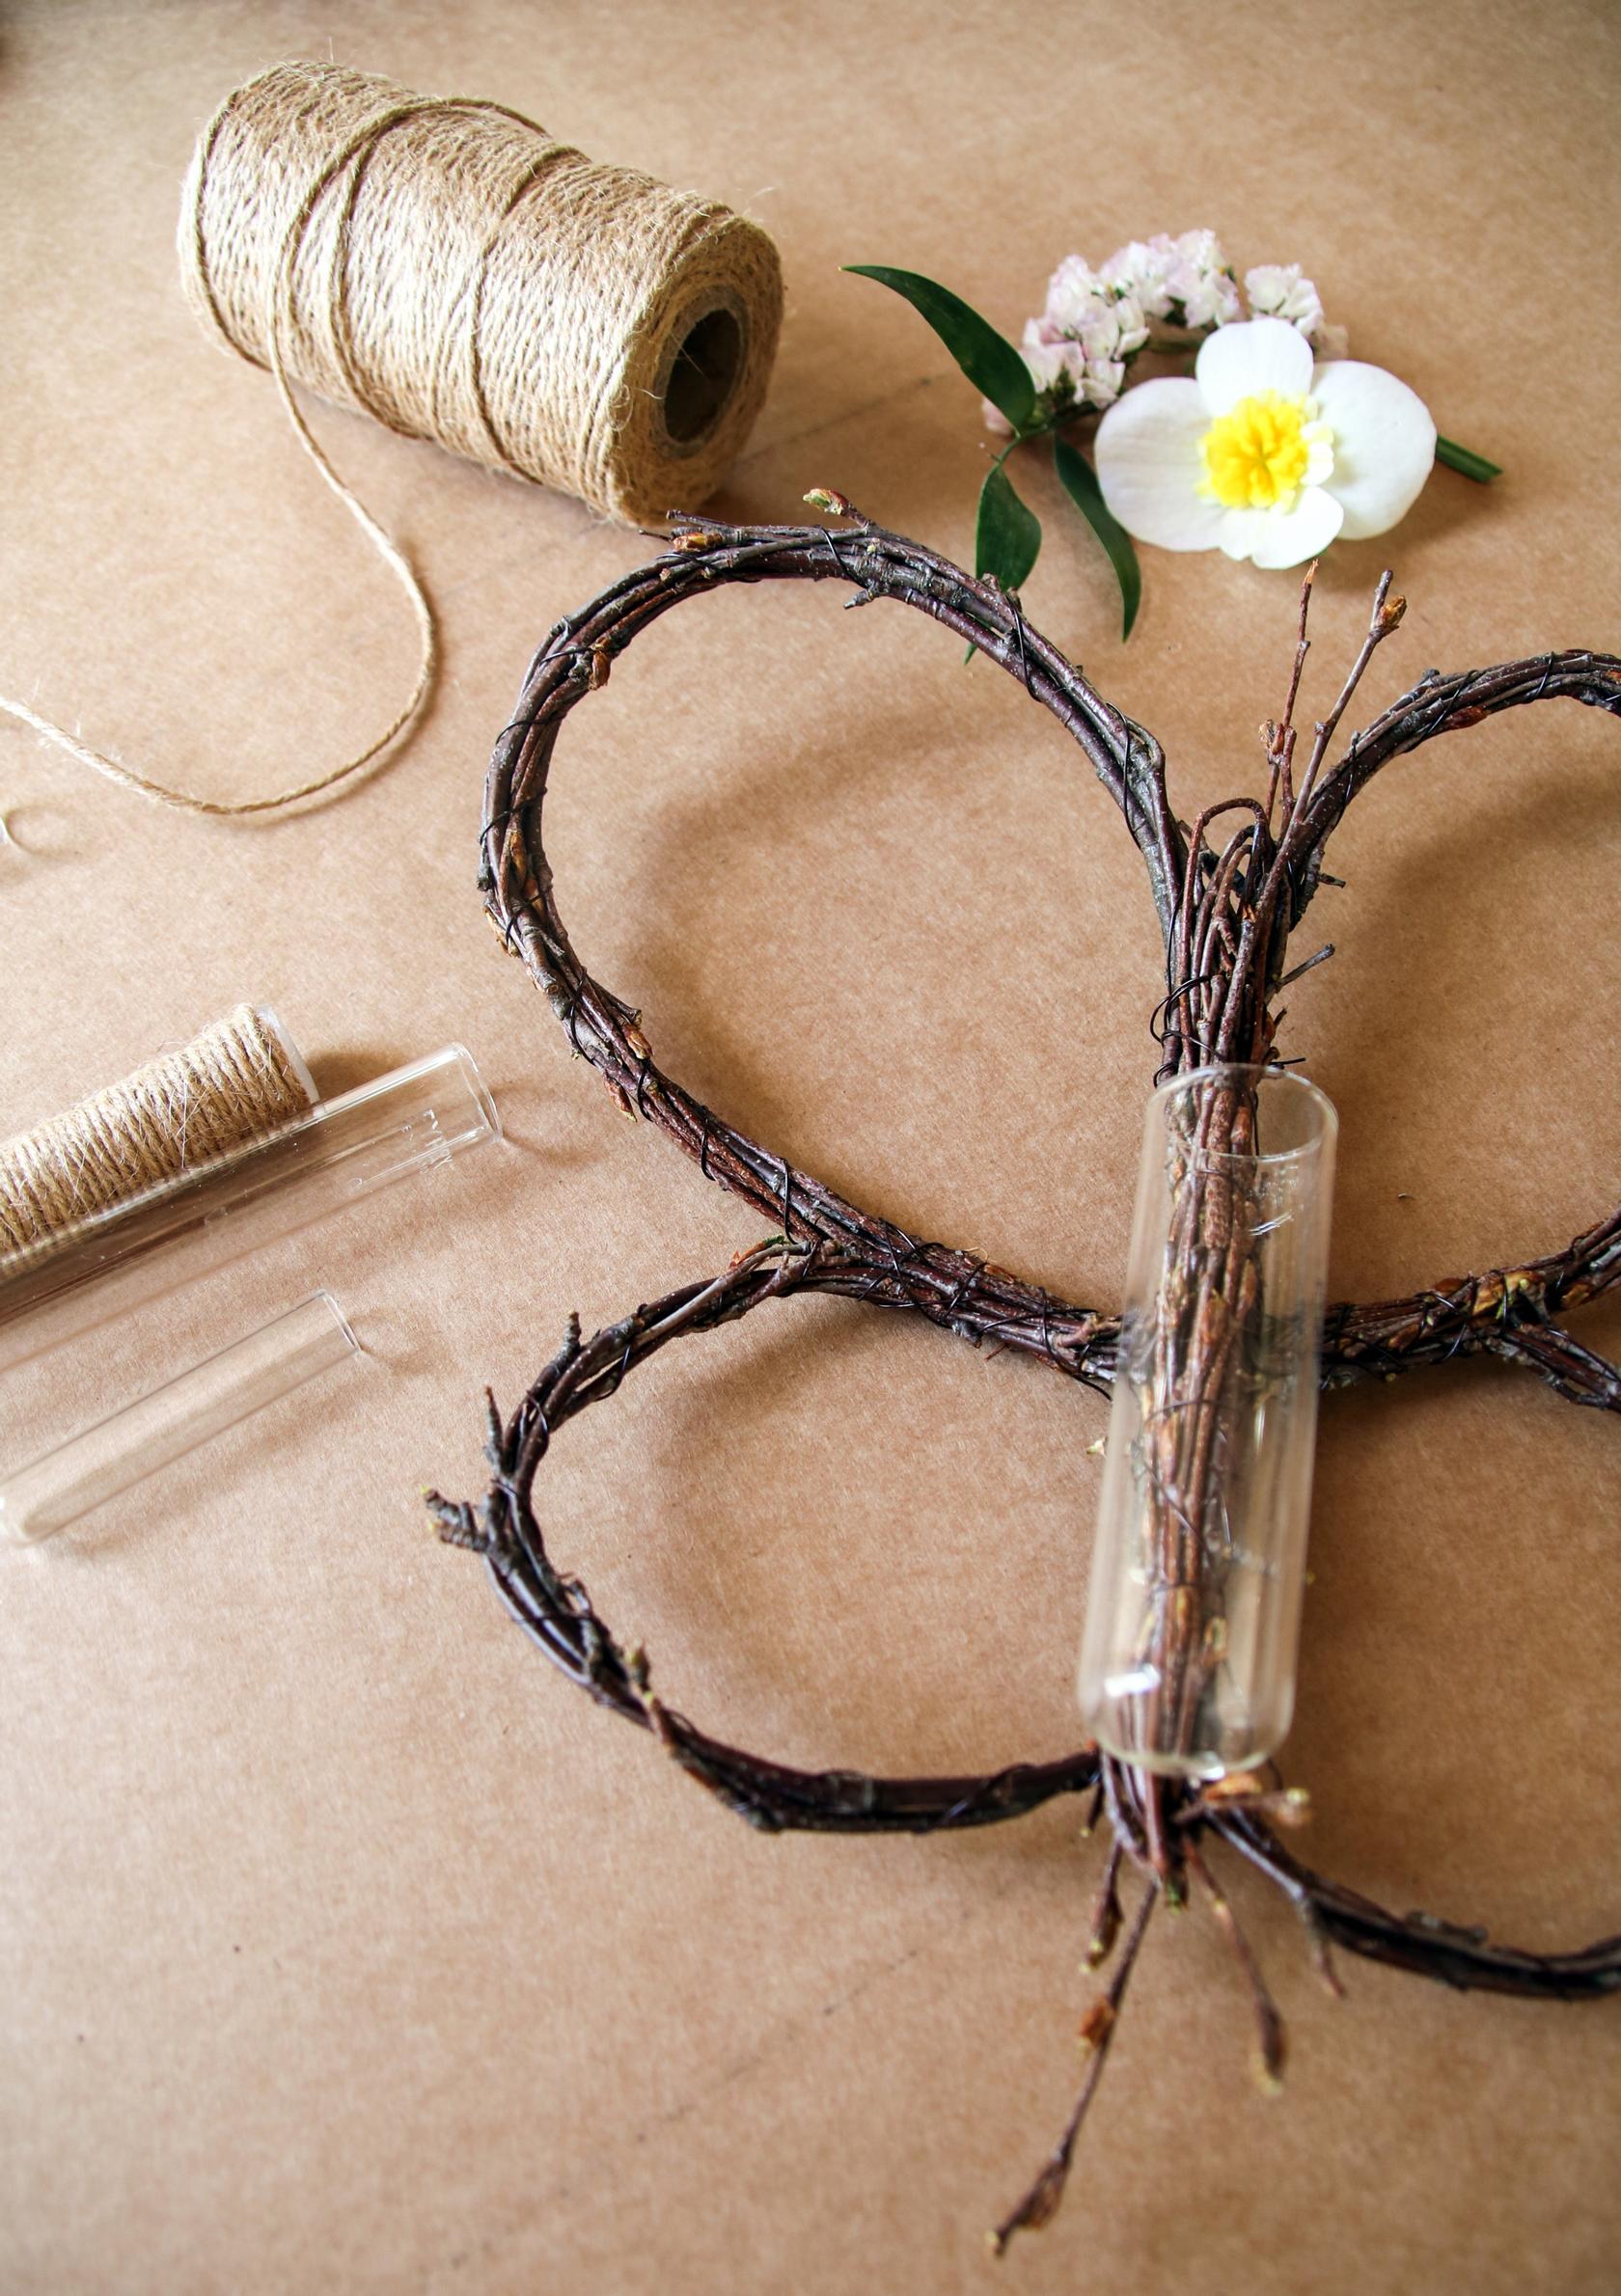
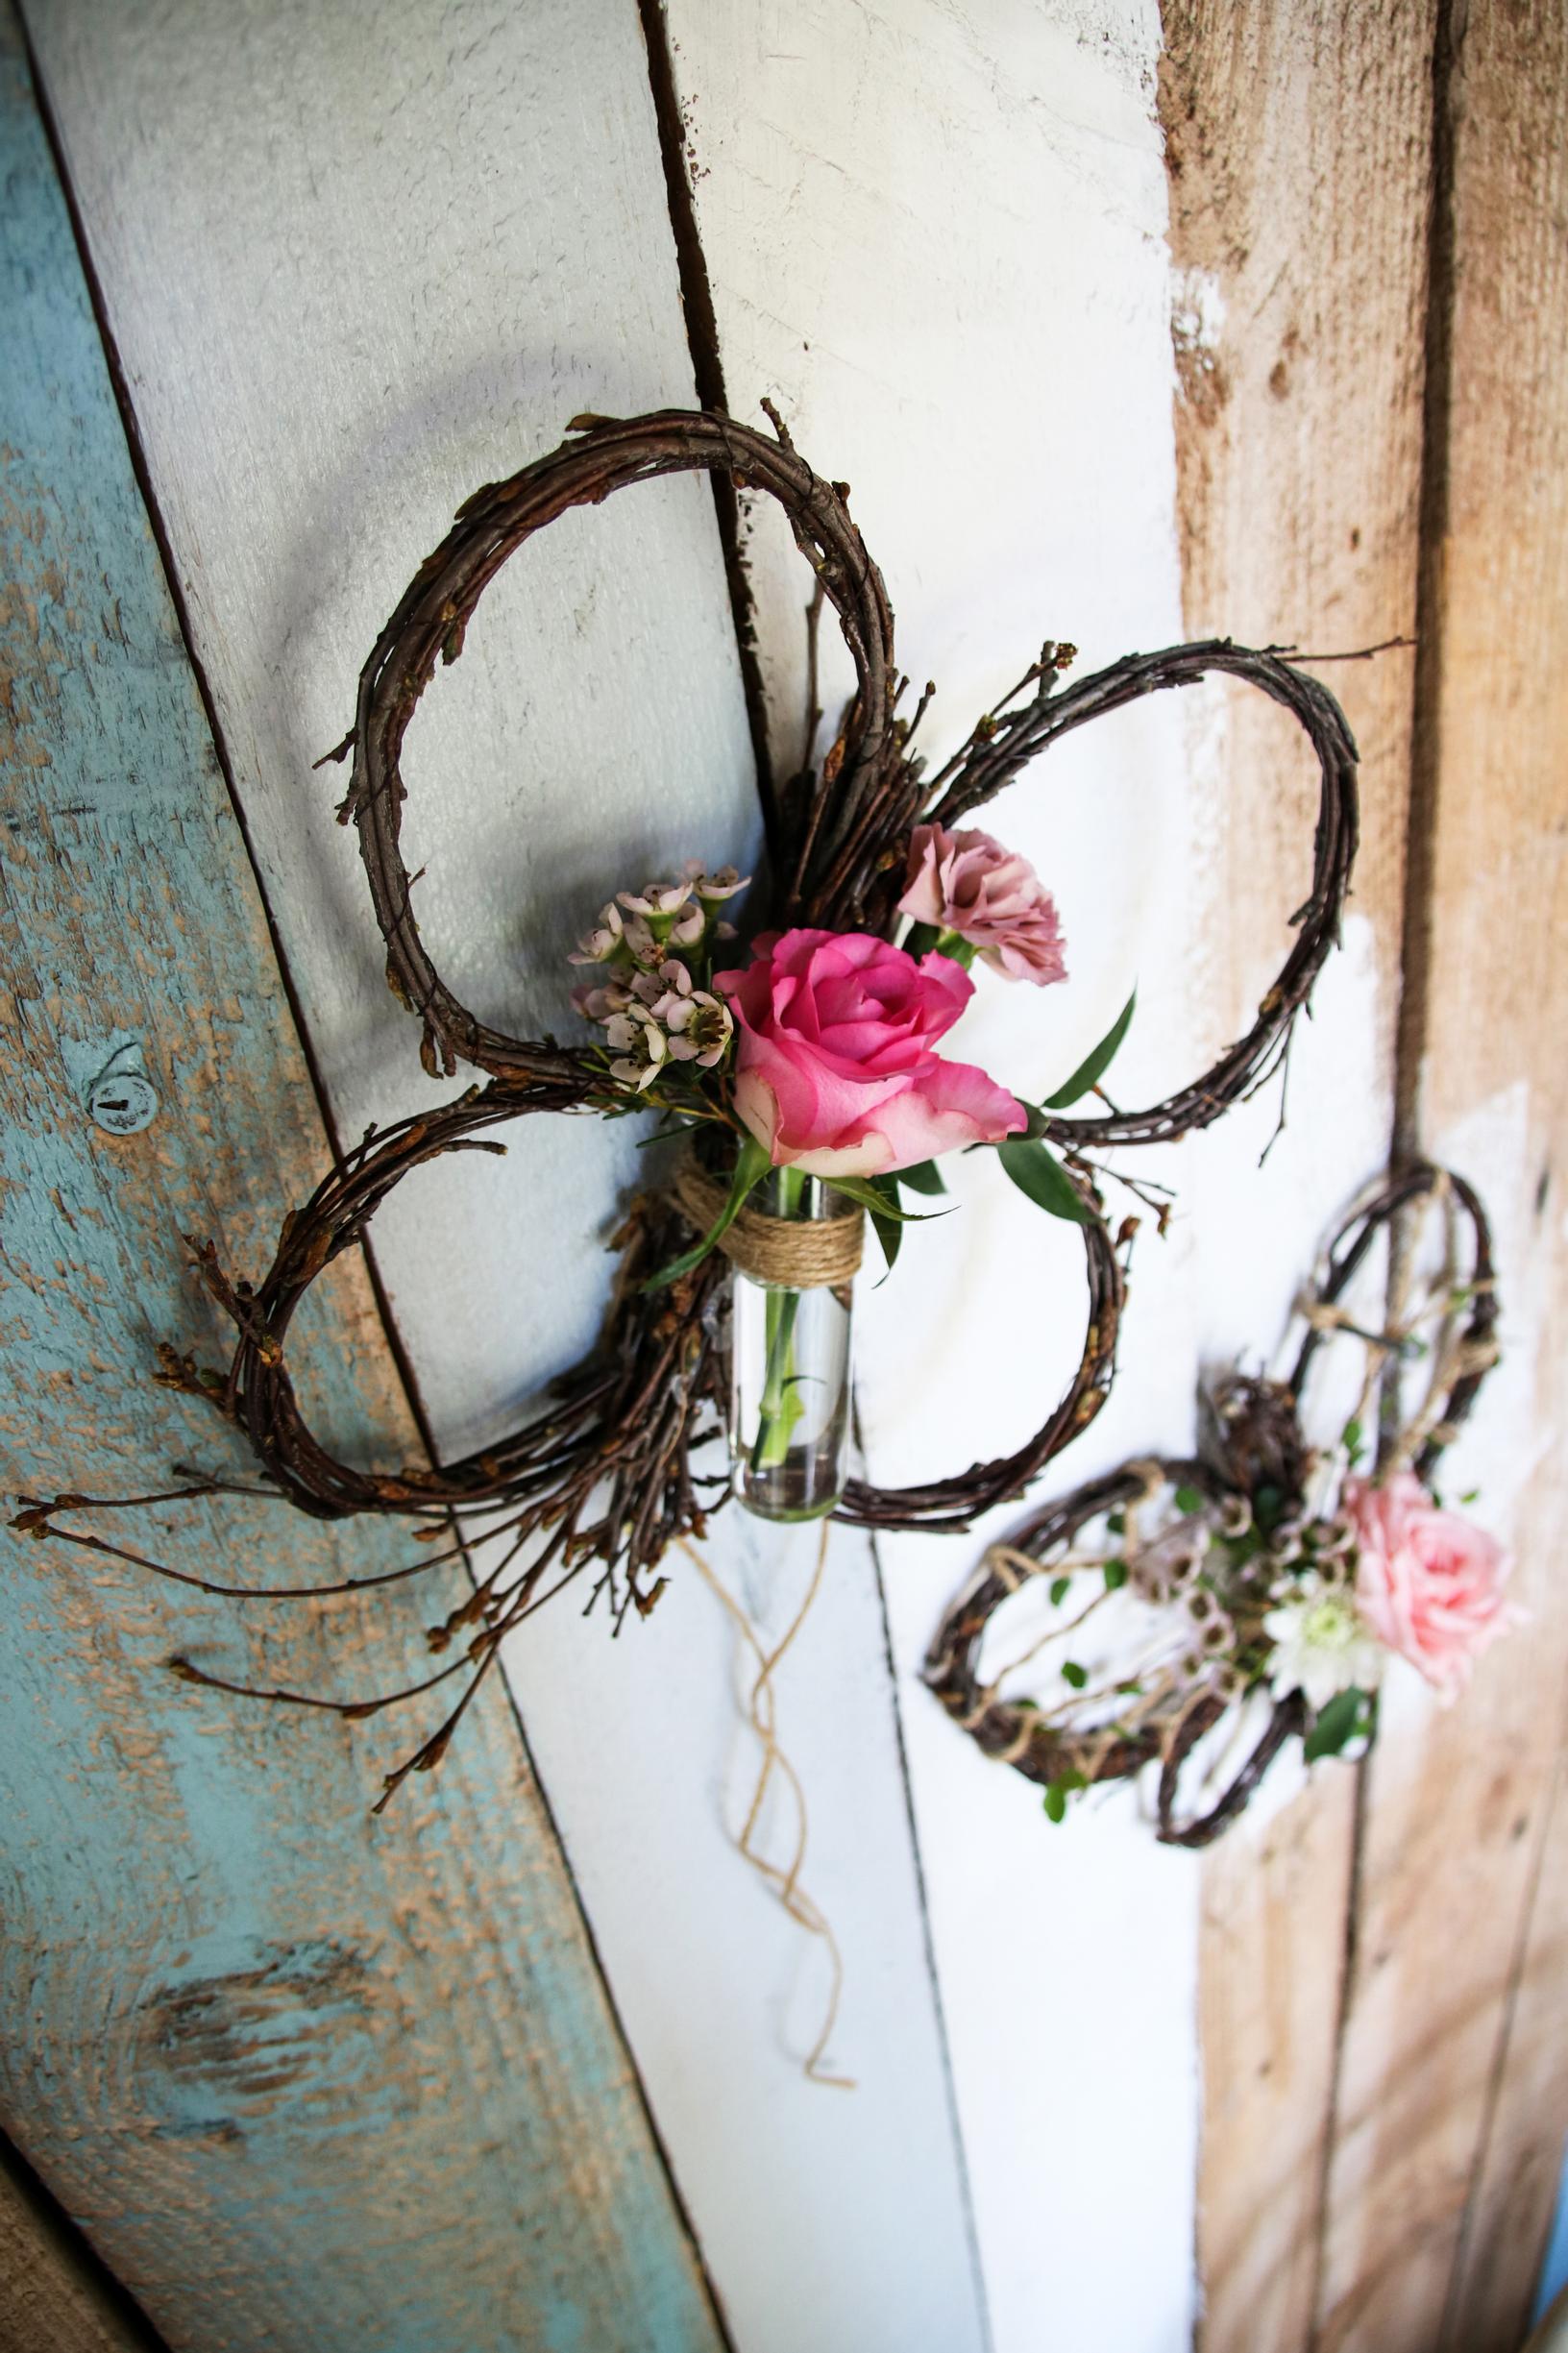
Twig butterfly as a mini vase
Attach a test tube to the butterfly’s center for fresh flowers, and you’ll have a decoration you can change with the seasons or to match party themes. Just a couple of blossoms or leaves add a lovely touch of color and character. Make use of flowers from your garden or potted plants, for example.
Materials:
- jute string
- scissors
- hot glue and a hot glue gun
- test tubes
- cut flowers from the store or your garden

Instructions
- Attach the test tube to the lower part of the butterfly’s body with hot glue. Because the twigs shrink a bit as they dry, hot glue alone isn’t enough—wrap jute string around the tube several times and tie it tight. You can let the loose ends of the string drape beautifully from the back of the piece.
- Fill the tube with water, hang up the butterfly, and arrange flowers and leaves in the tube.

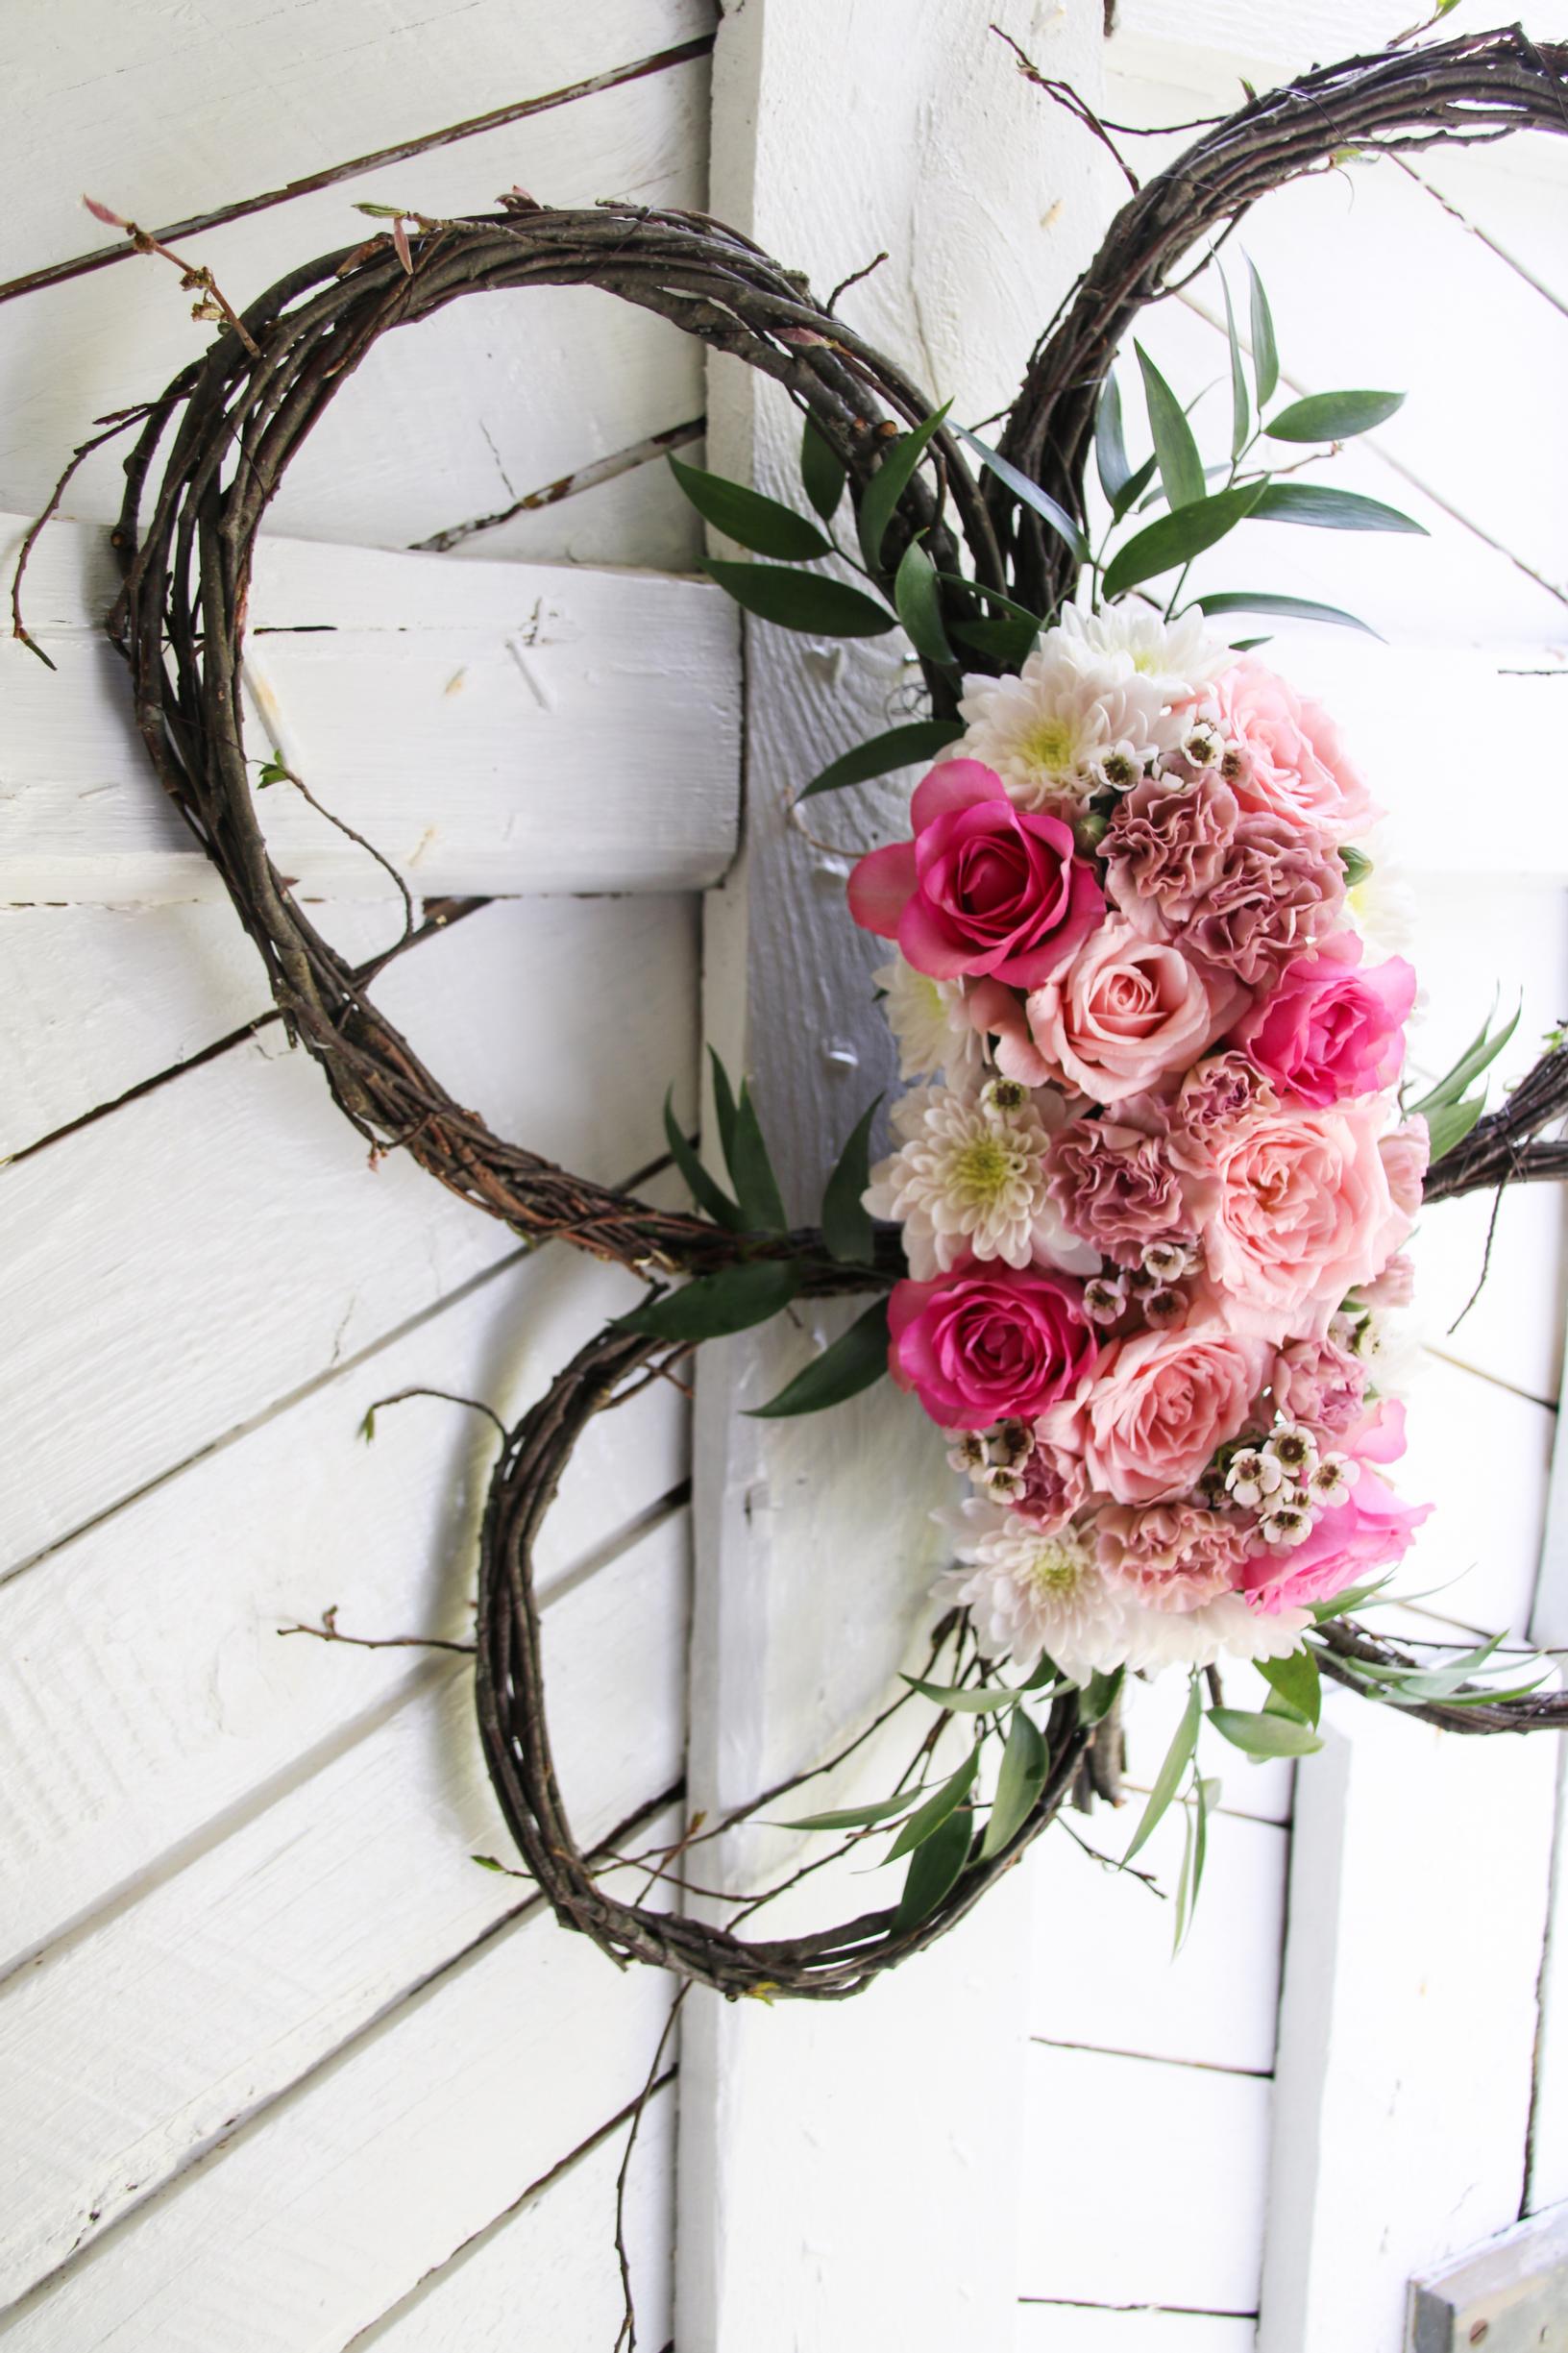
Twig butterfly as a base for floral arrangements
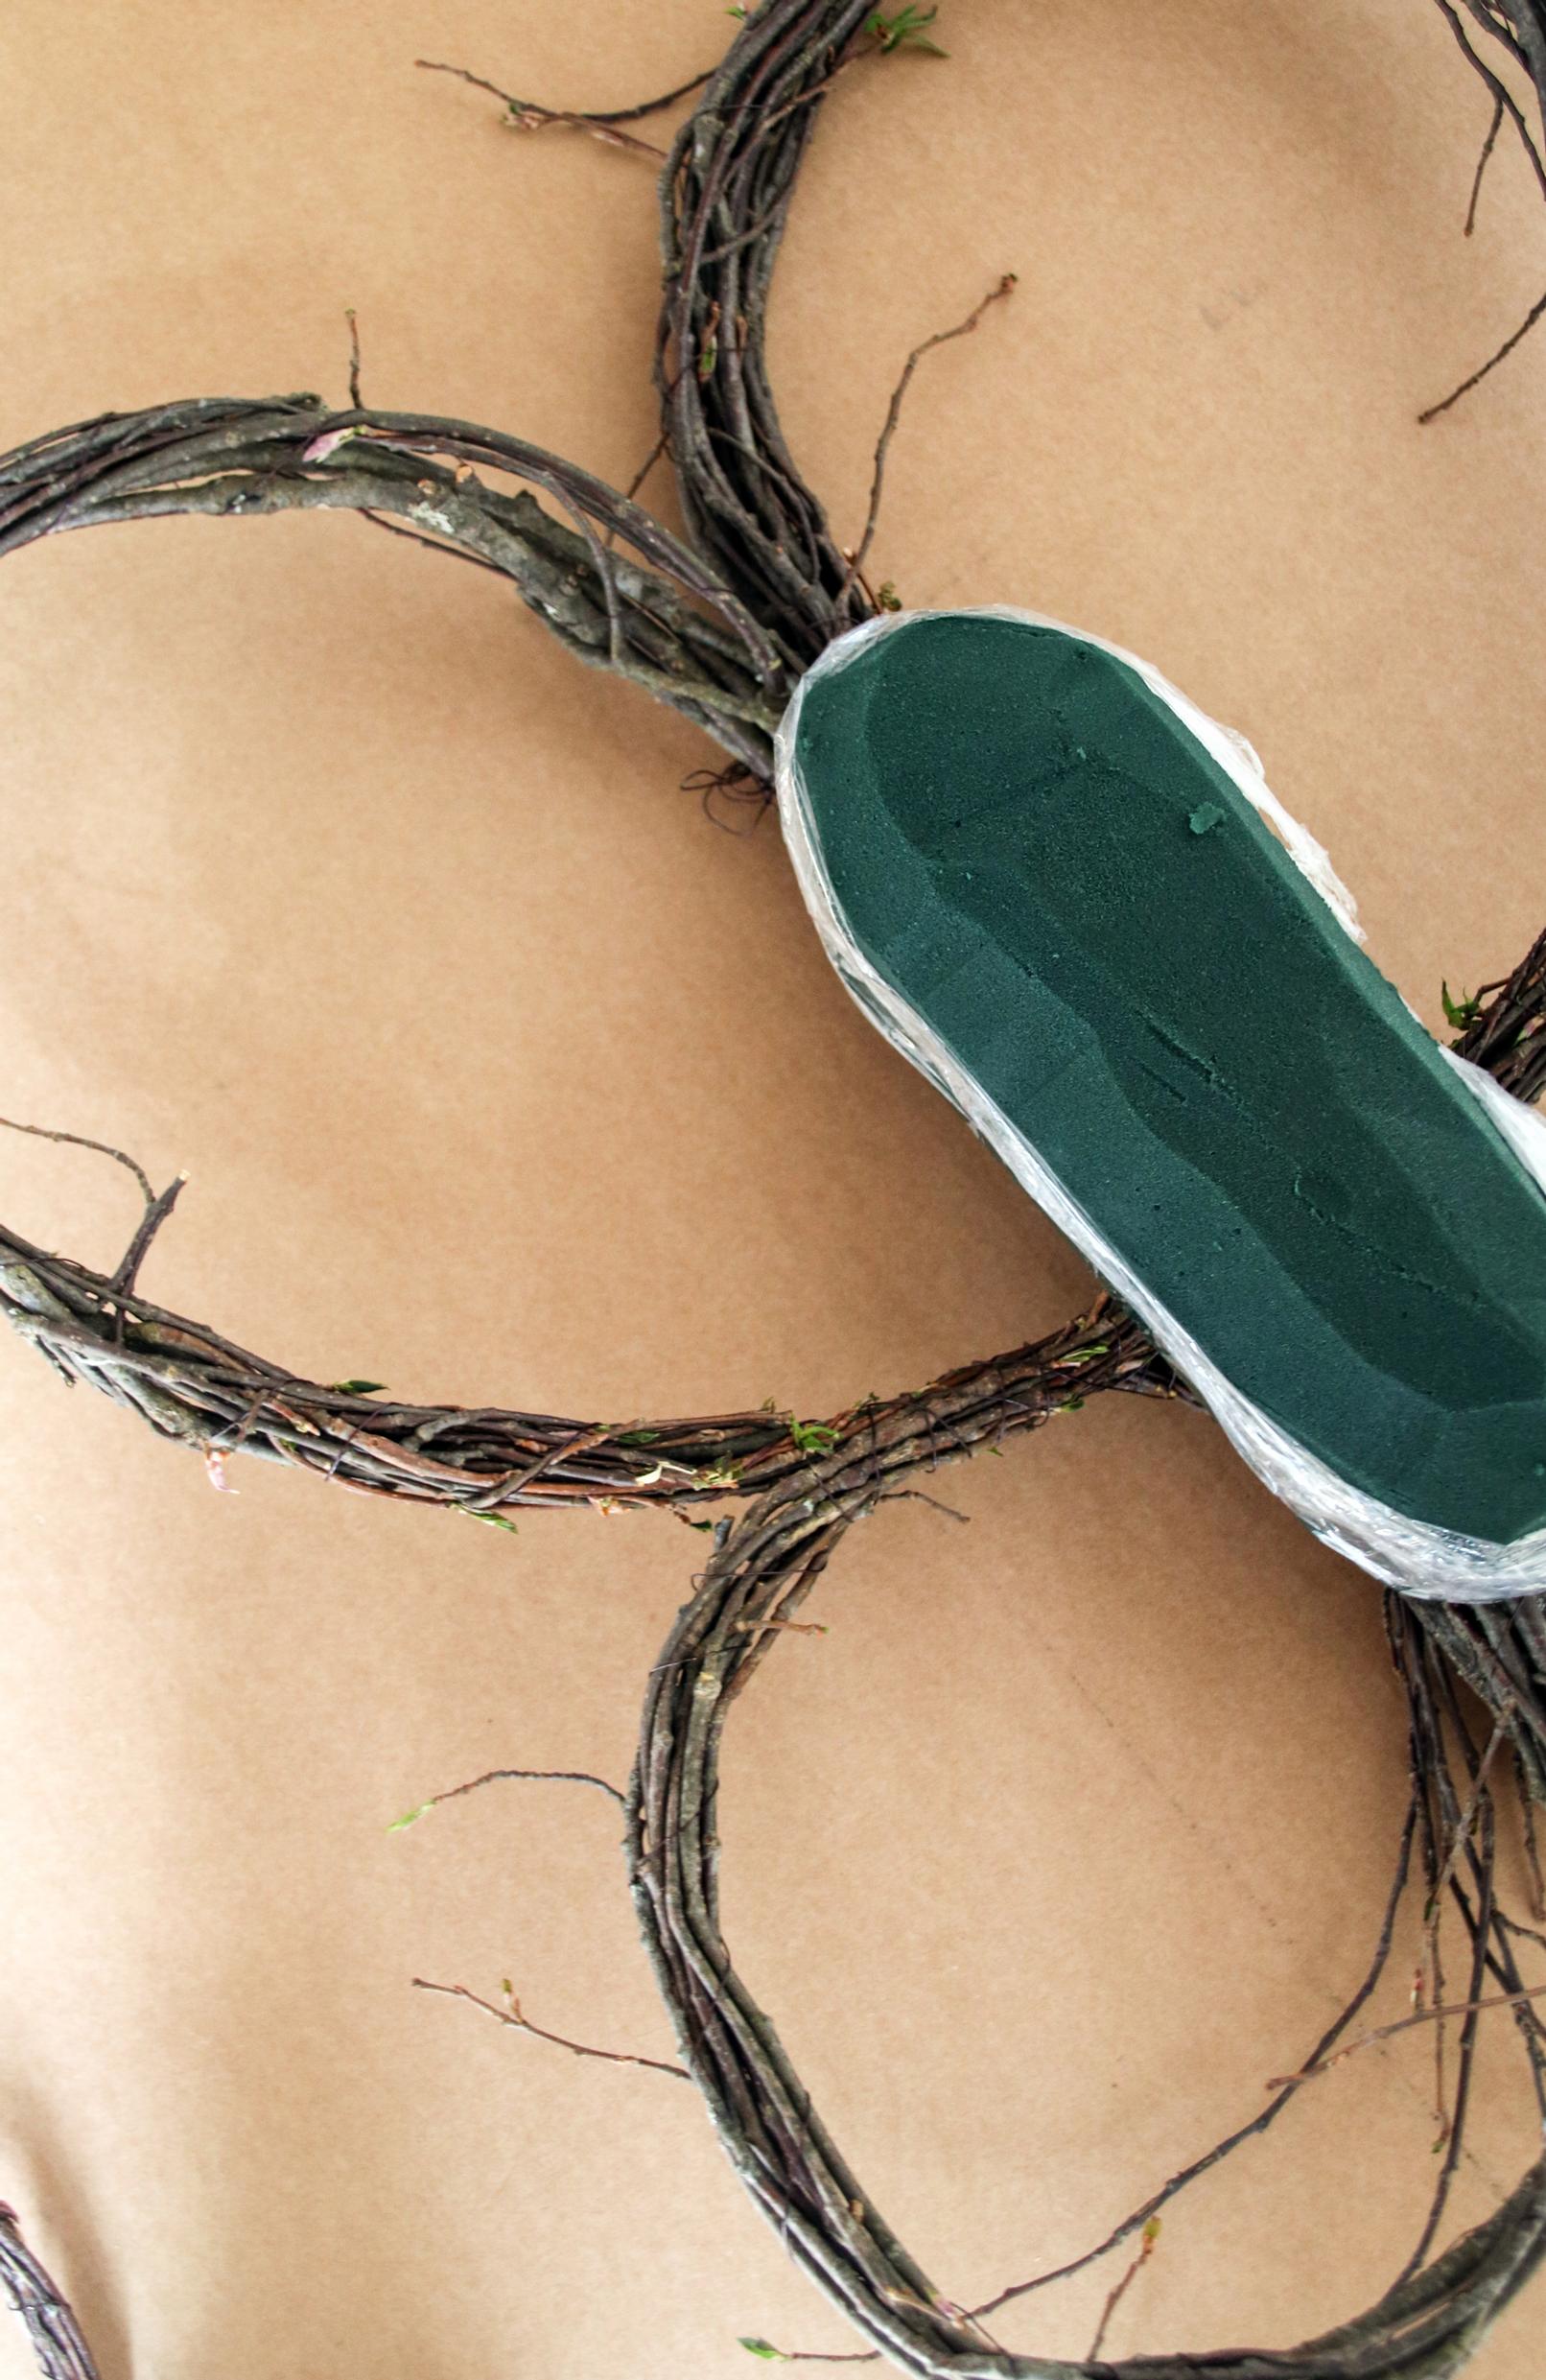
If you’re aiming for a spectacular result, perhaps for a garden party, use floral foam to form a lush butterfly body. Floral foam is available in both a biodegradable and traditional version, which can be disposed of with combustible waste.
Materials:
- floral foam
- knife
- water container, flower food, and water
- plastic wrap
- jute string
- scissors
- cut flowers from the store or your garden

Instructions:
- First, cut the foam into a piece that is appropriately sized for your butterfly. In the example, the foam was cut lengthwise. Let the foam soak freely in water mixed with flower food. Don’t press or force the foam into the water; it will sink on its own in a few minutes. A bucket or sink is great for this.
- Once the foam is wet, shape it with scissors into a piece that works as your butterfly’s body. Round the corners with a sharp knife. Keep in mind the flowers will significantly increase the size of the center.
- Lay the wet foam on plastic wrap and fold the wrap over the edges, leaving the top uncovered. Fasten the foam firmly to the center of the butterfly with jute string; be careful not to break the fragile foam. Ensure the attachment is secure by occasionally lifting the piece upright.
- First arrange leaves to cover the edges of the foam and the plastic. Press each stem firmly into the foam one at a time. Then fill the entire surface. Start by arranging the large flowers and then fill the gaps with more delicate blooms. Choose flowers with strong stems that are generally durable and dry beautifully. Cut each flower stem short enough for your work. The stem should not be moved inside the foam once inserted, as this creates air pockets that cause the arrangement to wilt quickly. Creating a simple, compact design is achievable even for a first-time home florist. The butterfly in the image uses butcher’s broom, carnations, roses, chrysanthemums, and wax flower.
- Place the butterfly where you want it. Note that the floral foam may drip some water, so the decoration shouldn’t be used in very sensitive spots indoors. The decoration is at its best in the garden, summer kitchen, or porch, where it can really spread its wings.