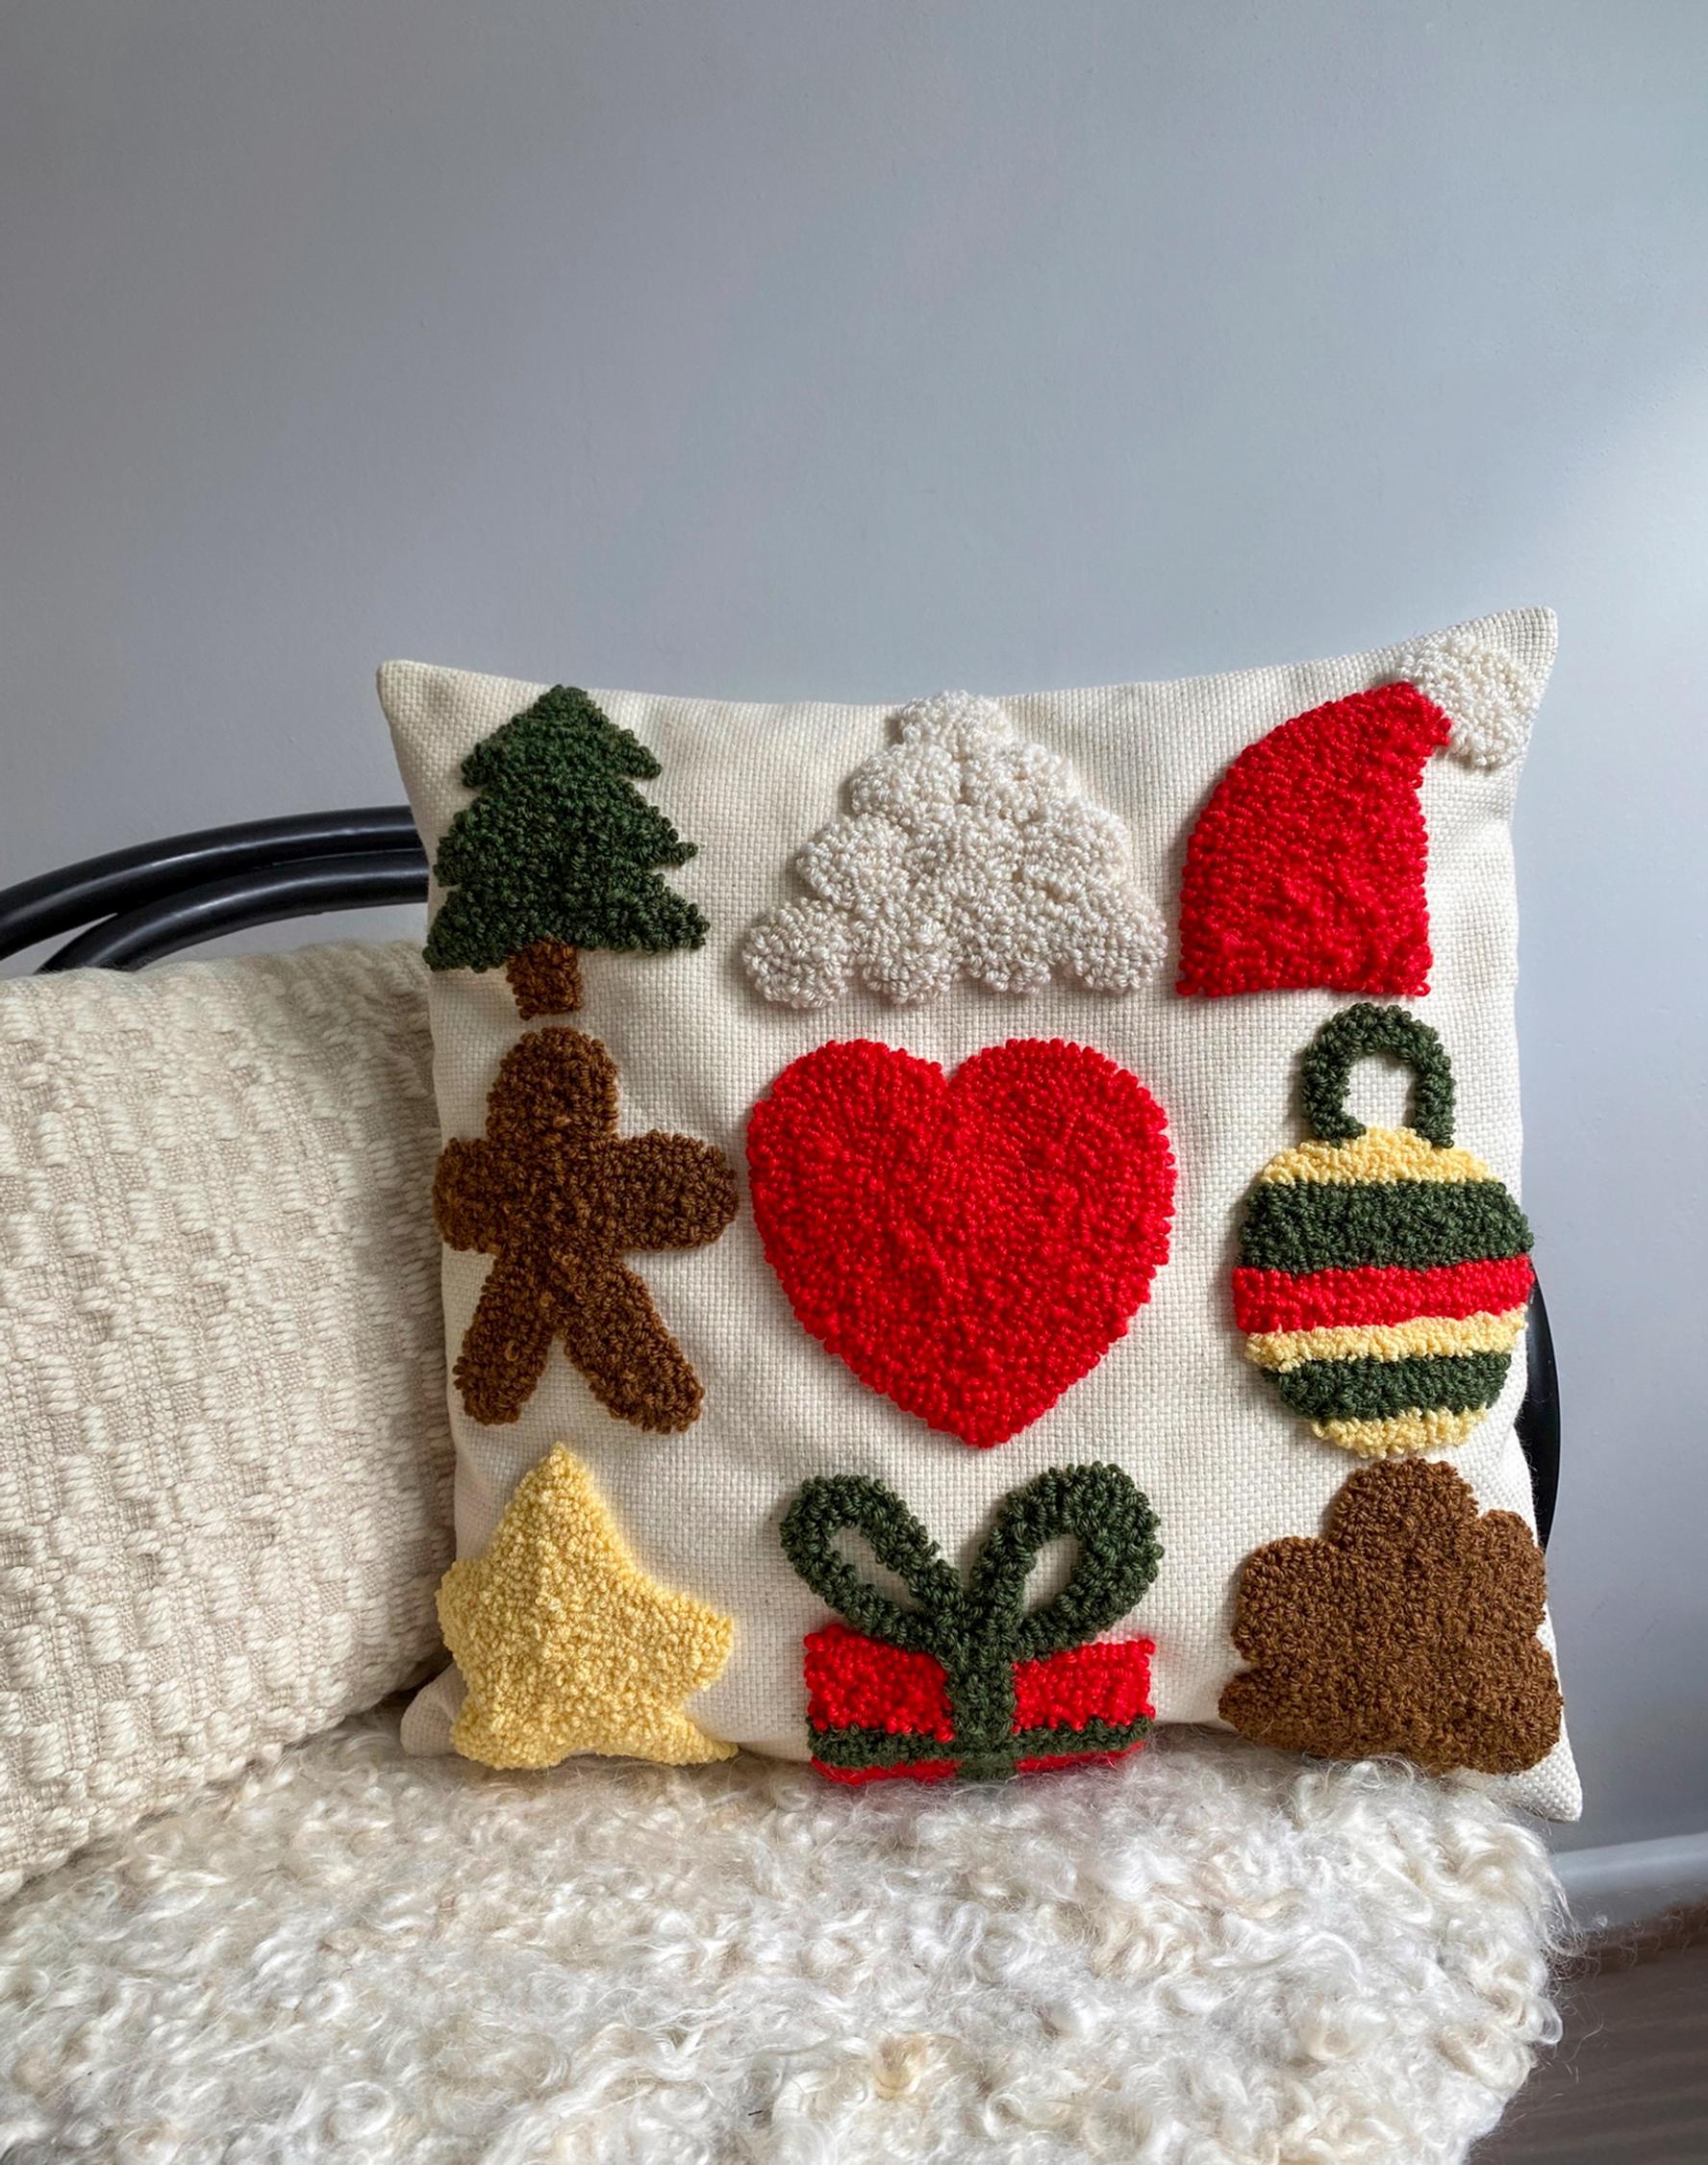
Snuggle-soft Christmas pillow: tuft the motifs the easy way
Tuft festive motifs onto a cozy throw pillow. Yarn scraps are perfect for this project. Some areas are left untufted, so it comes together quickly. See the how-to and step-by-step photos!
Tufted Christmas pillow—instructions:
- wooden tufting frame, 45 × 45 cm (18” × 18”)
- staple gun and staples
- punch needles
- white glue
- tufting fabric, 50 × 50 cm (20” × 20”). Measurements include about 5 + 5 cm (2” + 2”) of allowance for attaching to the frame.
- light-colored cotton fabric or similar, 43 × 43 cm (17″ × 17″)
- yarns, such as red, pale yellow, white, green, and brown
- pillow insert, 40 × 40 cm (16” × 16”)
- sewing machine
- scissors, tape measure, and pins
- small paintbrush
- pencil and ruler
Tip! Sketch the motifs freehand, or use cookie cutters as templates.
Tufted Christmas pillow — instructions:
1. Stretch the tufting fabric onto the frame as tightly as possible.
2. Lightly mark the finished pillow size, 40 × 40 cm (16″ × 16″), on the tufting fabric and divide it into a grid of nine squares. Sketch the motifs into the squares. Note that the side you work on is the wrong side of the finished piece.
3. Choose your punch needle size to suit the yarn you’re using. Set the base of the needle flush with the handle. Our sample is tufted entirely at this pile height, but you can play with height differences if you like.

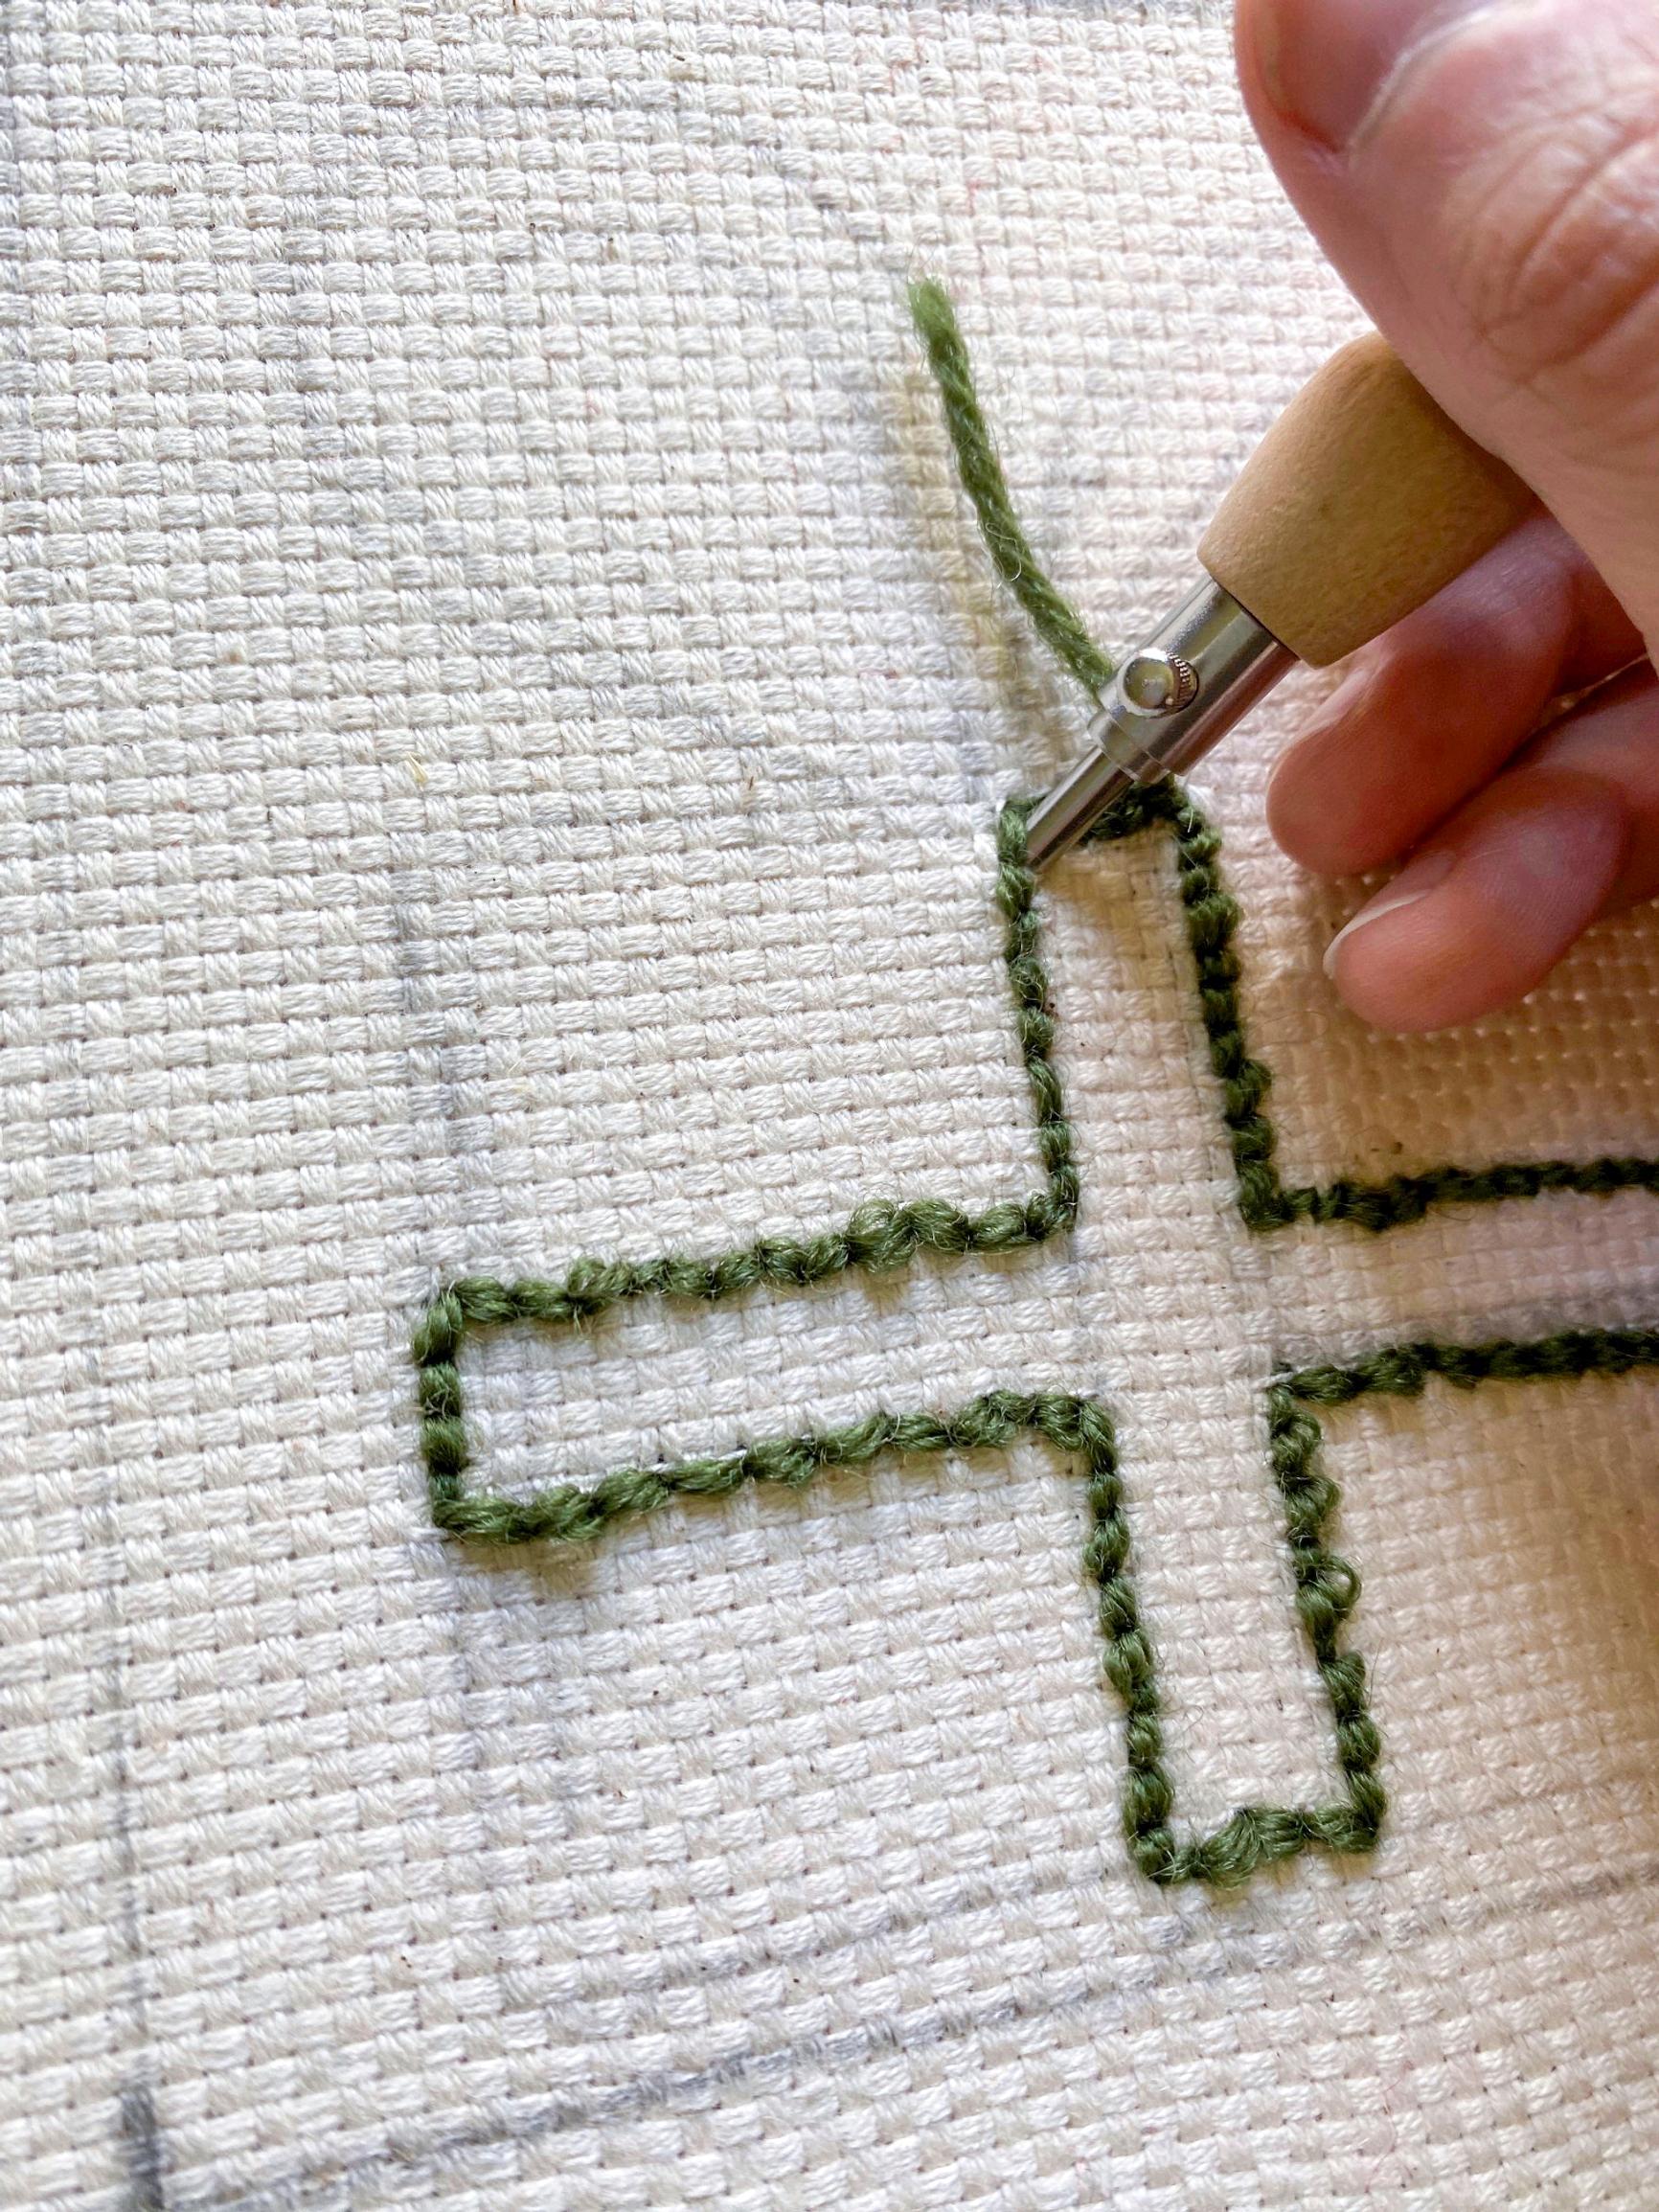
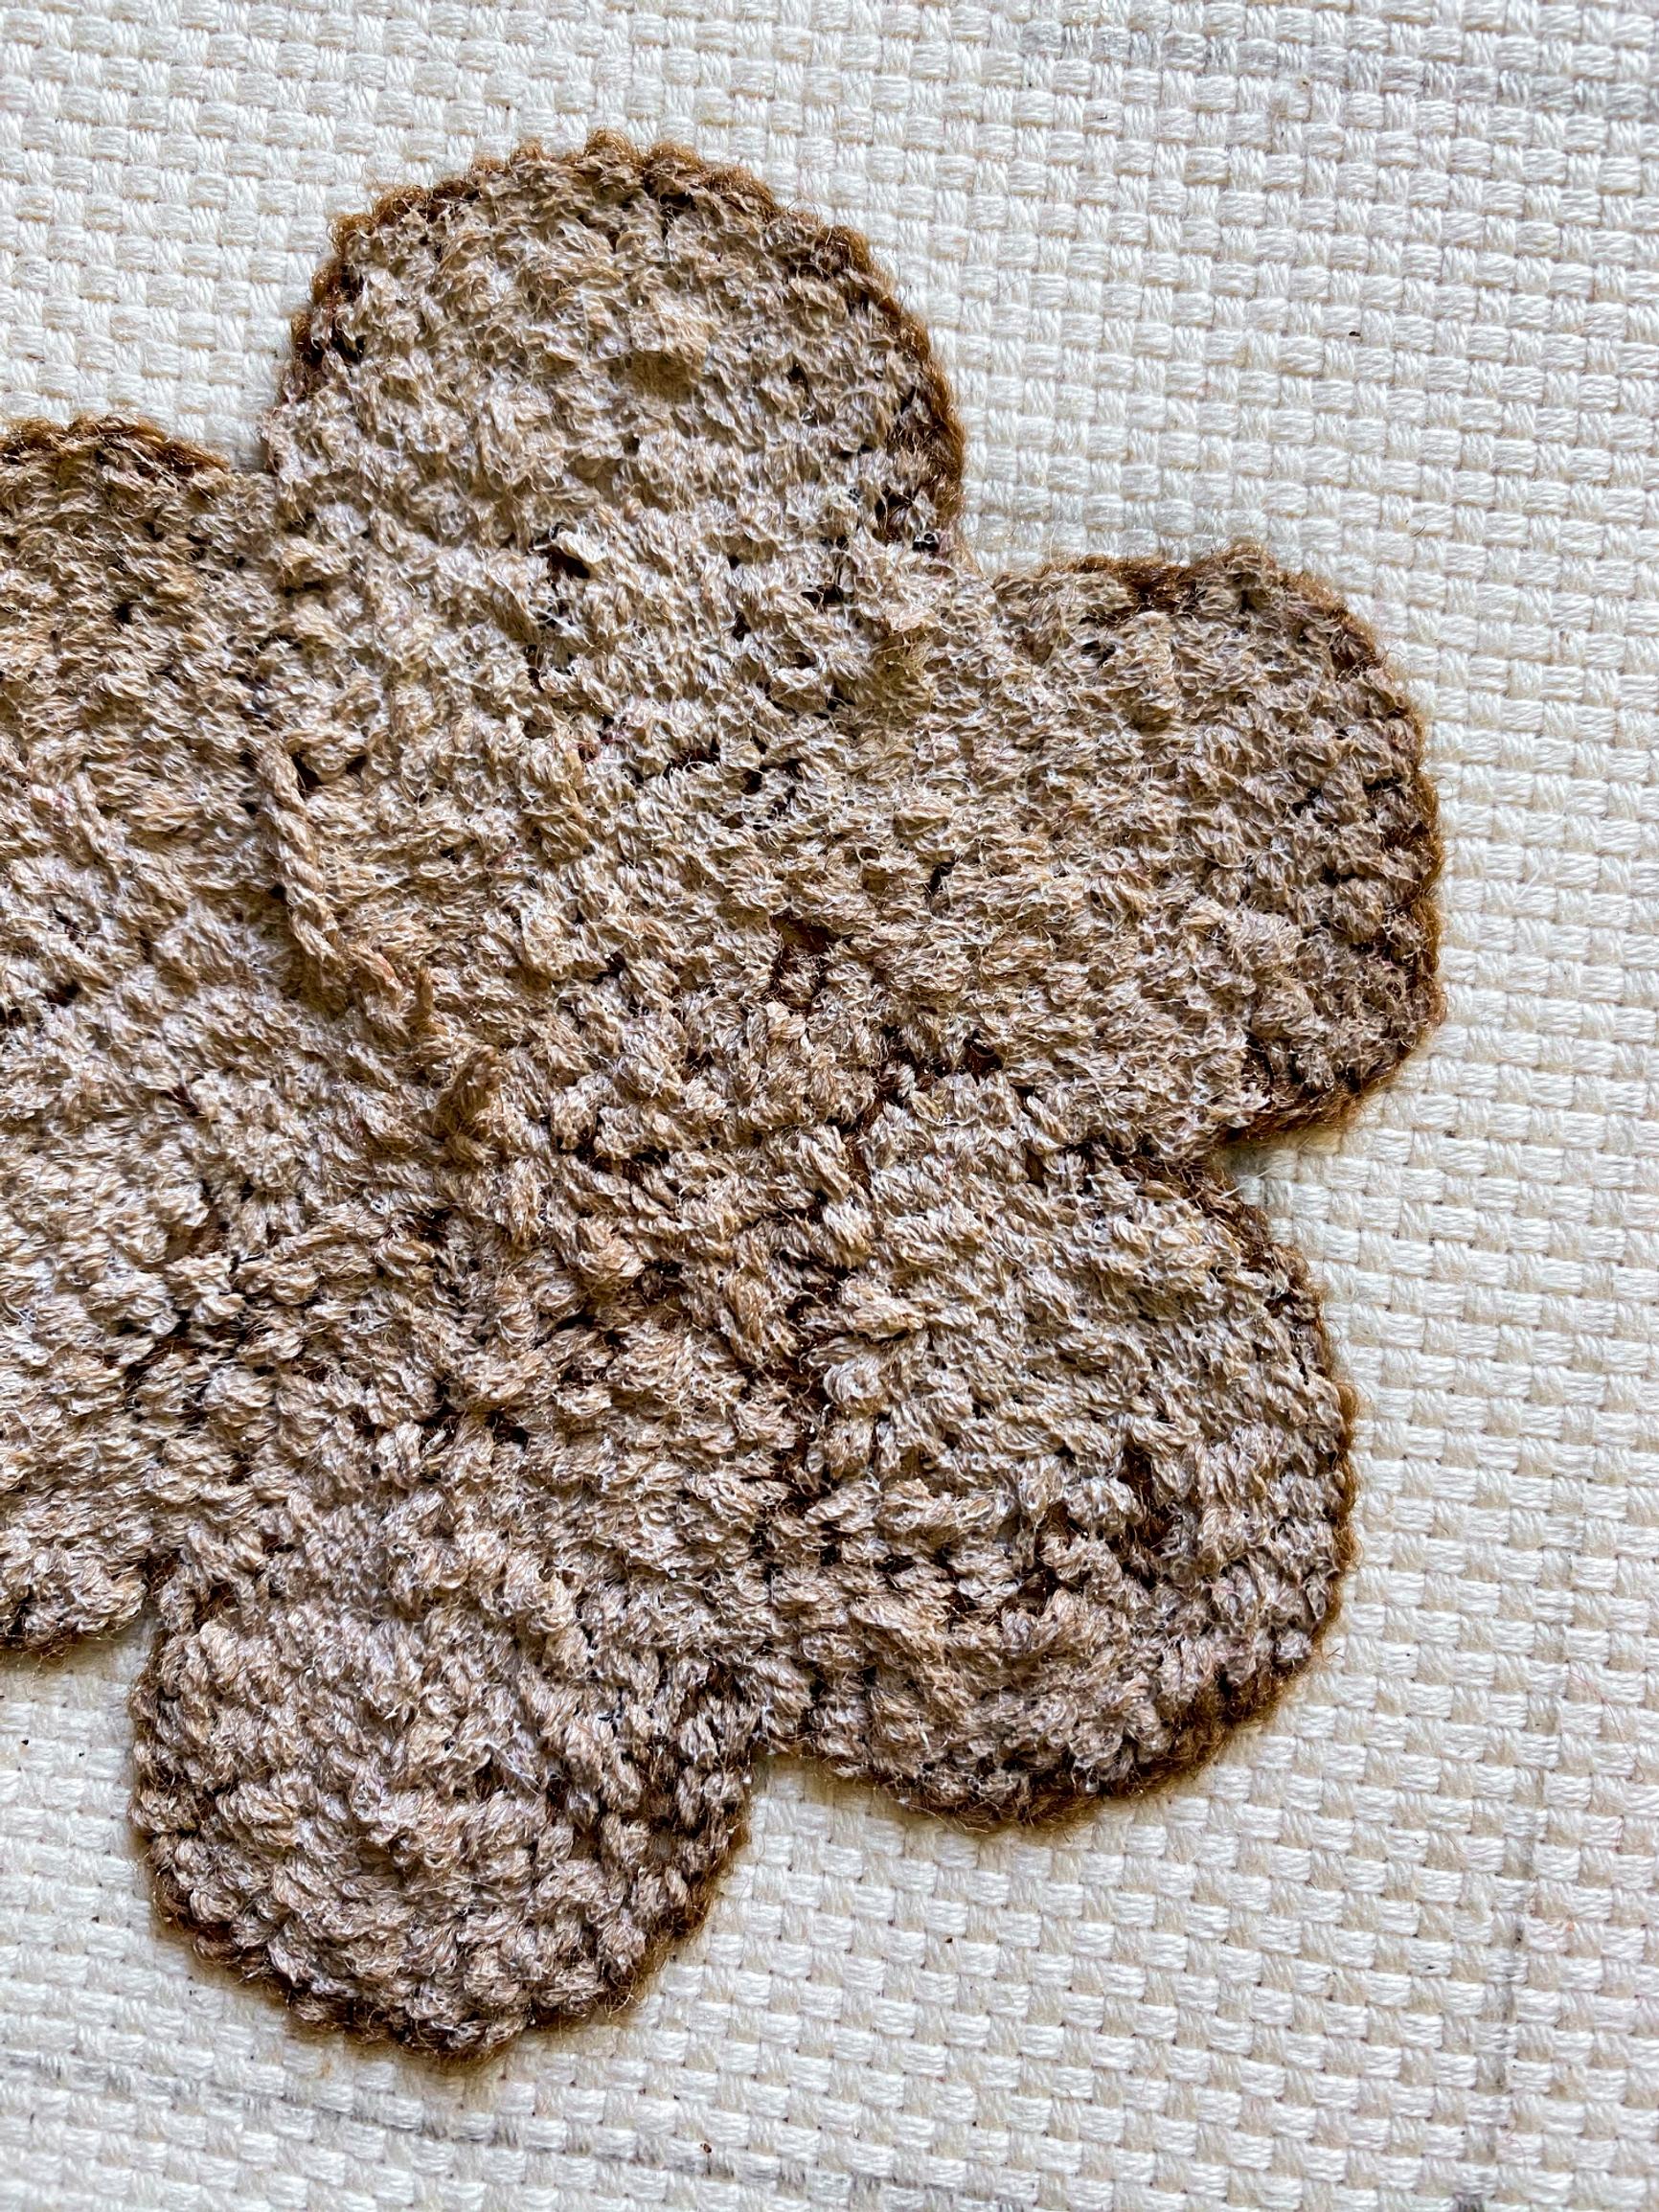
4. Tuft the motifs one section at a time. First make the outlines, then fill in toward the center.

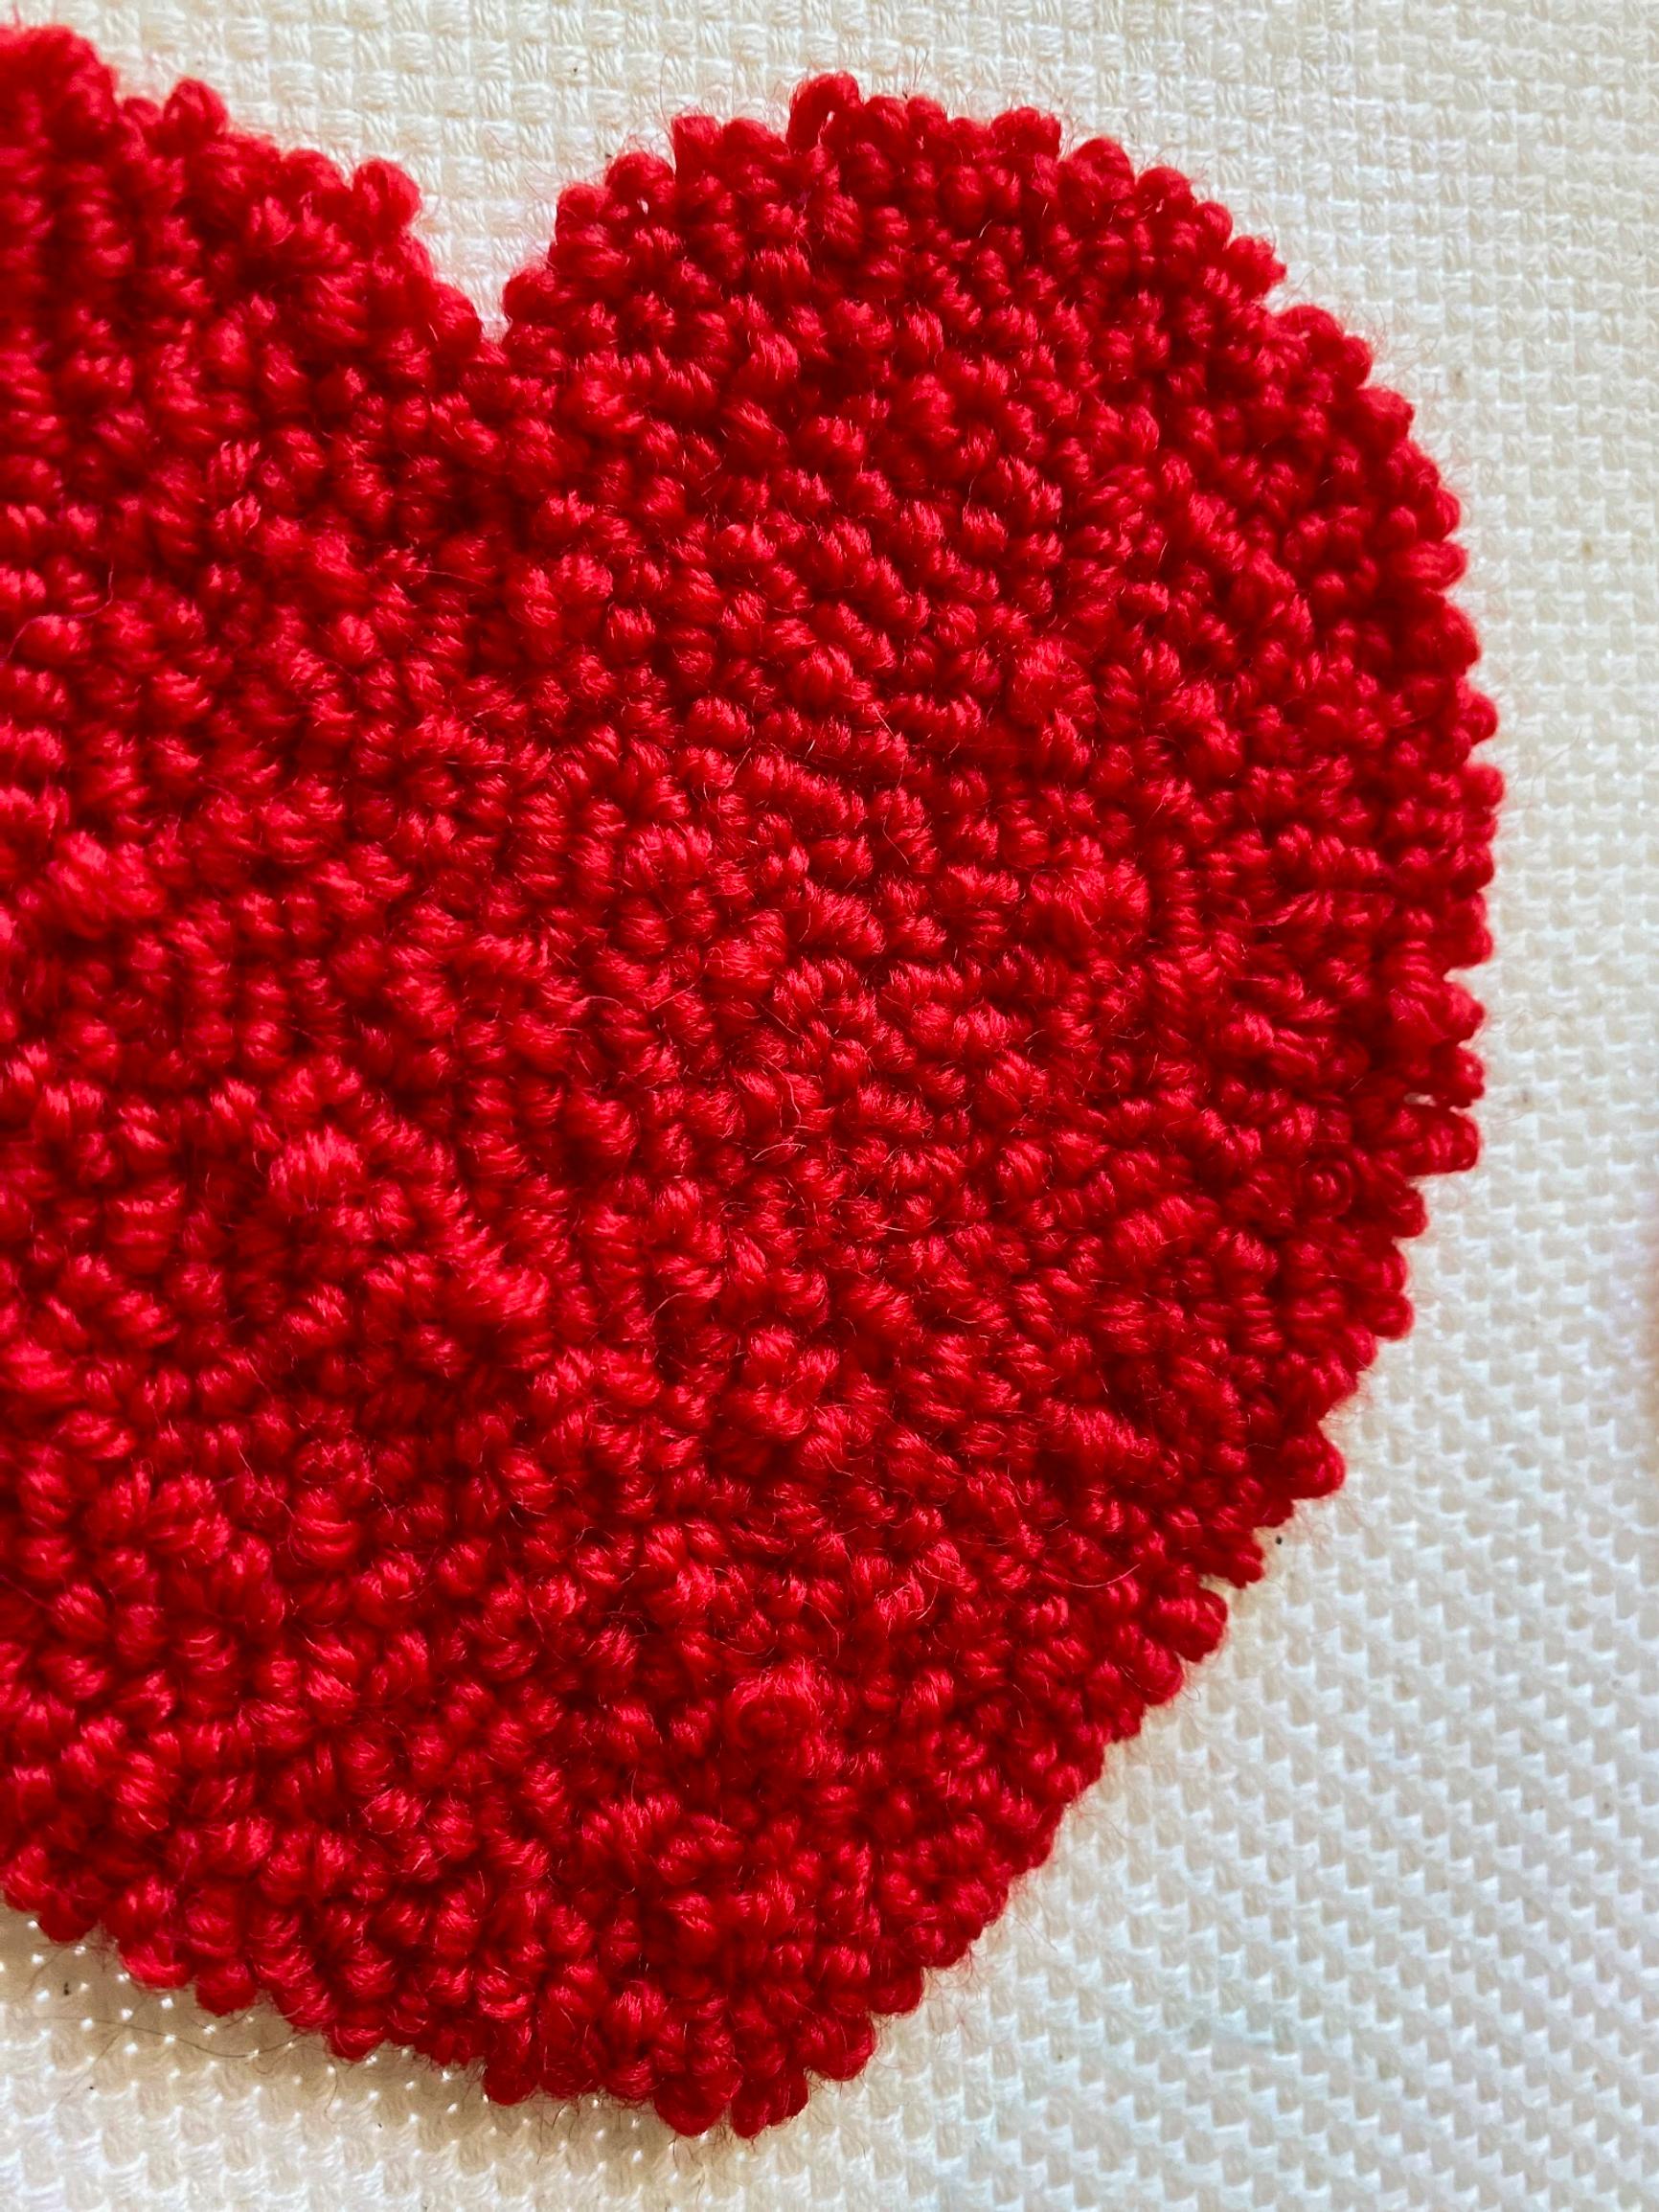
5. Check the density from the front. It’s good when the base fabric isn’t visible on the tufted areas. A little uneven pile won’t hurt—it adds character.

6. When you’re done, trim the yarn ends. With a brush, apply white glue over the tufted motifs on the back side. The glue secures the ends and keeps the work from unraveling. Let it dry completely before removing the piece from the frame.
7. Trim the tufting fabric to 43 × 43 cm (17″ × 17″). Zigzag the edges so they won’t fray.
8. Place the tufted front and the backing fabric right sides together. Leave 1.5 cm seam allowances (5/8″) and sew them together, leaving an opening for the insert. Turn right side out and add the insert. Pin the opening and stitch it closed by hand or by machine.

