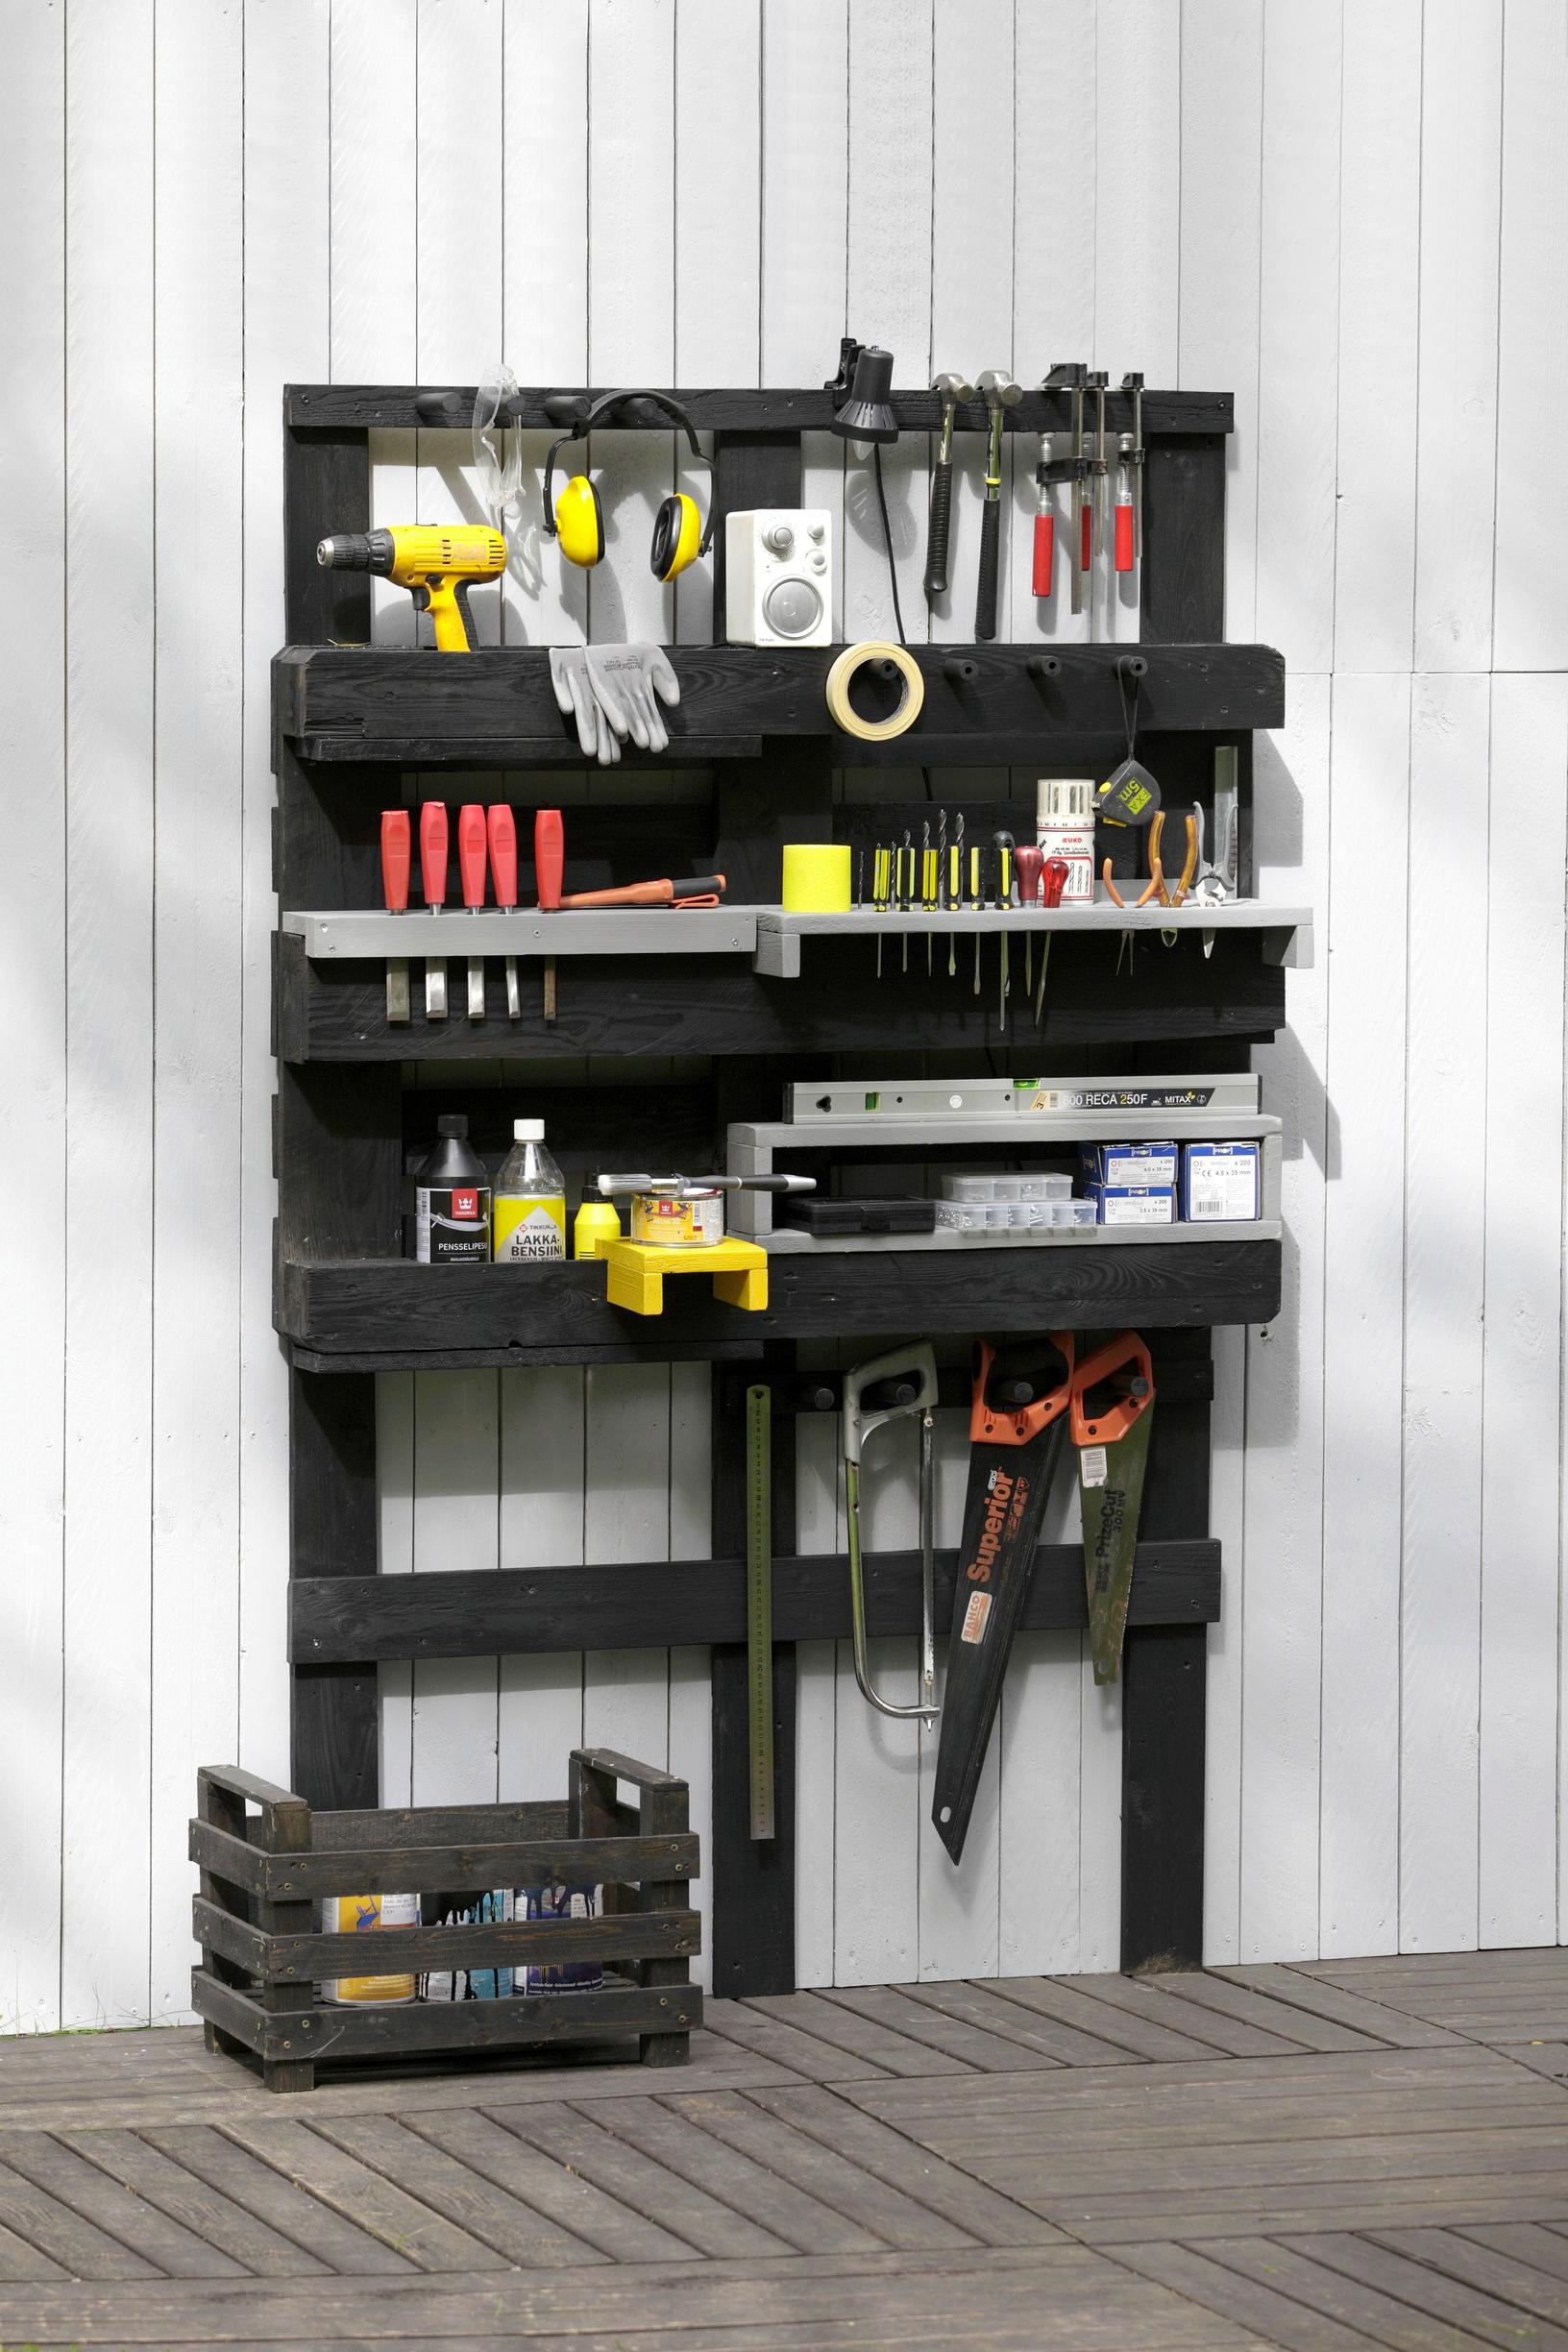
Are your tools scattered around your storage, and the exact tool you need always missing? With pallets and a few leftover boards, you can build a tool shelf that has a place for everything—and it looks great, too. You only need basic tools that most people already have.
The model shelf measures 120 cm wide, 180 cm high, and 18 cm deep.
Tool shelf—supplies:
Pallet, 80 × 120 cm
Boards, 22 × 100 mm, about 11 m
Strips, 22 × 50 mm, 2 m, and a piece of 10 mm trim
Broom handle
Countersunk head screws, 4 × 40 mm and 4 × 60 mm
Water-soluble furniture paint and a brush
A small amount of wood glue
Saw, sander, drill, screwdriver, and countersink bit, plus wood bits and Forstner bits for drilling holes in the shelf
Tape measure, square, and work gloves.
Here’s how to build the tool shelf
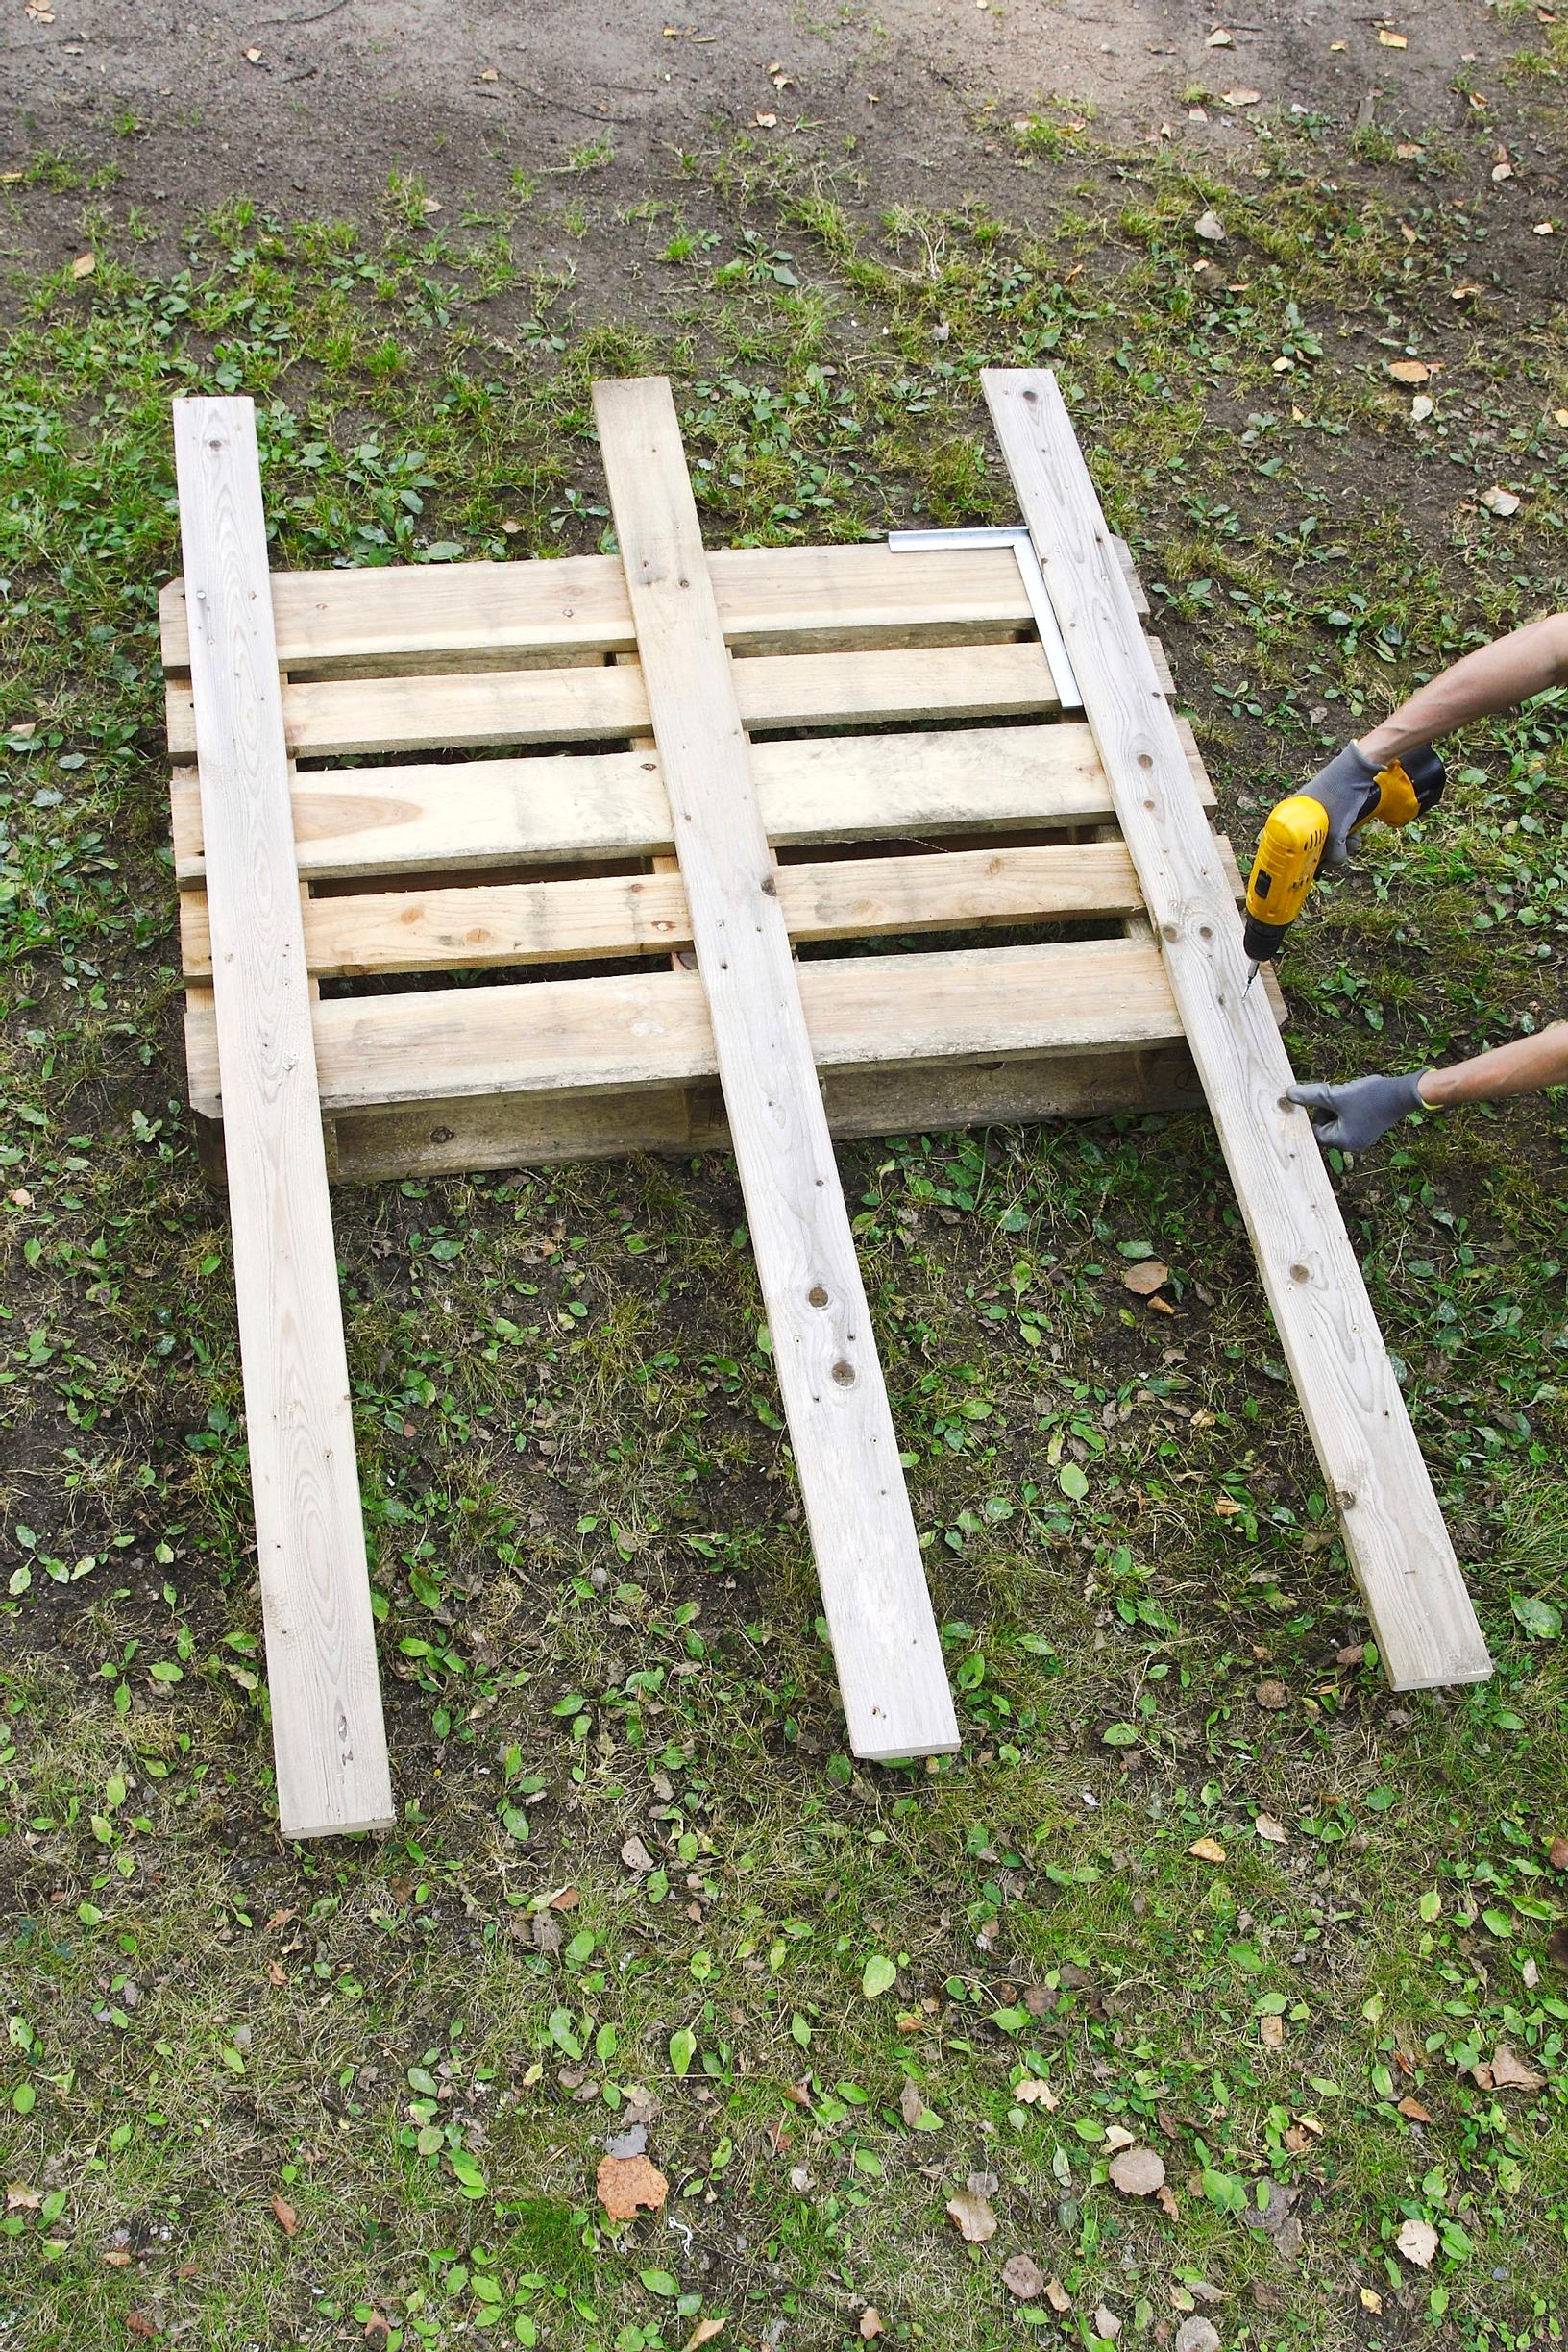
1. Cut three 180 cm boards to serve as legs for the shelf. Sand the boards and pallet. Screw the legs in place. Add a top strip to the front, a long horizontal board under the pallet, and a short board for saws. Finally, screw a couple of bottom boards in place to form compartments.
2. Paint the shelf. First, apply a generously thinned coat of furniture paint. Let it dry, then apply a second coat of undiluted, opaque paint.
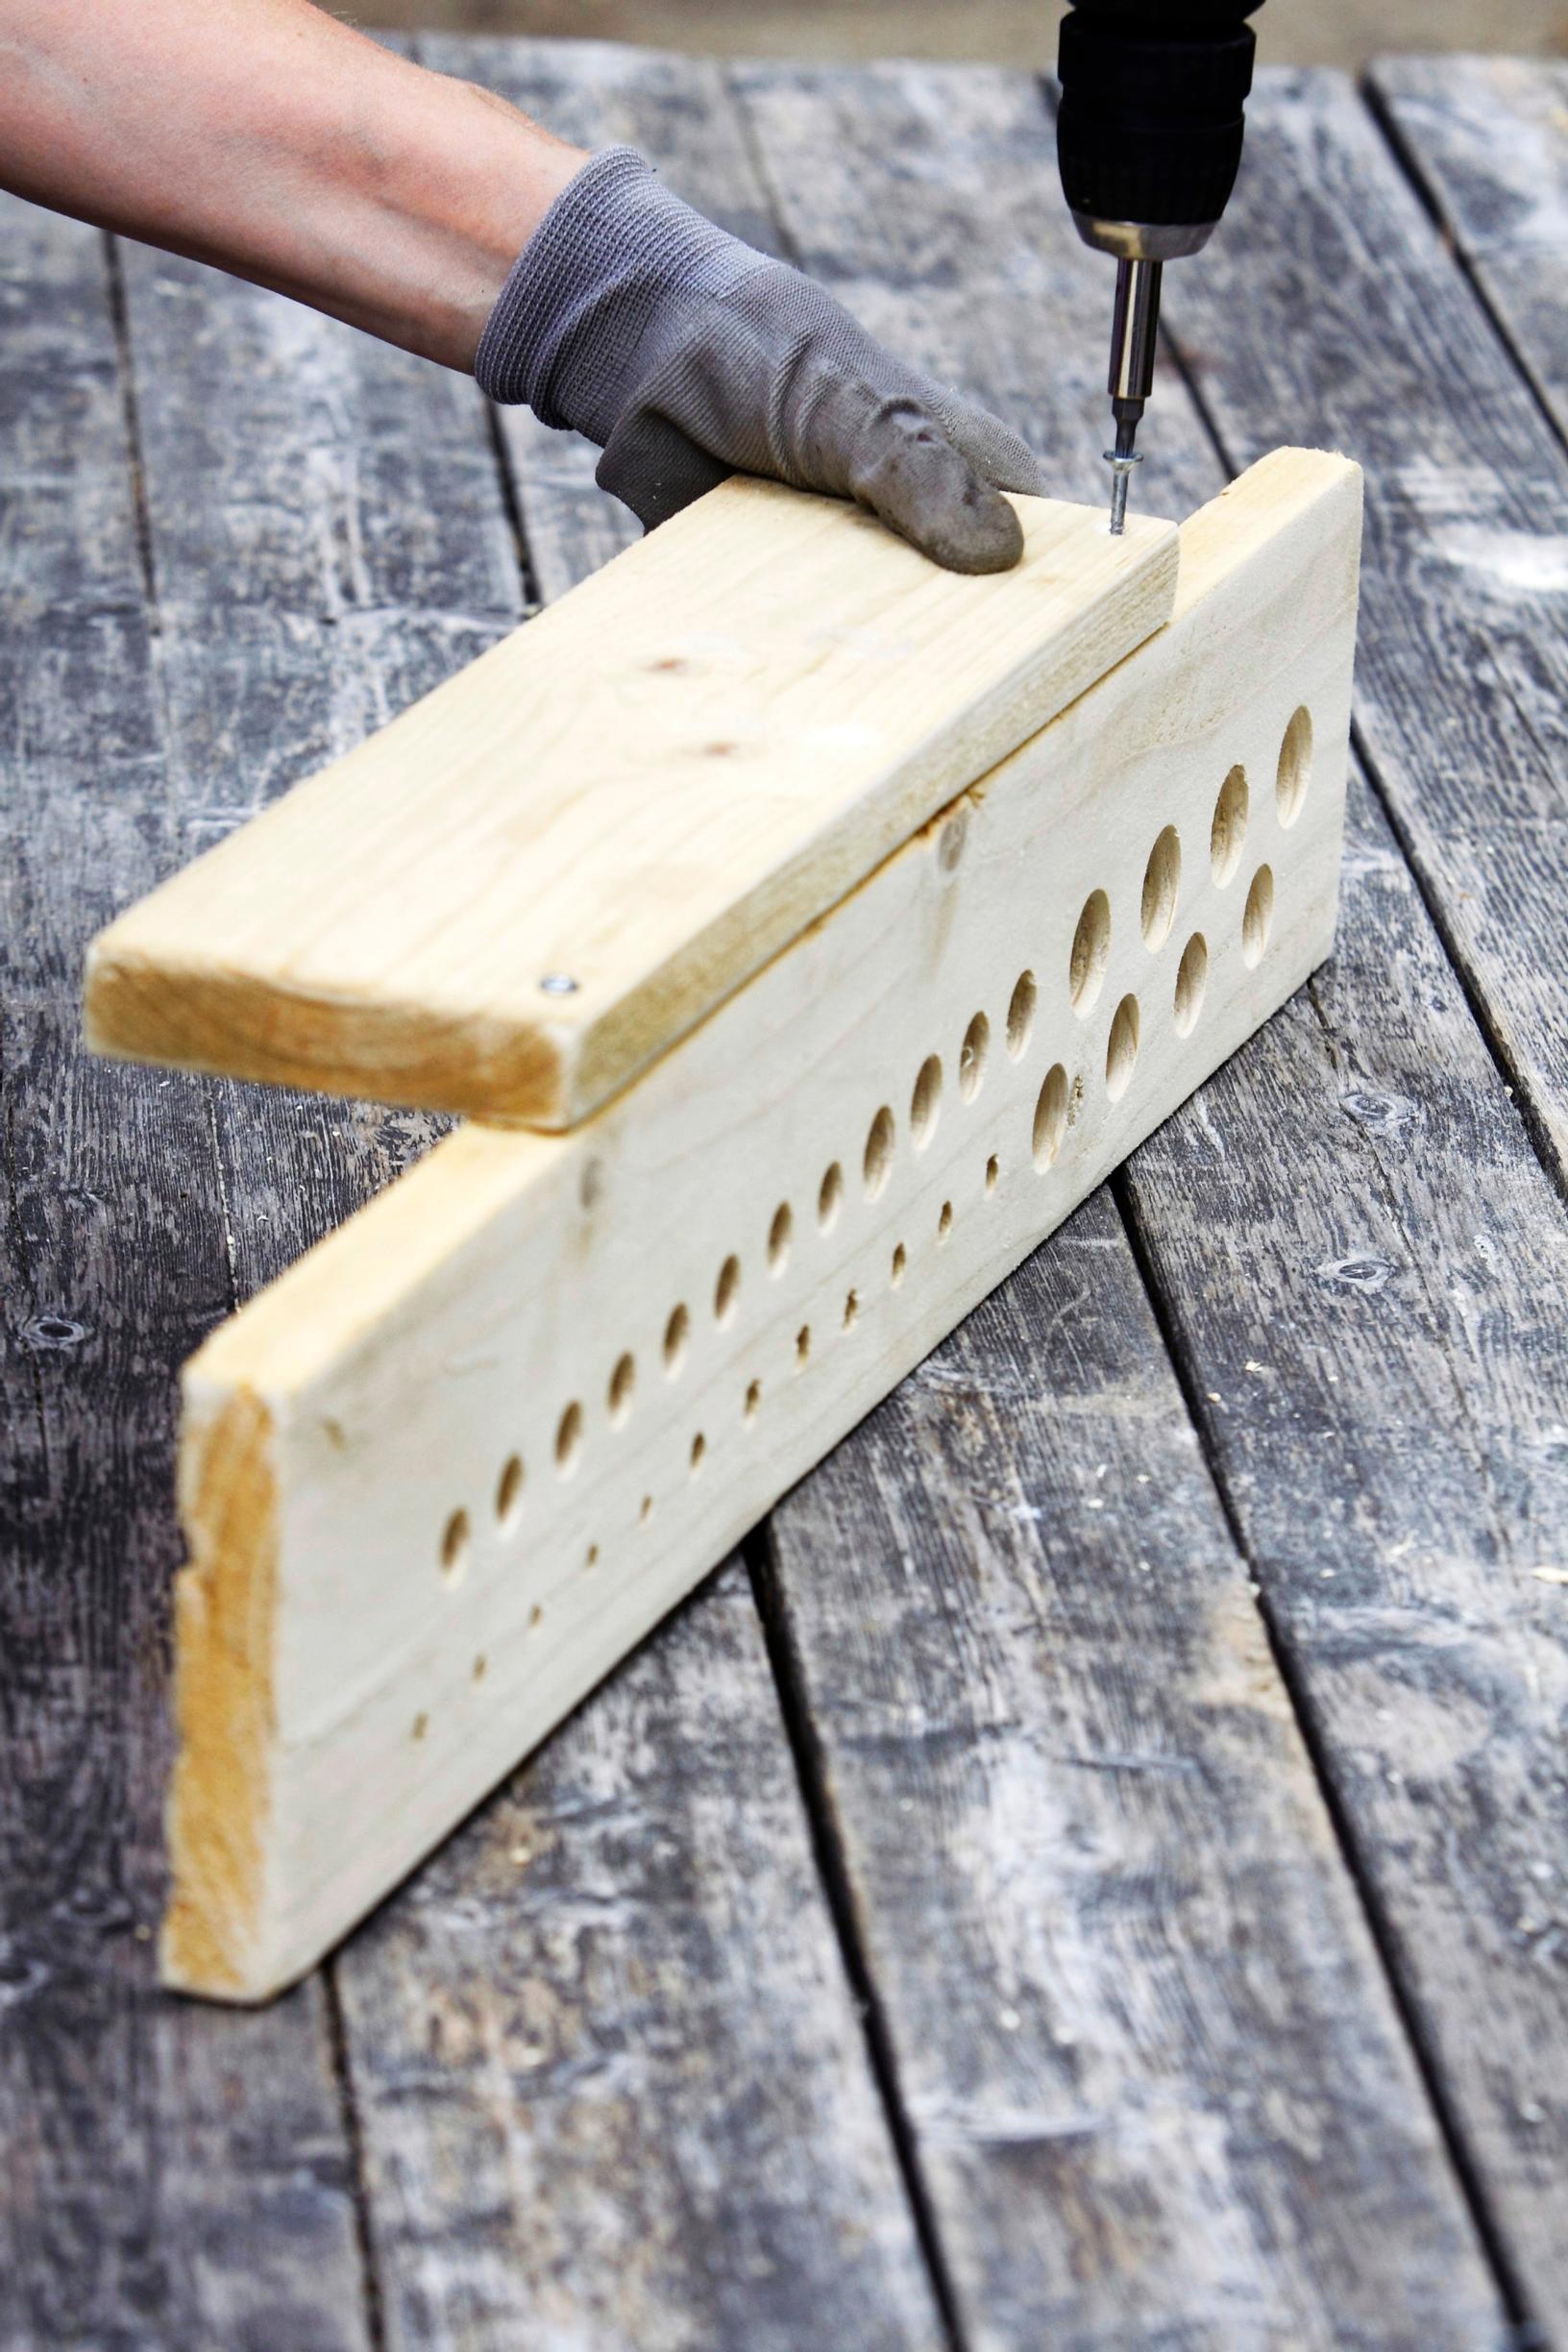
3. Cut a shelf for hand tools. Drill holes of different sizes into the board using wood bits and Forstner bits for the various tools. Attach a support board sideways behind it.
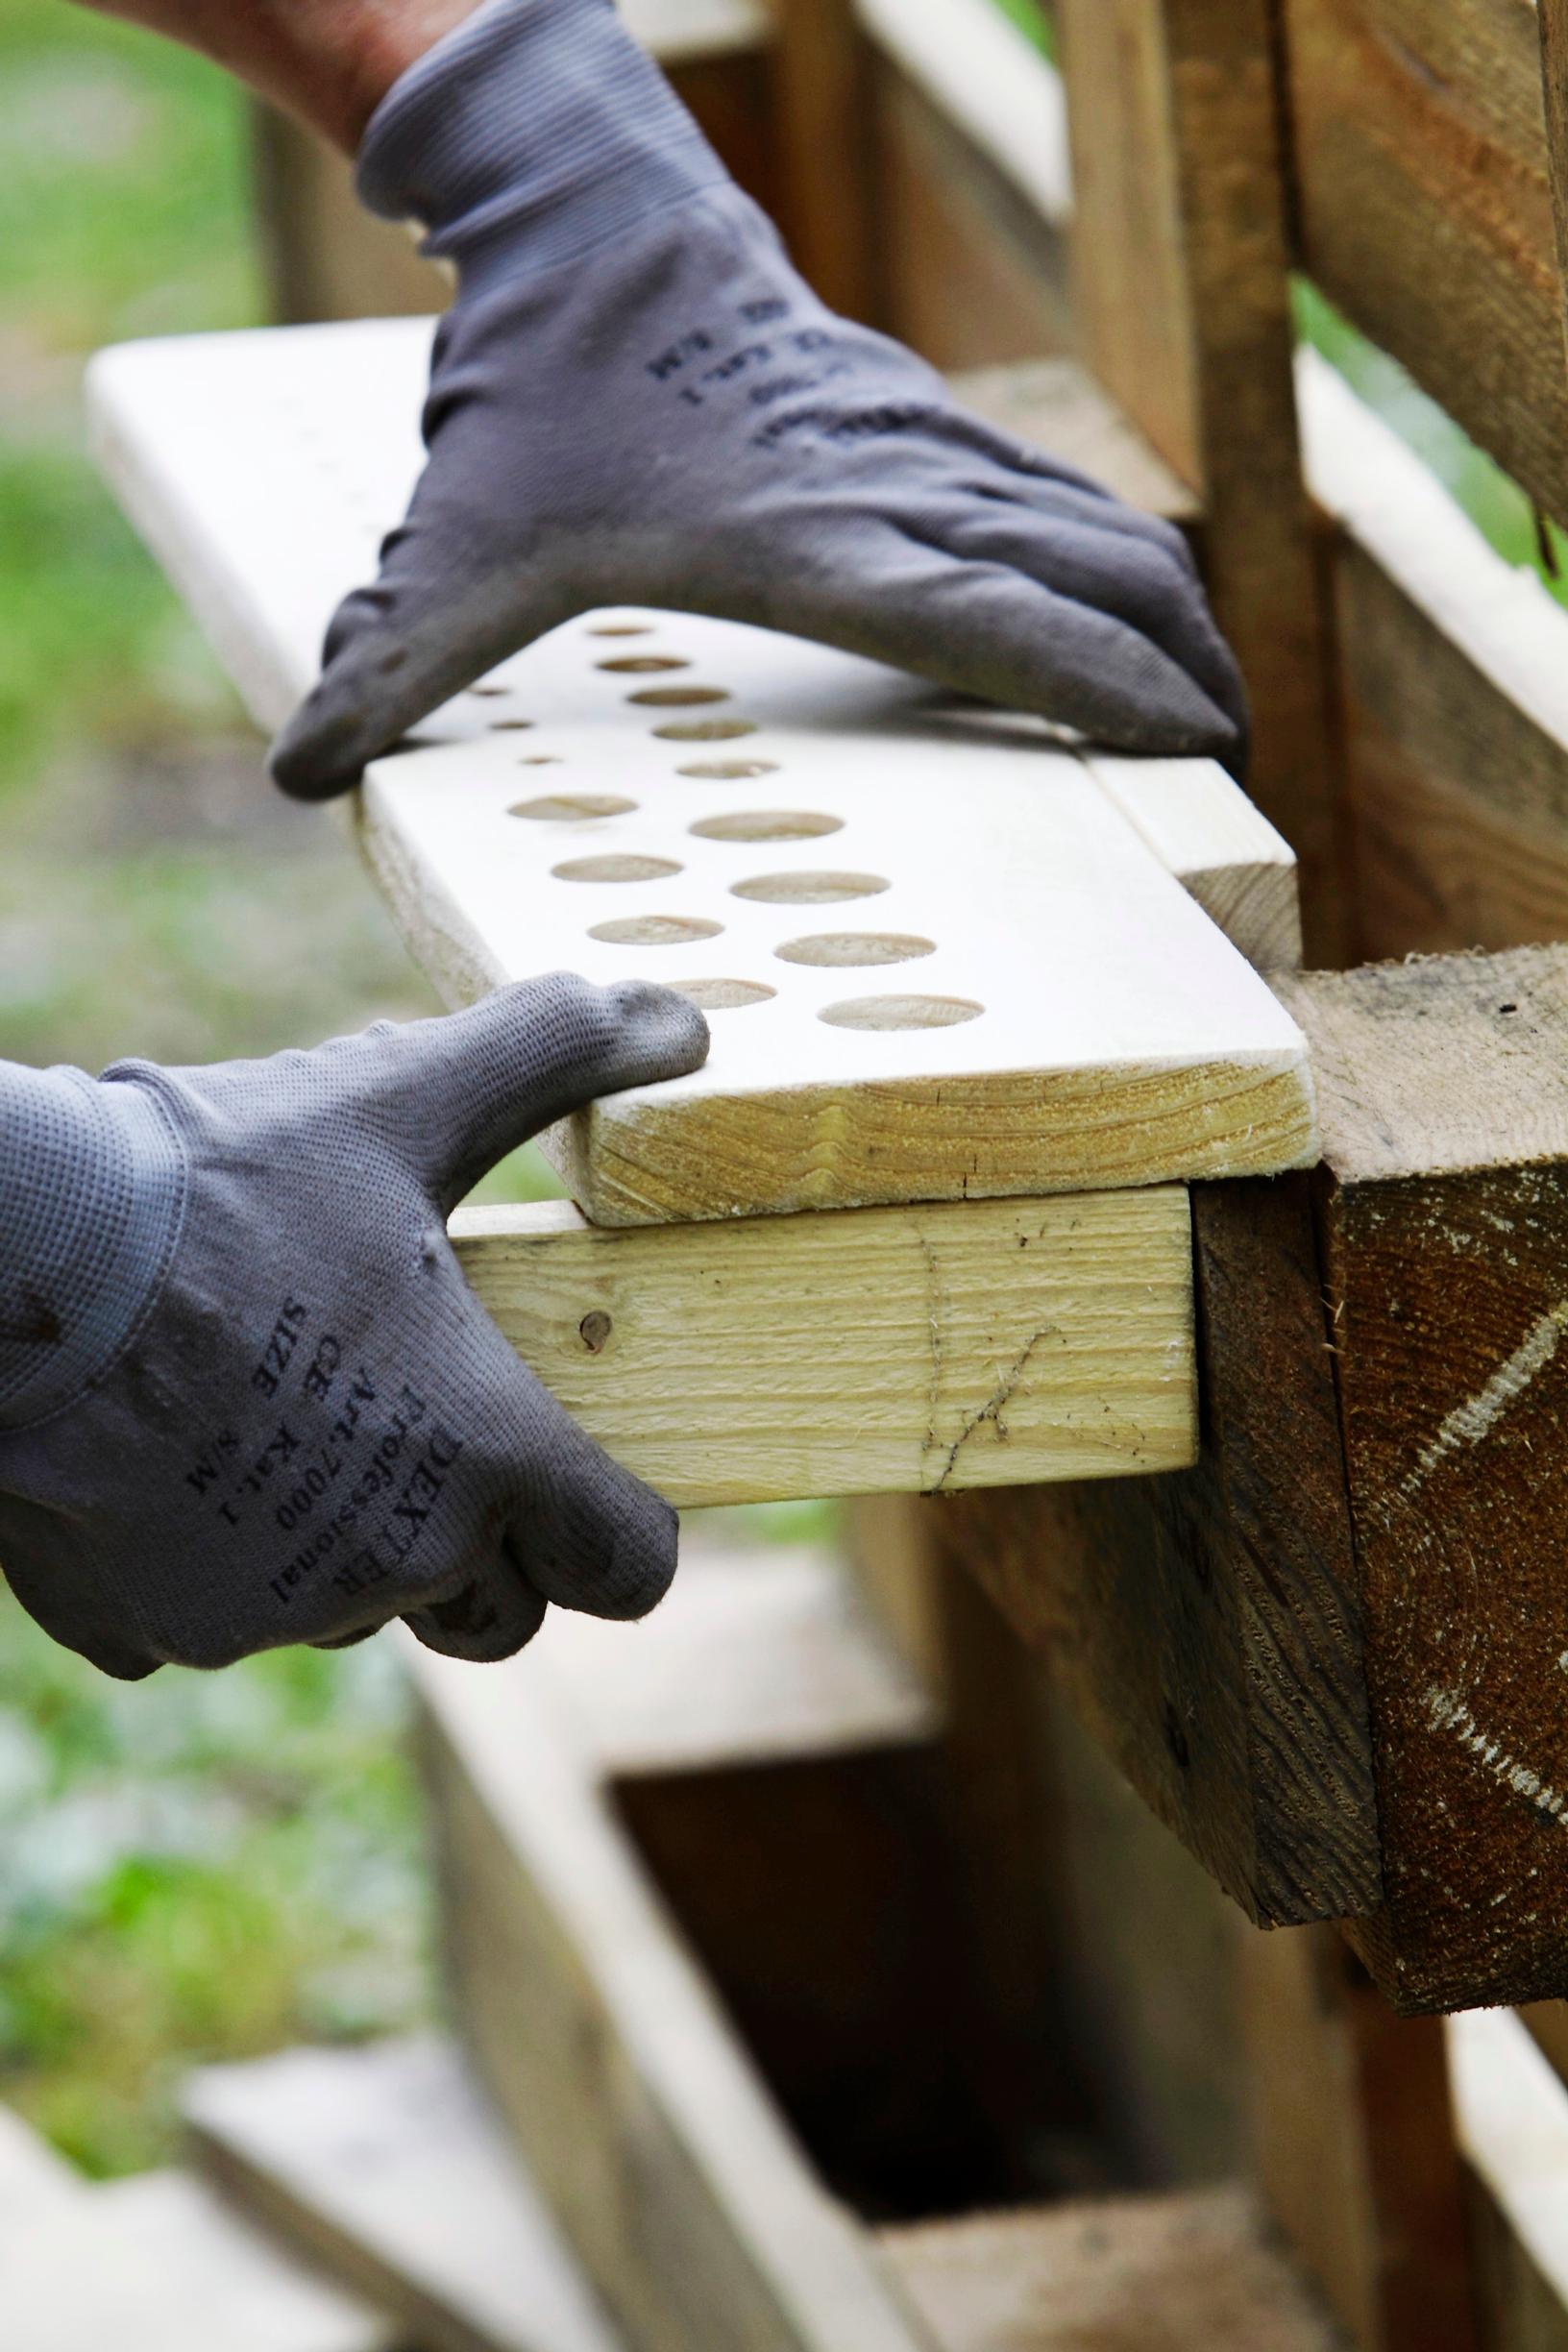
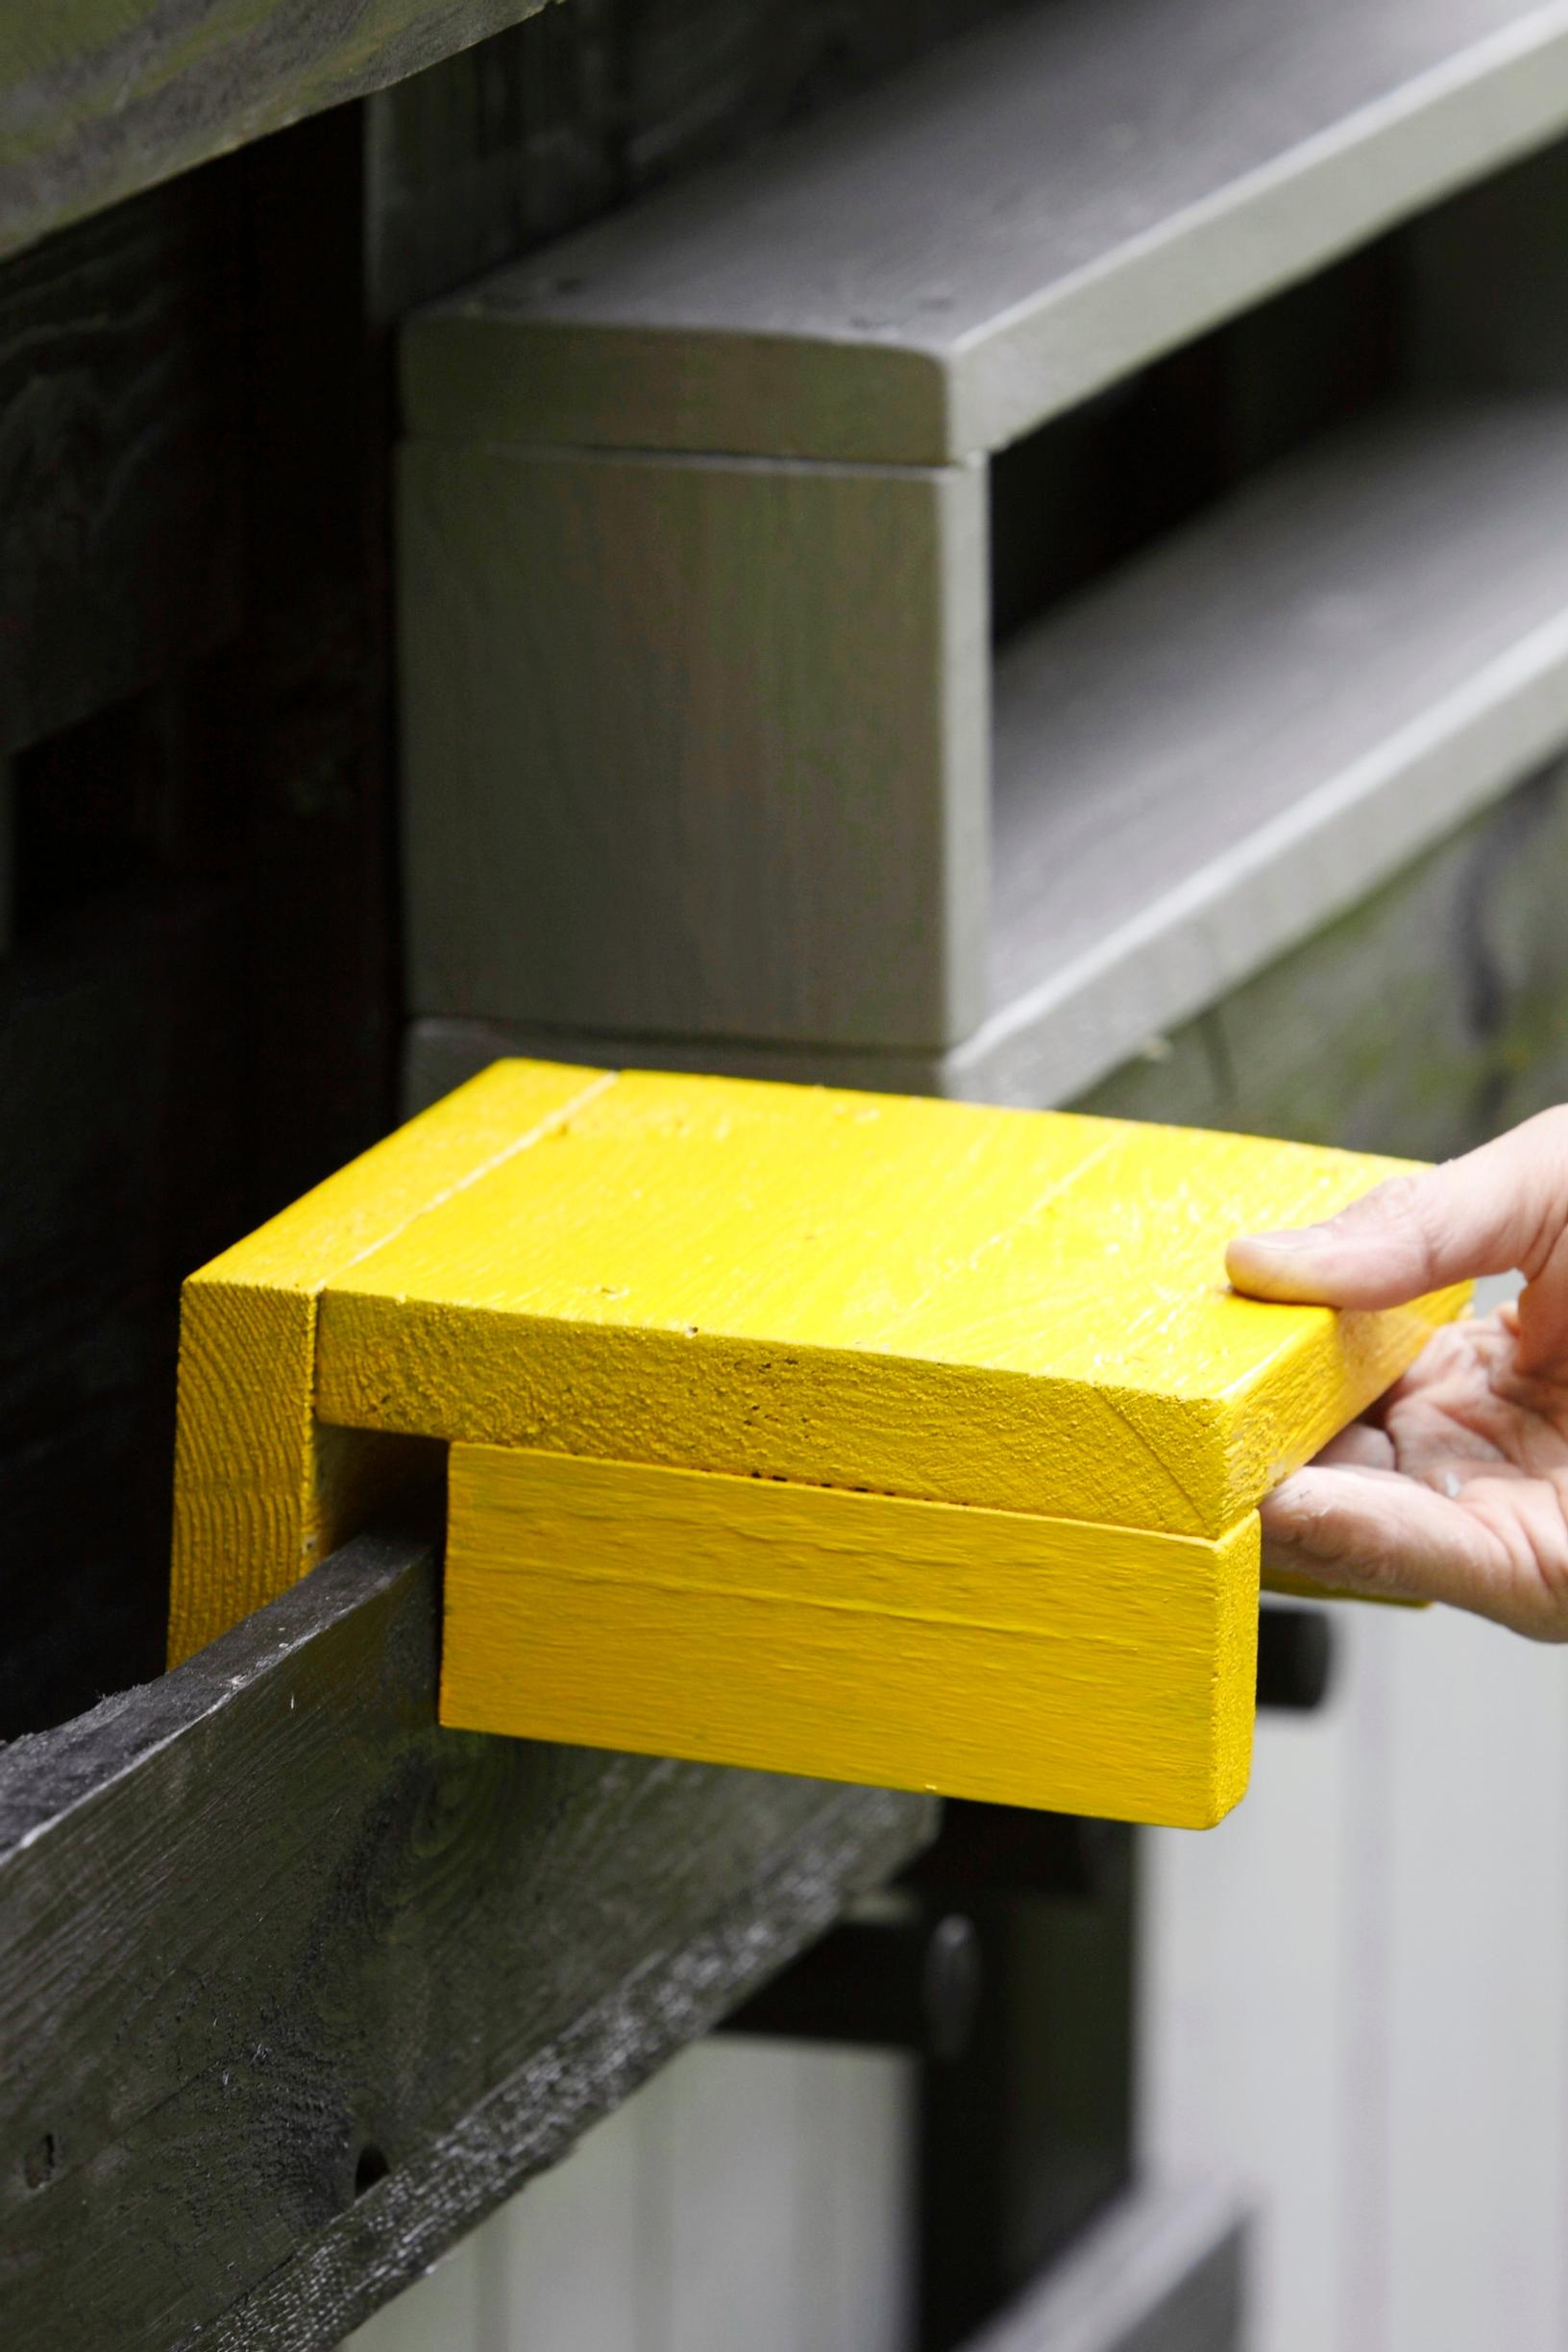
4. Add short strips to the sides of the hole board, leaving just enough space between them and the support board to fit the pallet’s front board. Use a countersink bit to create recesses for the visible screws.
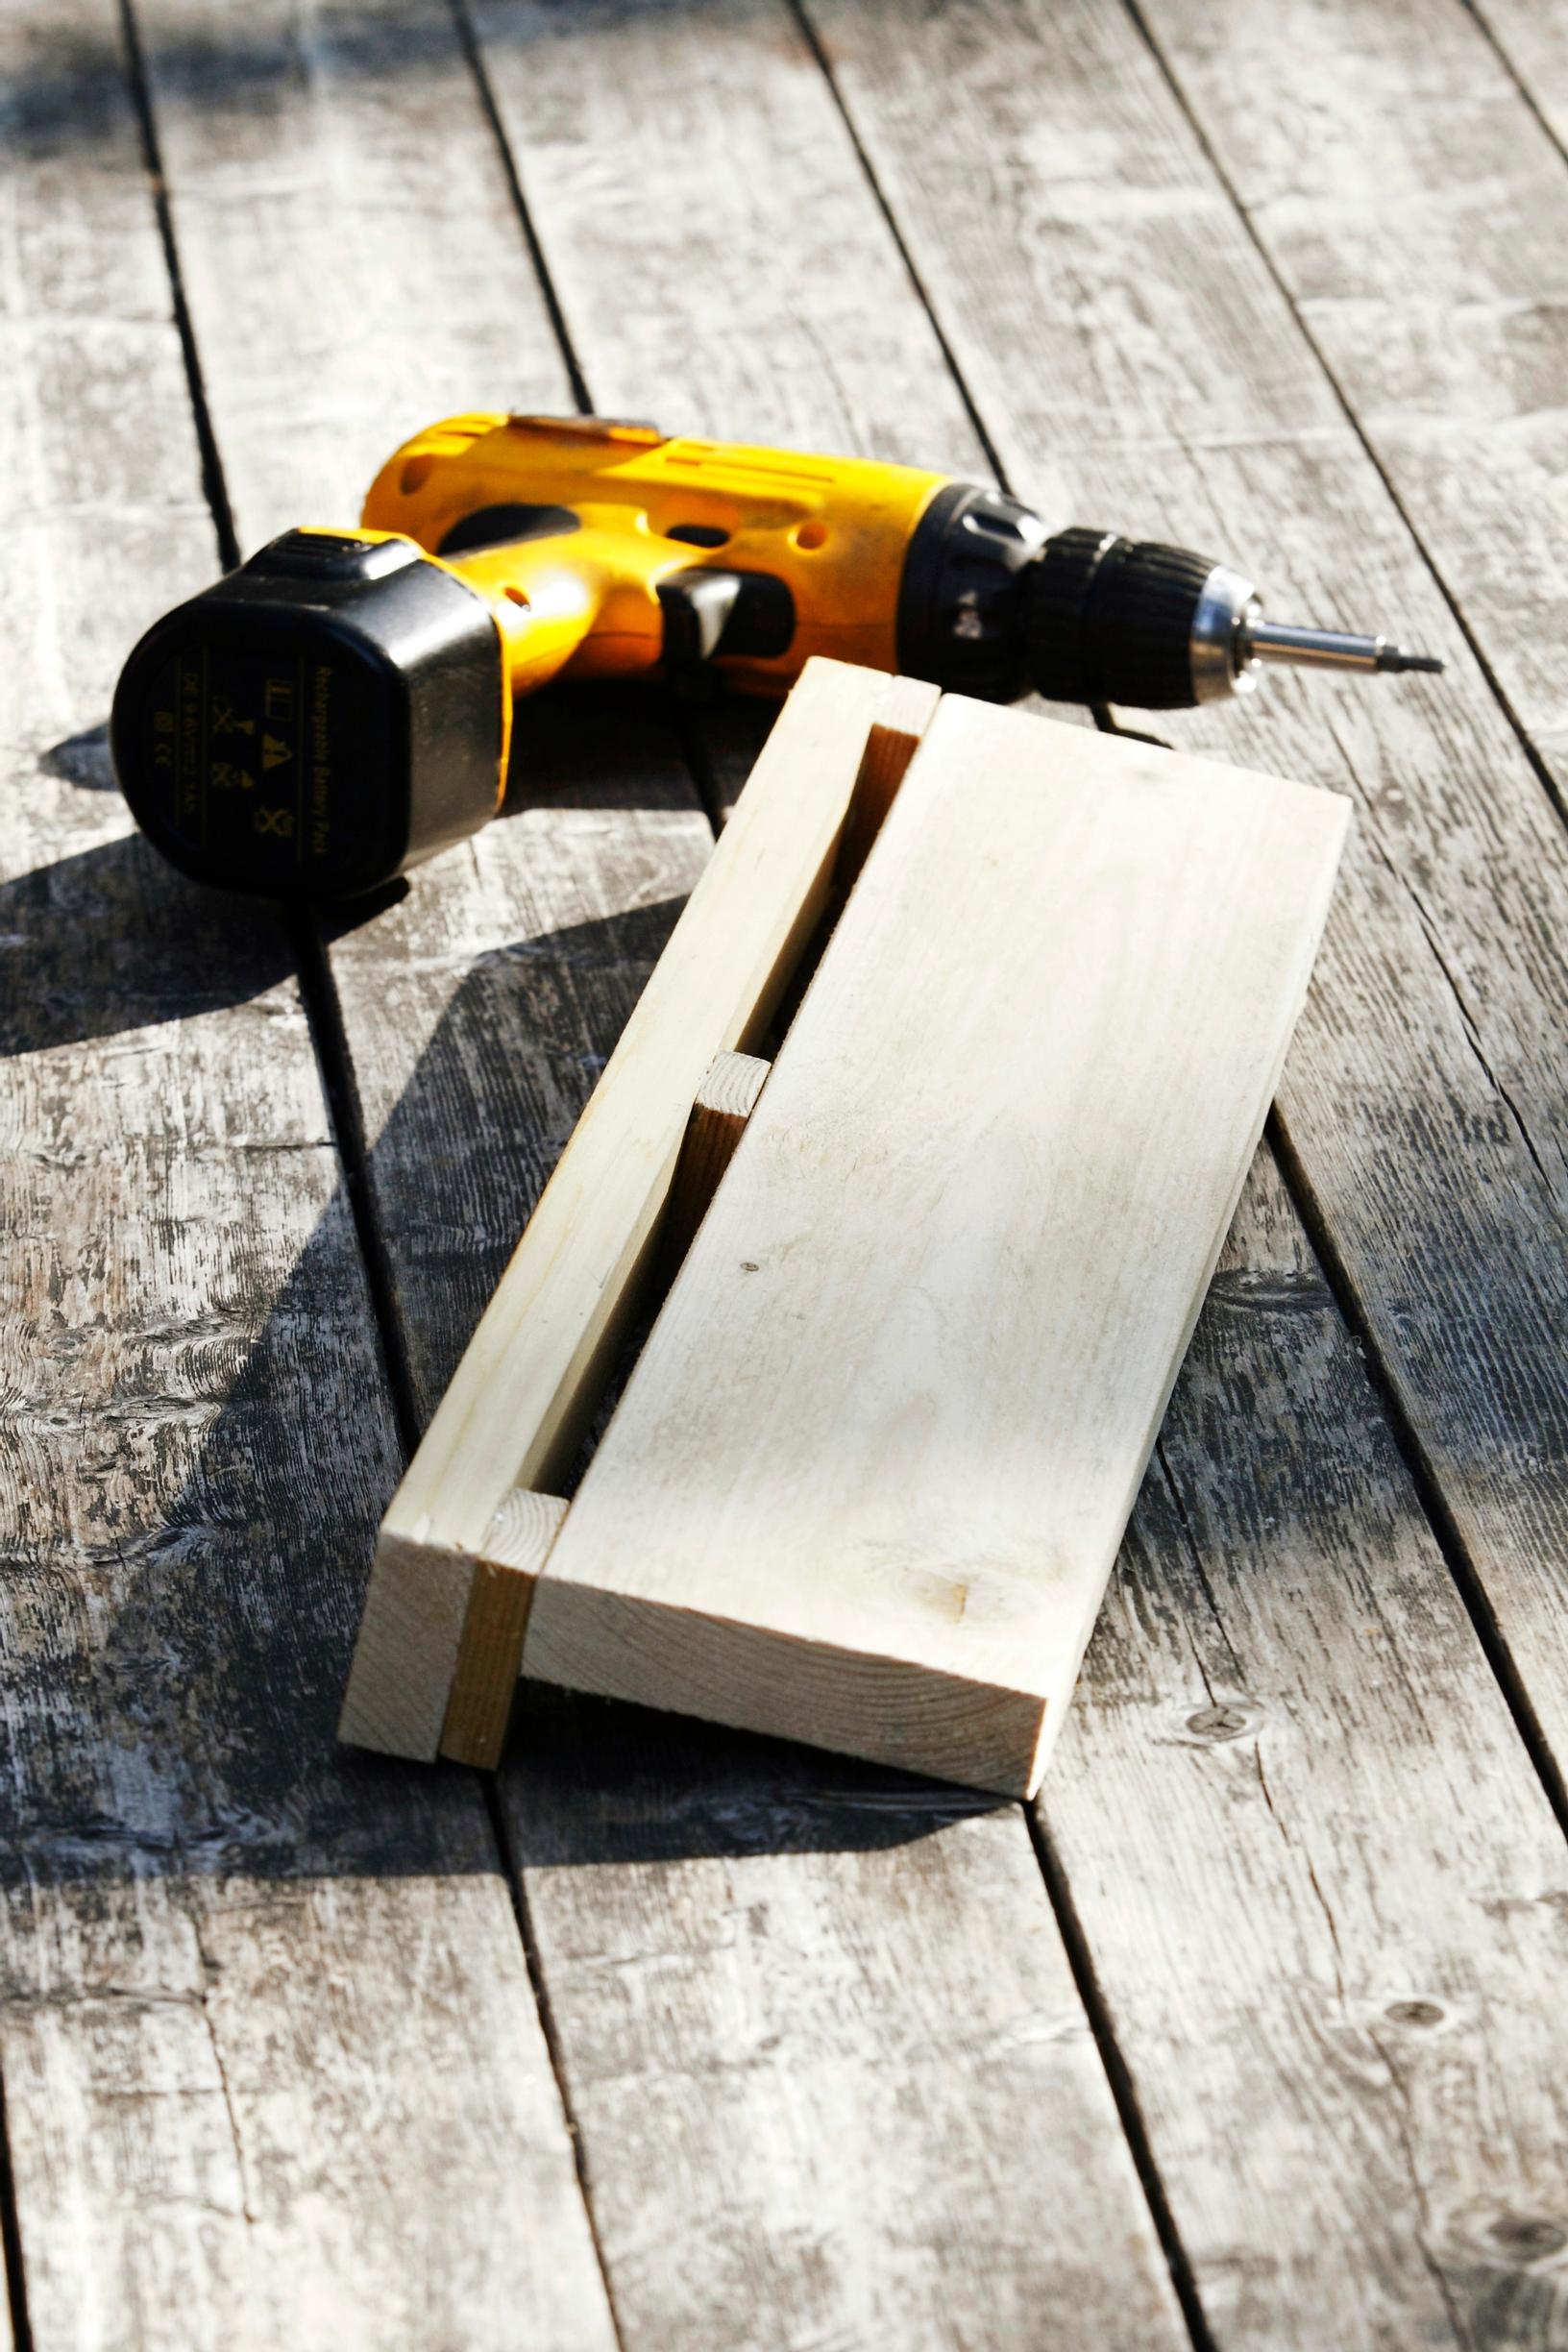
5. Use a strip to form a groove for chisels. Glue small, 1 cm thick pieces of molding onto the strip. Attach the raised strip to the side of the board with screws. Build a long compartment for screw boxes. Paint the compartment and shelf surfaces.
6. Cut 5 cm and 10 cm wooden pegs from the broom handle. Attach the longer top pegs from behind. Drill a deep recess into the shorter pegs and fasten them from the front. Then place the shelves and compartments in position.