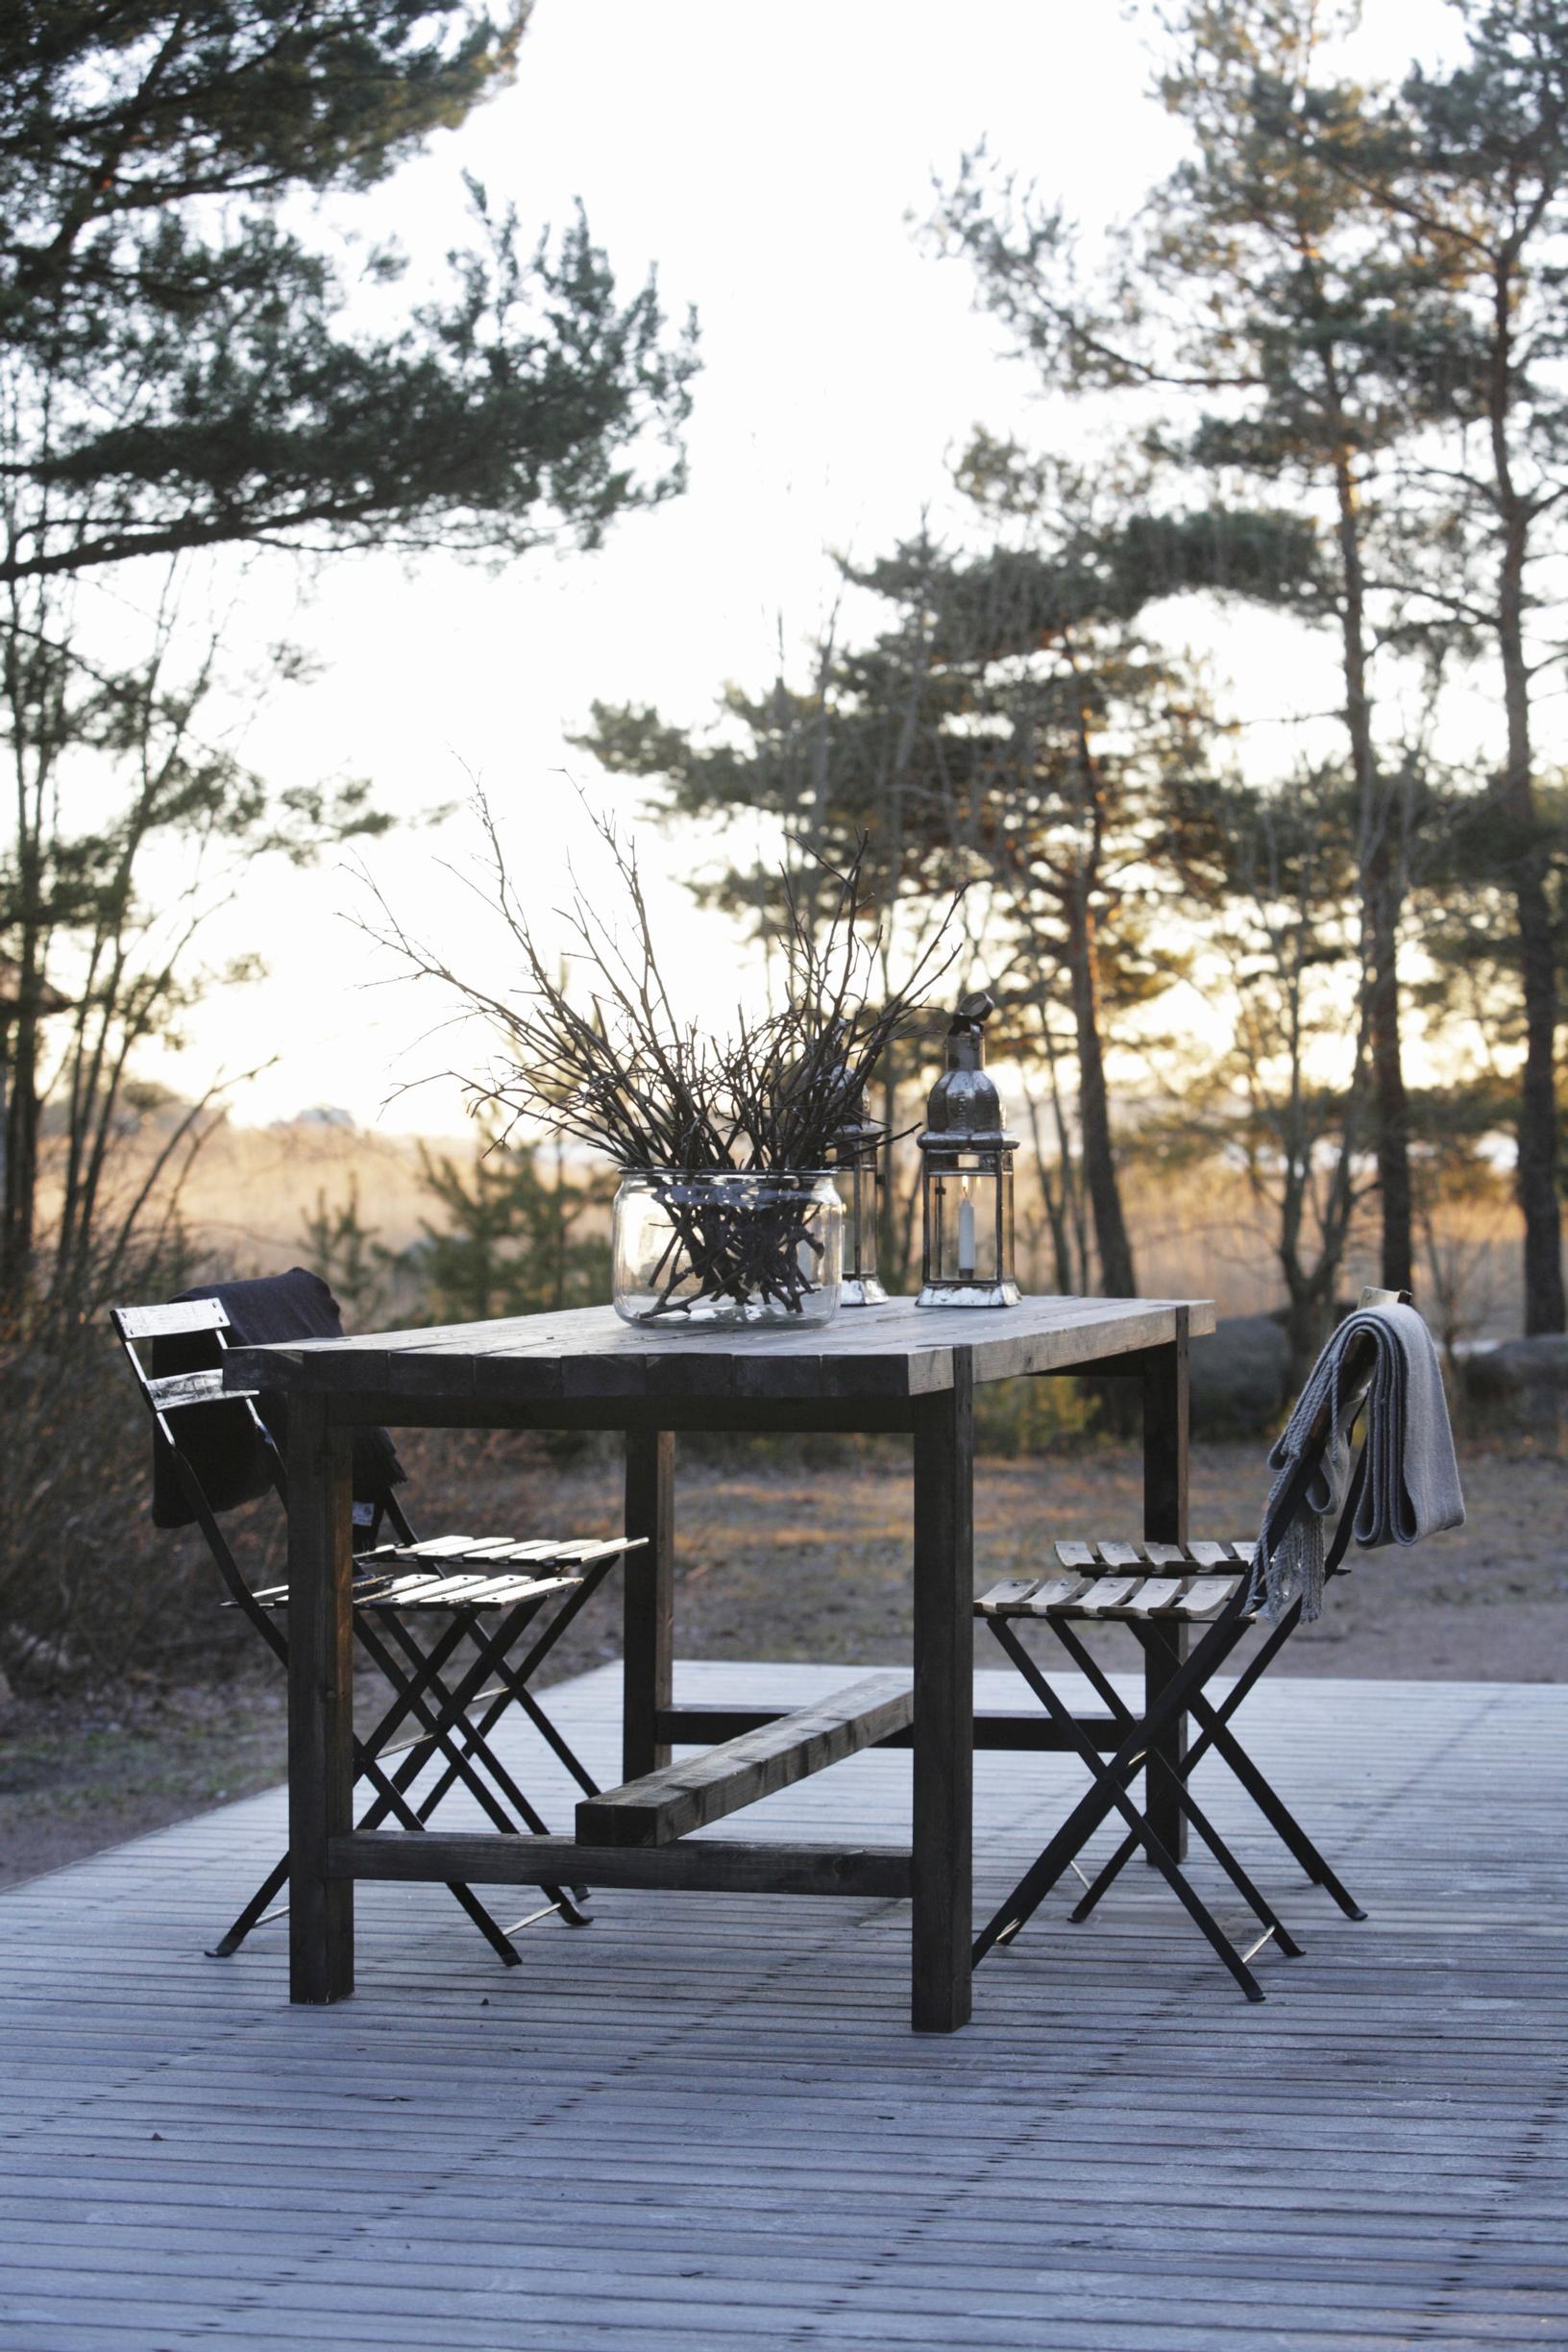
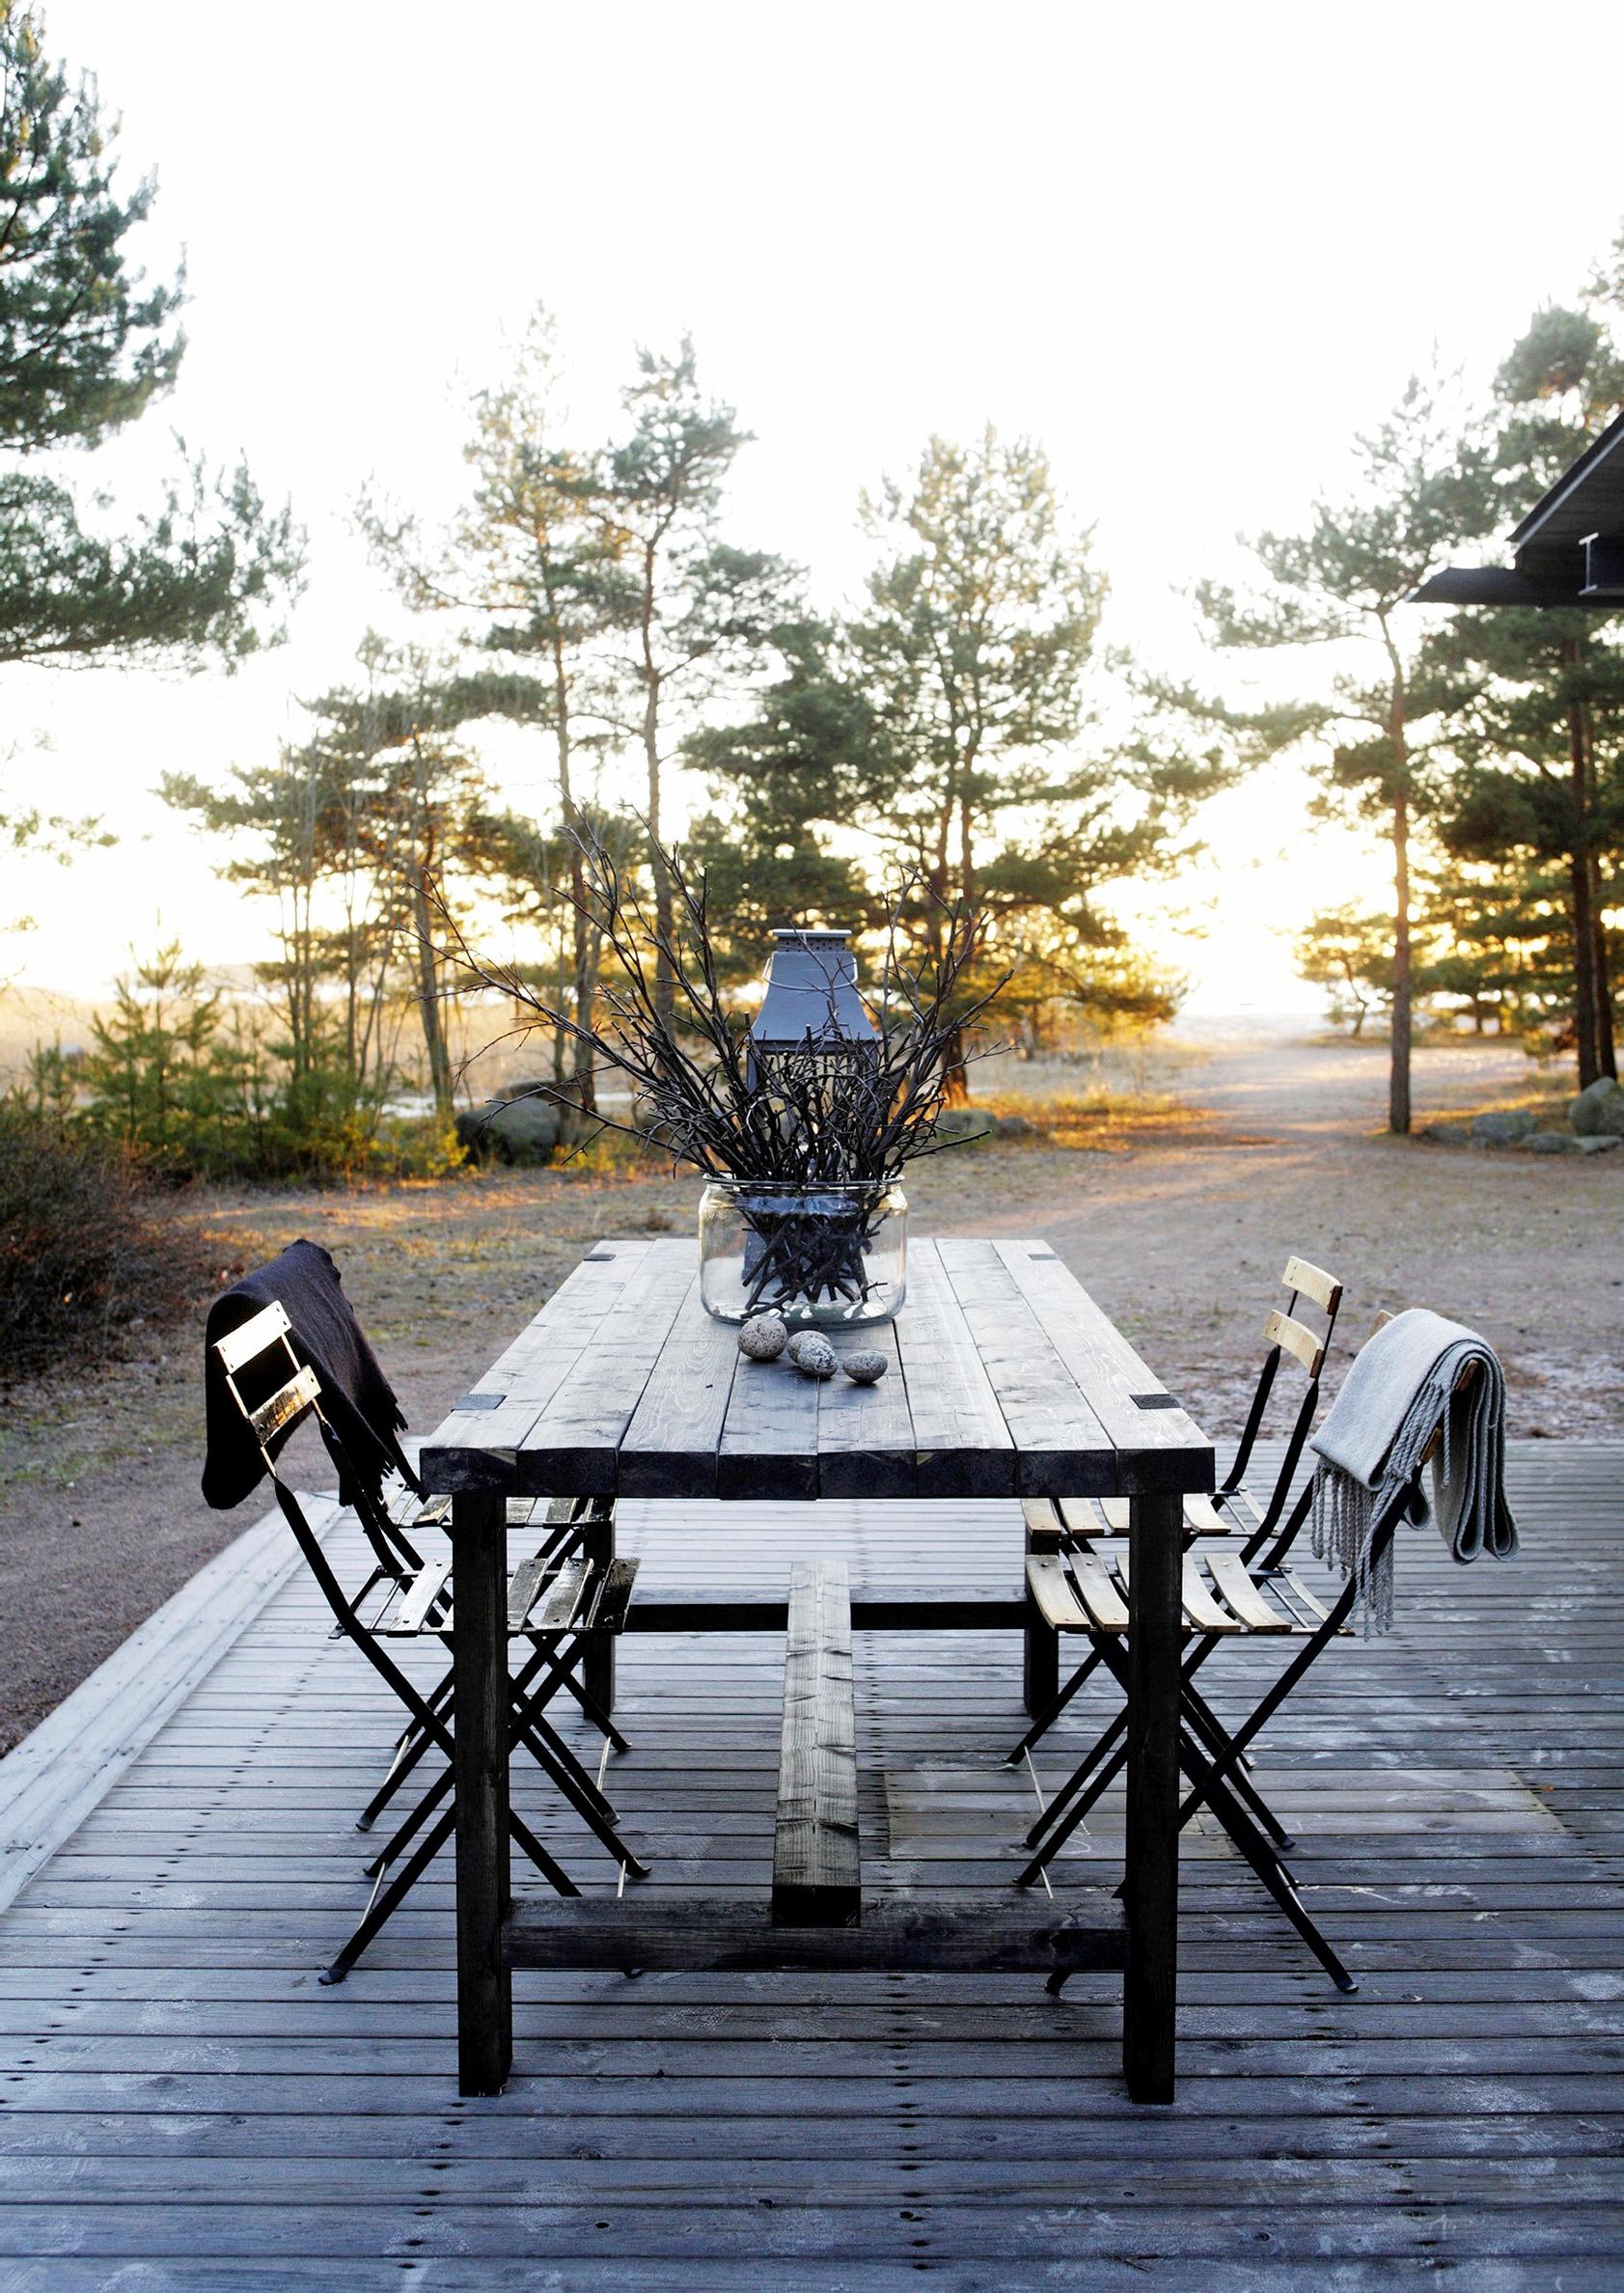
Outdoor table made to stay out—build a sturdy terrace table from planks
This table for your terrace or garden can stay outside all year round. In winter, it’s best to cover it with a tarp. Perfect for dining, working, or just lounging around.
You can build a steady terrace table from rough-planed planks that provides plenty of space for dining and reading. You can also use this robust table as a work desk, for example, for small cottage projects.
This table is easy to build overall, but the leg joints require careful work and precision. It’s wise to practice making the leg joint first on the least suitable board in the stack. Draw the leg shape on the board’s edge, and practice cutting out the wedges with a saw, removing them with a chisel and hammer, and finishing the slot with a knife.
The leg should fit into the notch easily. If the notch is too large, the leg will shift and won’t get the support it needs. It also shouldn’t be too tight, since outdoor furniture needs space for the wood to expand. Once you’ve successfully created the notches in your practice piece, move on to making the joints in the actual table planks.
Terrace table—supplies:
Table dimensions: 80 x 190 x 75 cm (width x length x height).
- Rough-planed planks, 48 x 98 mm, 30 m
- Stainless countersunk screws, 5 x 80
- Saw
- Drill and screwdriver
- Square, measuring tape, and pencil
- Coarse sandpaper
- Wood oil in a desired shade
Total cost for supplies: about €102.
Terrace table—instructions:

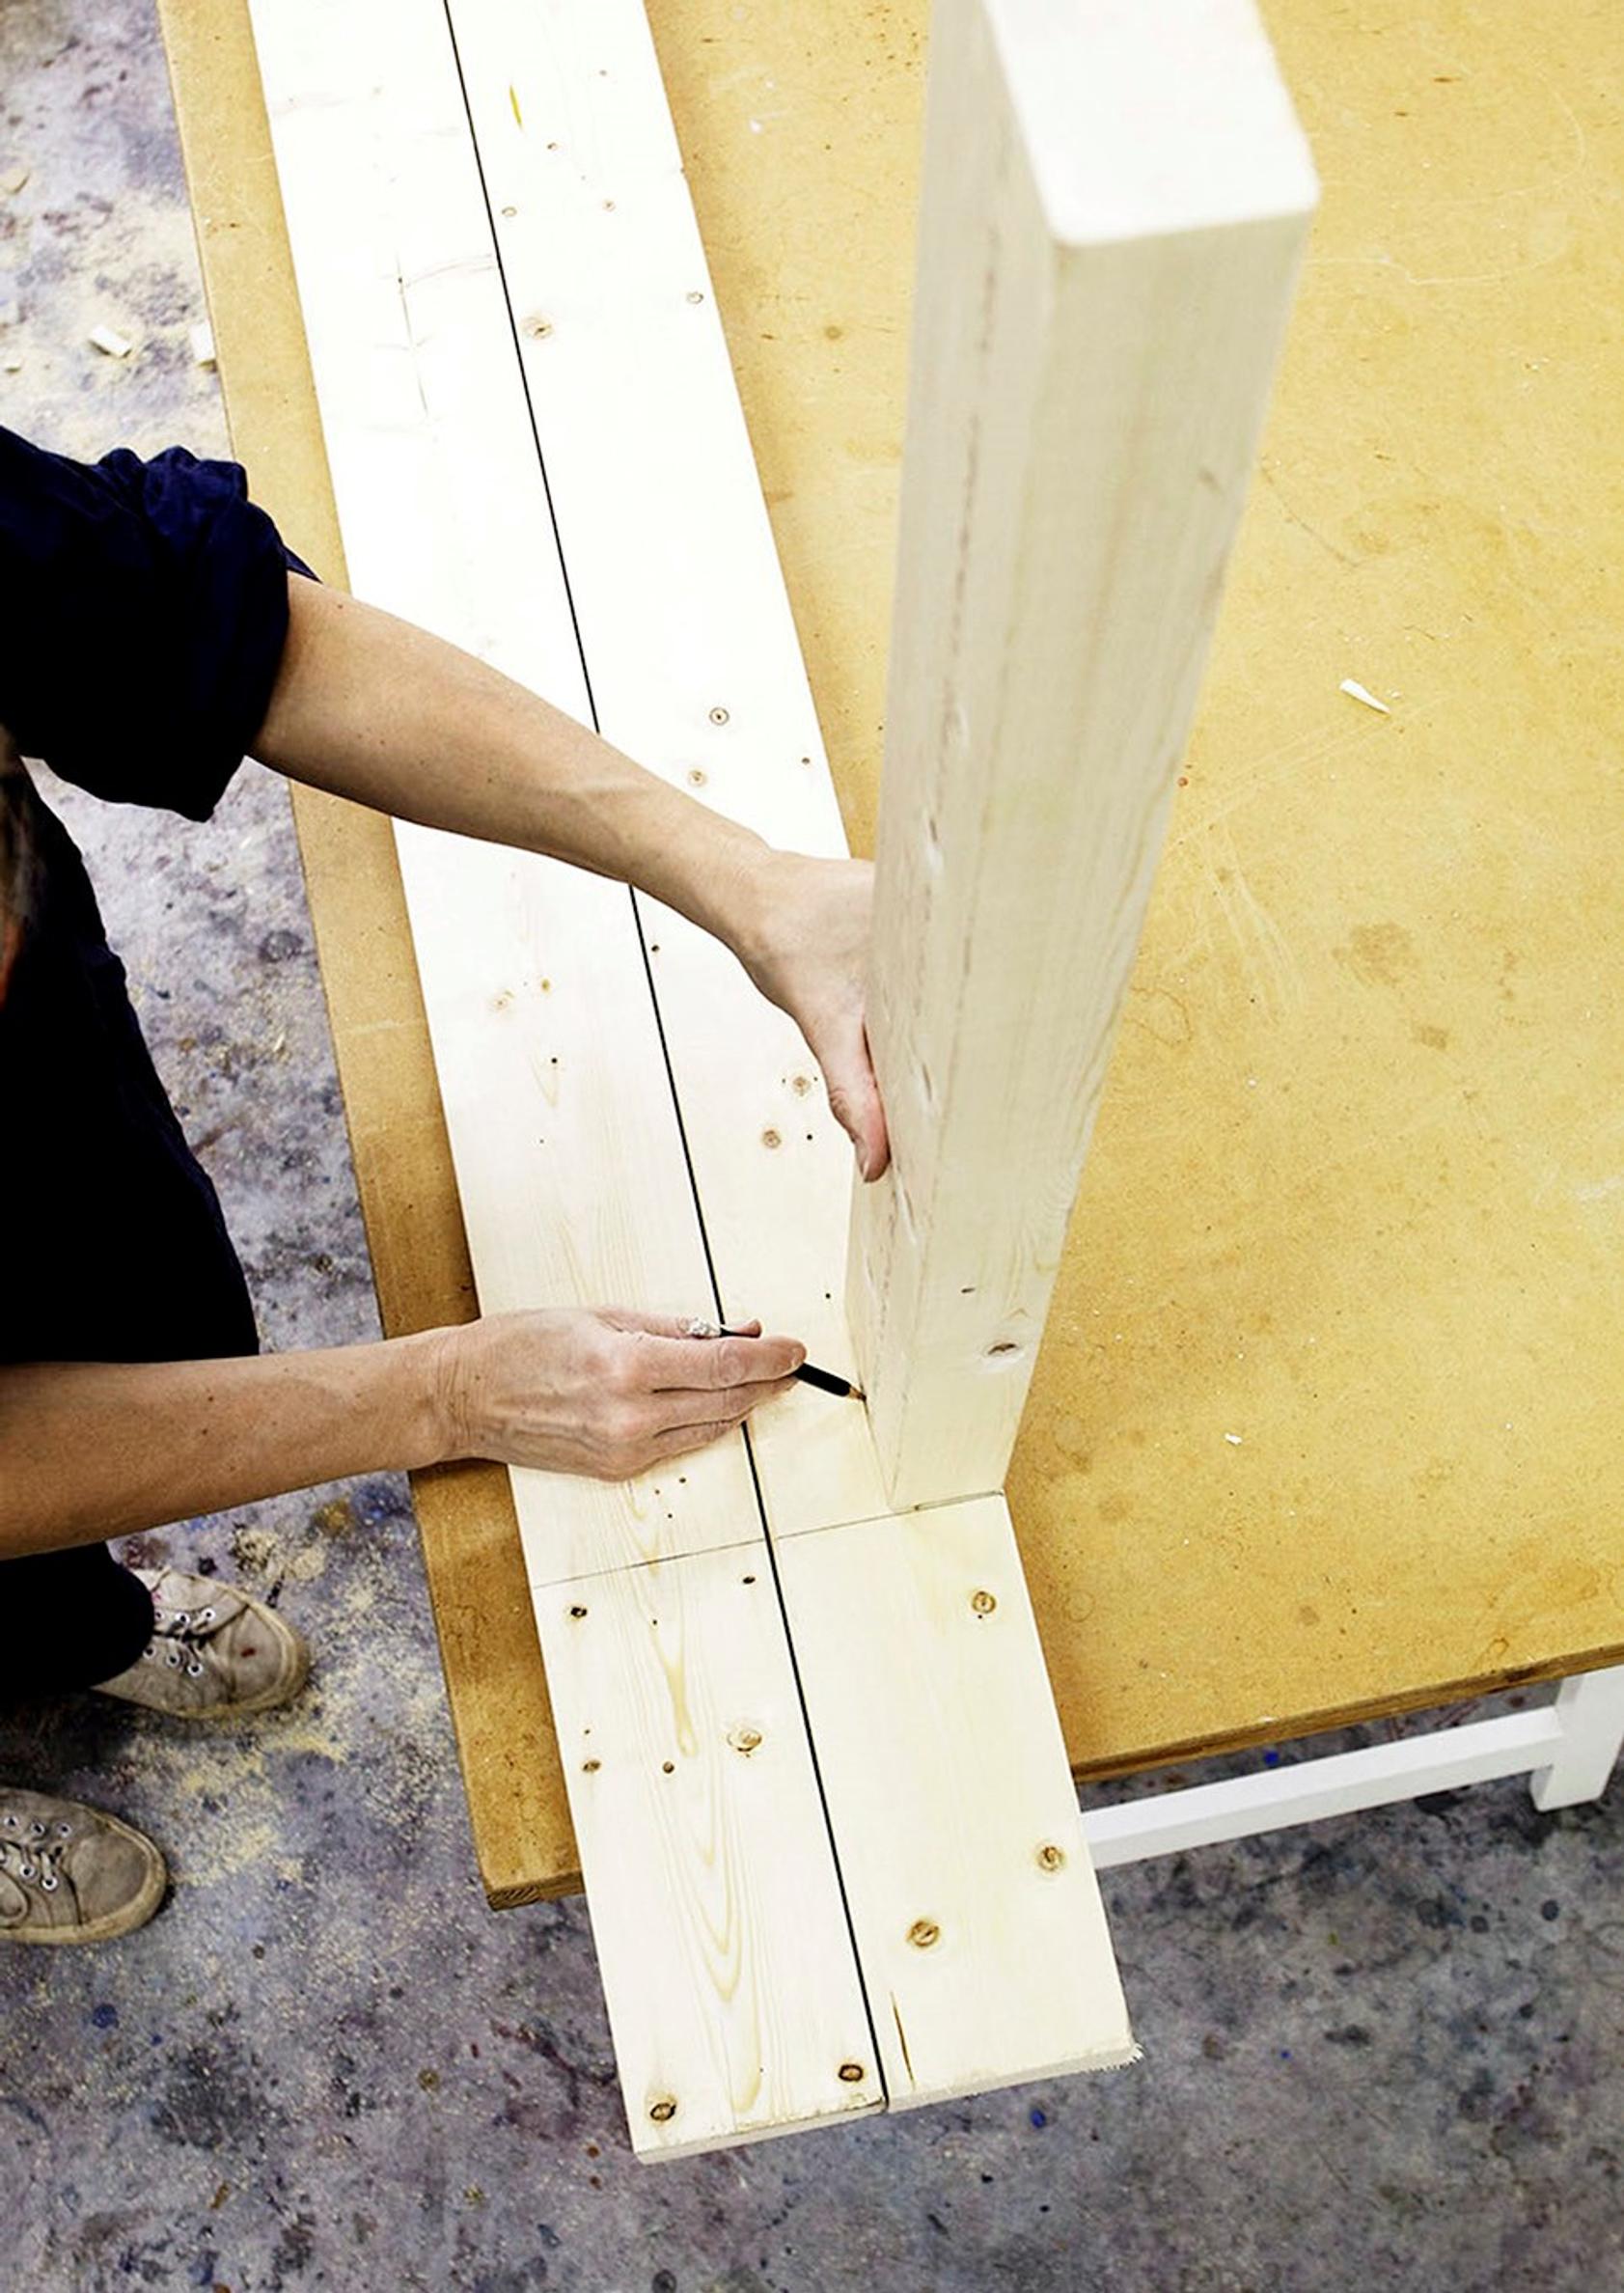
1. Saw eight 190 cm boards for the tabletop and four 75 cm boards for the legs. Place two boards on your workbench with the underside facing up. Mark the shape of the leg on the outer edge of one board, and use a square to mirror the same area onto the other board. Use a pencil and the square to draw a line around each board.


2. Begin forming the leg joint by cutting narrow slices in the marked area with your saw, spaced 1–2 cm apart, almost down to the horizontal line. Make sure you don’t cut beyond the line on either side. If you go past the line, it will remain clearly visible. A backsaw works well for these joints, and a pull saw is also handy.

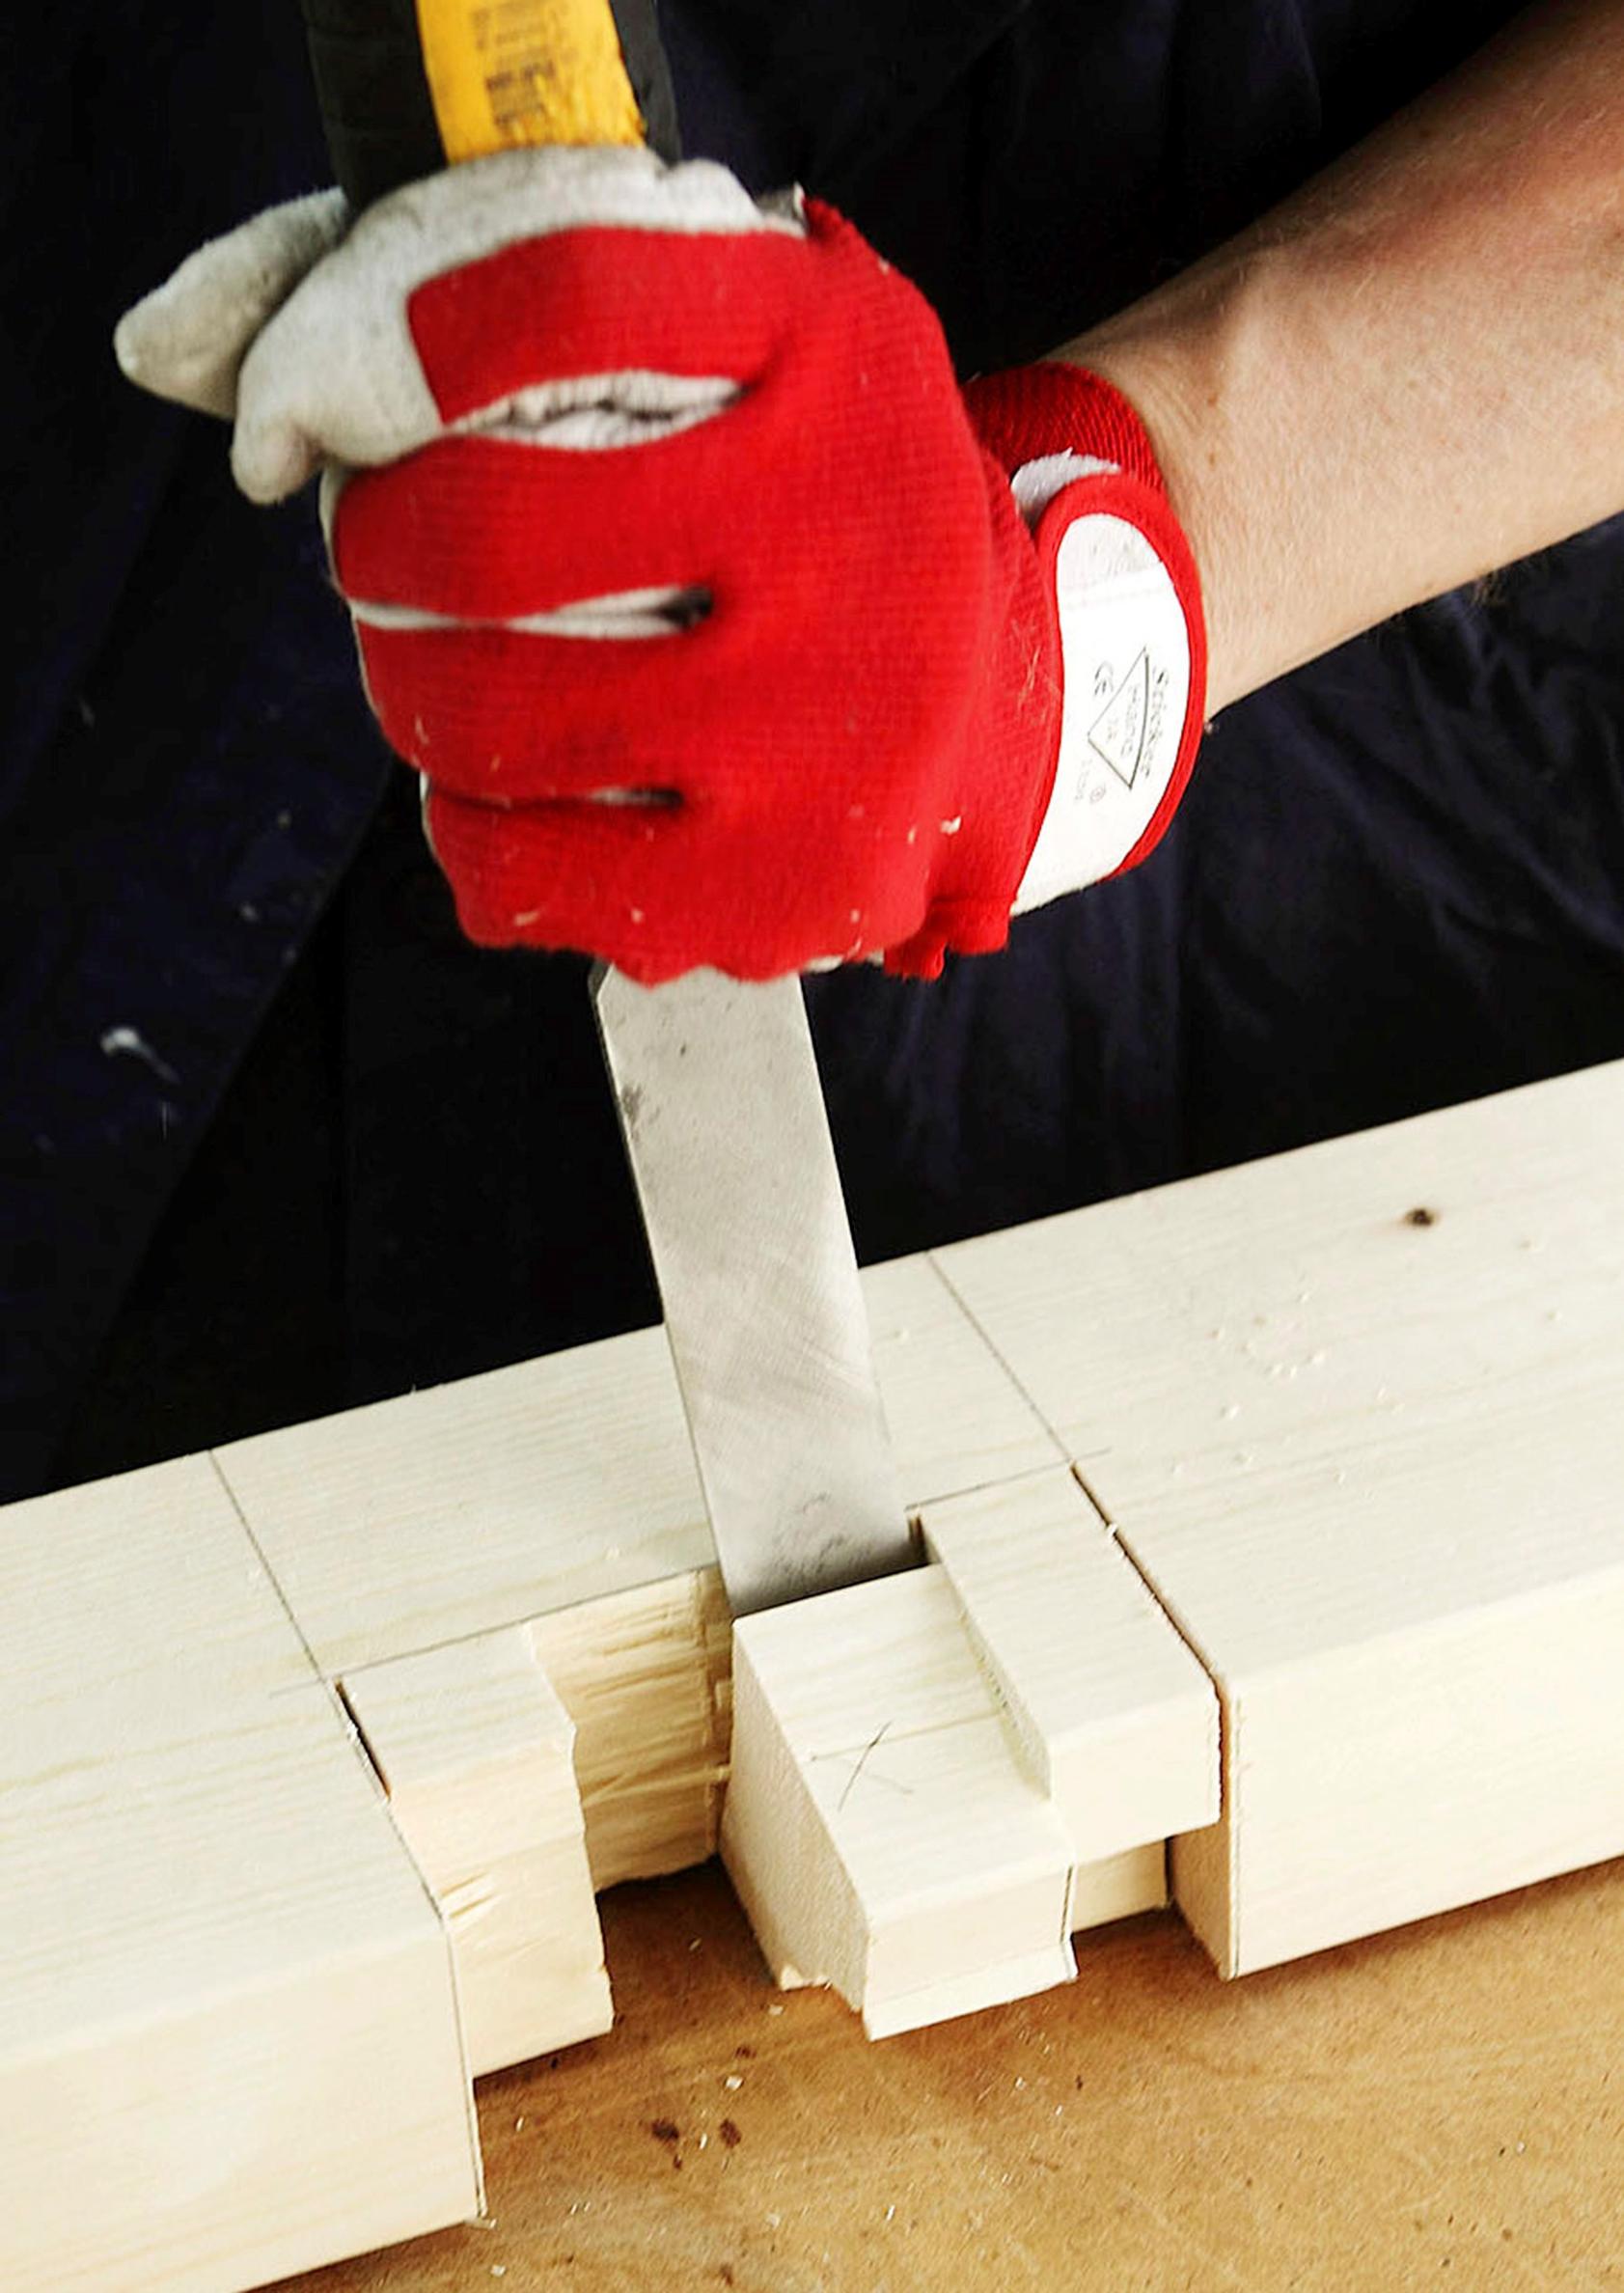
3. Use a chisel and hammer to knock out the sliced wedges, making sure the line stays visible. Start about one centimeter from the edge and proceed carefully until all the wedges are removed.

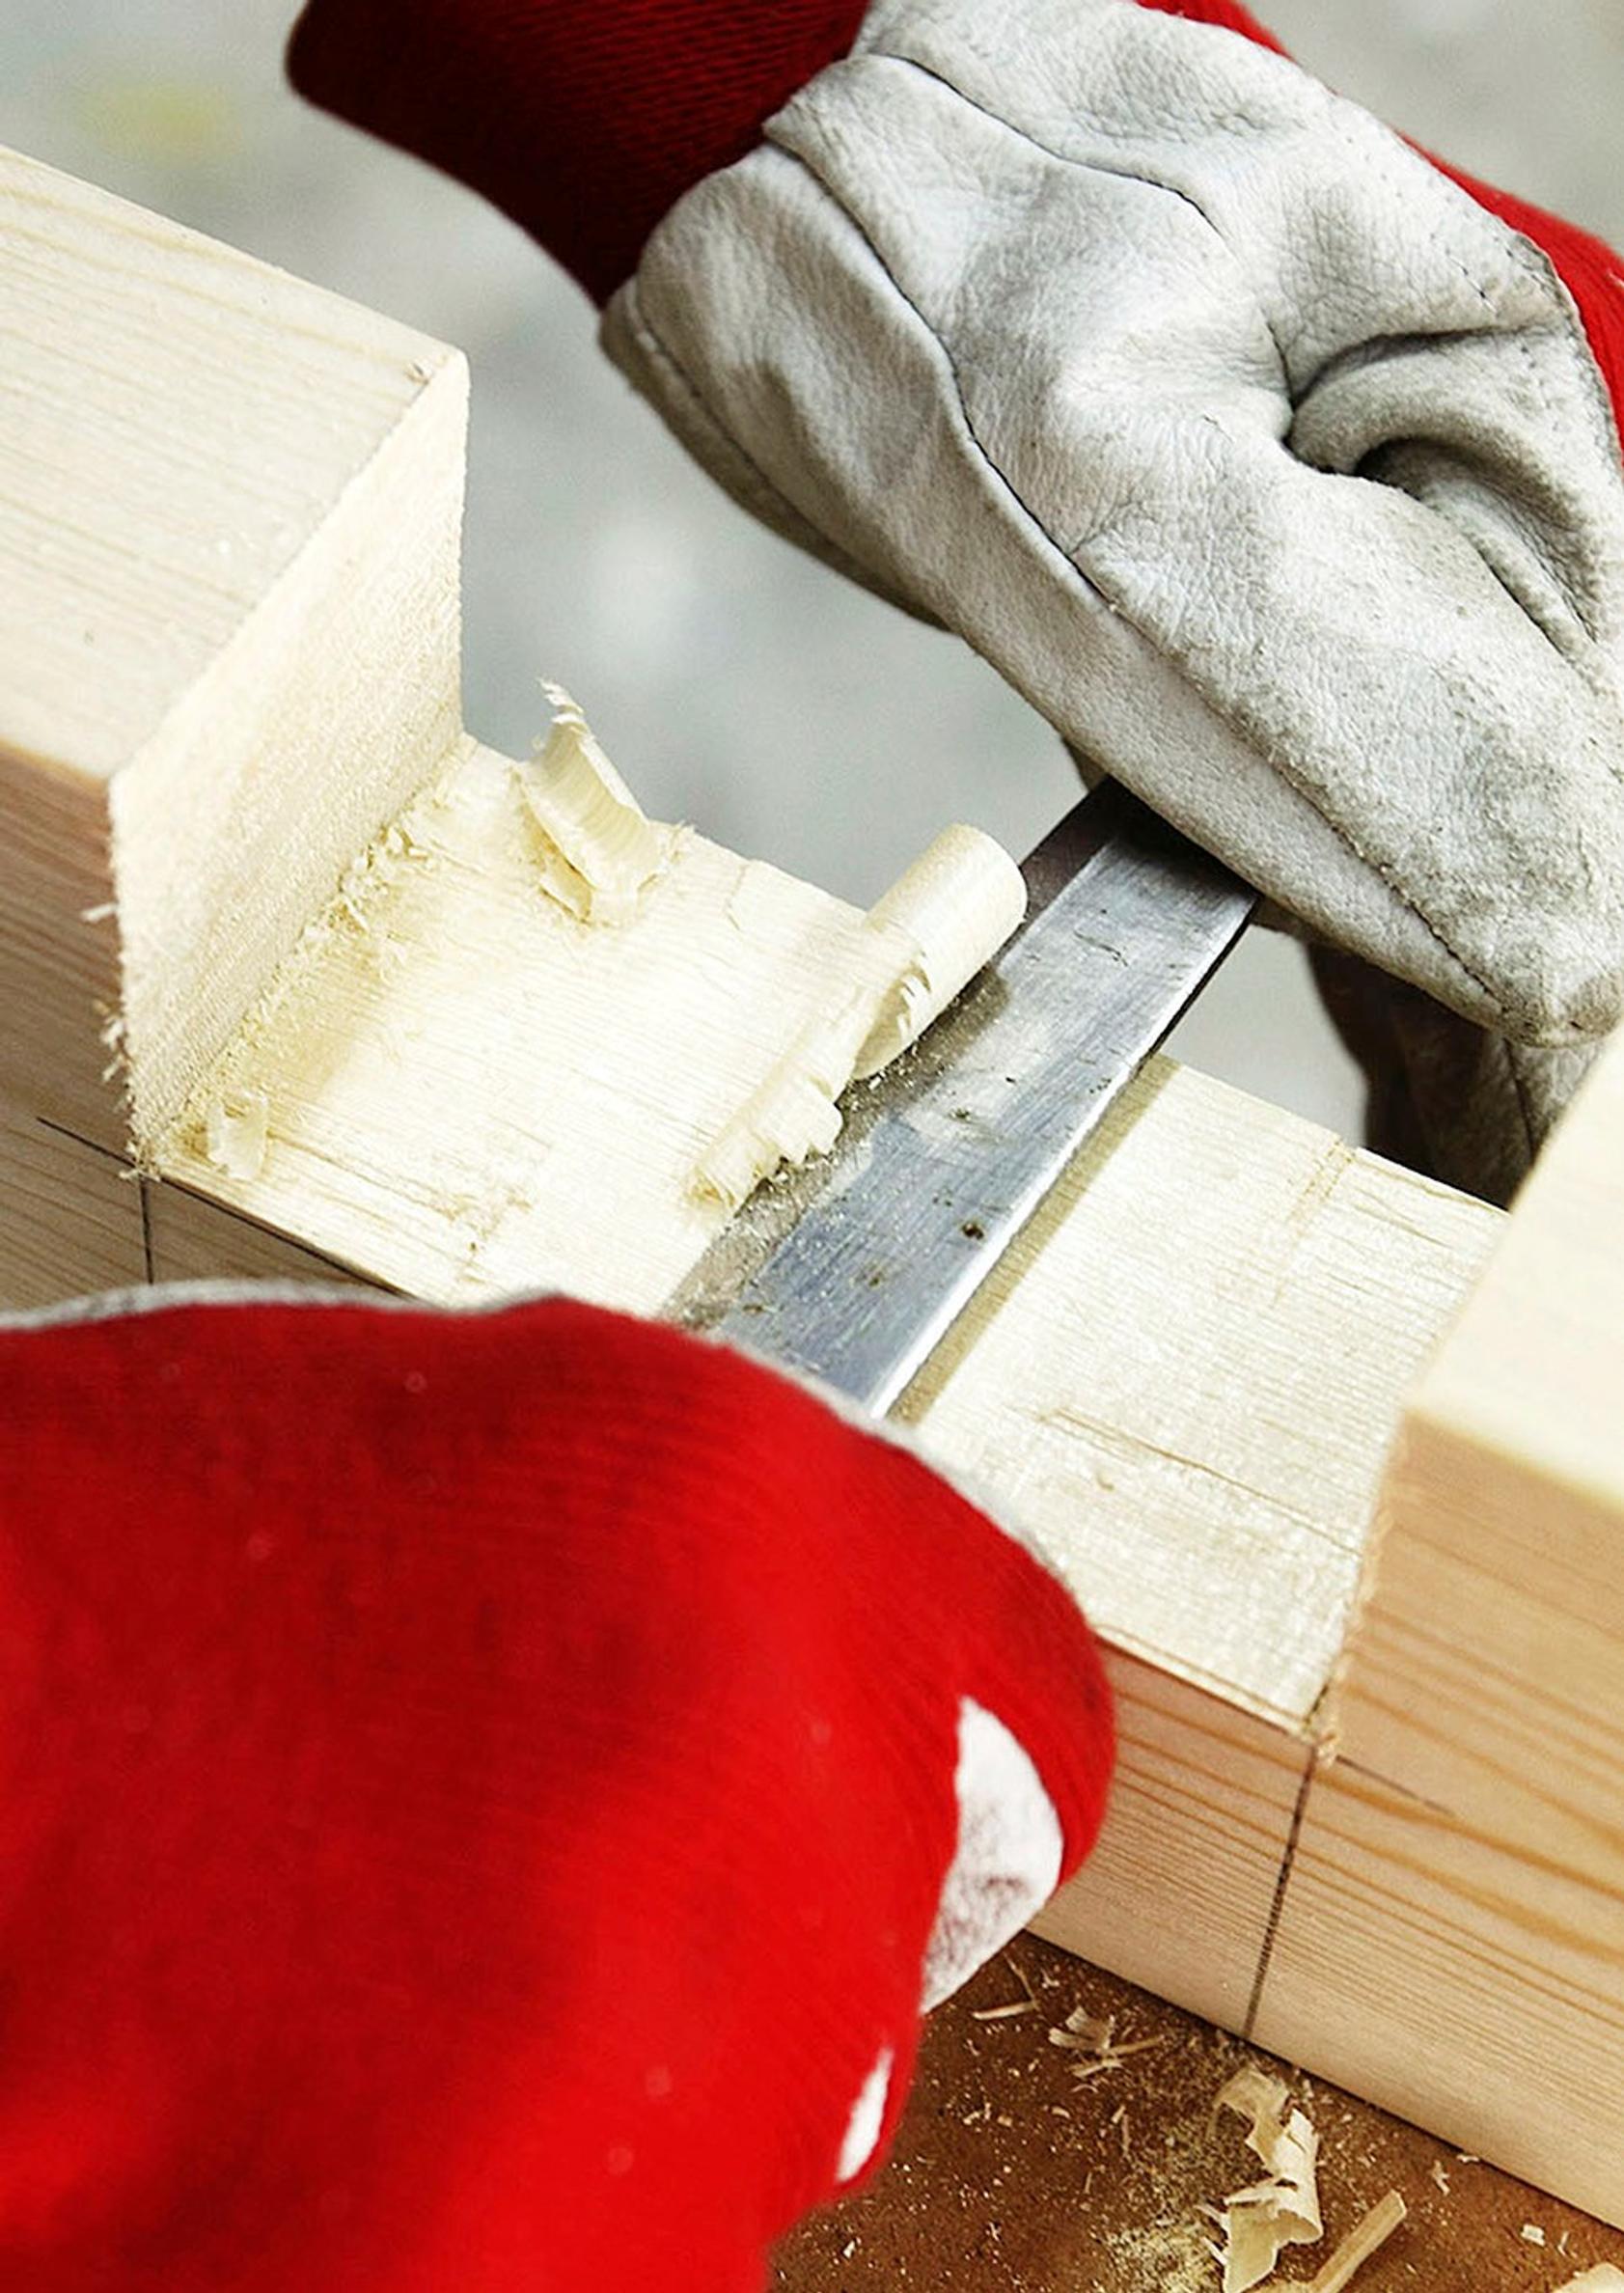
4. Finish the notch with a knife. Hold the knife by both the handle and the blade, pulling thin shavings toward yourself. Check the leg’s fit from time to time. The leg should settle in easily. Repeat on the other three notches.

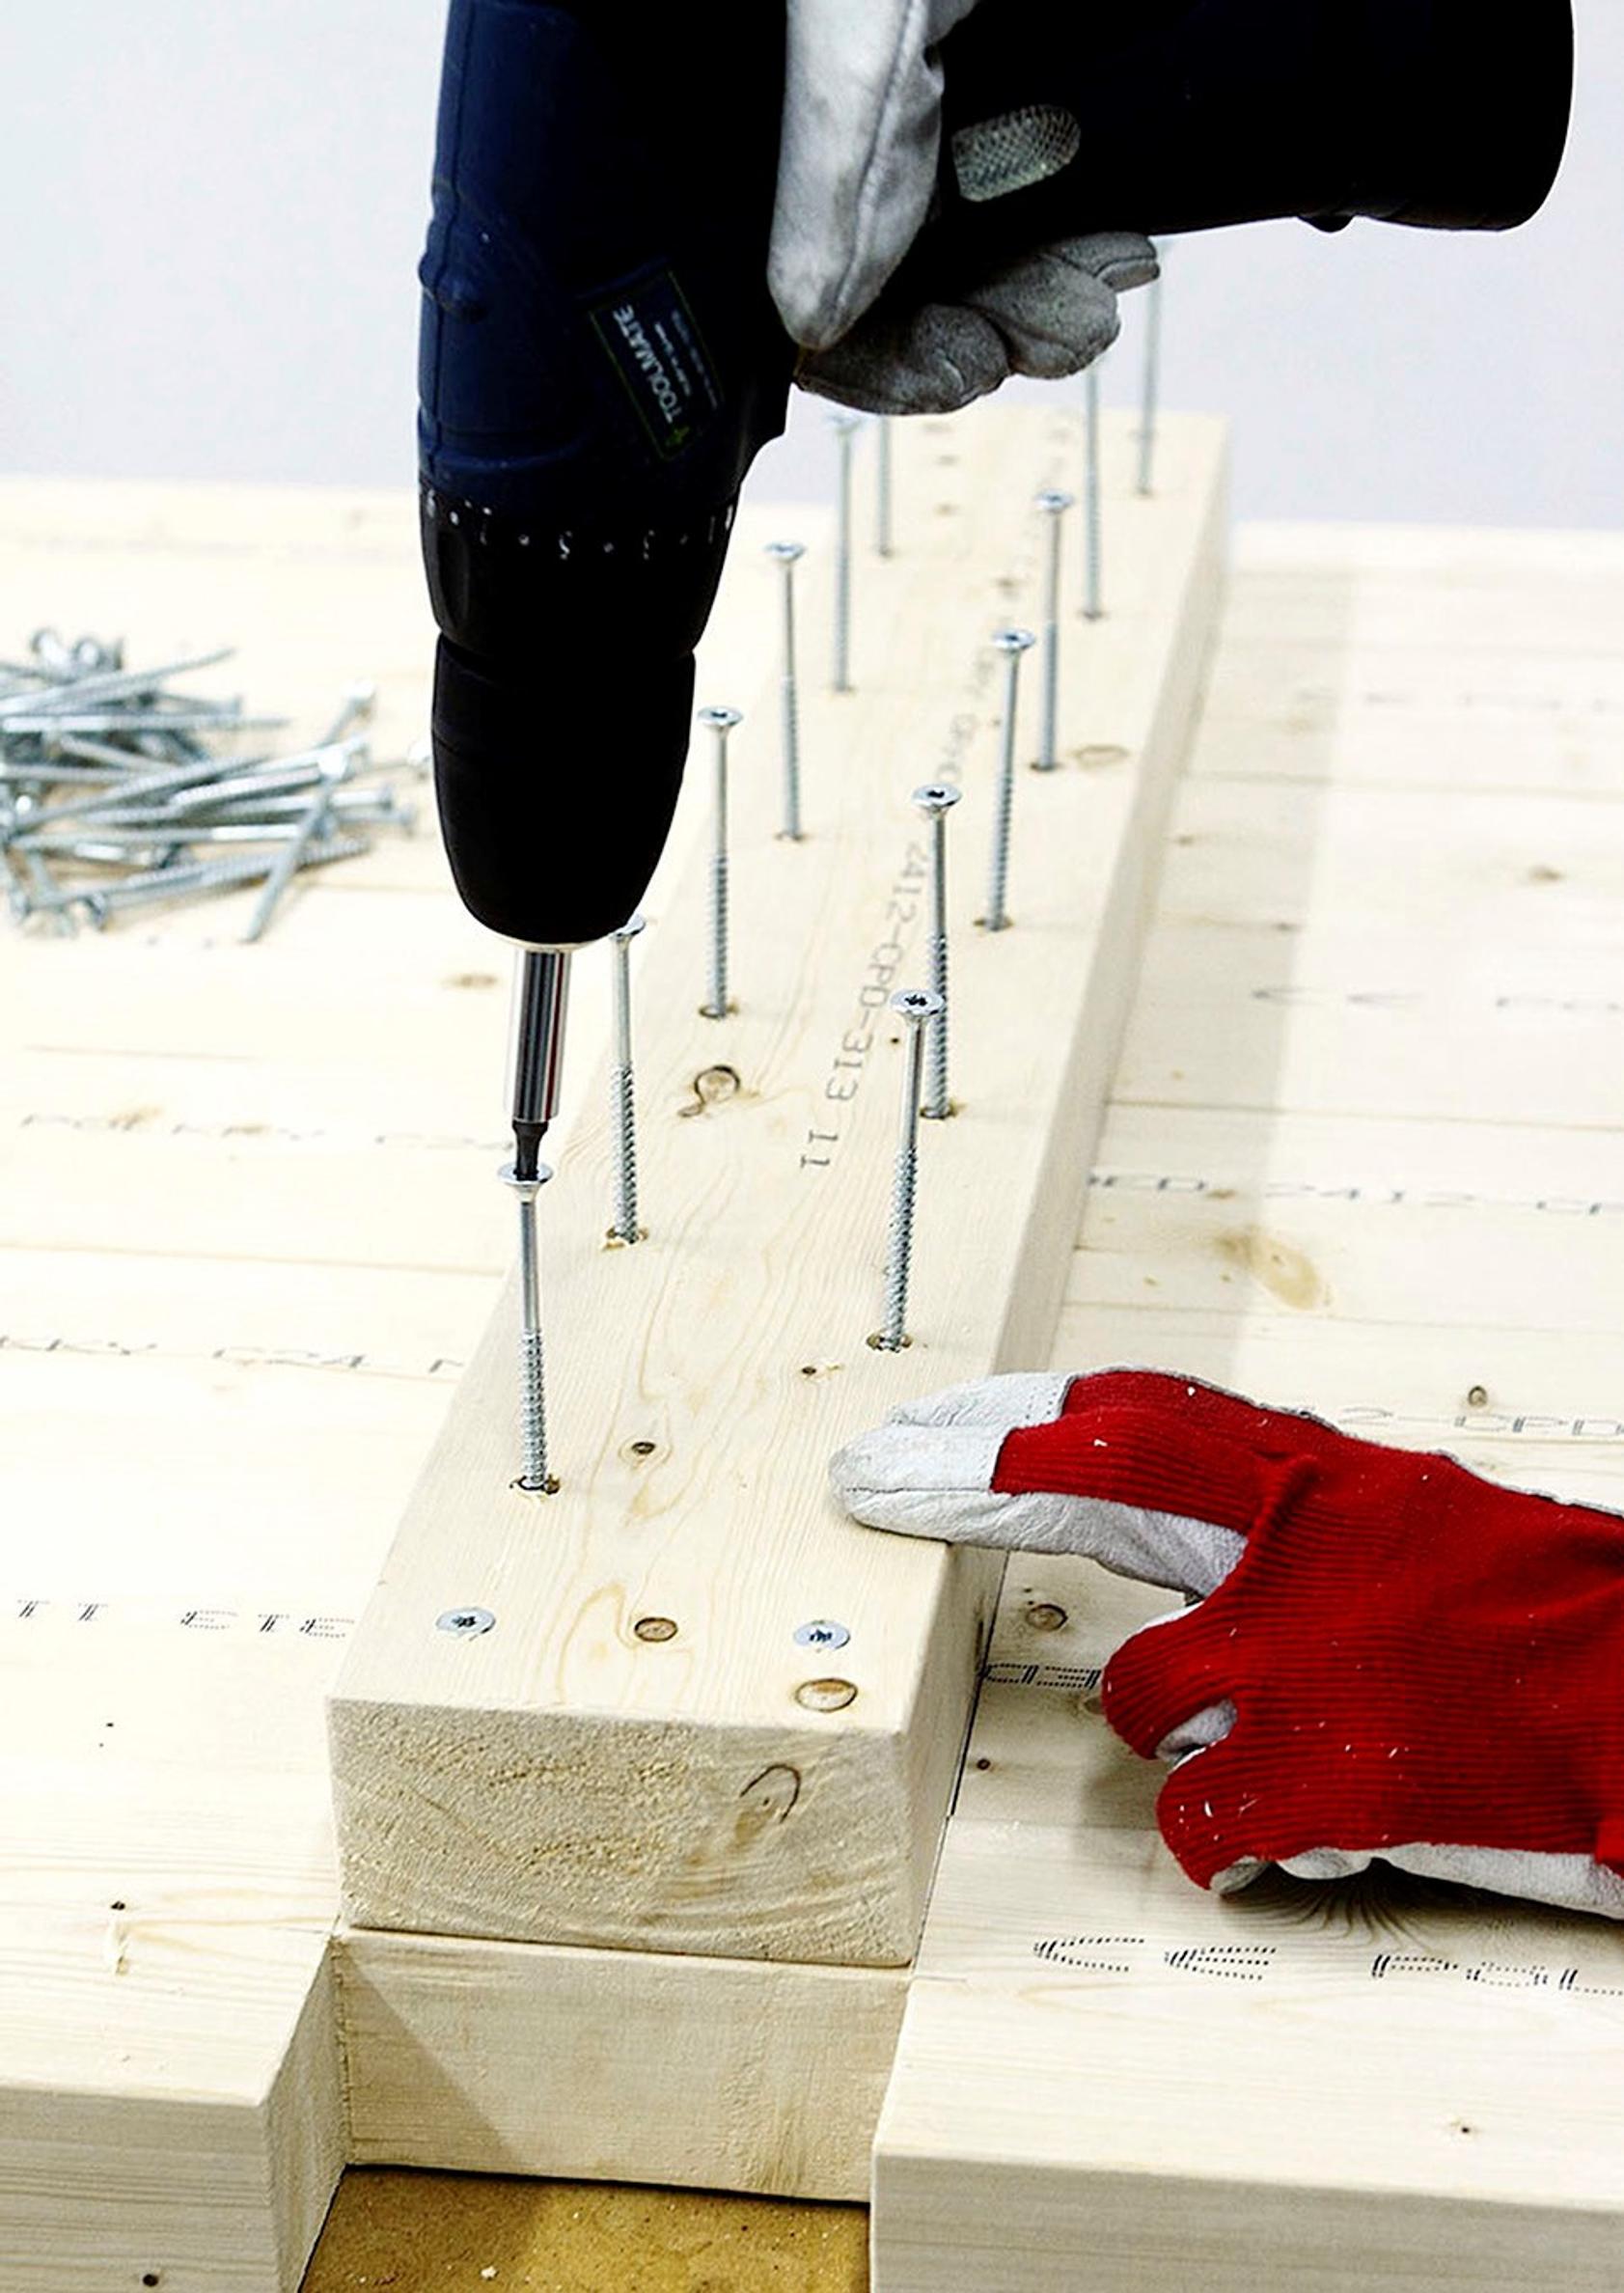
5. After all four notches are ready, lay the tabletop boards in place. Measure the distance between the notches and cut a support board to that length, to which the tabletop boards are attached. Drill two diagonal holes for each tabletop board and secure them with screws.

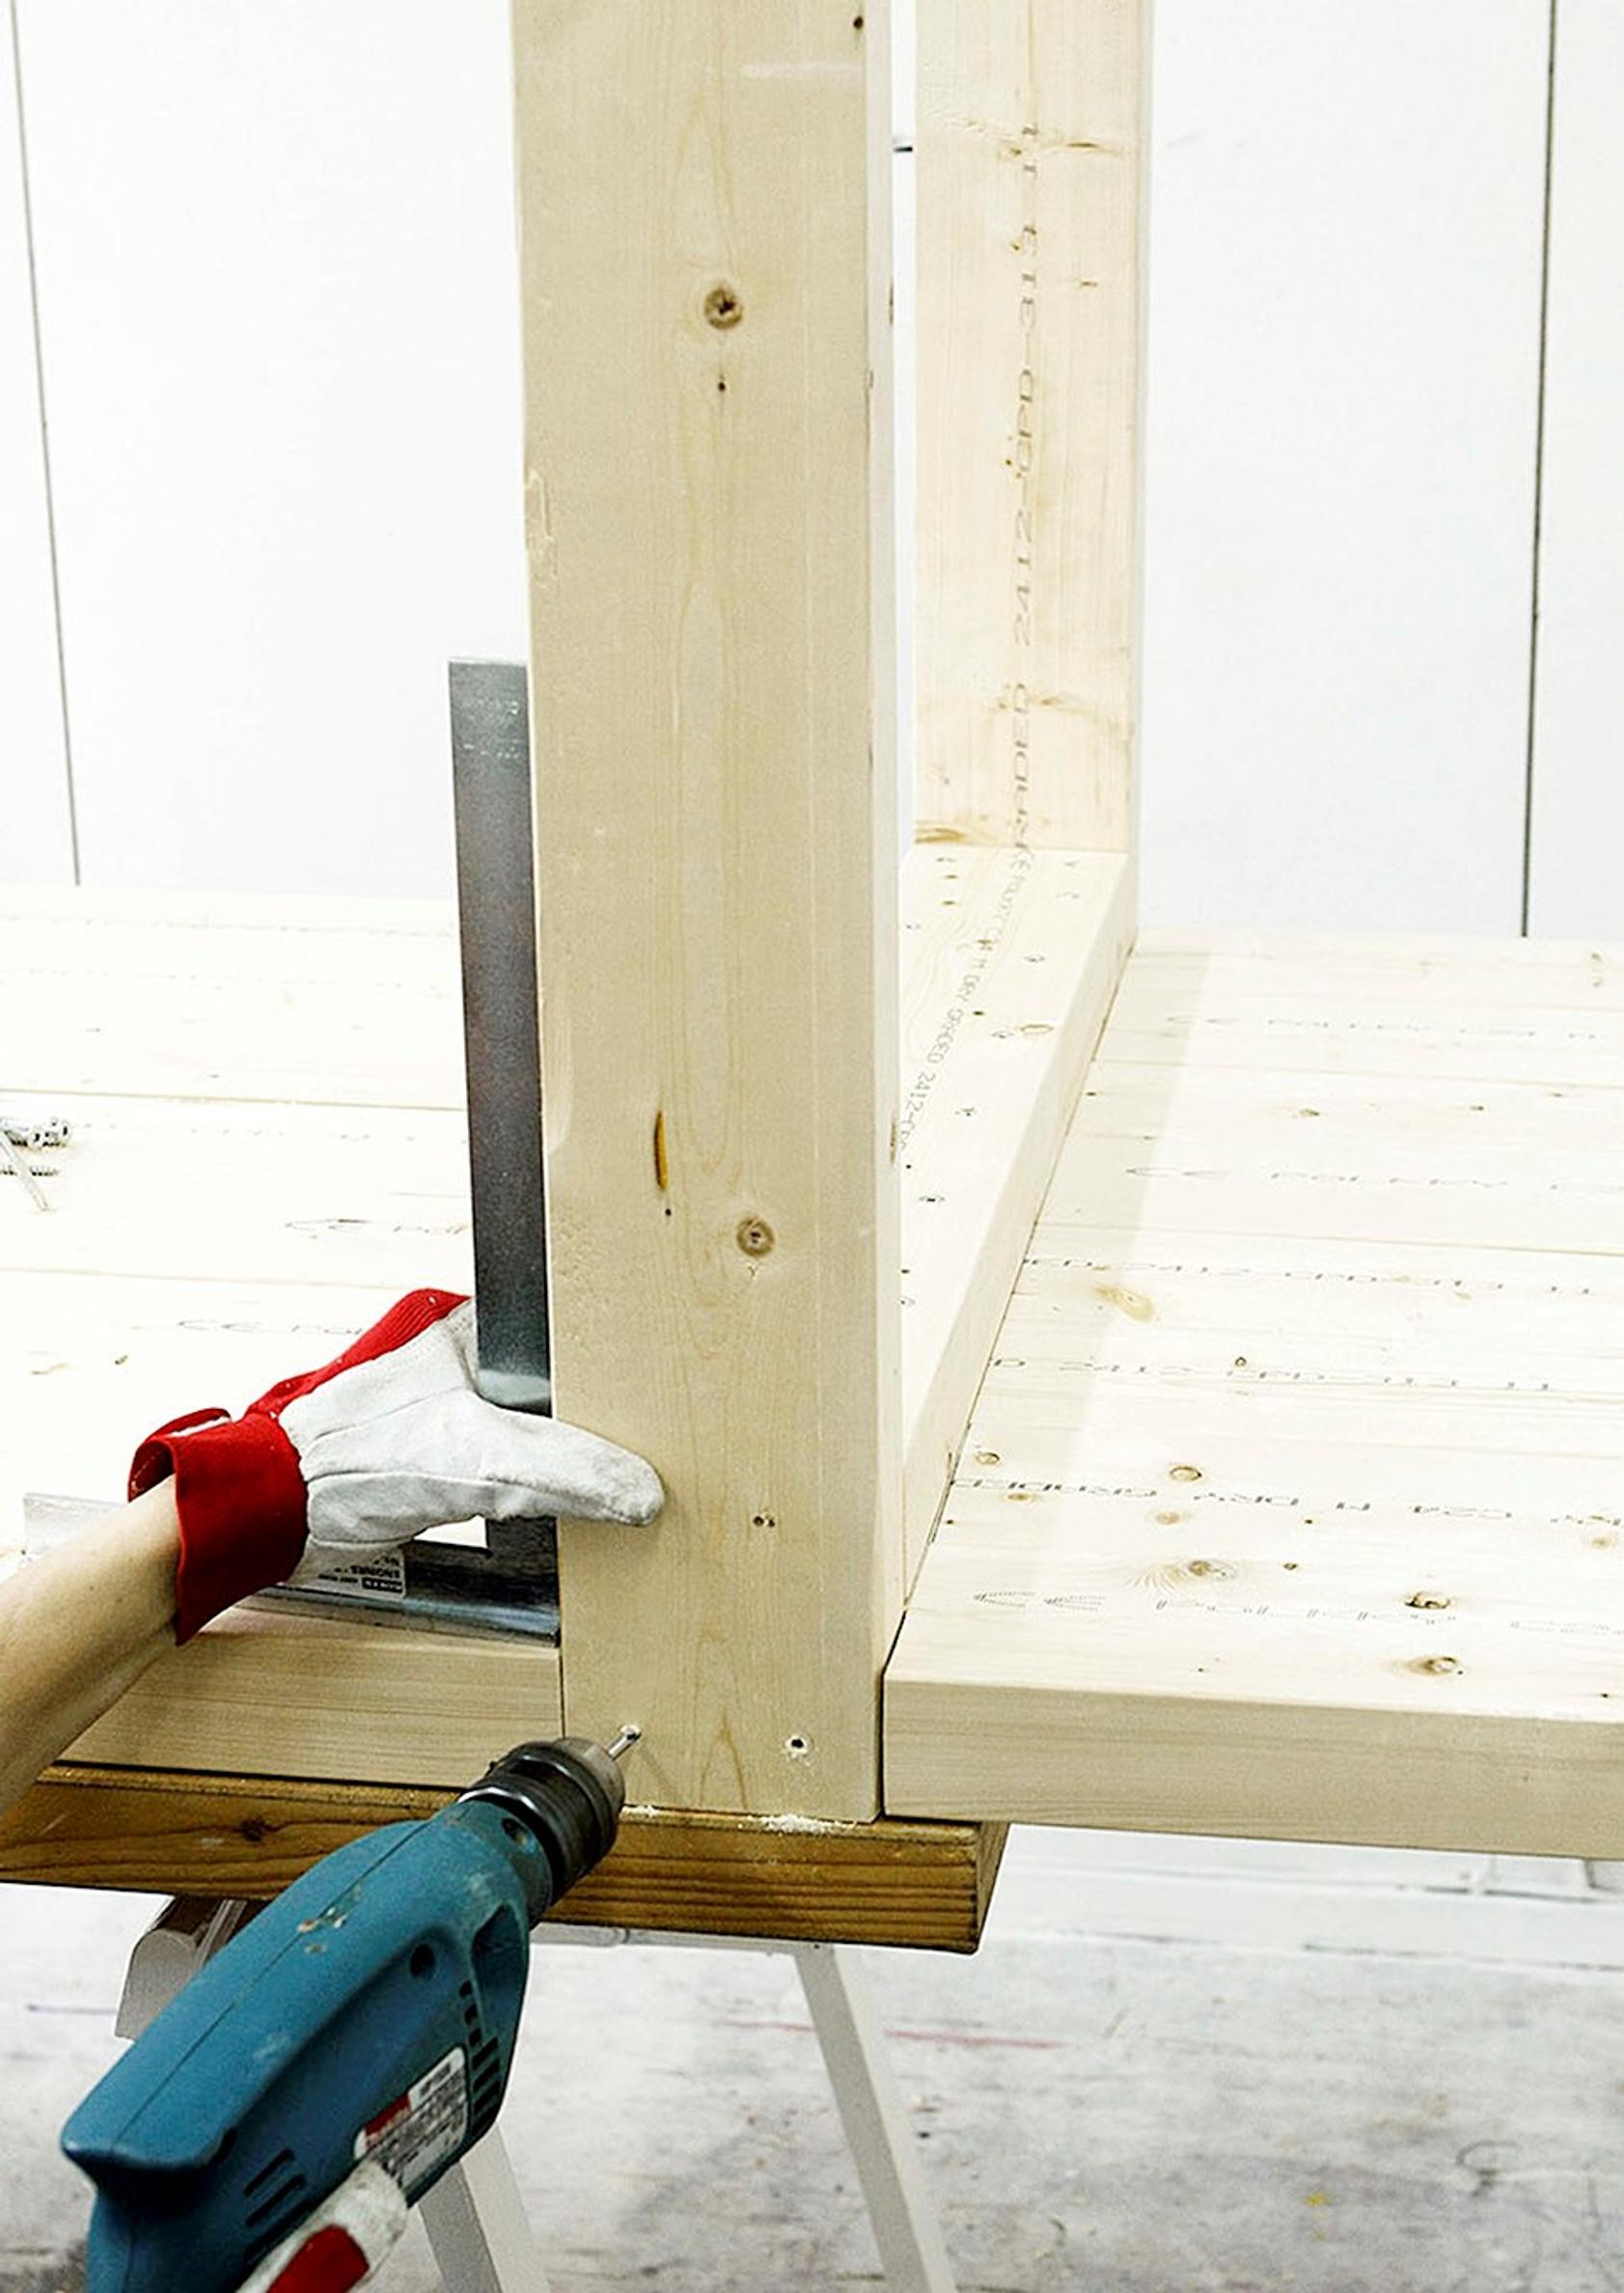
6. Attach the legs. Use a square to make sure each leg is at a 90-degree angle to the tabletop. Fasten the leg with two screws to the tabletop and two screws to the support board. Drill a pilot hole first, then use a countersink bit or a large drill bit so the screw sits flush.


7. Add a crossbar between the opposite legs and secure it with a pair of screws at each end. Flip the table upside down and attach a long support board between the pairs of legs.

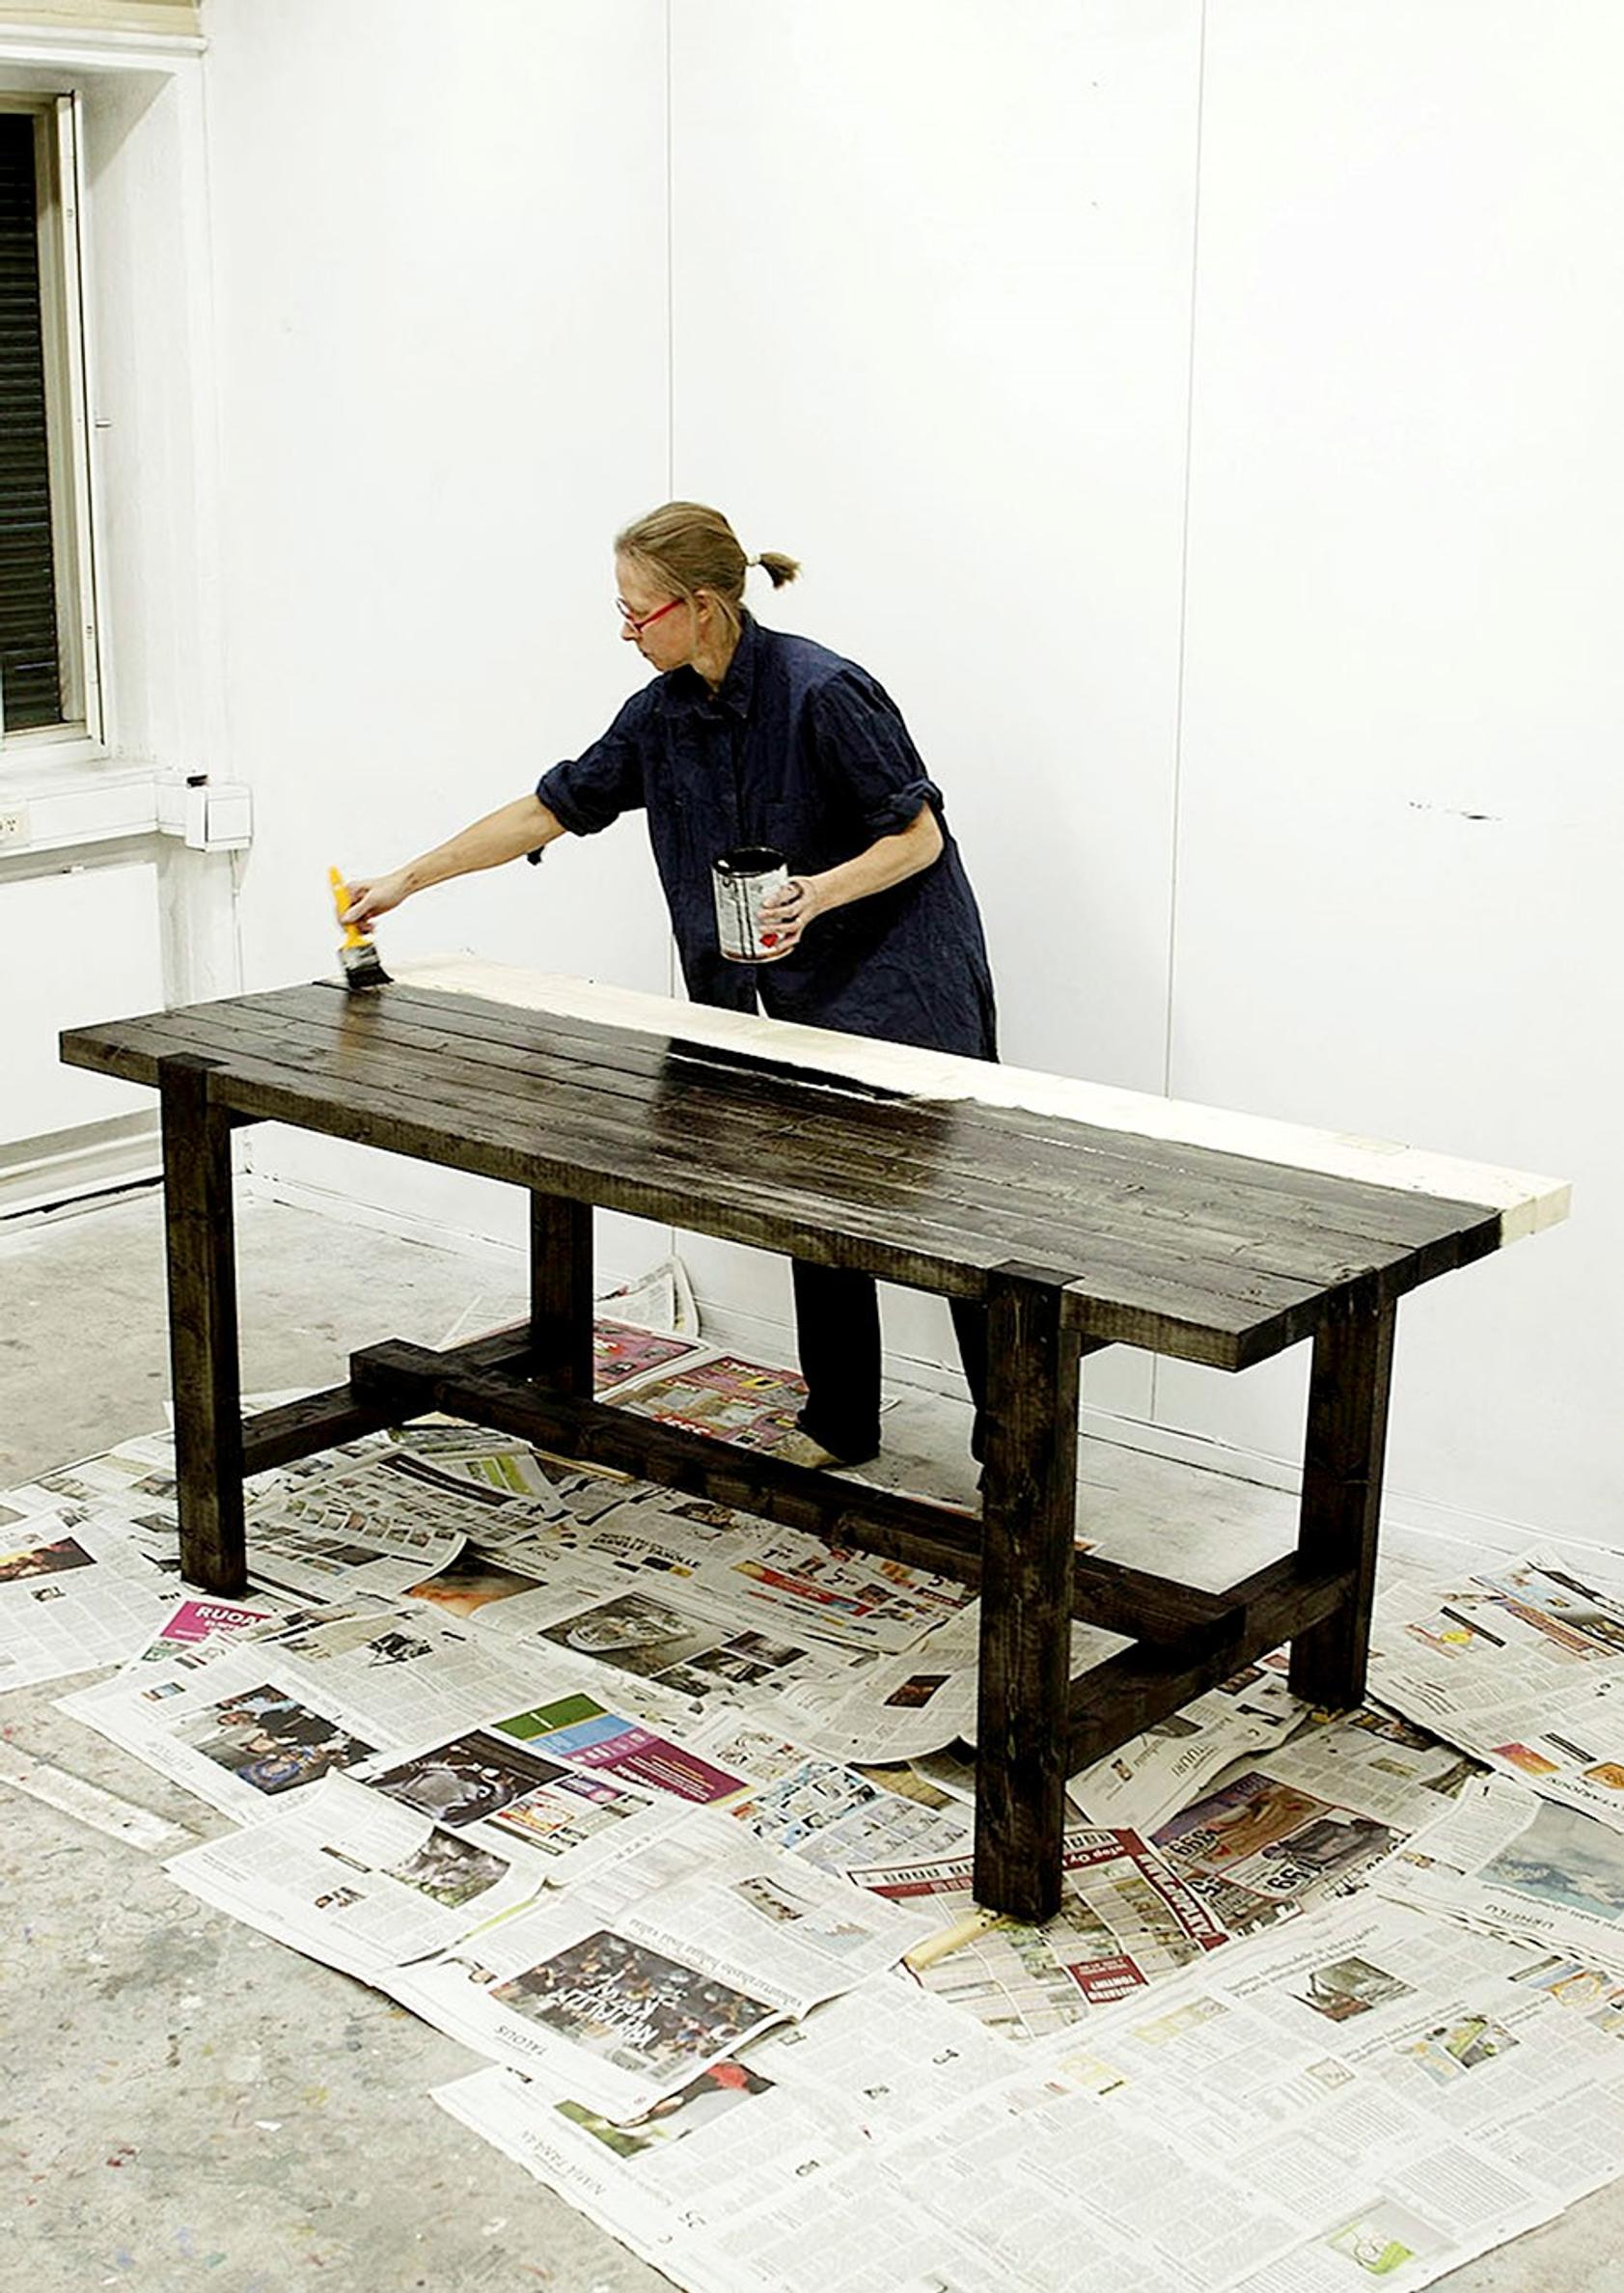
8. Treat the terrace table with tinted wood oil to protect it from moisture. First, pour wood oil into four containers and place the table legs in them. Let the newly cut surfaces that will be on the ground soak up a generous amount of oil. Then lift the table onto supports and apply oil all over once or twice.

Where to buy supplies: K-rauta.