Add warmth to your home with a stylish DIY slat wall: here’s how
A slat wall is a striking eye-catcher that brings contrast and depth to a space. You can also conveniently hide cables or other technical elements behind it. Follow our instructions to build it yourself.
DIY slat wall—materials
- Wood
- Protective gloves and covering material
- Miter saw or hand saw
- Measuring tape
- 180-grit sandpaper
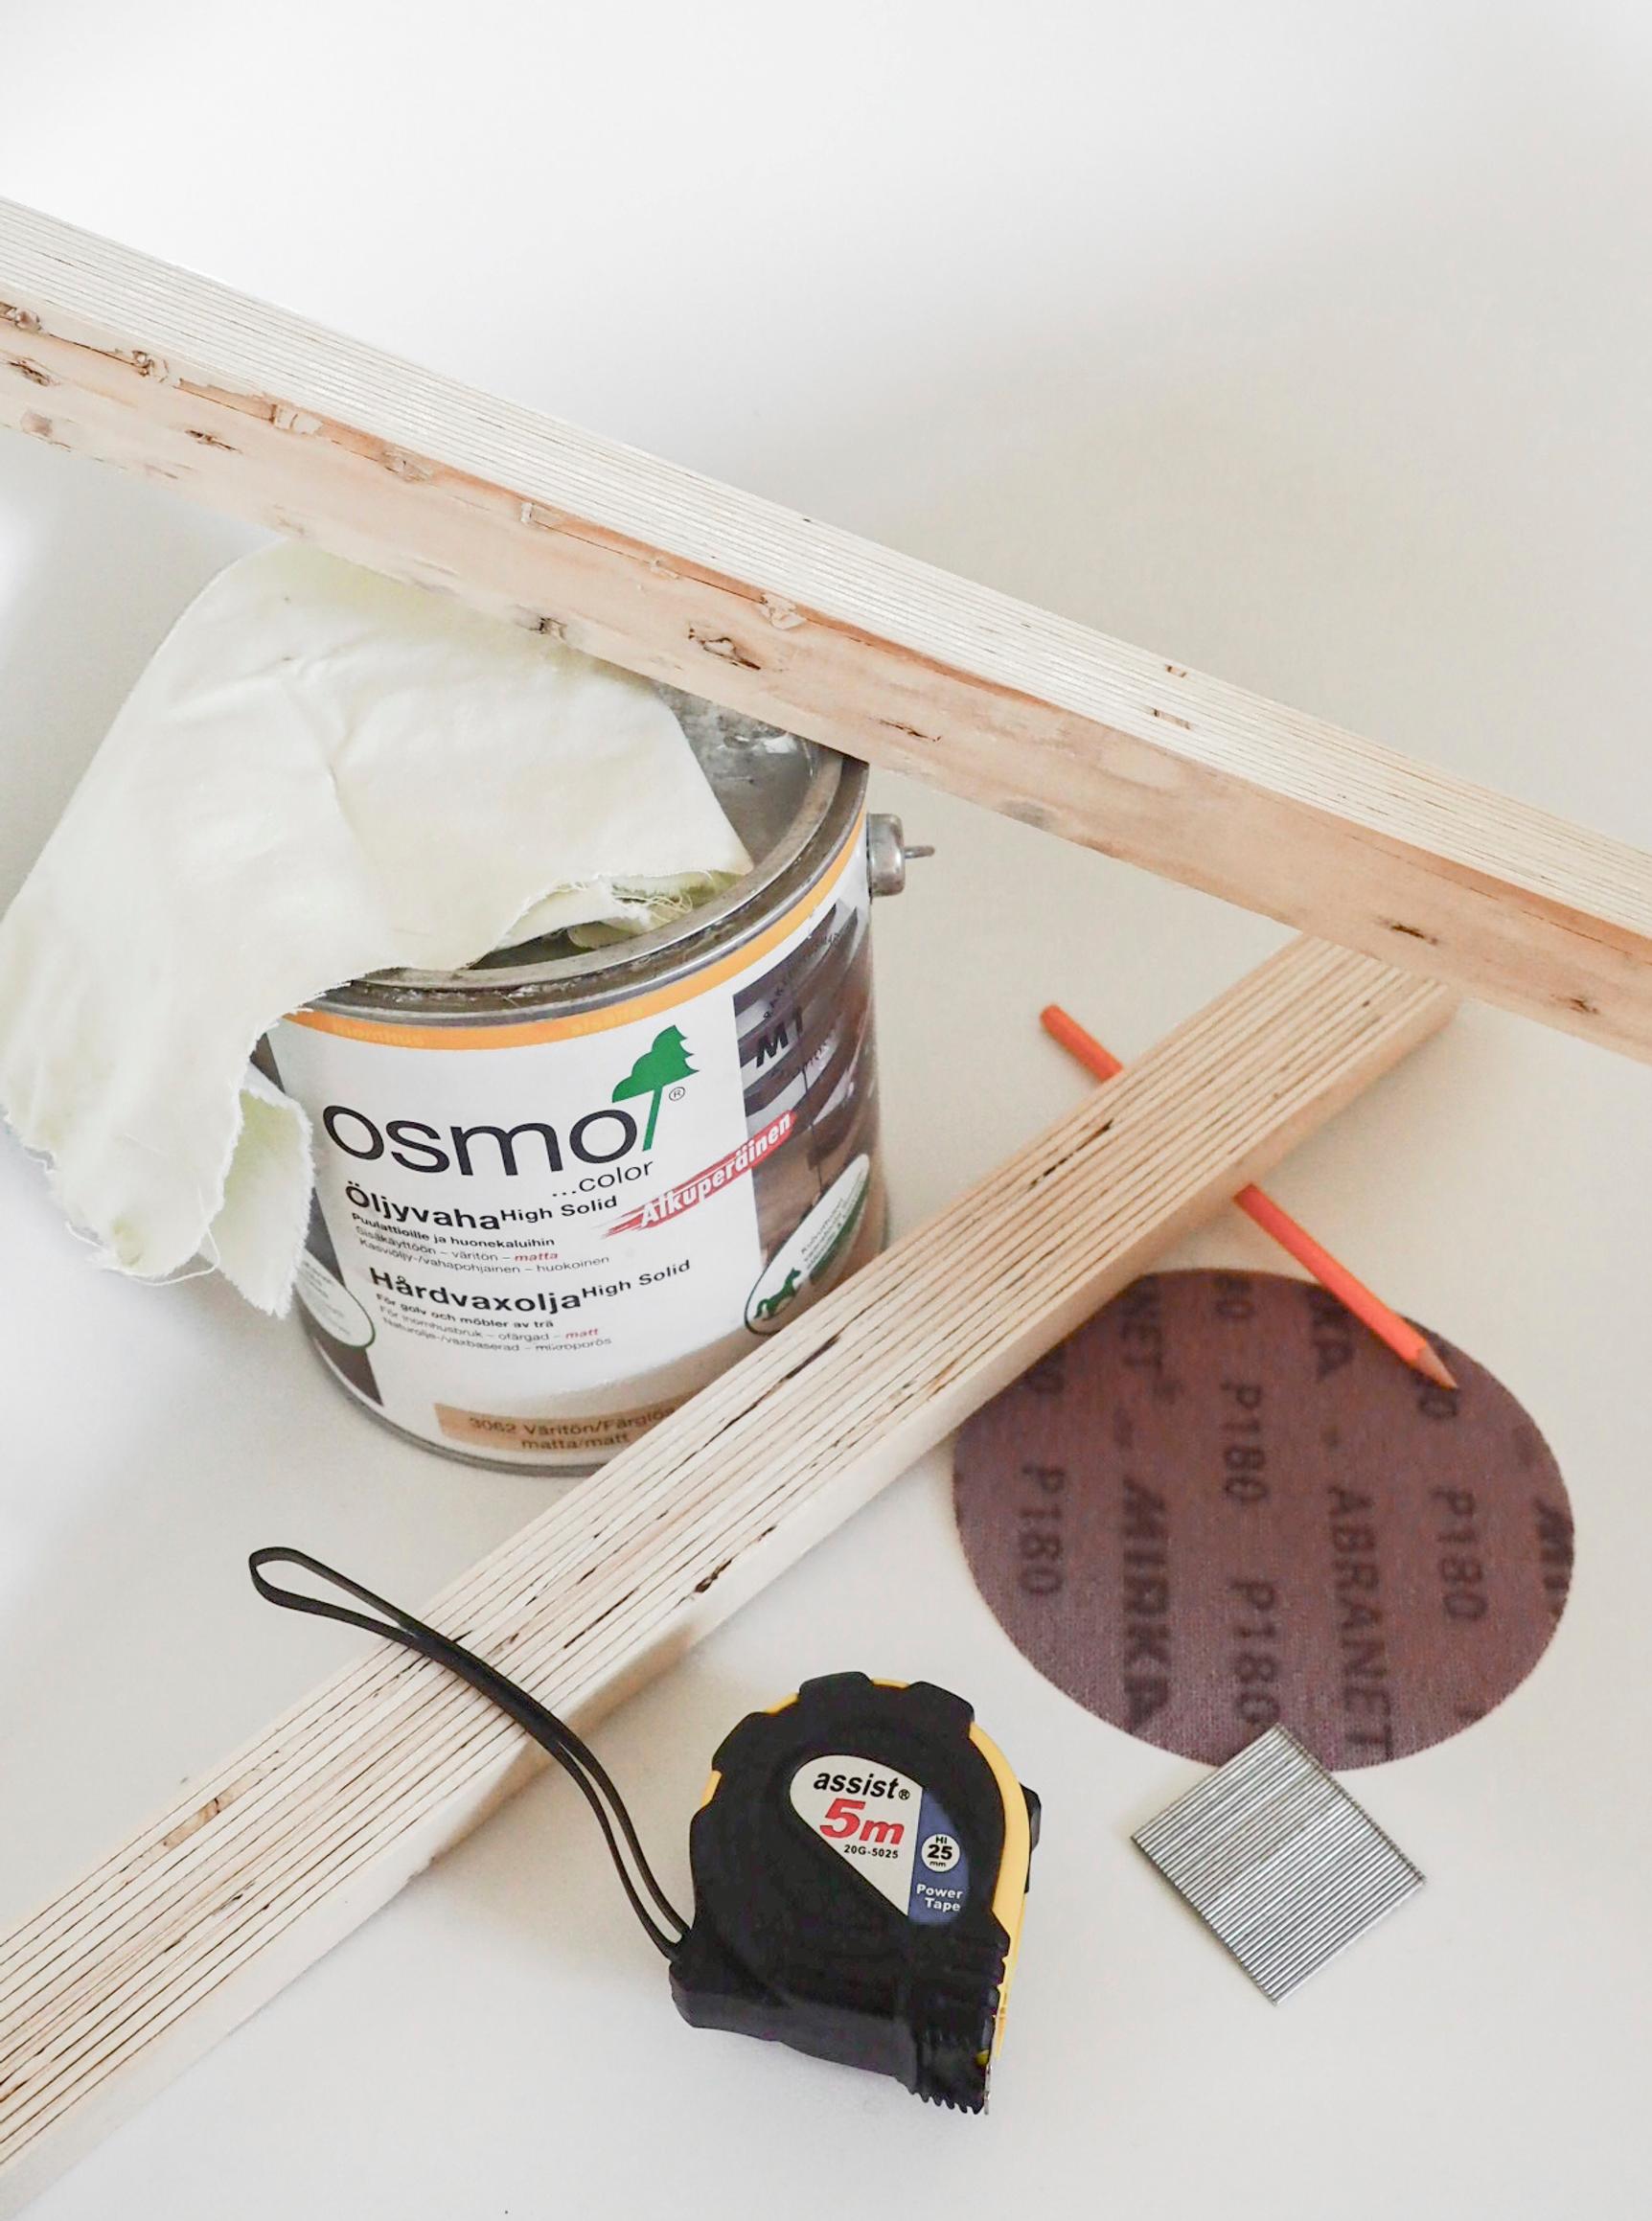
- Osmo Color colorless oil wax
- Application cloth
- Nail gun
- Small-headed nails for the nail gun
Tip!
Renting tools can be an eco-friendly way to save money.
DIY slat wall—instructions


1. Measure the area where you plan to install the slatted wall. You can use a tape measure or a laser measure.
Here are the example wall measurements:
- Wall width 102 cm (about 40 in)
- Wood width 3.5 cm (about 1.4 in)
- Slat spacing 1.5 cm (about 0.6 in)
- 20 pieces of plywood were needed for the wall

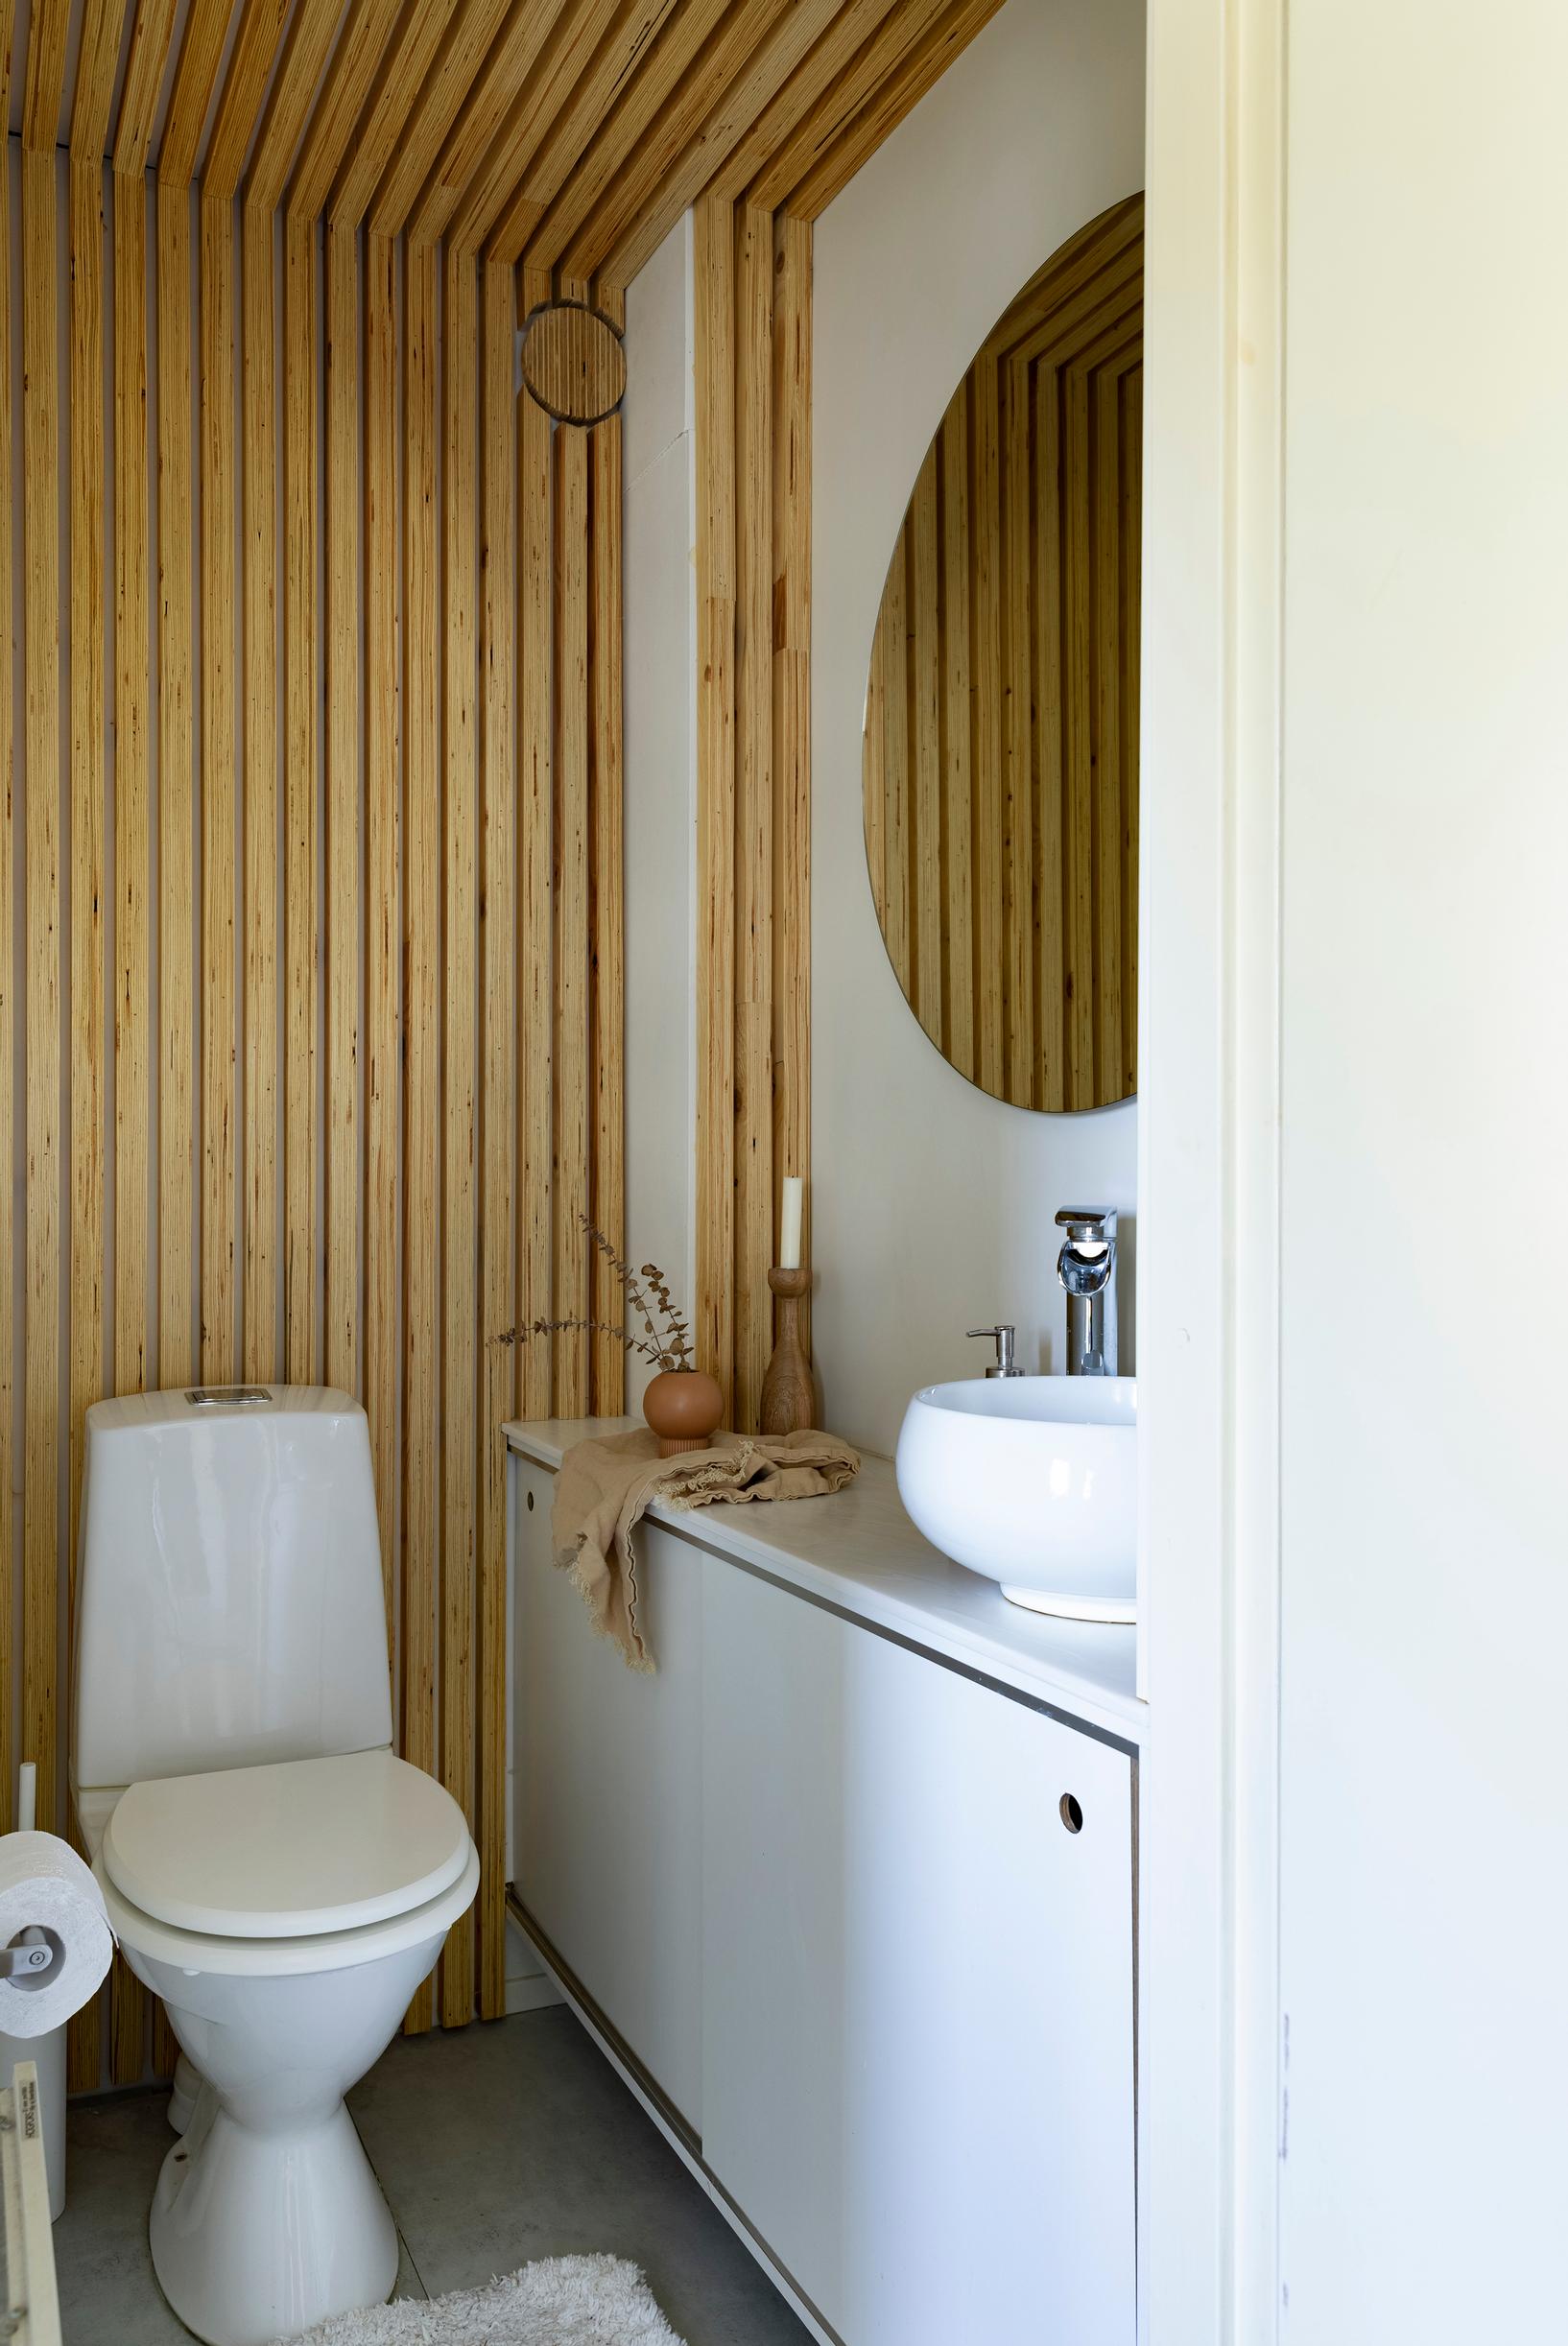
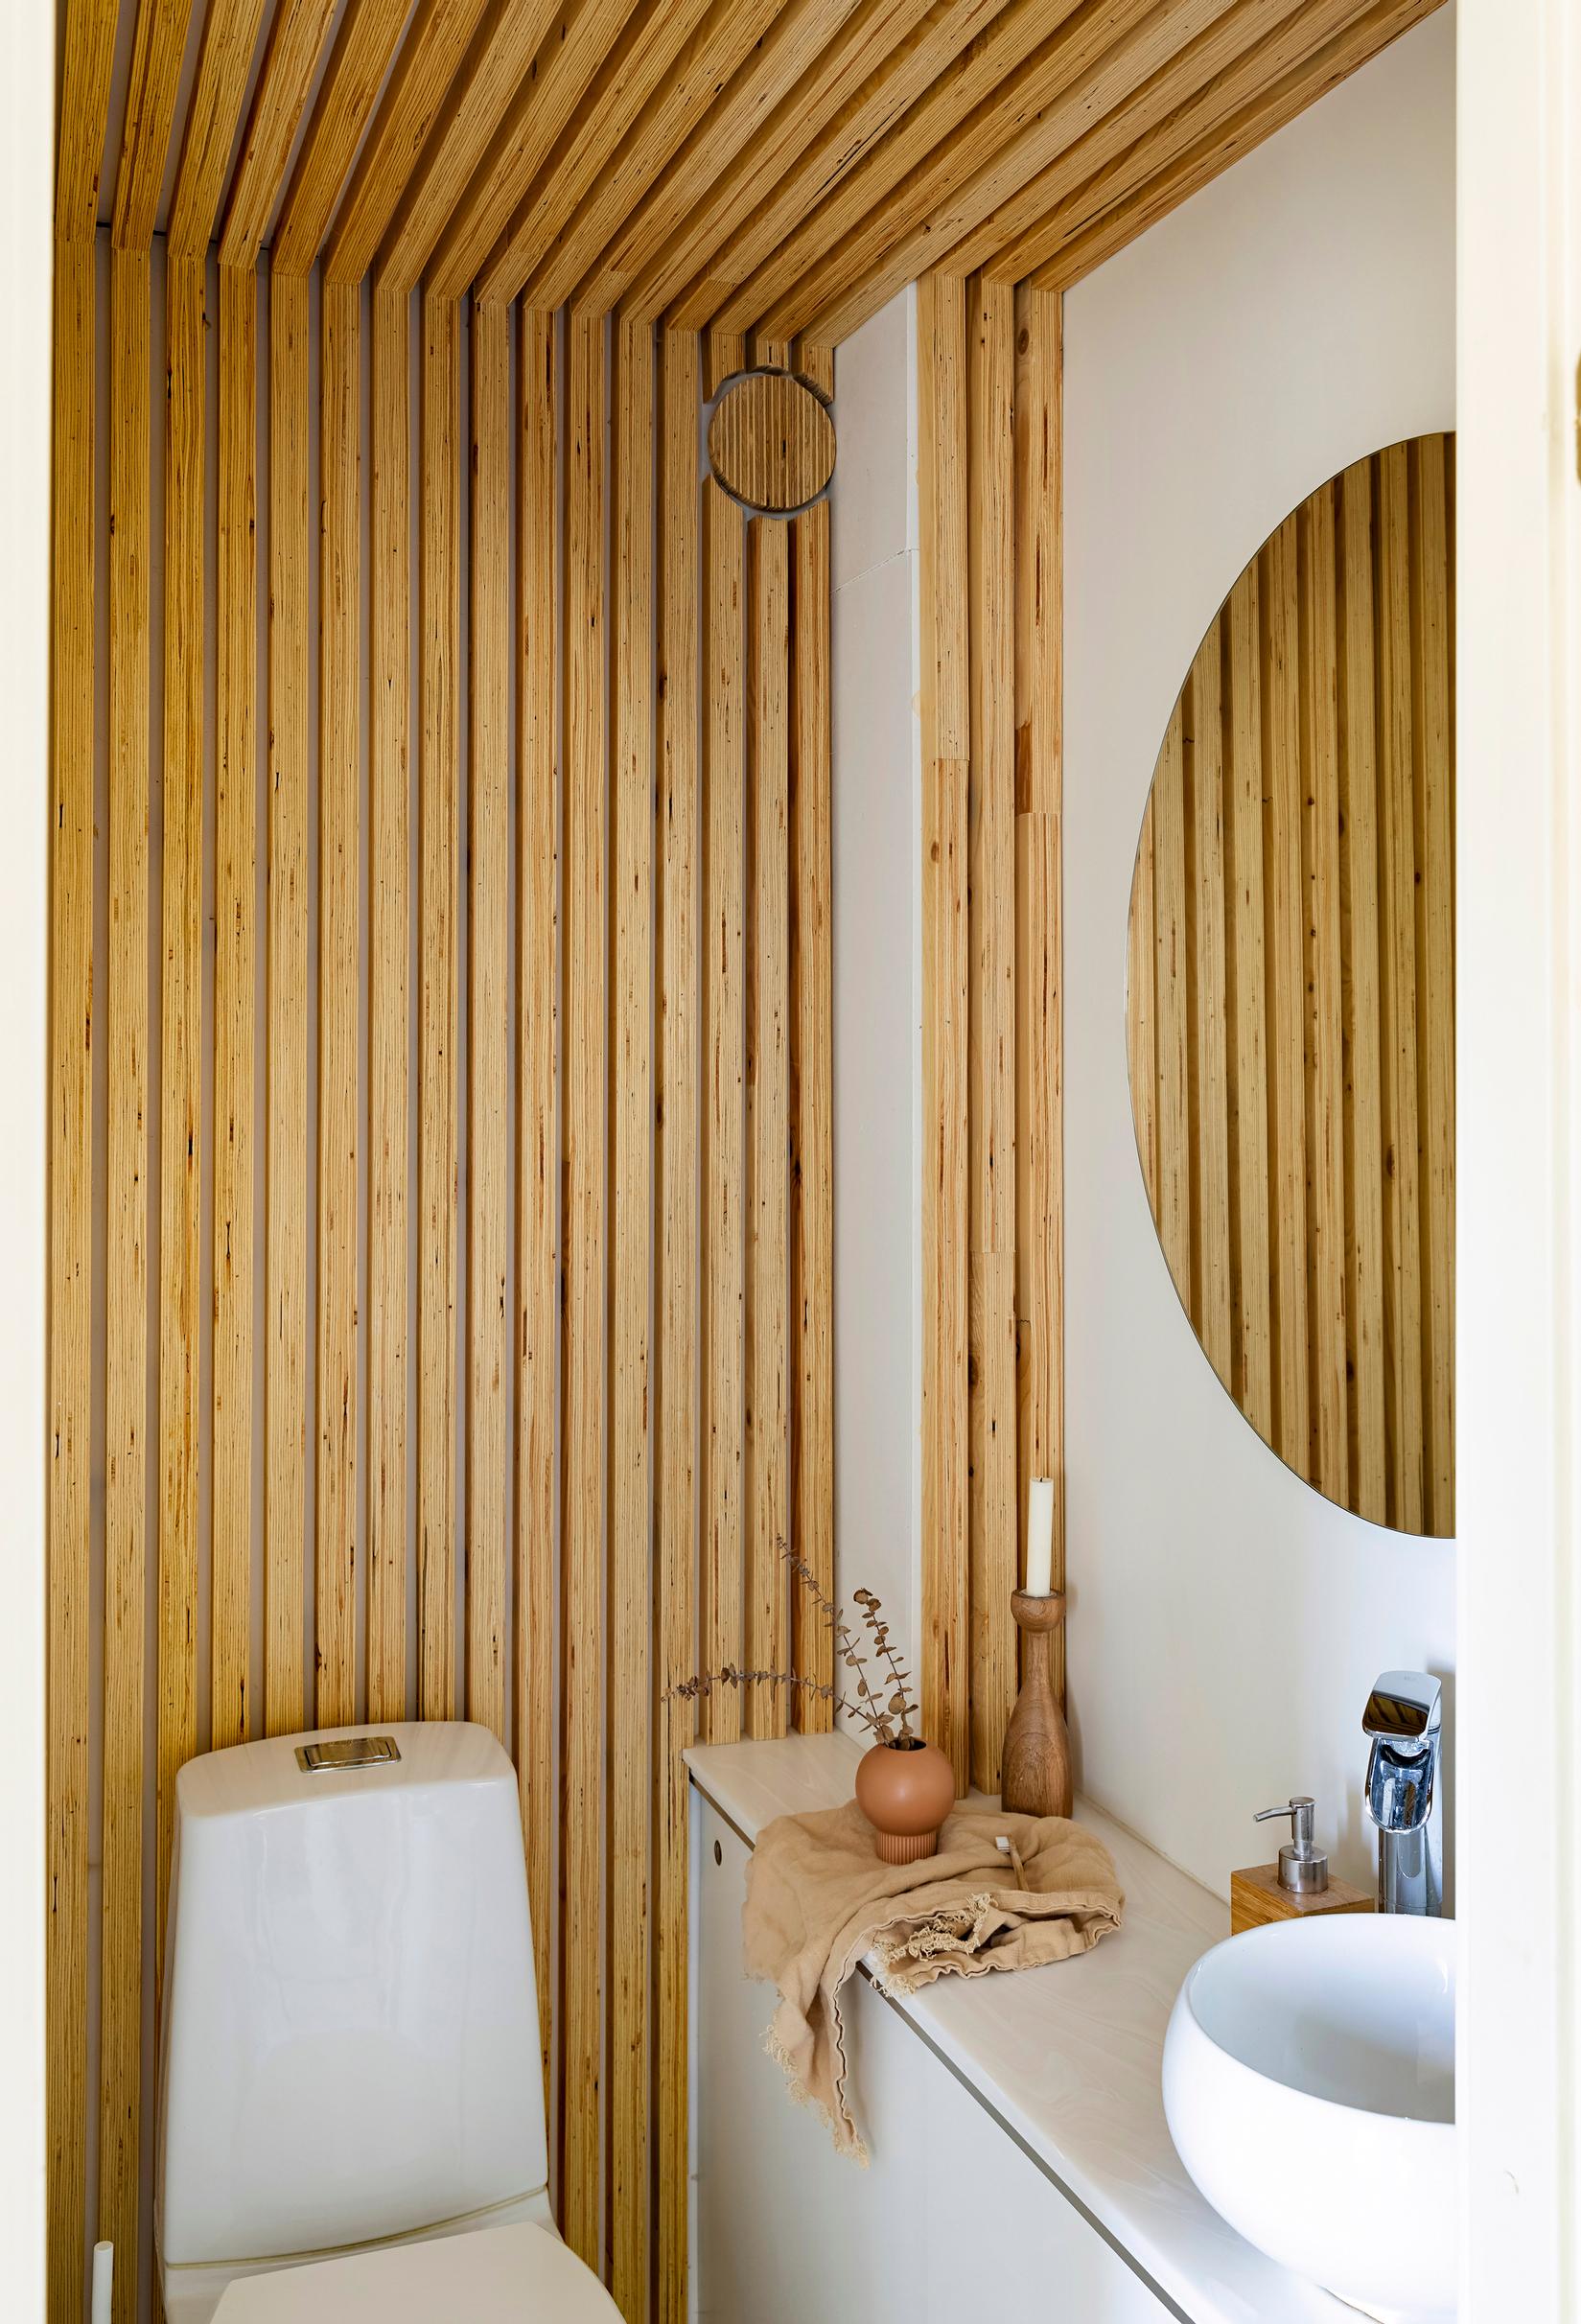
2. Gather the materials and tools you need. A slat wall can be made from many different types of wood, depending on your preferences and budget. First, consider what color you want to show through between the slats. A black wall paint, for example, can make the slats stand out.

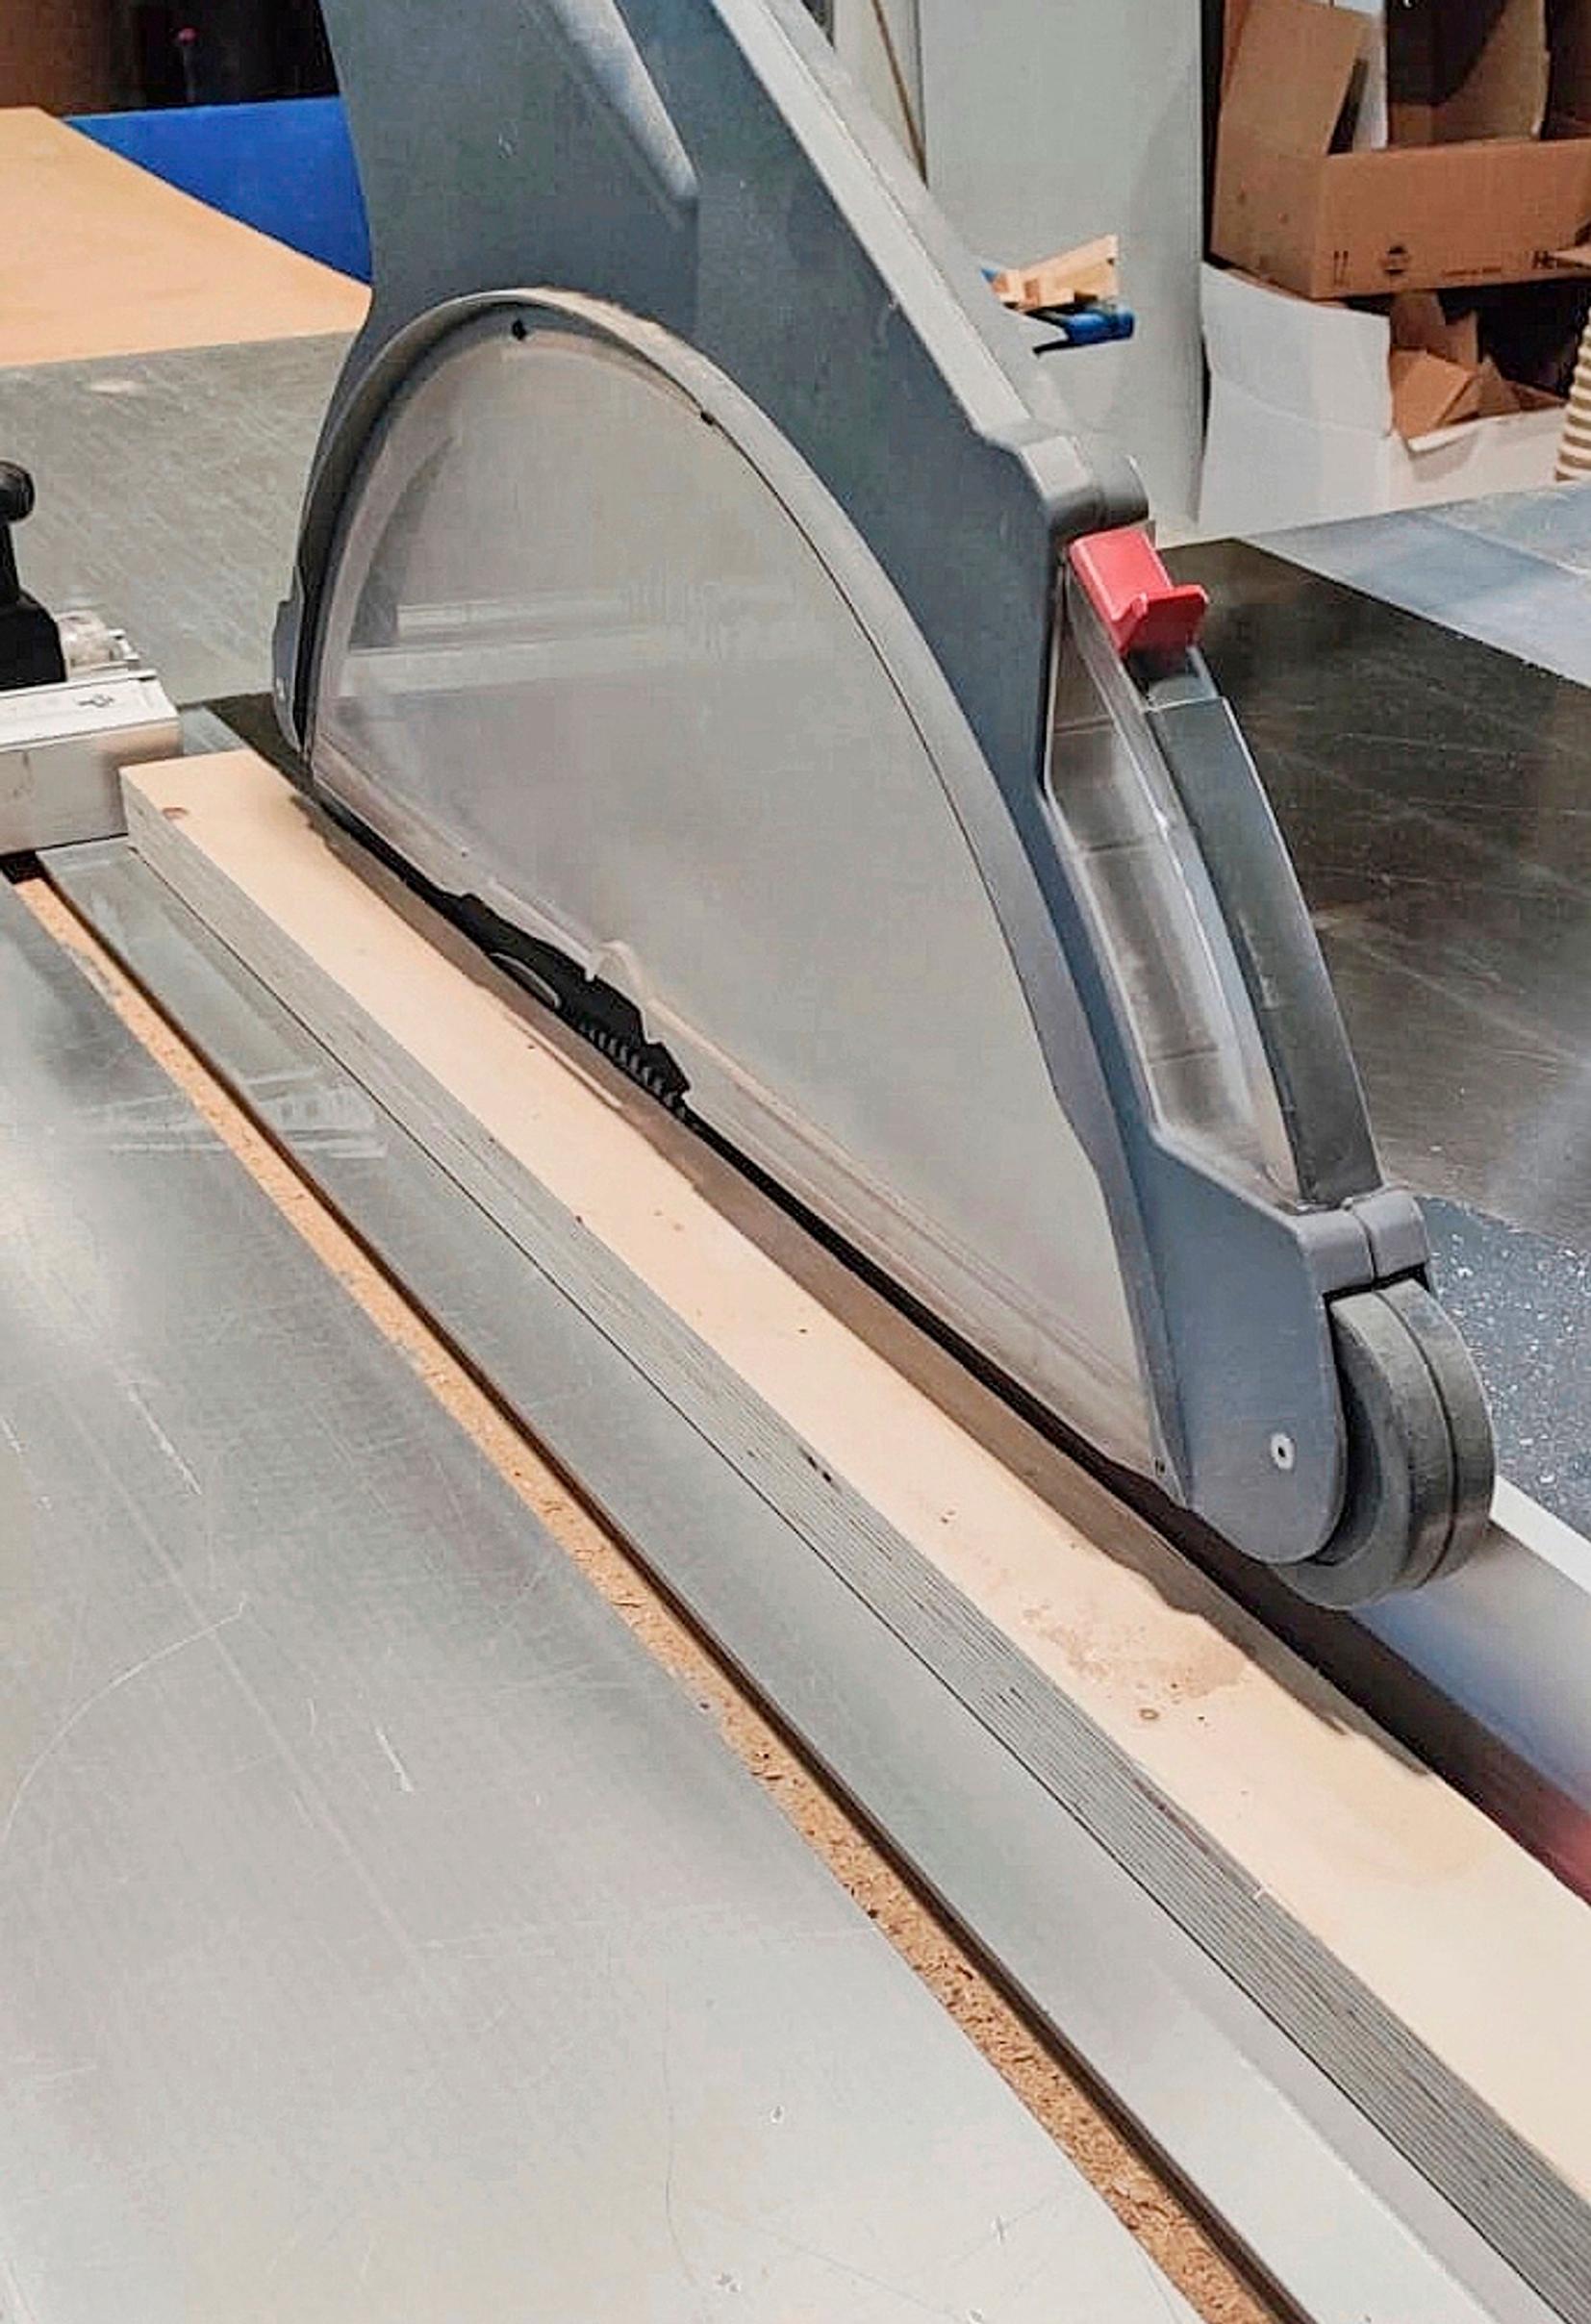
3. Cut the slats to the desired length using a miter saw or hand saw. If you want to use narrower slats, cut them in half lengthwise with a table saw. Wear appropriate protective gear, such as hearing protection and safety glasses.

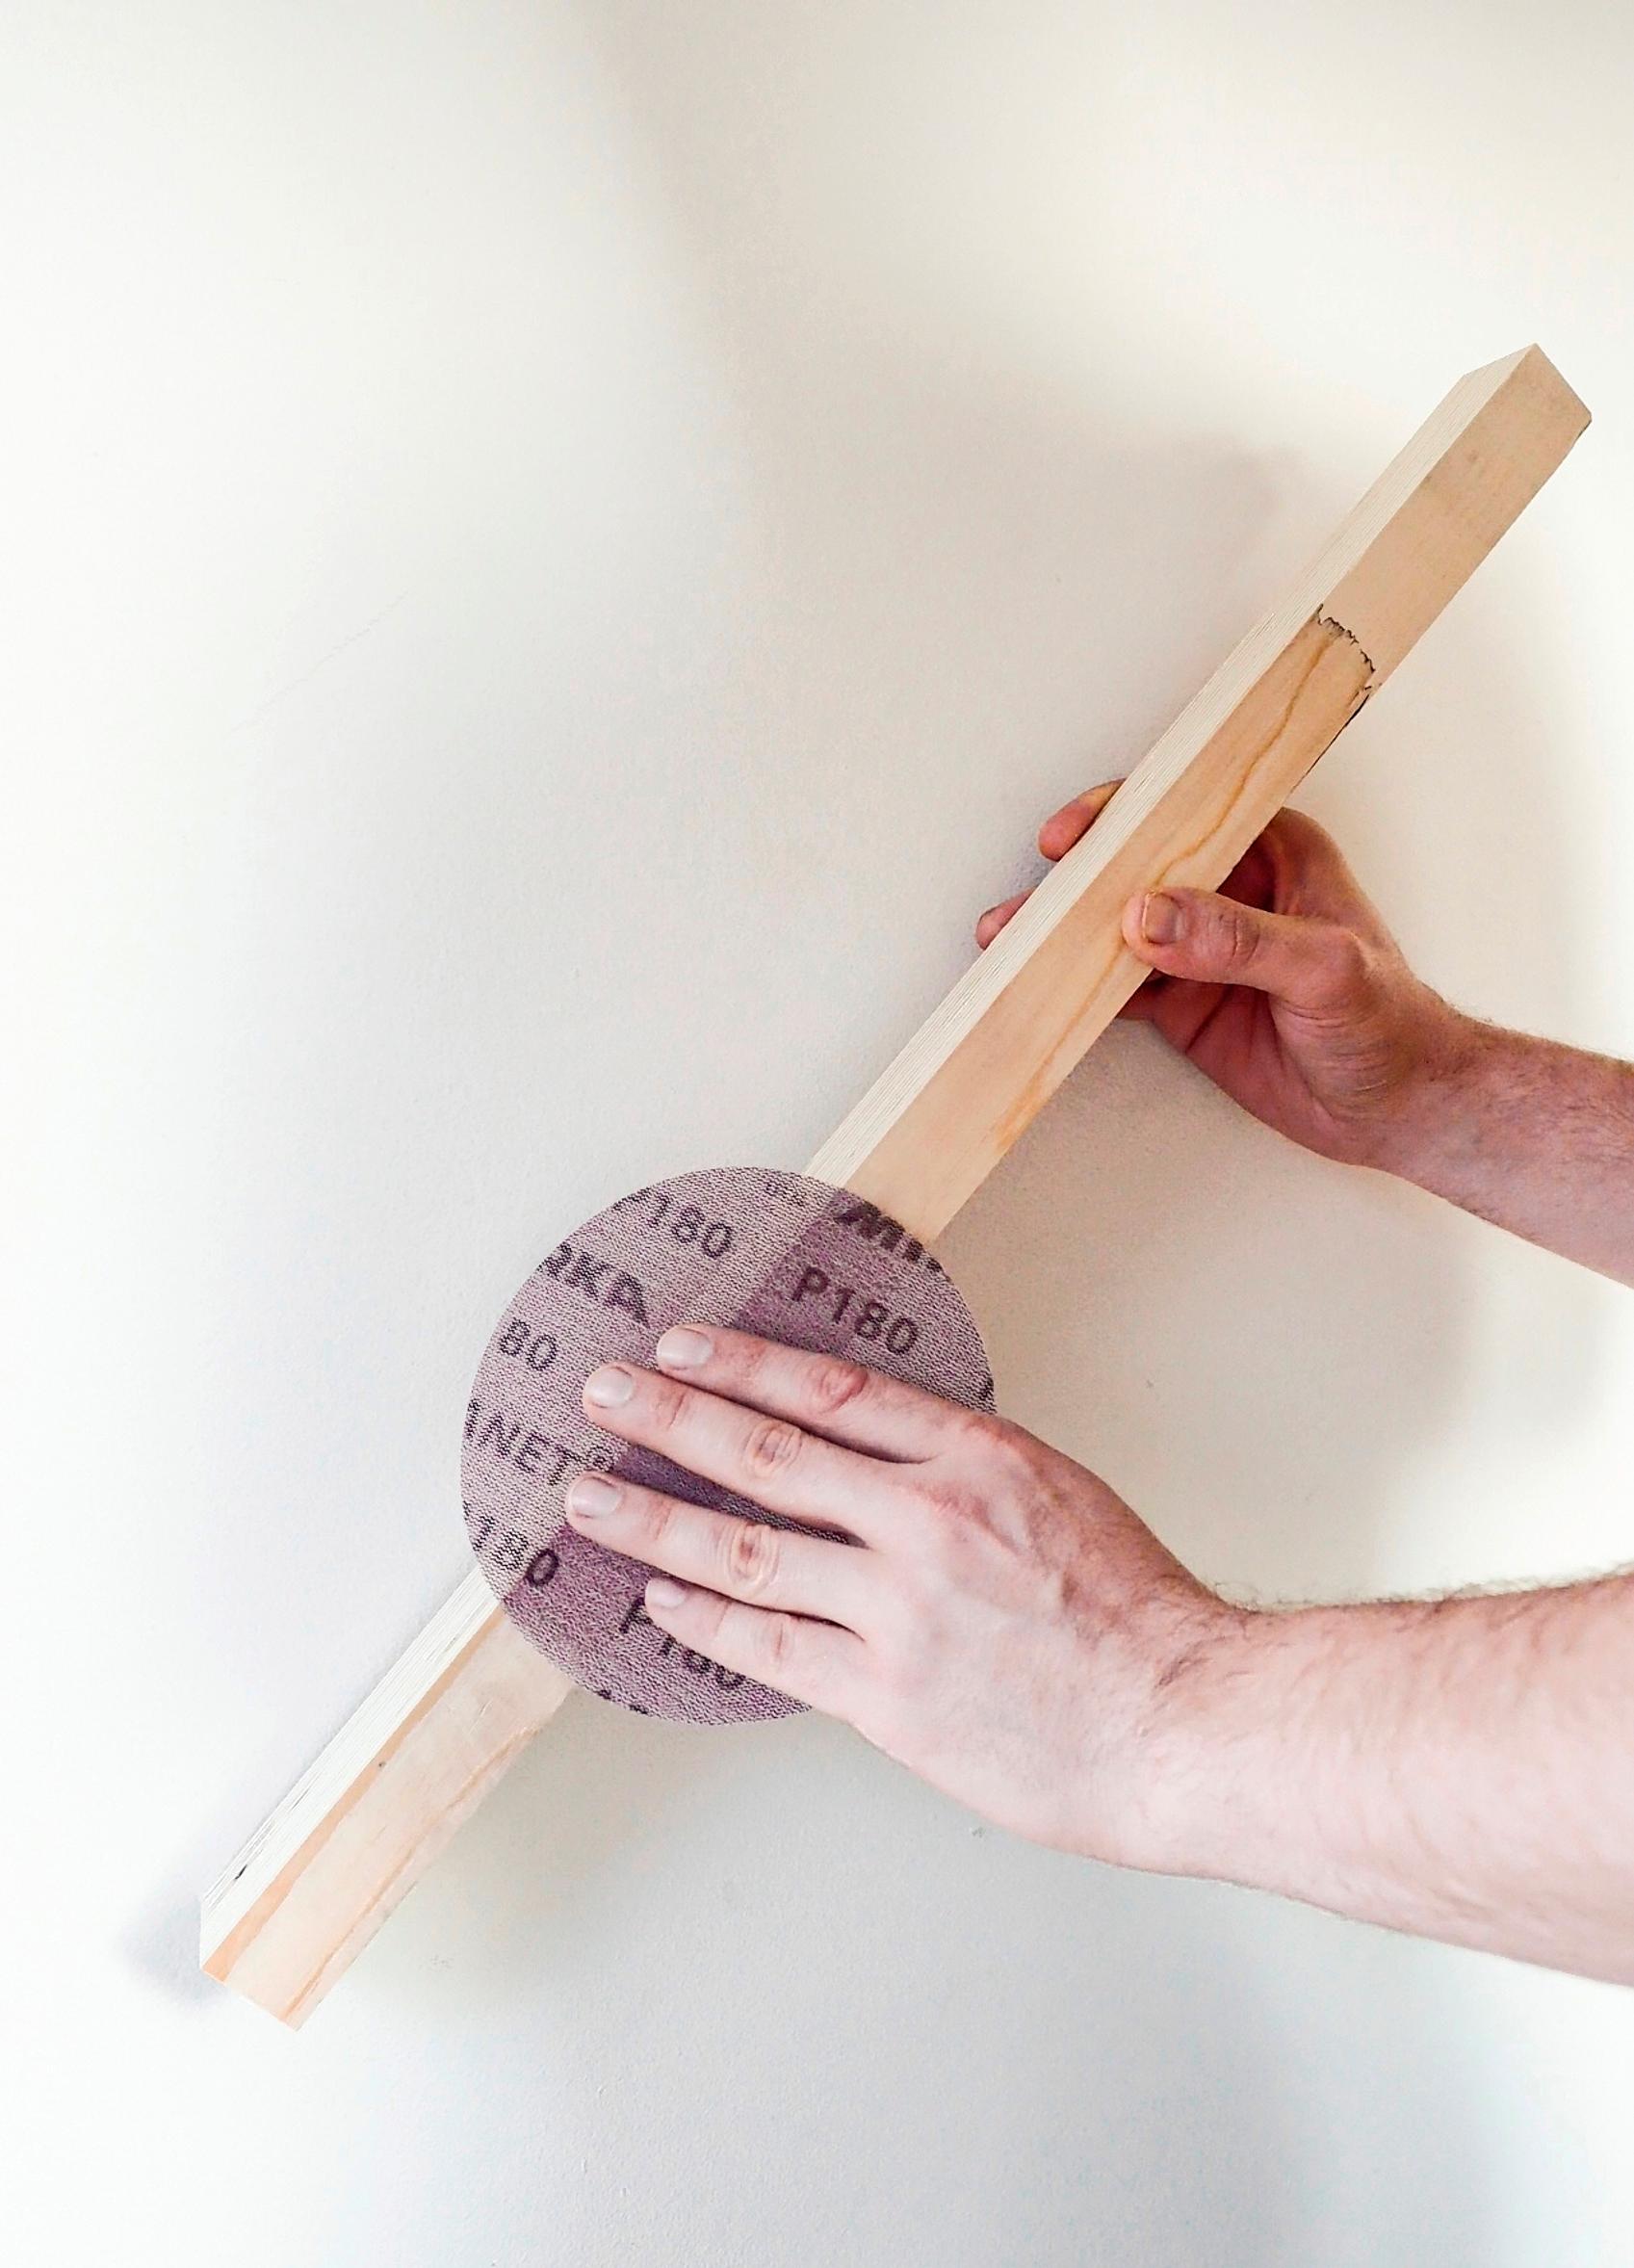
4. Sand the slats with sandpaper to make the material smooth and easy to handle. You can sand all sides of the wood or at least the edges. If you sand the entire piece, it’s easier to treat because the application cloth won’t get caught on the rough surface.
Tip!
180-grit sandpaper is a good choice for this DIY. Anything coarser will scratch the surface, while a finer grit won’t sand it enough.

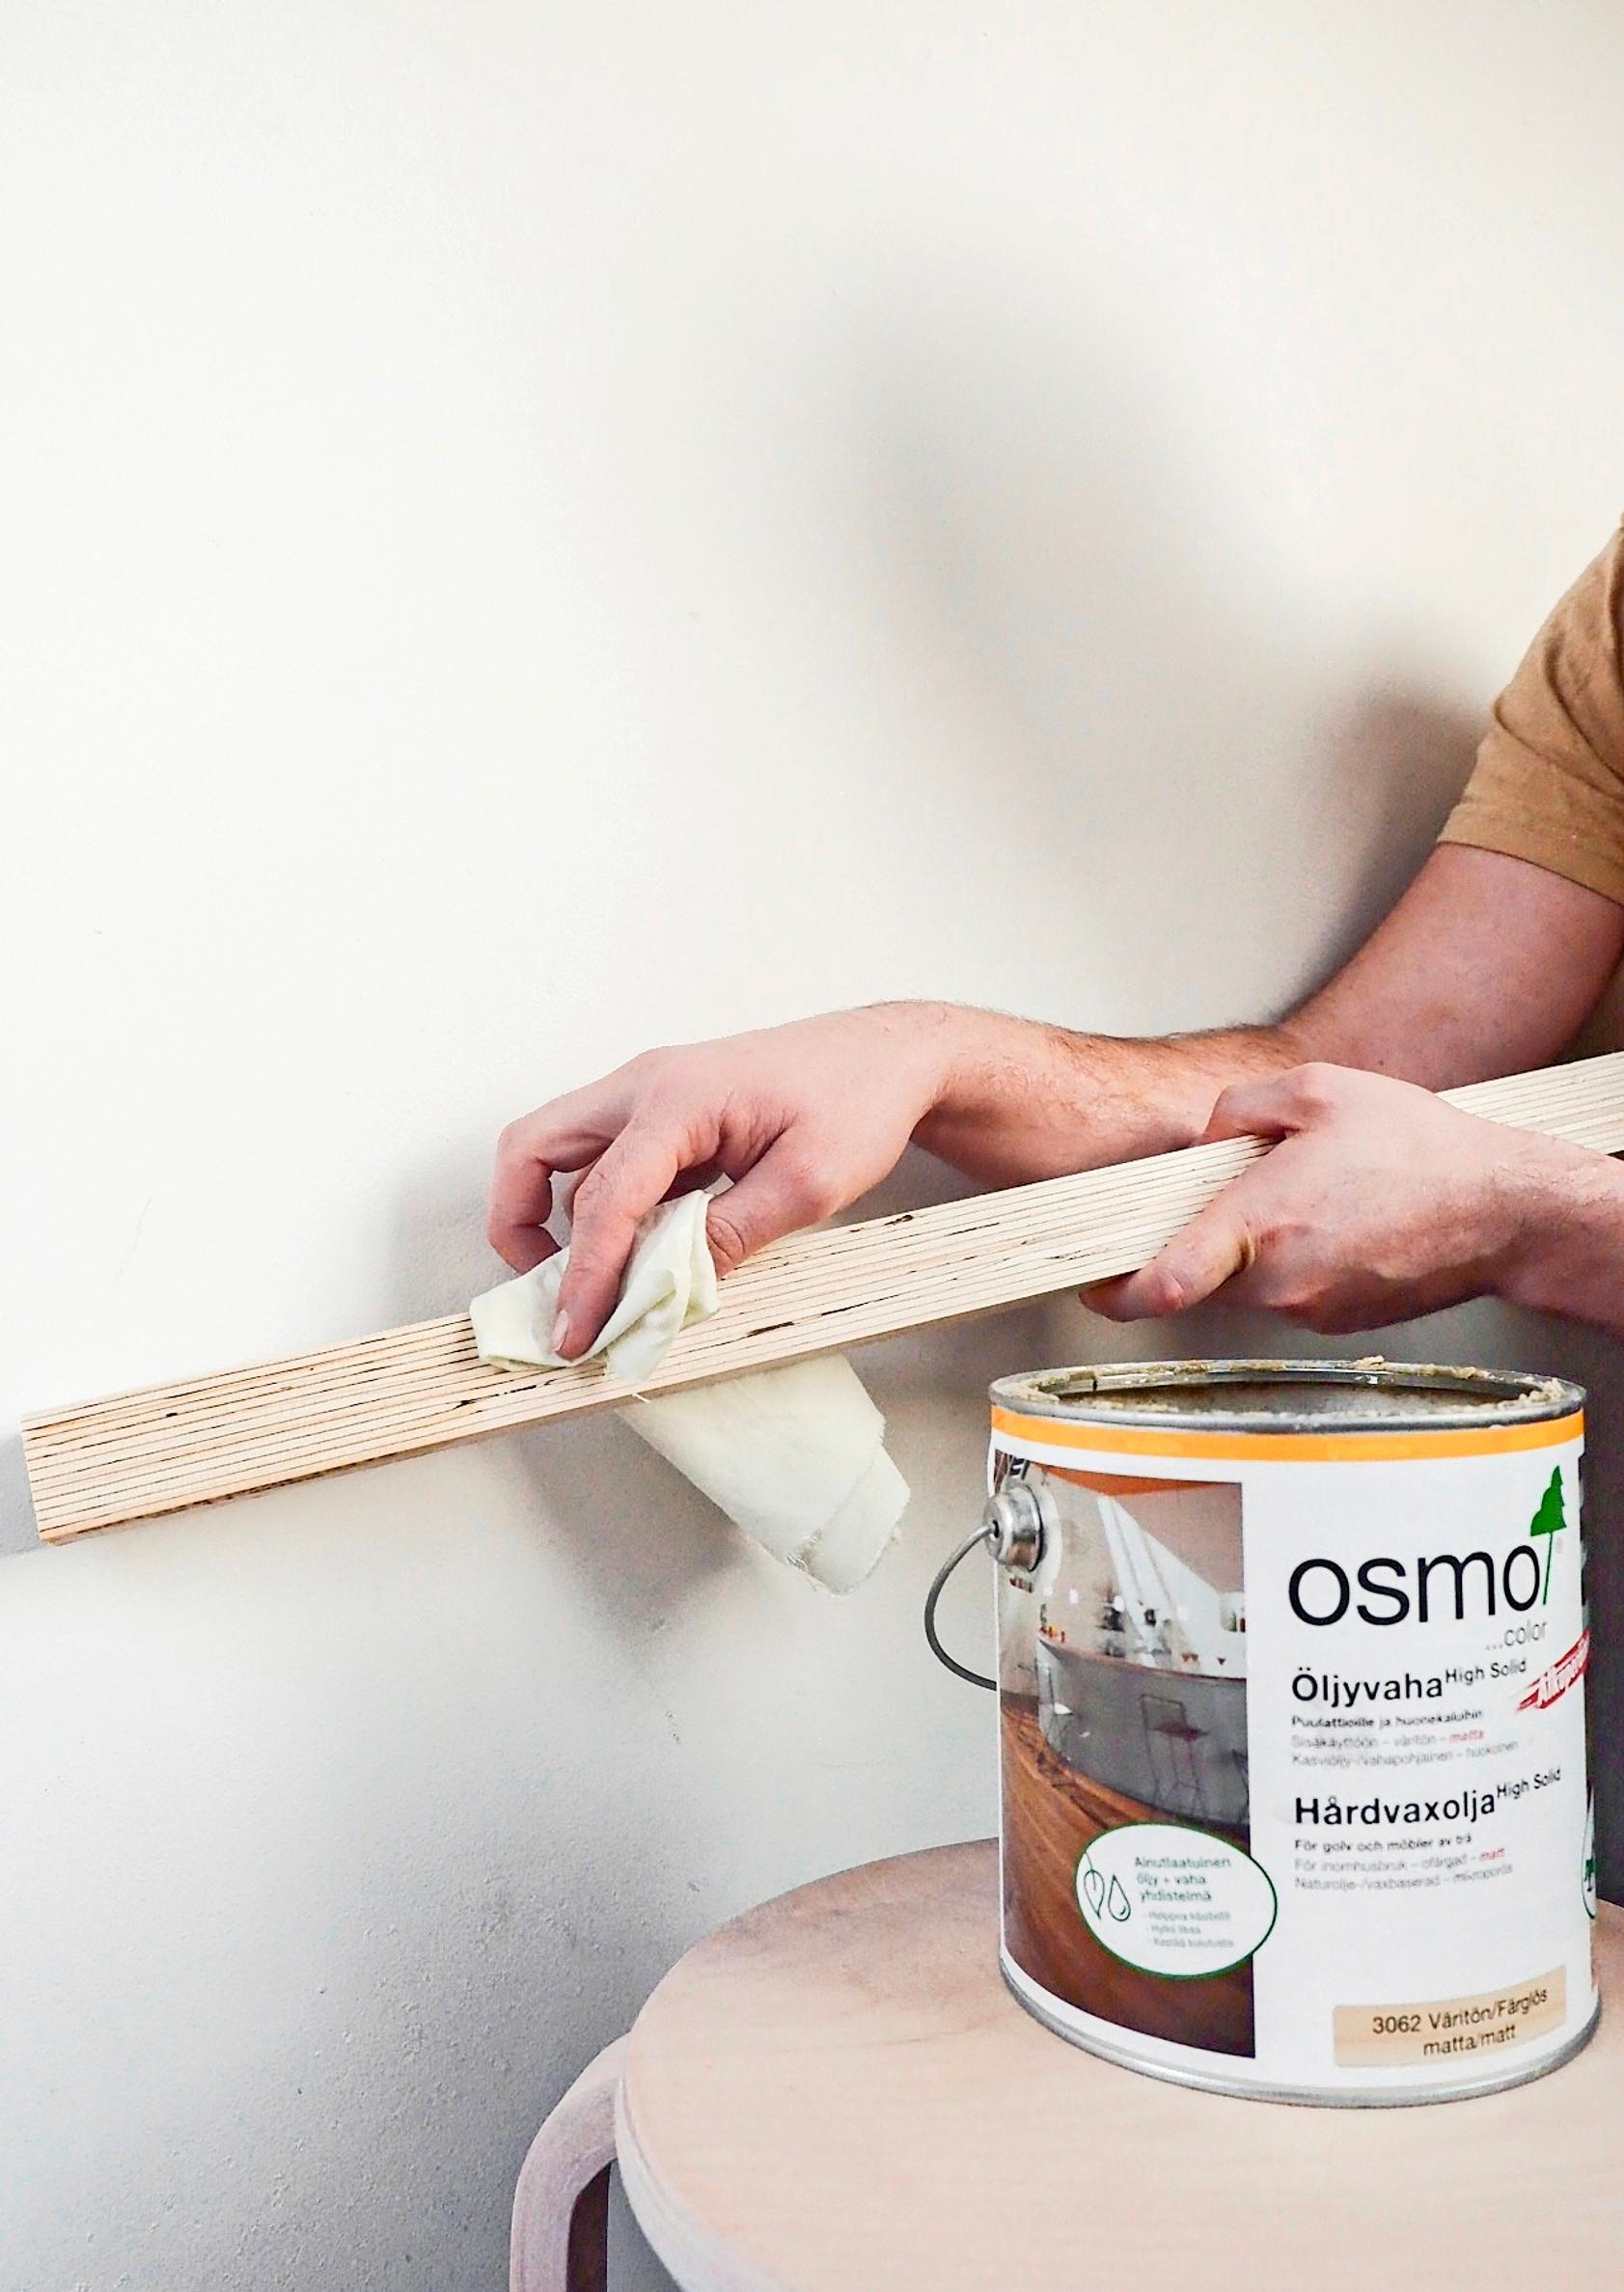
5. Protect your work surface and finish the slats. You can use Osmo Color colorless oil wax for the finish.
Tips!
- Use a lint-free application cloth, such as a piece cut from an old bedsheet.
- After the slats have dried, lay them out on the floor or a table to figure out your desired spacing.

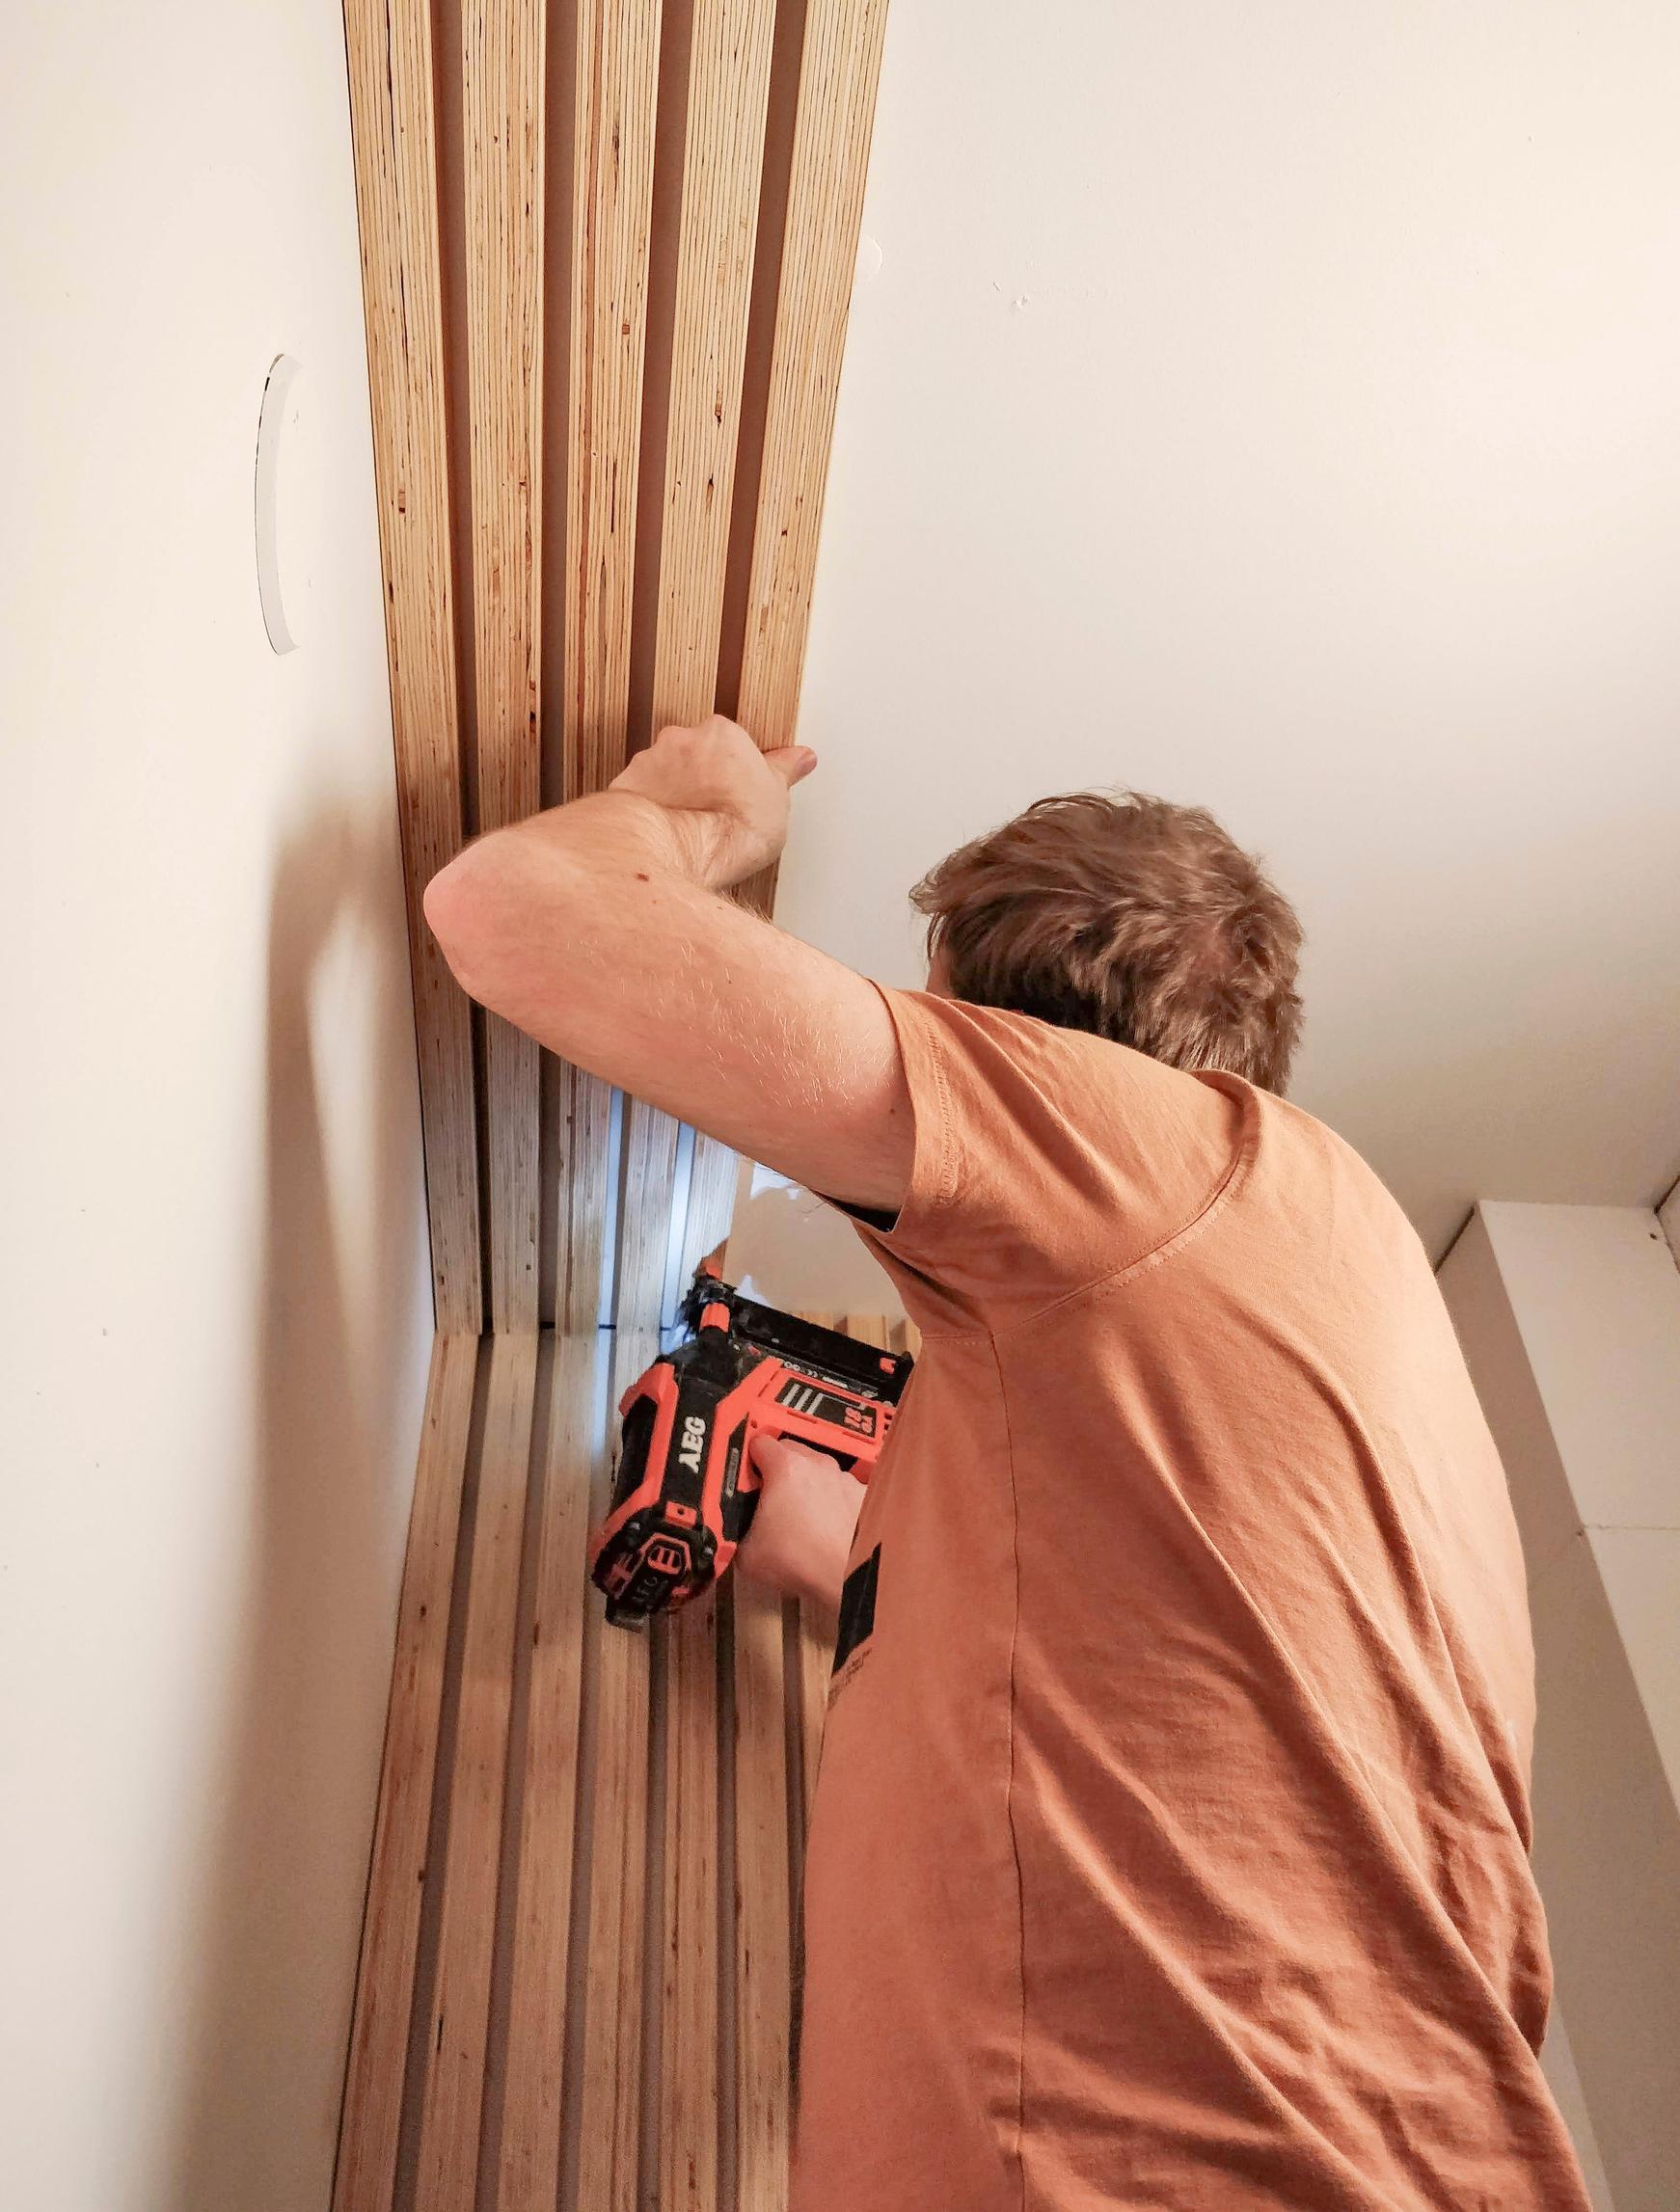
6. Attach the slats with a nail gun. To keep spacing consistent between the slats, use the same spacer pieces throughout installation, placing them at the bottom, middle, and top. If you want to add a slatted ceiling, it’s a good idea to first attach a full-length slat near the ceiling on the wall, then fasten the slat on the ceiling against that wall slat.
Tip!
Use small-headed nails so the nail heads don’t stand out.