Your cart

Your cart is empty.

Continue shopping
You'll love these, too
Why not do it yourself!

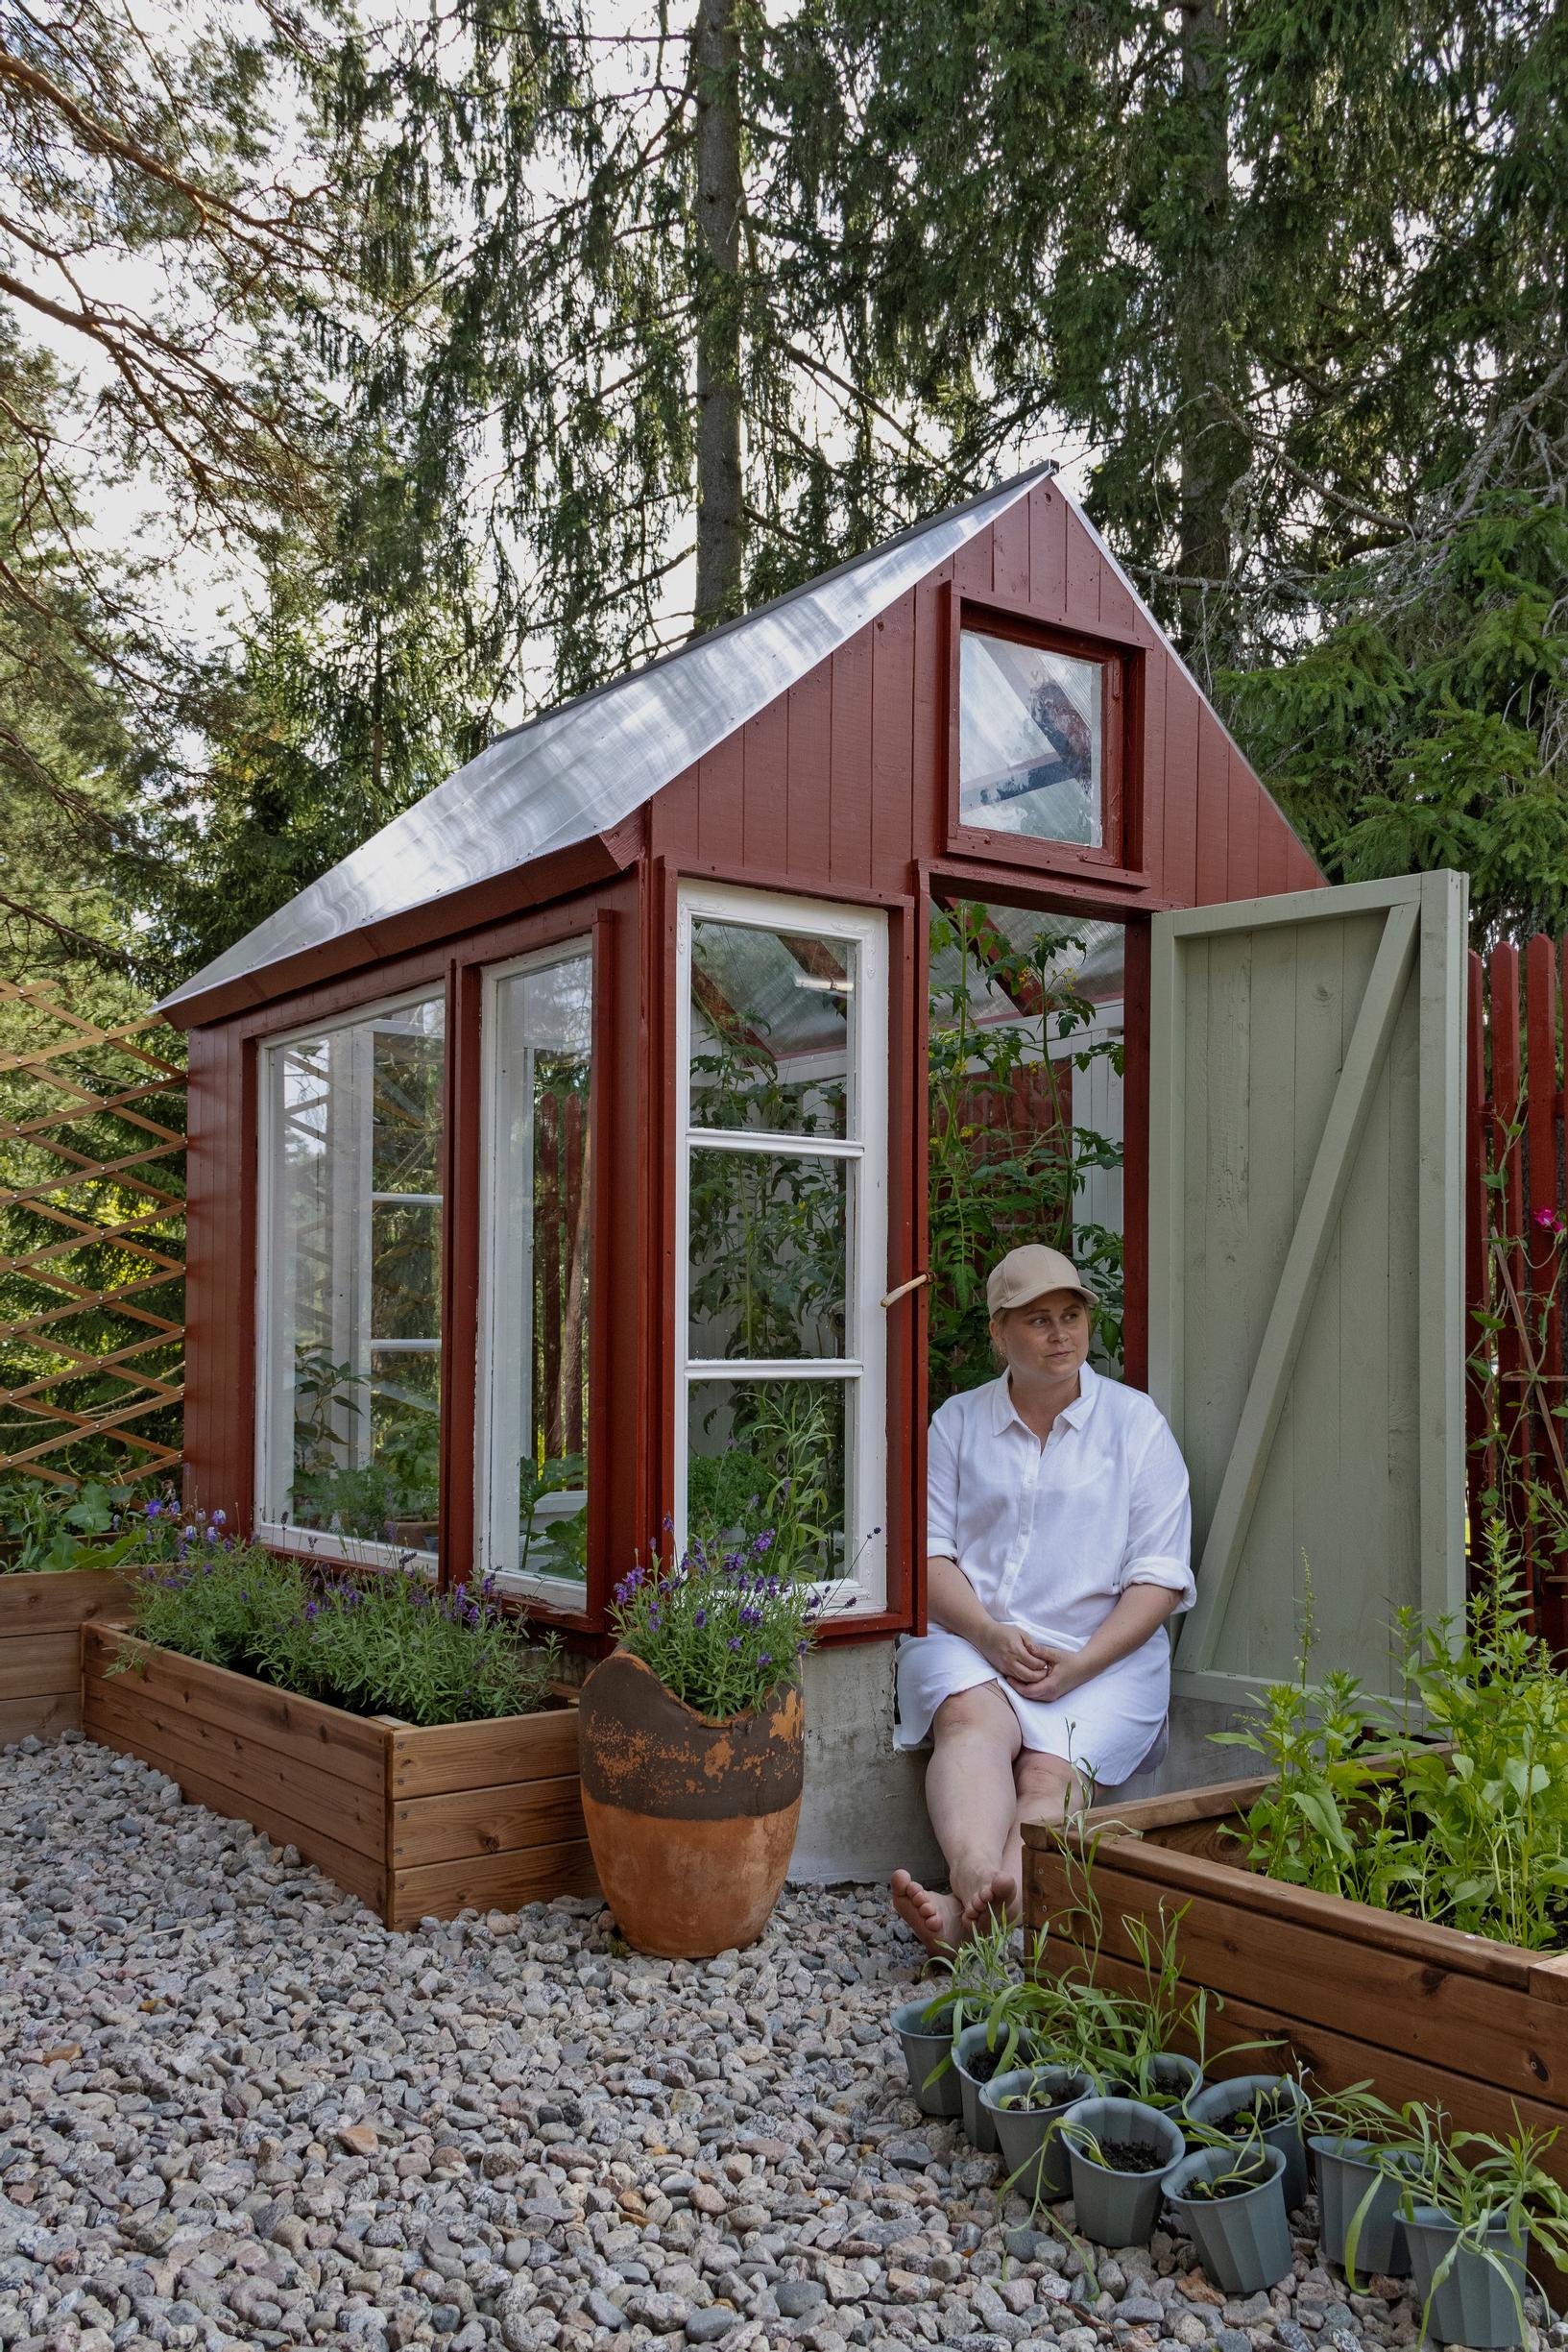
Rilla built a greenhouse from old windows: “I discovered I can do all sorts of things”

When being just a helper started to feel frustrating, Rilla Tervonen learned to build on her own: “It was a project that let me experience both successes and failures.”

June 5, 2025Lue suomeksi

Our garden: A house built in 2021 and a garden started in 2022 in Jyväskylä.

Happily living here: Photographer Rilla Tervonen and carpenter Sami Tervonen plus two teenage children, a cat, and a dog.

Follow on social media: @pienimustamokki

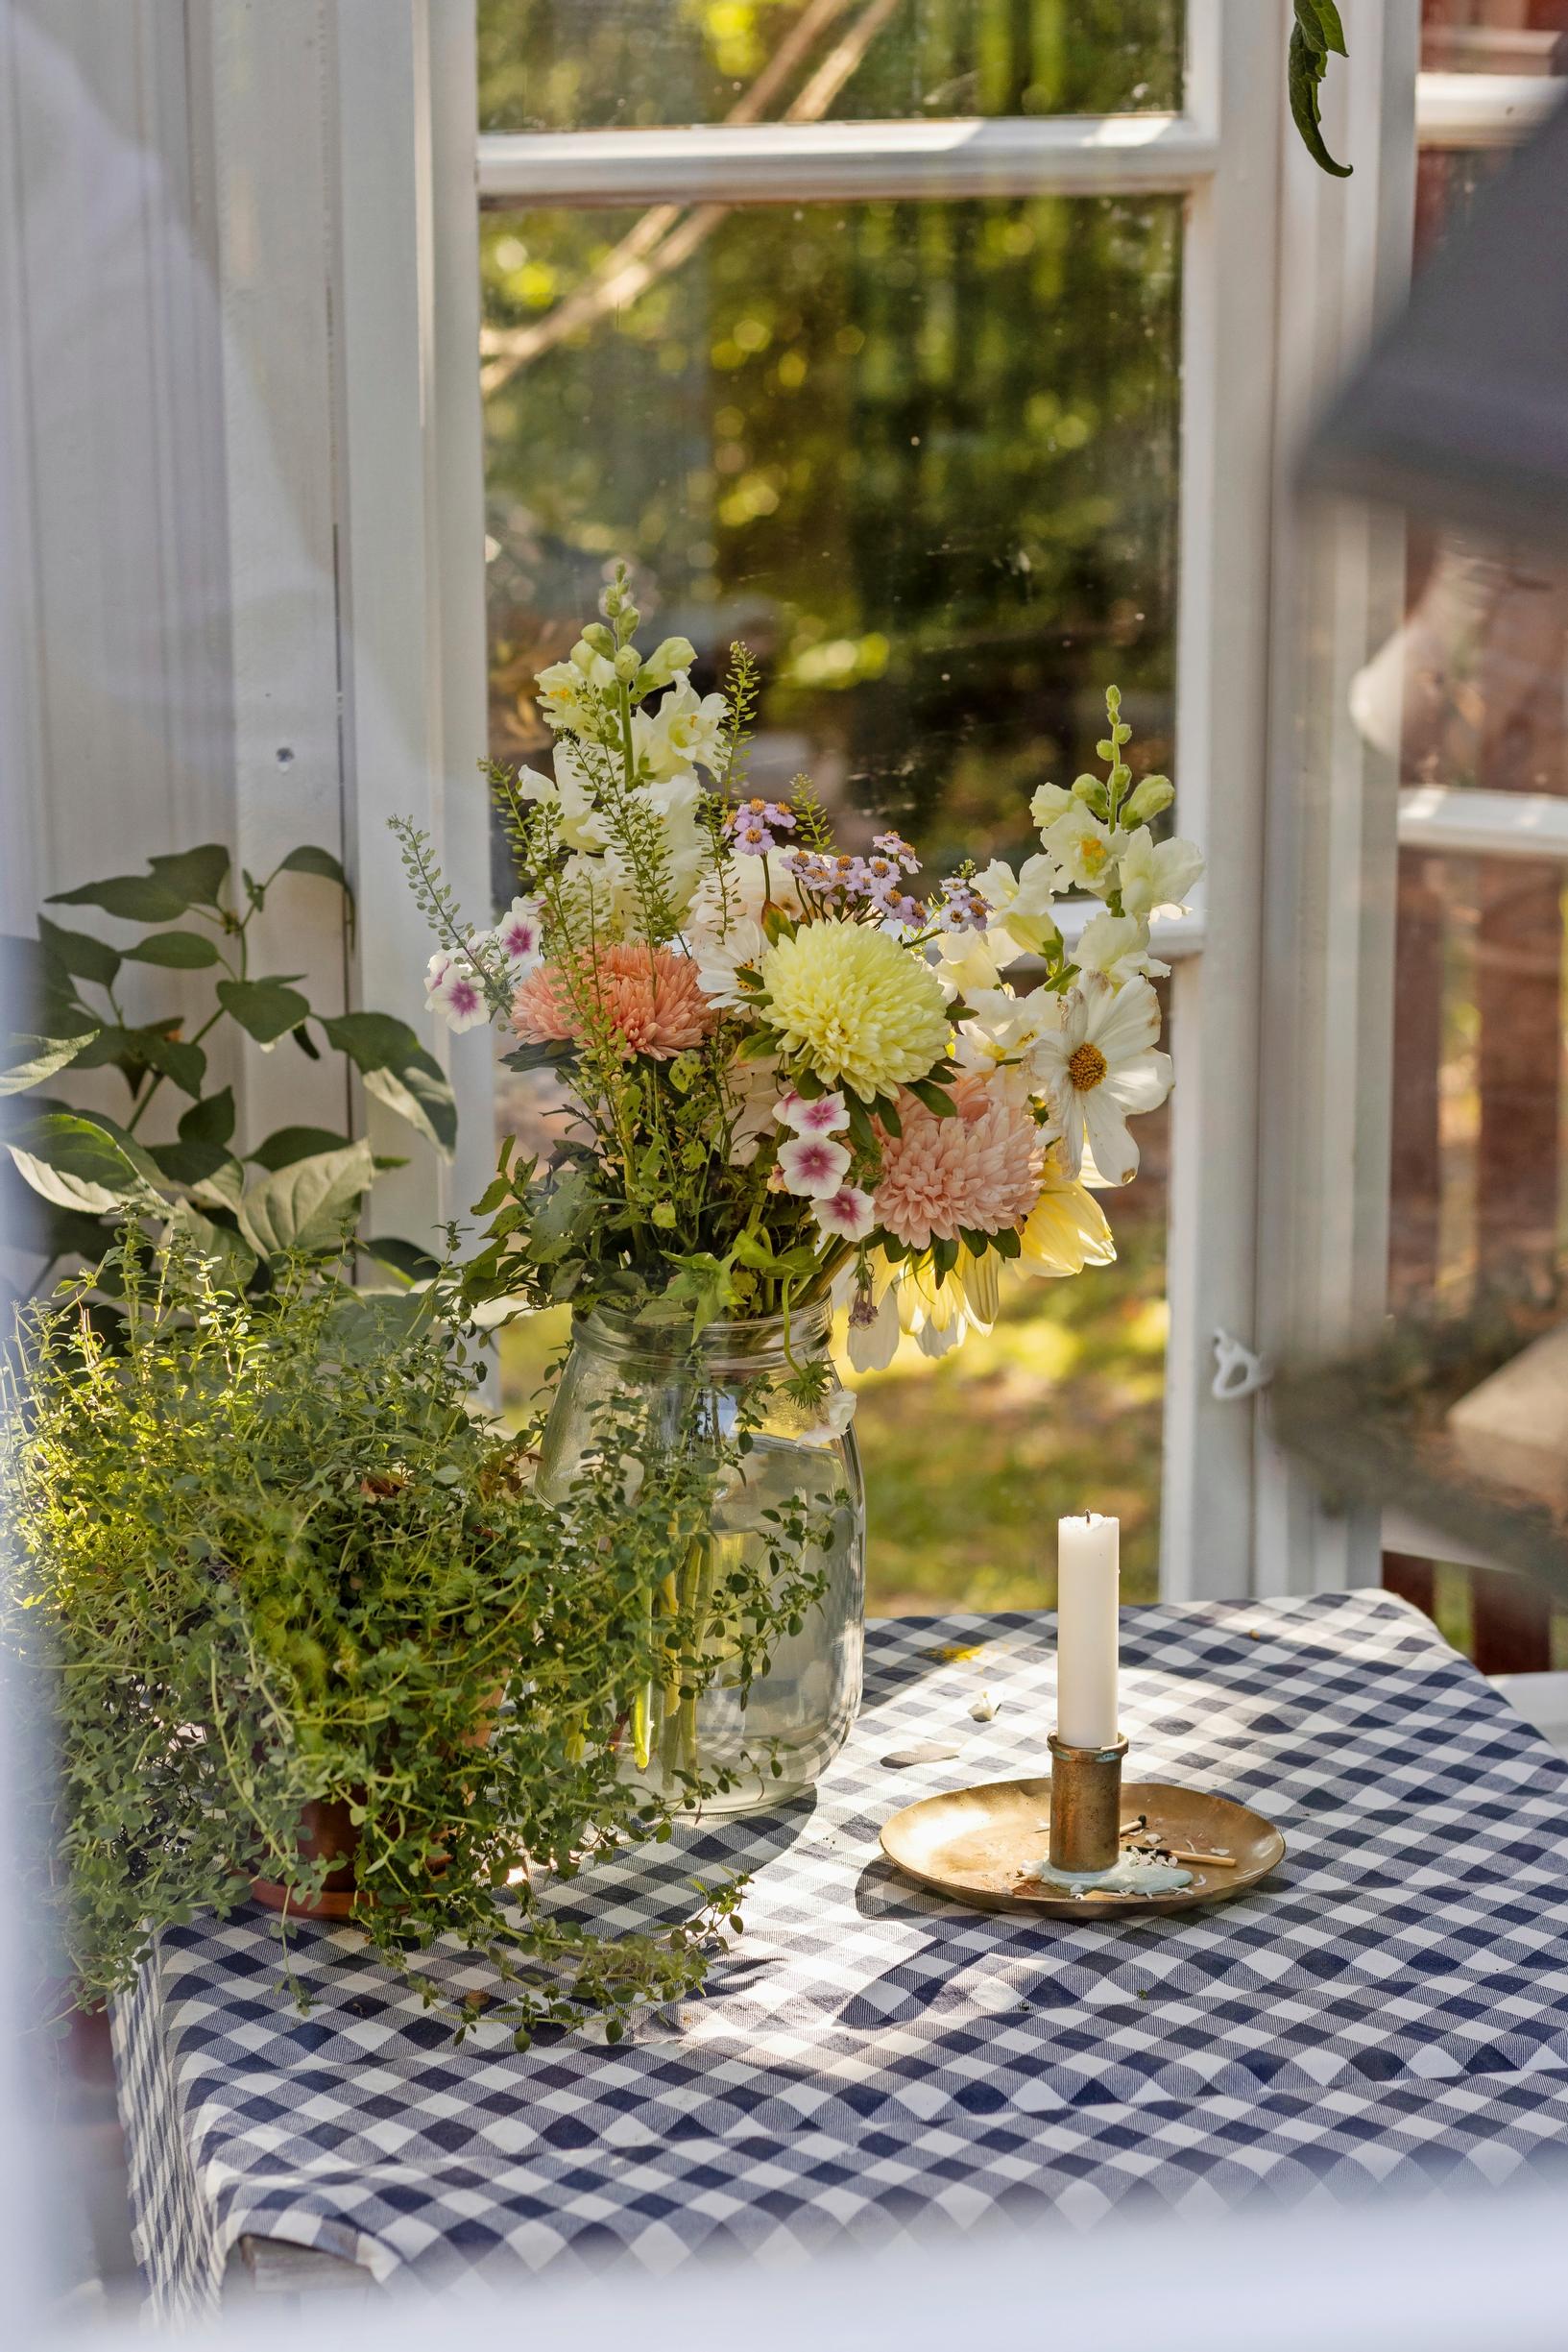
When I was designing a new home for my family, I also made a garden plan that included a kitchen garden and a greenhouse at the end of the house. The space isn’t very large, but its orientation is suitable for a kitchen garden. I pictured an area that would form one cohesive, room-like space using fences and other elements.

Most of the responsibility for building the house and outbuilding naturally fell on my partner, who is a professional, while I did what I could whenever I could.

Once the house was finished, we put up the fence and gate for the kitchen garden. By the following spring, I was already eager to build the greenhouse.

Meanwhile, my spouse was busy finishing a rather large outbuilding in our yard, so he was understandably less enthusiastic about my greenhouse dream. So, I decided to build it myself.

Photo of a garden gate.
The greenhouse and the gate at the other end define the kitchen garden as its own little world. I found the gate’s design inspiration on Pinterest.

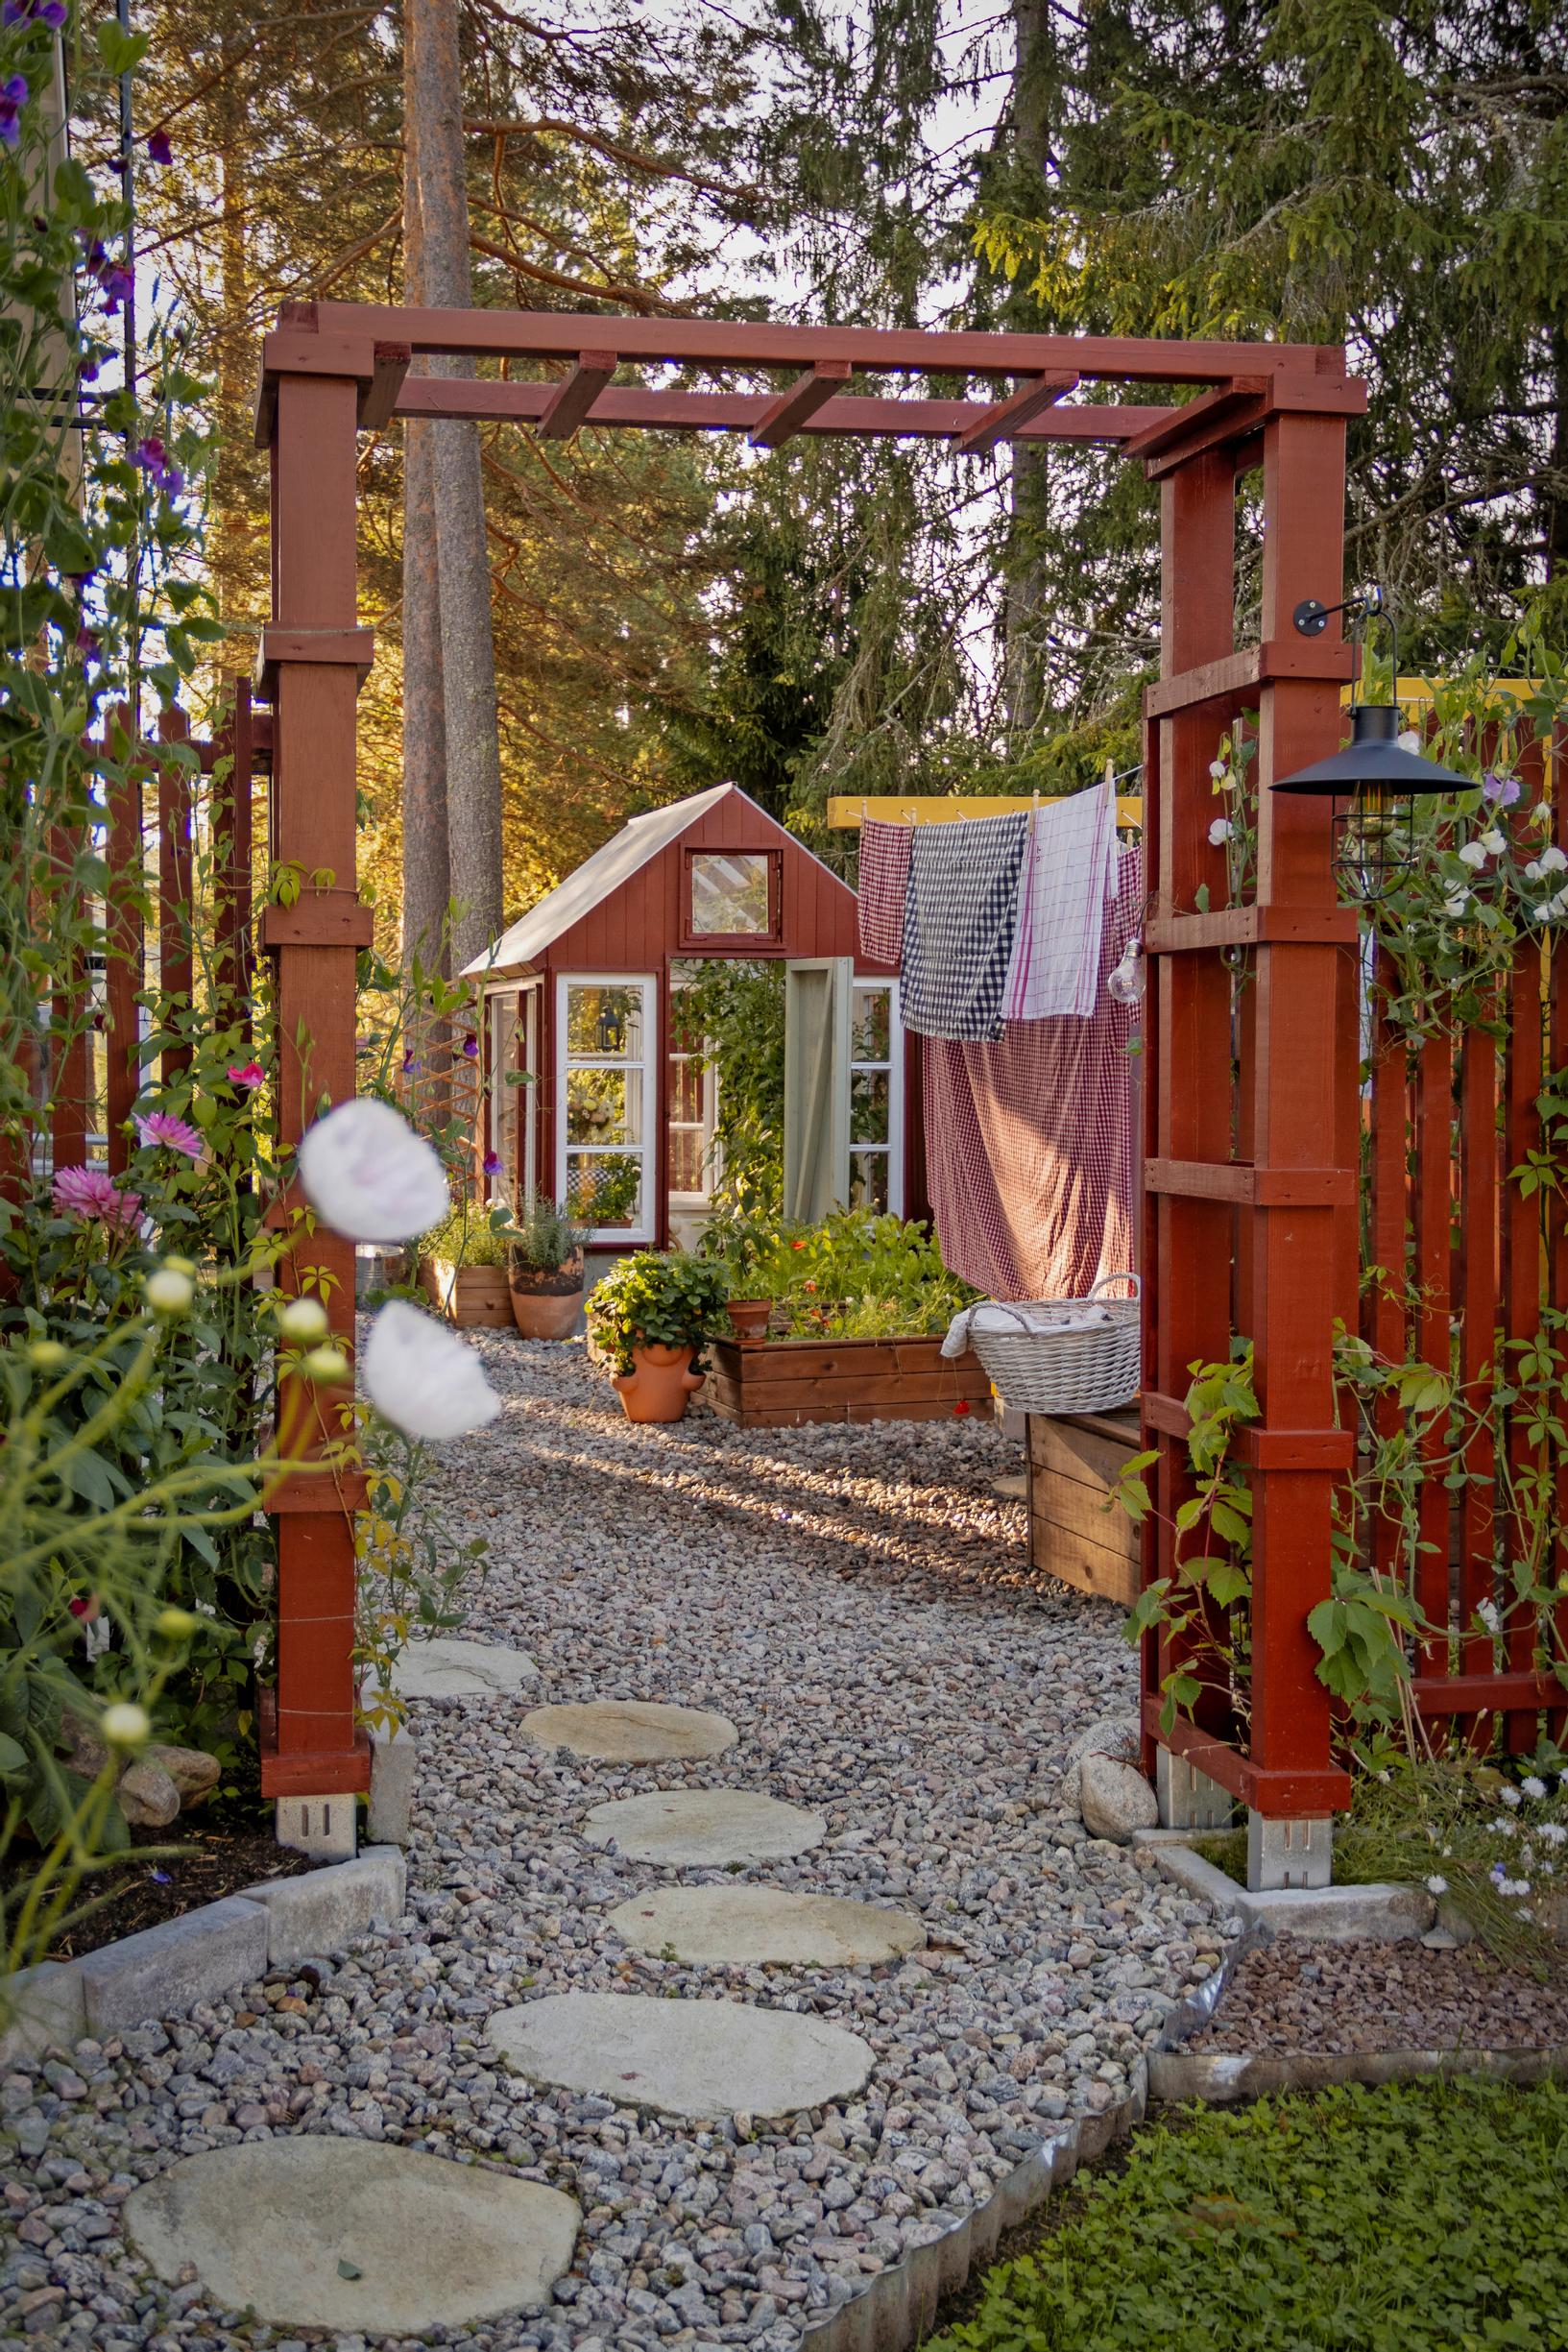
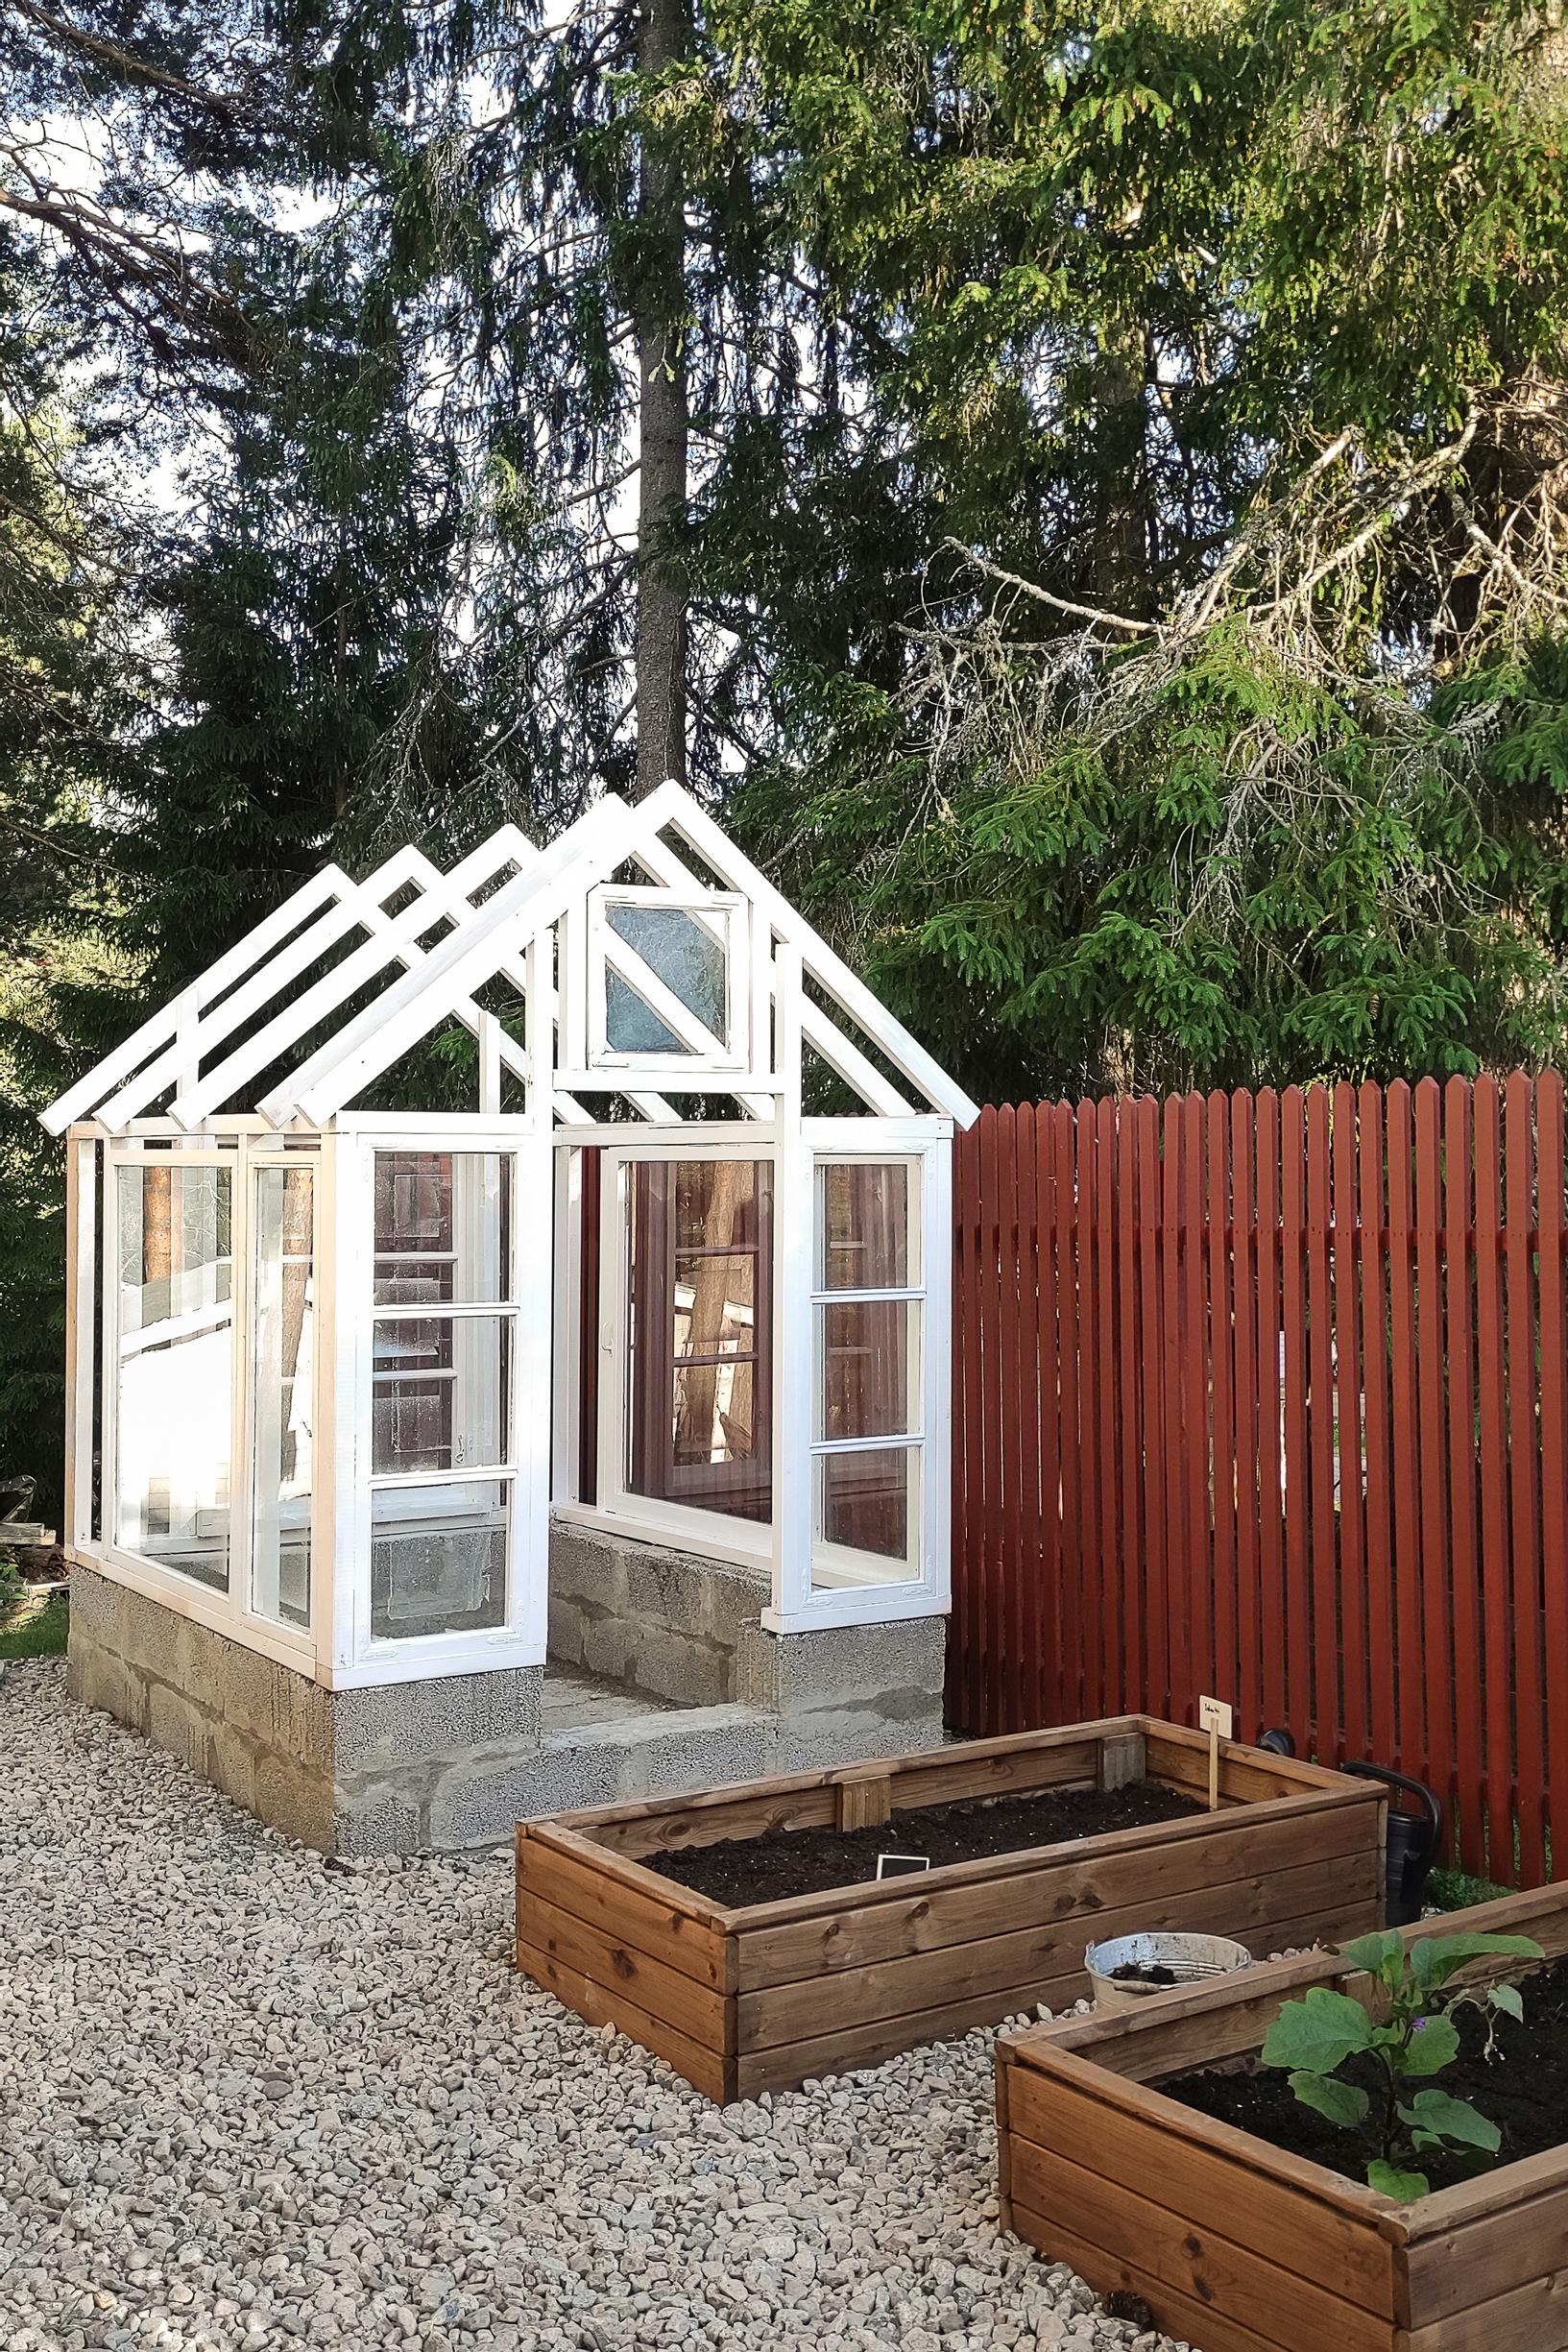
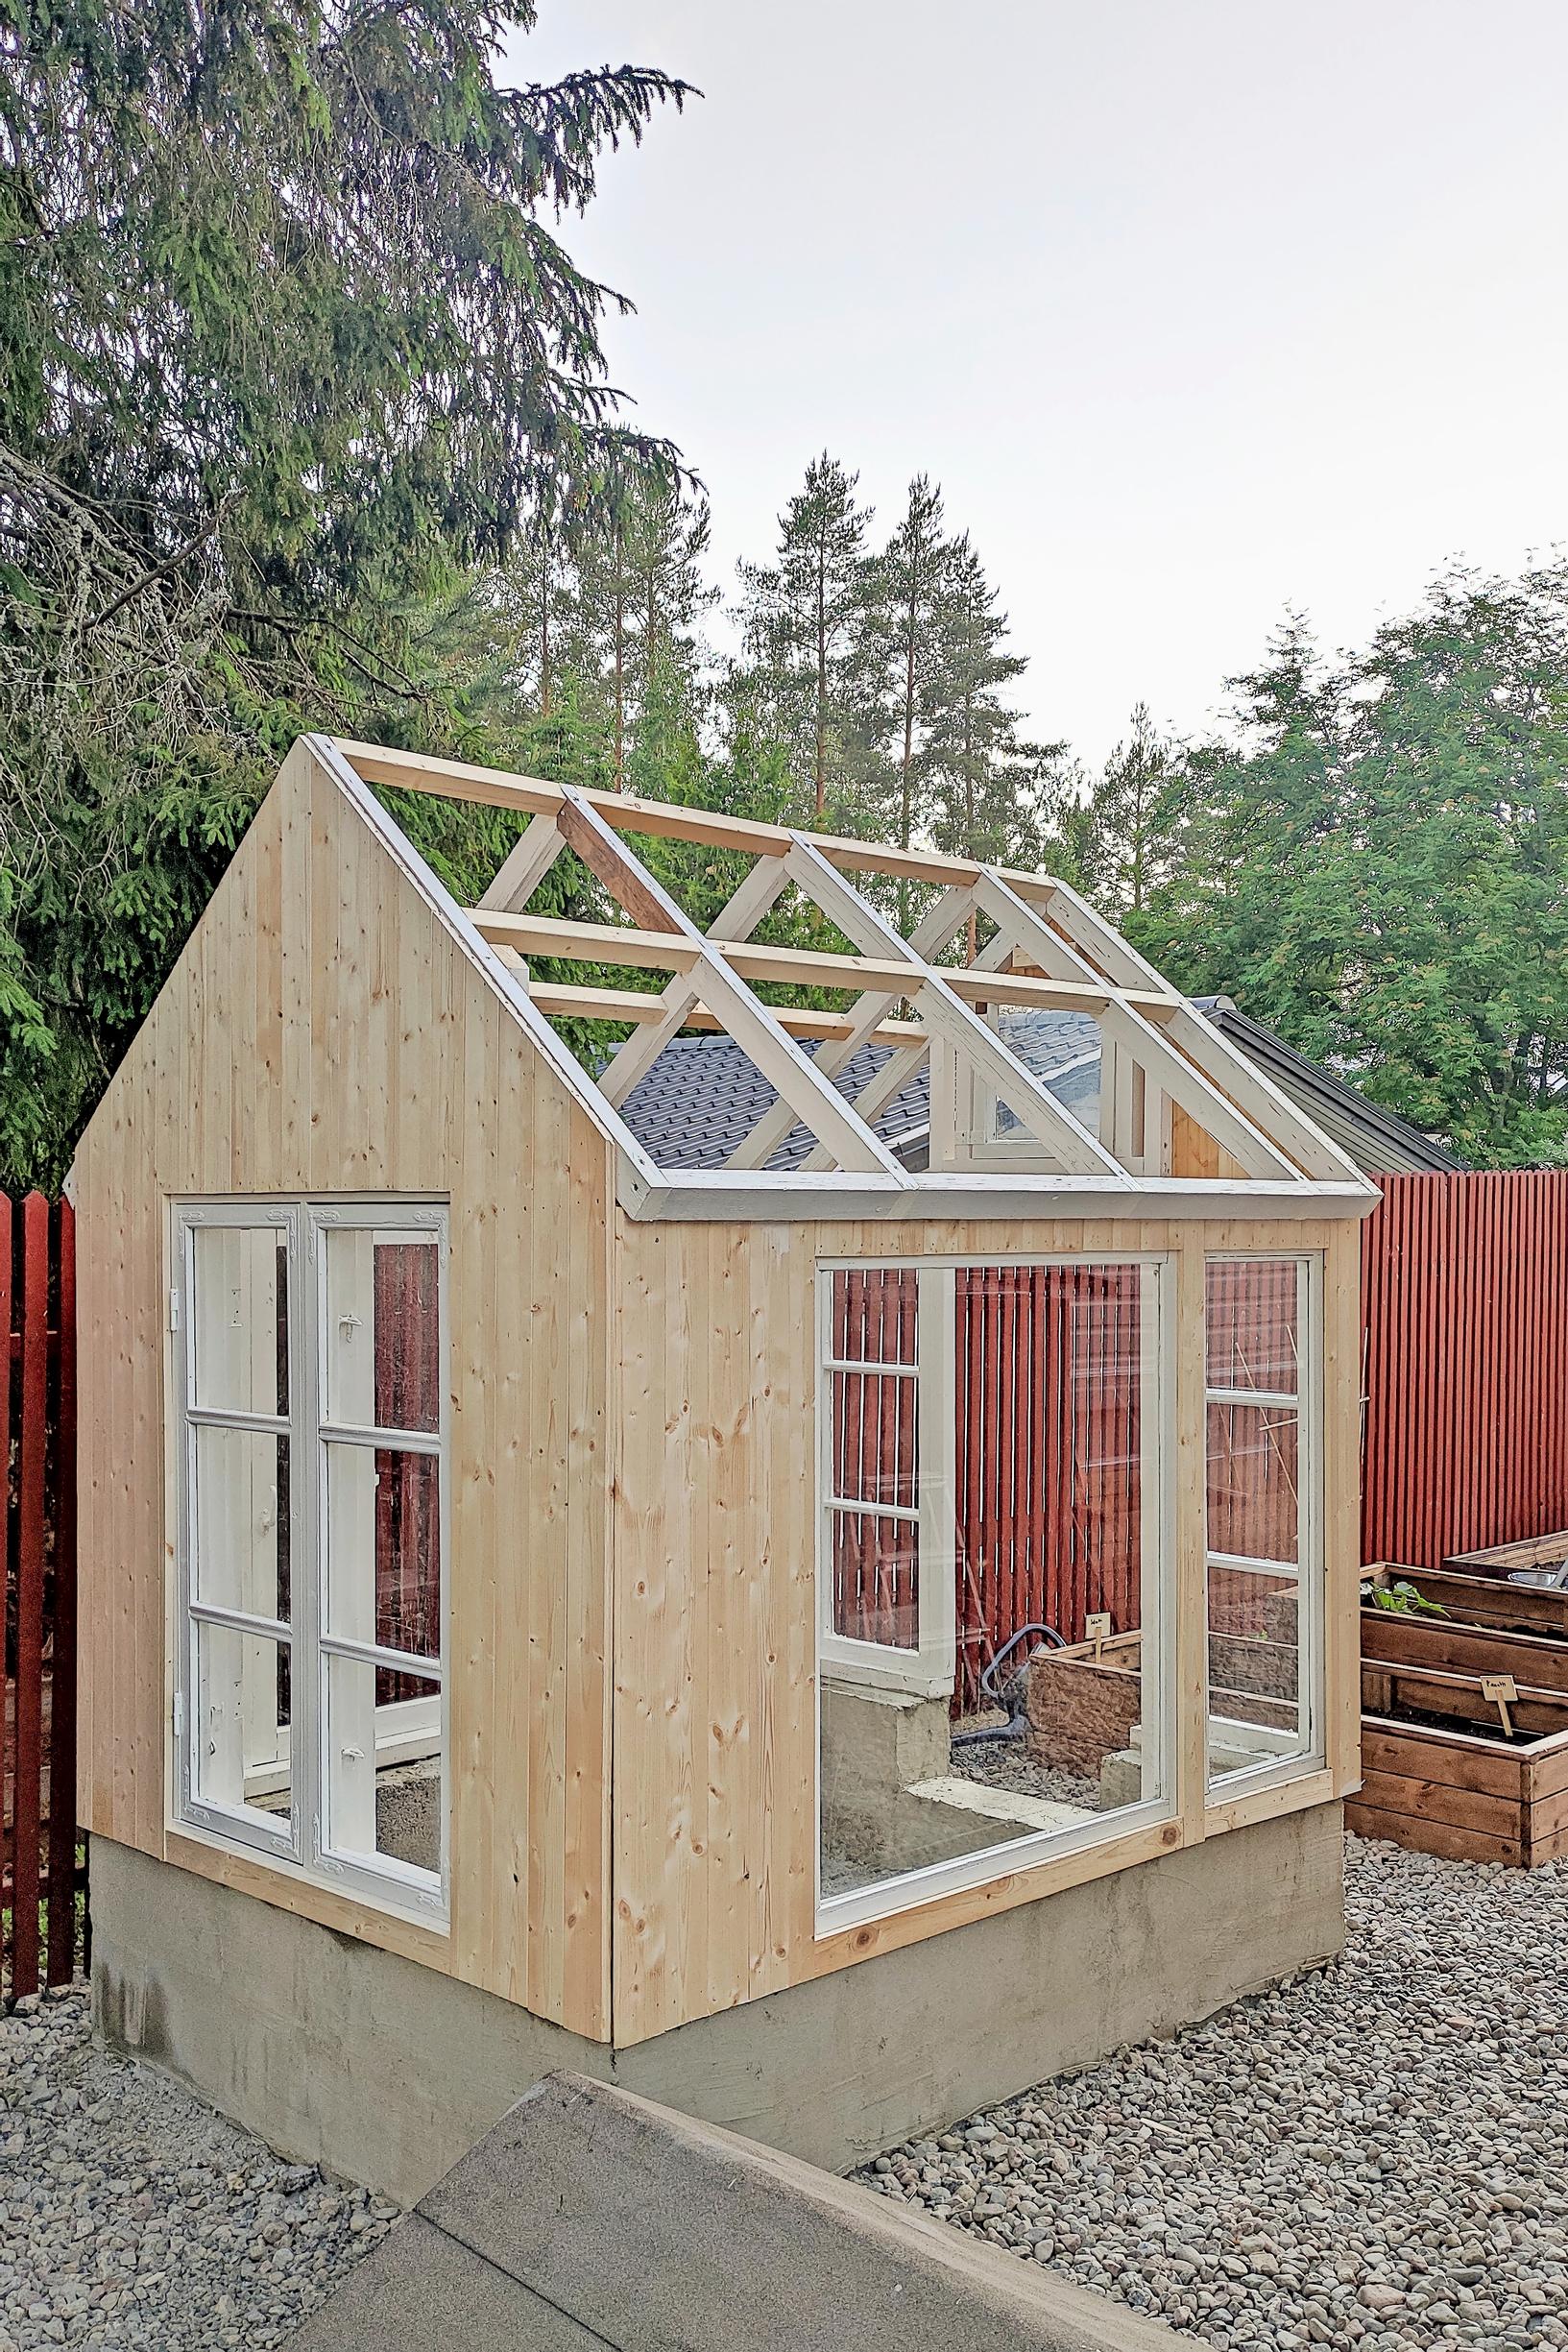
Round stone pavers lead you into the kitchen garden. They were purchased from a local garden center, but you can make something similar yourself using concrete.

Photo of a clothesline stand.
A simple clothesline stand was painted summery yellow, which forms a beautiful color pairing with red. The paint color is Kesä by Tikkurila.
Photo of a woman by the greenhouse next to a planting box.
An old paned window looks lovely and is also handy for ventilation. On the side of the greenhouse, Rilla built raised beds. She kept the foundation gray on the outside but painted it white inside. She first applied filler with a trowel, then smoothed it in circular motions with gloved hands, and finally painted the surface with foundation paint.

A vertically installed flower support not only does its job but also provides a bit of privacy.

Photo of the homemade greenhouse doorway.
Surrounded by the heady scent of tomatoes, it’s lovely to sit down with a cup of coffee and jot a poem or two. A small table and chair were must-haves when planning the greenhouse’s size. The foundation was poured directly over patio tiles after thorough preparation.
Photo of a table and a bouquet inside the greenhouse.
Flowers are picked for vases from May all the way to early October.

Building had fascinated me for a long time. The previous summer, I had practiced by building a flower box under the kitchen window and raised beds in the kitchen garden.

I discovered I can do all sorts of things if I just find good instructions and follow them.

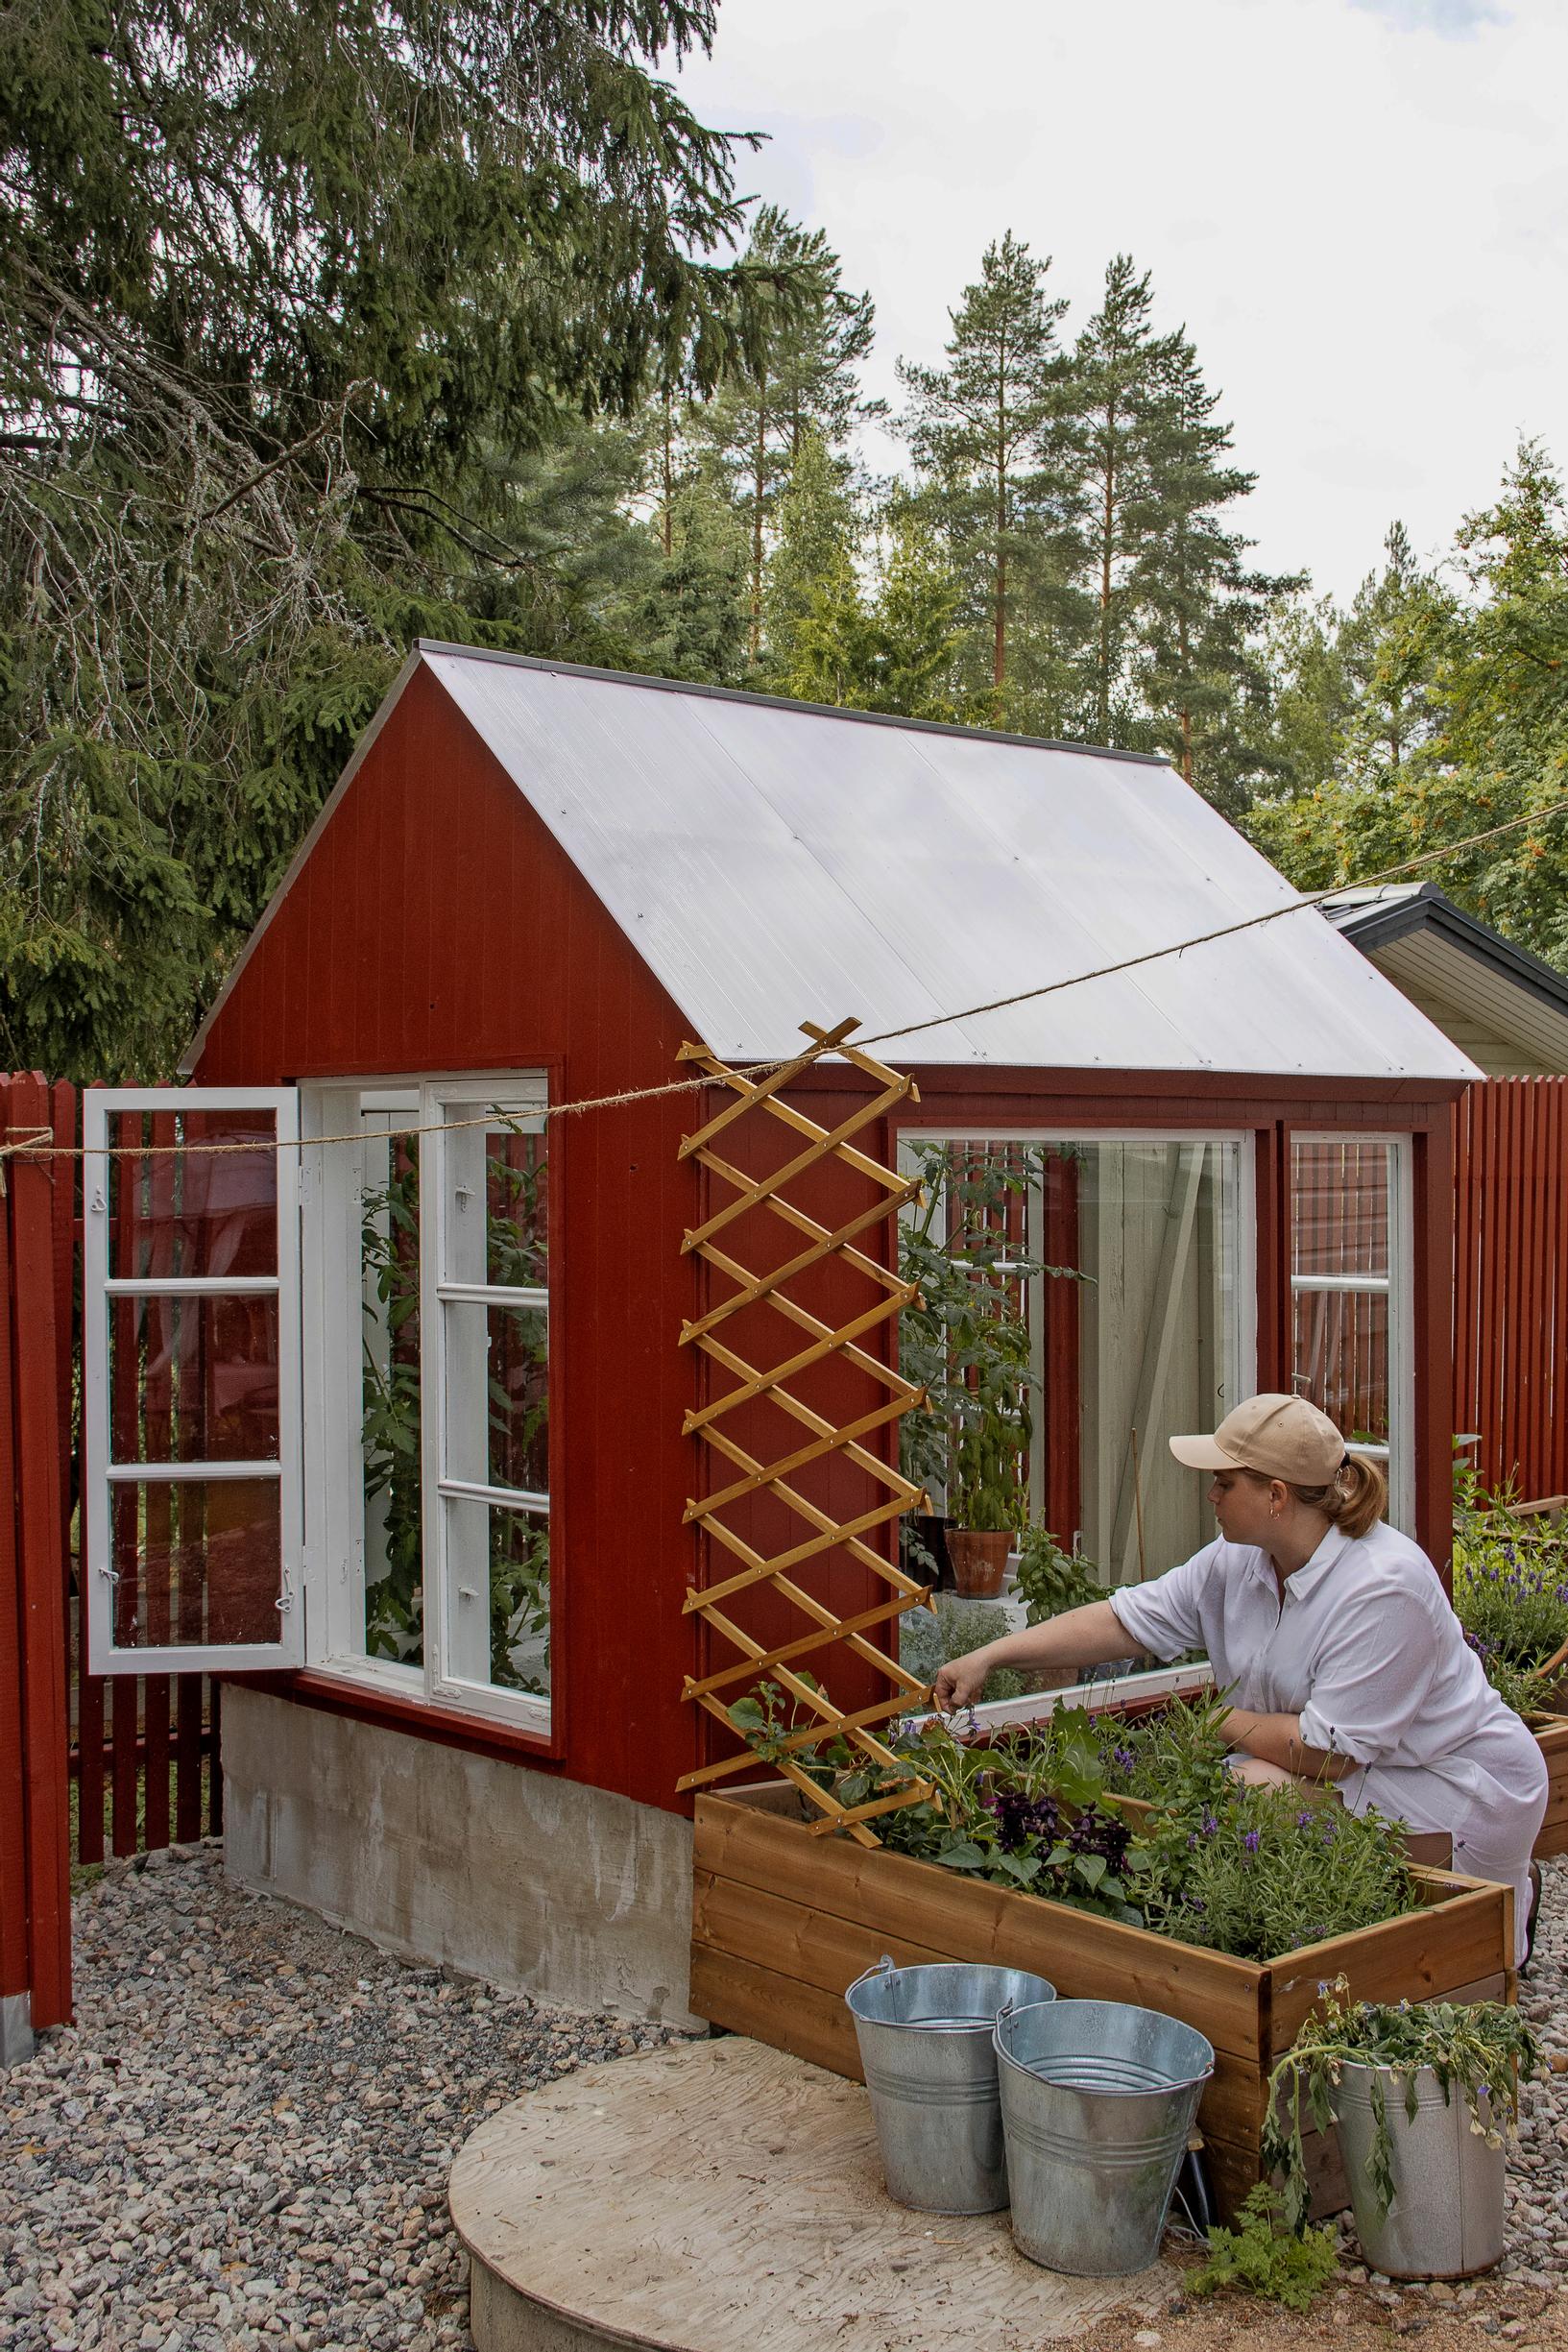
I decided to involve my spouse as little as possible in the greenhouse project, so I turned to YouTube for instructions on building the foundation and frame. As soon as the snow melted, I poured the foundation, and by carefully following the tutorials, it turned out quite sturdy and pretty straight.

Photo of the greenhouse windowsill.
The kitchen garden is full of color and has an old-time ambiance.
Photo of the greenhouse interior and wall structure.
We didn’t finish the greenhouse interior in any special way, so the foundation, windows, and frame boards naturally formed shelves and surfaces. The roof trusses were painted red. The paint color is Rusta’s Cottage Red.

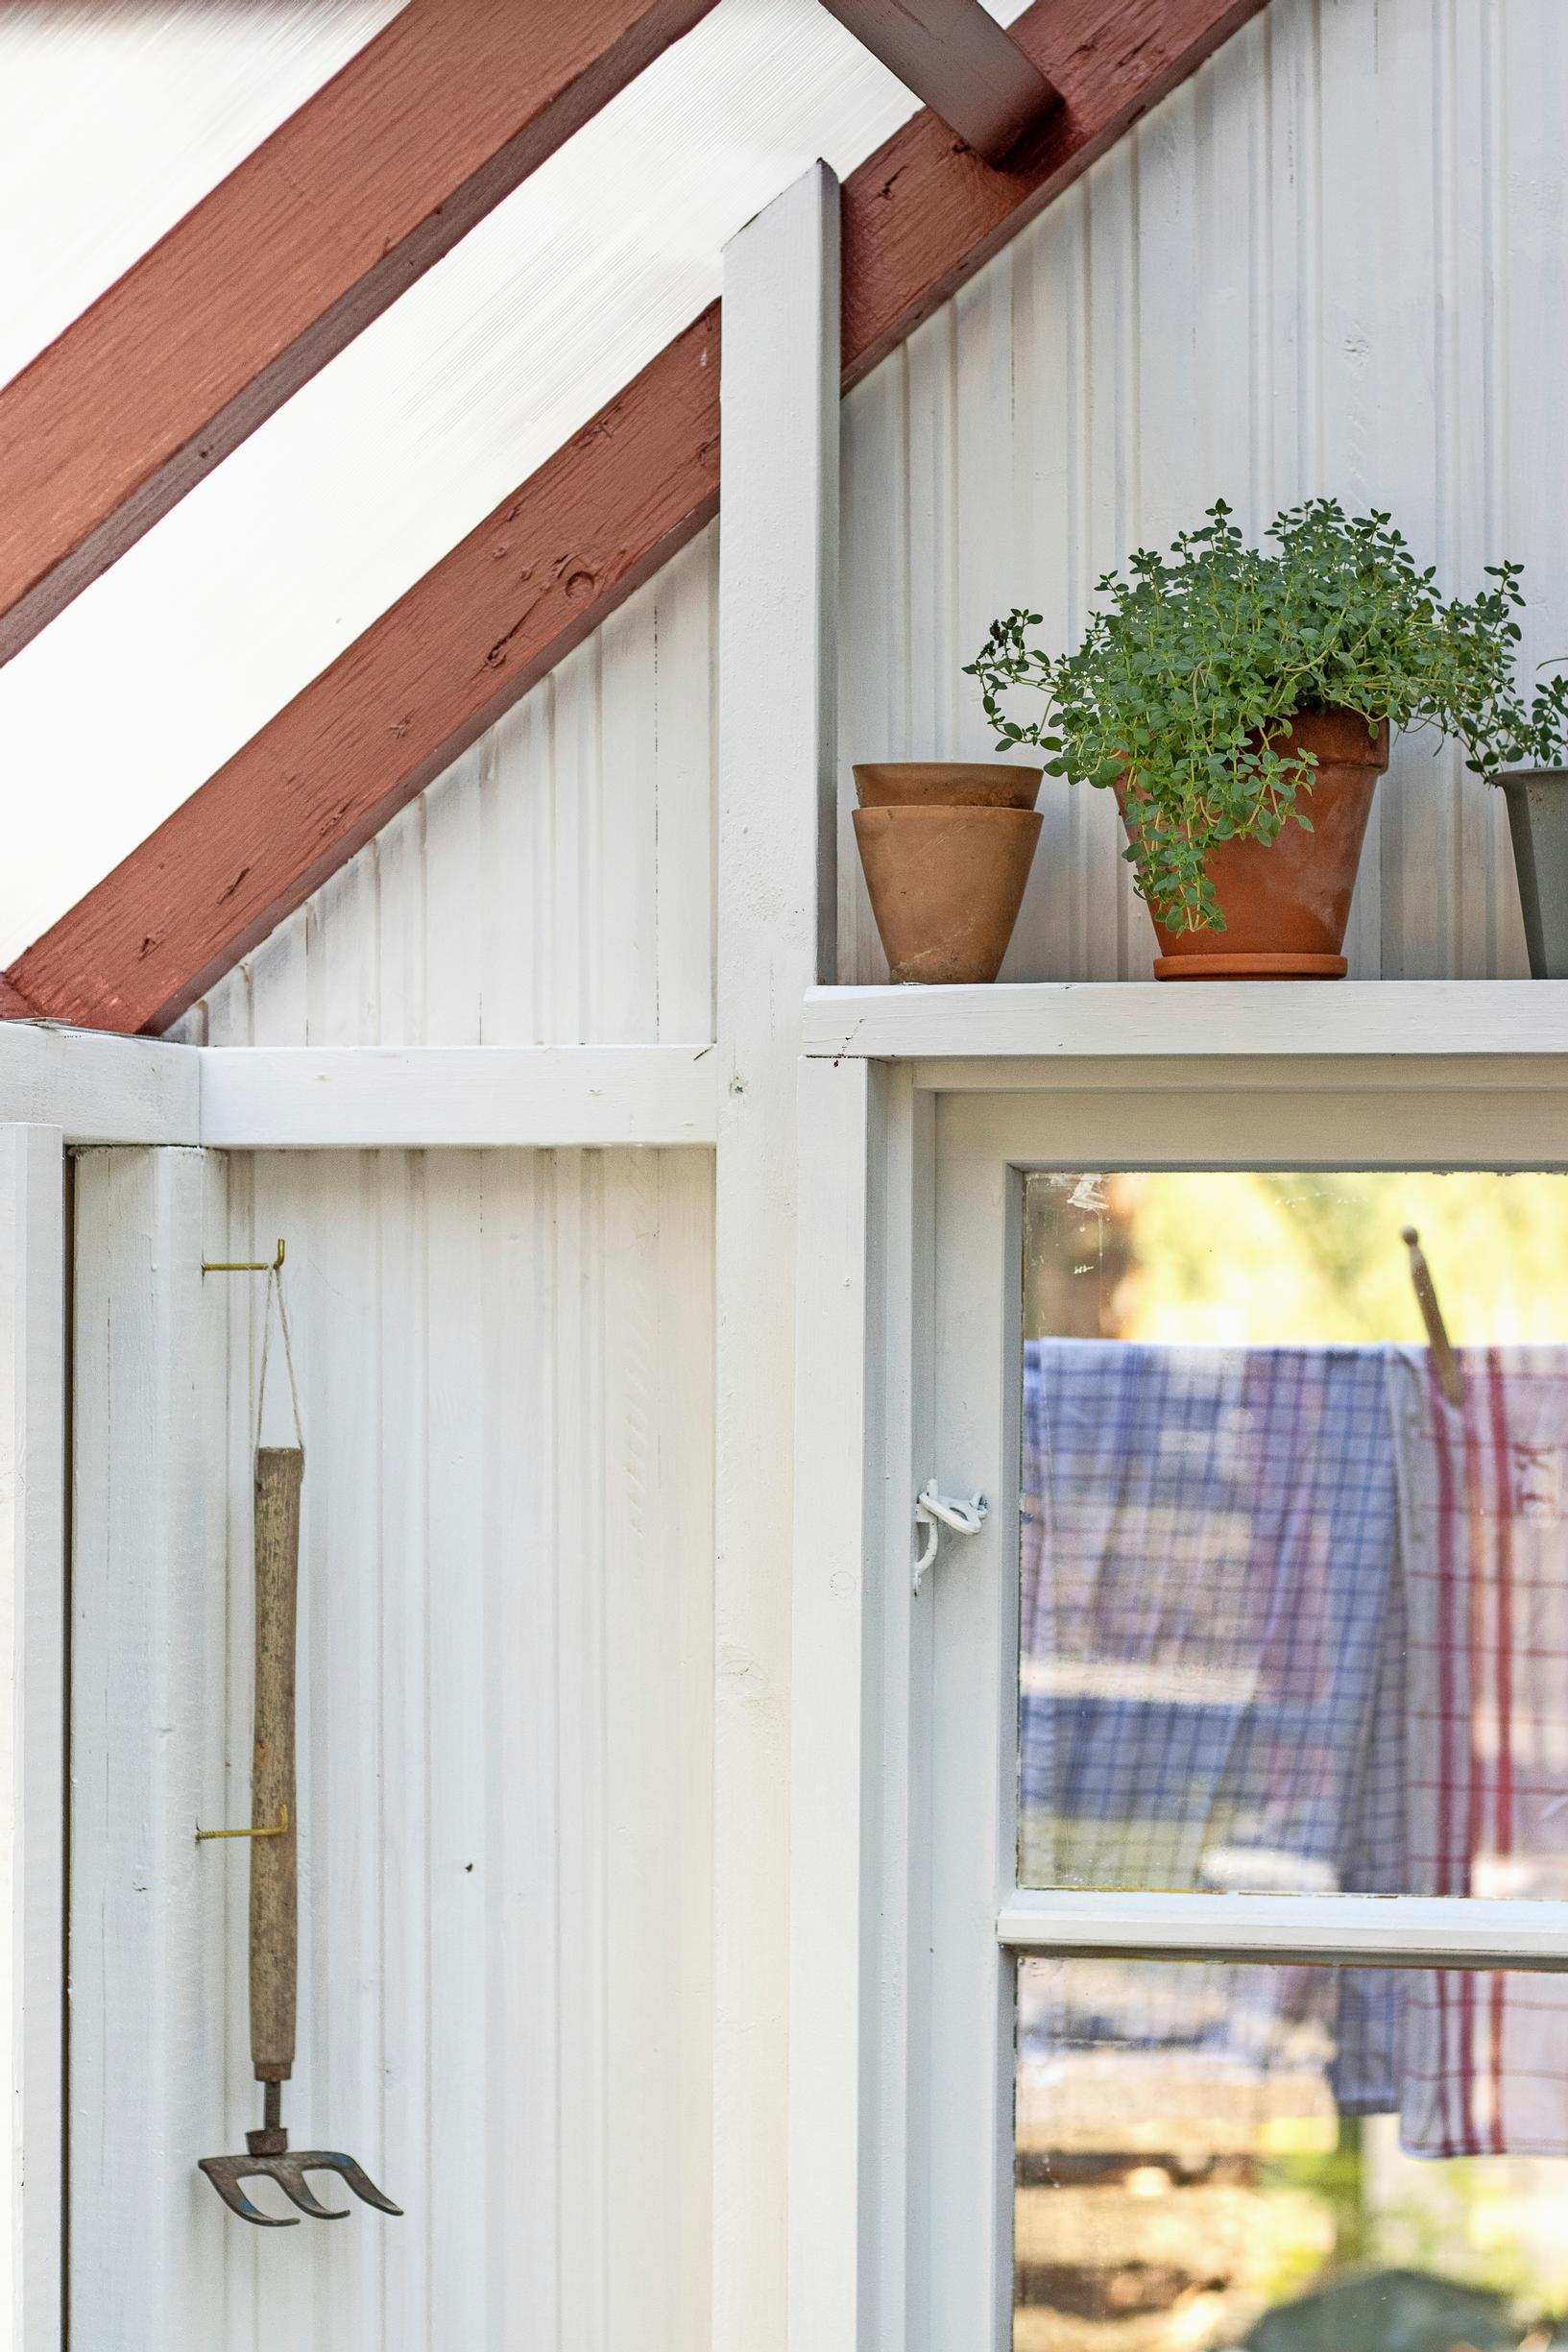
Attach nails and hooks of various sizes to the walls for tools and other necessities.

Photo of a raised bed with lavender growing in it.
Lavender and herbs grow in the raised beds. Attracting pollinators is important in the kitchen garden.
Photo of laundry hanging out to dry on a line.
Hand-me-down kitchen towels from Grandma and towels gifted by a friend are drying in the summer breeze at the end of the greenhouse. The kitchen garden gets sunlight from midday to evening, making it a perfect spot for drying laundry.

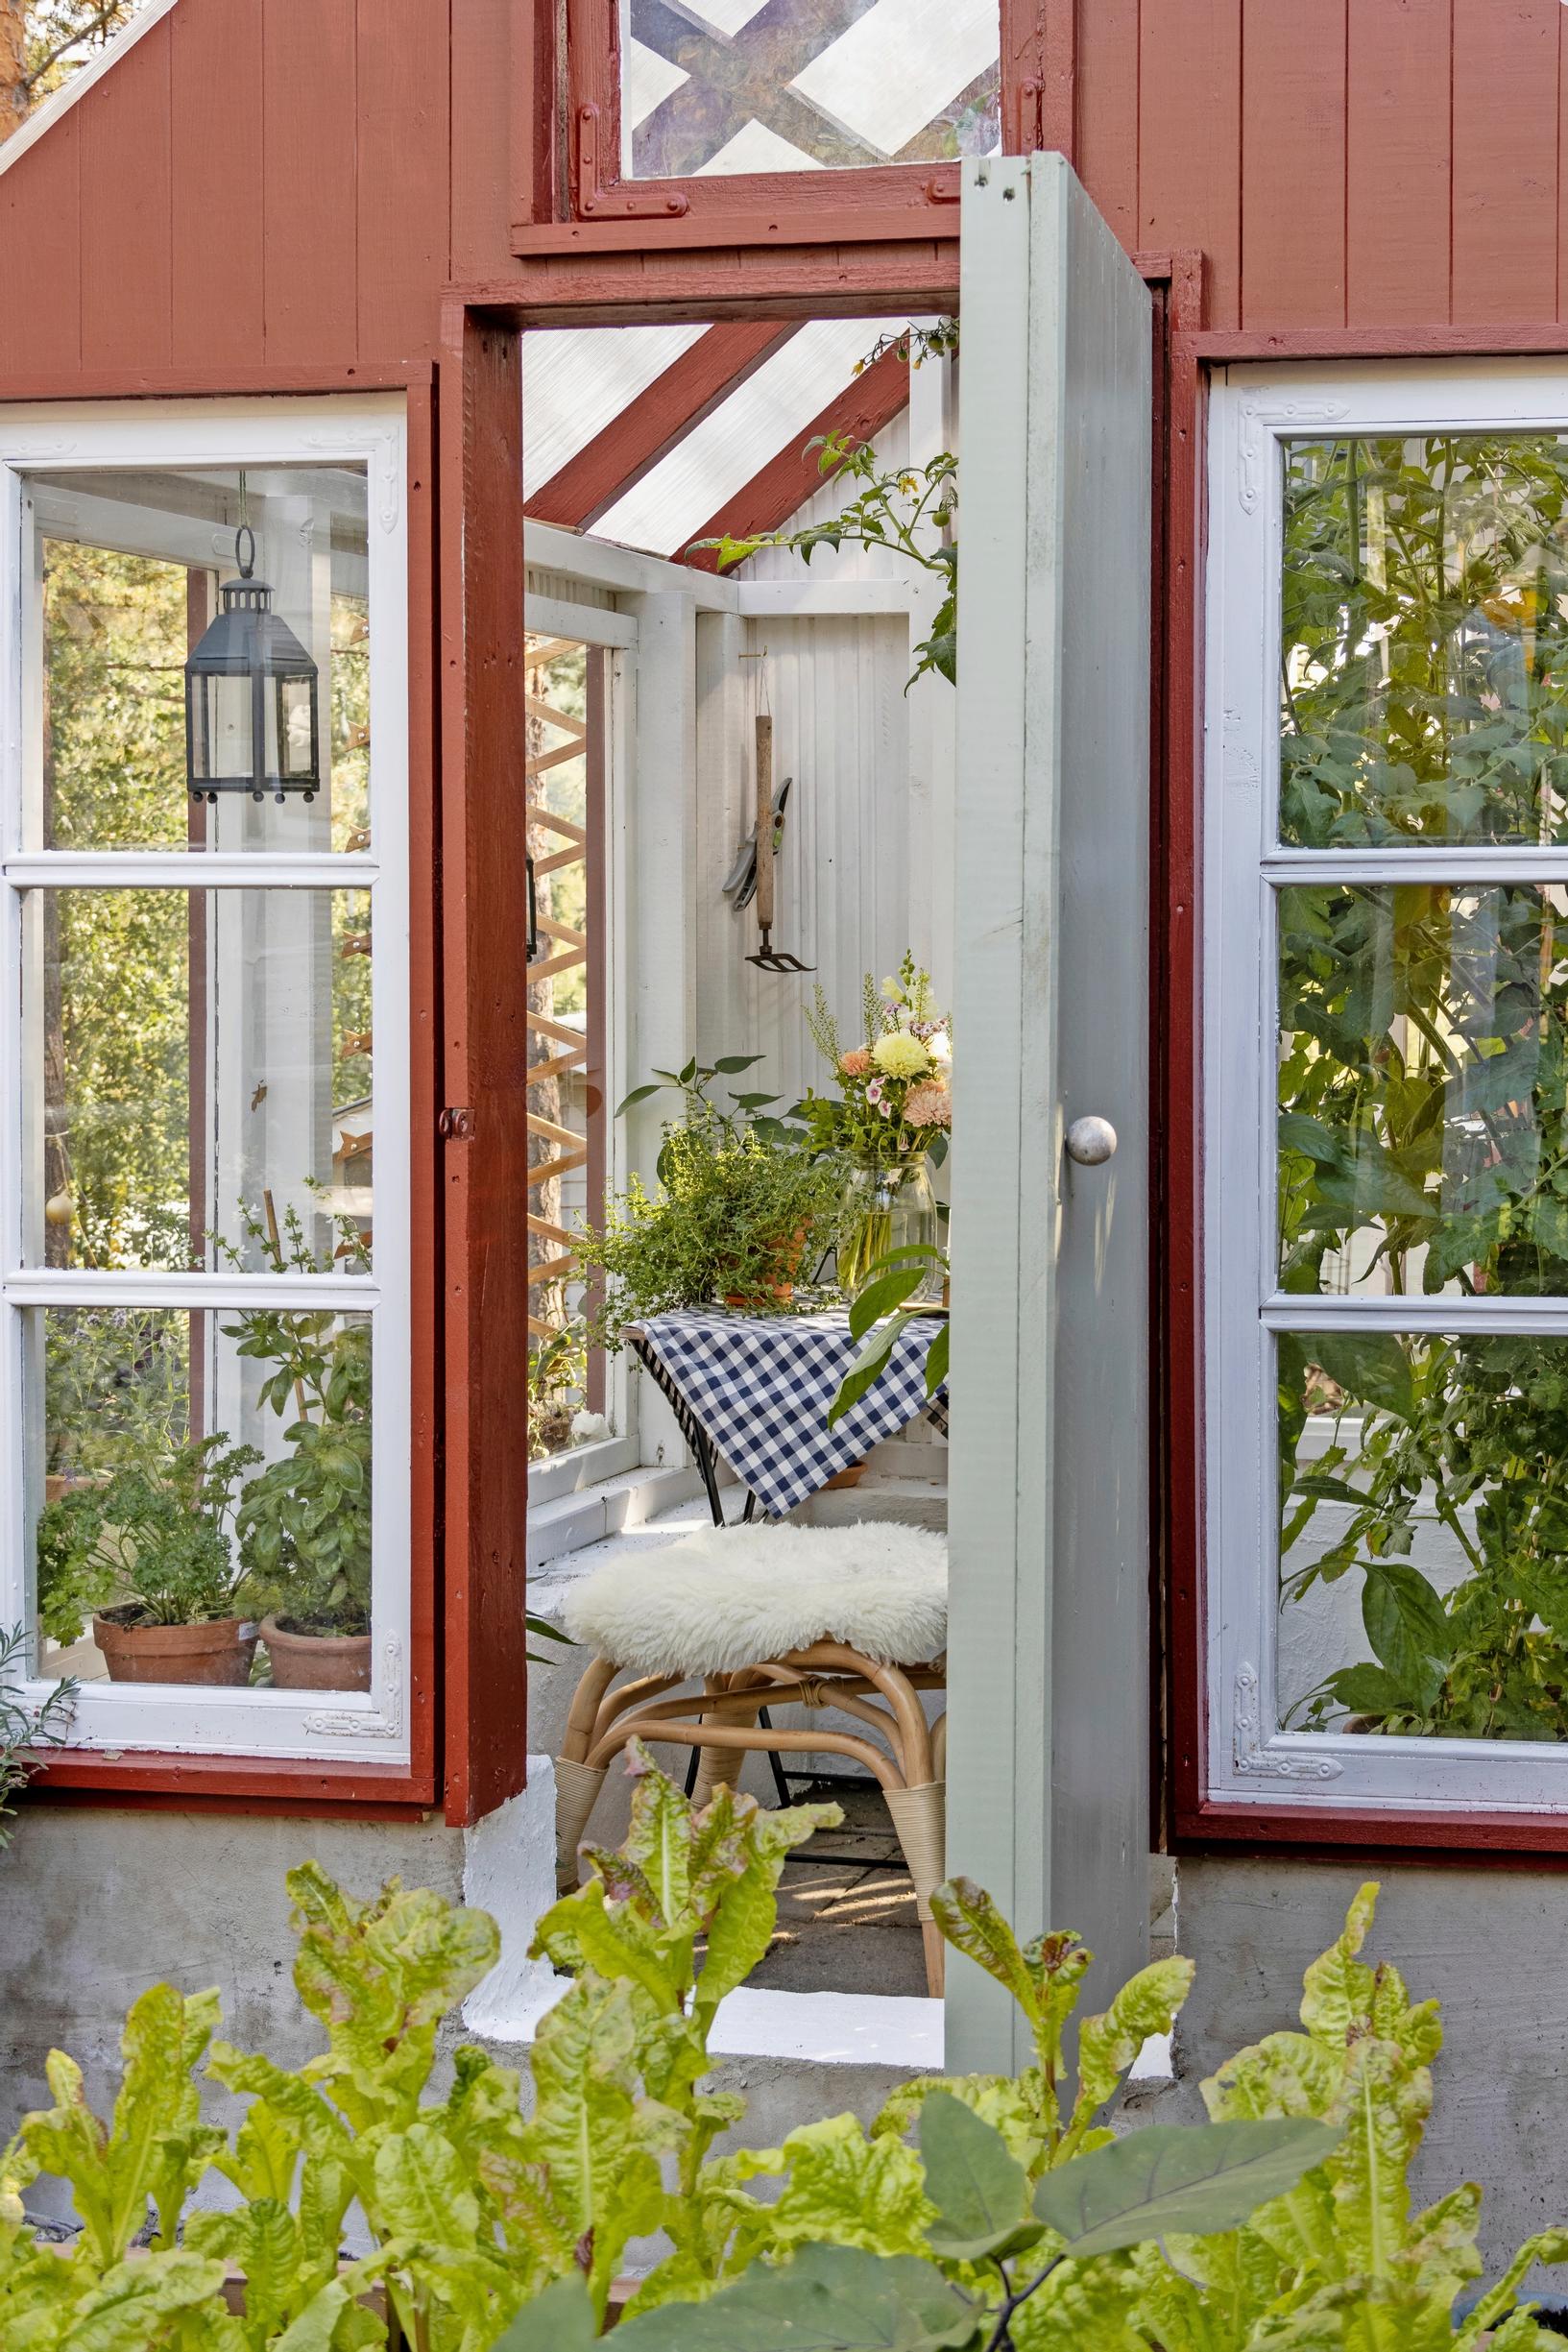
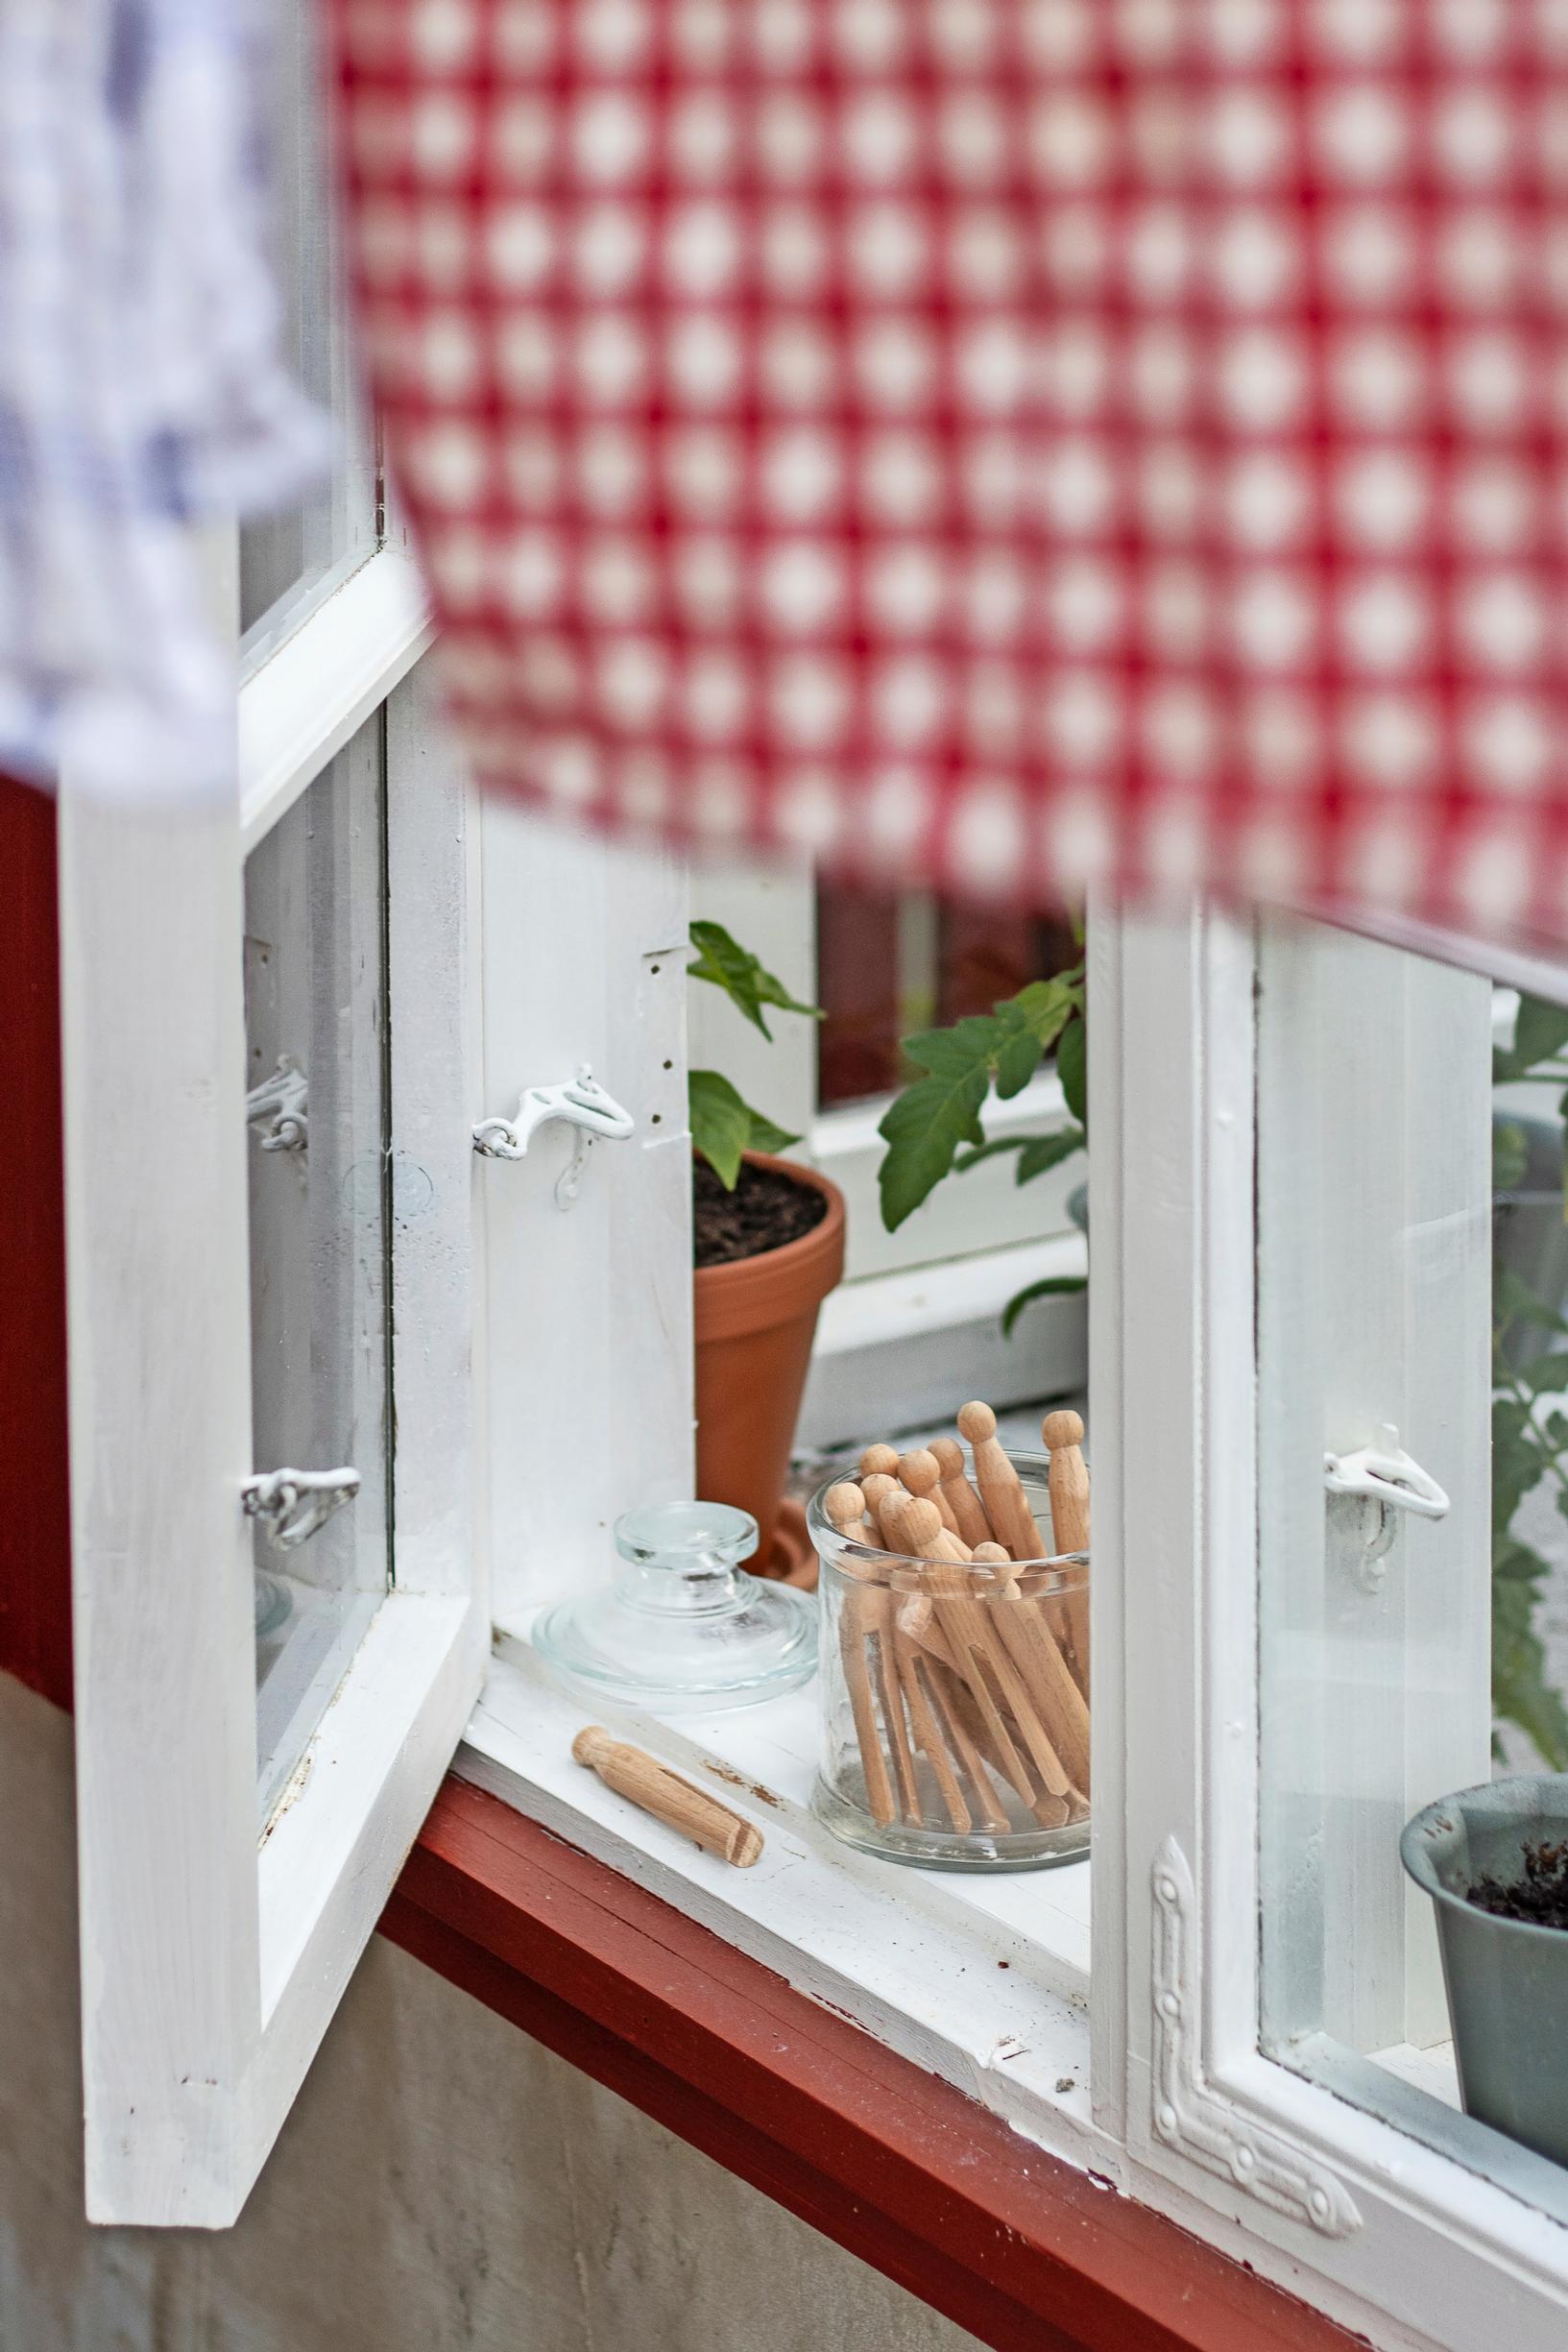
After I finished the foundation, the puzzle began: I rummaged through our storage shed for a variety of windows.

We had dismantled an old building to make way for our house and saved its windows, which now came in handy. I measured each window and drew scale diagrams on paper, making it easy to figure out the proportions and place the windows and door.

Photo of the homemade greenhouse interior.
Almost all of the greenhouse windows came from our own storage, and the small end window was a flea-market find. You can open the end window to increase ventilation if needed.
Photo of cosmos flowers in a raised bed.
In the kitchen garden’s raised beds, tulips bloom first, and in June Rilla plants various colors of cosmos that she grows from seed.

I quickly realized, that there was no point in stubbornly hammering every nail myself if help was available. My spouse stepped in when it was time to attach the roof trusses and install the honeycomb roof panels. We sawed and nailed the panels as a team.

The greenhouse went up in bouts of drizzle and scorching sunshine. It was an excellent practice project that let me experience many different work phases, along with successes and failures.

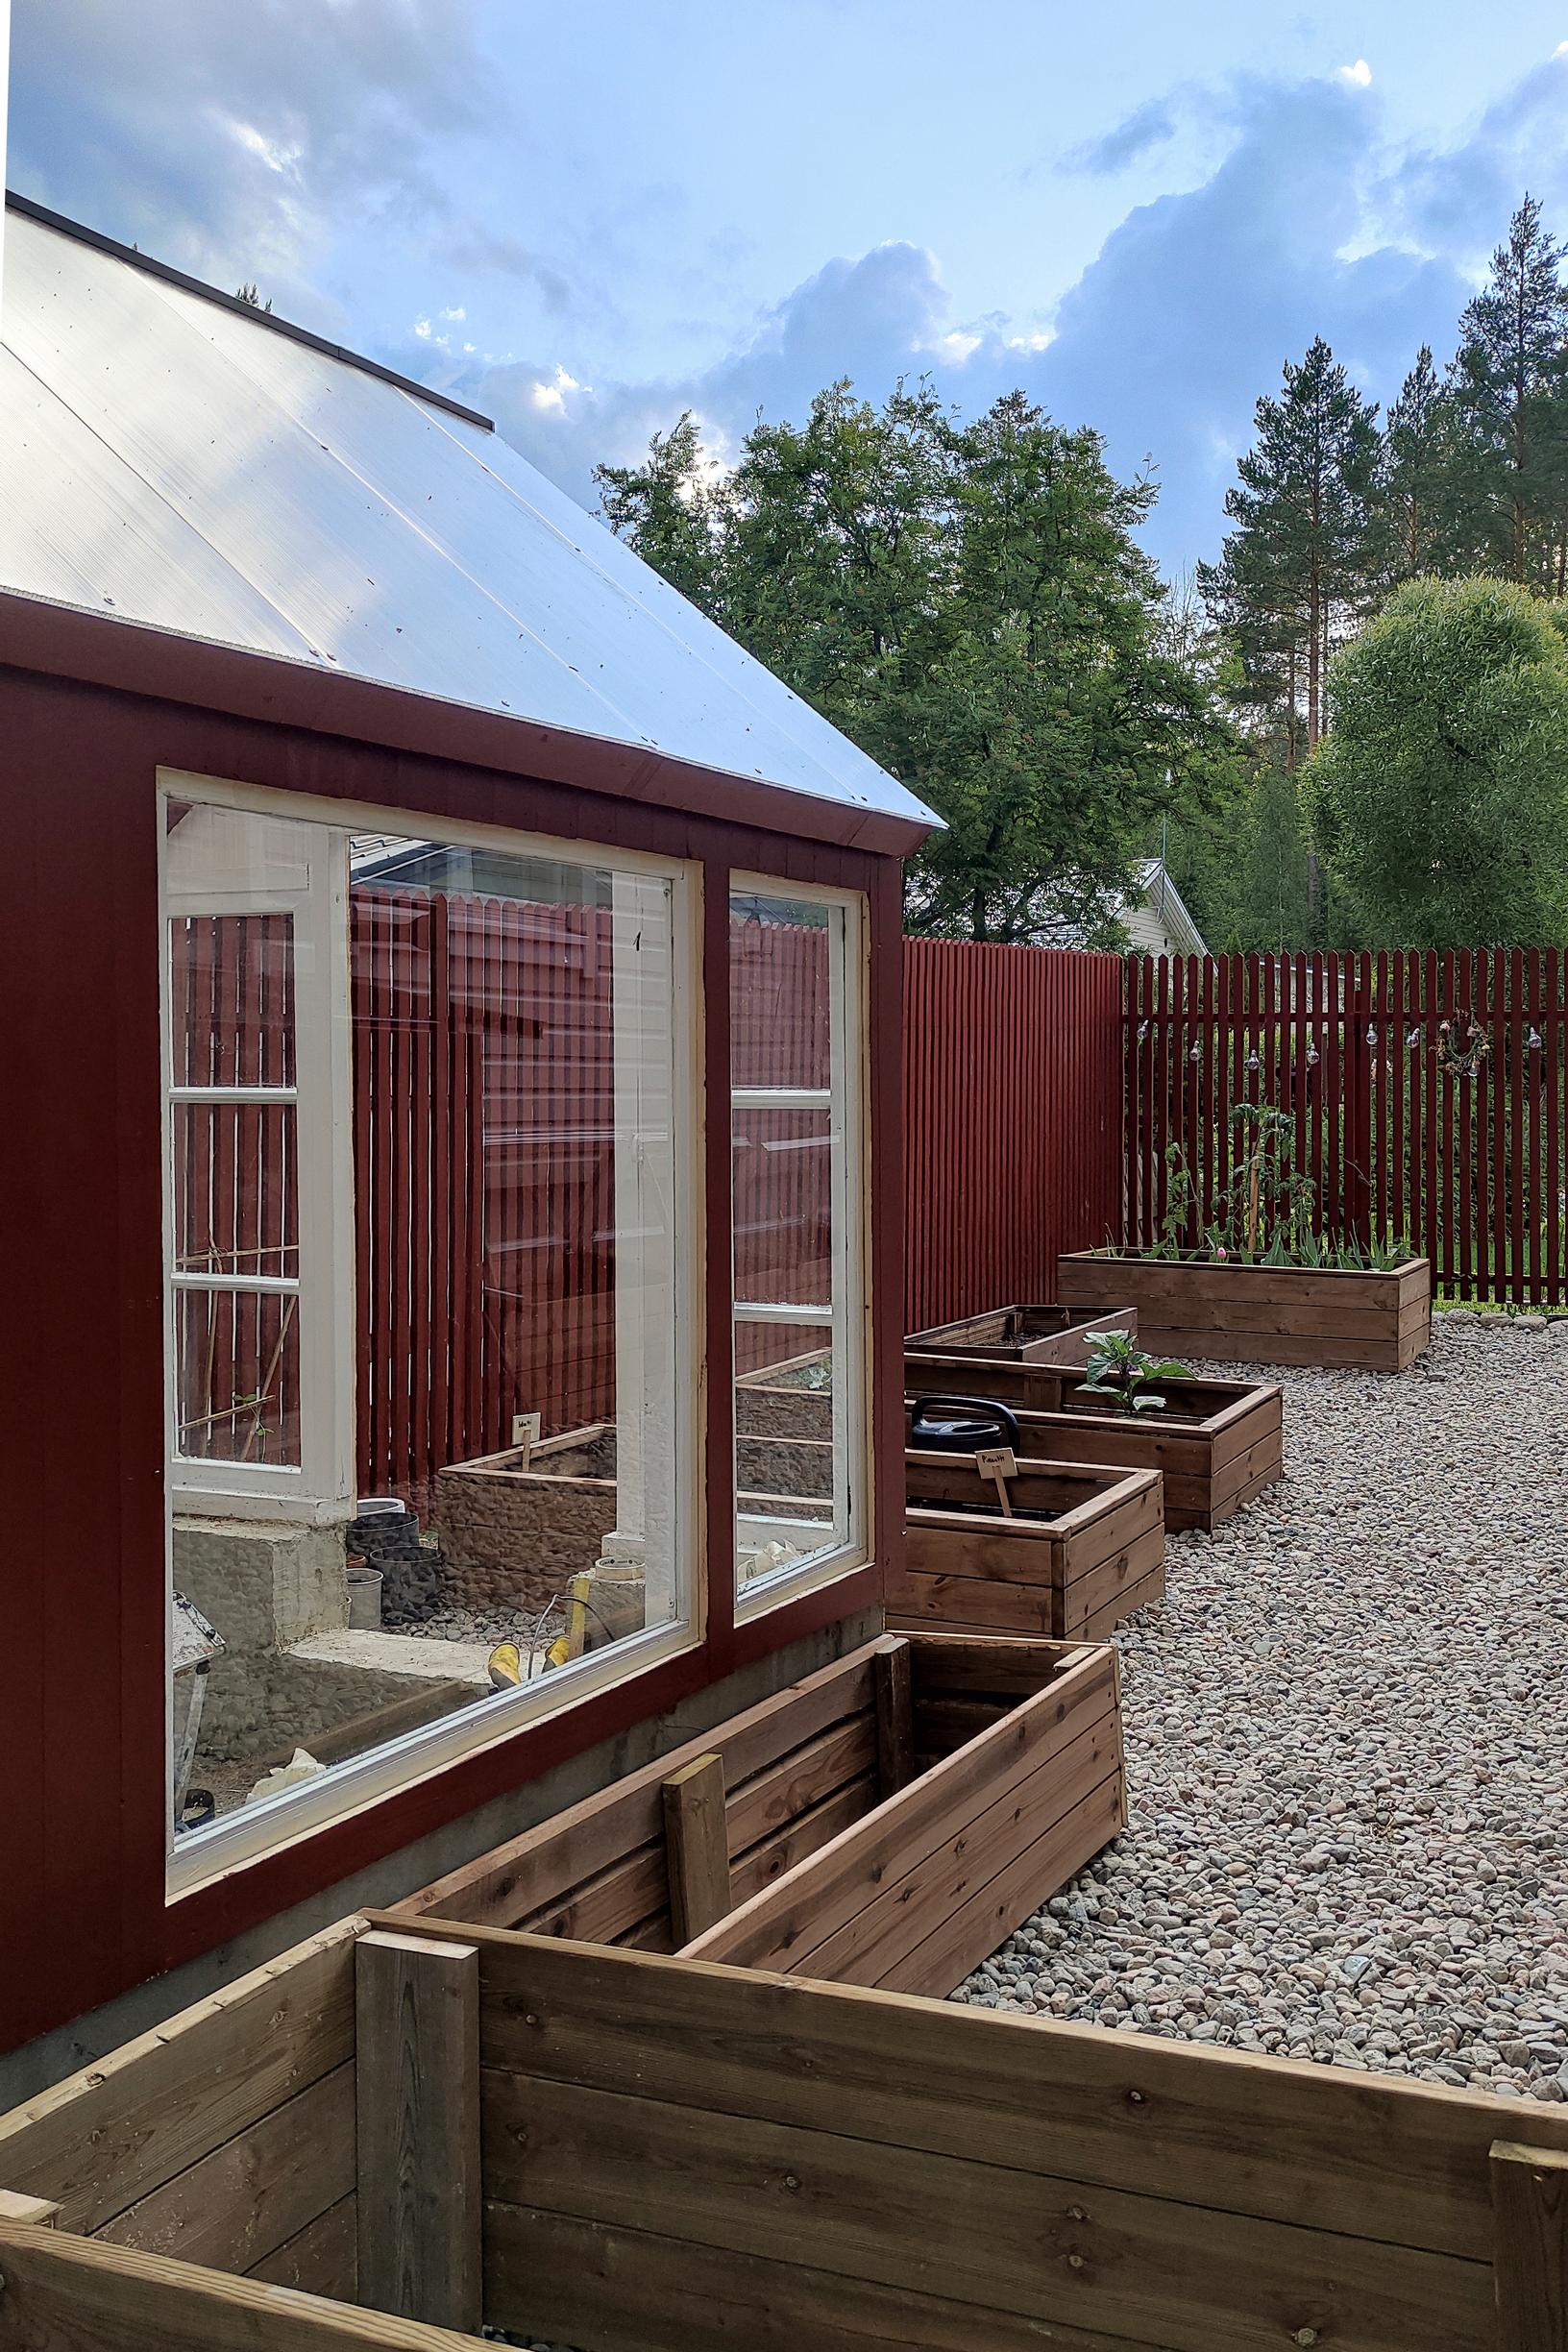
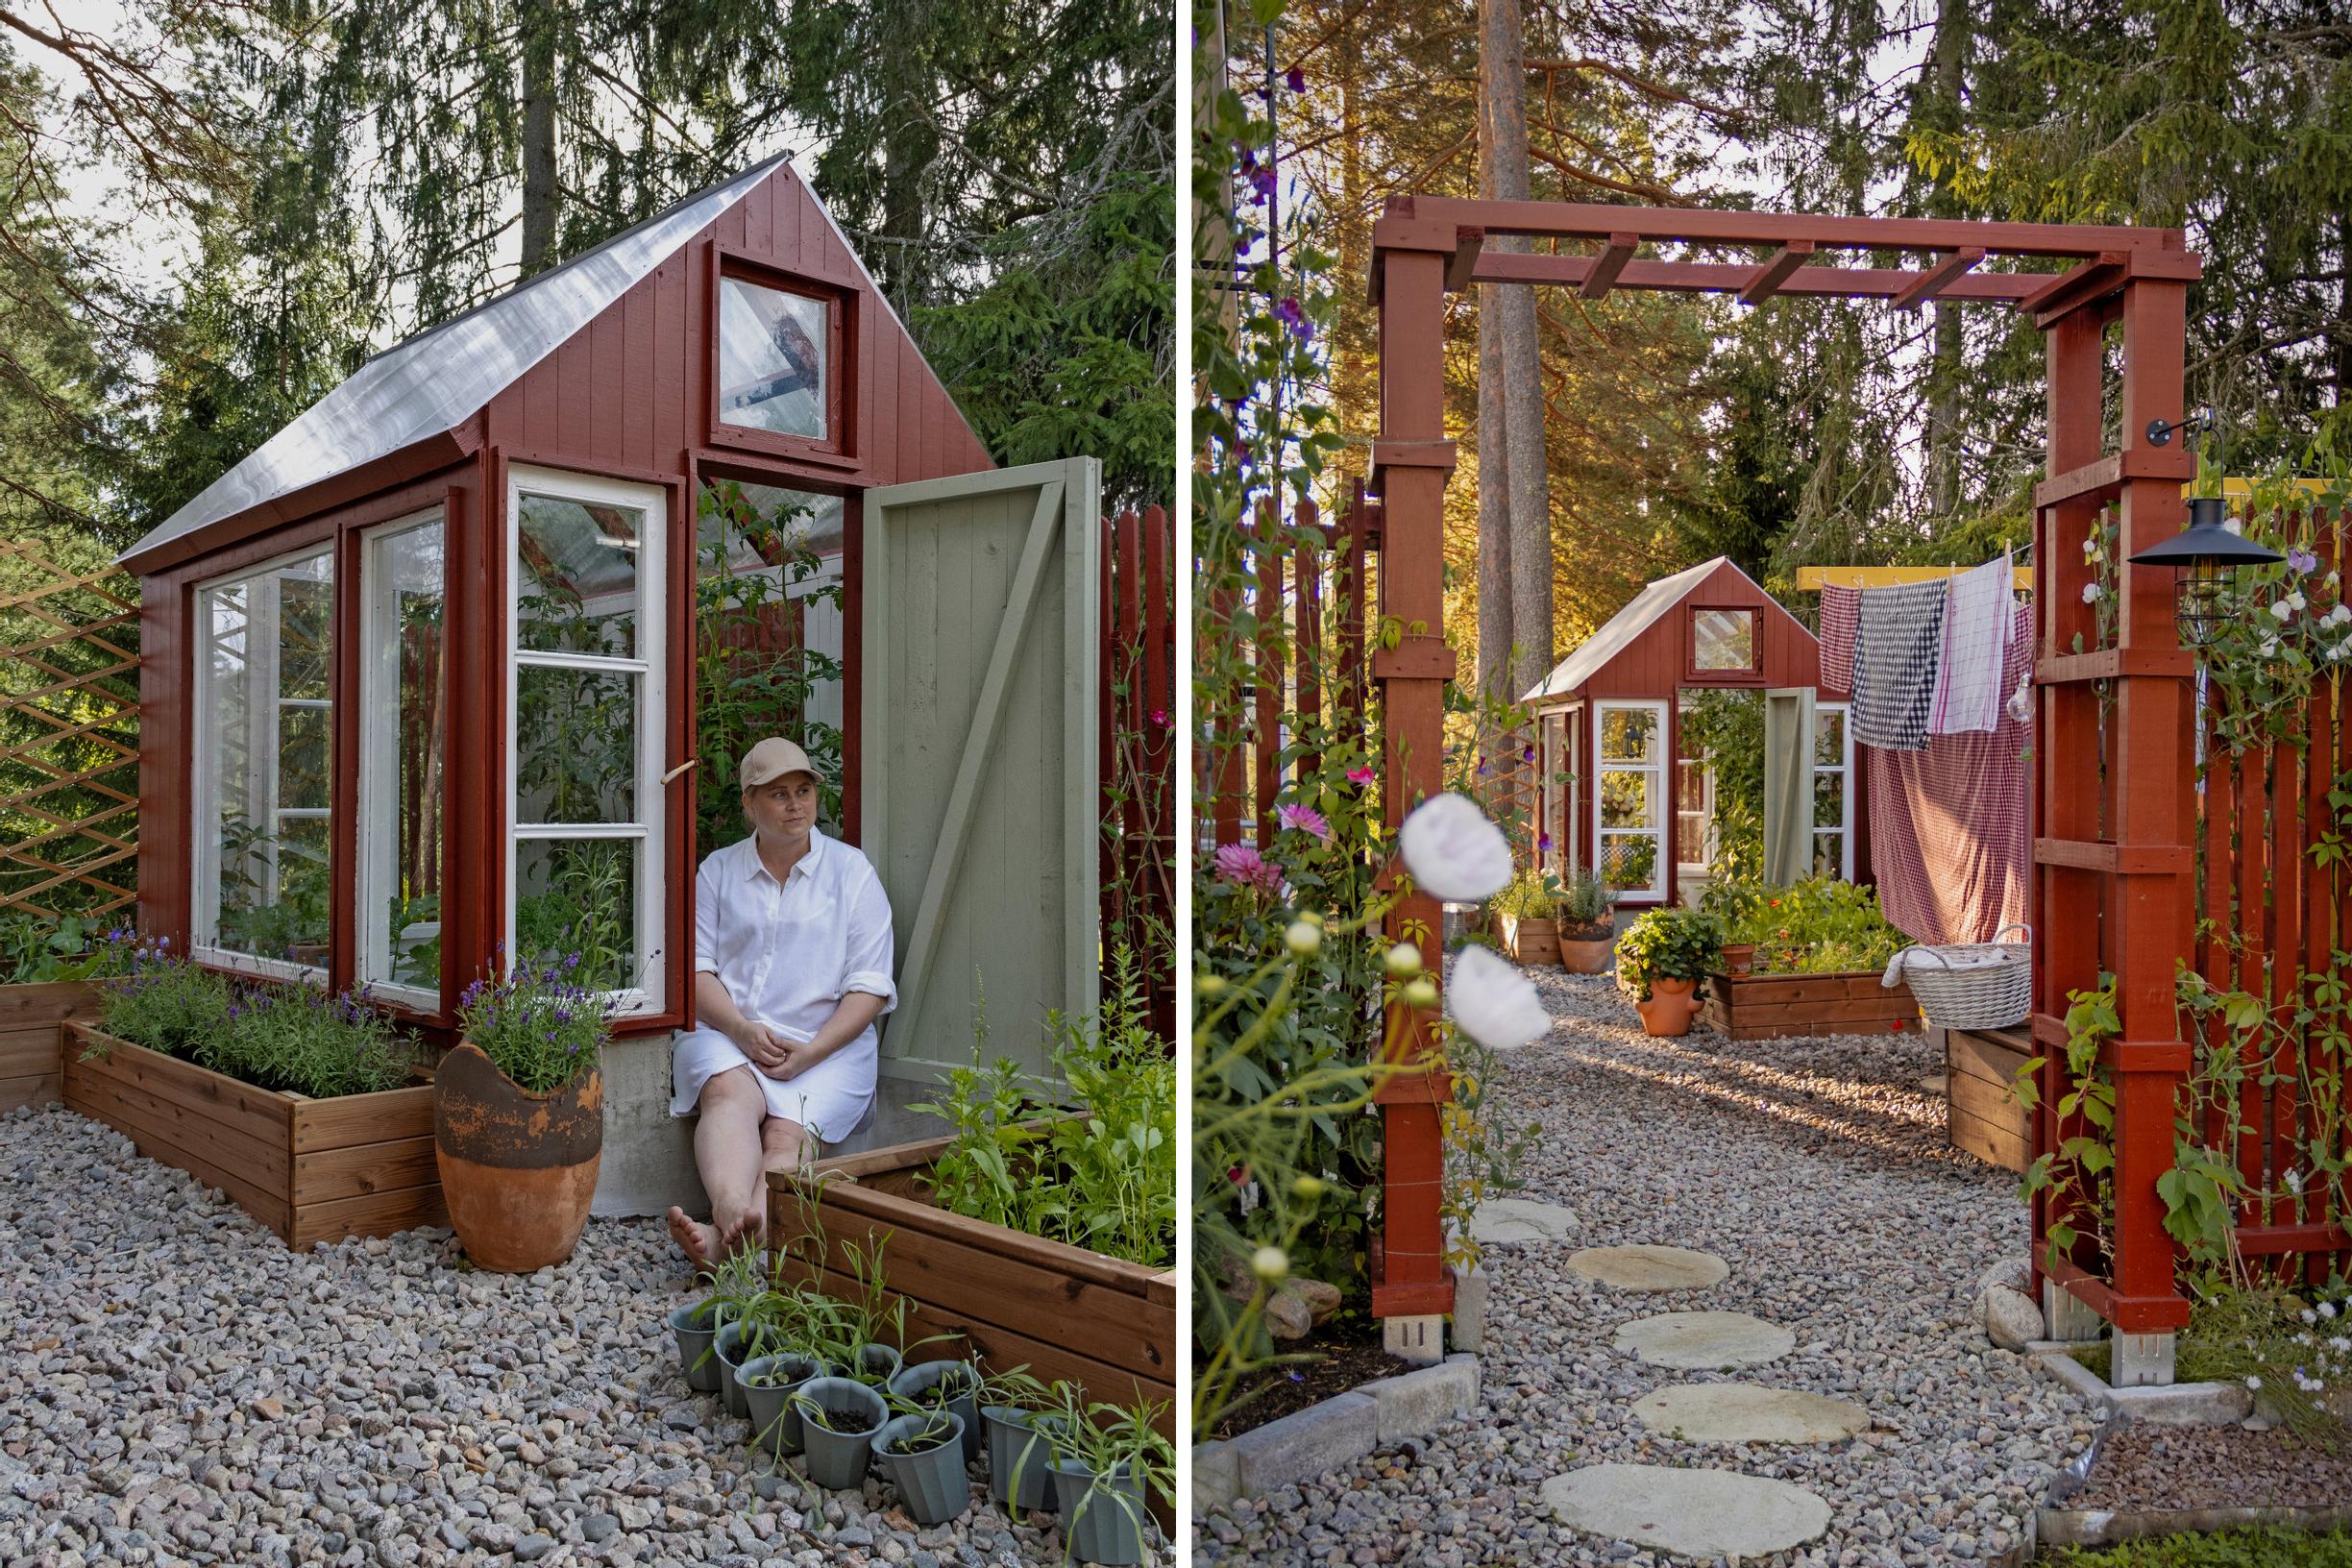
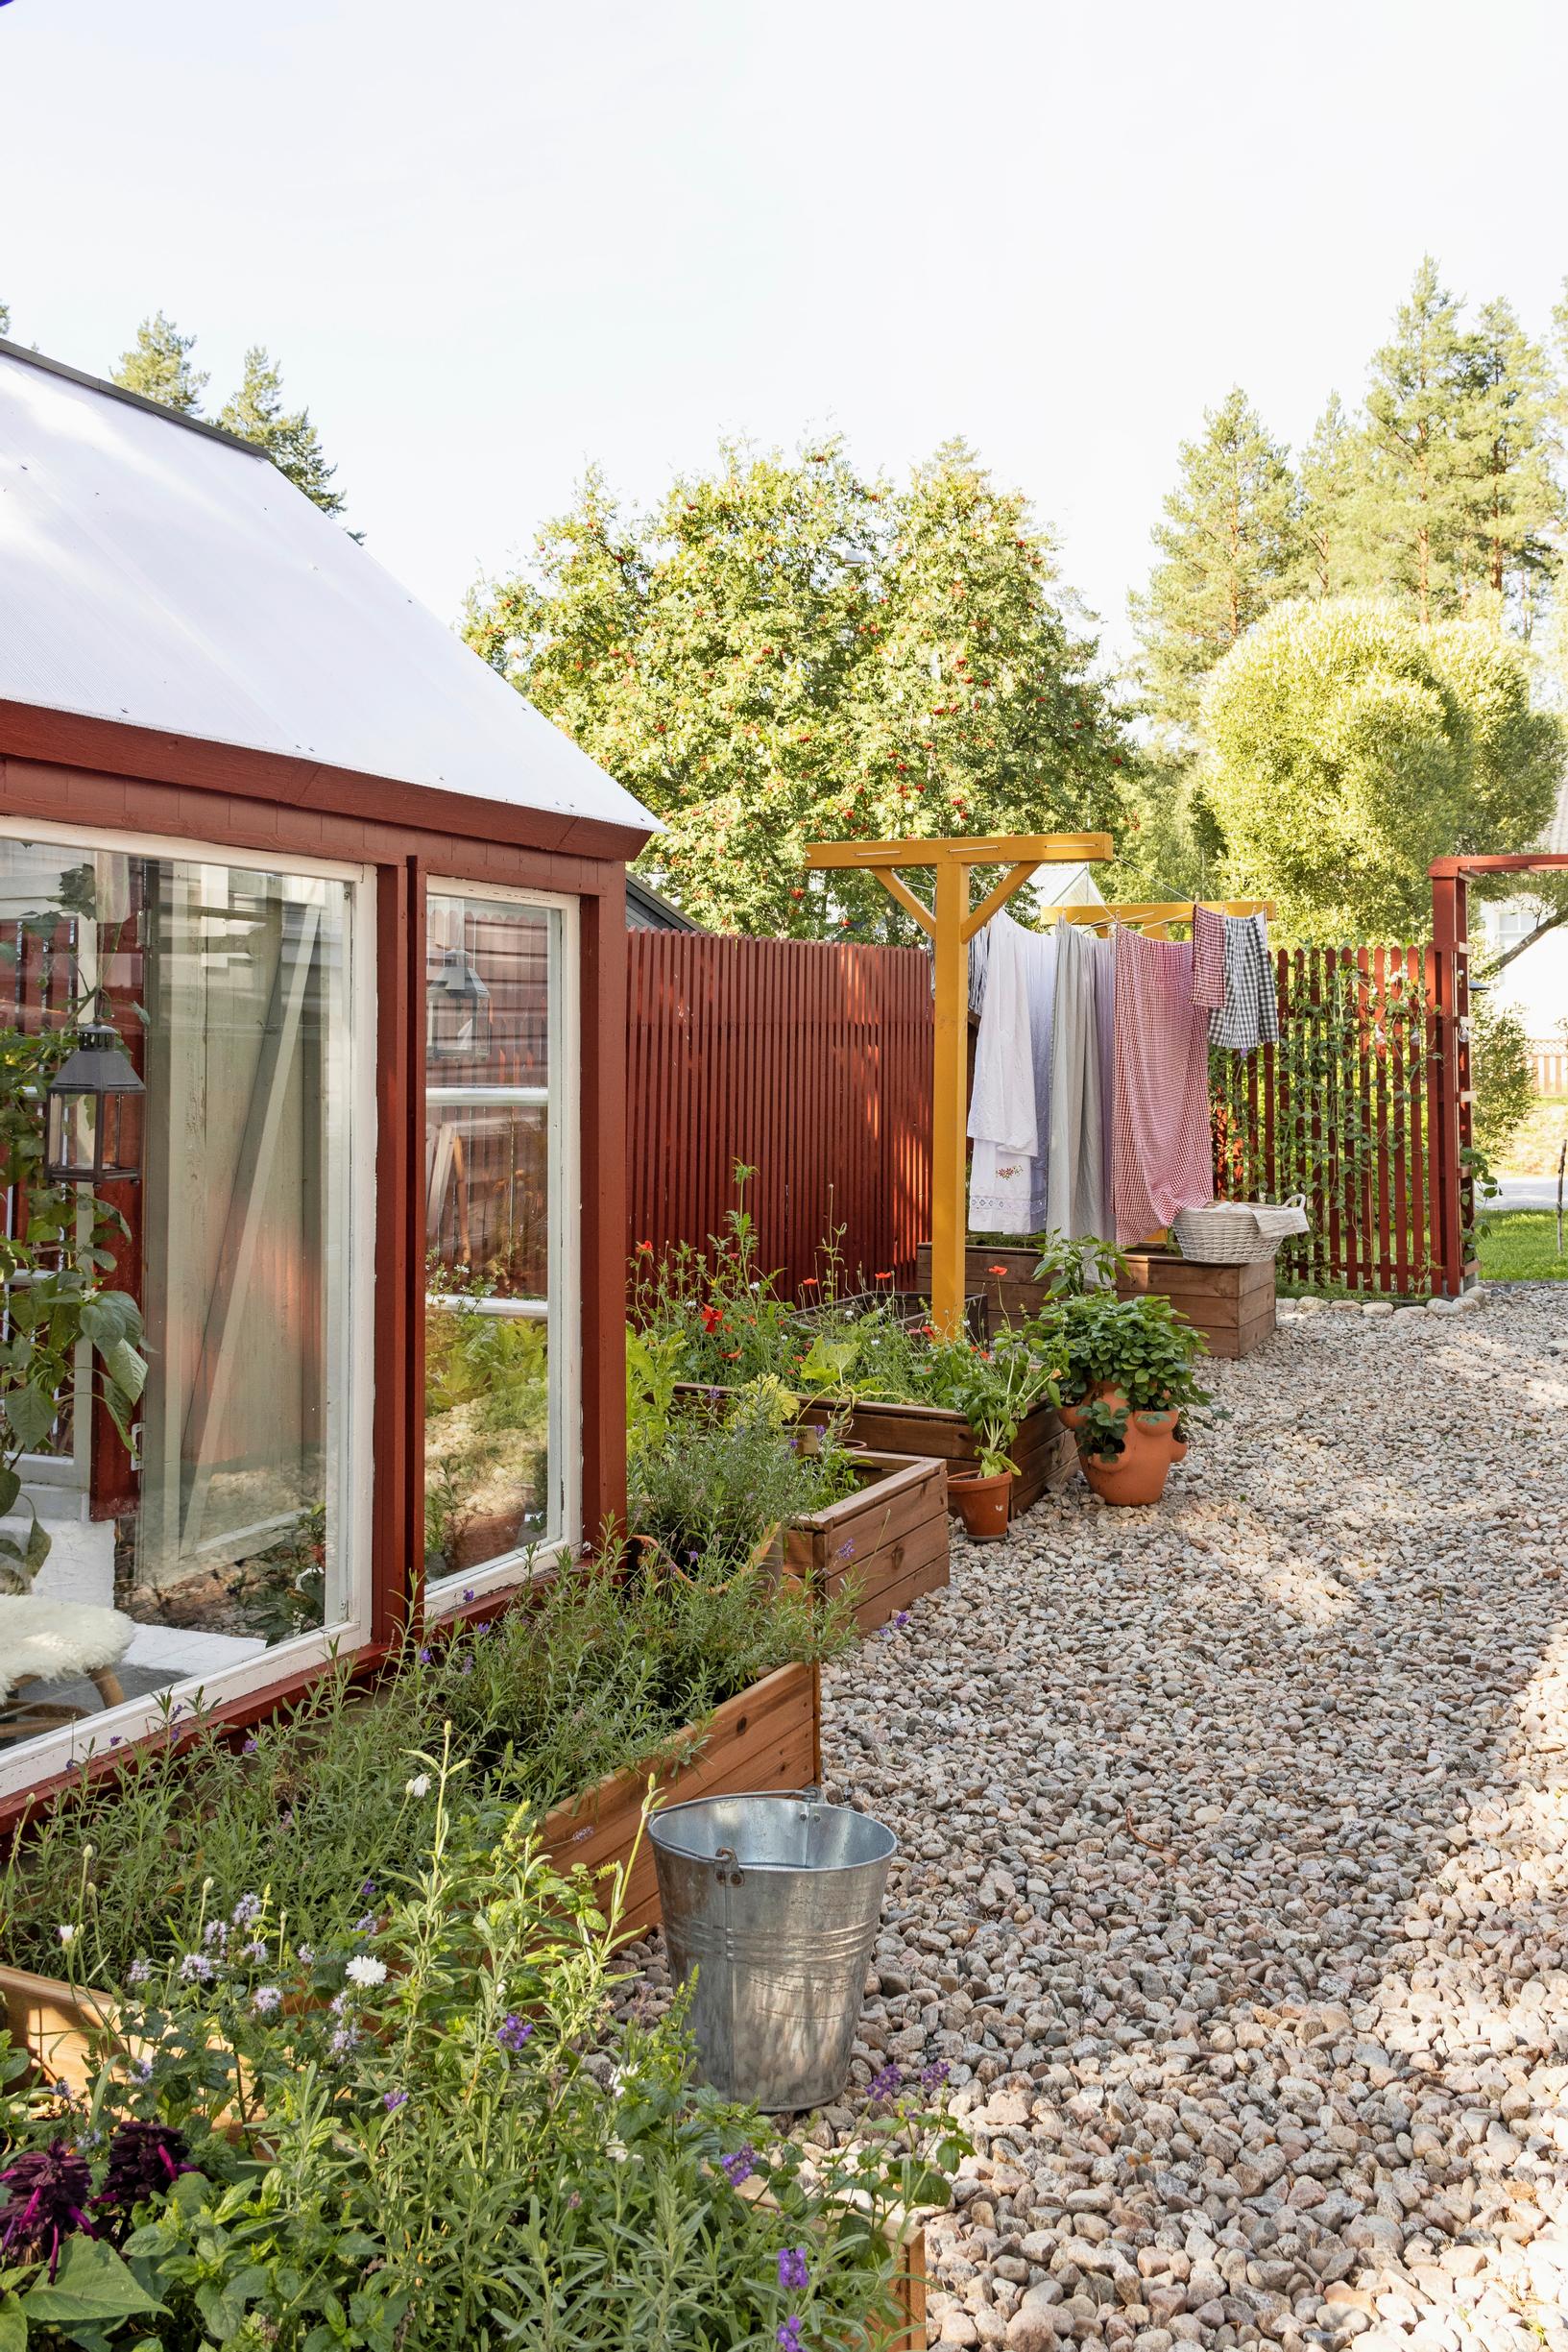
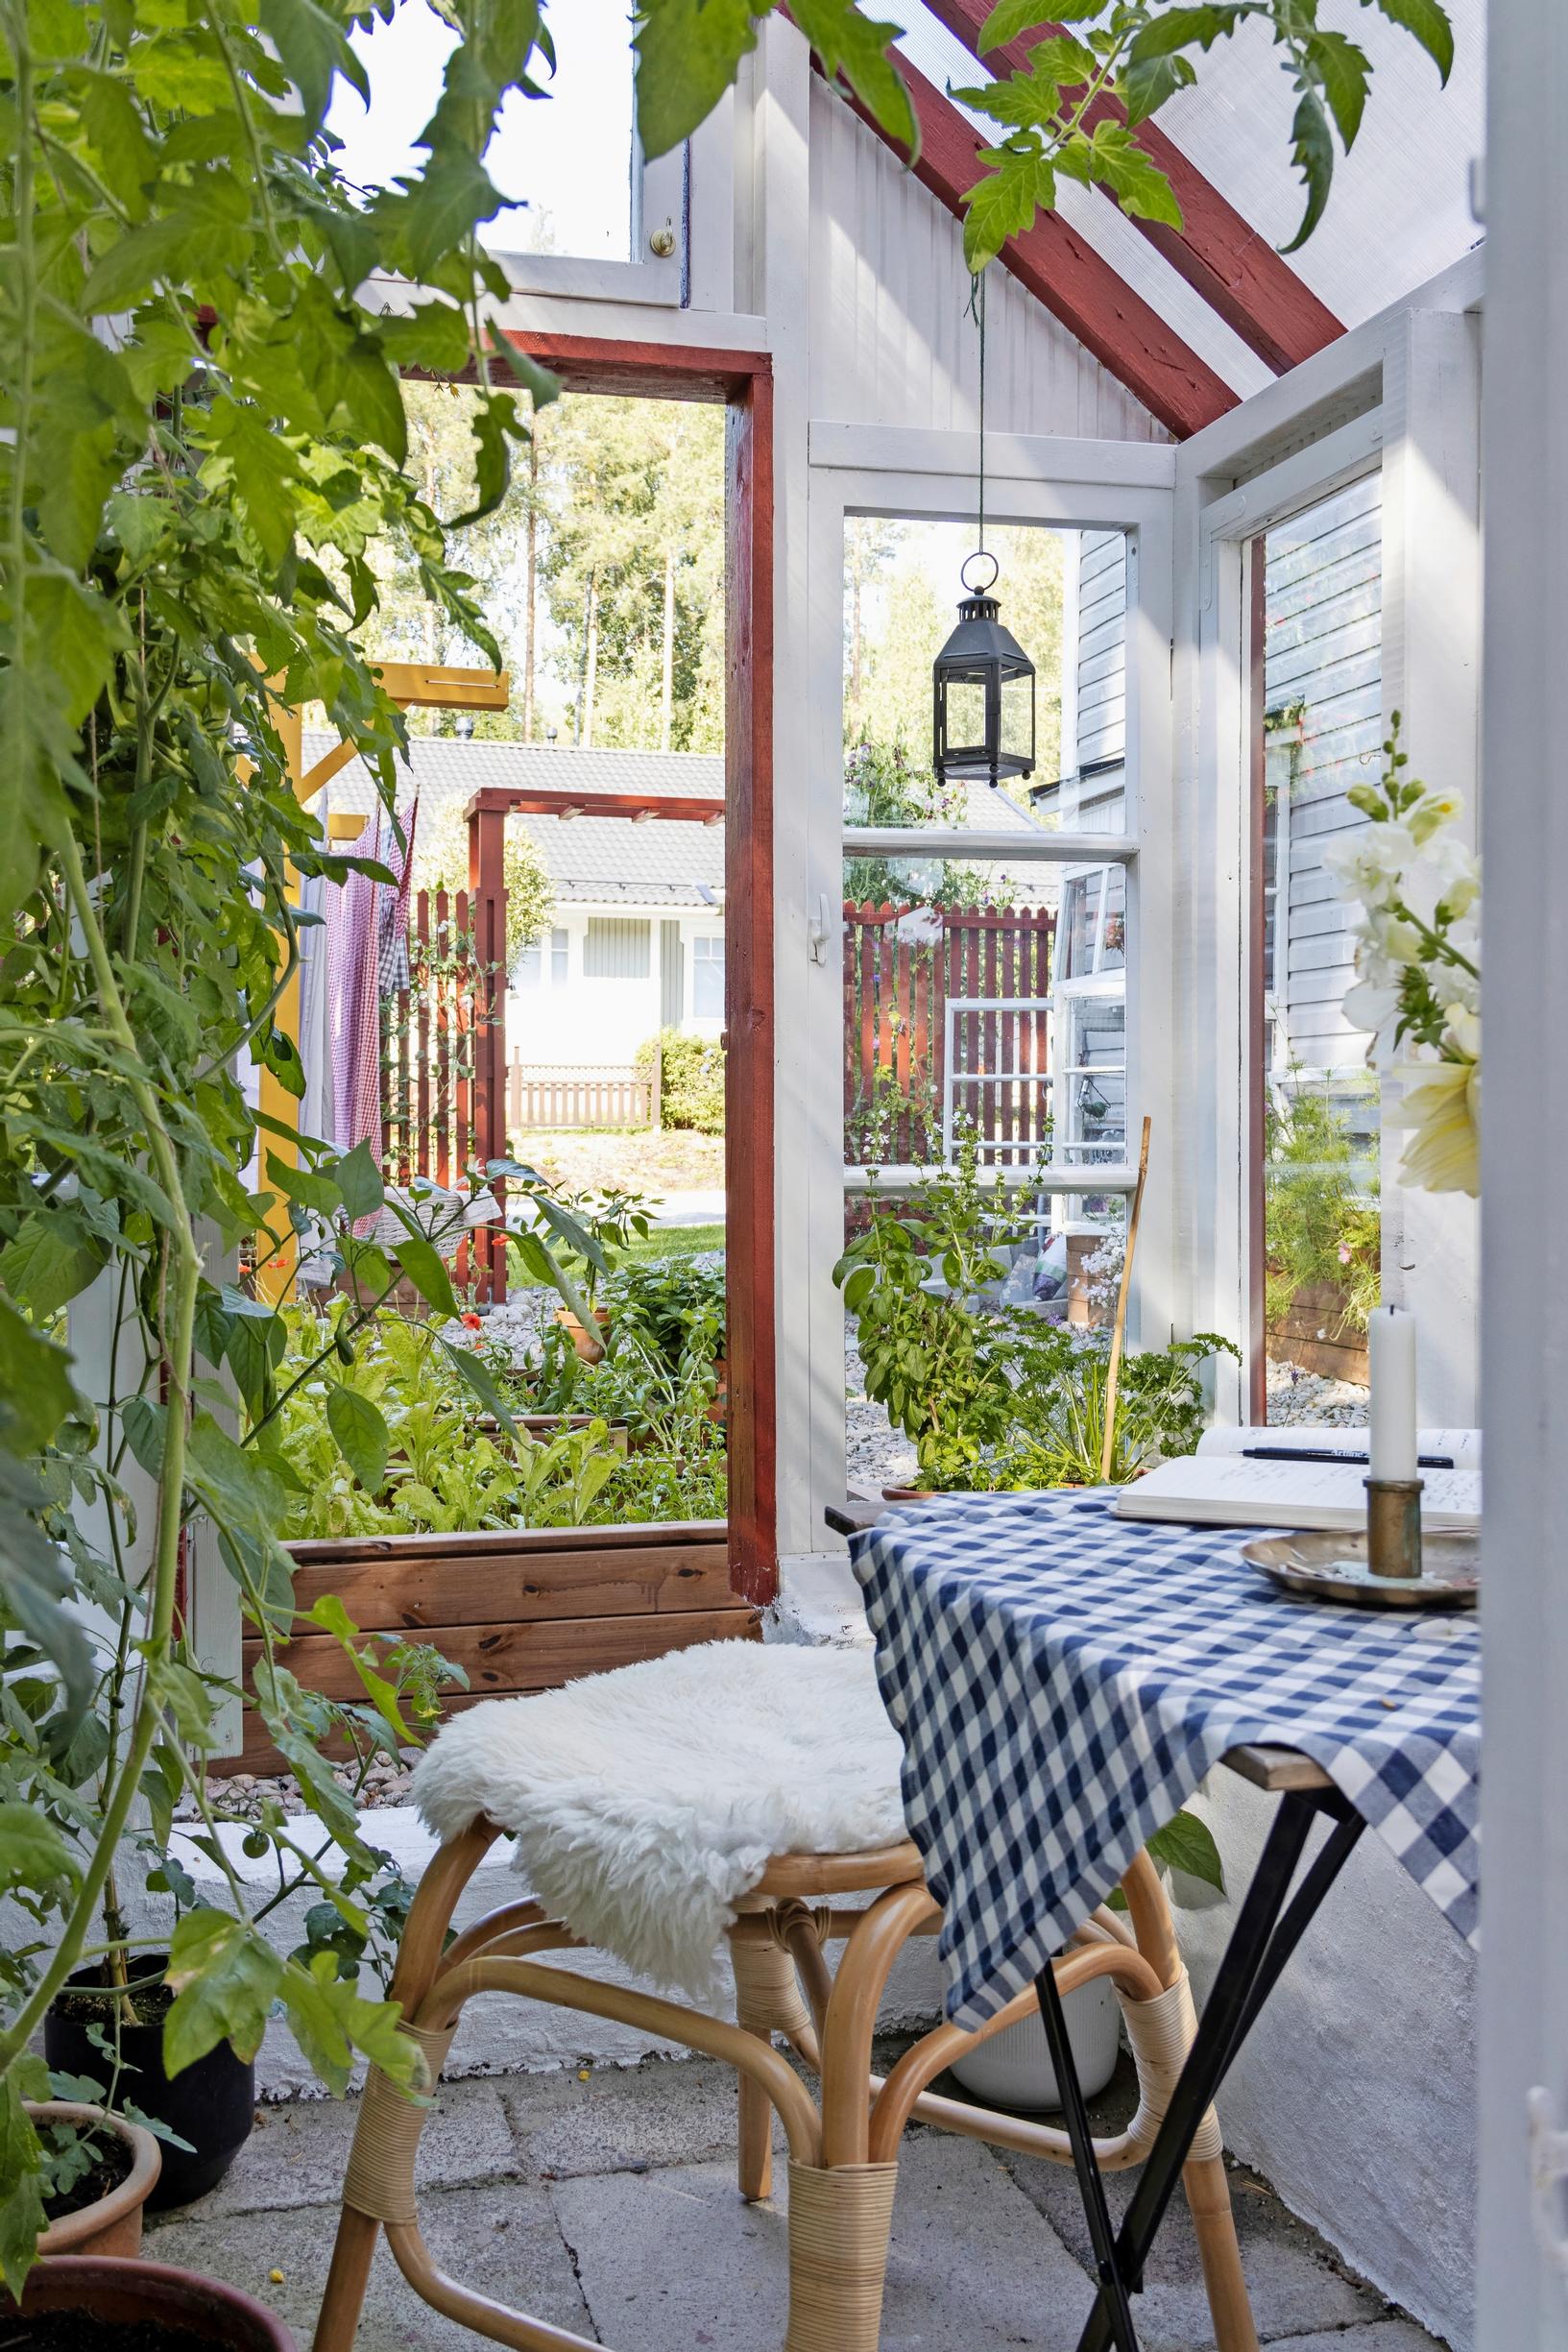
We’ve grown tomatoes and herbs in the greenhouse, enjoyed coffee, written poems, and even hosted an end-of-summer party with cheese and wine for friends. One friend noted that the greenhouse and kitchen garden feel like their own little world. I’d say that’s spot on.

A personal world doesn’t have to be big—sometimes a small one is enough.

Rilla Tervonen sits in the doorway of the greenhouse.
The door’s paint color is Tikkurila’s Karviainen.

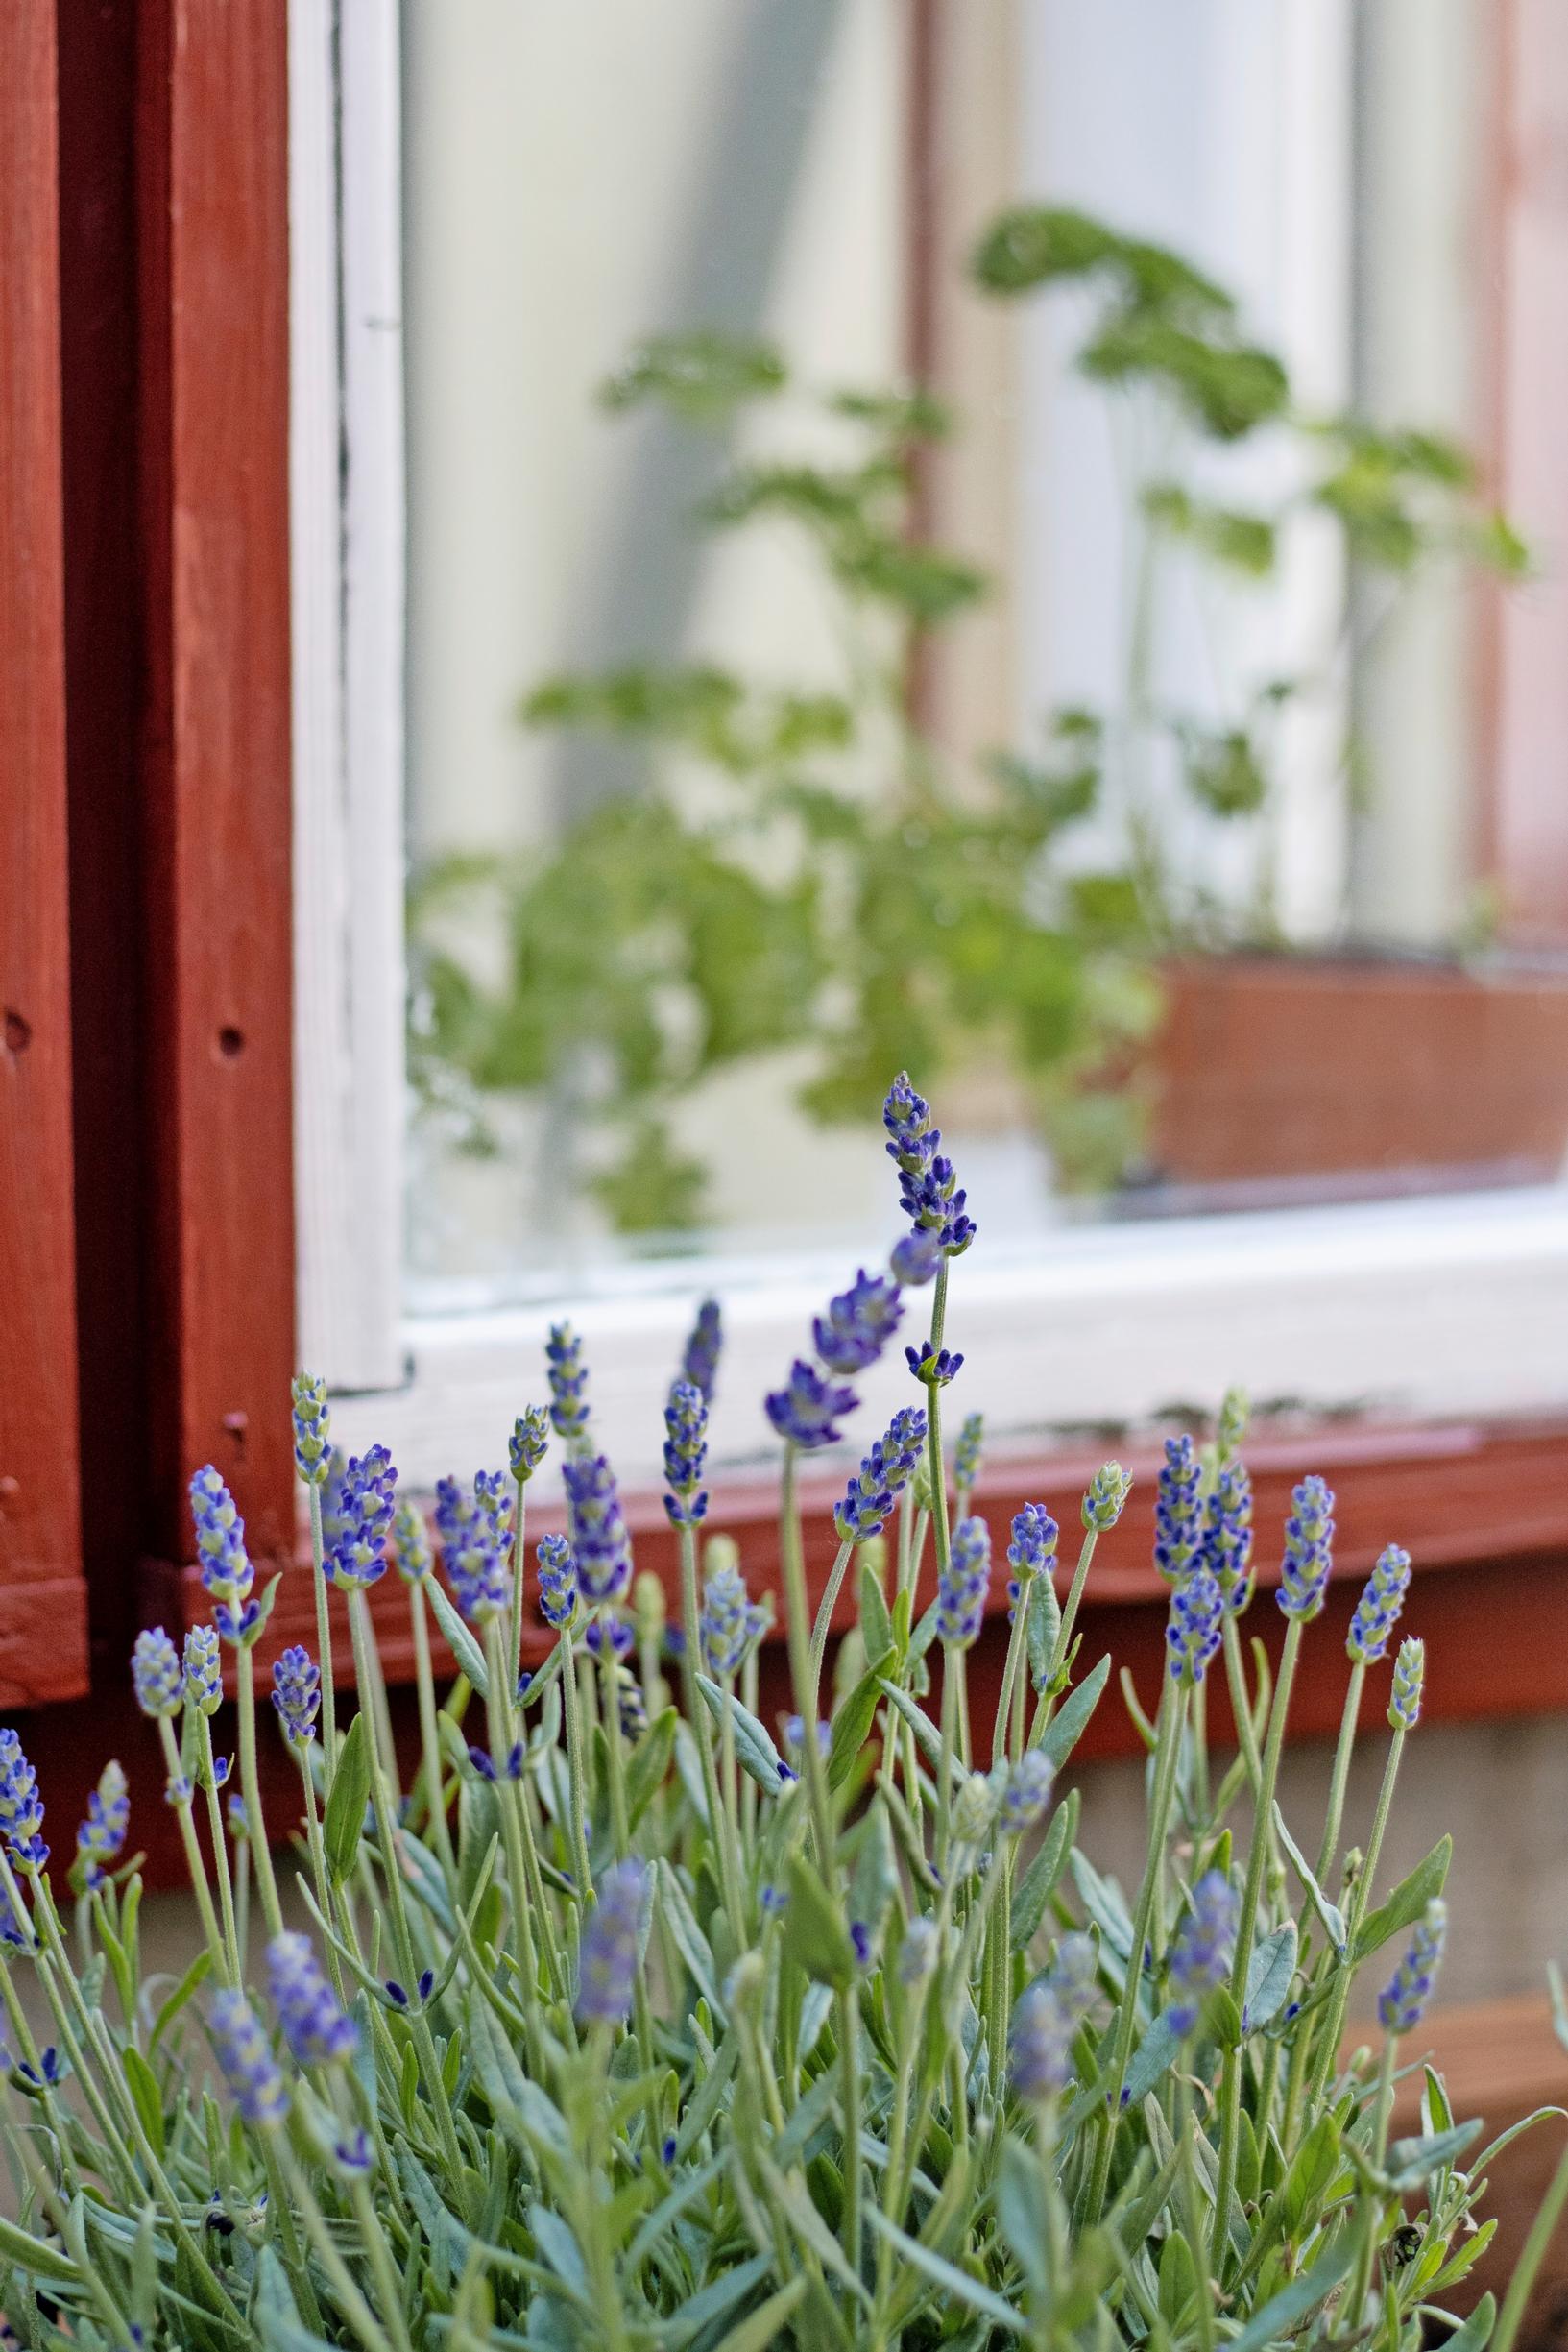
Here’s where it all started!

The foundation and old windows for the greenhouse
With solid ground and a level foundation, the greenhouse stays upright, and there’s no need to fear frost heave. A spirit level is a best friend for anyone doing groundwork or foundations, and also invaluable when building the frame. Once the base work is done properly, you can freely think about window and door placement, colors, and roof angle.
The greenhouse frame is up.
Almost all of the greenhouse windows came from our own storage.
Photo of the greenhouse under construction.
We left the outside of the foundation gray but painted the inside white. First, we spread filler with a trowel, worked it in with circular motions using gloved hands, and once it dried, we painted the surface with foundation paint.
Raised beds alongside the greenhouse.
Rilla built raised beds alongside the greenhouse.

Most recent
Latest
terve
Terms and conditionsPrivacy policyOur cookie policy