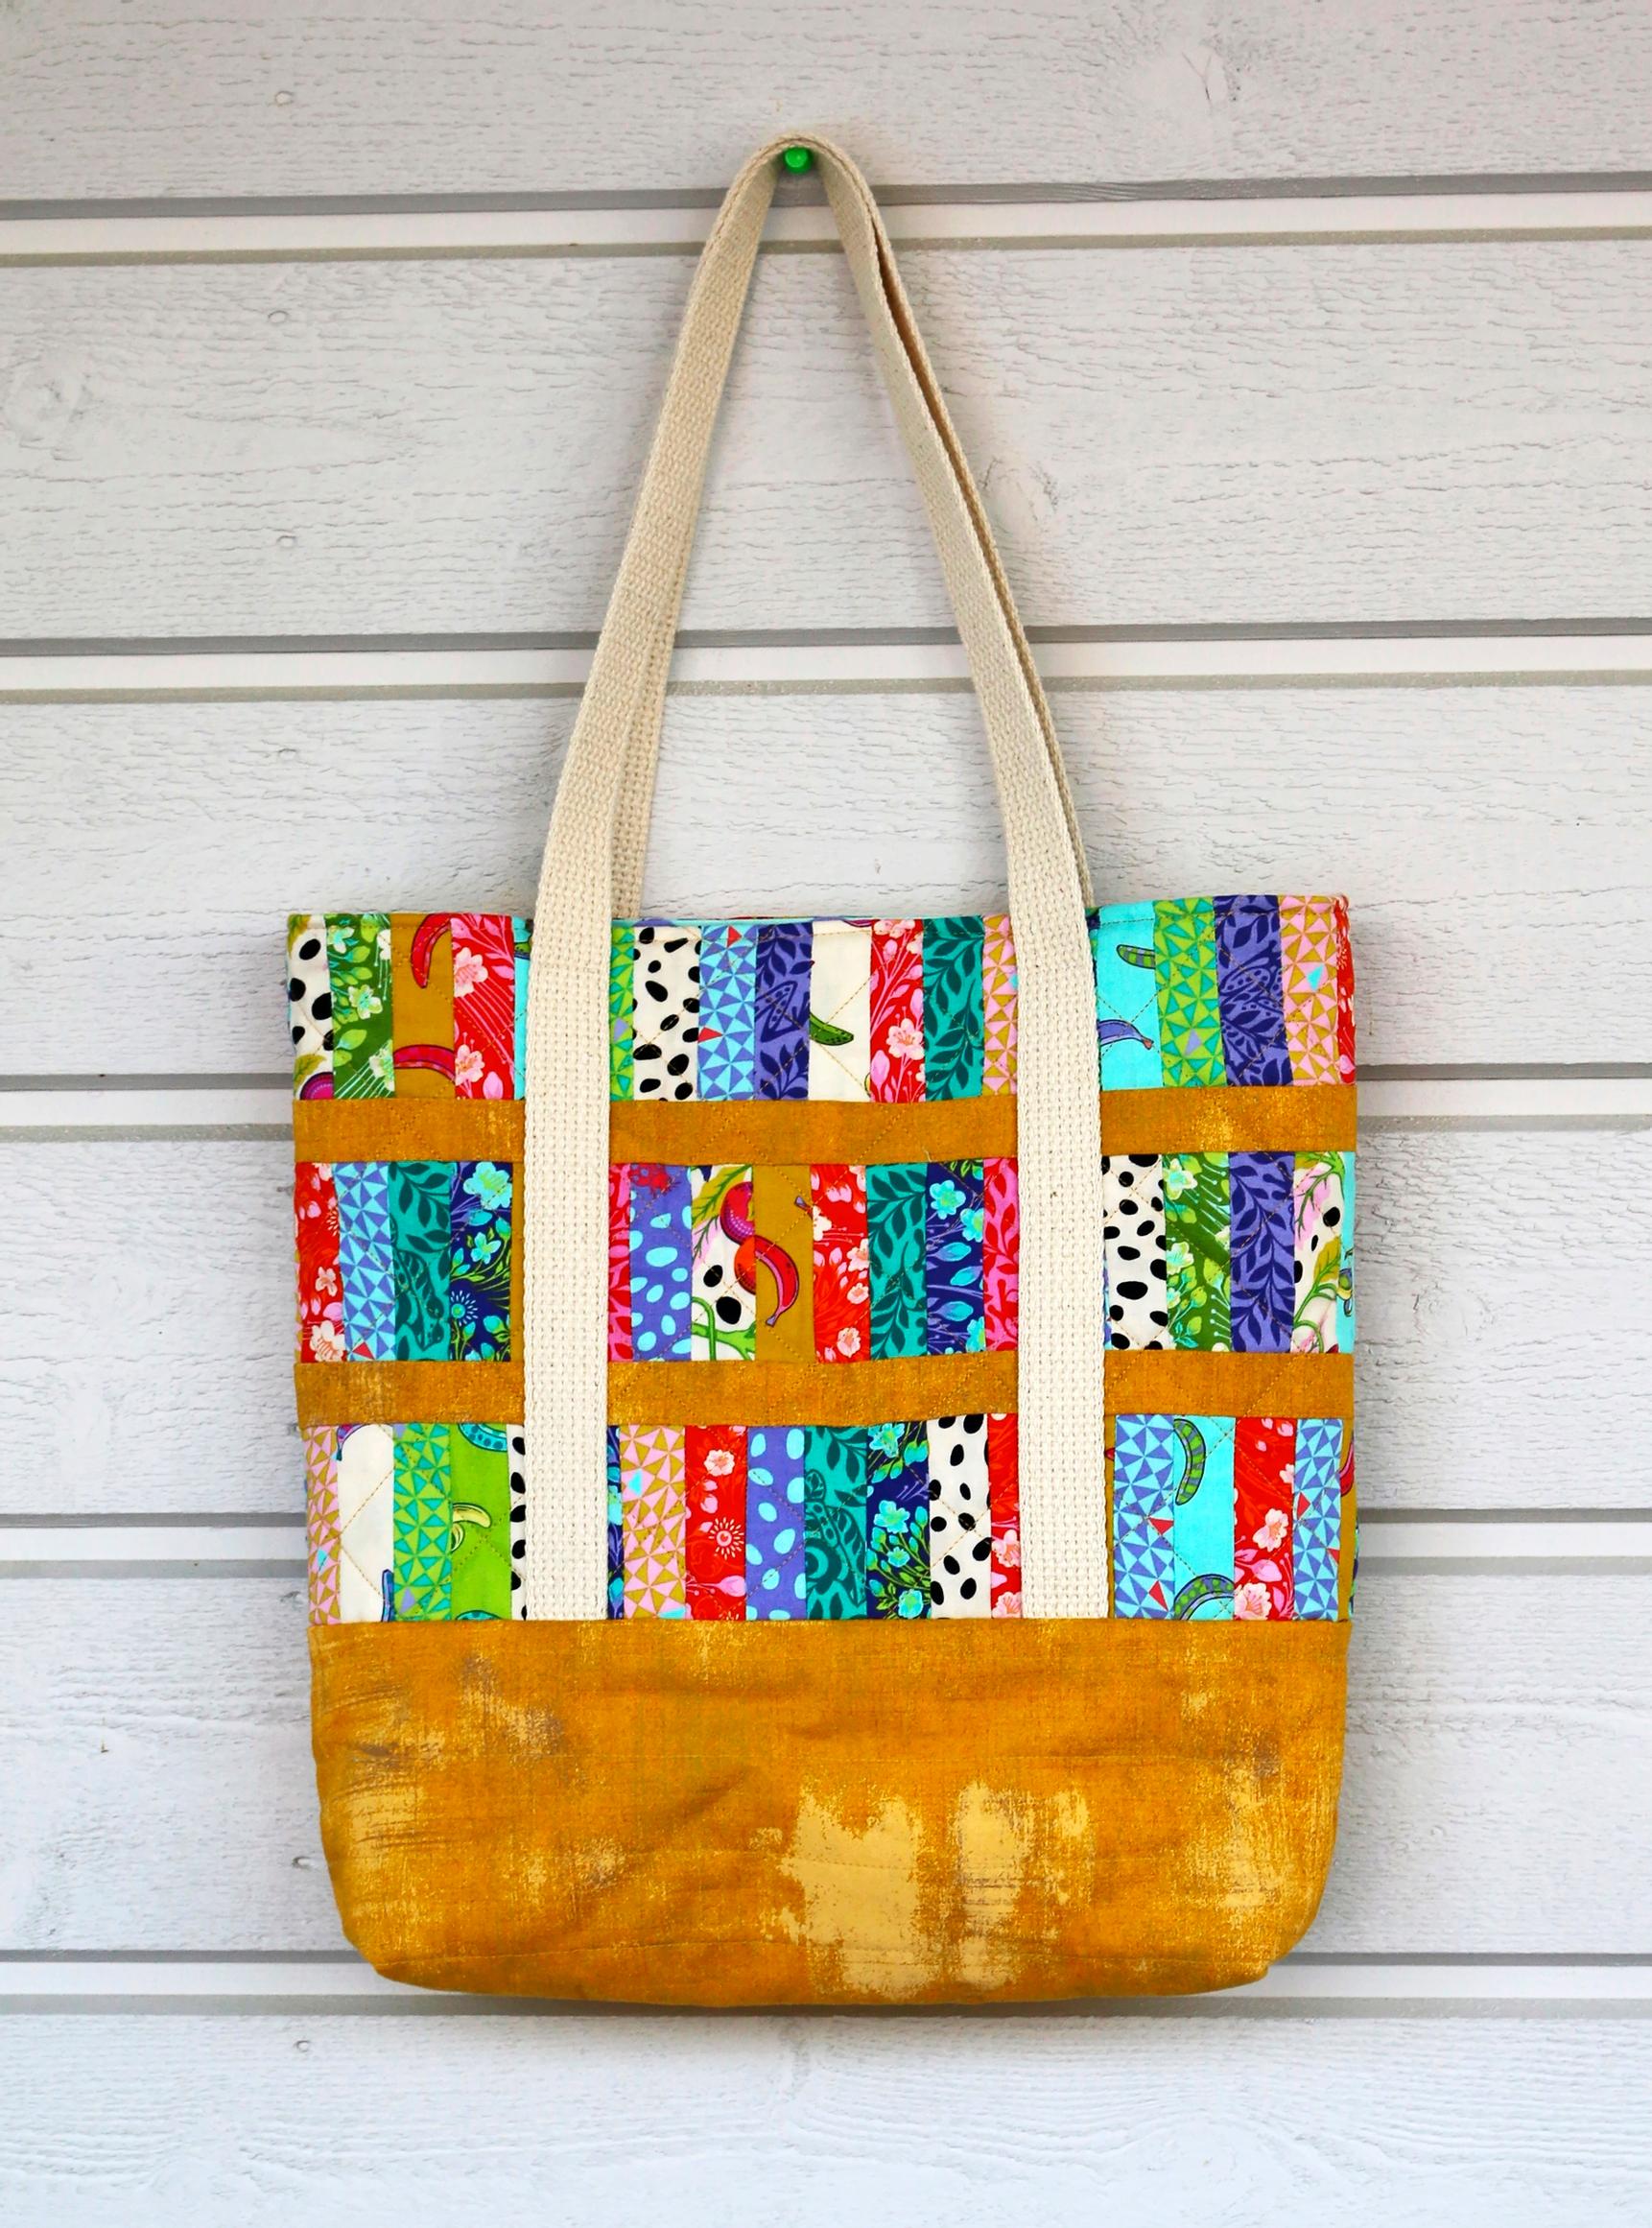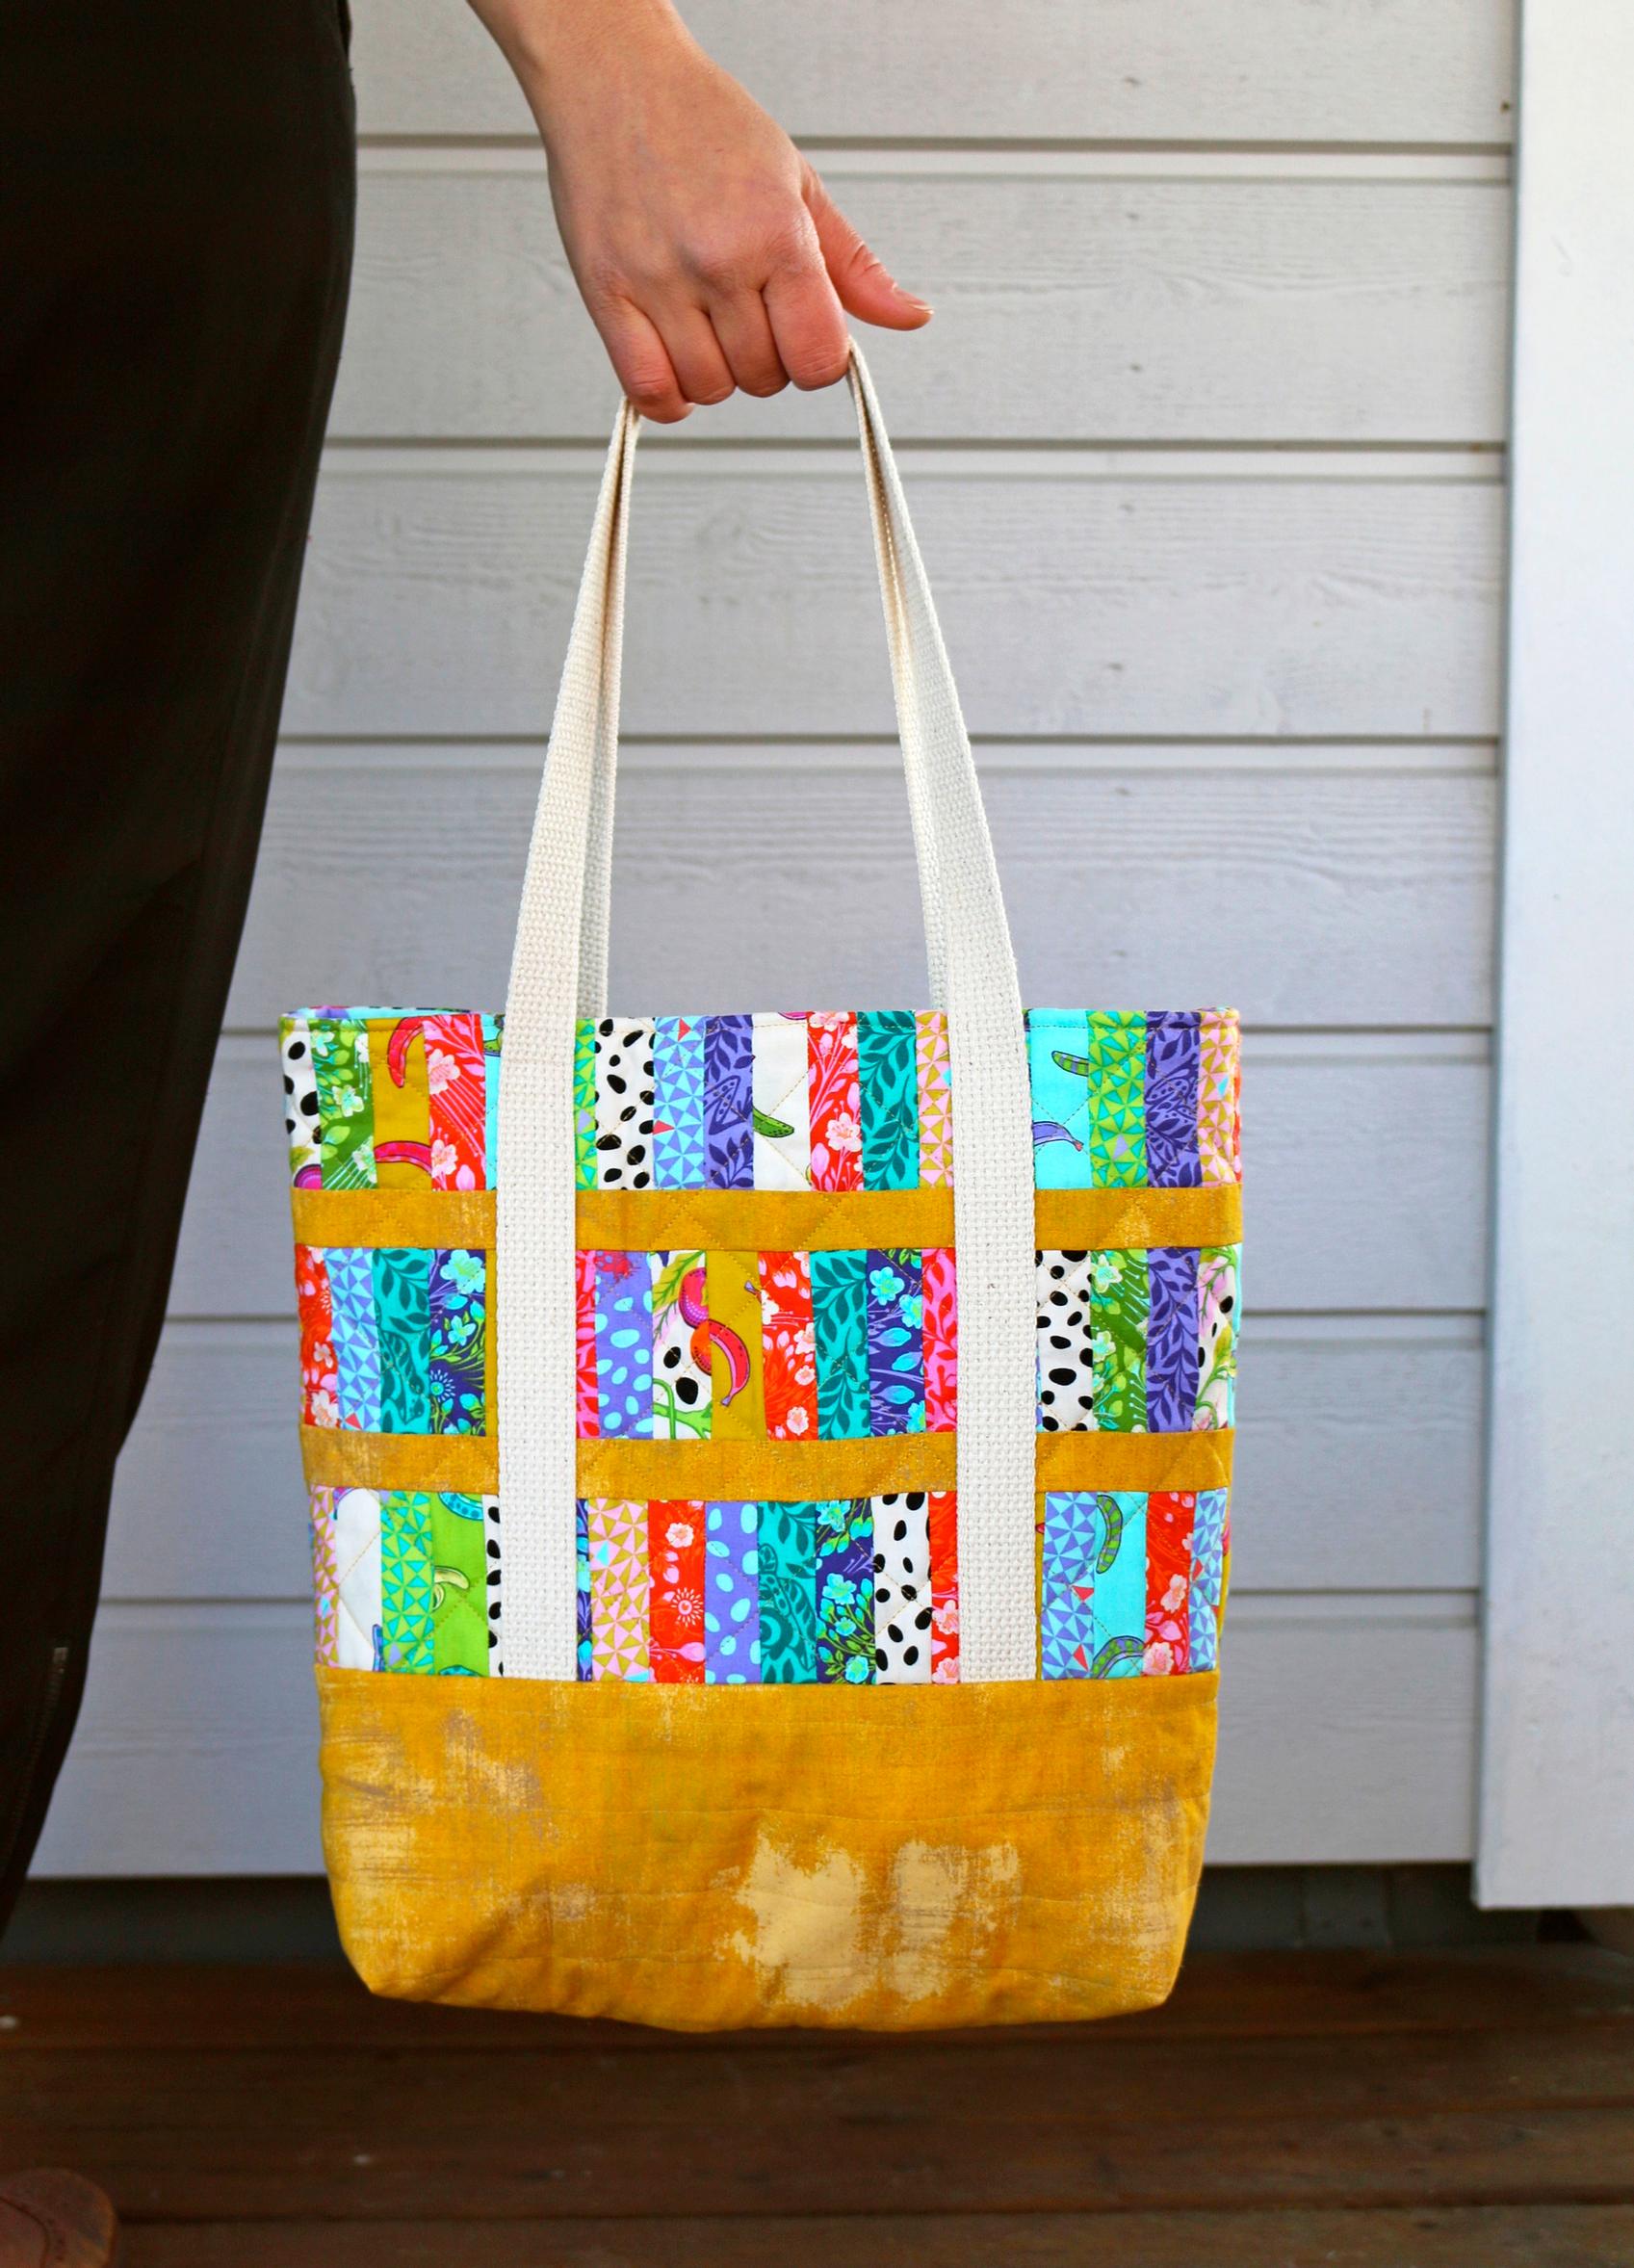
DIY patchwork bag—use leftover scraps to create a bright, cheerful surface
Have fun with your style in a patchwork bag! This one-of-a-kind tote can be made from anything you have on hand—like old clothes or home textiles.
Bag size: about 32 cm high, 36 cm wide, and 8 cm deep.
Patchwork bag—materials
- Cotton fabric scraps
- 30 cm of yellow cotton fabric (110 cm wide)
- 40 cm of cotton fabric for lining (110 cm wide)
- Batting, fleece, or similar
- Recycled material to reinforce the bag (45 × 84 cm piece)
- 1.9 m of 2.5 cm wide bag strap
- A rotary cutter, cutting mat, and a quilting ruler
- Basic sewing supplies
- A water-soluble marker or another marking tool
- Sewing machine
- Ironing tools
Patchwork bag—instructions
Preparations
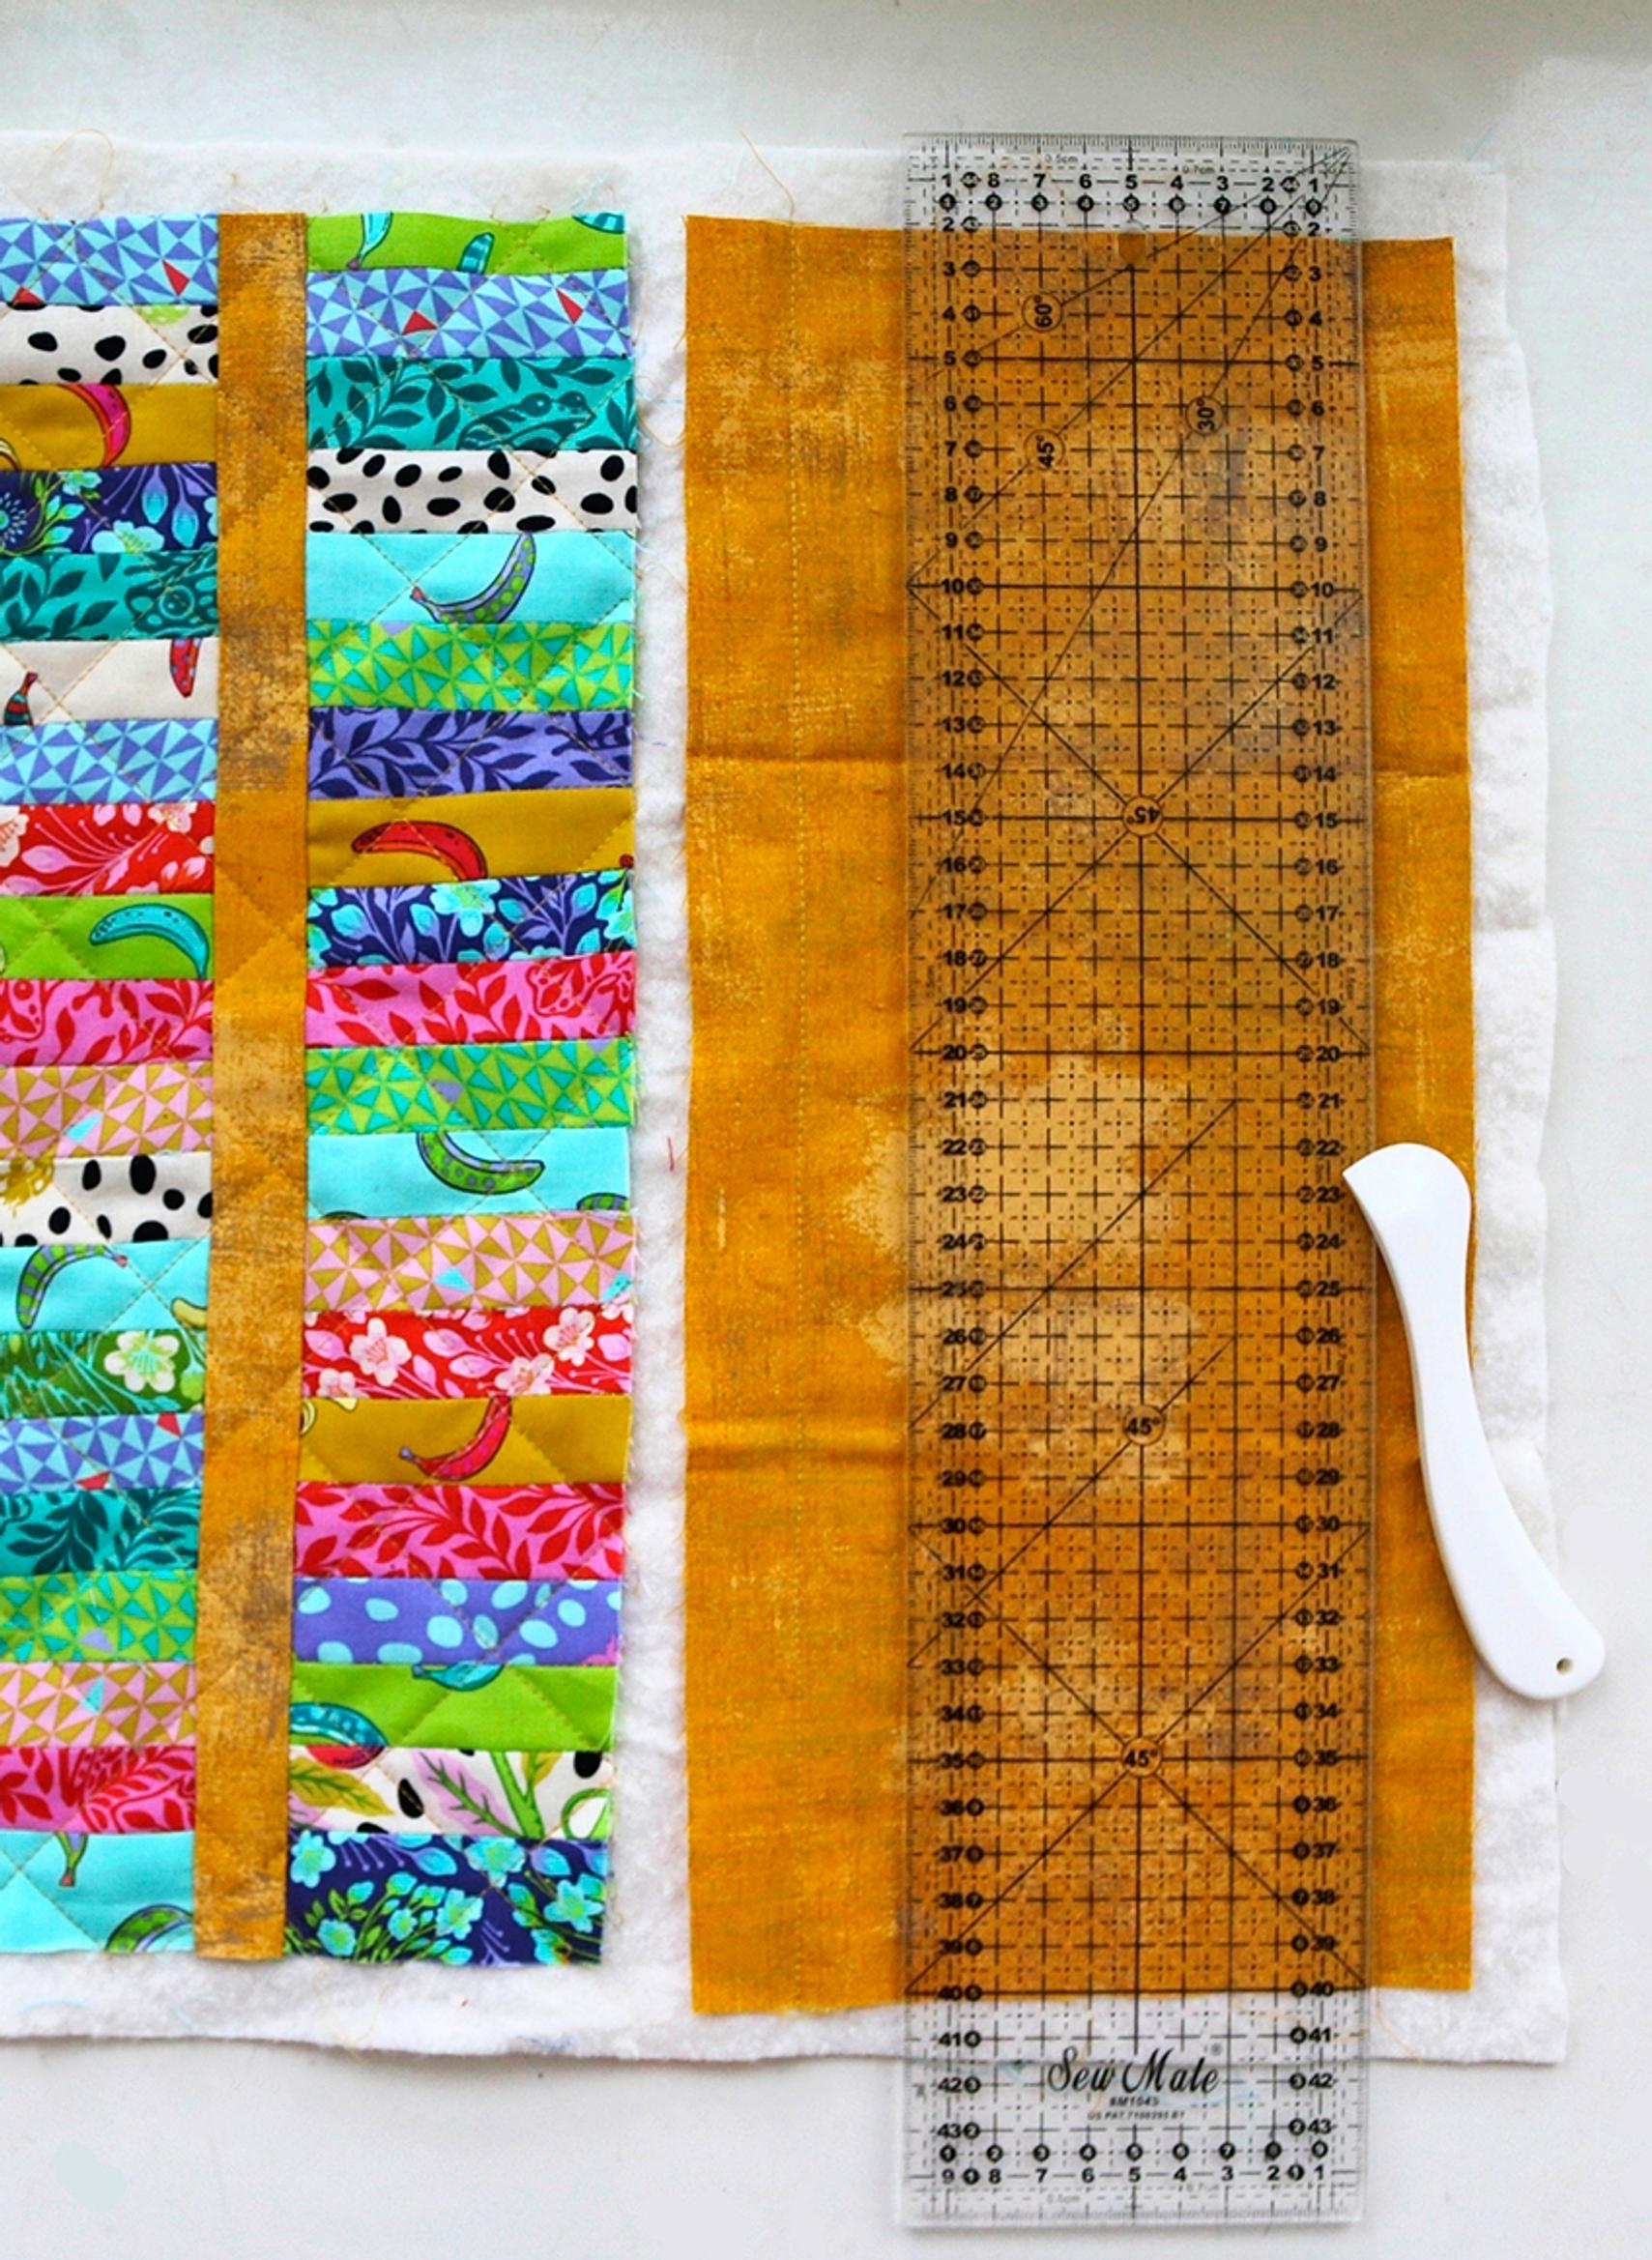
1. Cut about 120 strips from your scraps, each at least 9 cm tall and 3.5 cm wide. It’s okay if some strips are different heights, you can trim them after sewing. Press all fabrics well before cutting.
2. Cut a 17 cm tall strip from the full width of the yellow cotton fabric. Then cut two 17 × 38 cm pieces for the bottom of the bag from that strip. From the remaining fabric, cut four 4 × 38 cm border strips.
3. Cut the batting into two 45 × 42 cm pieces.
4. Cut the bag strap in half (2 × 95 cm).
5. Cut the lining fabric later, following the instructions provided in the article below.
Sewing the patchwork panels

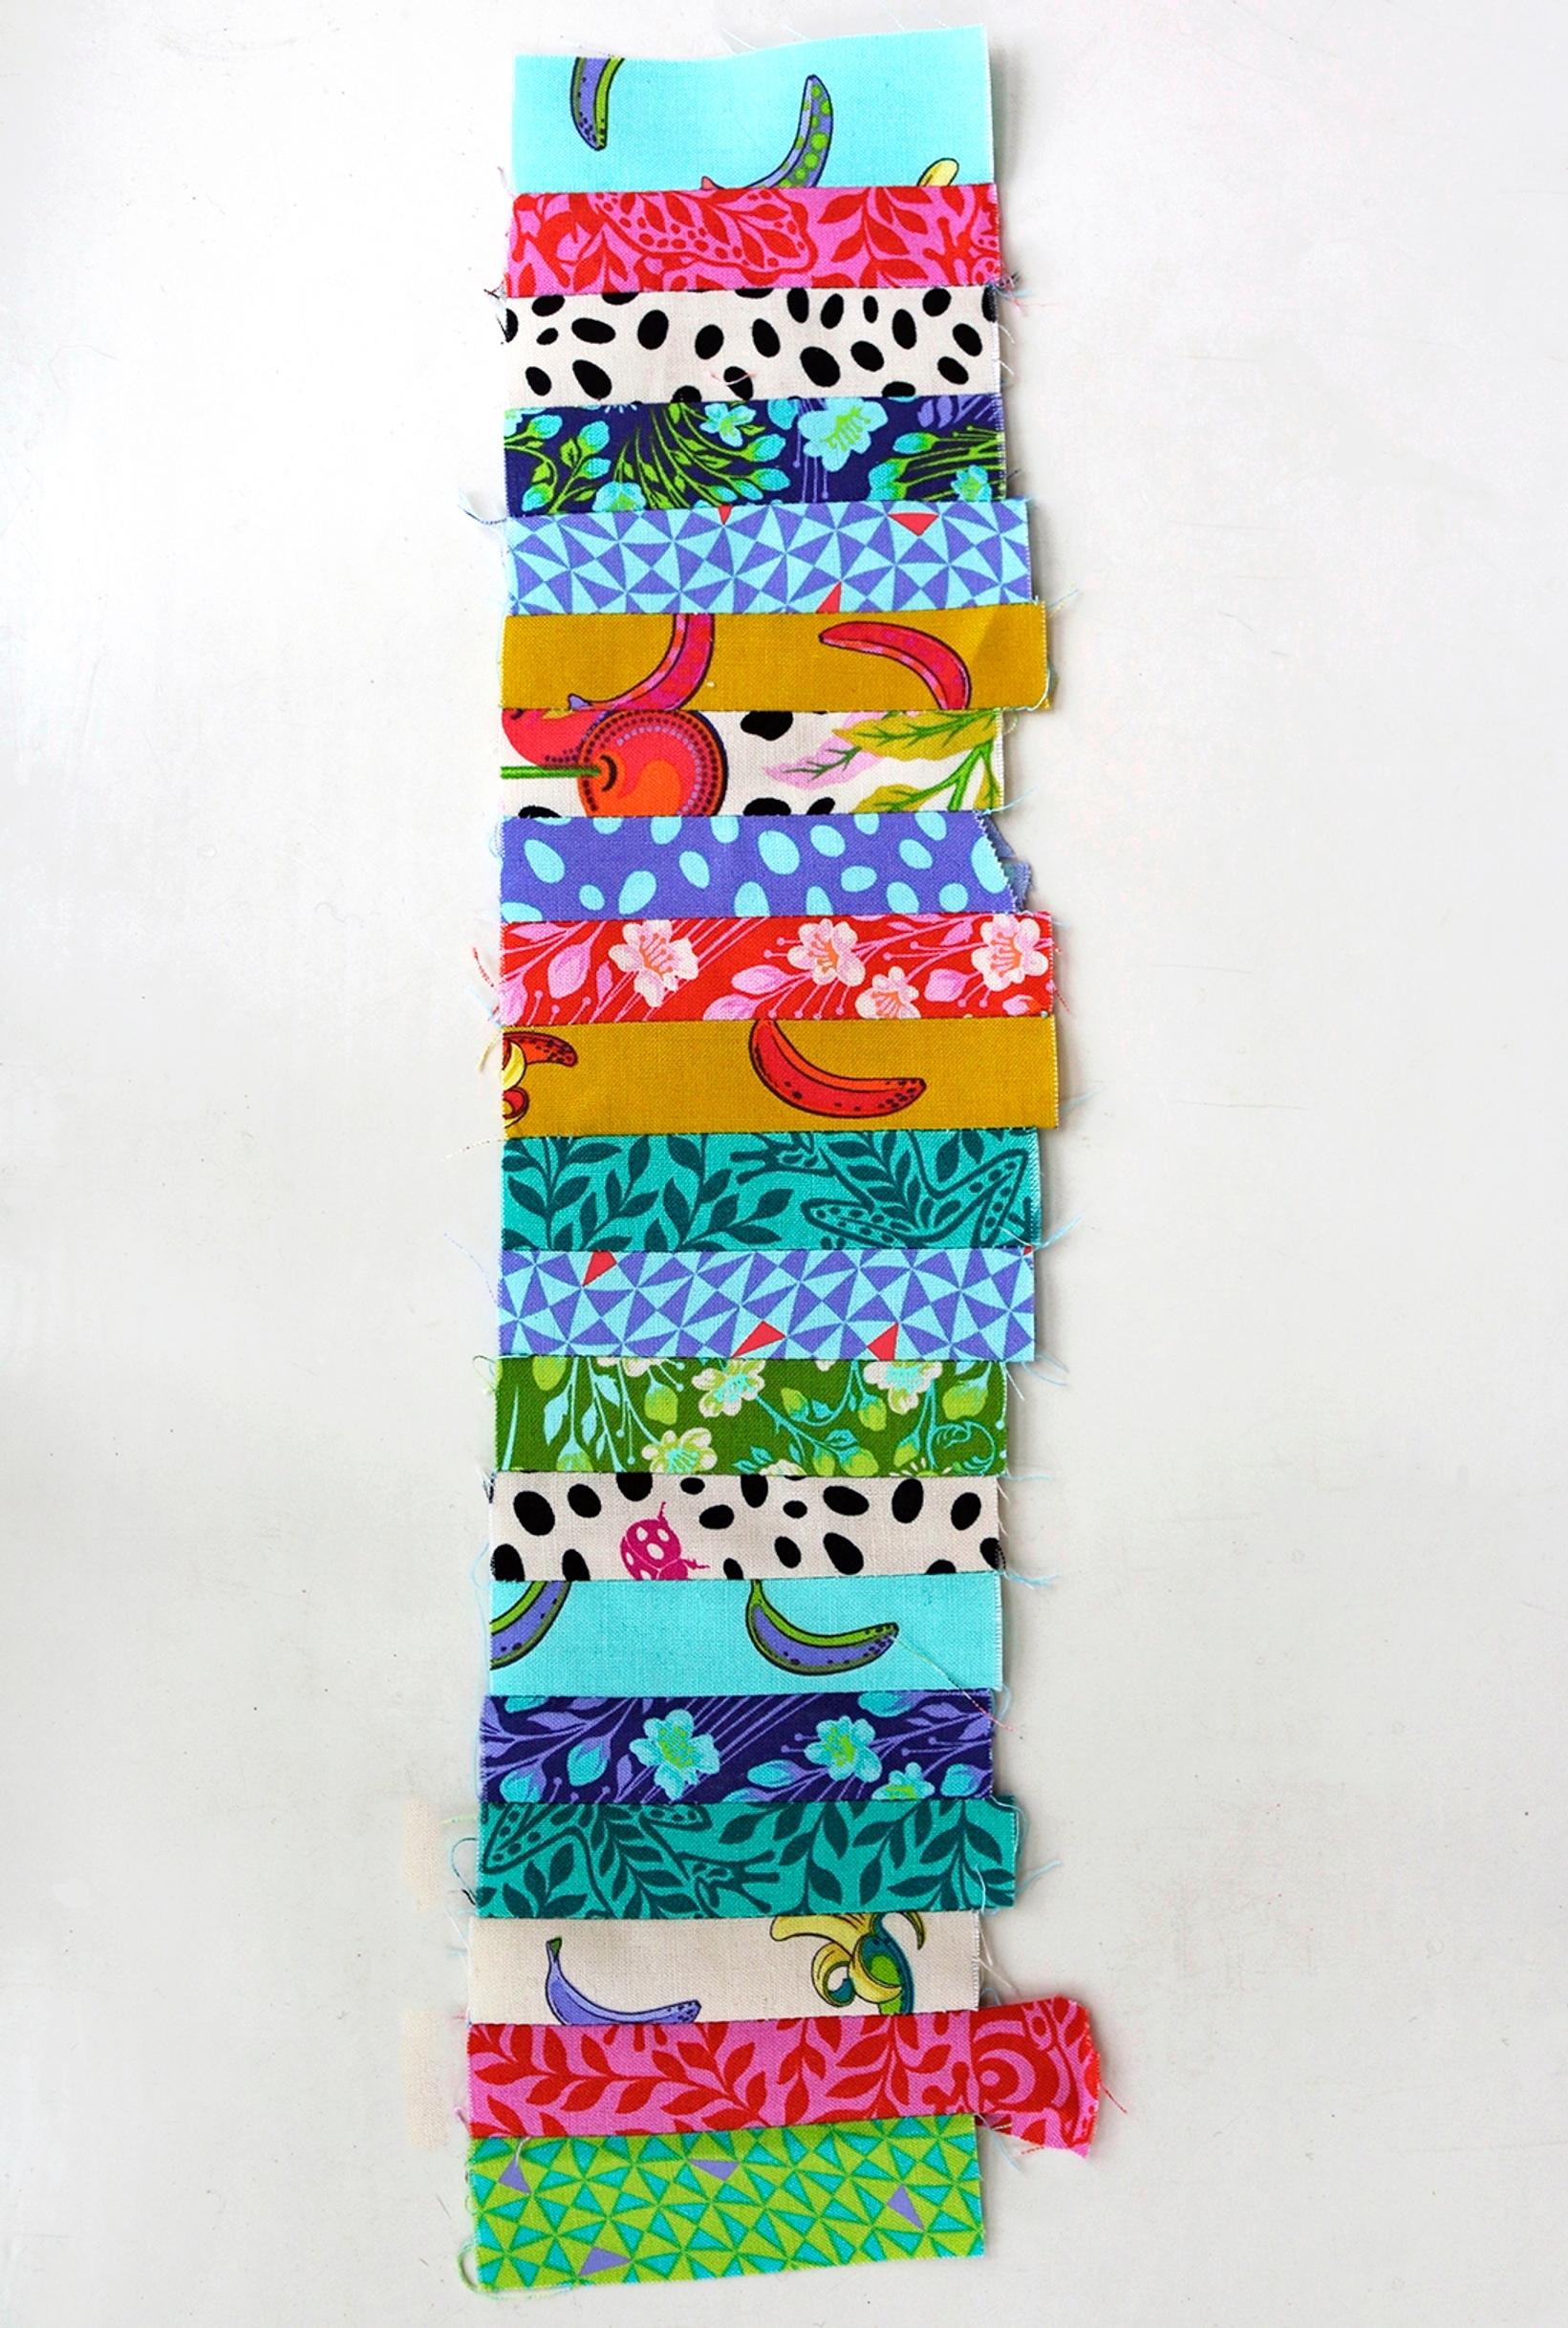
6. Sew the strips together using a presser-foot seam allowance in any order until the panel is at least 38 cm wide. After each seam, press the seam allowances open with your fingernail. Make six patchwork panels for the bag—three for the front and three for the back.
7. Press and trim the panels to 8 × 38 cm each.

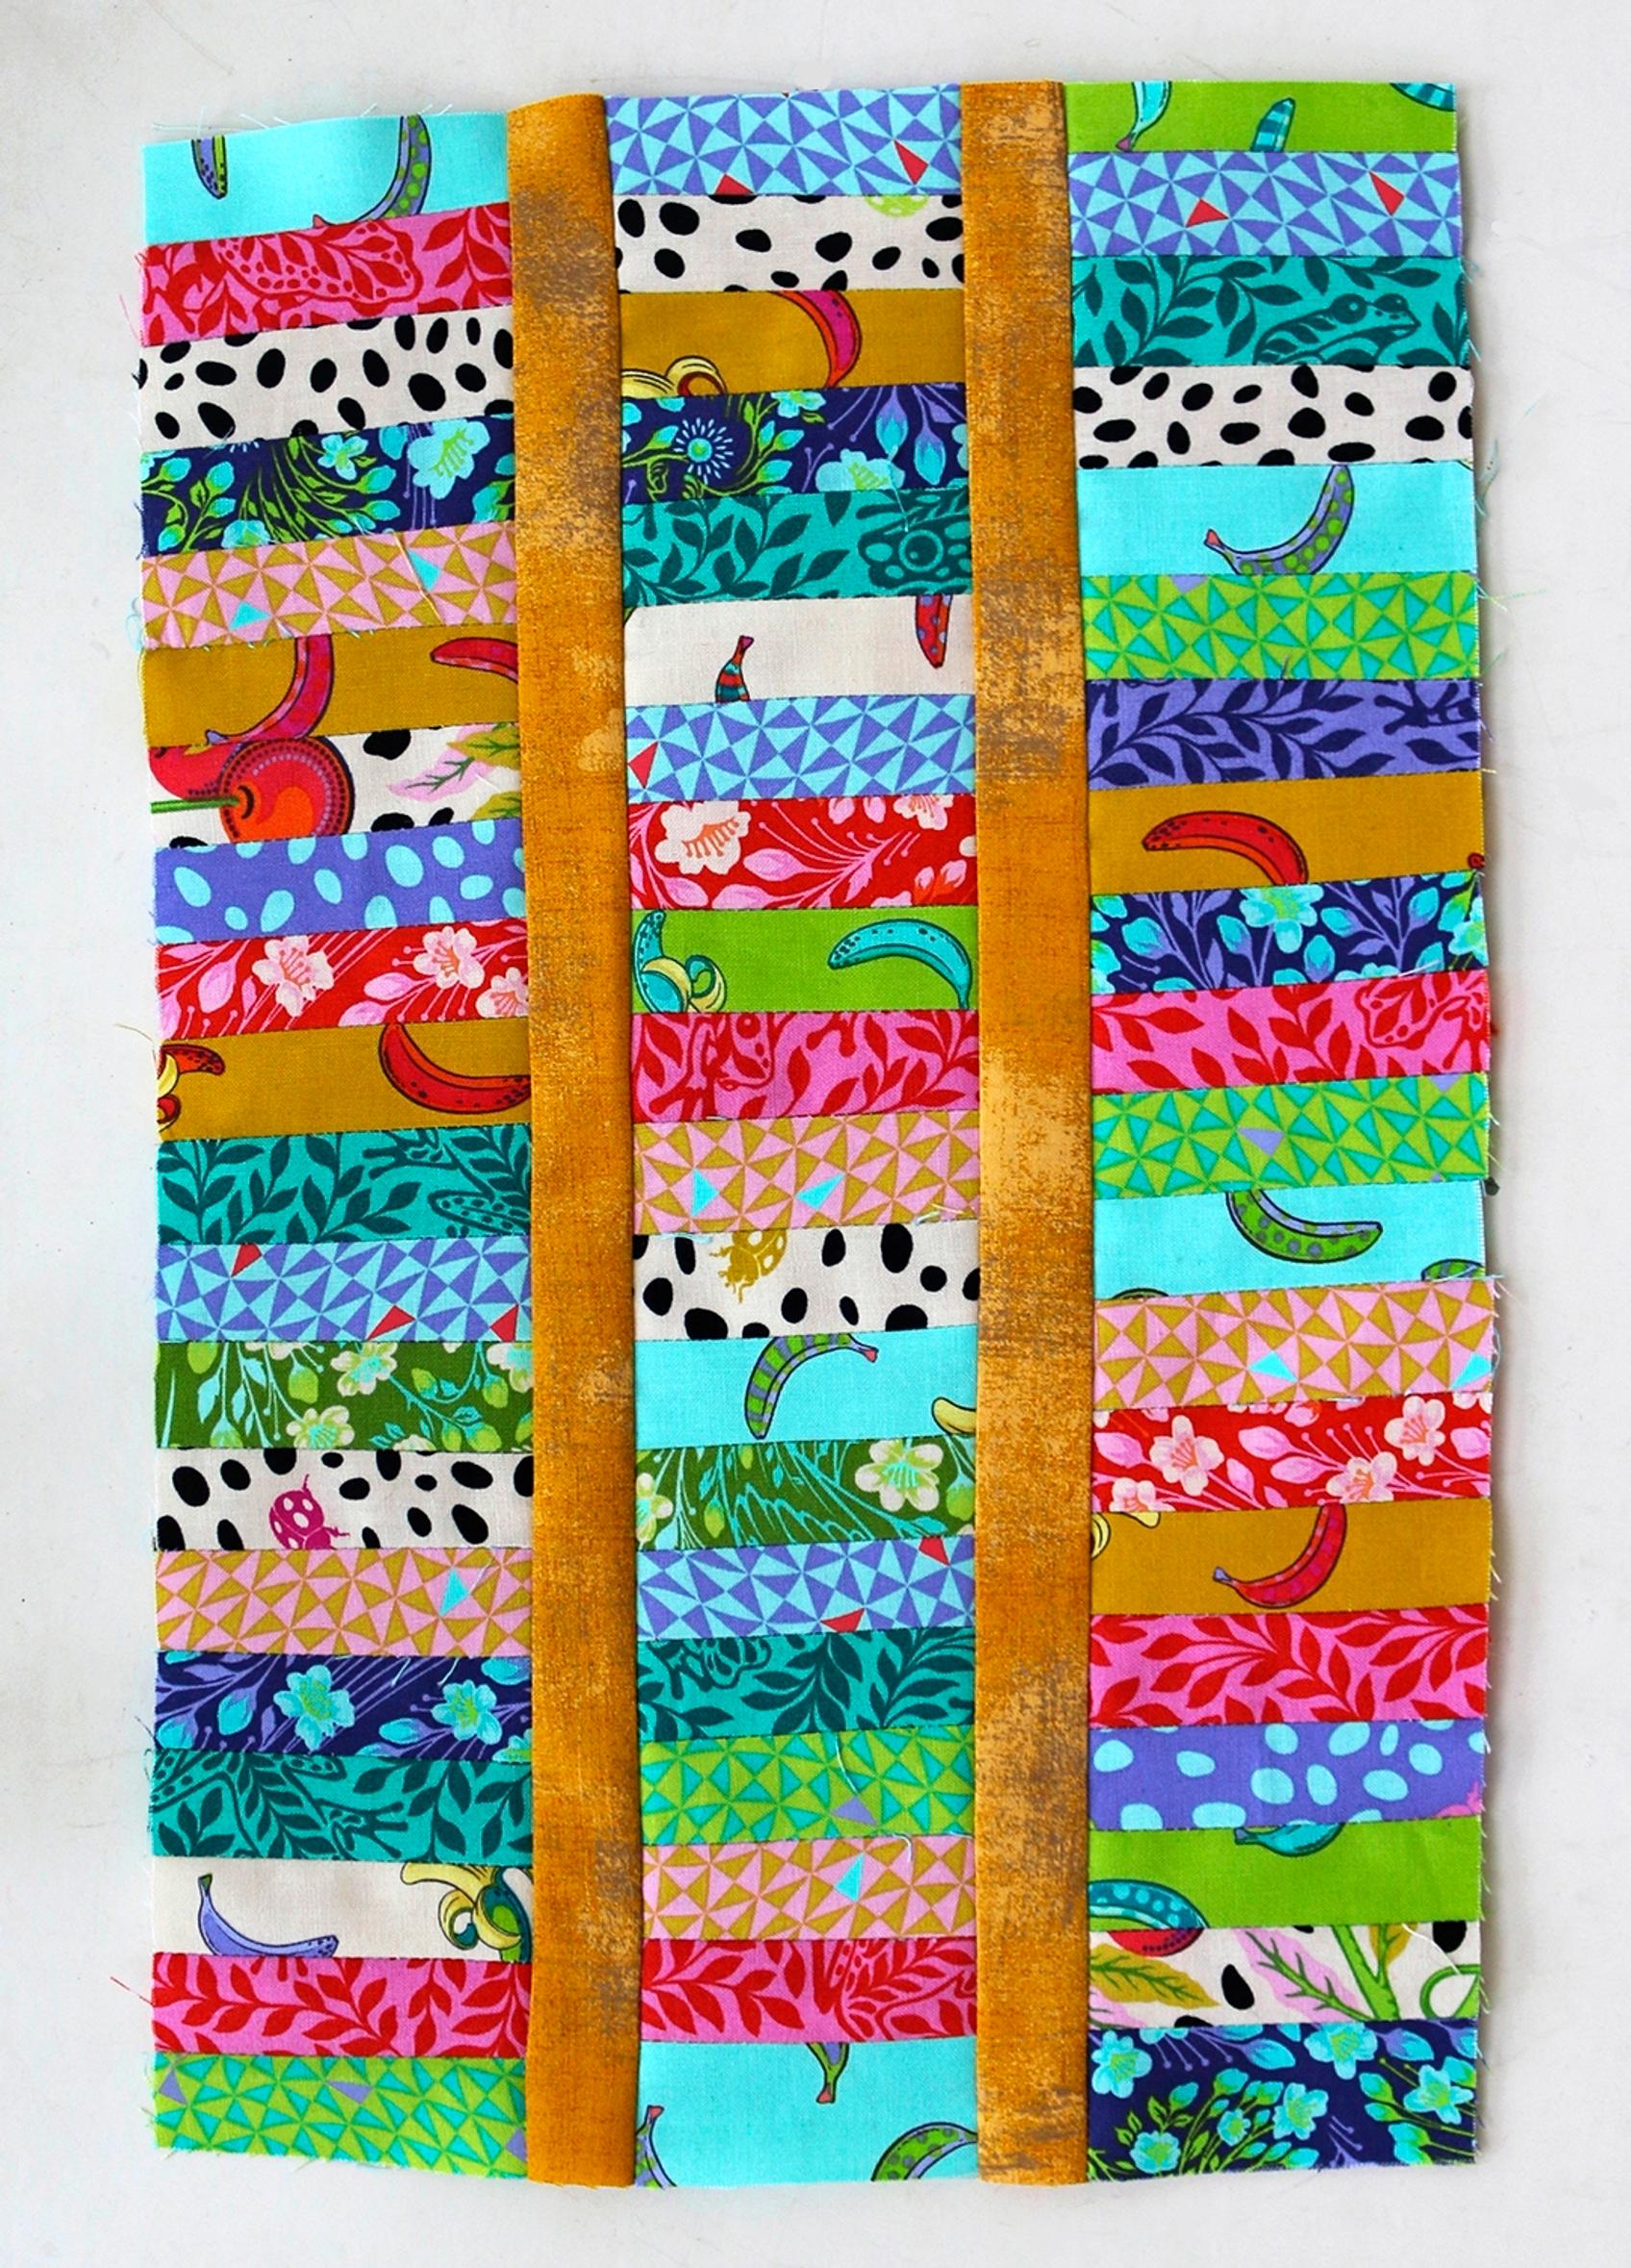
8. Join the patchwork panels and the yellow border strips, placing two yellow strips between the three panels. Use a 1 cm seam allowance. Press the seam allowances toward the strips. Assemble the remaining panels and strips the same way.
Quilting the panels and bottom sections
9. Place the patchwork panel and bottom piece on top of the batting, and baste or pin the layers together.

10. On the bag’s top, quilt a 3.5 × 3.5 cm diagonal grid, and on the yellow bottom, quilt horizontal lines 3 cm apart. Start quilting horizontally from the center outward. Mark the quilting lines with a water-soluble marker and ruler. Quilt the other side the same way.
11. Trim any excess batting from around the patchwork panels and bottom pieces.
Assembling the bag

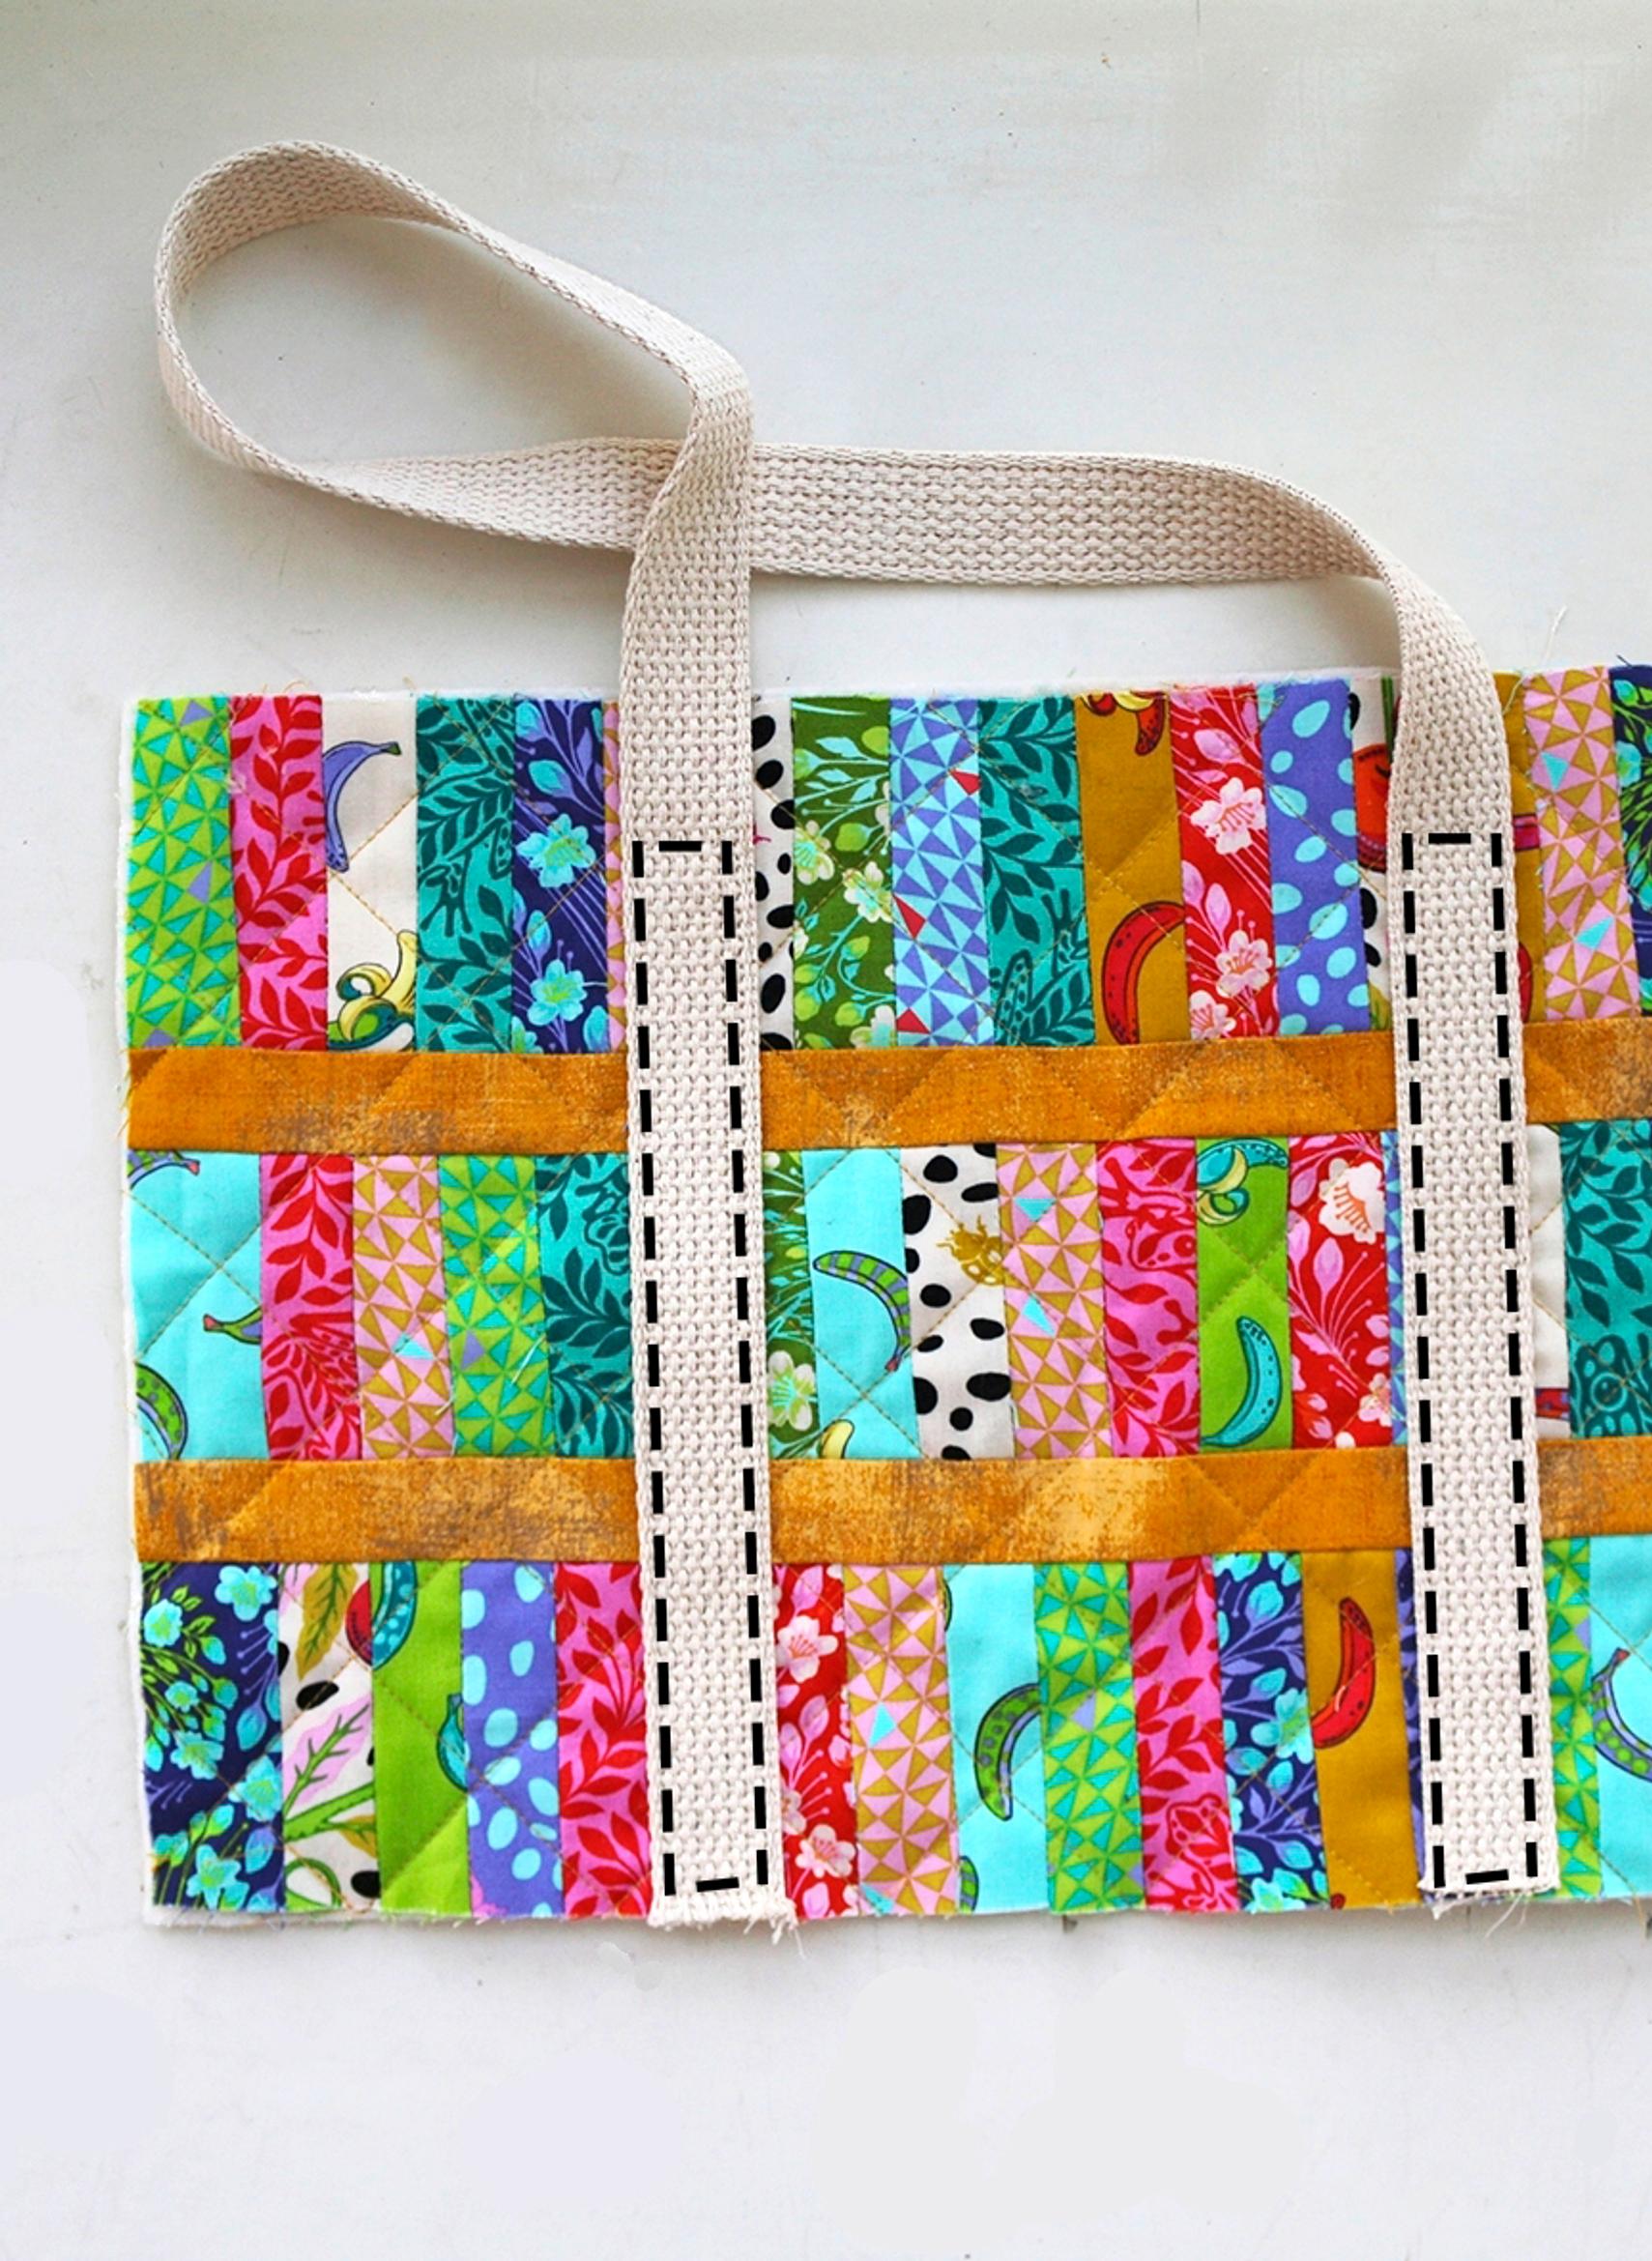
12. Pin the straps to the front pieces so that each strap’s outer edge is 10 cm from the side. Stitch, stopping about 3 cm from the bag’s top edge. (The stitching is marked in the photo above.)

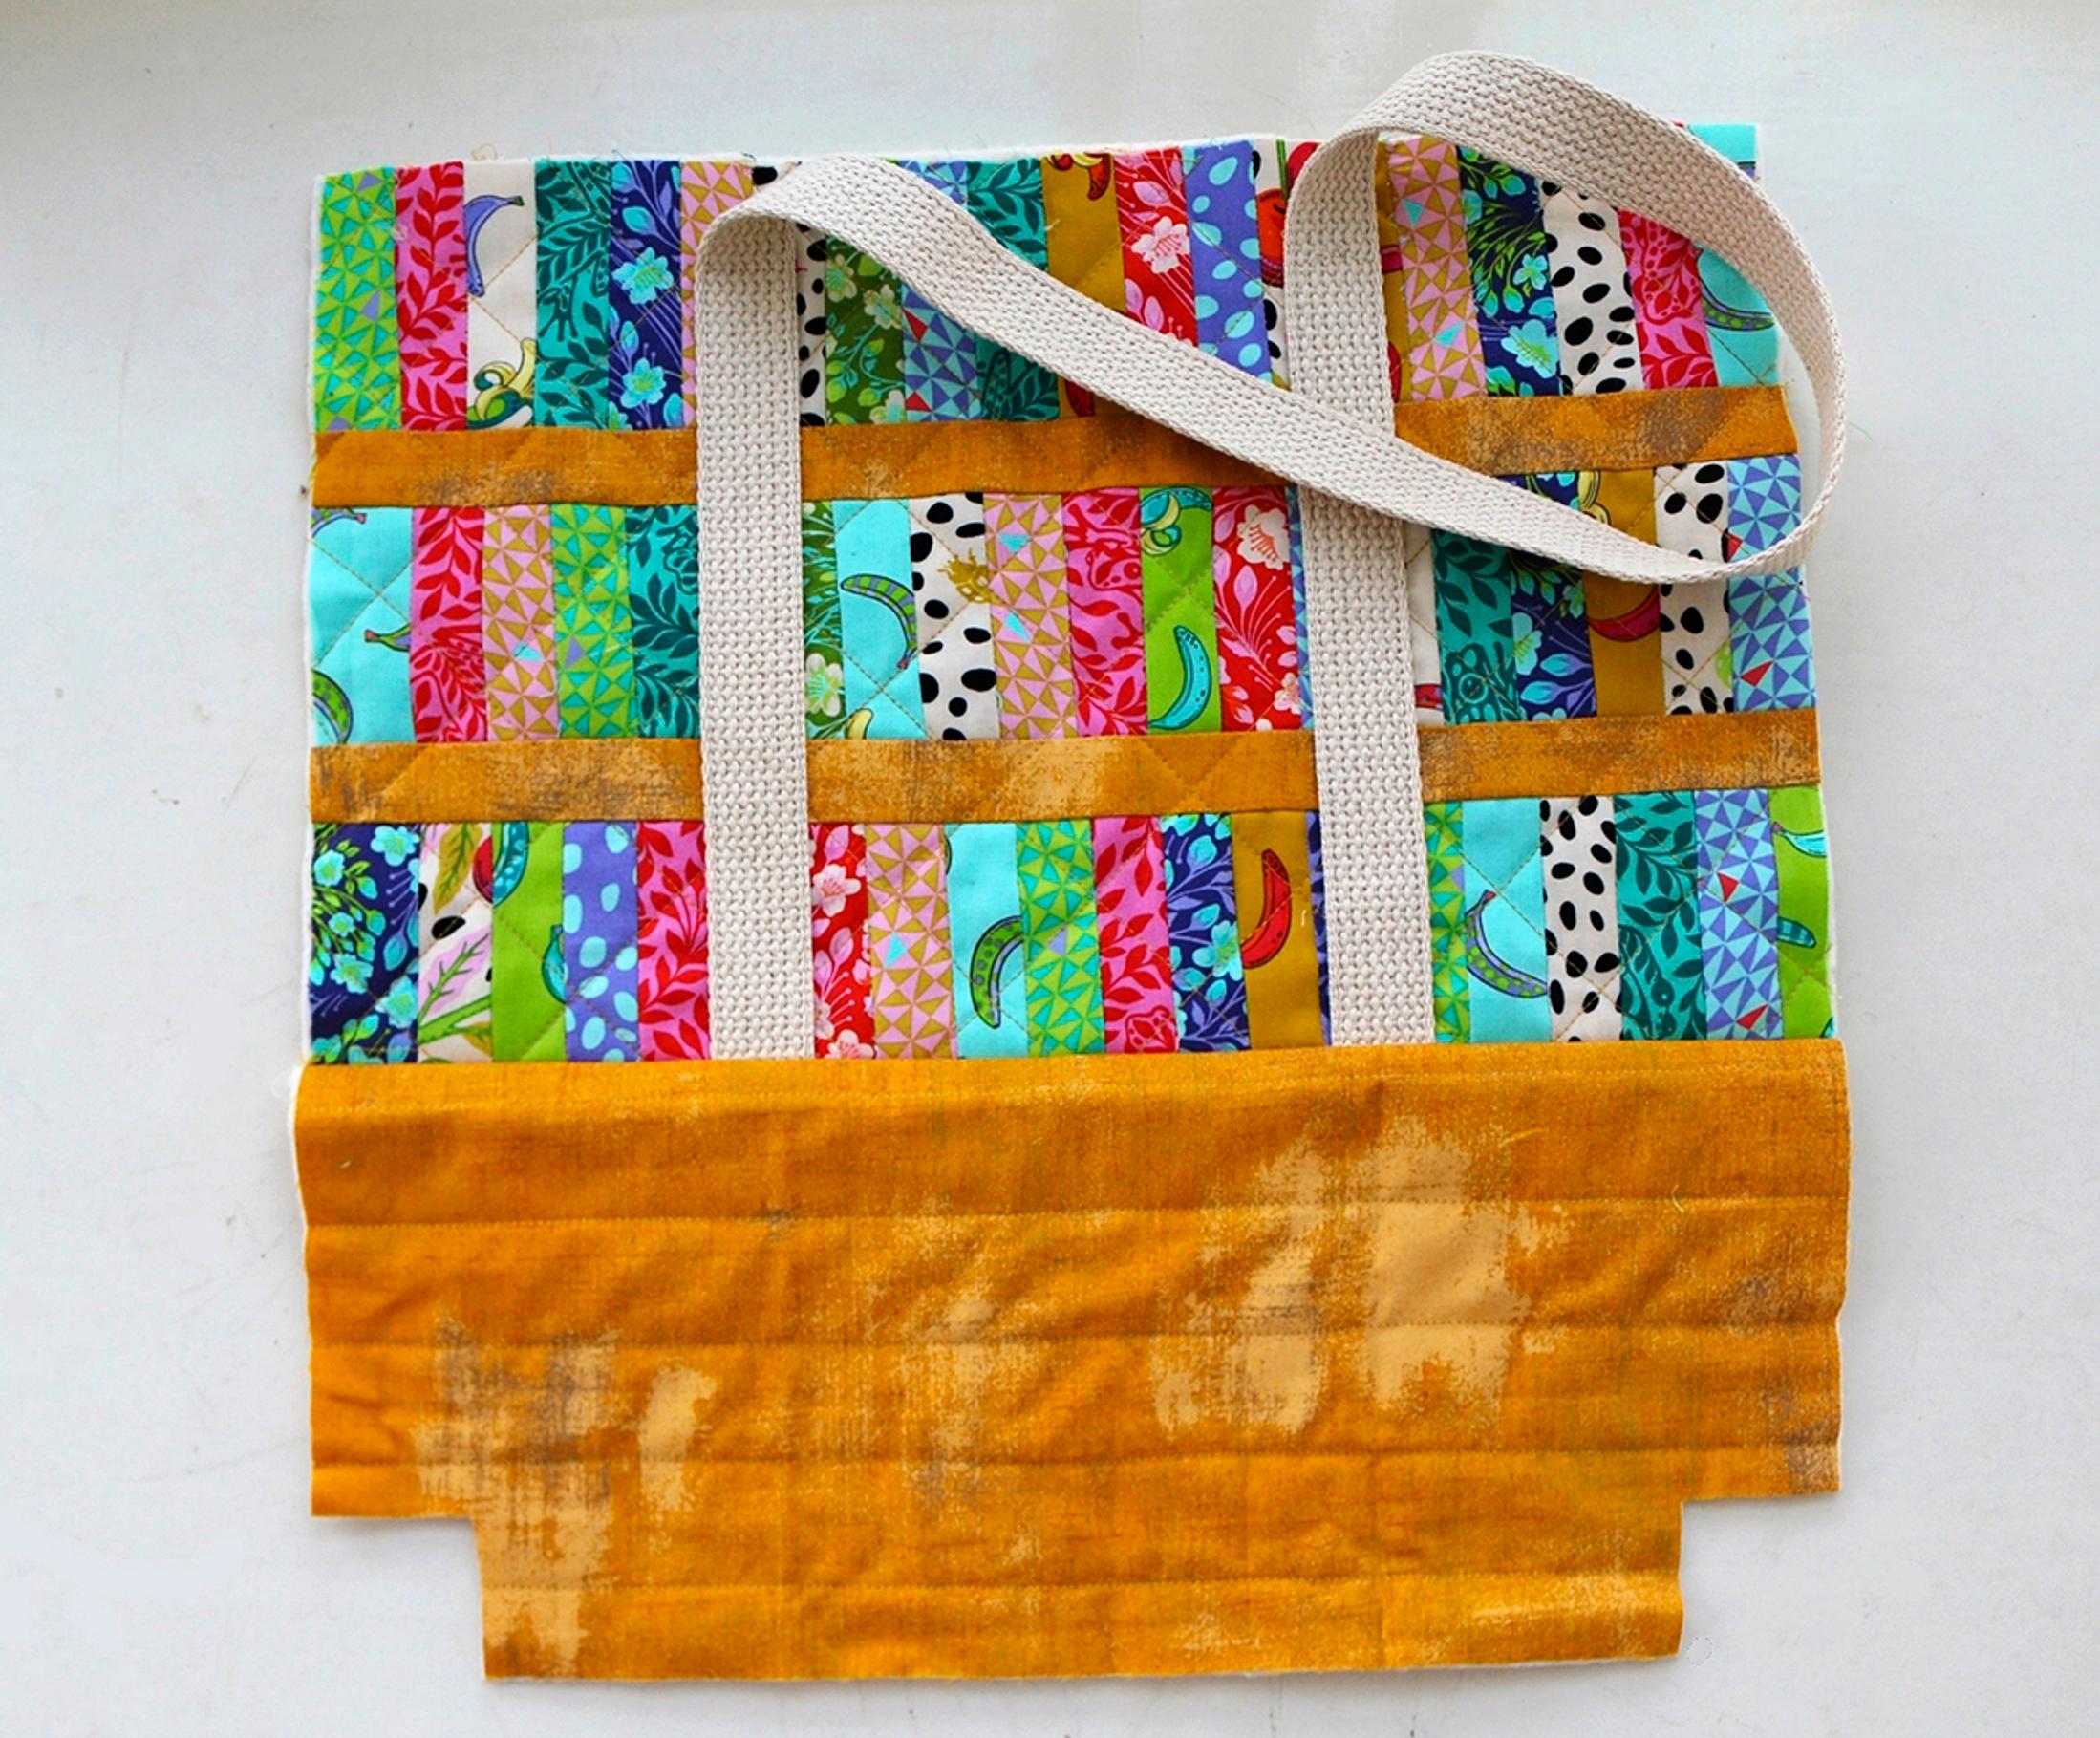
13. Sew the patchwork sections, right sides together, to the yellow bottom pieces using a 1 cm seam allowance. Cut out 4 × 4 cm squares from each bottom corner of the bag.
14. Cut the lining: from the lining fabric, cut the front and back pieces ever so slightly smaller than the bag’s front and back for a better fit. Cut out the bottom corners the same way as in step 13. Set the lining aside for now.
15. Place the bag’s front and back pieces right sides together and sew the side and bottom seams. Match the yellow border strips and bottom piece along the side seams. Press seams open.

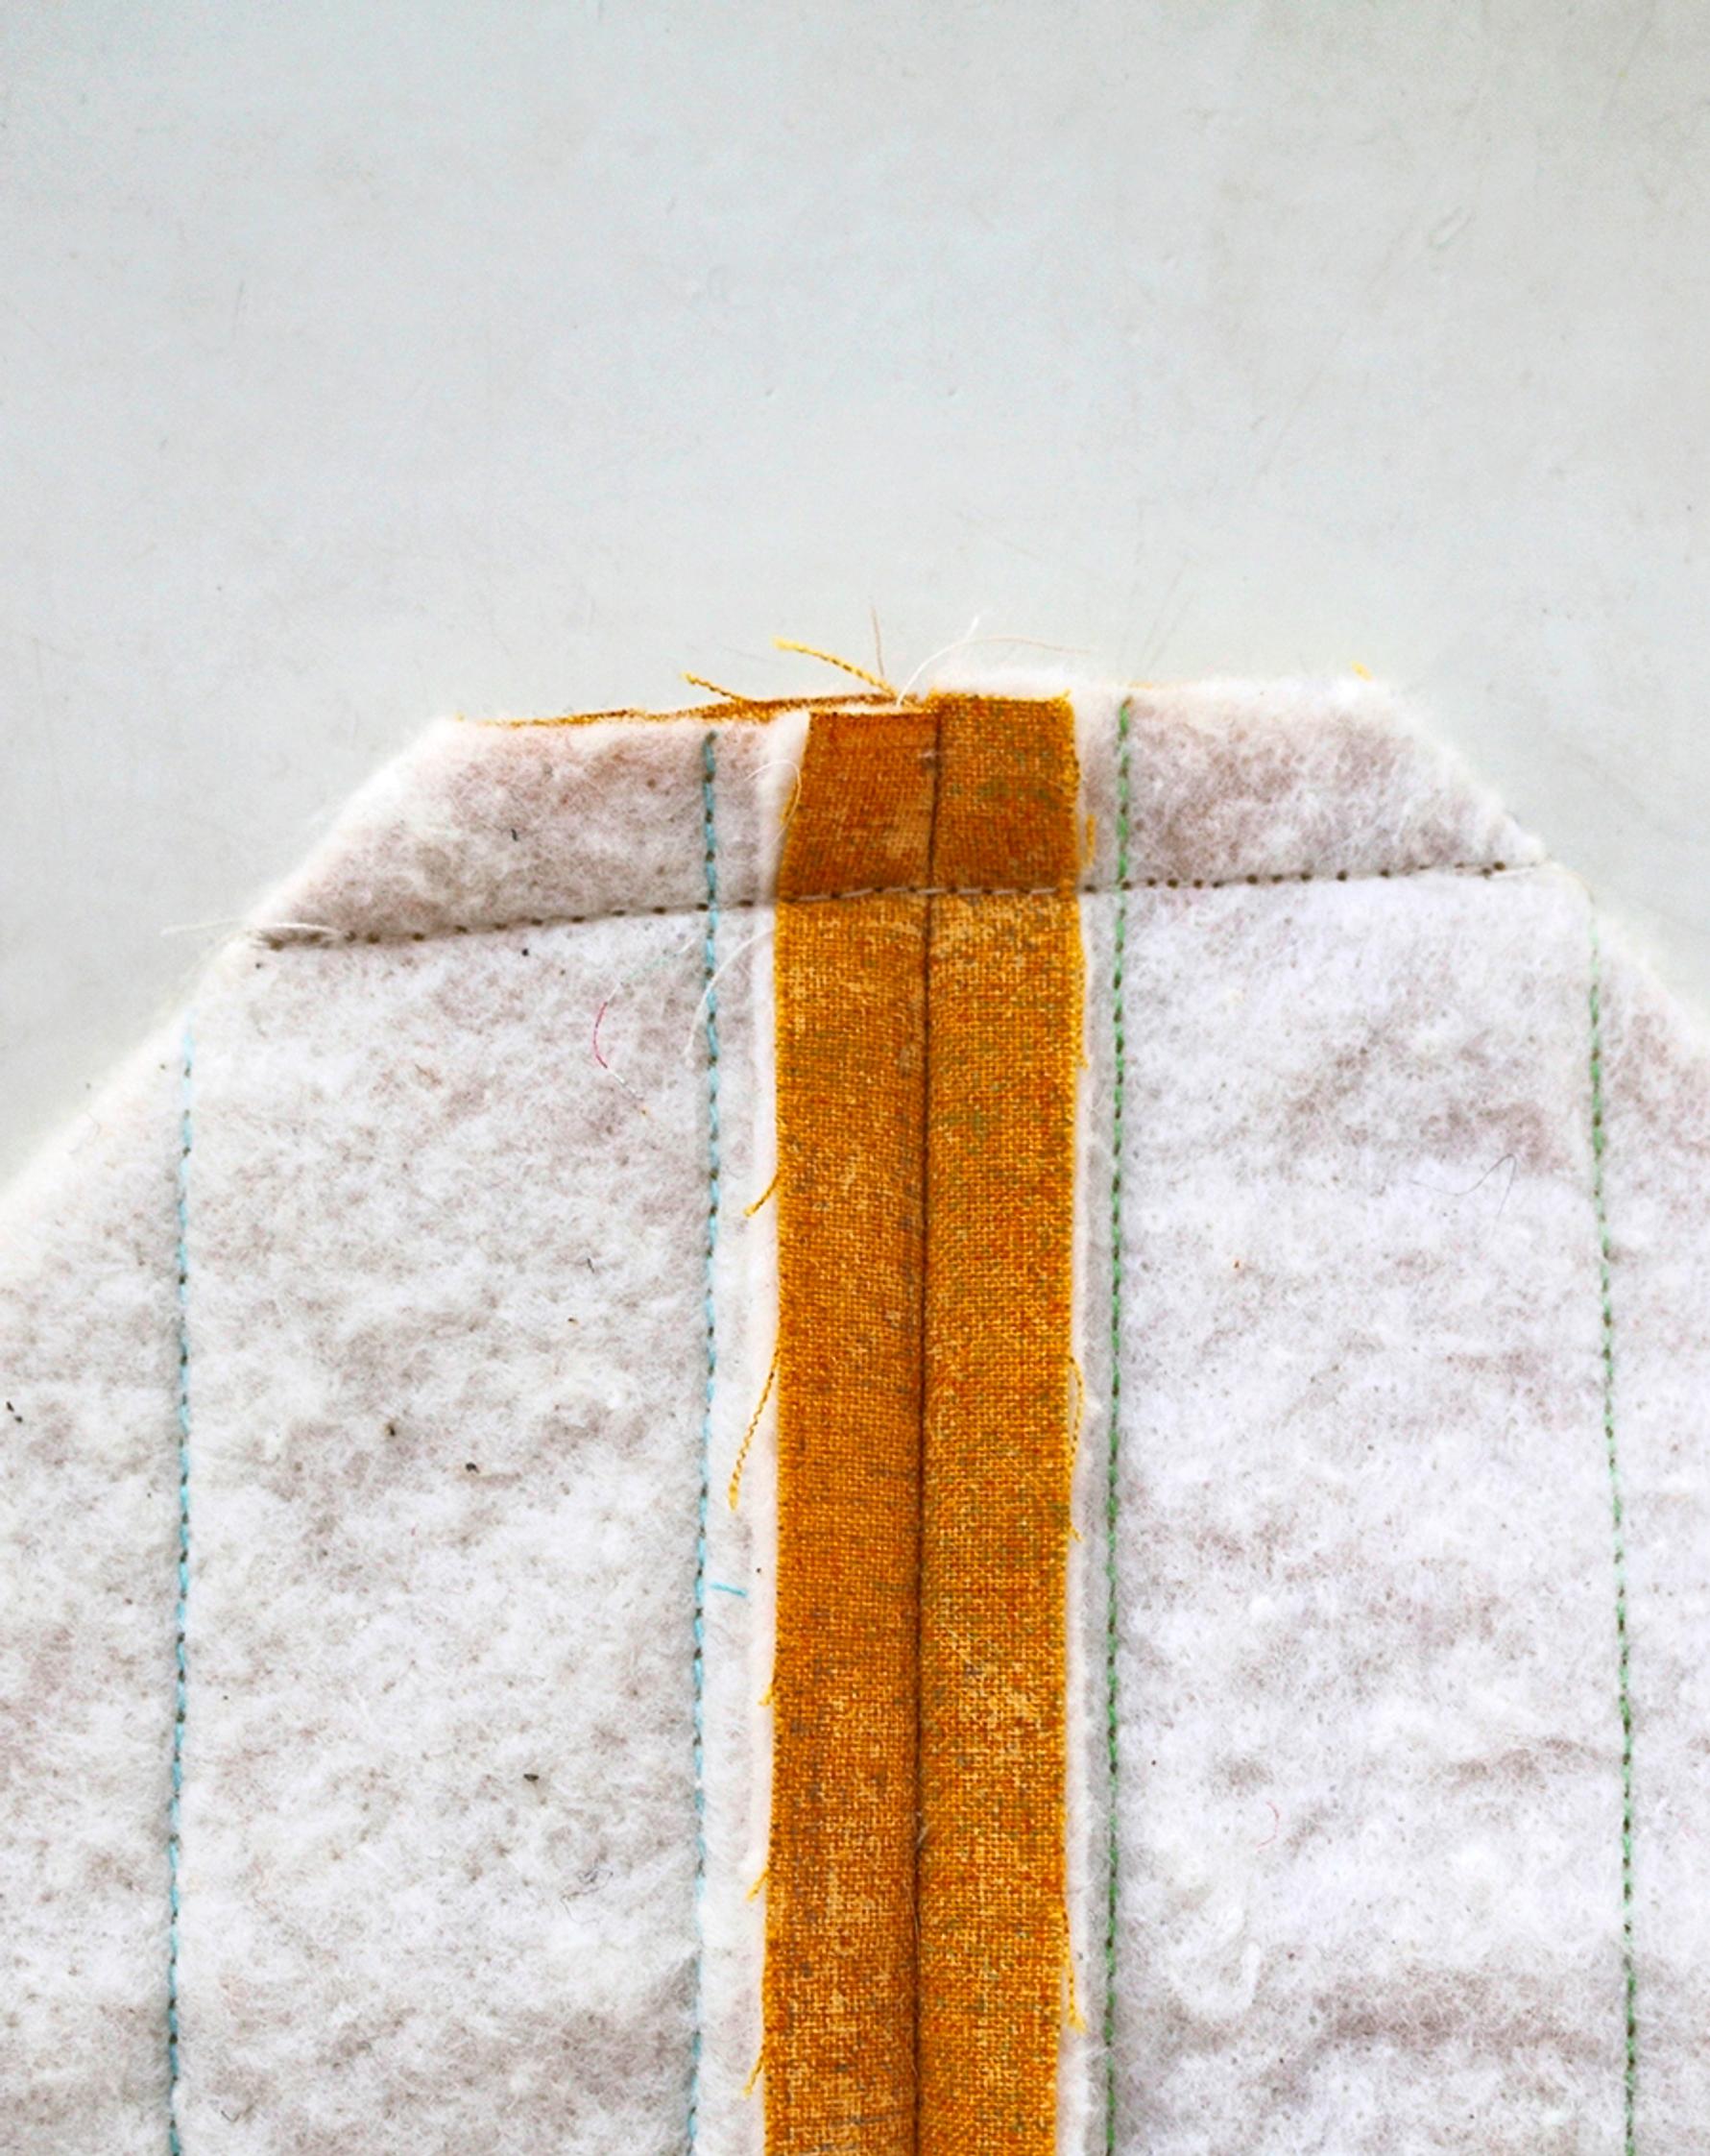
16. Sew the corners by matching the bag’s side seam with its bottom seam.
17. Sew the lining’s side seams, bottom seam, and corners the same way, leaving an opening for turning the bag right side out in the bottom.

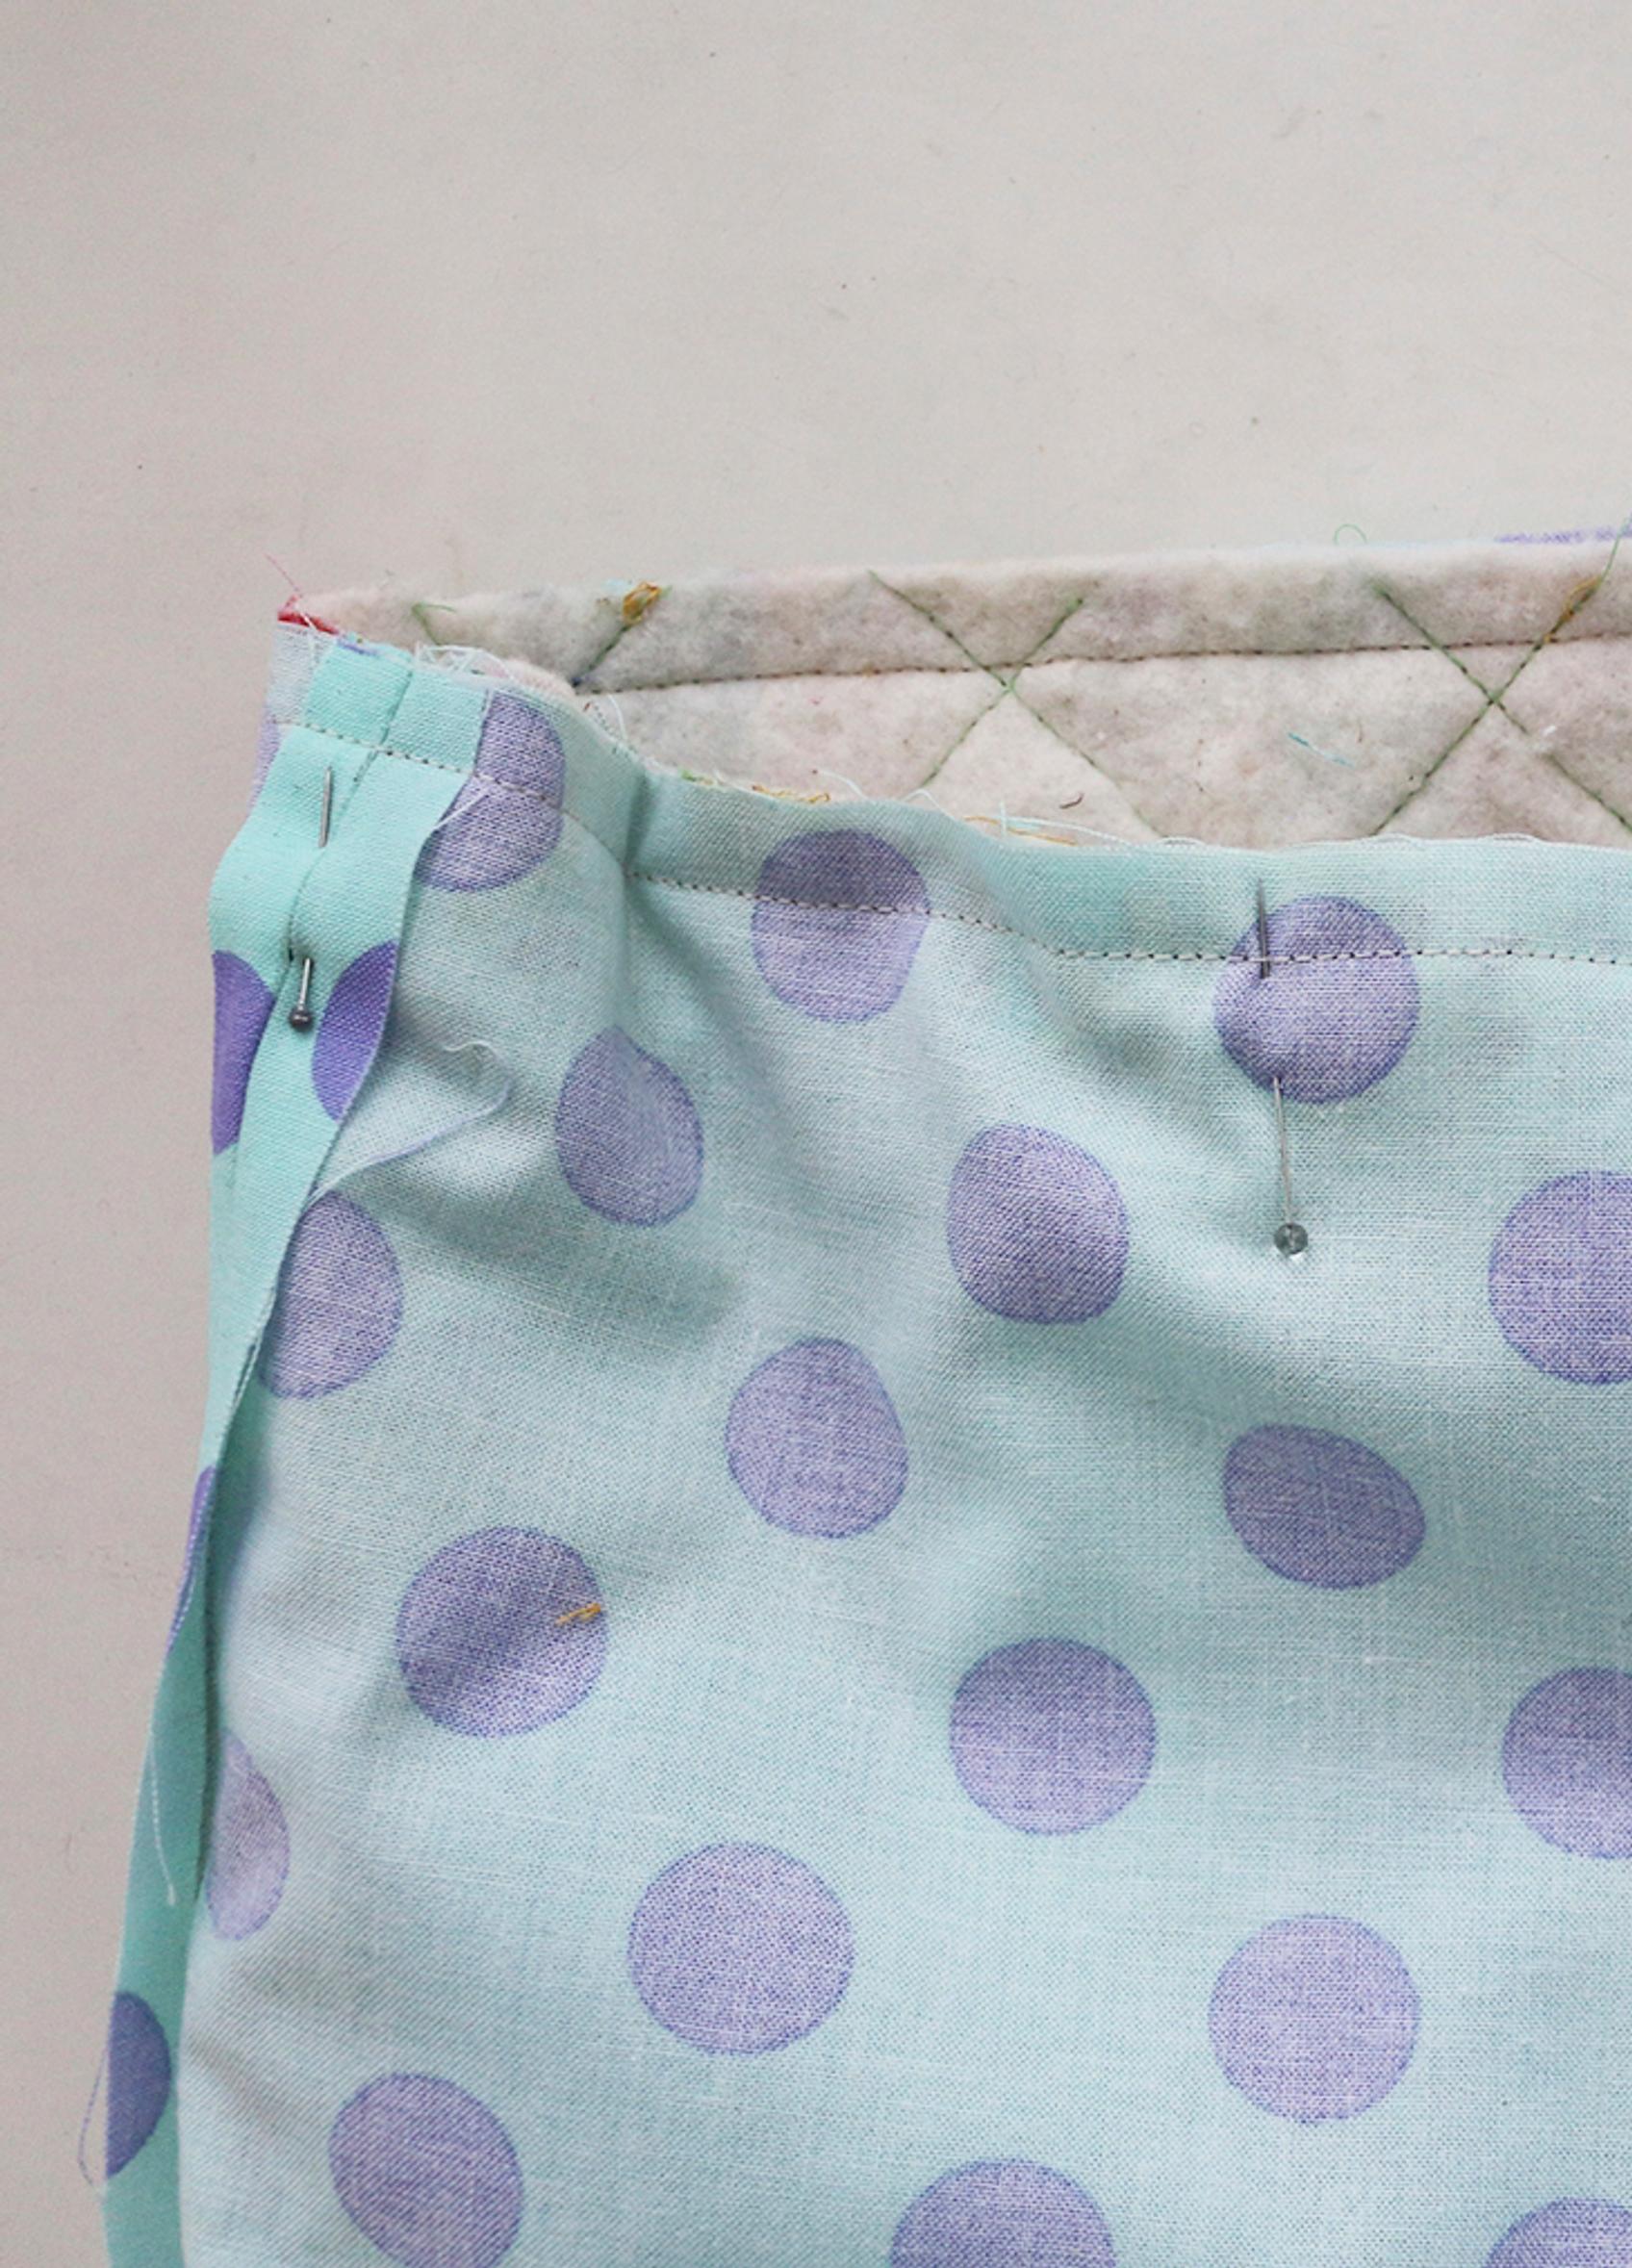
18. Pin the bag and lining together at the top with right sides facing, and sew. Make sure the straps don’t get caught in the seam.
19. Turn the bag right side out and topstitch near the top edge. If you like, secure the lining’s corner seam allowances to the bag’s corner seam allowances with a few hand stitches so the lining stays in place. Sew the turning opening closed with small hand stitches.