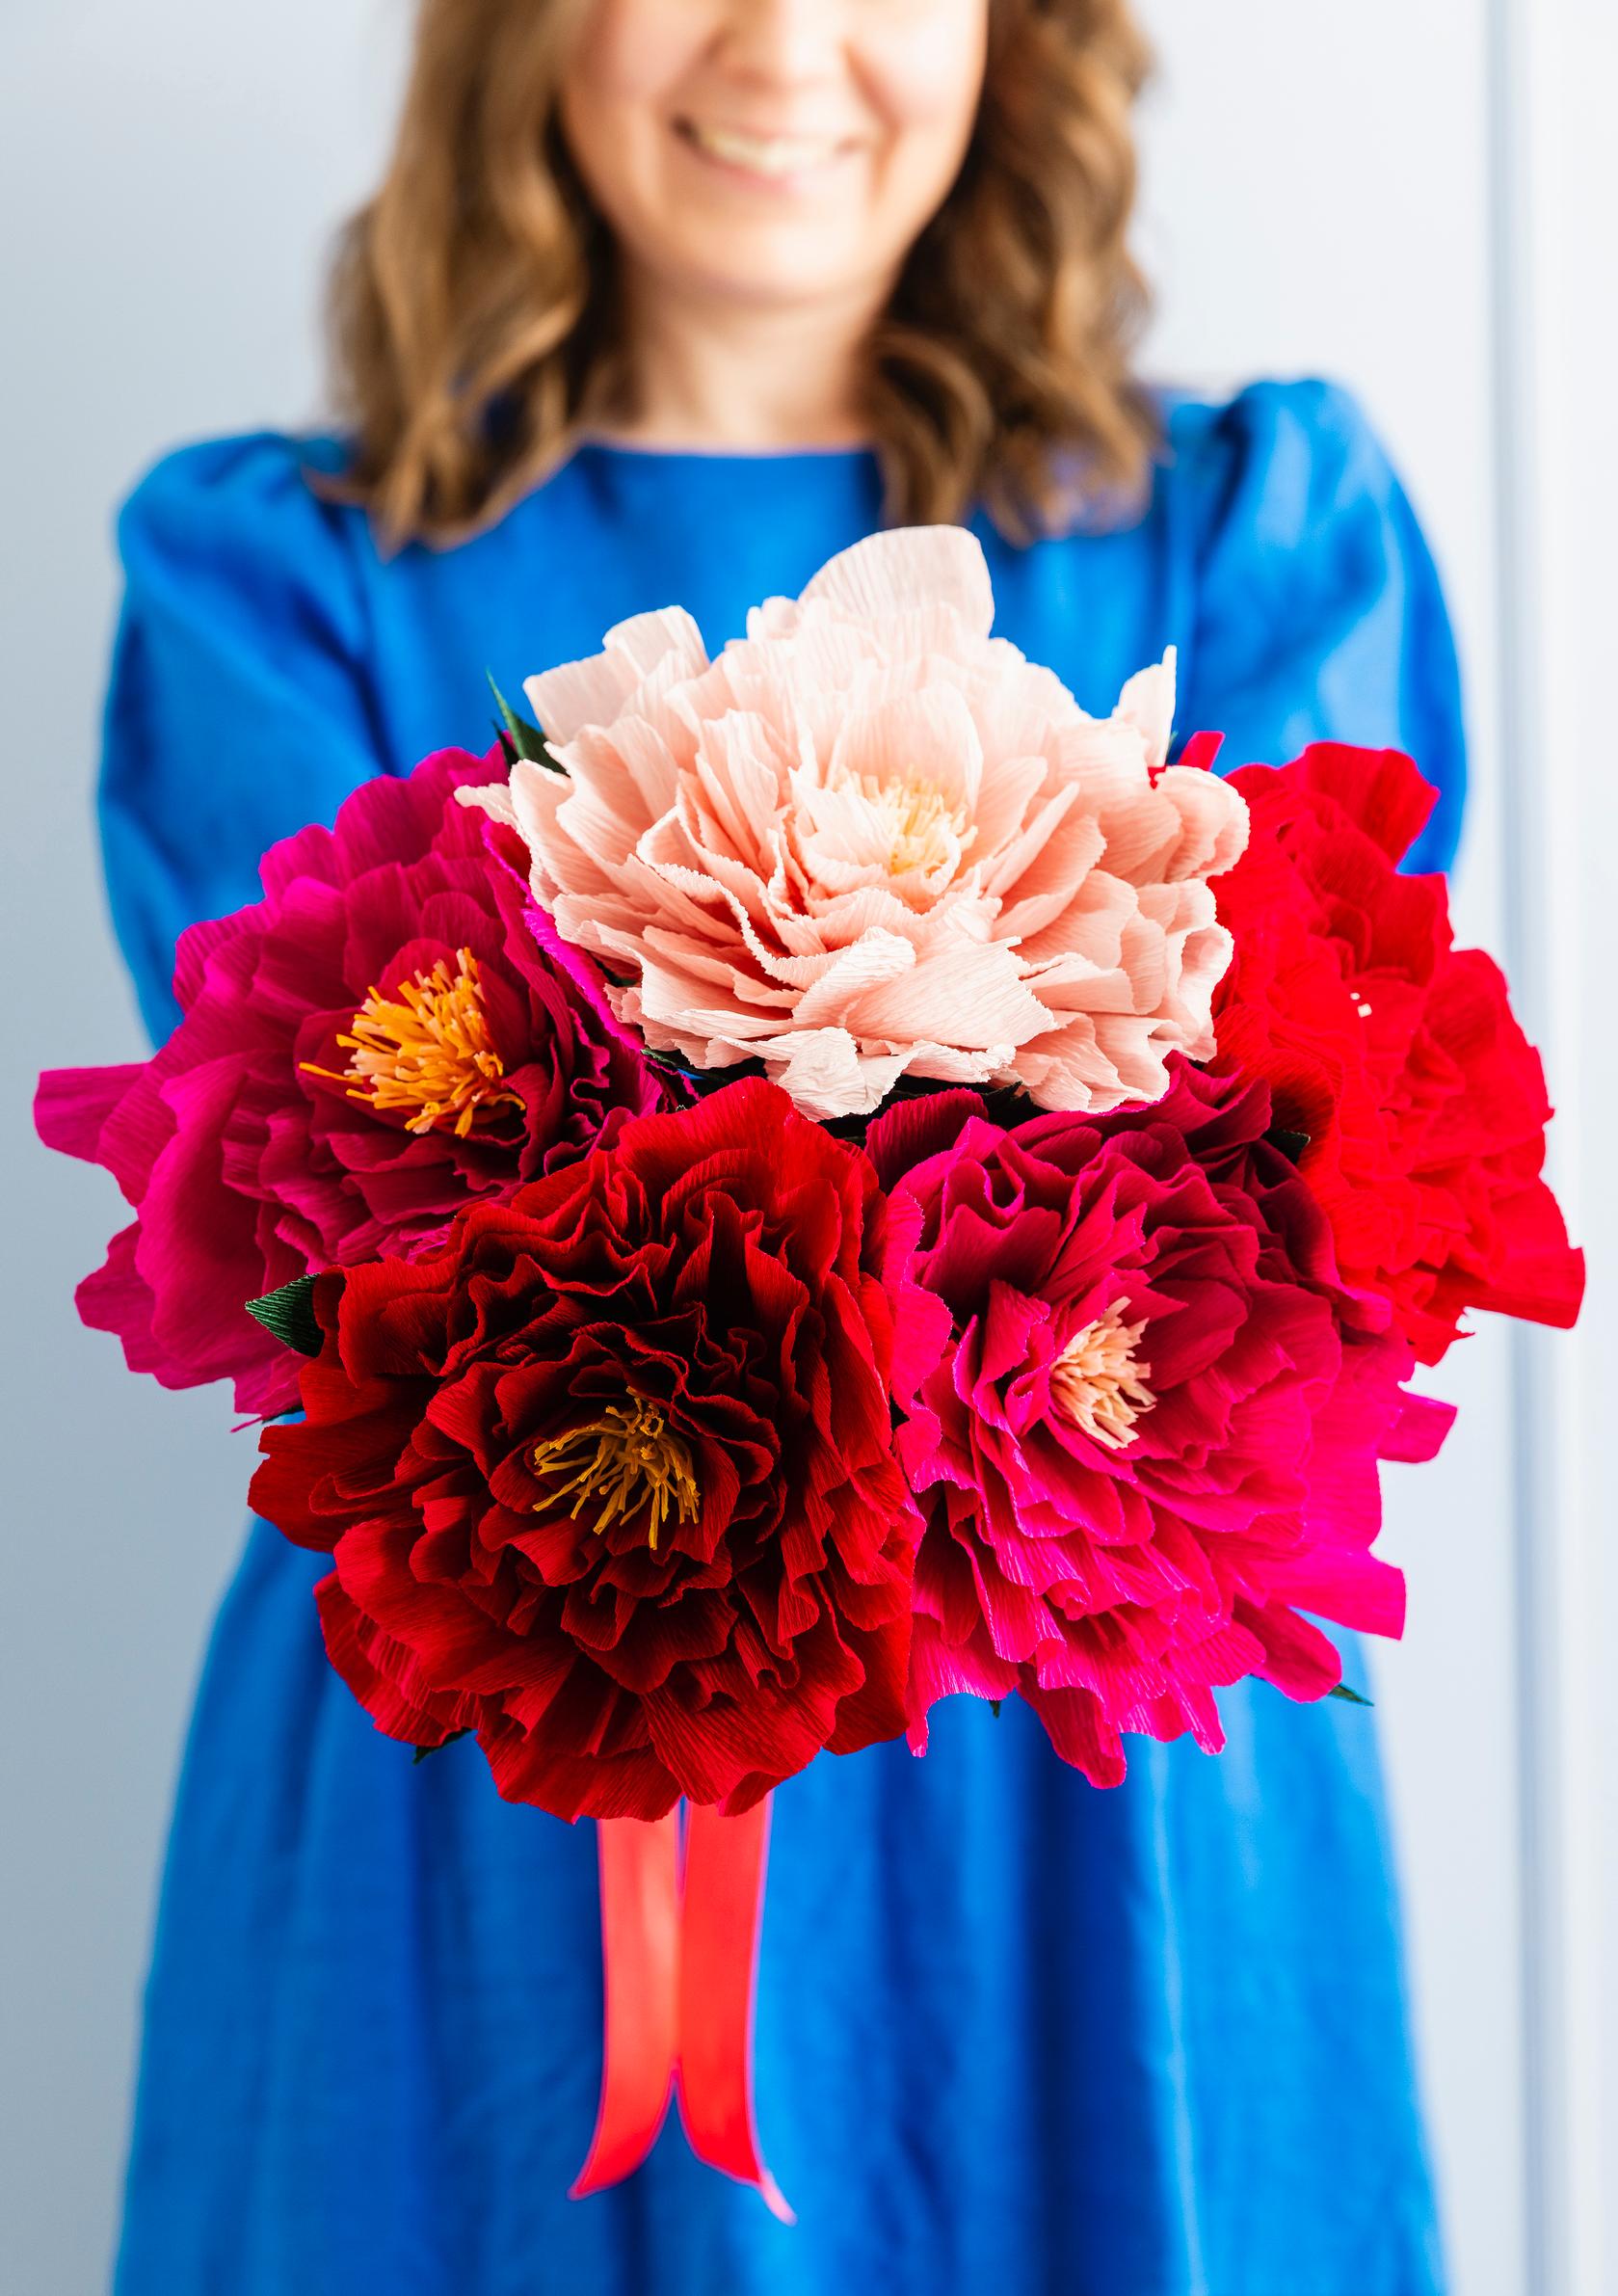
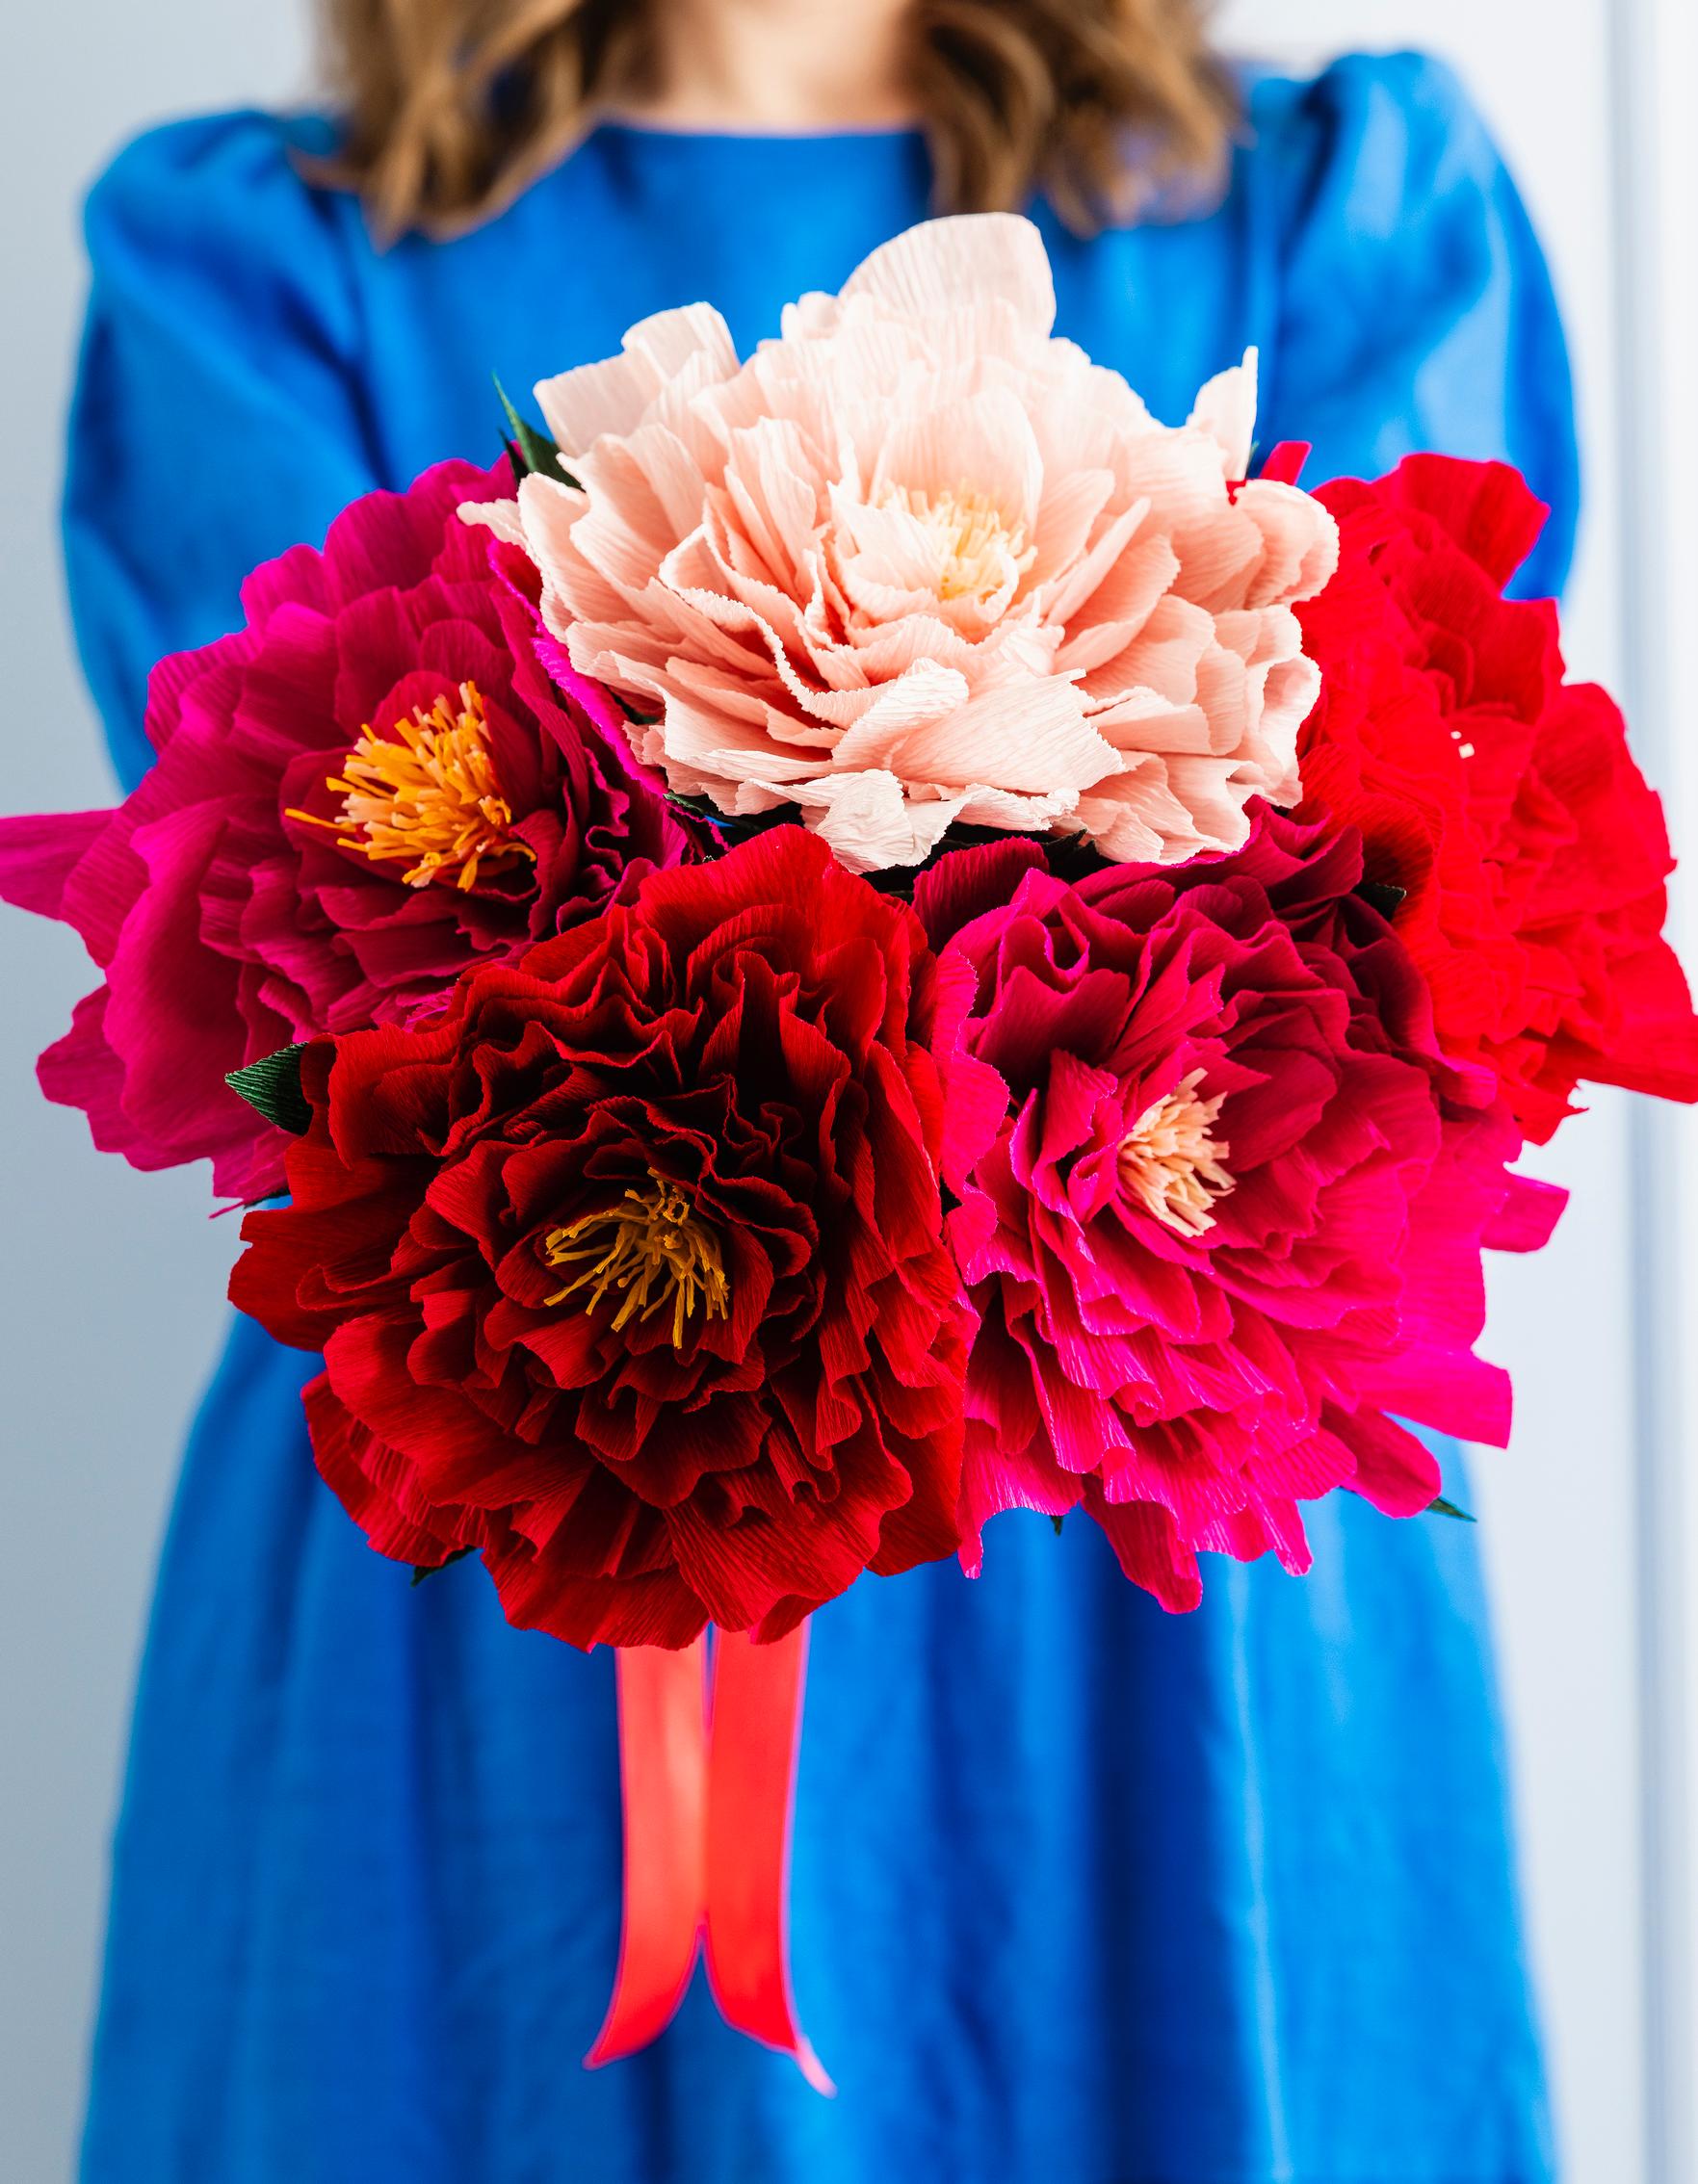
Paper peonies as lovely as the real thing—craft a beautiful bouquet from crepe paper
Do you love peonies too? These lovely crepe paper blooms will flower year after year. Decorate your table setting or party space with single blooms or craft an entire bouquet for a summer wedding. You'll find the peony templates to print out at the end.
The finished peony measures about 15 cm in diameter.
Paper peony—materials:
- Pink, fuchsia, or bright red crepe paper (weight 180 g) for the petals, and green for the leaves
- For the stamens, yellow and/or light yellow crepe paper (the example used 105 g, but any weight works)
- Petal templates (a printable PDF is available at the end)
- Floral wire (30 cm long, 2 mm diameter)
- Scissors
- Liquid glue
- (Ribbon for tying the bouquet)


Paper peony—instructions:
1. Print out the ready-made templates. If you want peonies in different sizes, scale the template. Remember the petals will become larger than the template once the crepe paper is stretched. Then cut out the templates. You can cut a small notch at the bottom corners of the petals, as shown in the template, to make gluing easier.

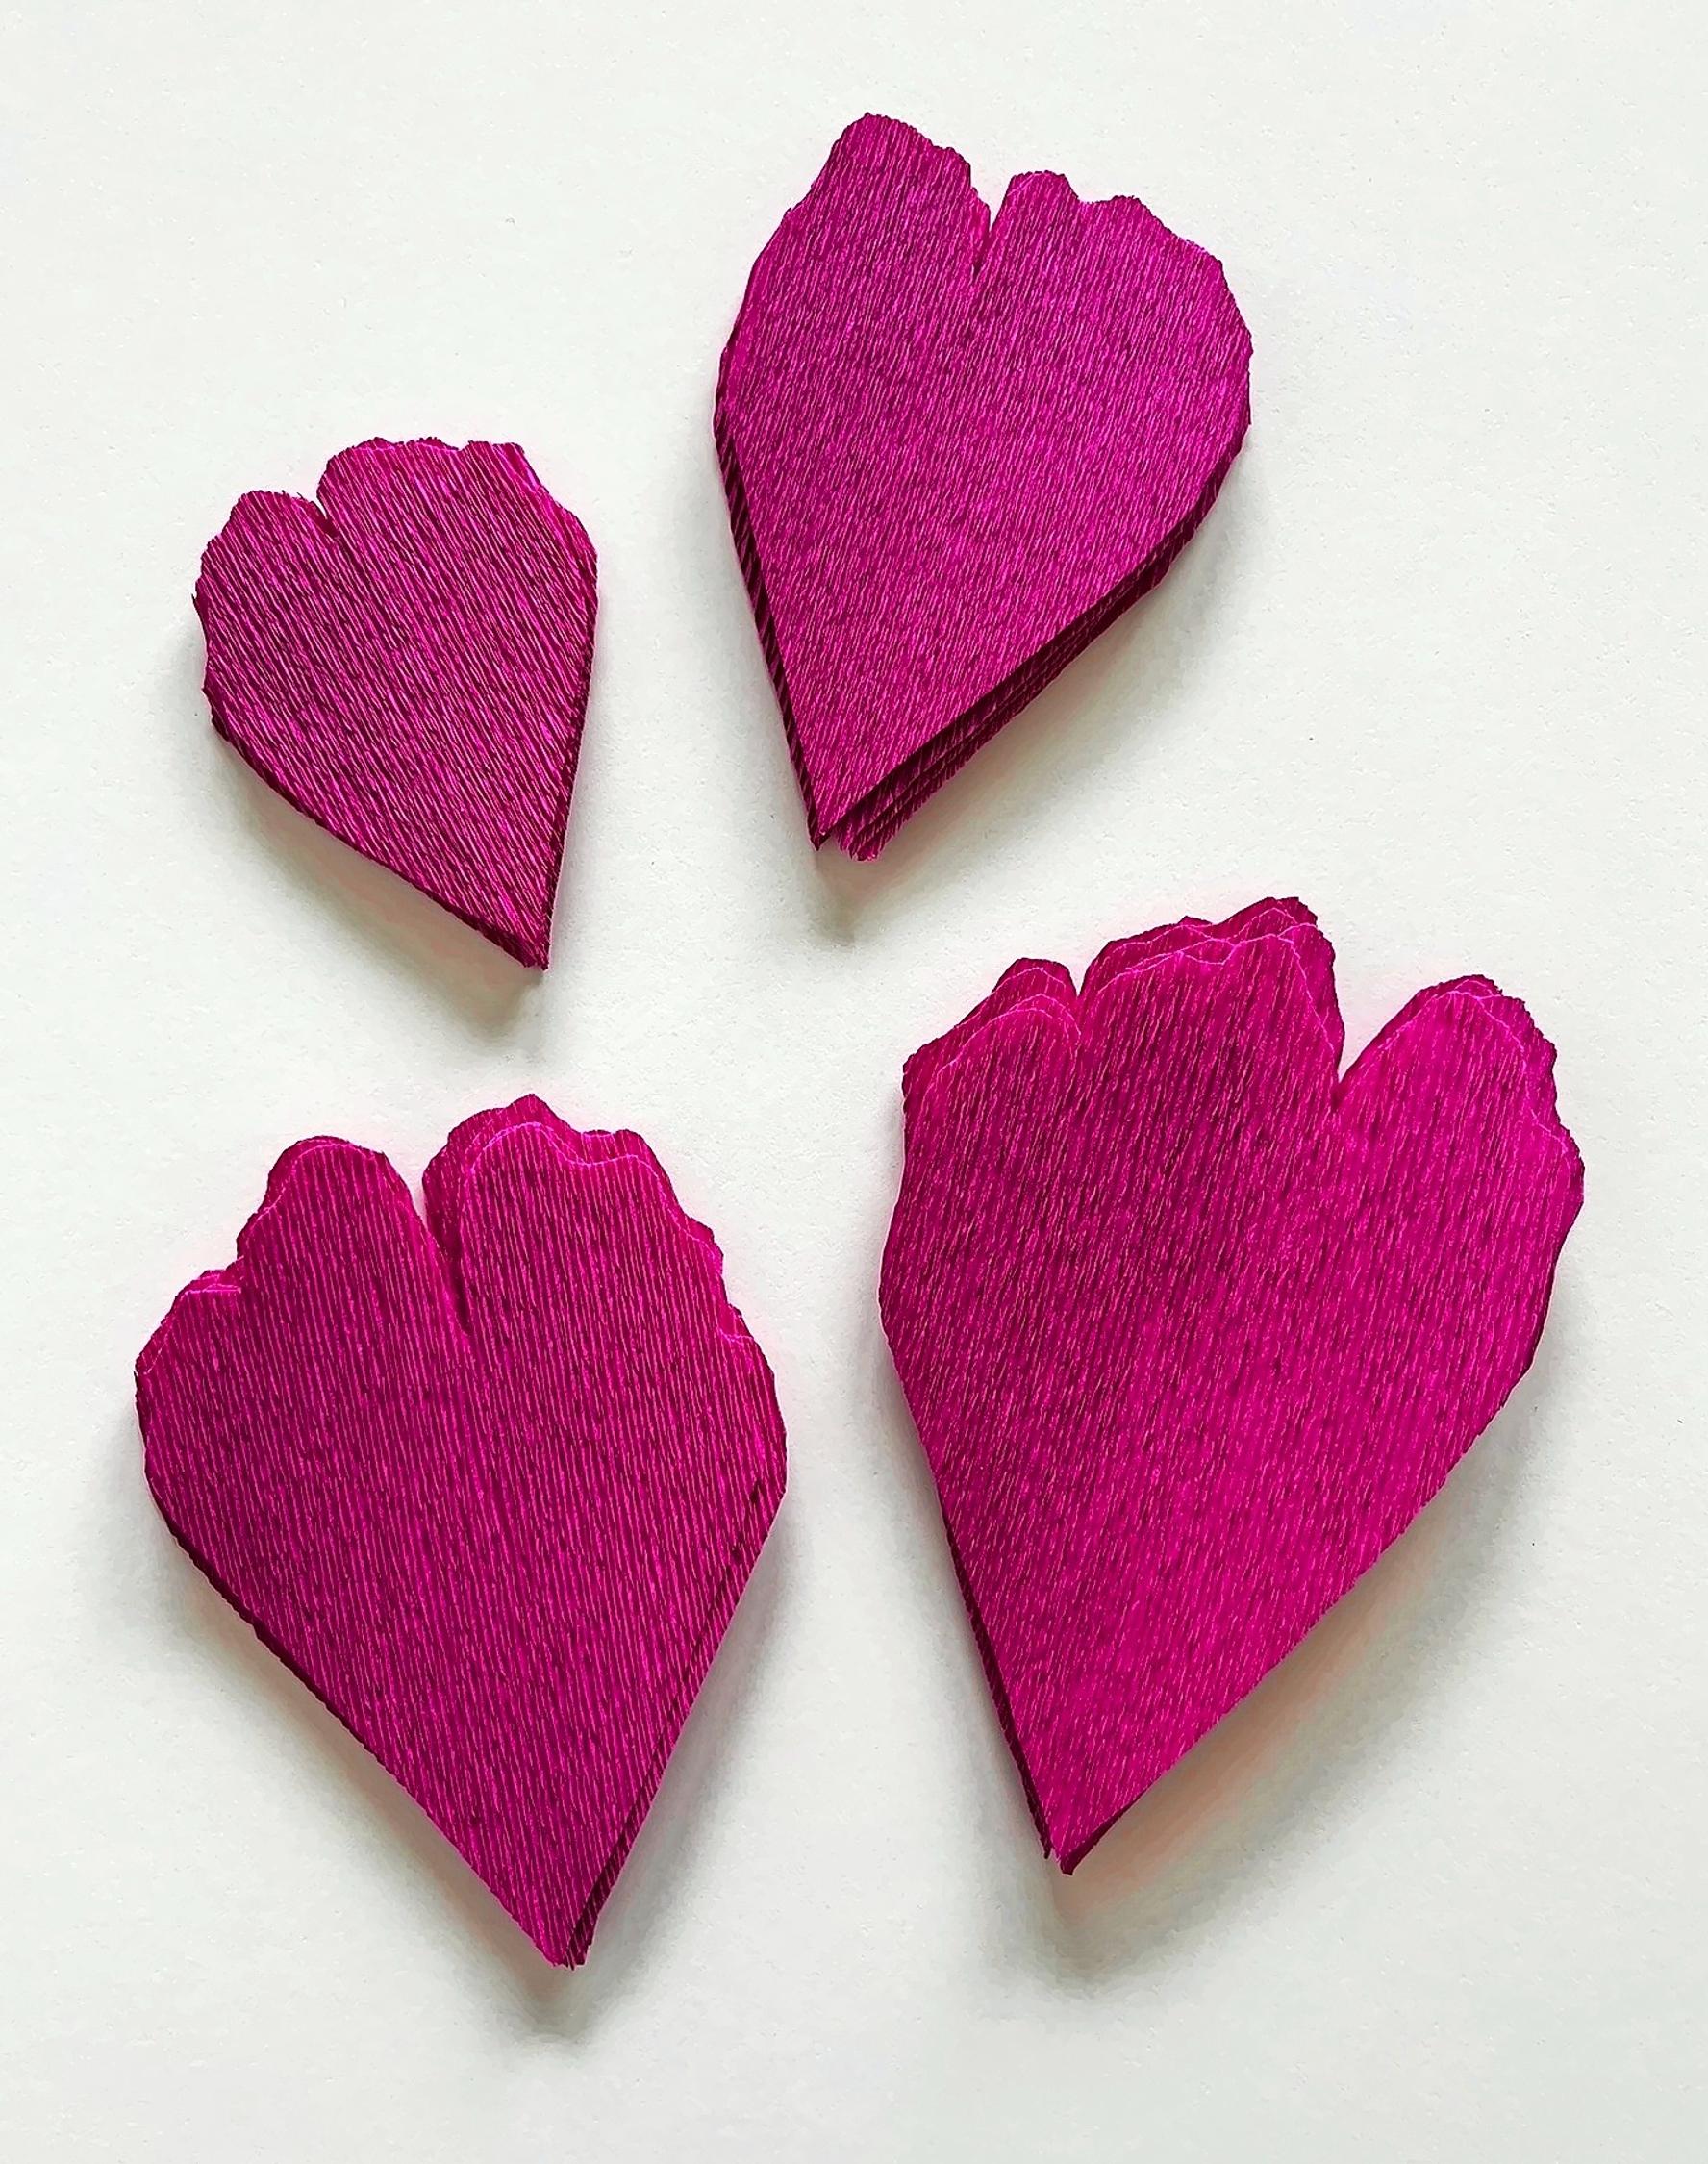
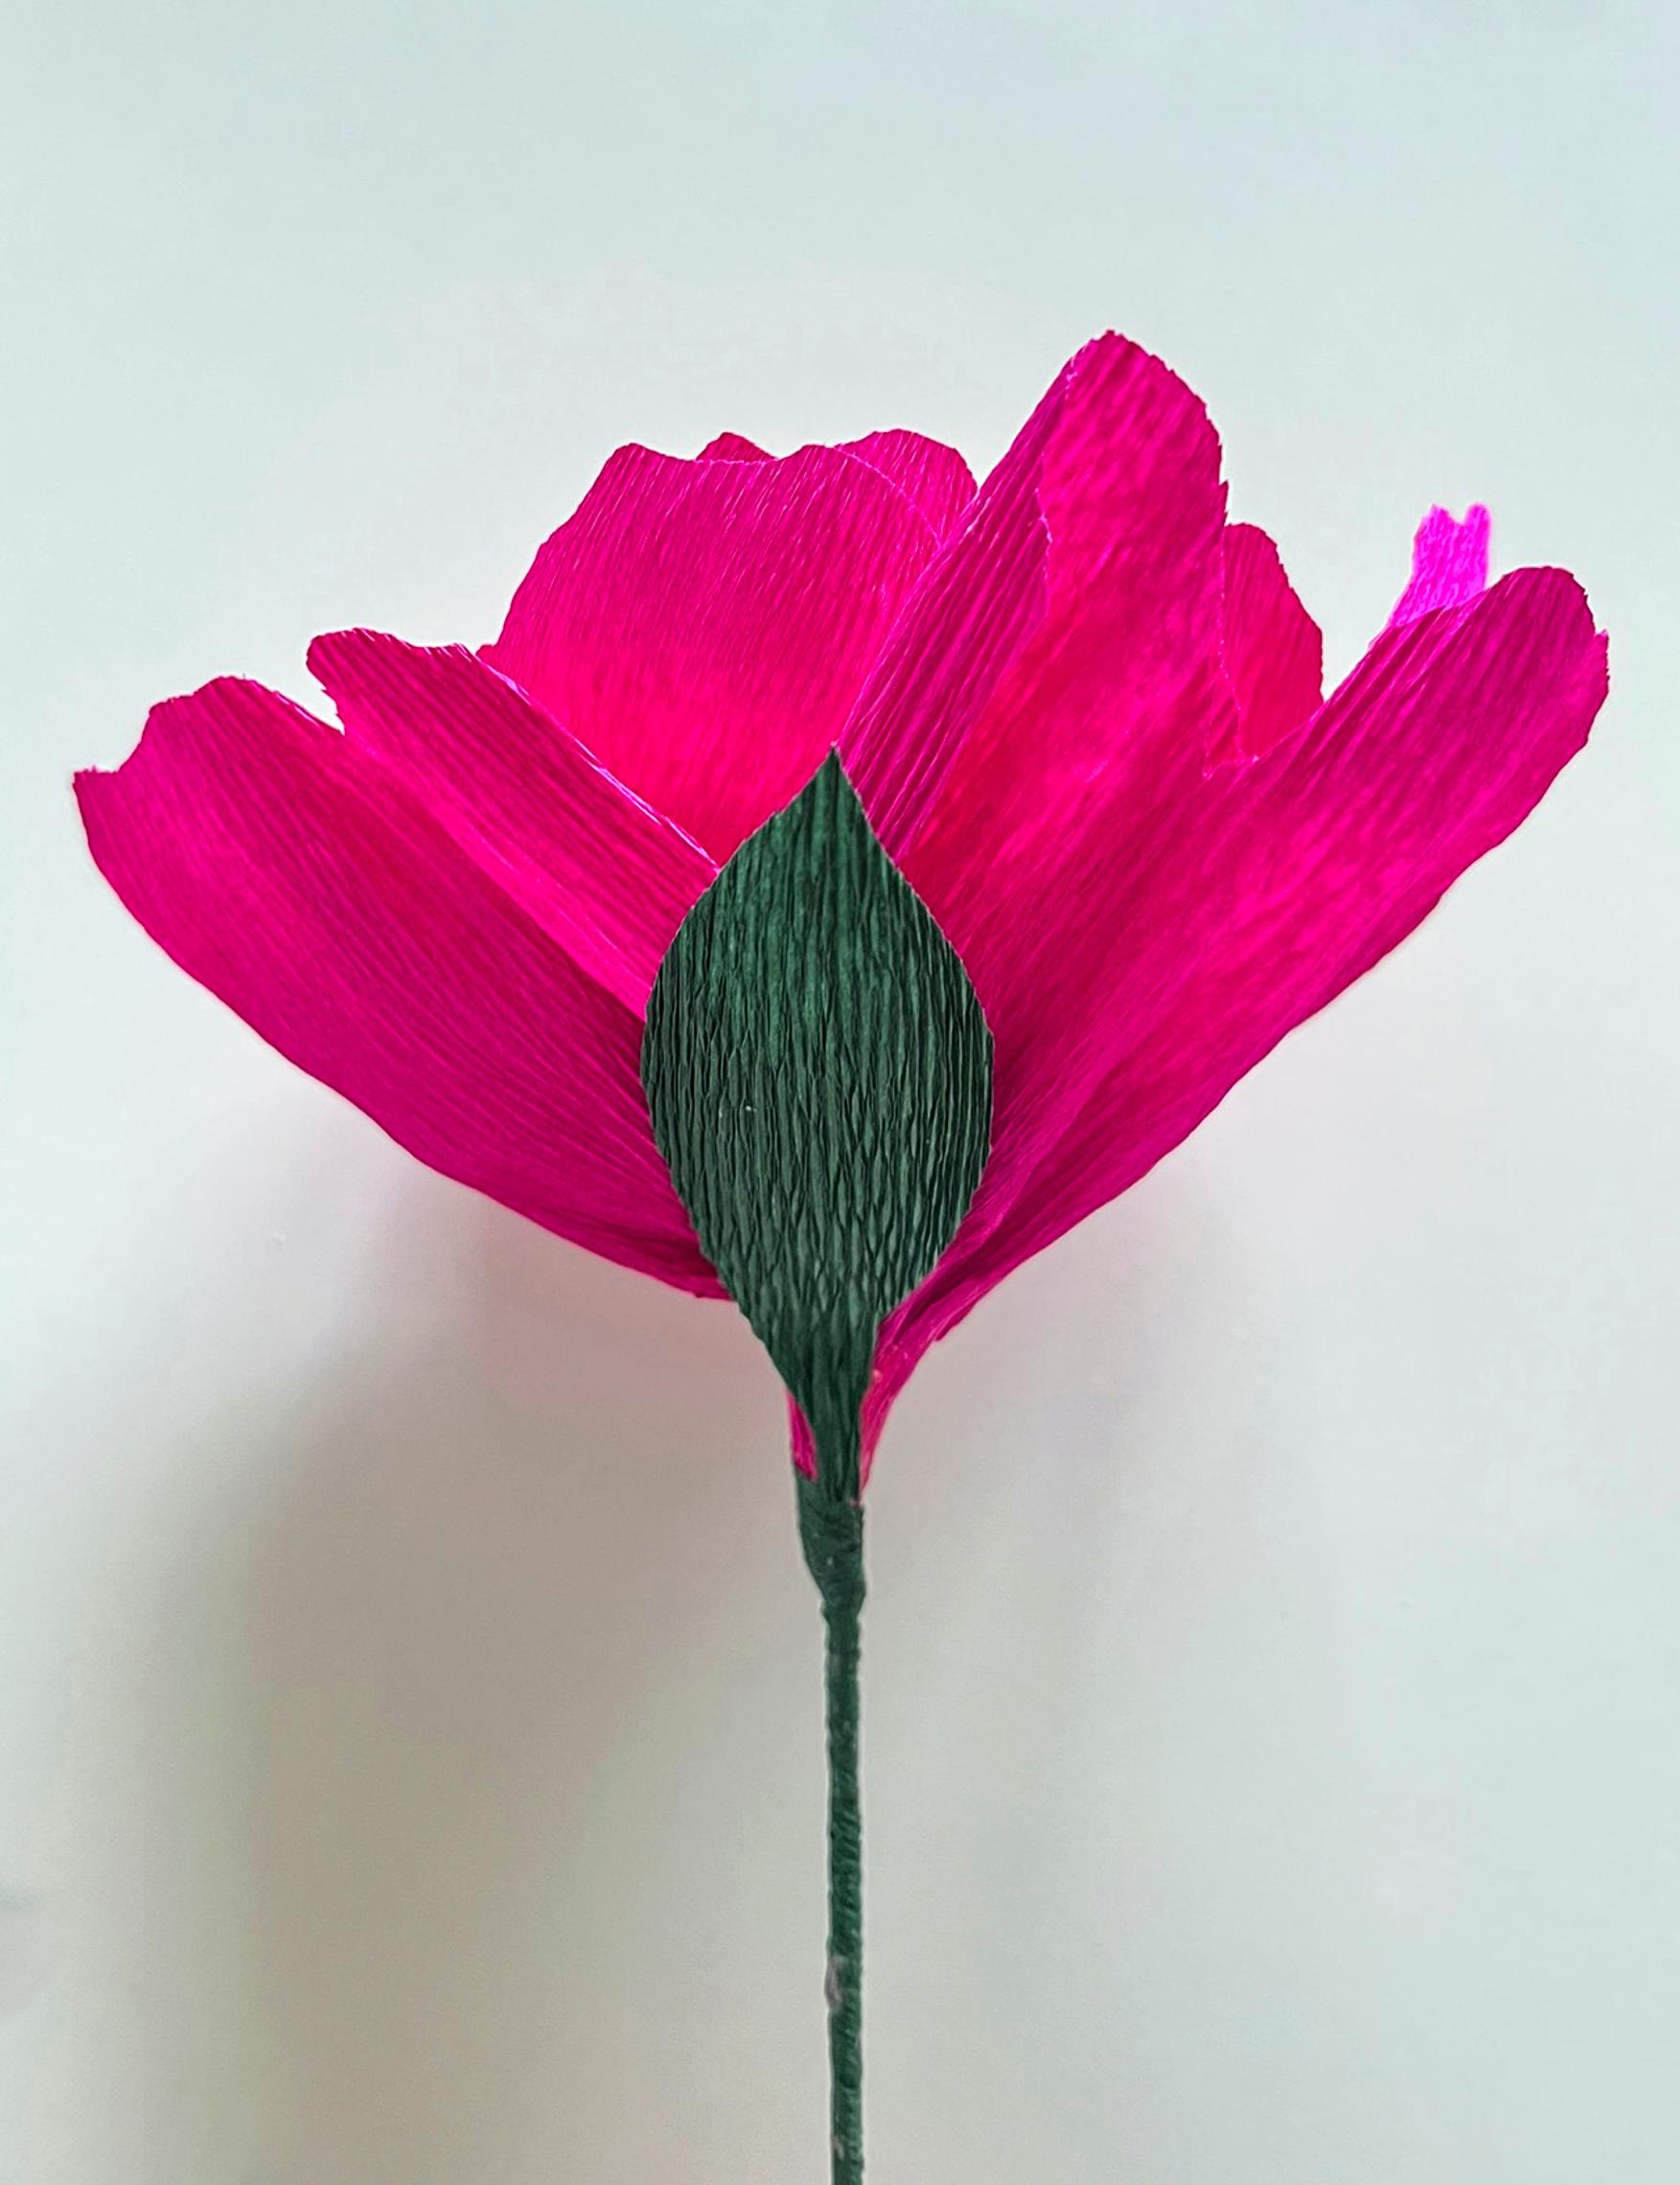
2. Use the templates to cut out petals from crepe paper, making sure the ridges run vertically. You may also use the templates as a guide and shape the petals however you prefer. In this tutorial, four sizes of petals are used: 7–9 of the smallest size and 6 of each of the other sizes.

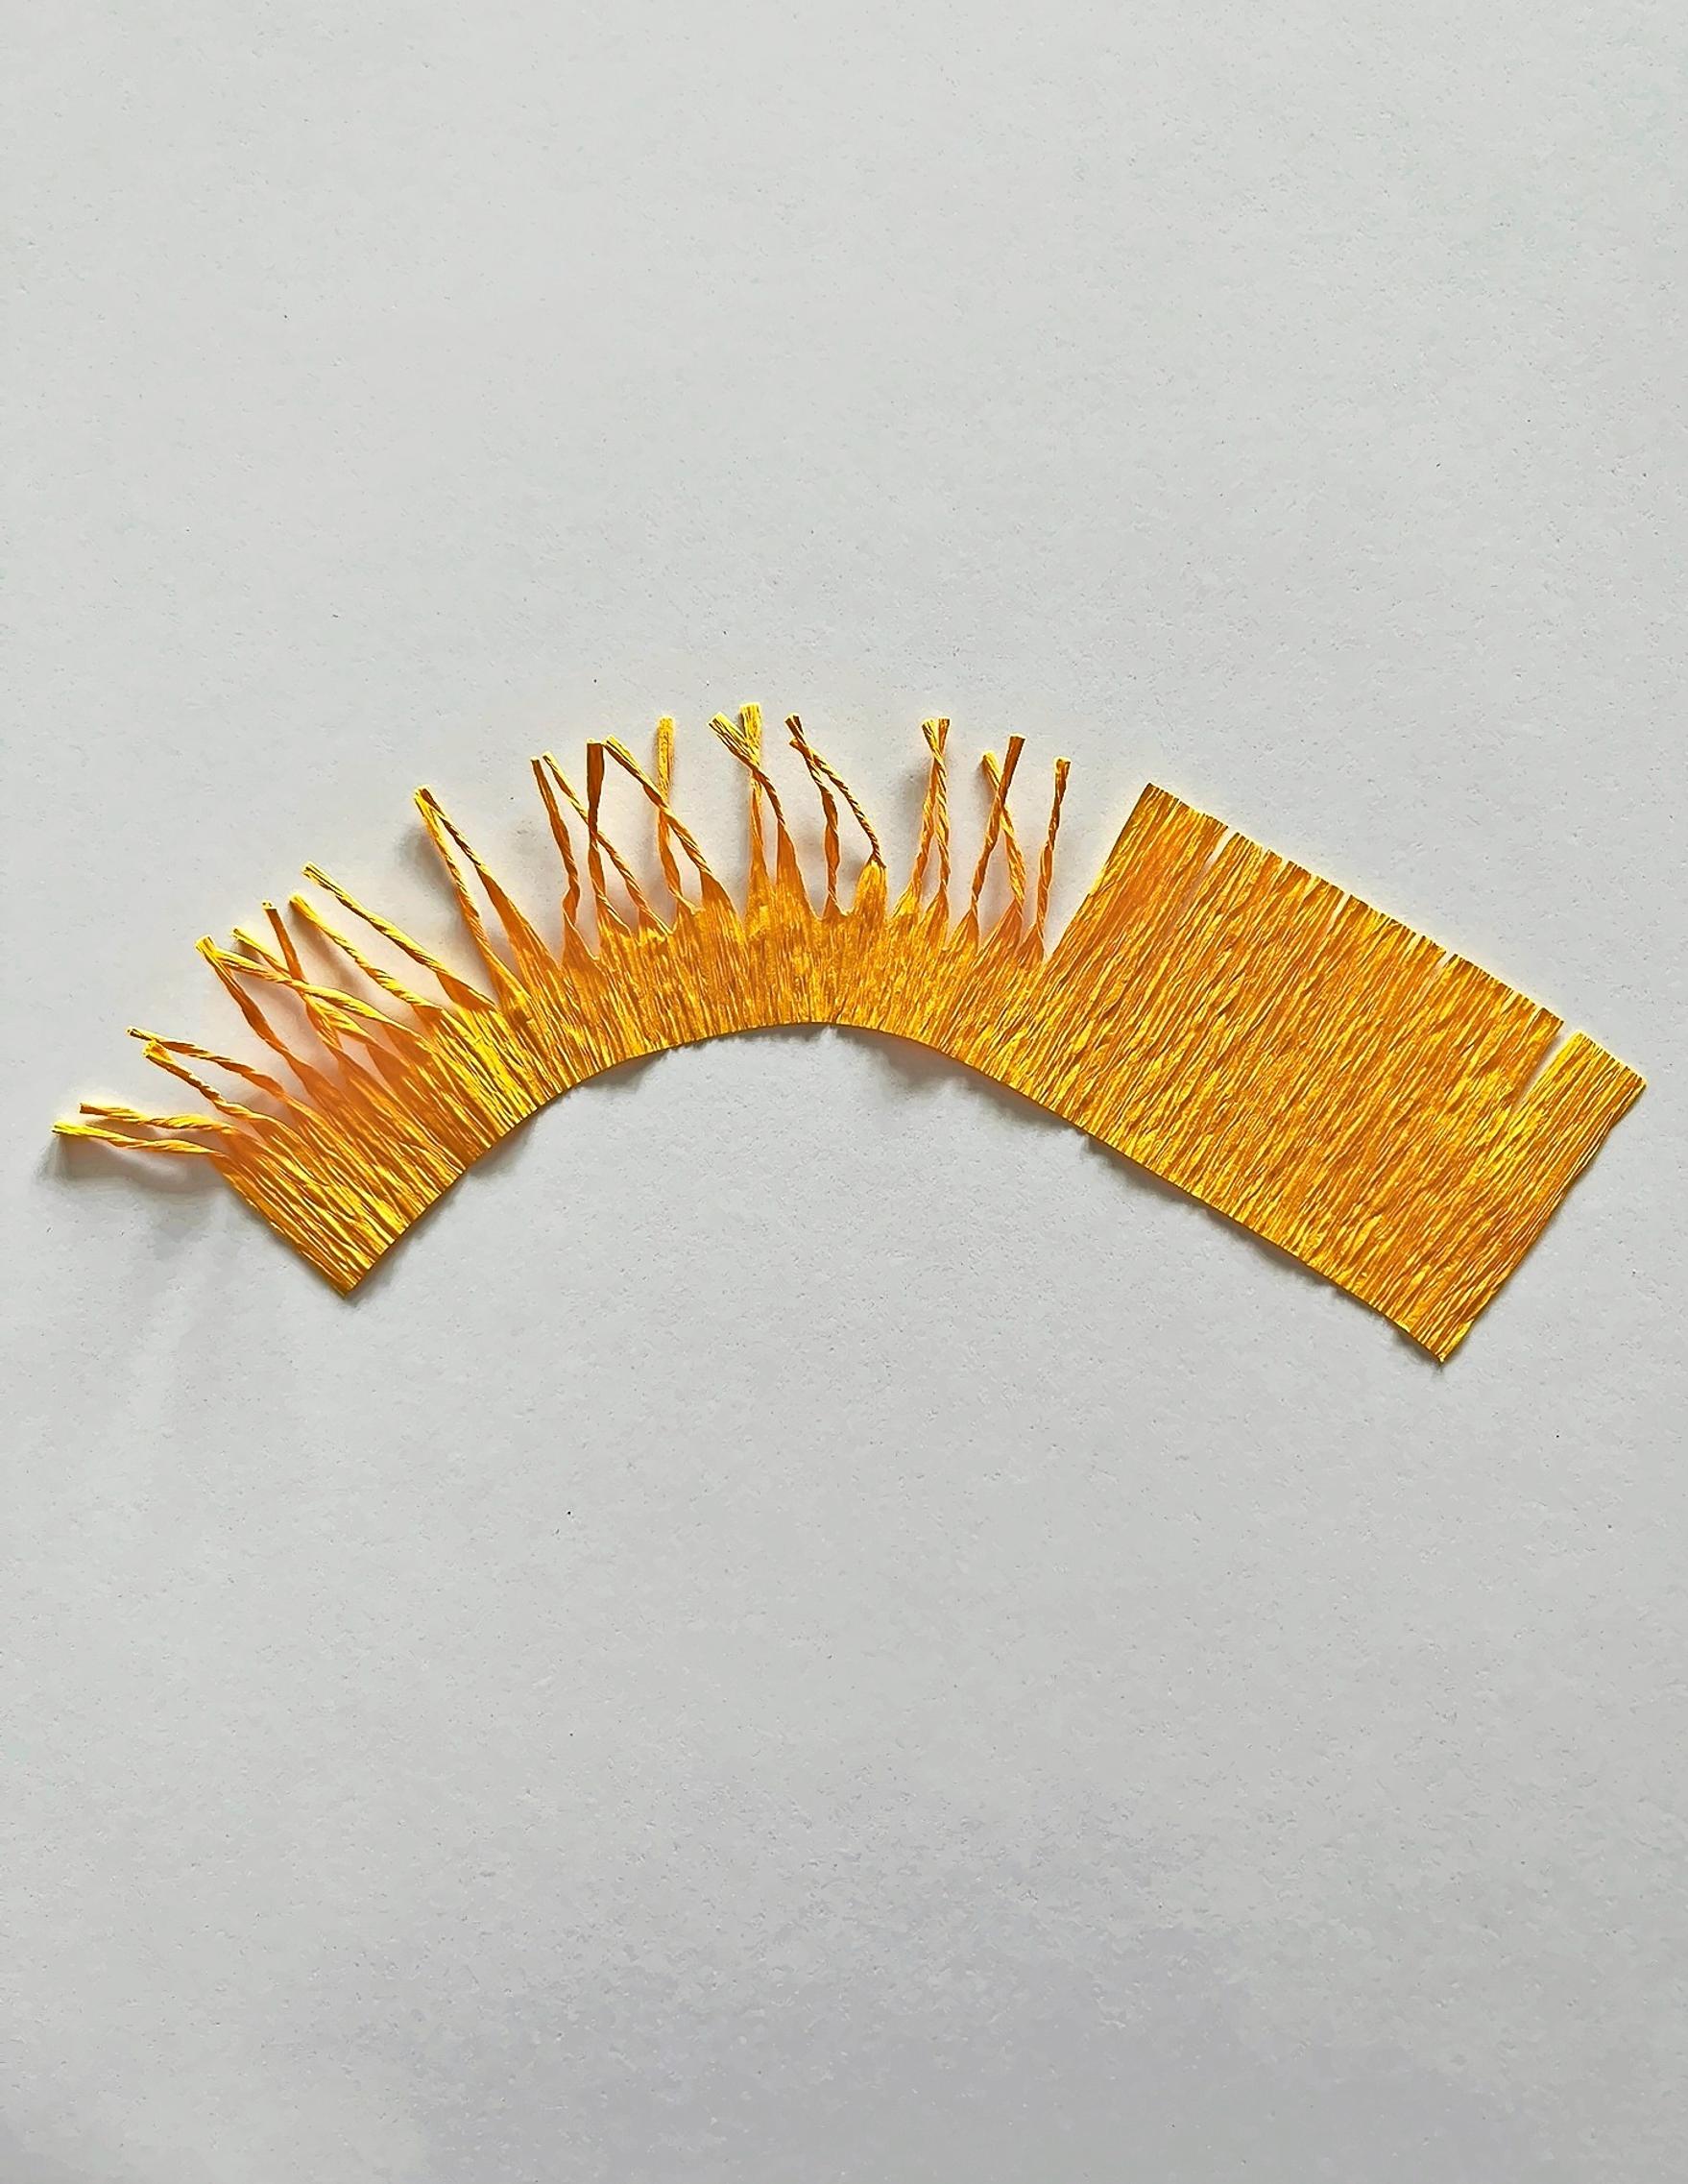
3. Cut a rectangle (about 12 cm × 4 cm) from yellow crepe paper. Stretch it widthwise, then fringe it with scissors. Roll the fringed edges between your fingers to form the stamens.

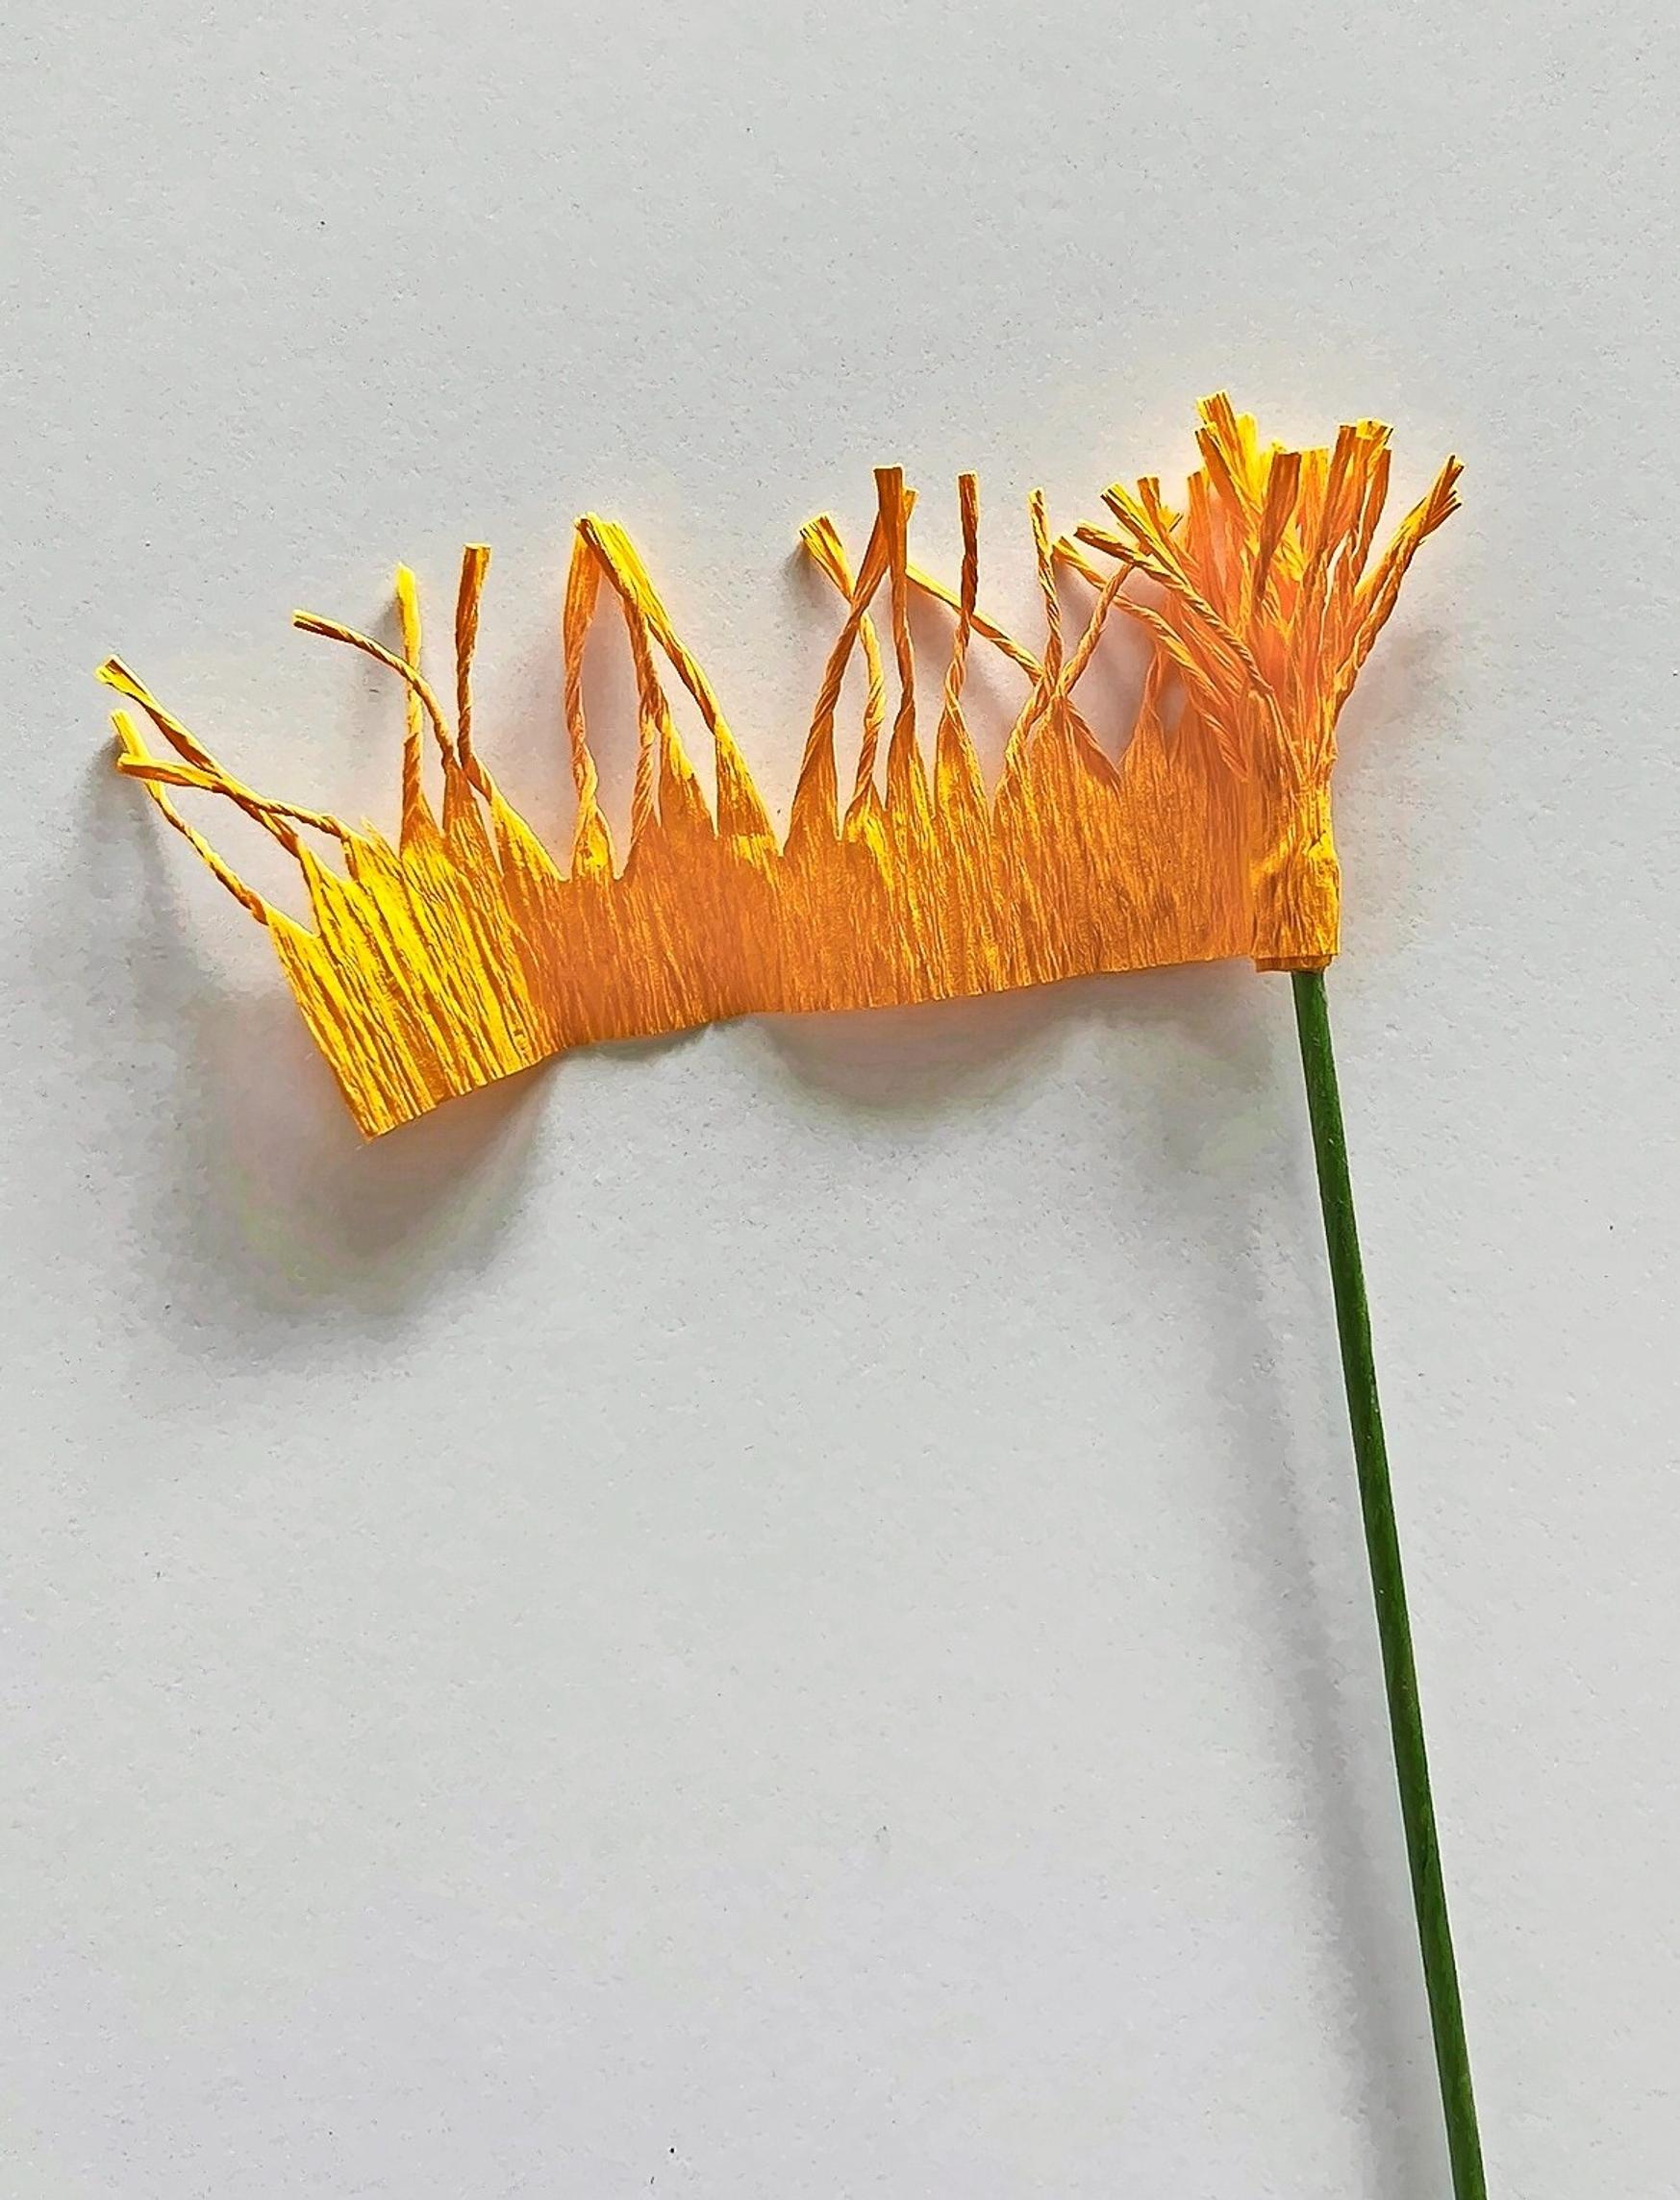
4. Glue the stamens to the end of the floral wire, then roll the paper around it.


5. Stretch the petals widthwise to give them a convex shape. Be careful not to tear the paper.


6. Glue on the petals, starting with the smallest ones. Apply glue to the base of each petal and press it firmly against the stem. Position the first petals so the stamens clearly show. Glue the petals evenly and slightly overlapping around the center.

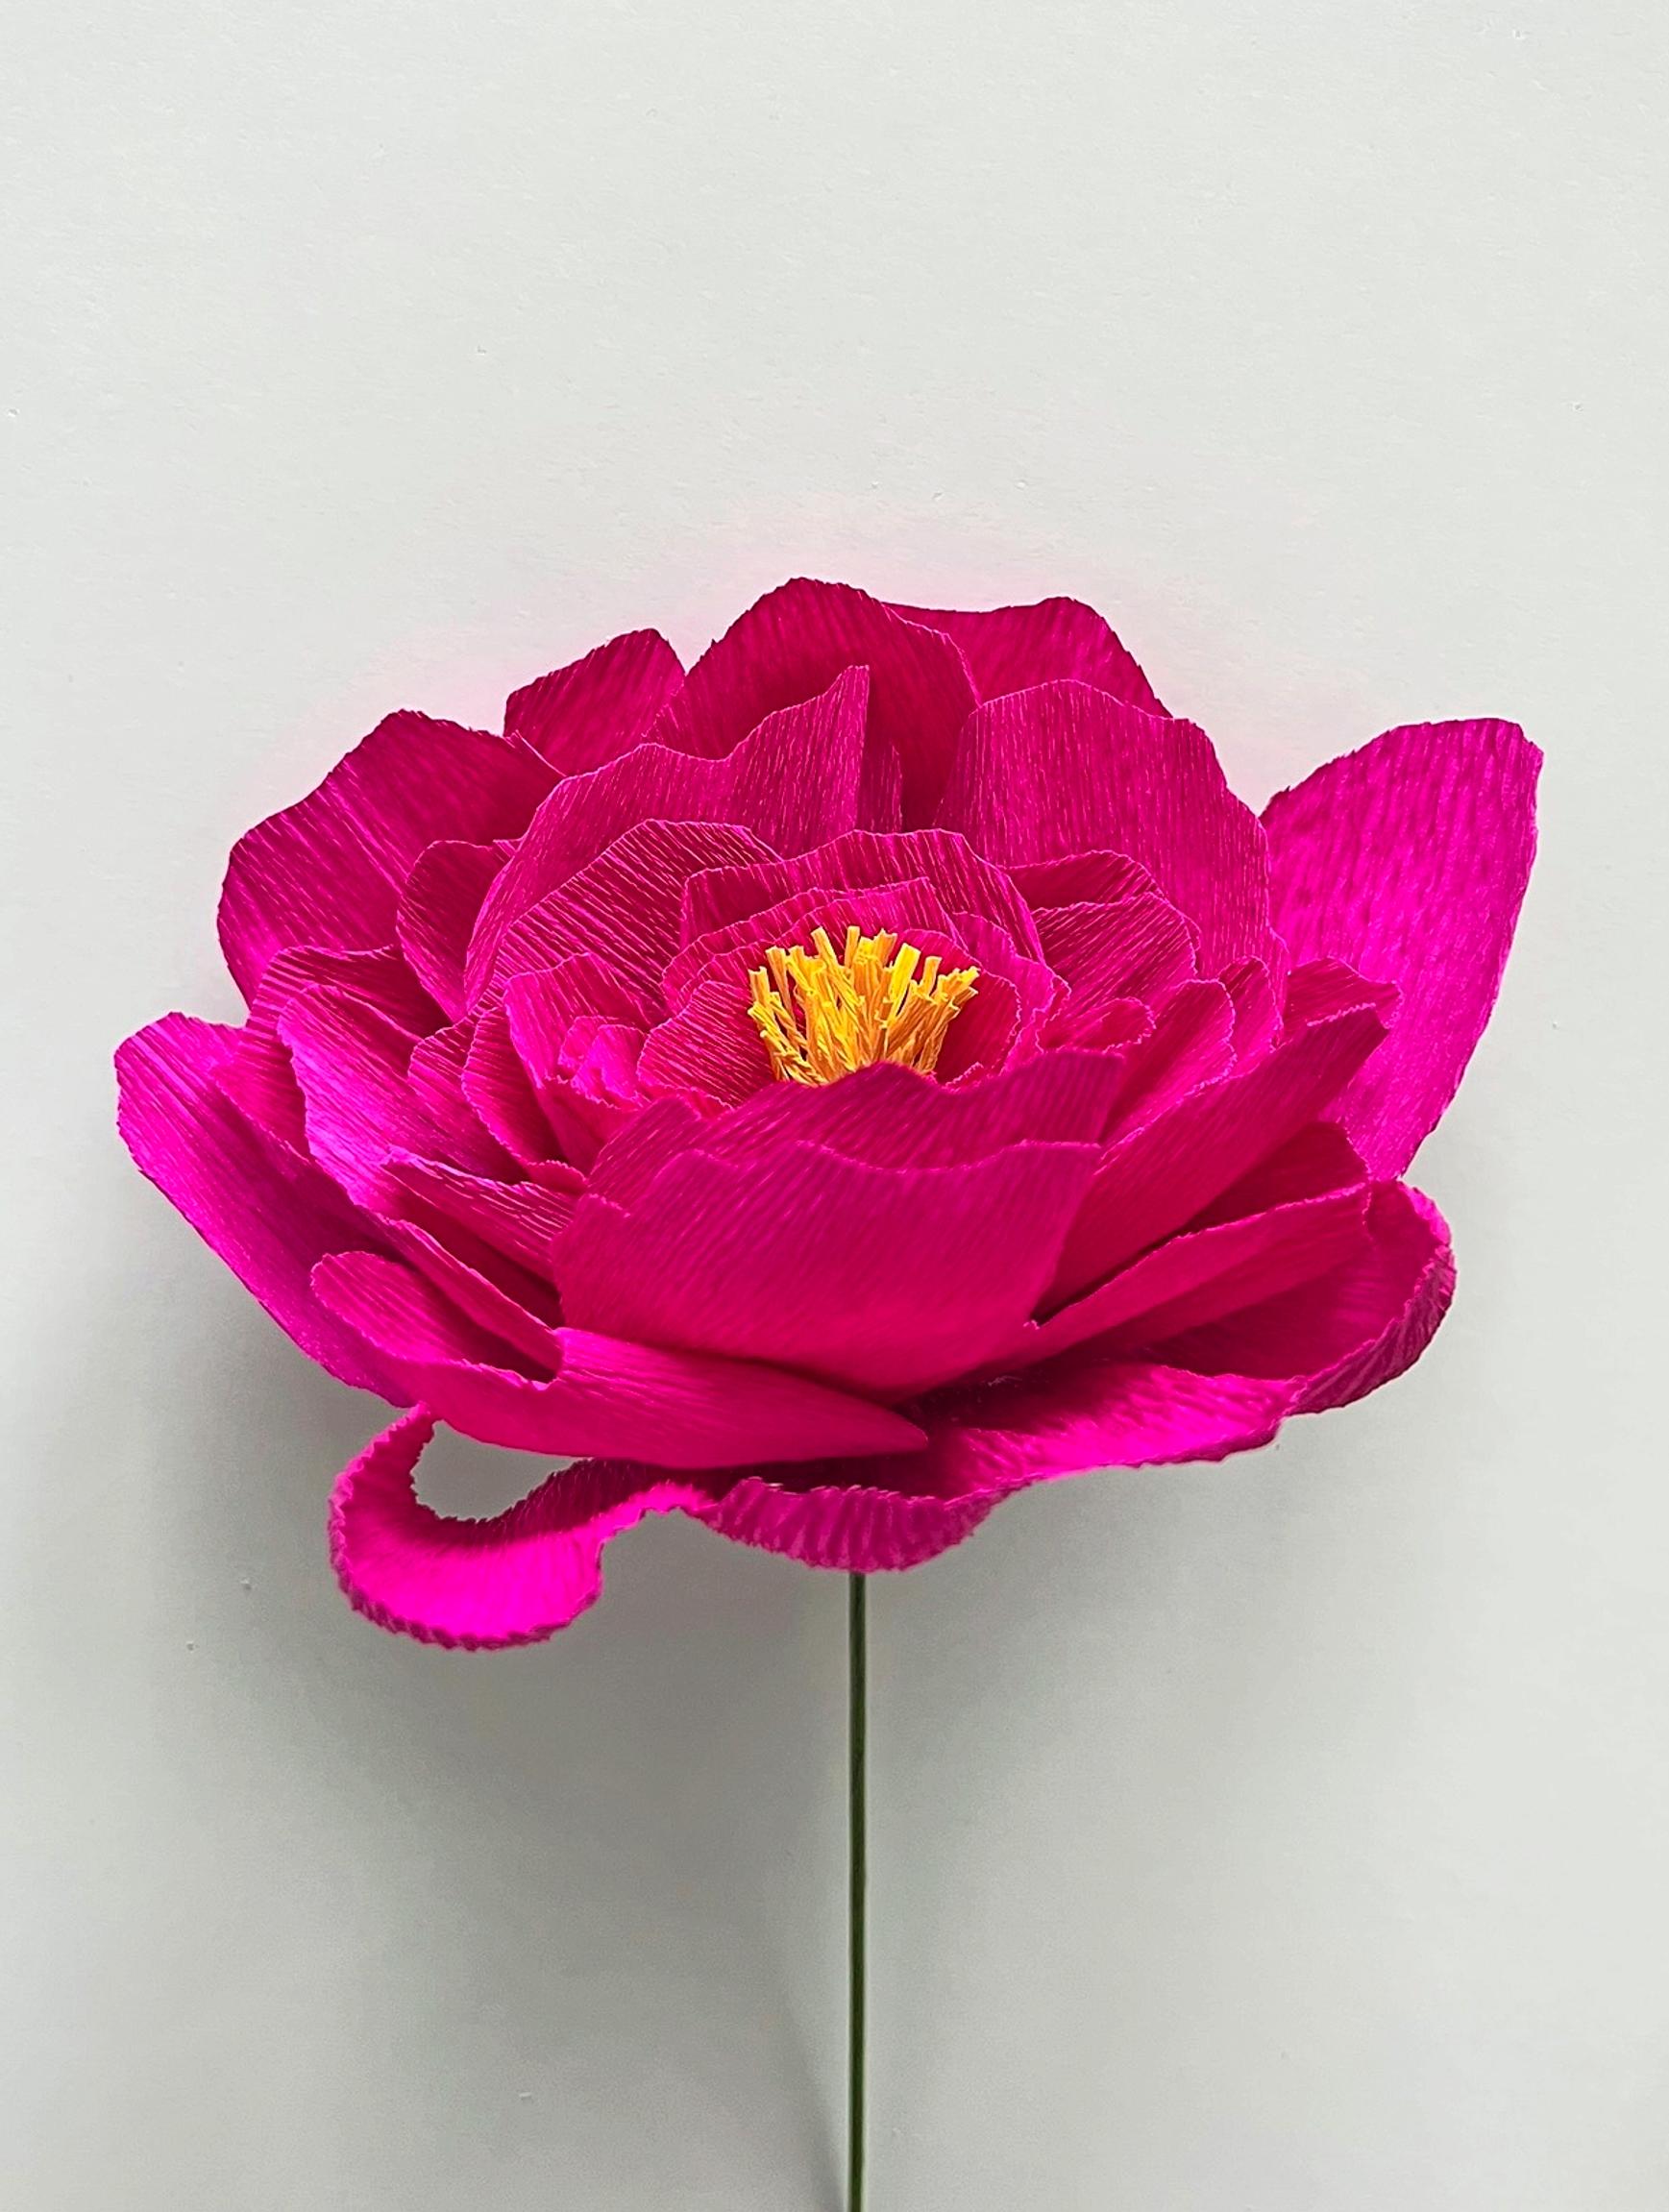
7. Place the largest petals a little higher than the smaller ones to give the flower more depth. Continue until you’ve used all the petals and your peony is beautifully full.

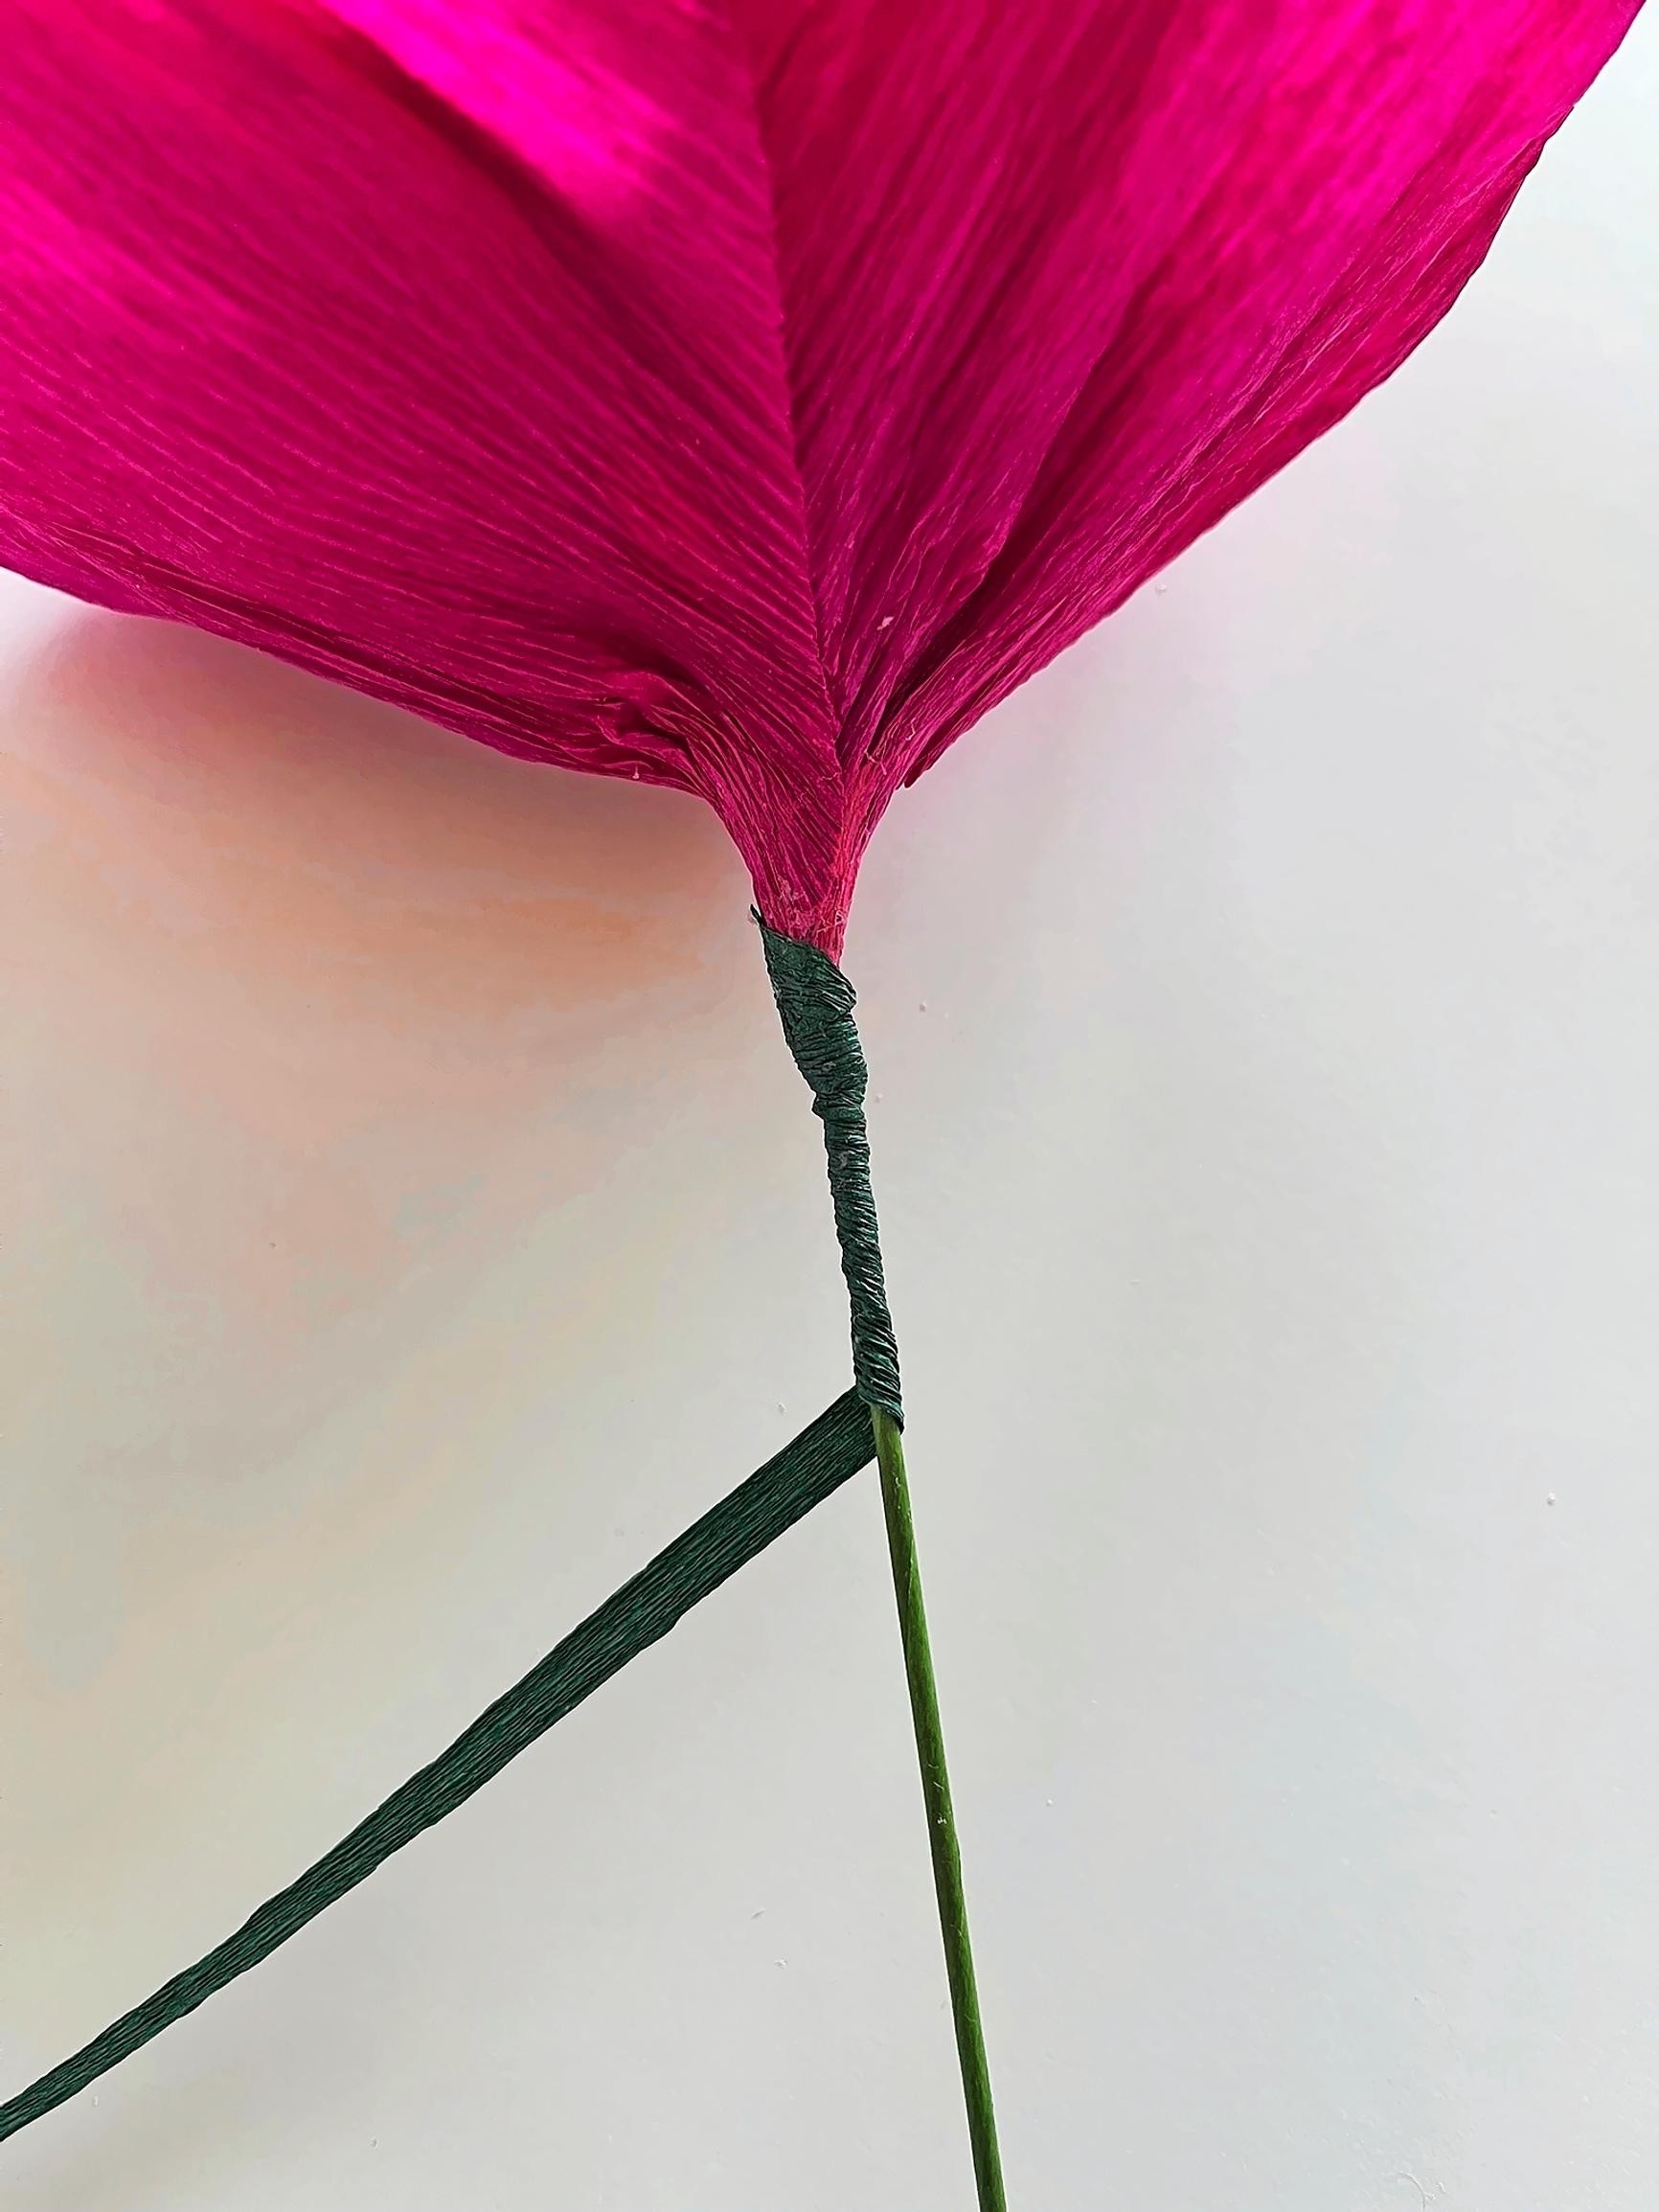
8. Wrap the flower stem with green crepe paper, starting at the base. Cut a narrow strip about one centimeter wide. Add a little glue and wind the strip around the stem.

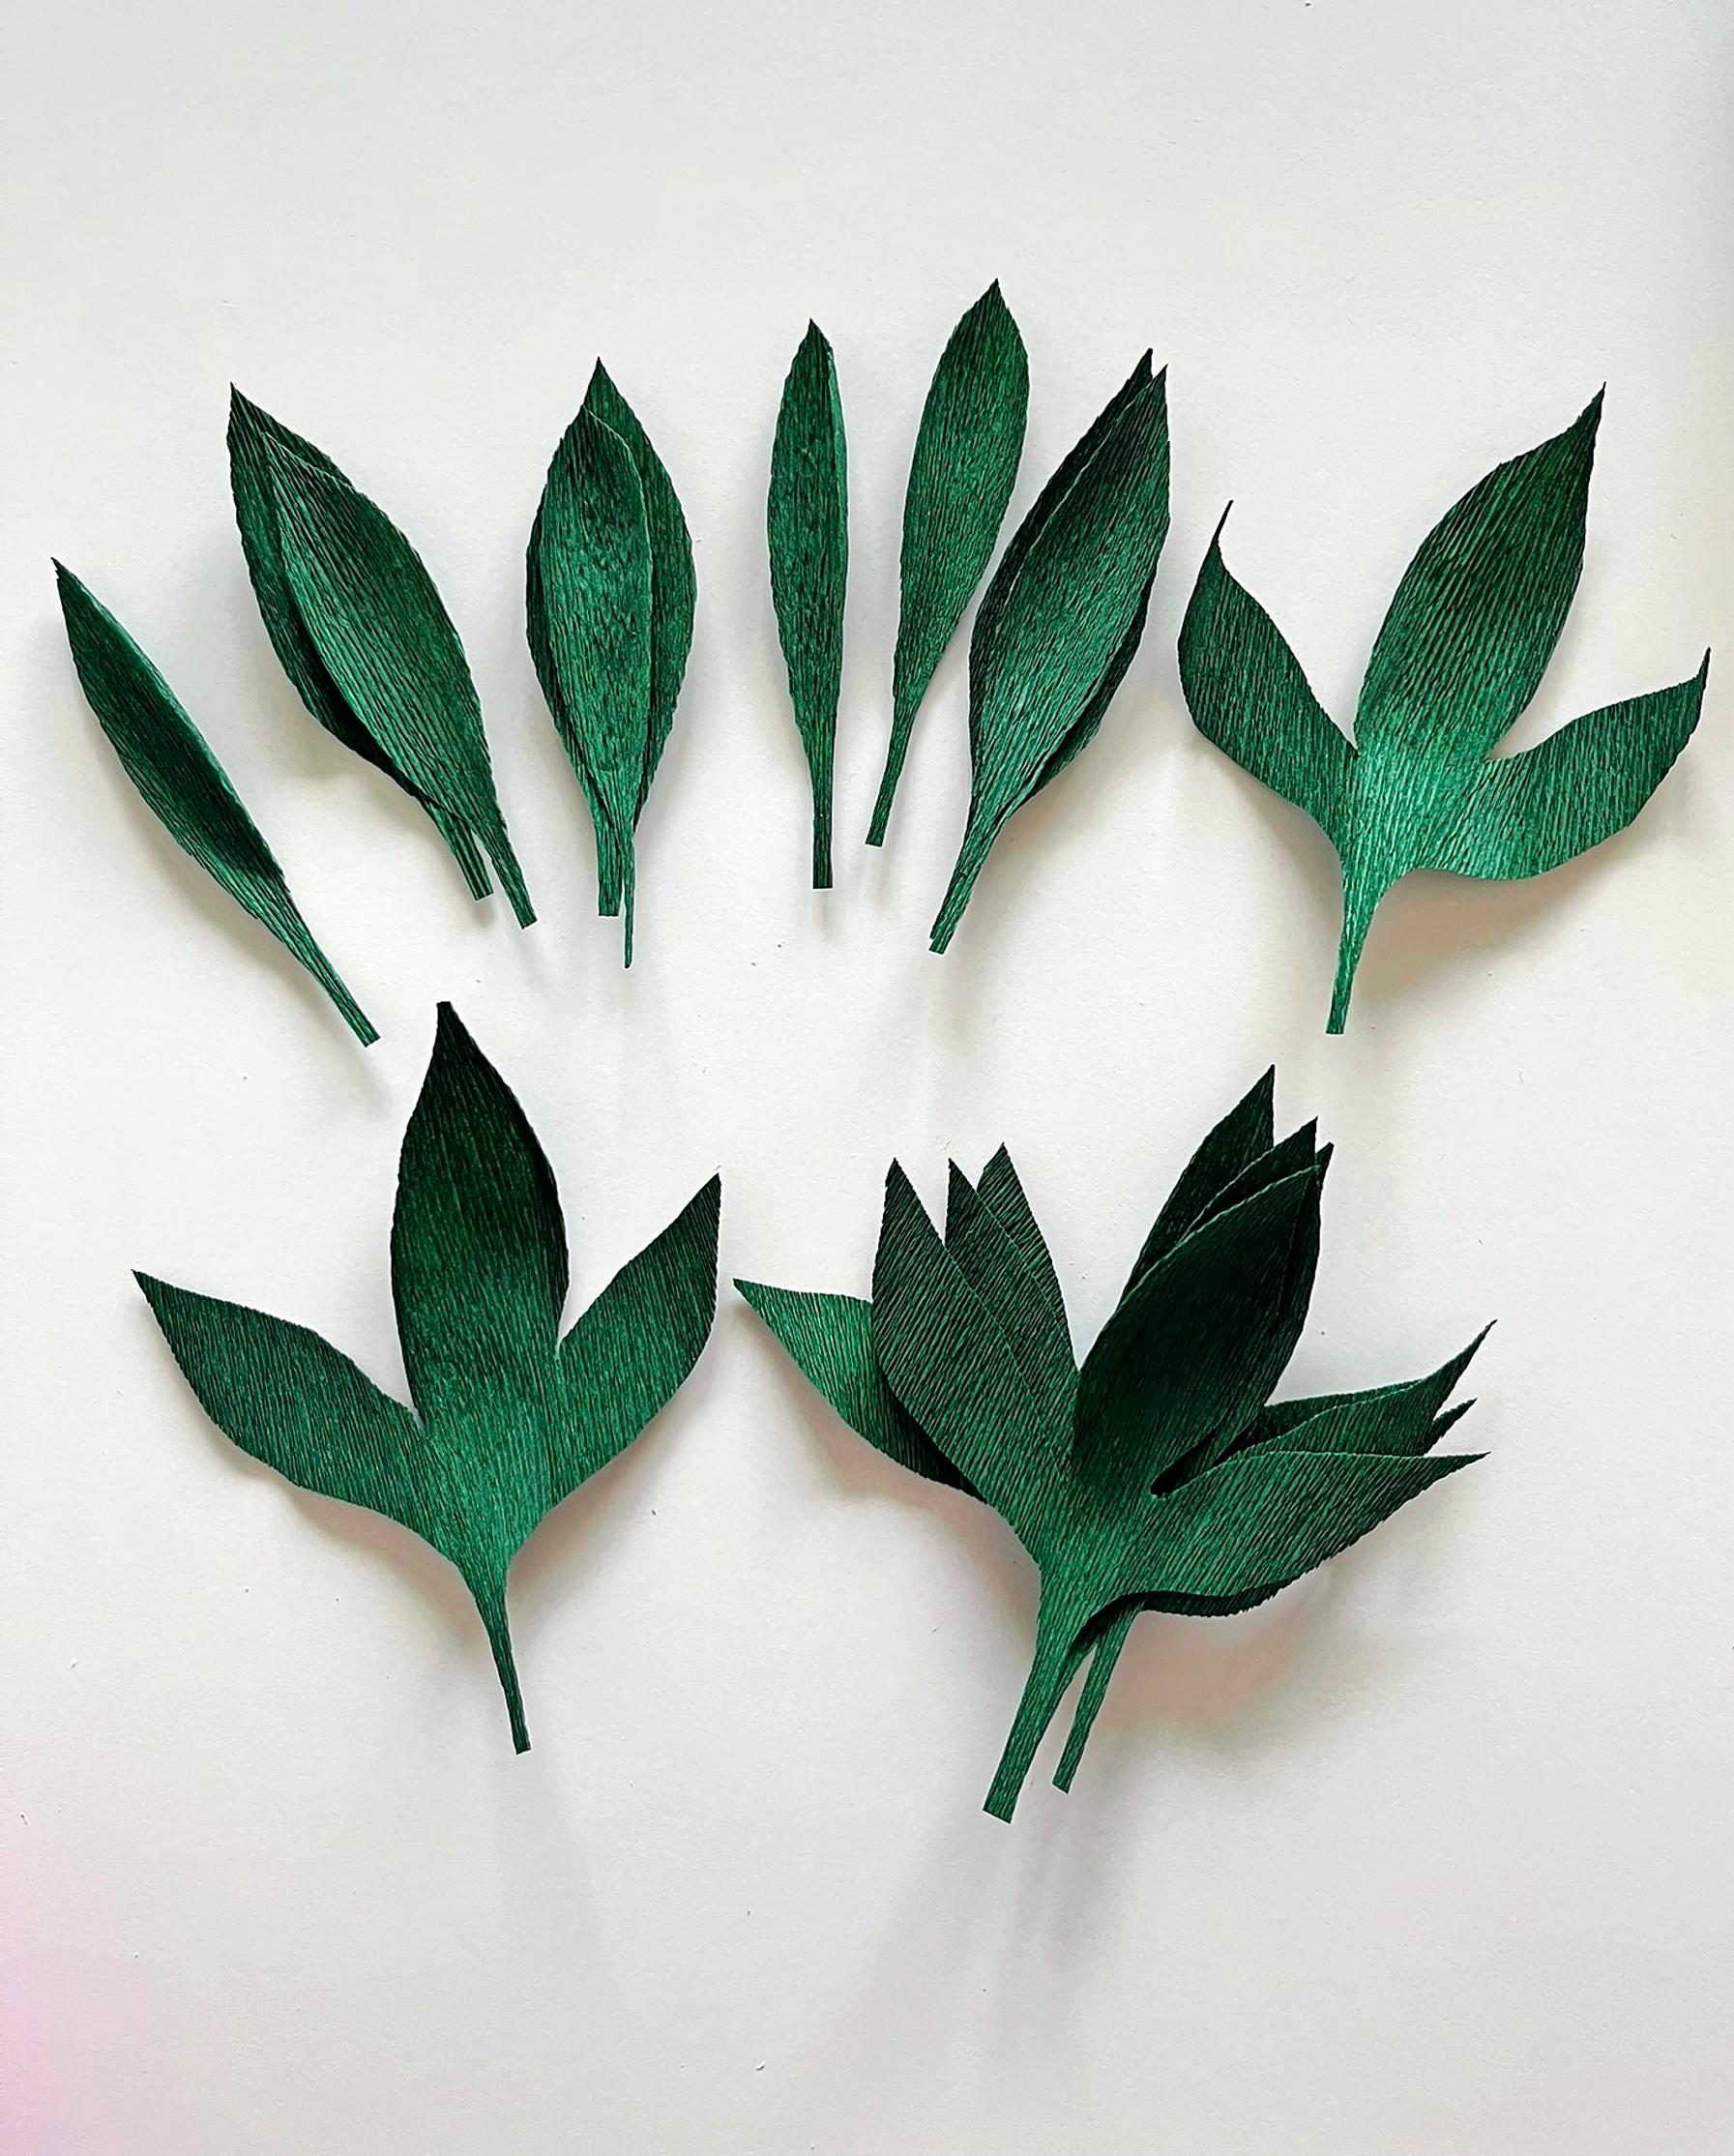
9. Cut leaves from green crepe paper and stretch them gently. In this tutorial, we used seven single leaves and 2–4 multi-leaf clusters.

10. Glue single and multi-leaf clusters around the base of the flower in any arrangement you like. You can also add multi-leaf clusters further down the stem.

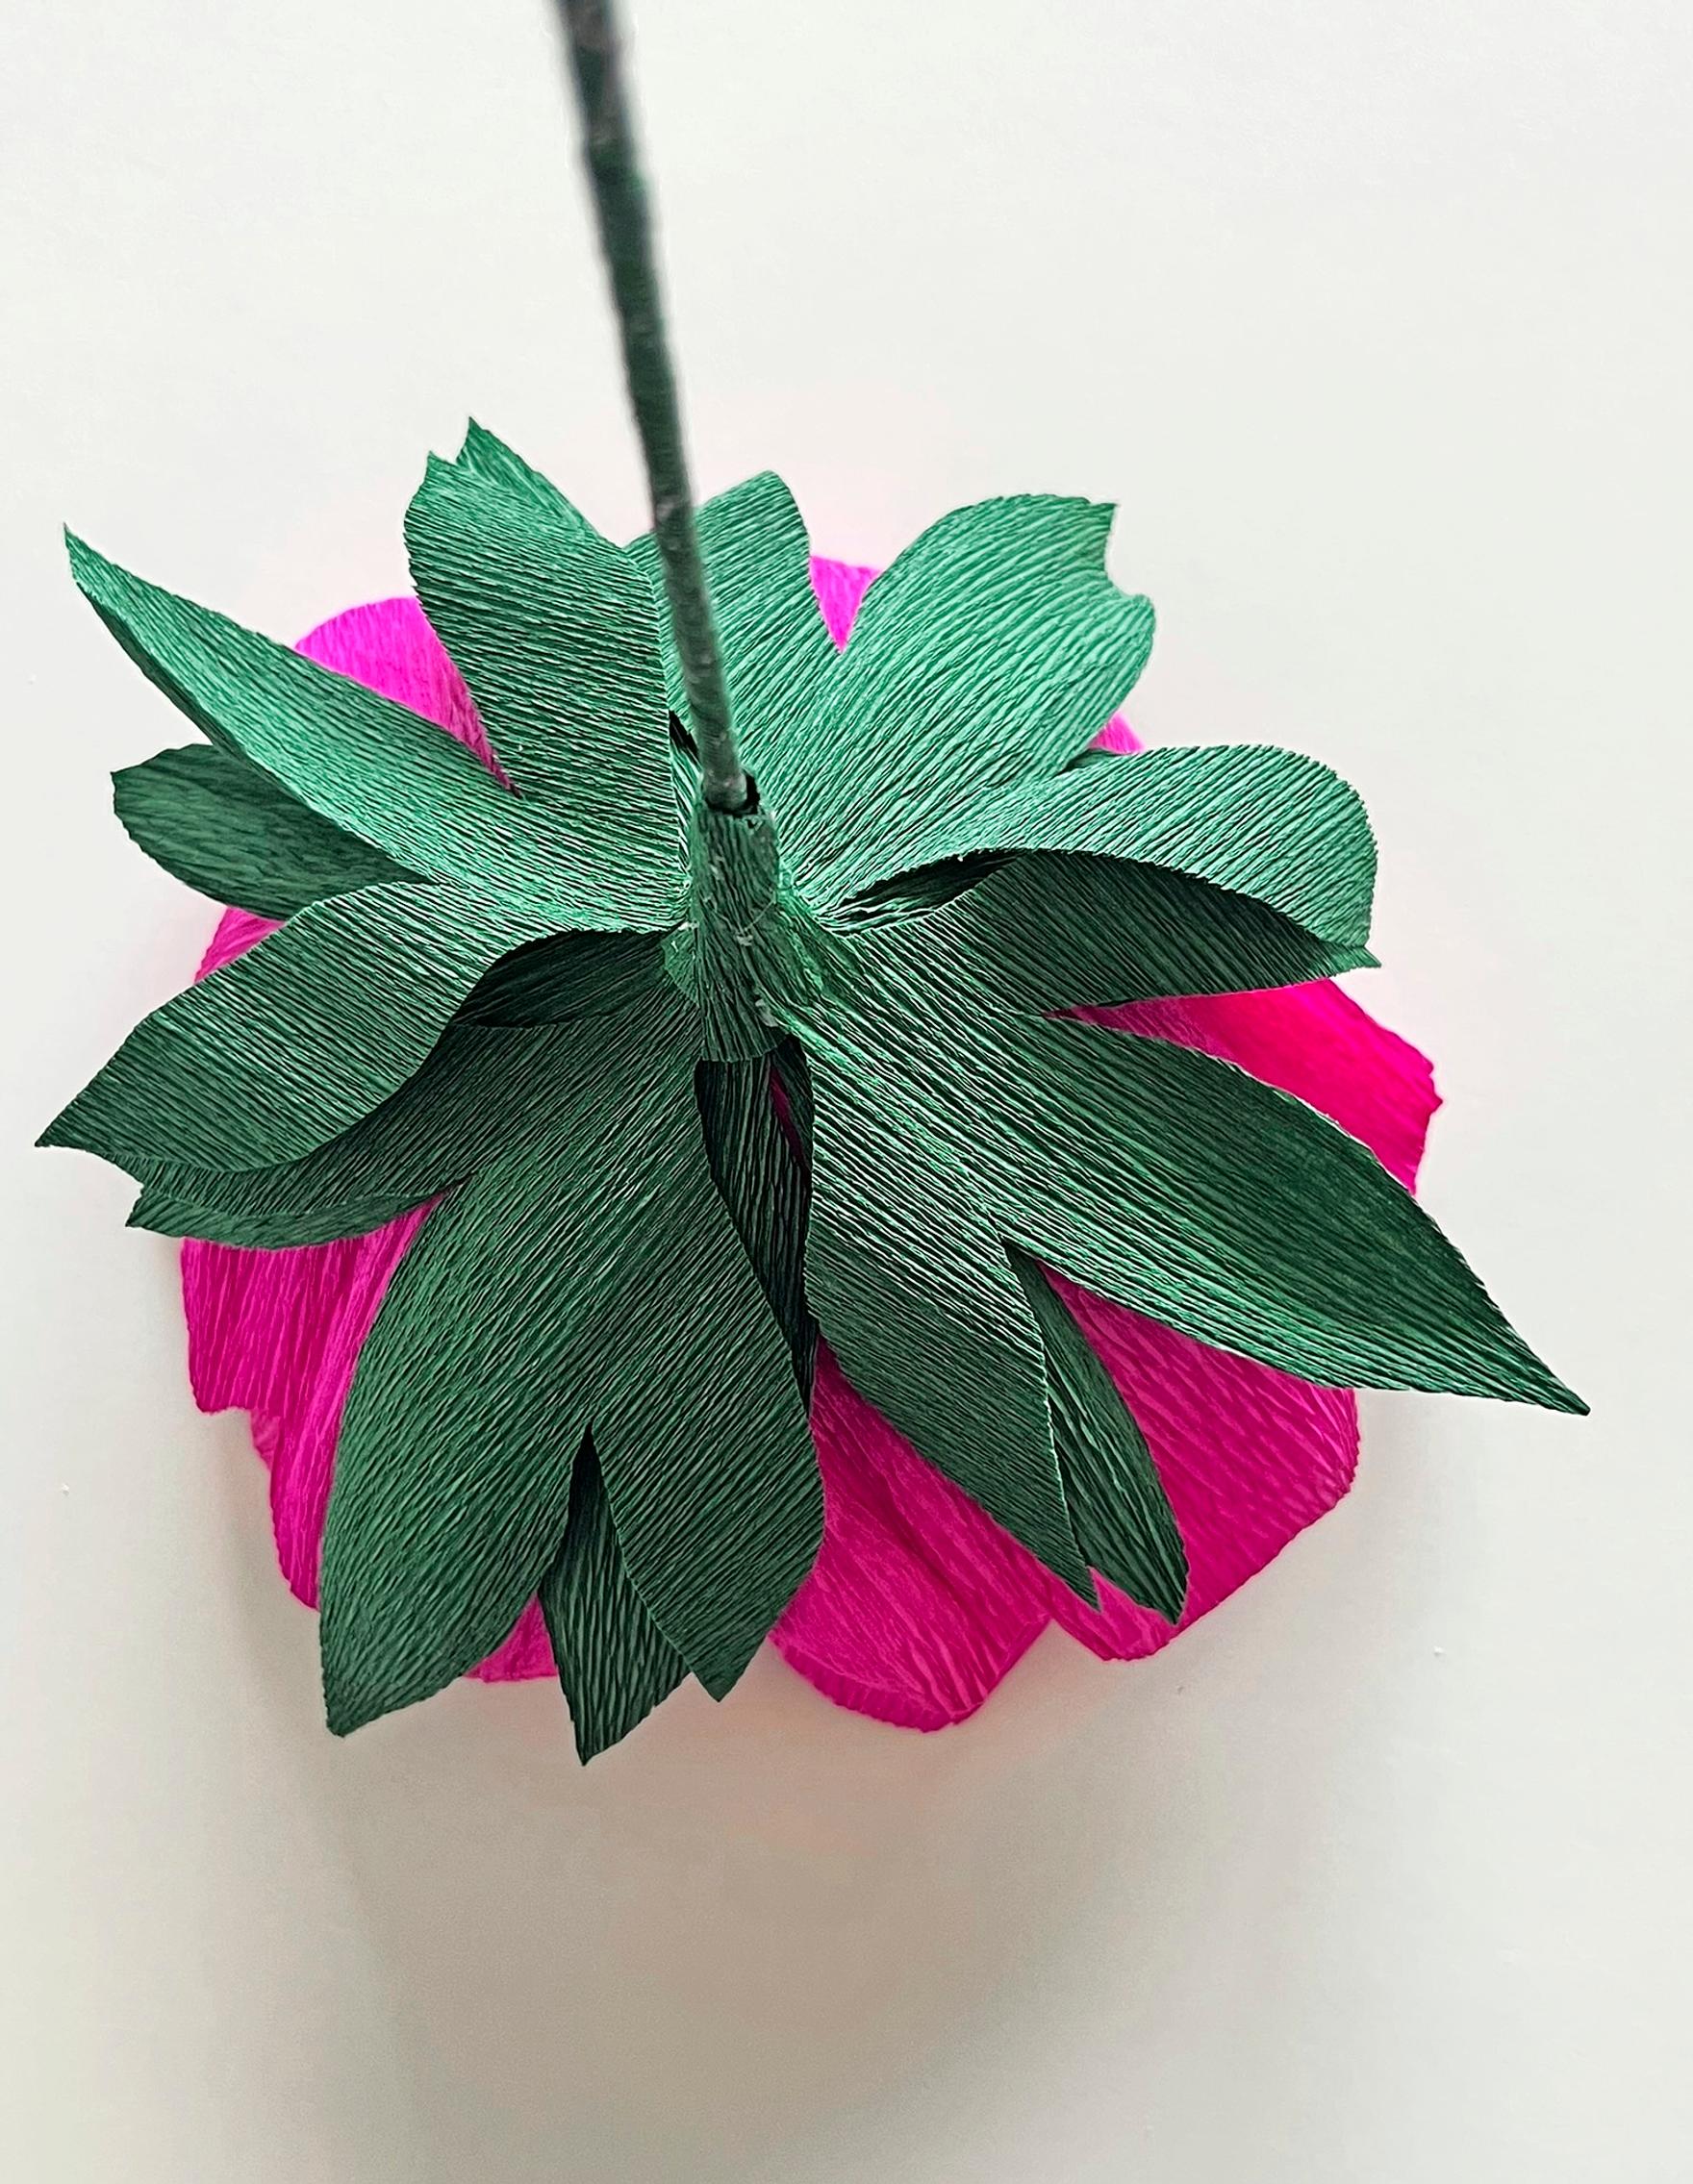
11. Finish off the base of the peony neatly with a piece of green crepe paper.
12. If you’re making more flowers, tie them into a bouquet with a pretty ribbon.

Materials found in craft stores. For the blooms and leaves, we used Cartotecnica Rossi Superior Florist craft paper. Dress by Nanso.
Download files
Paper peony templates(PDF)
Download