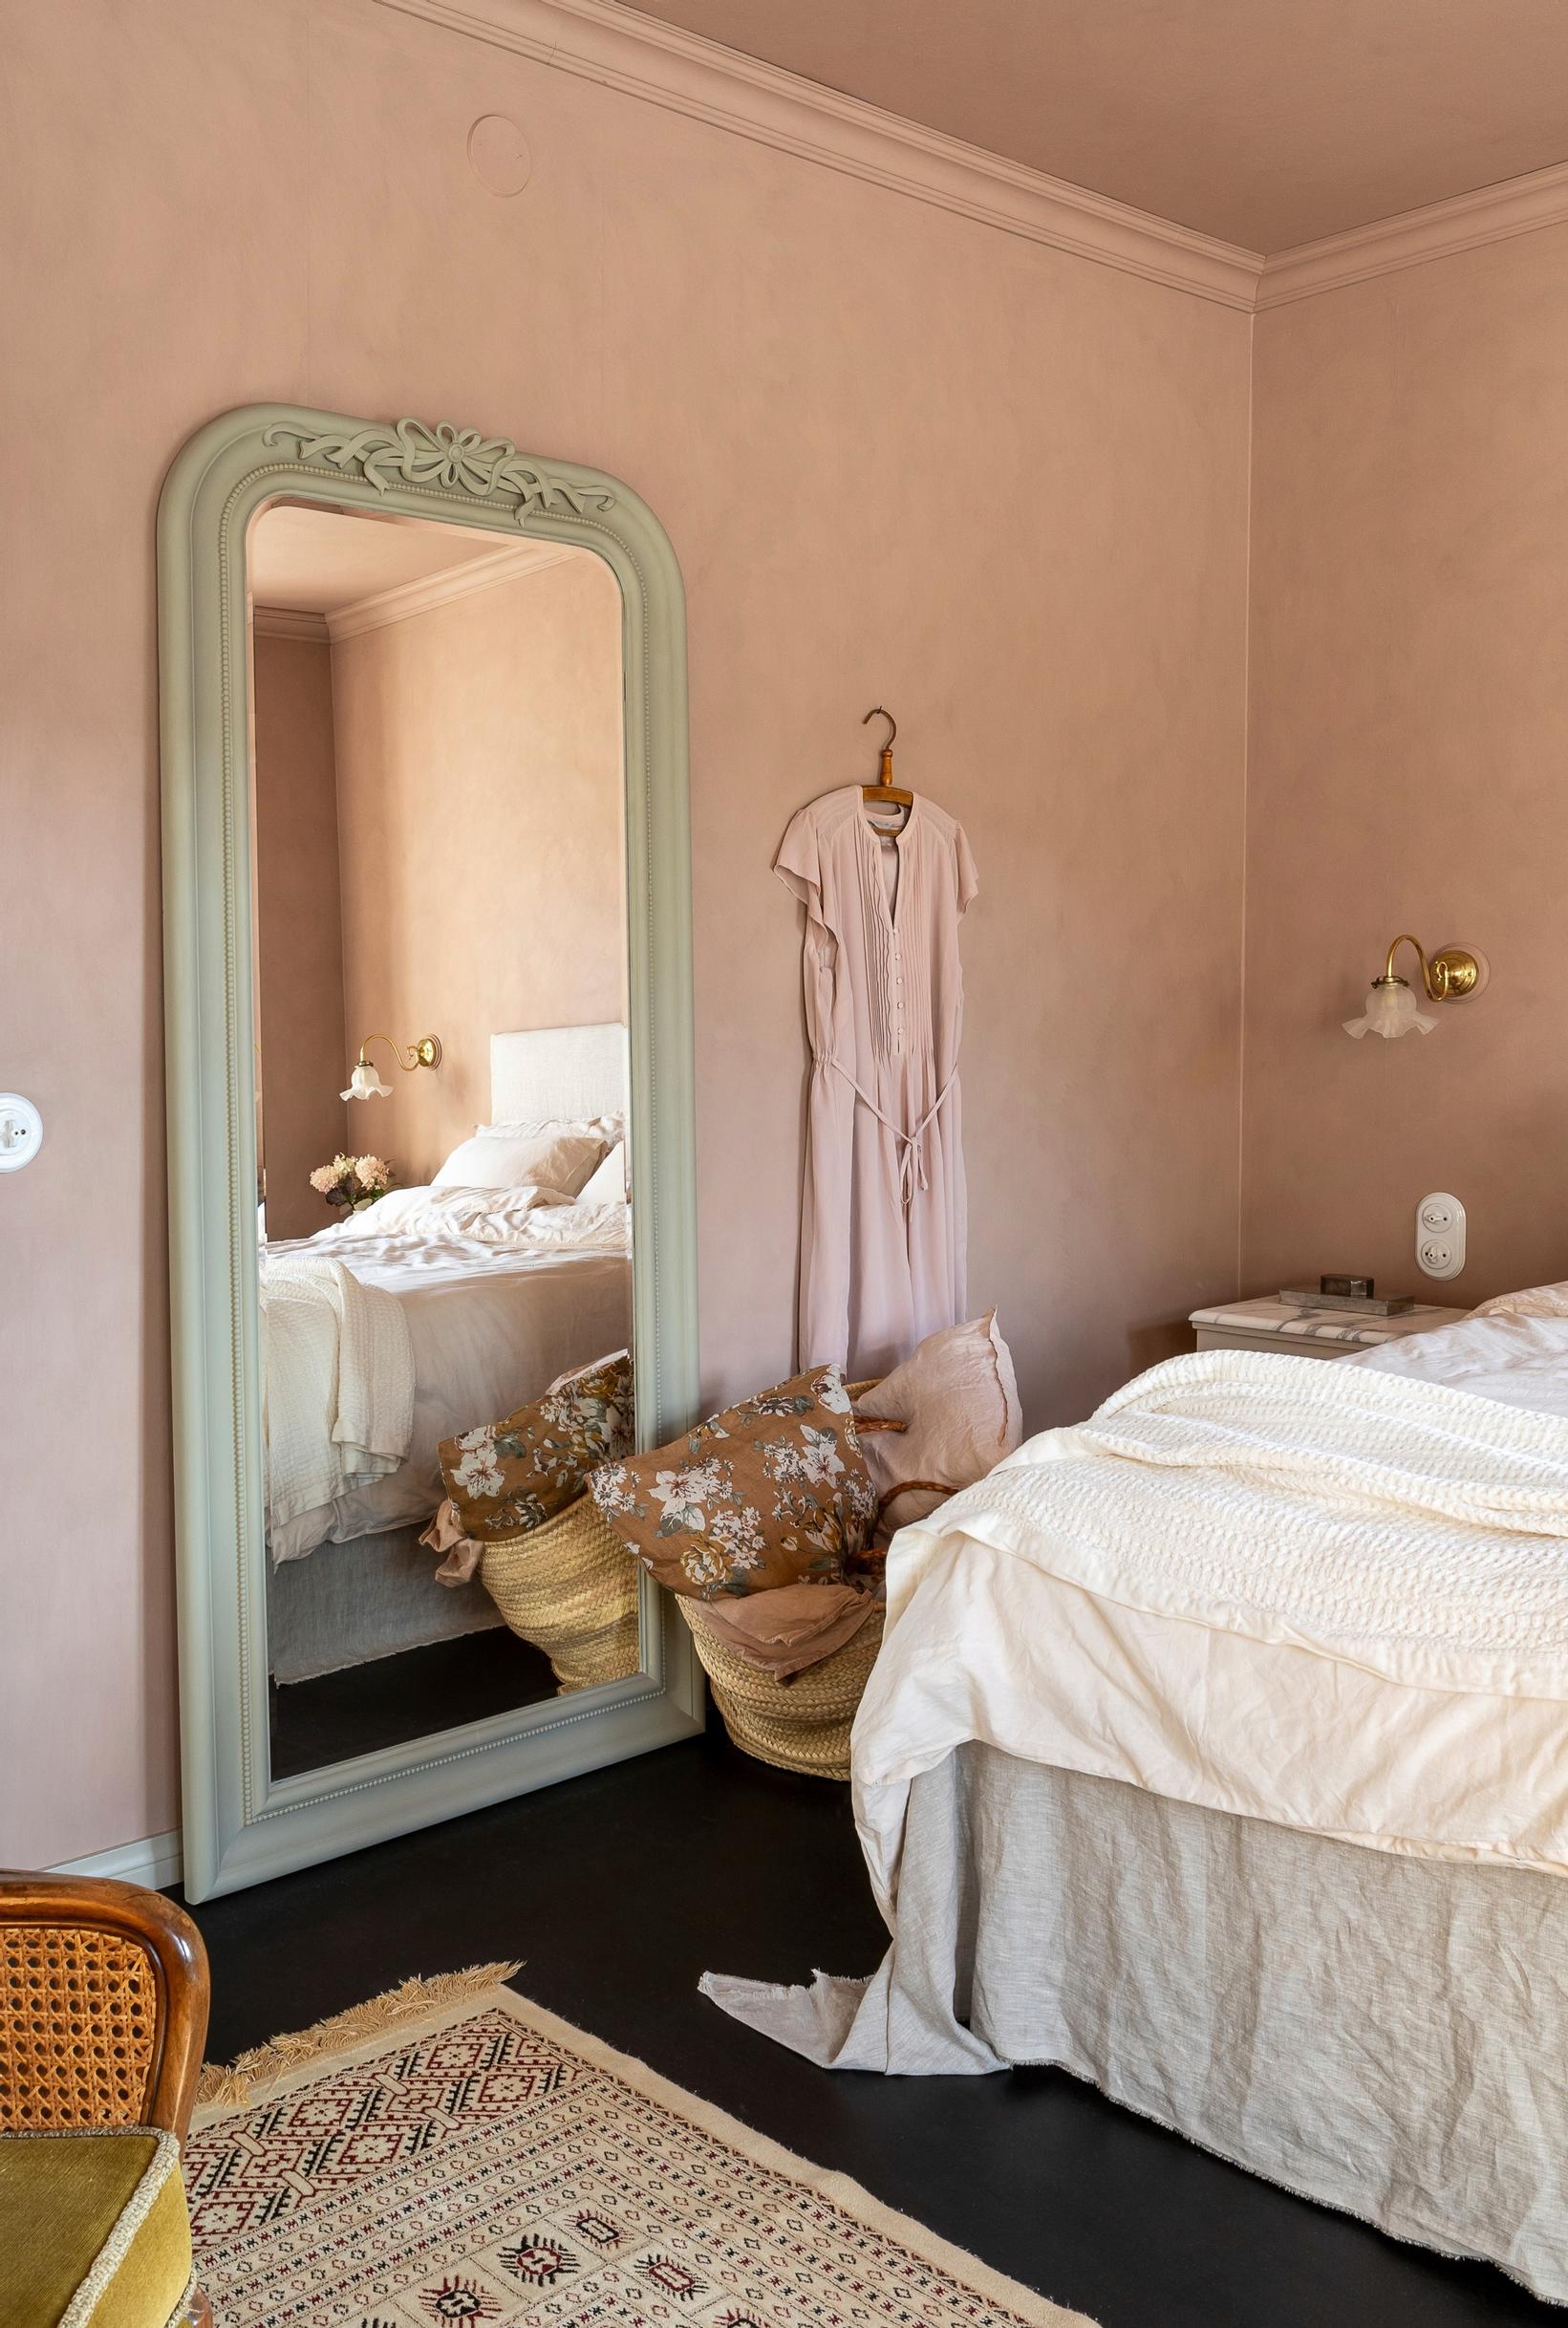
Mirror magic
Transform an IKEA mirror with wooden ornaments and chalk paint: Blogger Katja Rinkinen’s inspiring tutorial
Give an ordinary mirror an extraordinary makeover! Blogger Katja Rinkinen used a wooden bow ornament and beaded trim before finishing the frame with chalk paint. By following these instructions, you can make the frame as subtle or dramatic as you prefer.
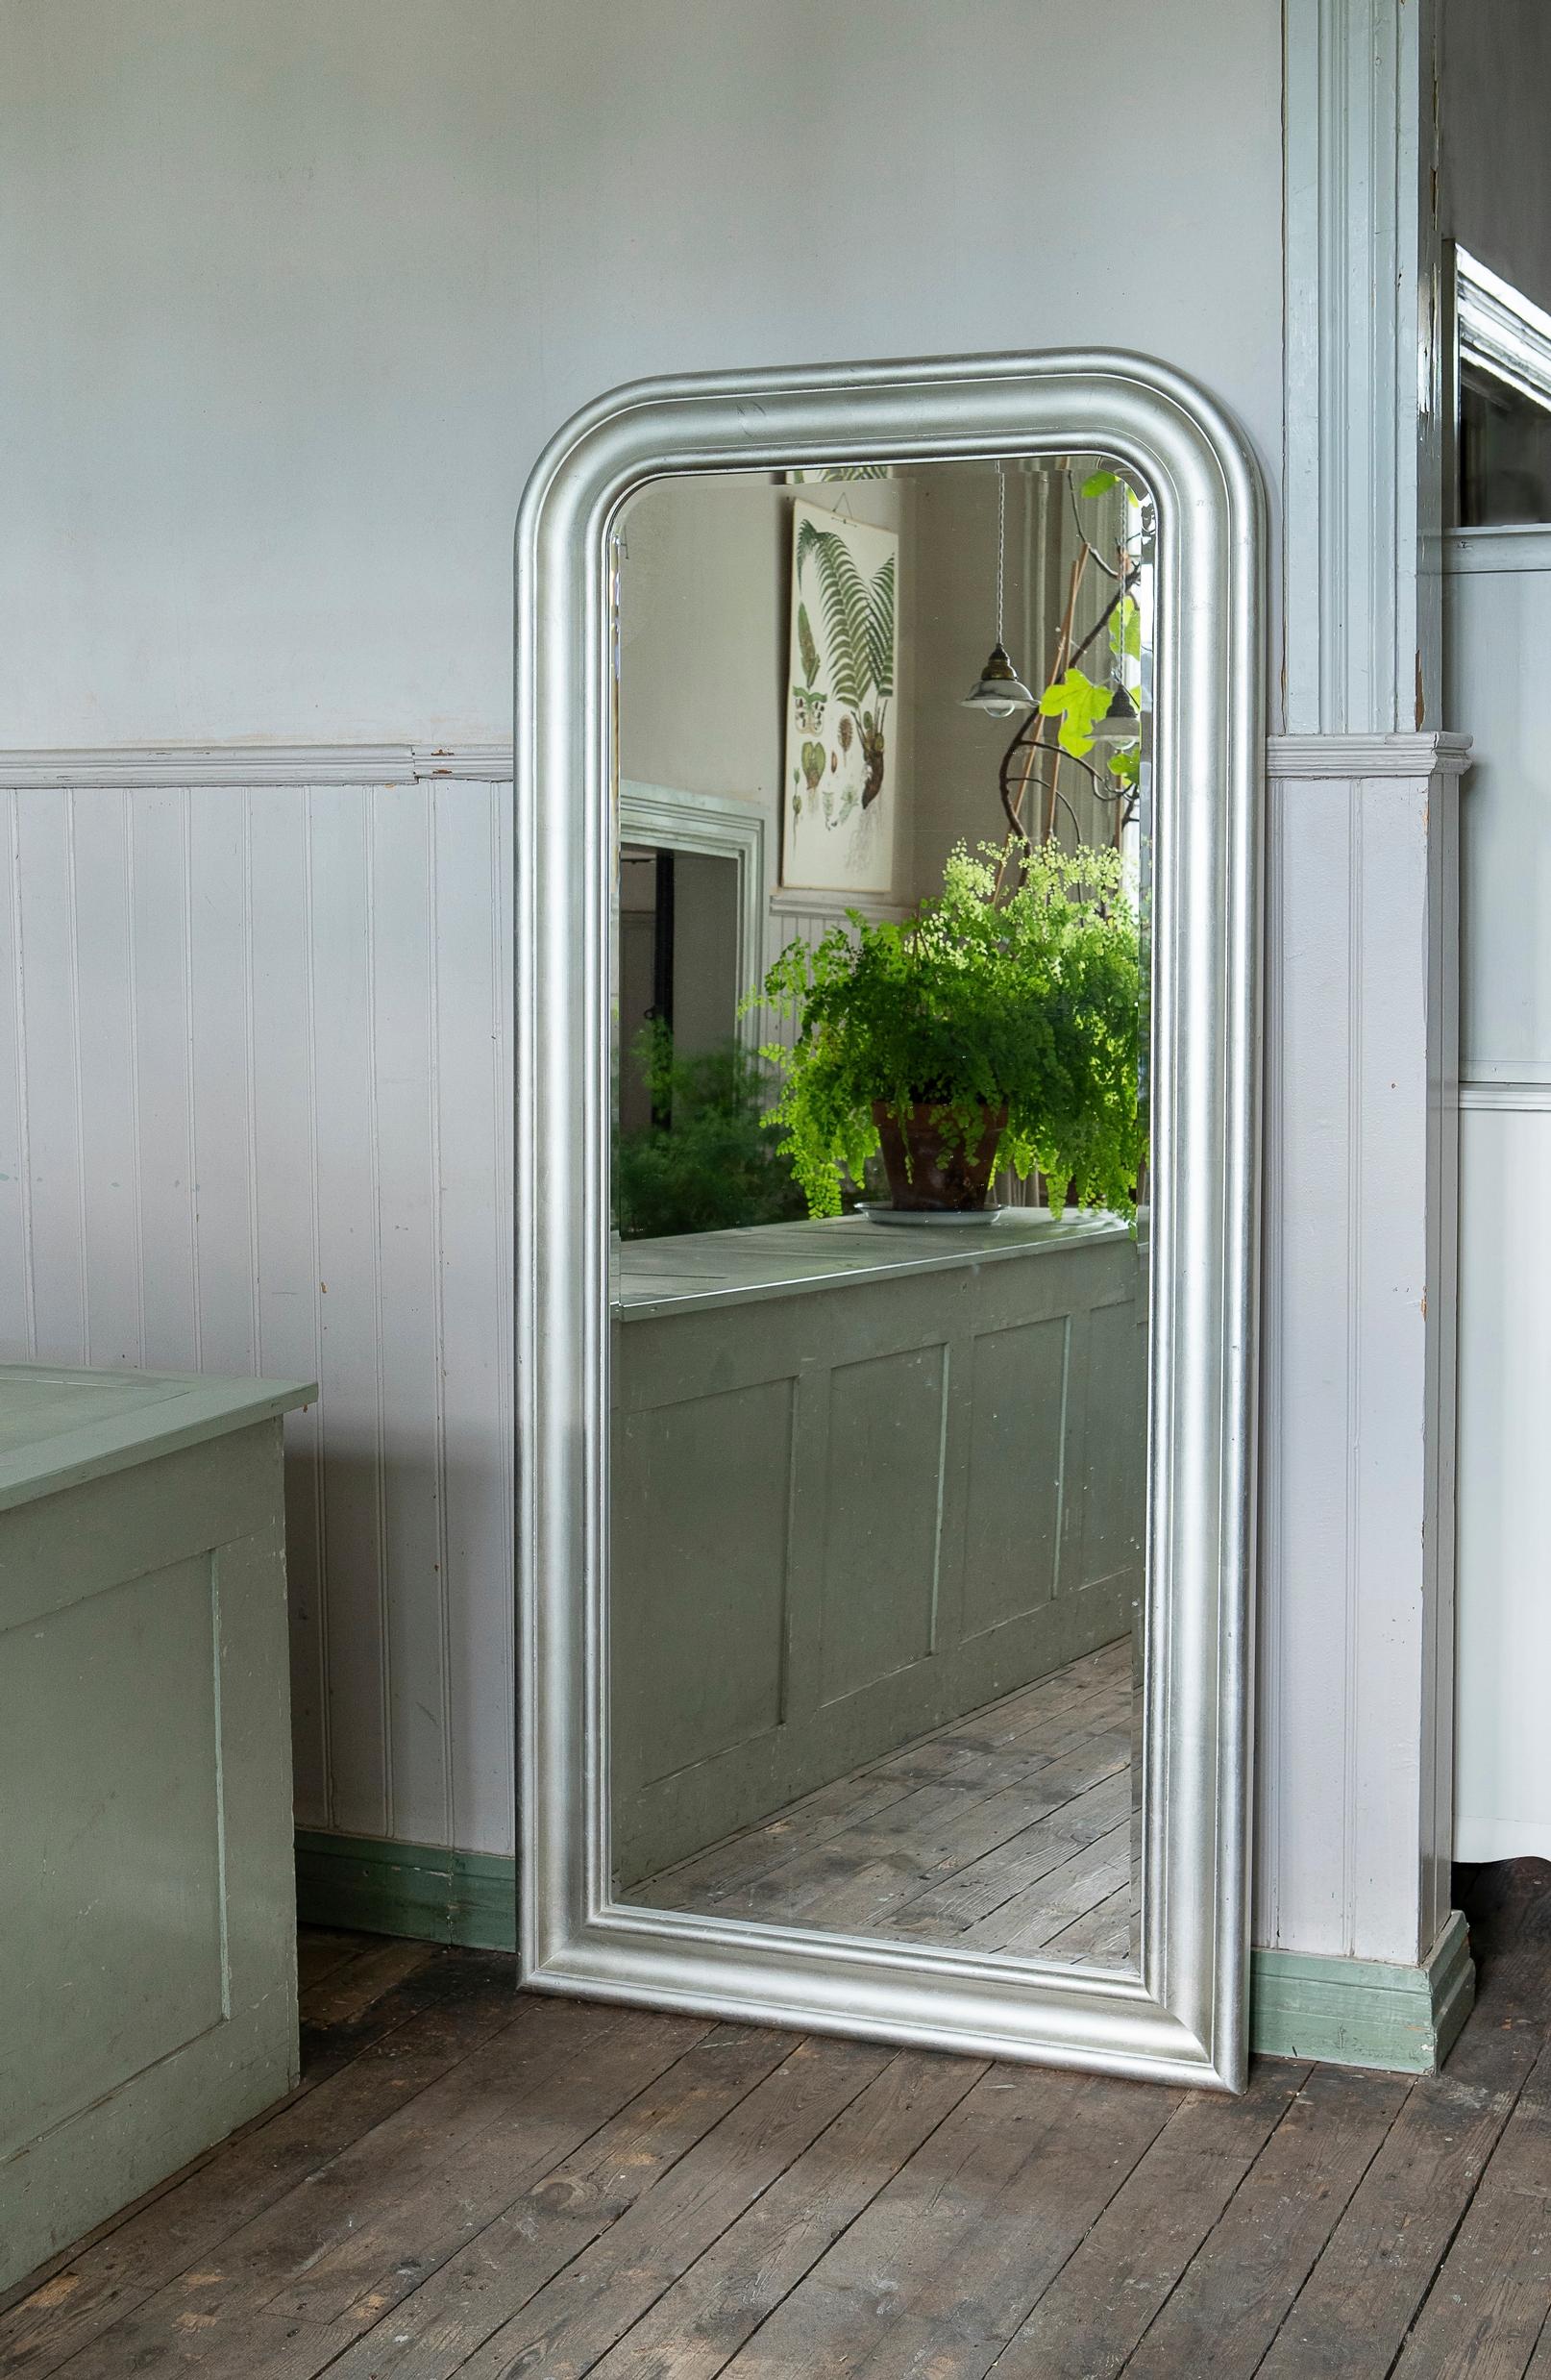
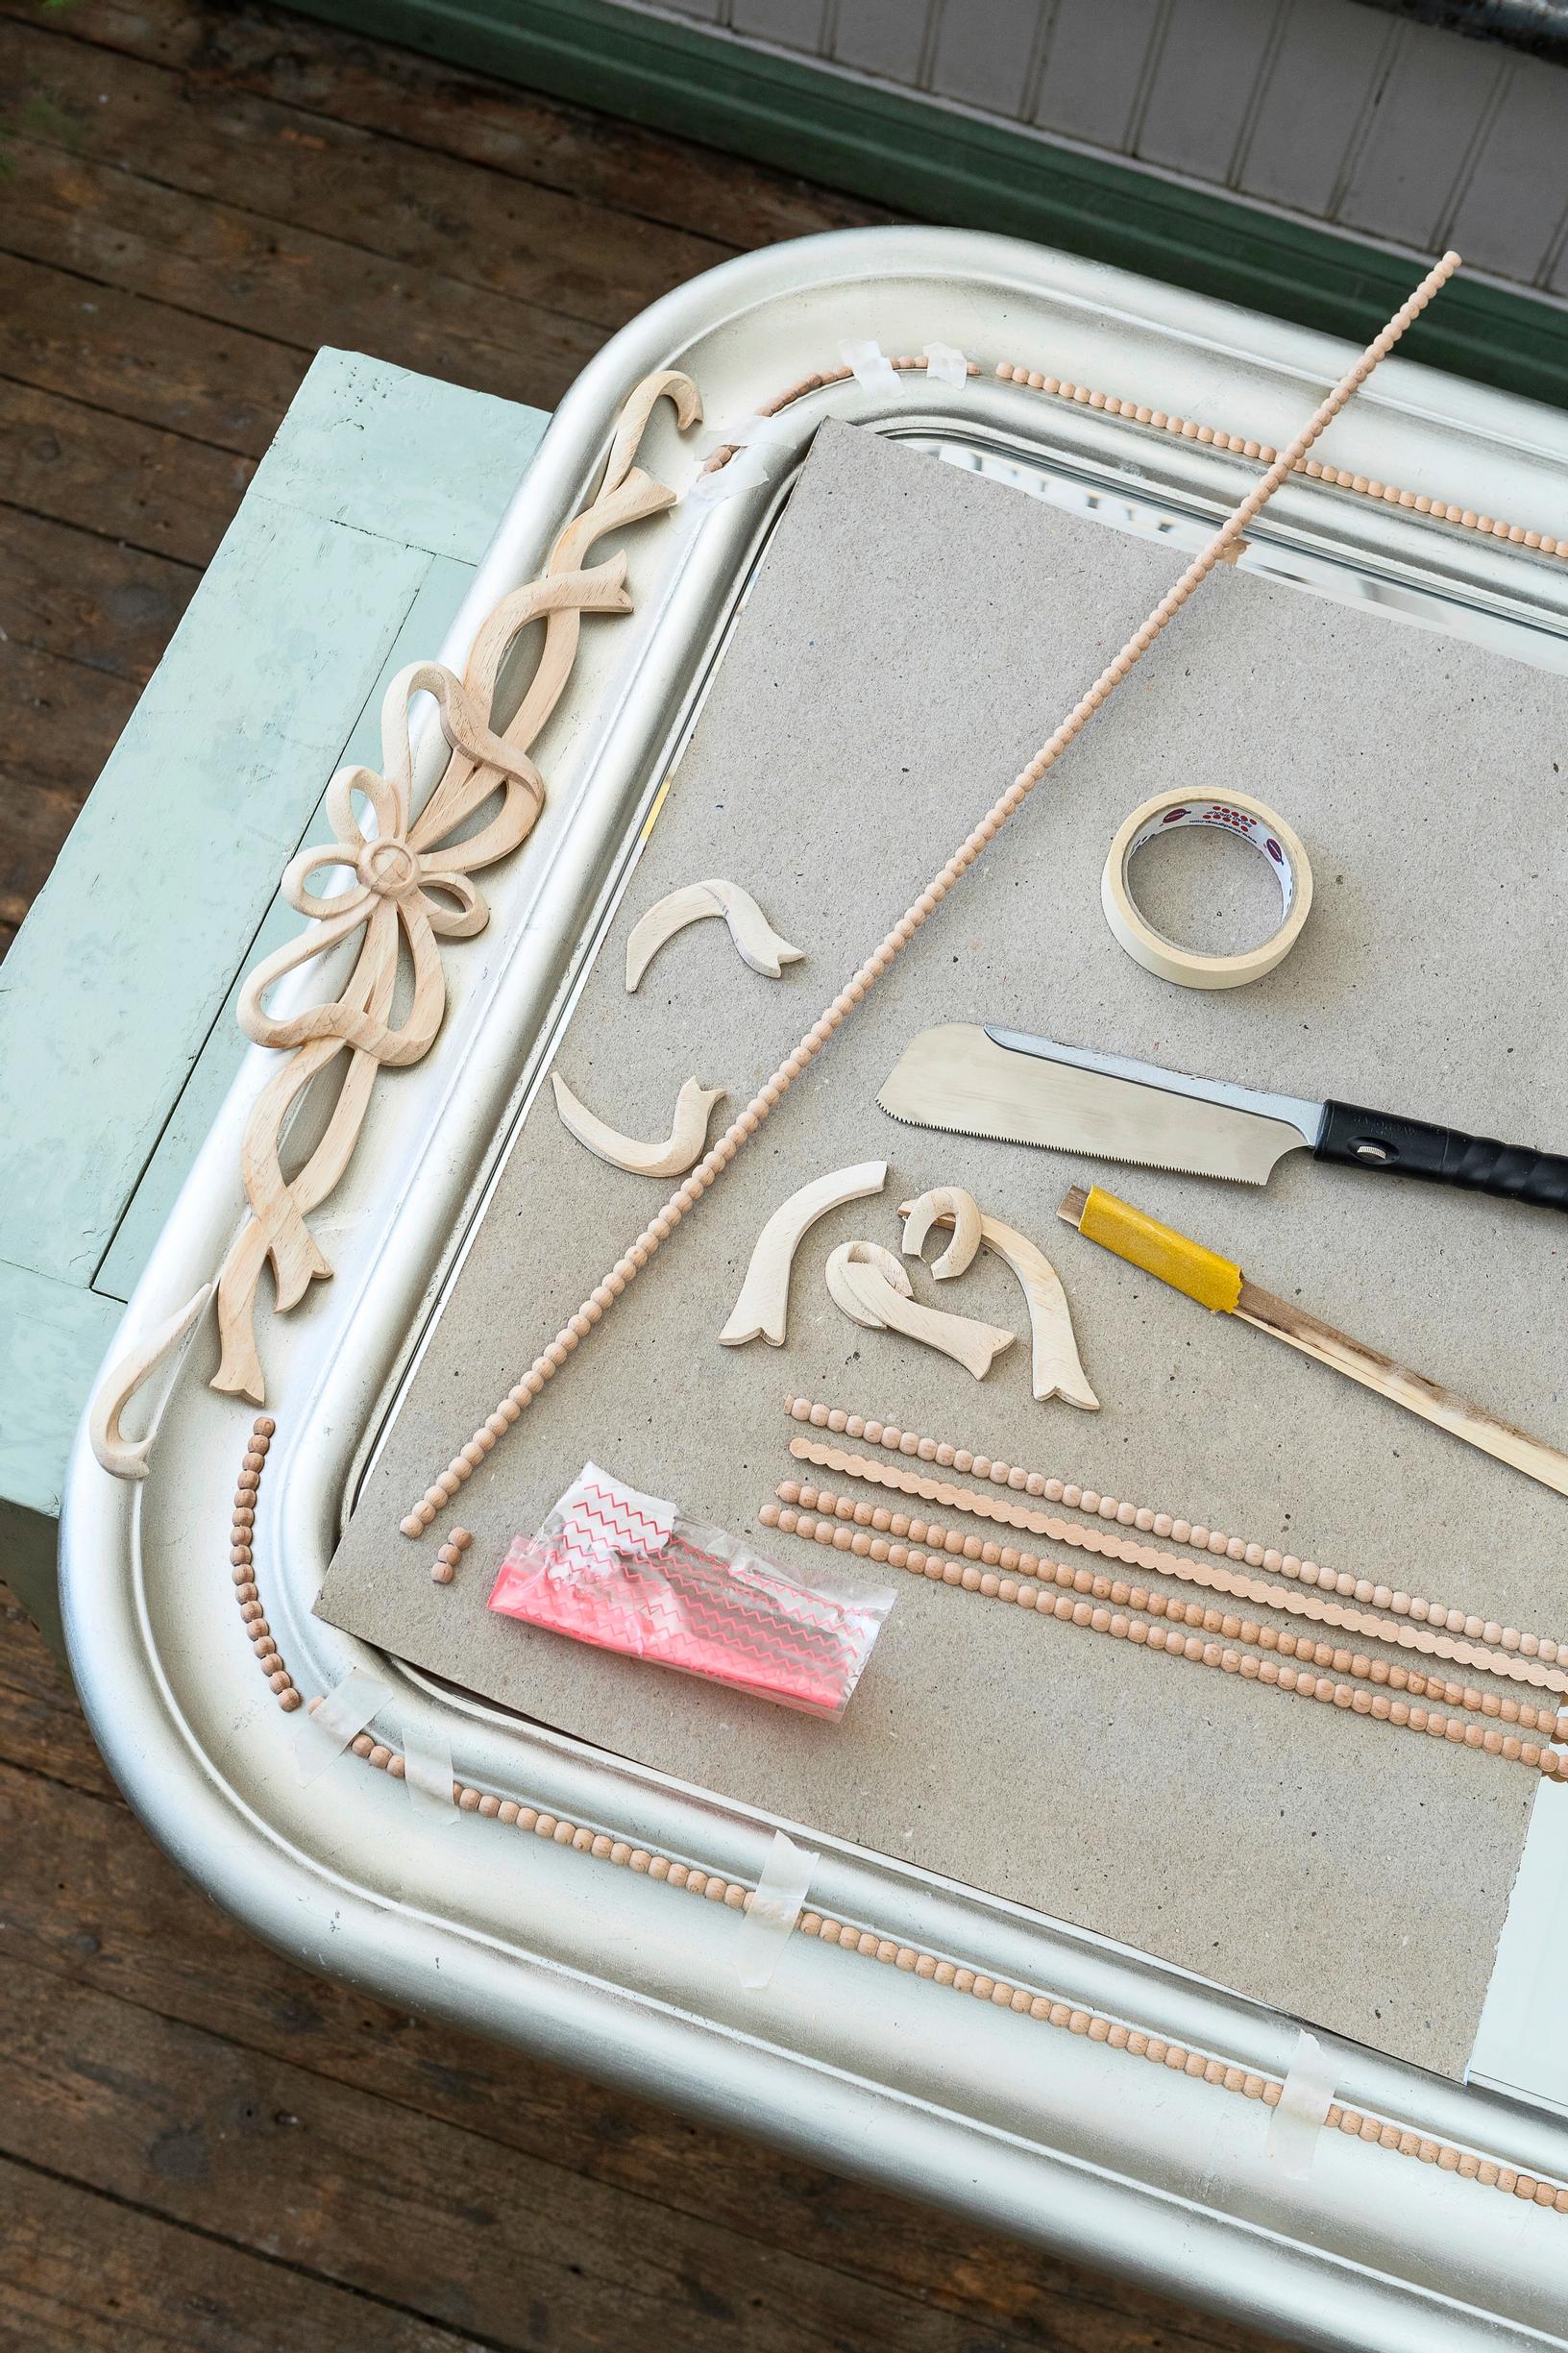
Mirror makeover: supplies
A wooden-framed mirror
Wooden decorative elements
9 × 4 mm beaded wood trim (125 cm or approx. 49 in in length)
A measuring tape and pencil
A Japanese saw or fret saw, and sandpaper
Painter’s tape
Construction adhesive and a small plastic bag
Paper or rags
A paintbrush and furniture paint (for example, Frenchic Paint's Al Fresco chalk-based paint in the shade Wise Old Sage)


Mirror makeover: instructions
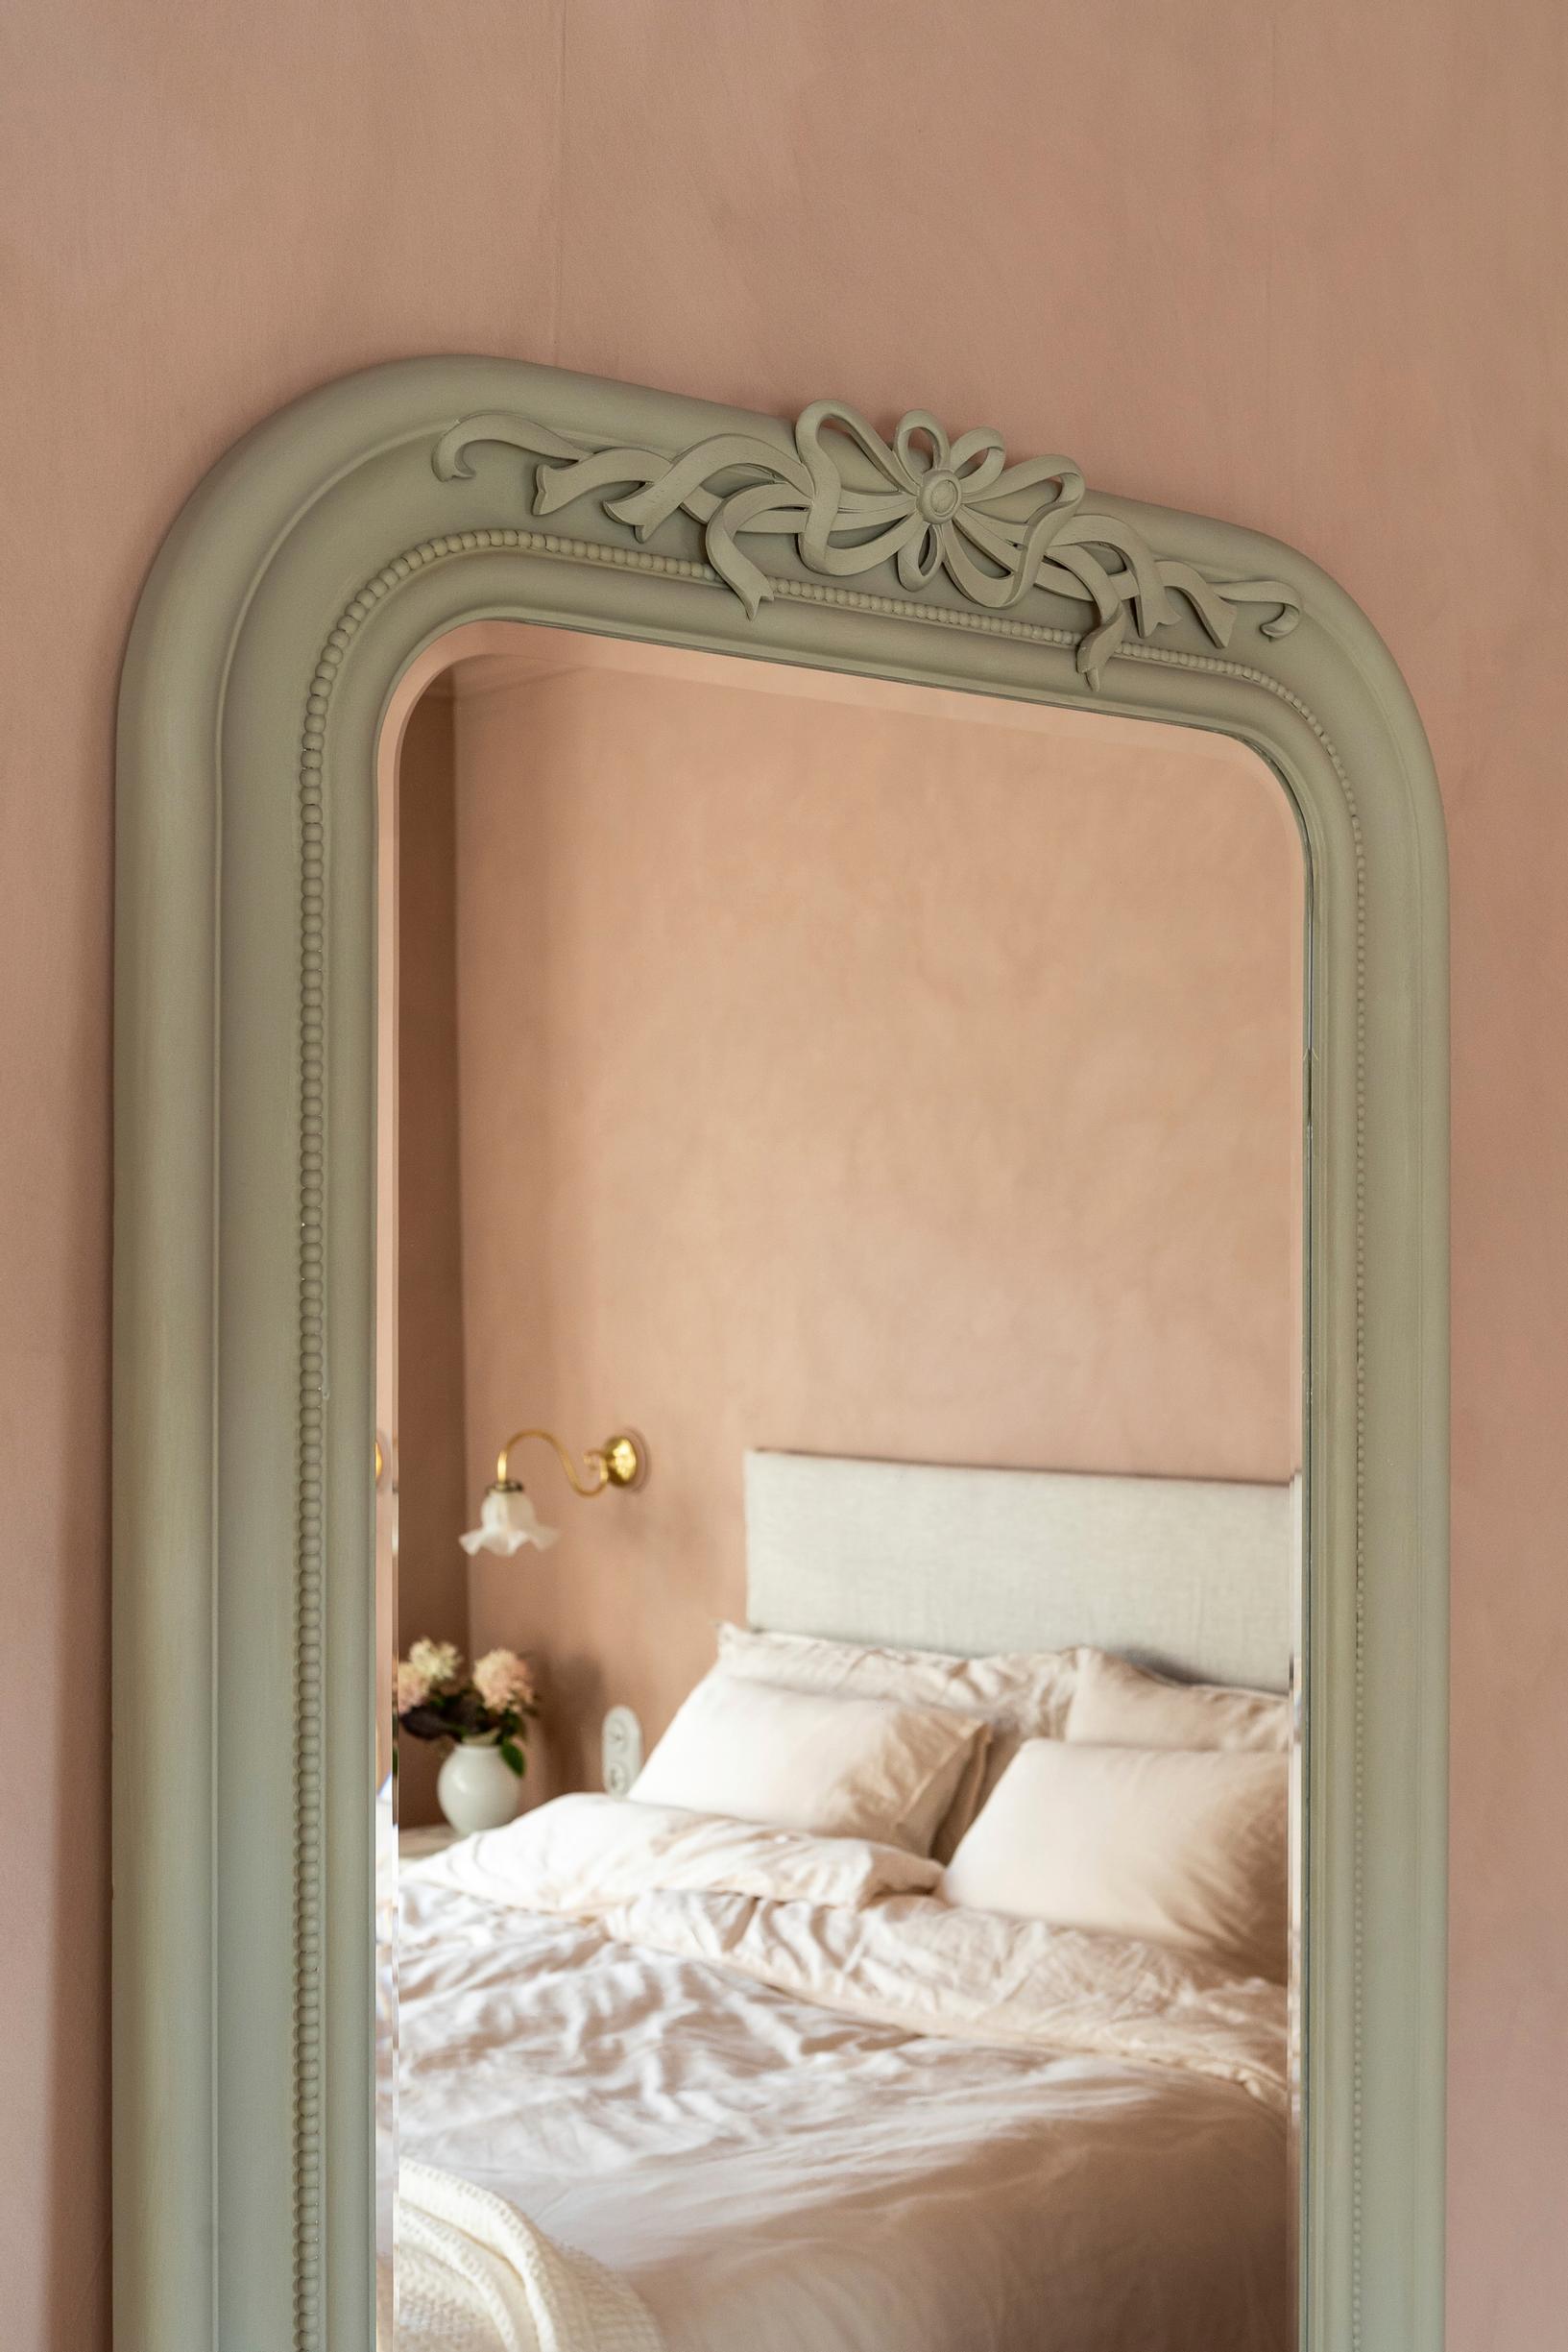
- Measure and mark the midpoint at the top edge of the mirror, then arrange where you want each ornament on the frame. You can overlap the ornaments, place them side by side, or saw them into smaller pieces. Sand any rough edges if needed.
- Arrange the beaded wood trim. To make it curve, saw nearly through between the beads, then soak the trim in water overnight. Gently bend the softened trim by hand to shape it. You can also create the curve in separate pieces. Tape everything to the frame and let it dry for at least one day before gluing.
- Use a pencil to mark the gluing points where the ornaments meet the frame. Squeeze some construction adhesive into a small plastic bag and snip off one corner. Apply the adhesive to each piece and press it into place. Wipe away any excess with a dry cloth or paper. Let everything dry for at least a day before painting.
- Paint the mirror with chalk paint or a metallic-effect paint. The sample mirror was painted with Frenchic Paint's Al Fresco in the shade Wise Old Sage, tinted darker with additional green umber pigment.