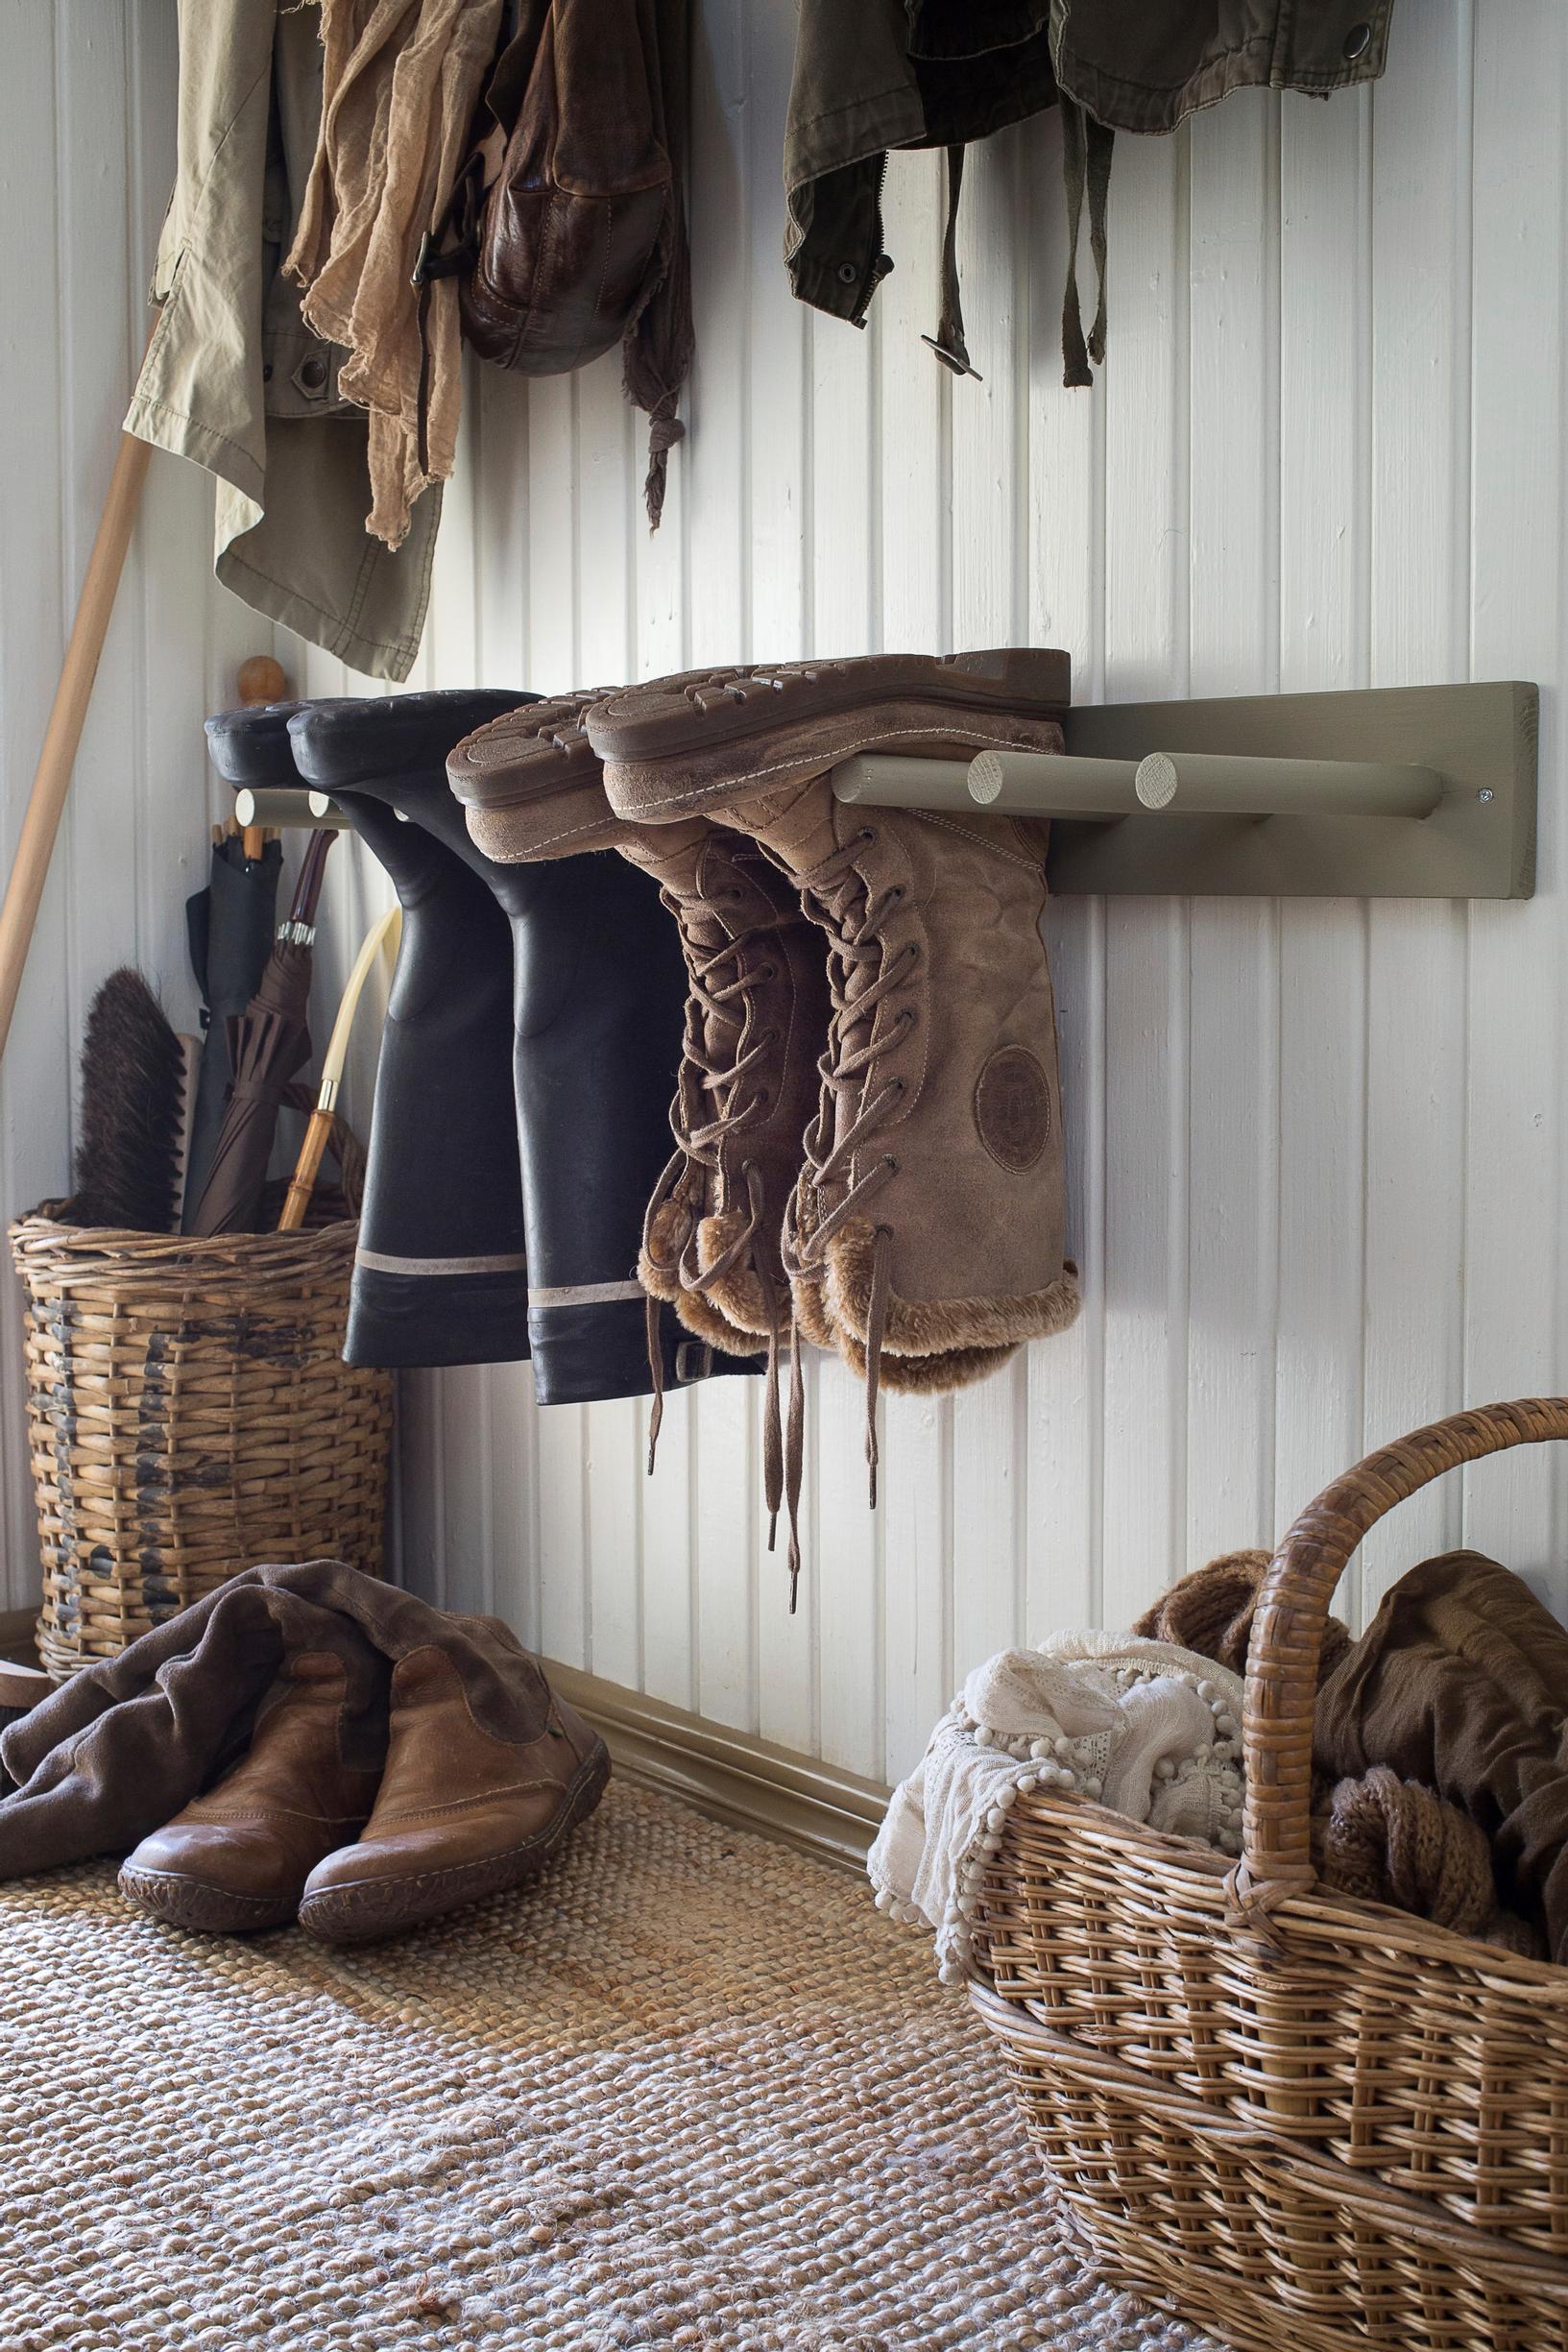
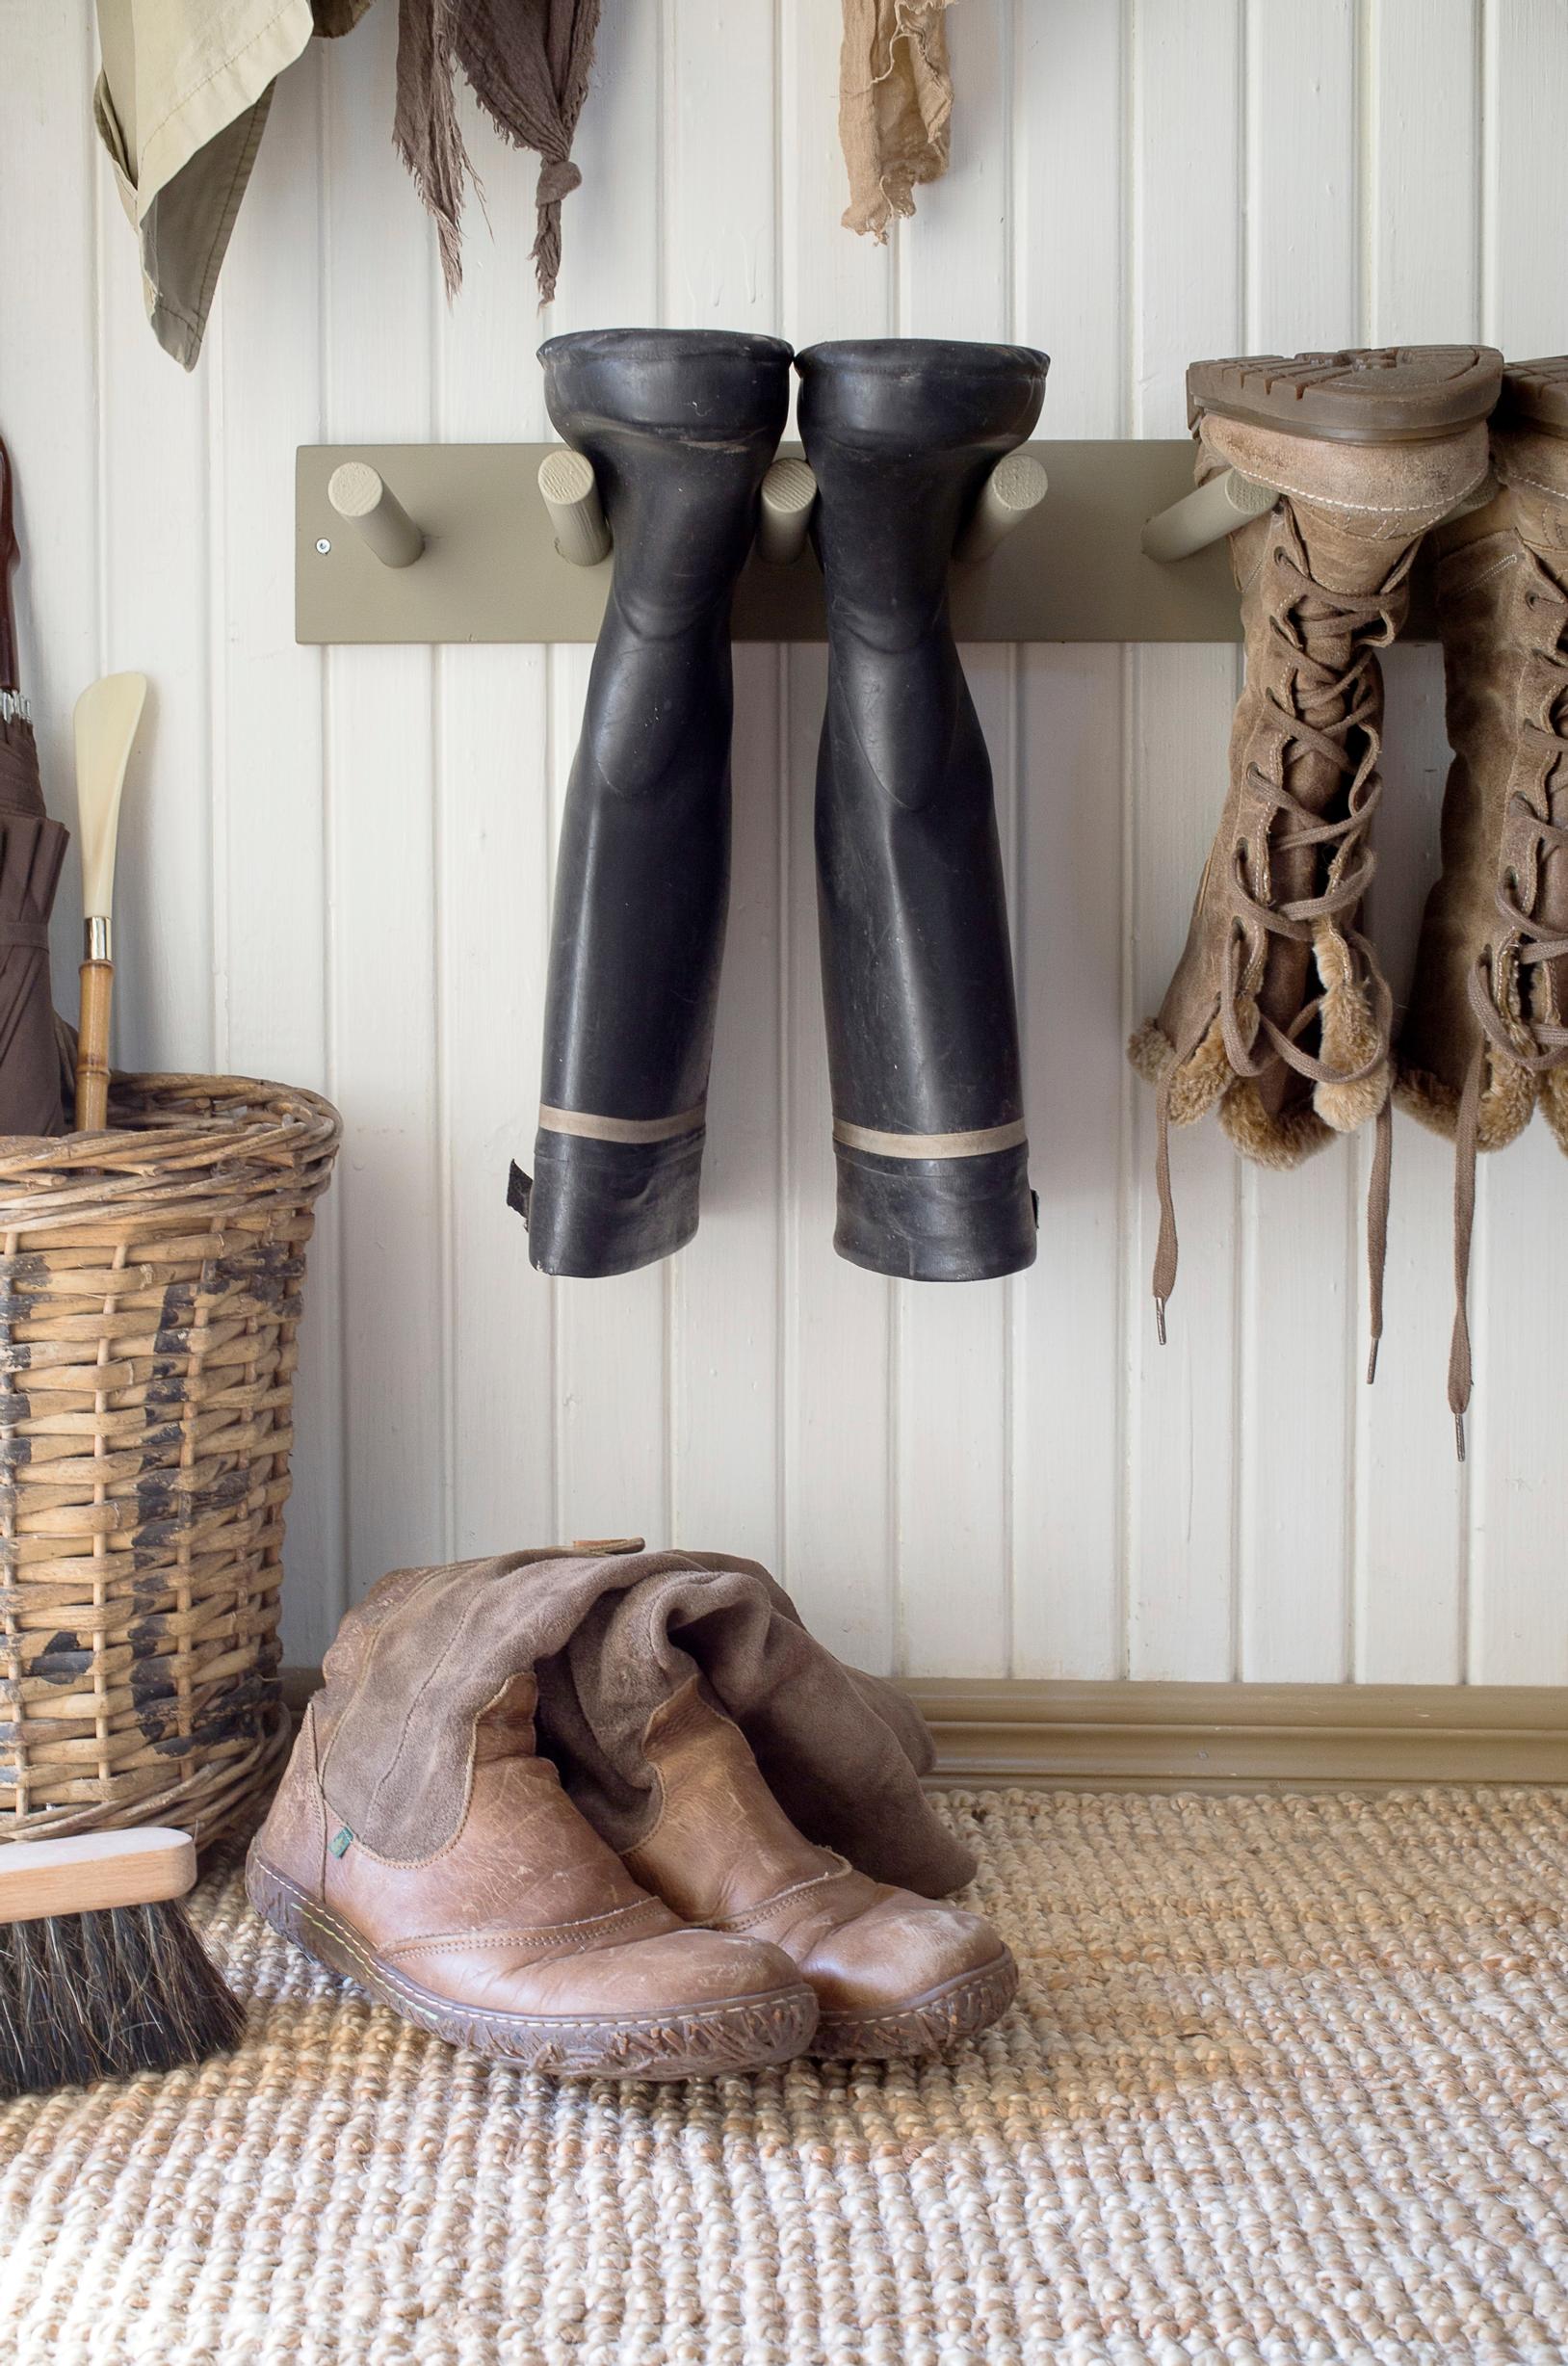
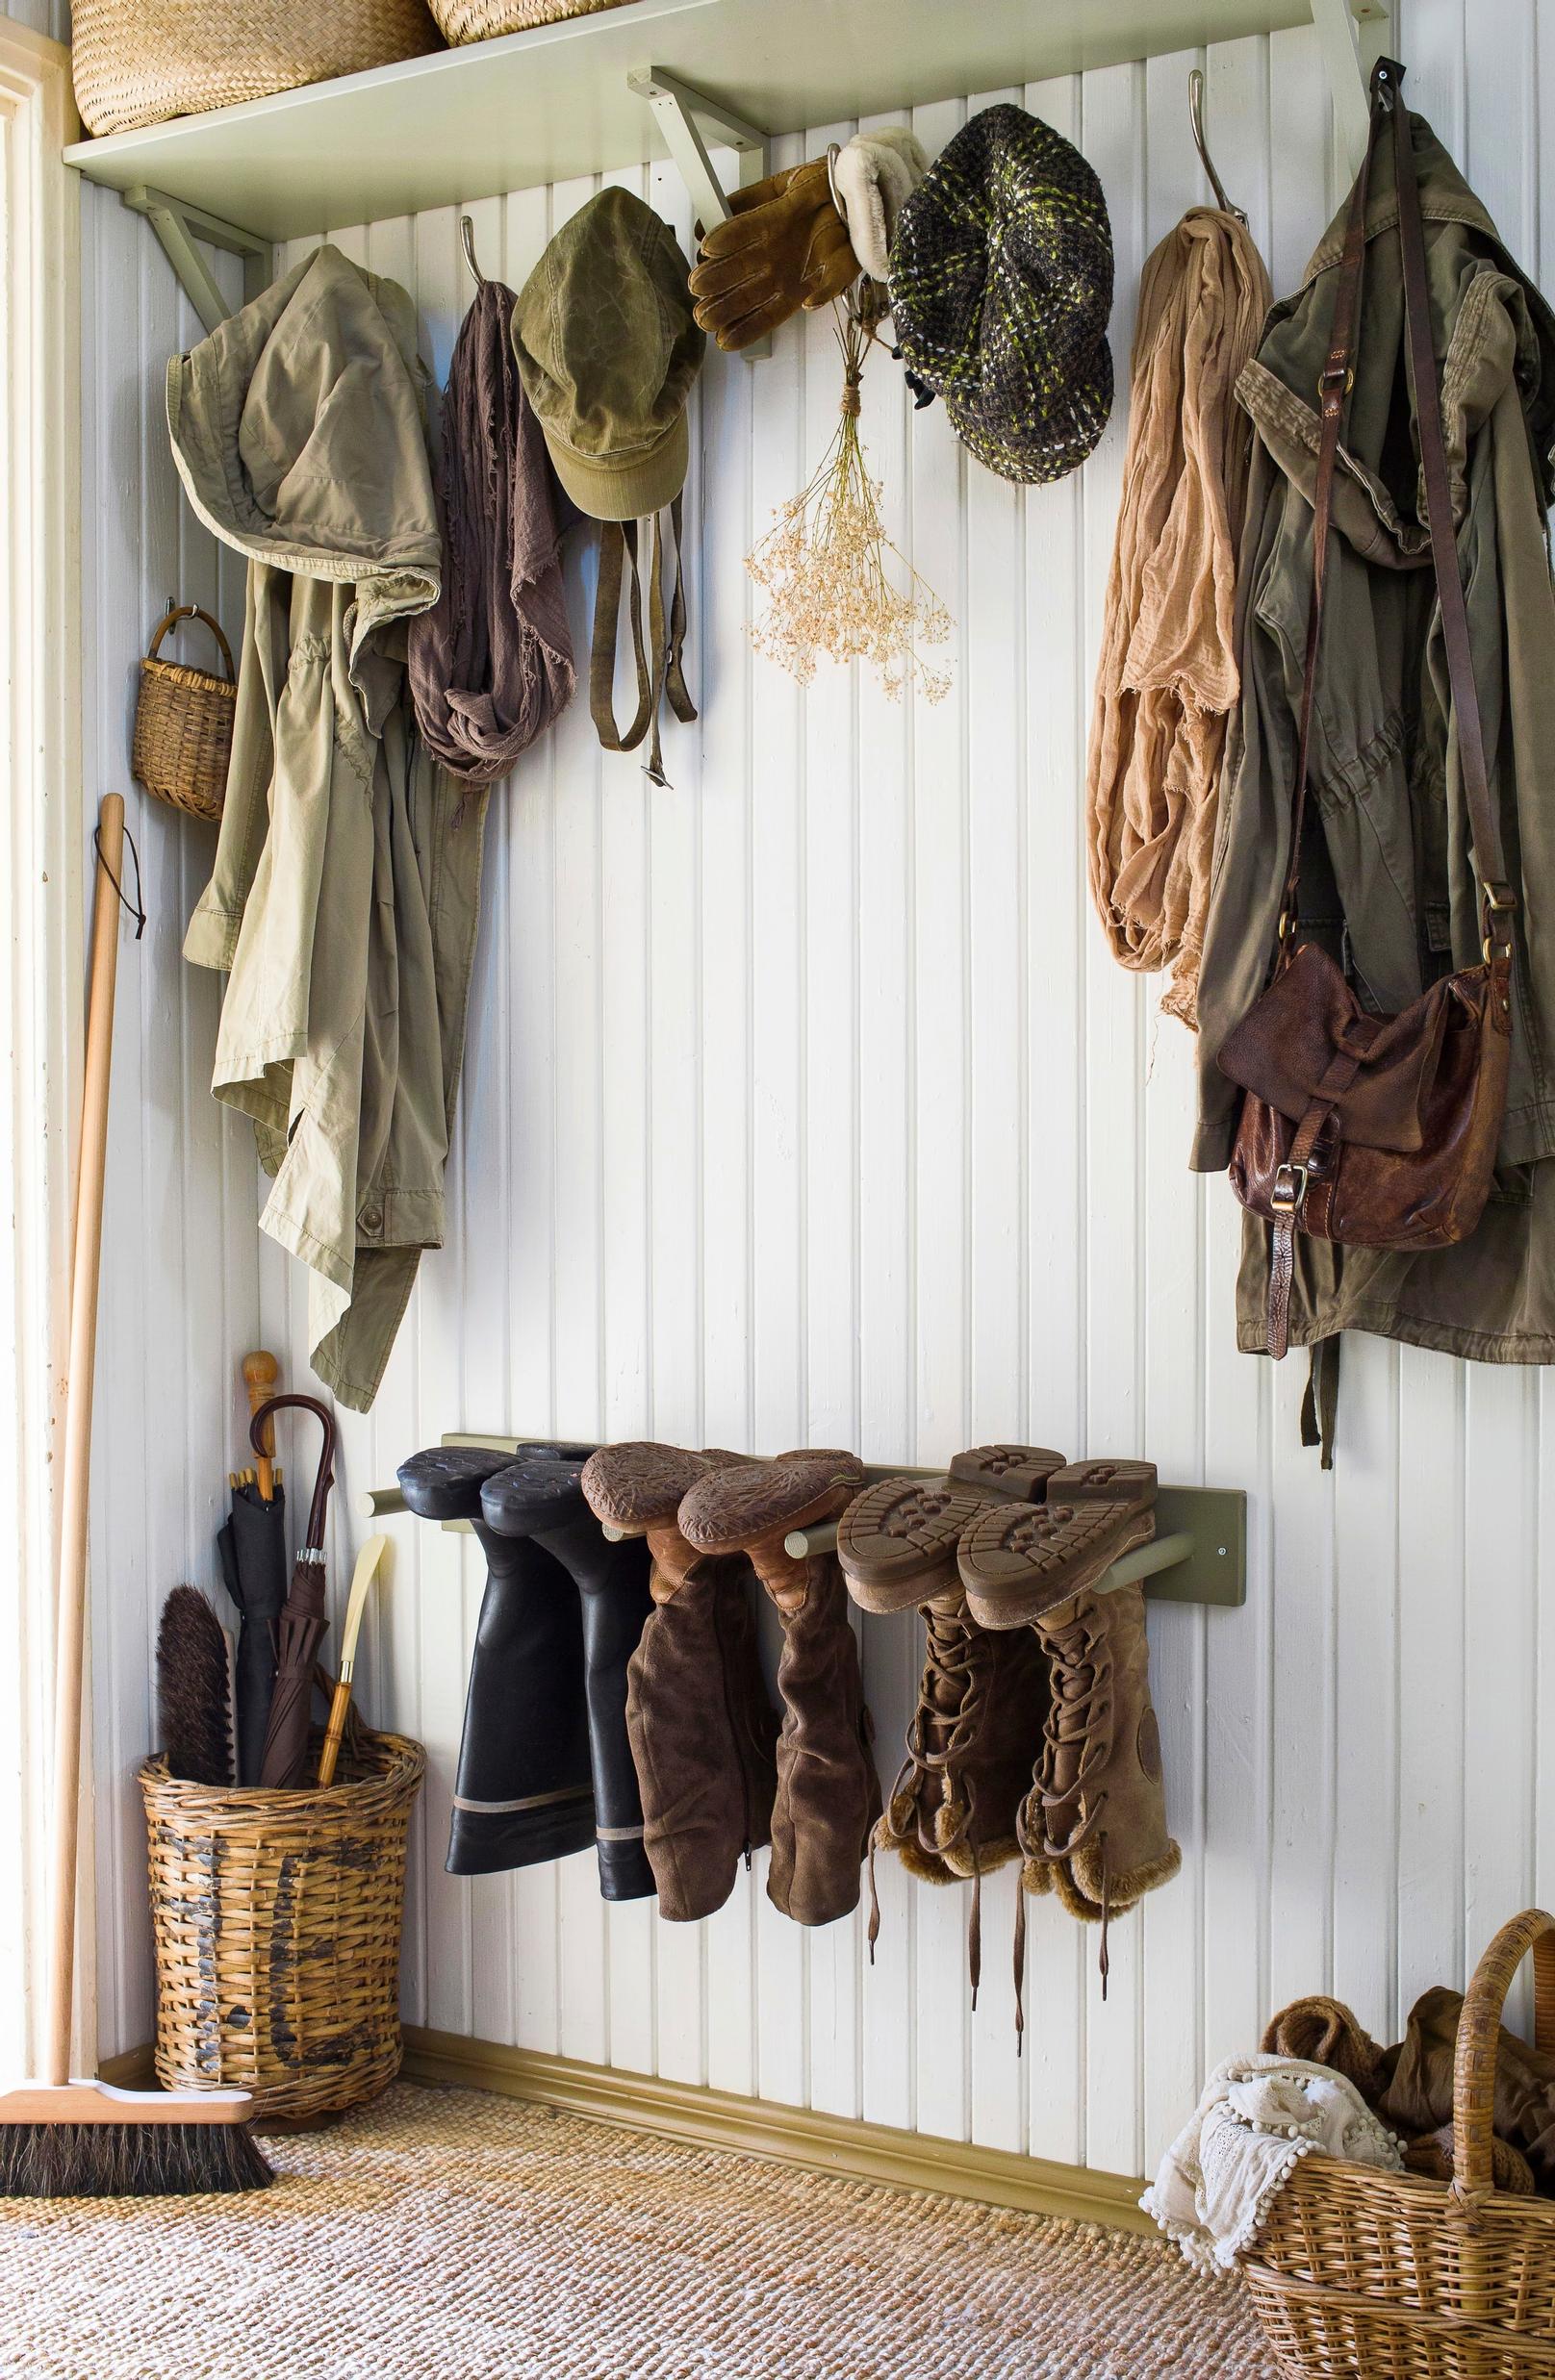
Boots in a row
Wet boots? Build a clever rack to dry them thoroughly and keep their shape—here’s how
Simple, stylish, and practical! Follow these instructions by DIY enthusiast and blogger Maria Meder to build a boot rack from broom handles and a plank.


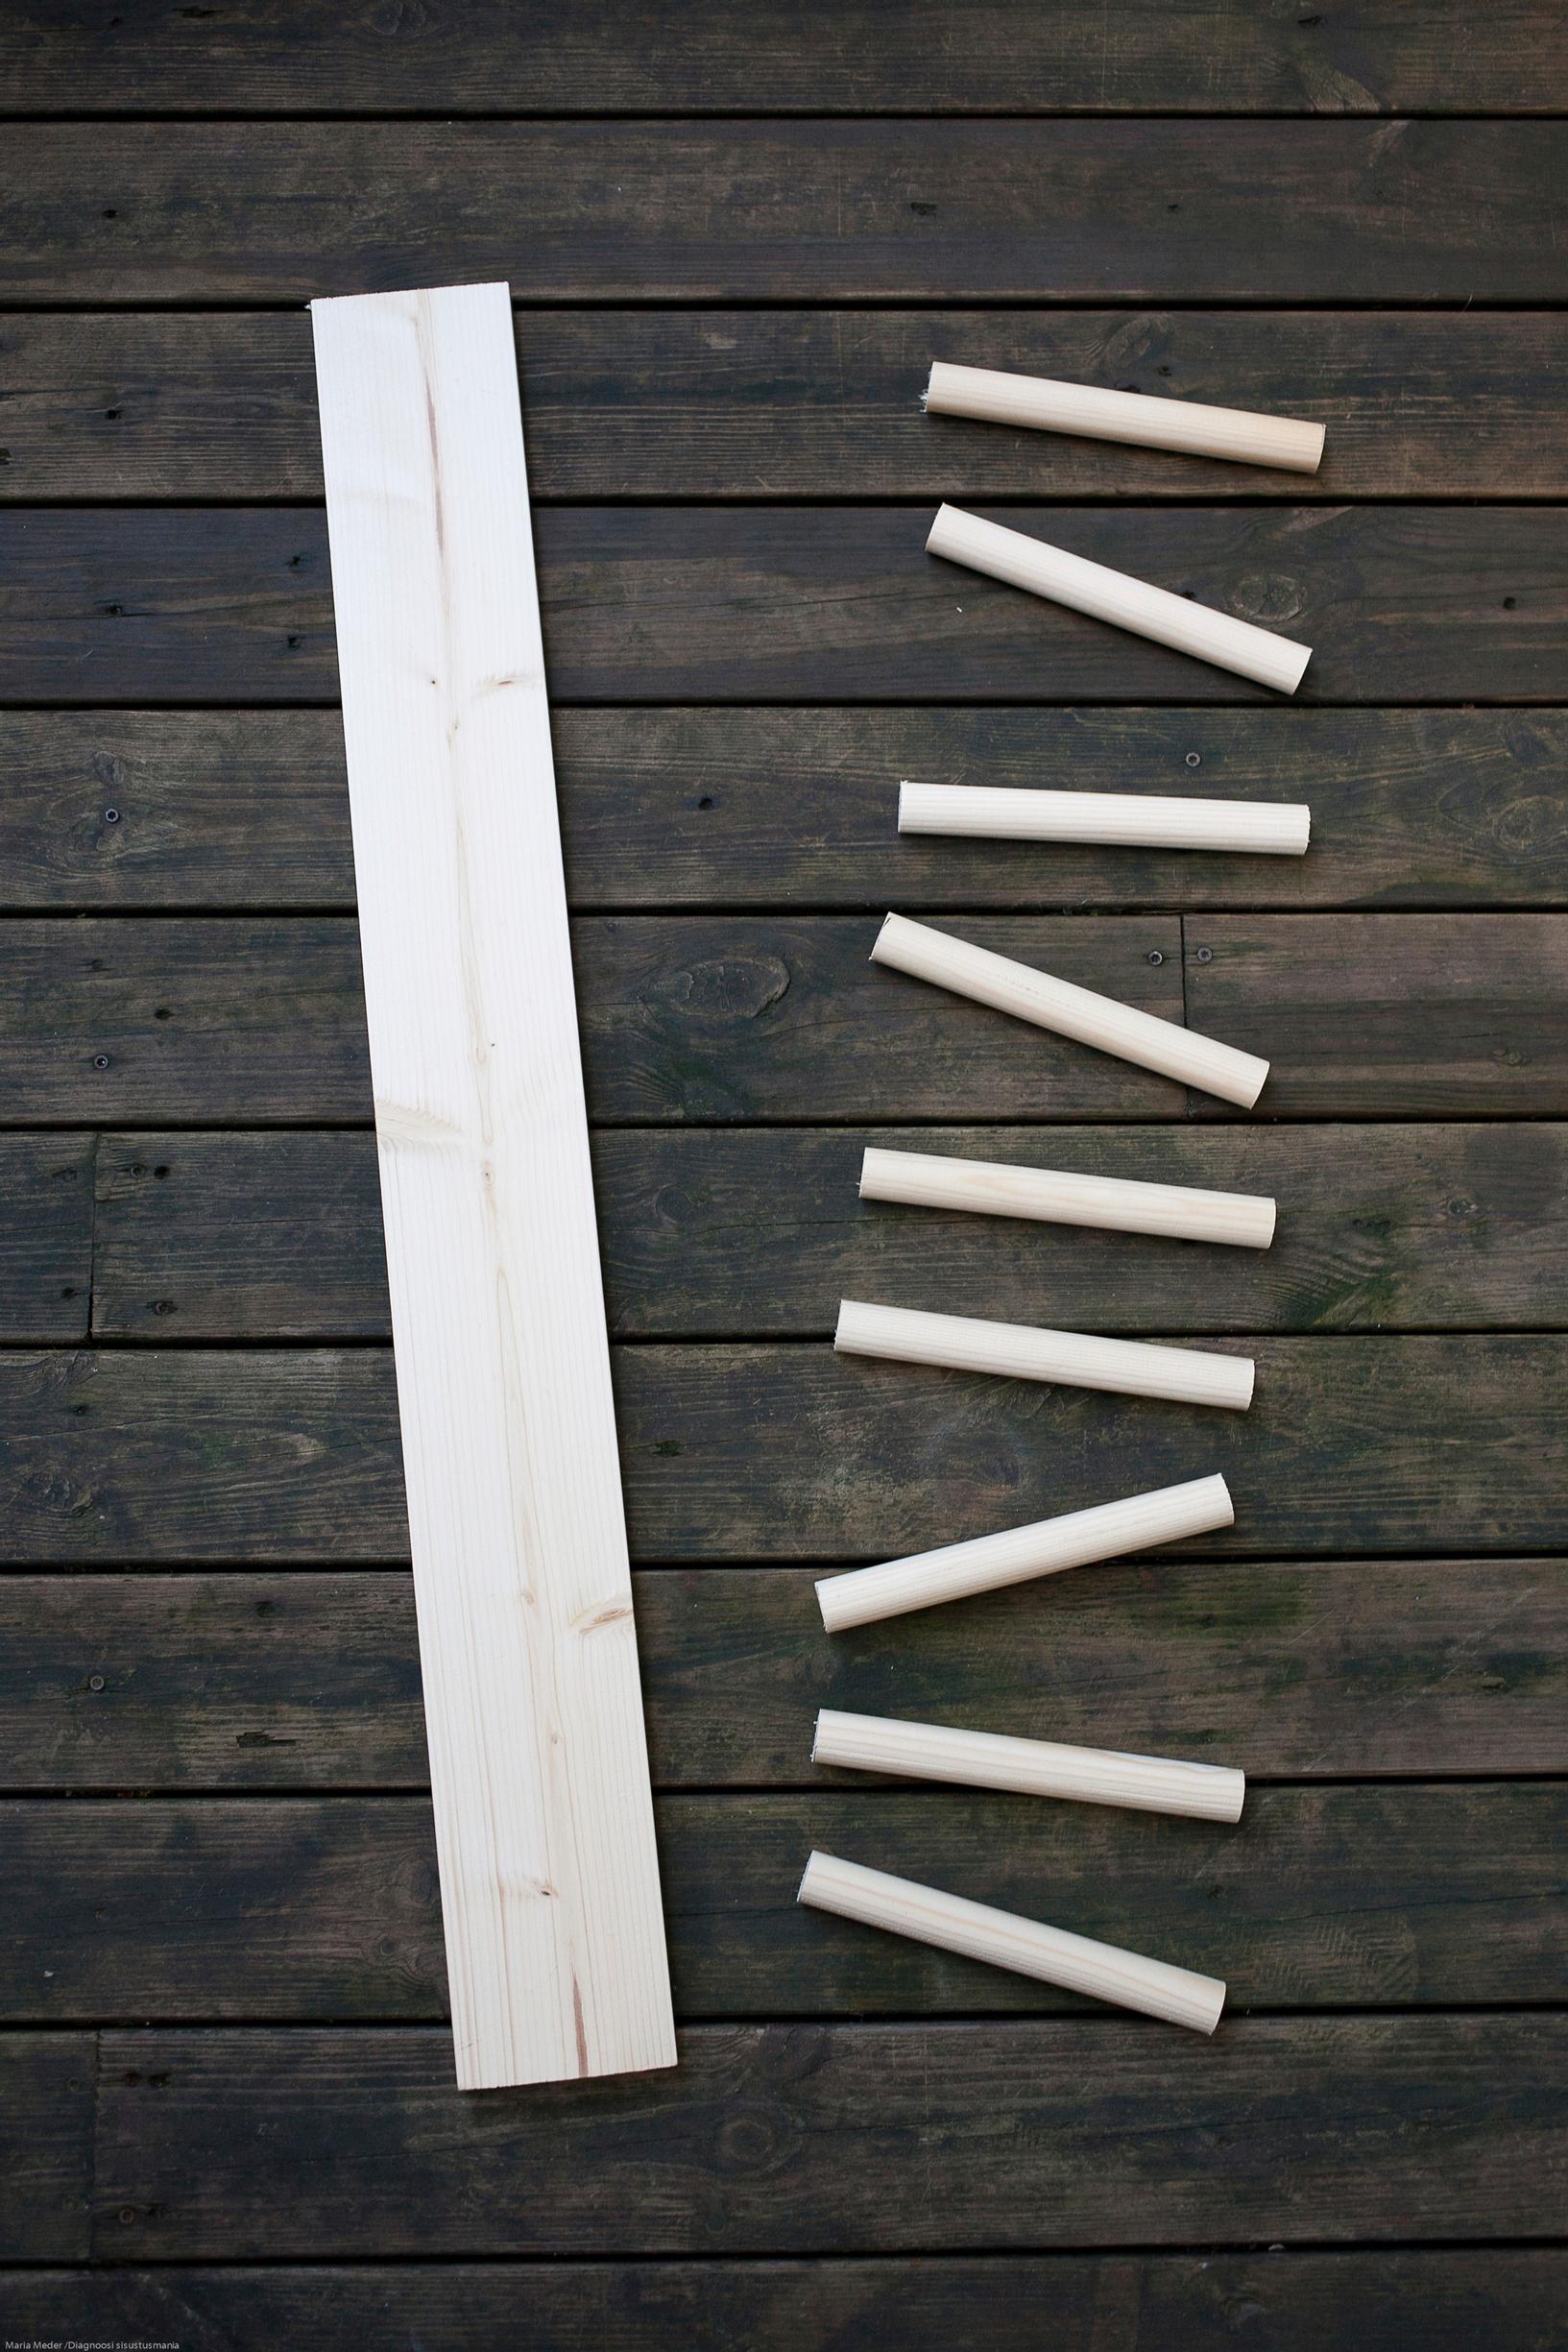
Materials for the boot rack:
82 cm of planed board (18 × 95 mm)
1–2 broom handles (ø 24 mm)
Fine saw or circular saw
Sandpaper
Tape measure and pencil
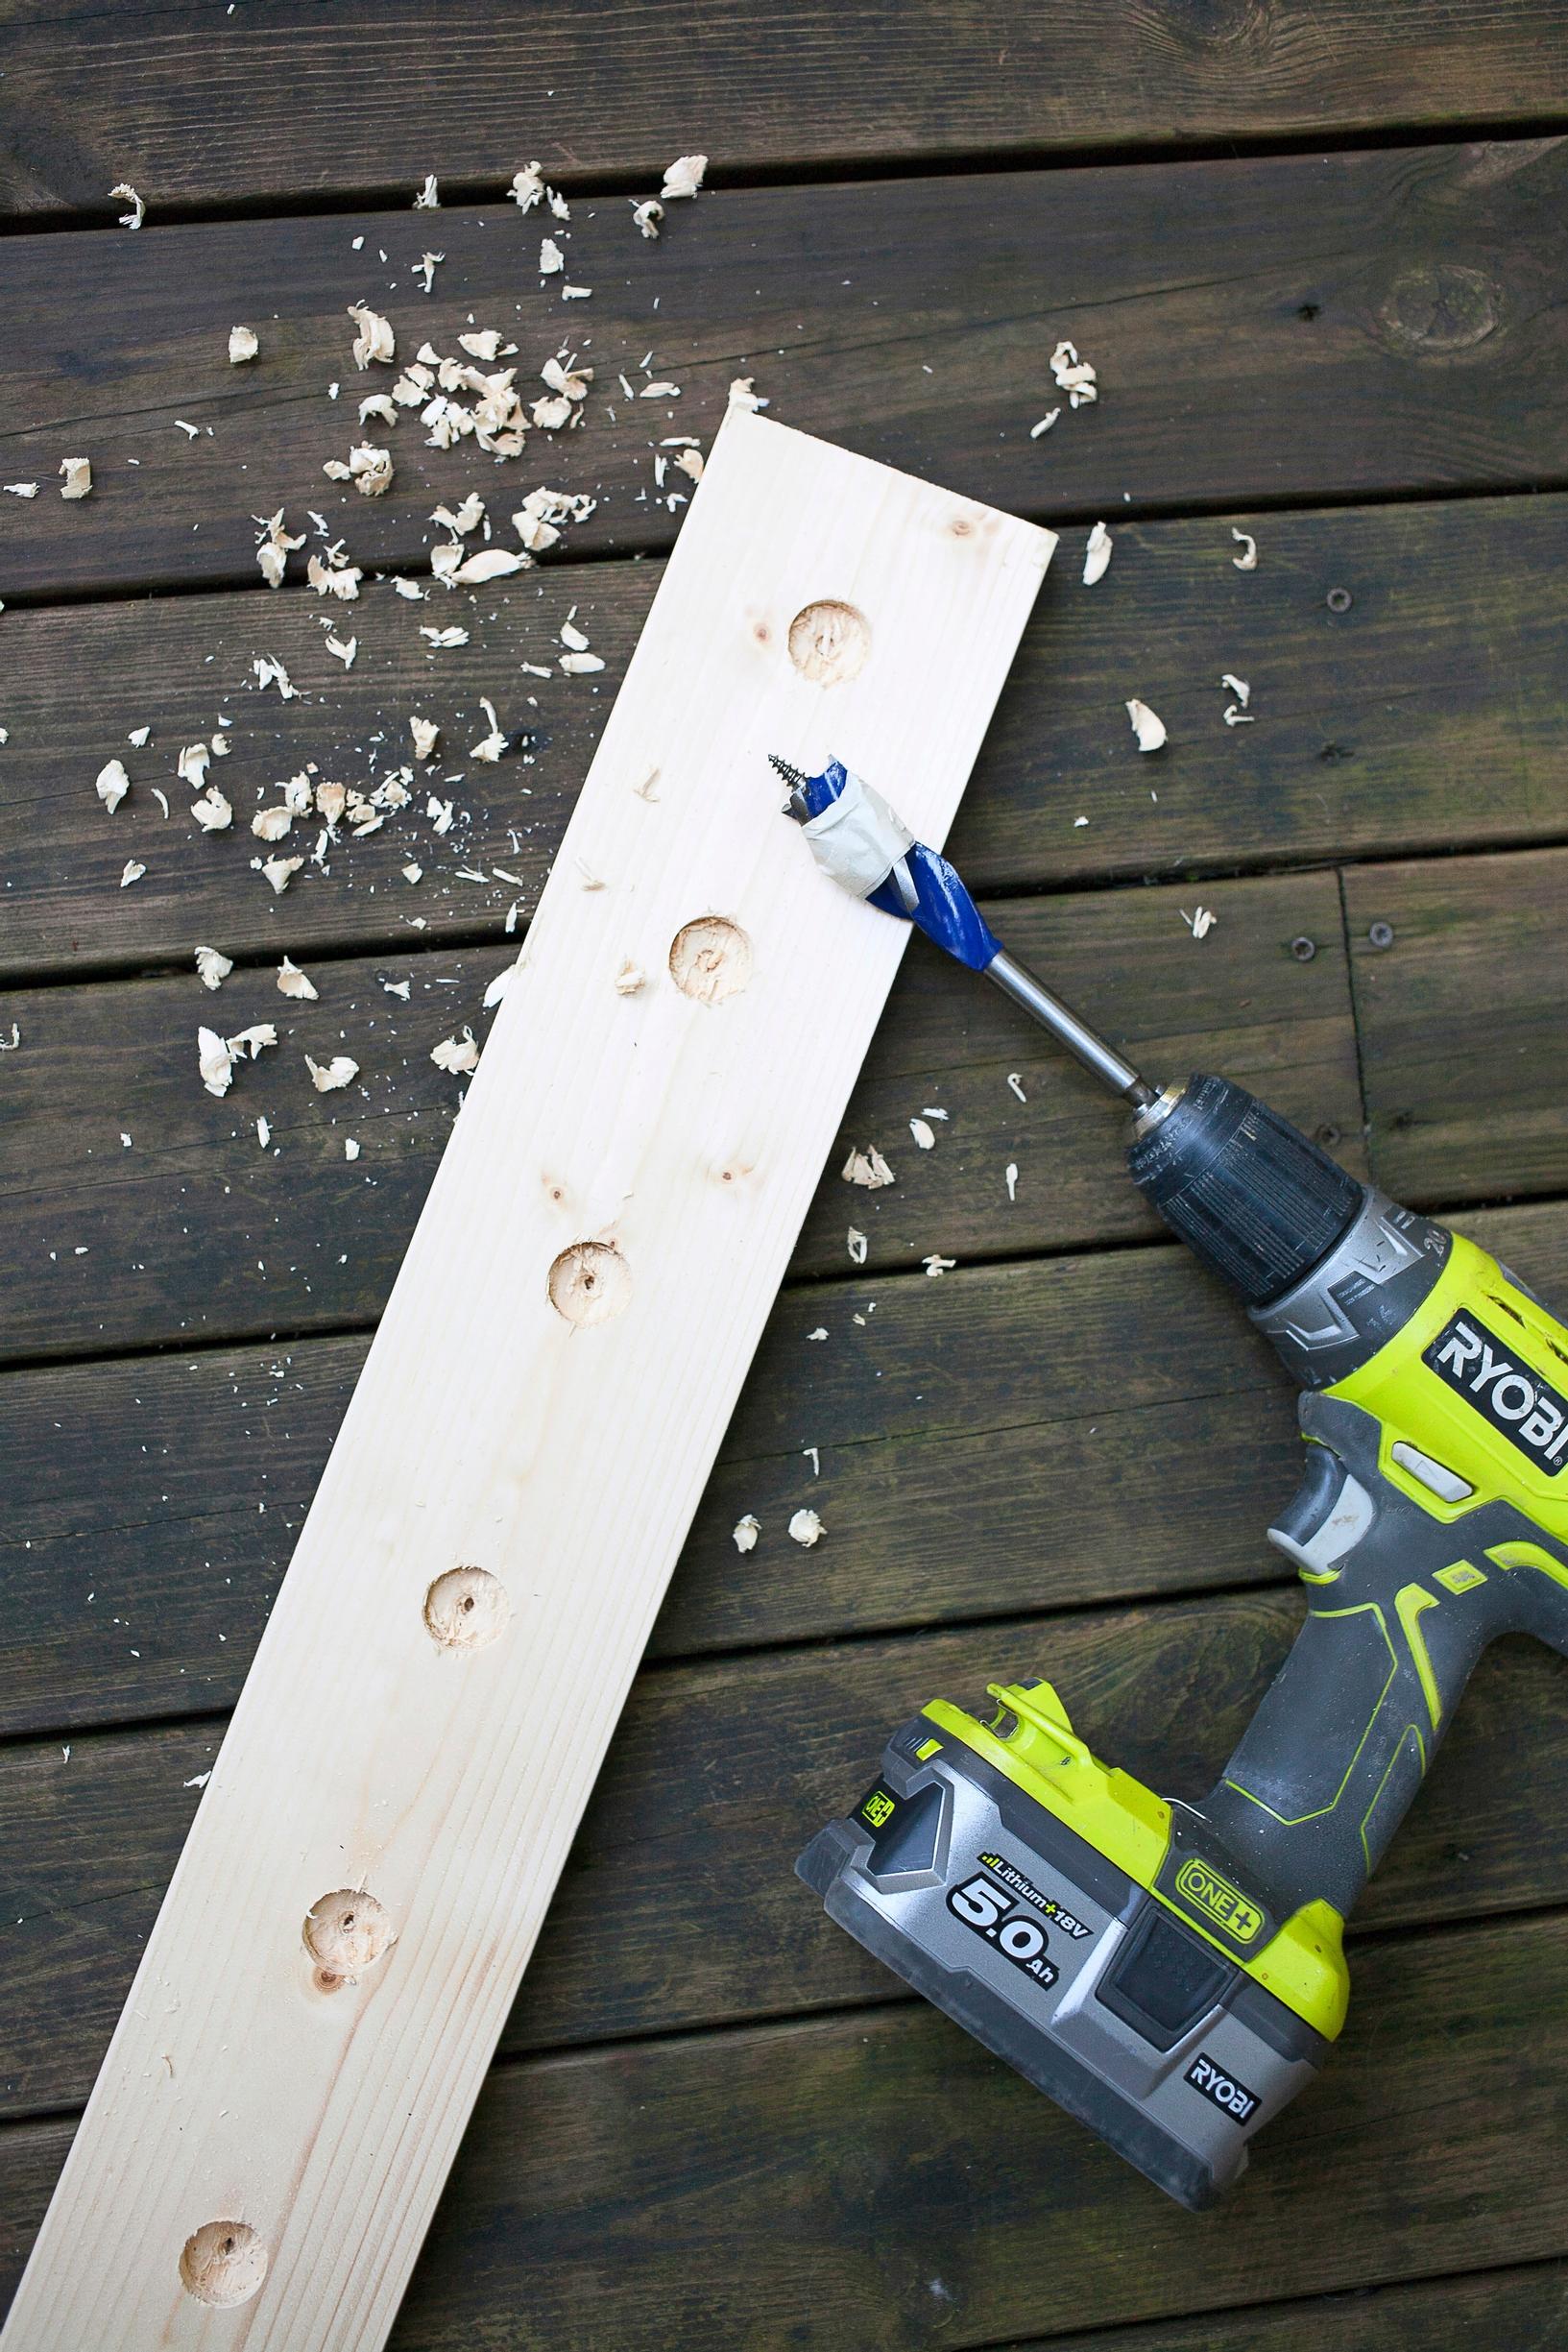
Cordless drill
24 mm wood drill bit and a thin drill bit (1–2 mm)
9 screws (4 × 35 mm)
Wood glue (optional)
Furniture paint (e.g., Frenchic Paint Al Fresco in the shade ‘Olivia’)
Paintbrush


Instructions for the boot rack:
- Cut an 82 cm piece from the board and nine 18 cm long pieces from the broom handles. Sand all the cut edges smooth with sandpaper.
- Measure and mark the positions for the dowels along the center of the board. Mark the first dowels 5 cm from the ends, and the other dowels at 9 cm intervals. Use a thin wood drill bit to make small starter holes at the marks, making it easier to align the larger drill bit.
- Using the 24 mm drill bit, drill approximately 5 mm deep holes into the board for the dowels. Clean up the edges with sandpaper. Tip: Wrap masking tape around the drill bit to mark the depth to which the bit should go.
- With the thinner drill bit, drill holes through the center of each recess and all the way through the board to the other side. These will serve as pilot holes for the screws.
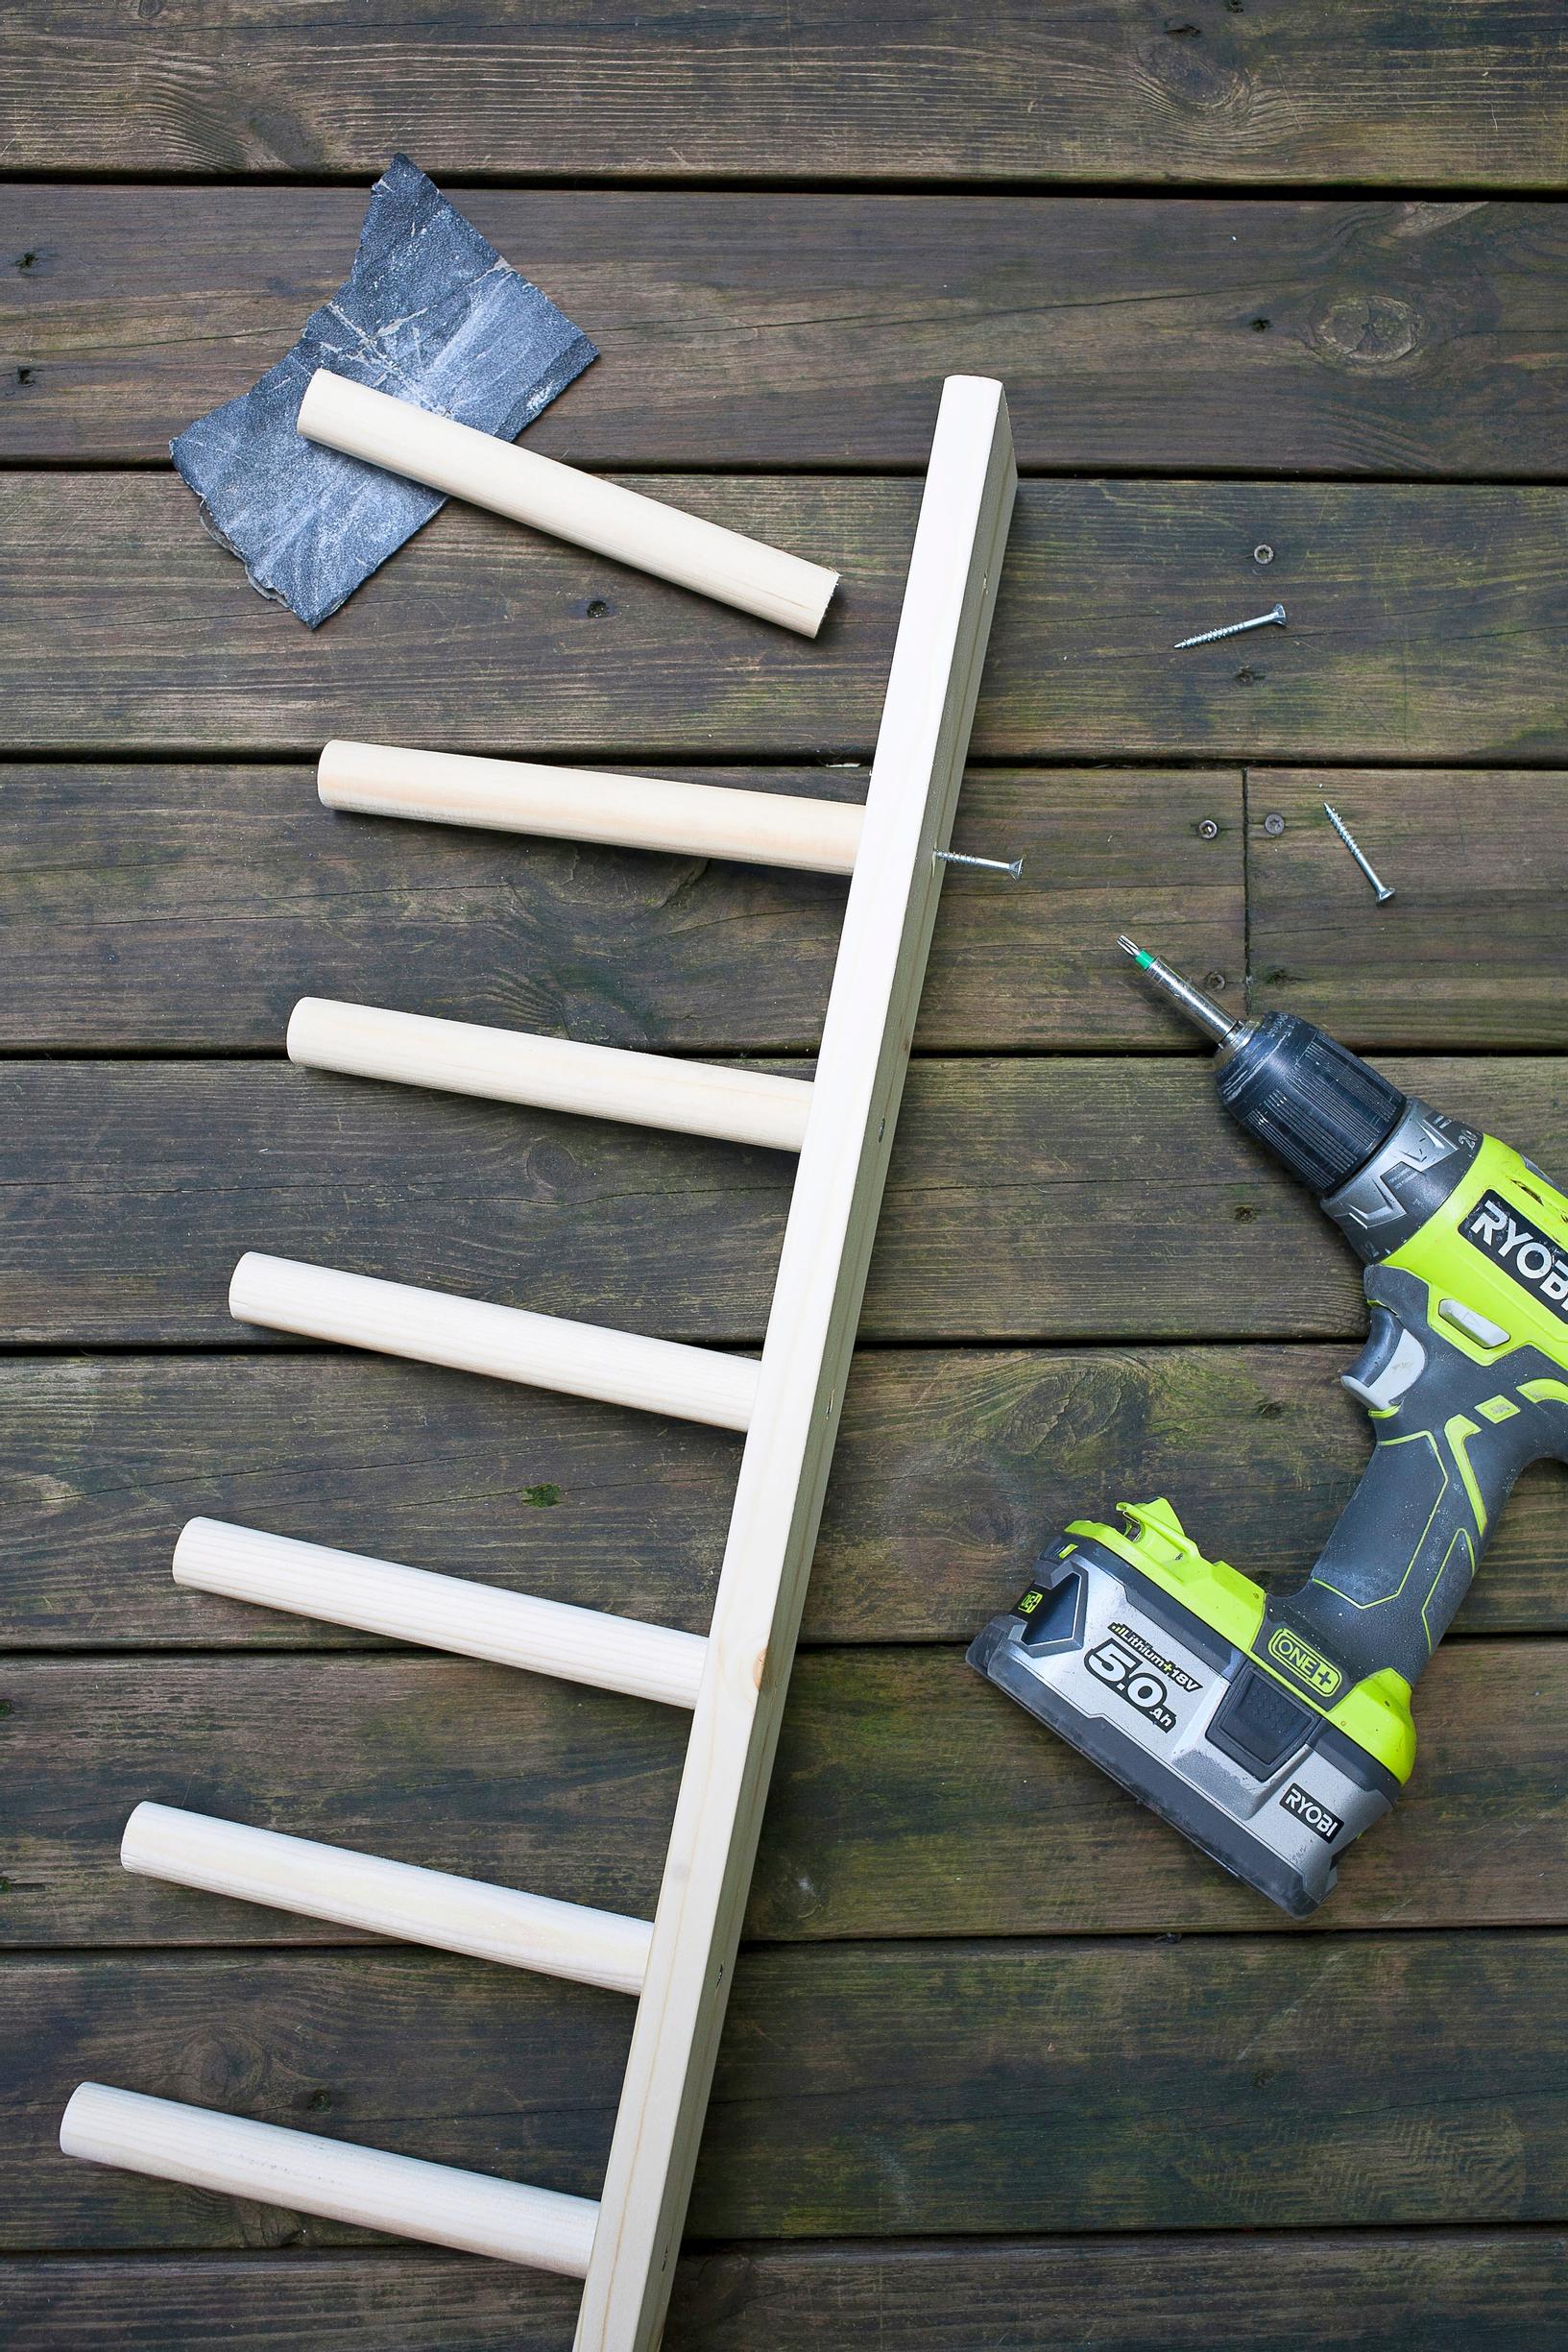
- From the backside, attach the broom handle pieces to the board by screwing them tightly into the holes. If the dowels do not fit snugly, apply a few drops of wood glue between them and the board. Allow the glue to dry for 24 hours. Sand the exposed ends of the dowels to round them off to make it easier to slide the boots on the rack.
- Using the thin drill bit, drill holes in the edges of the board for mounting it to the wall. Paint the rack in your desired color, and allow the paint to dry thoroughly.


Materials bought from: Boards and broom handles: K-Rauta. Paint: Frenchic Paint.
Find Maria Meder on her blog Diagnoosi: sisustusmania (“Diagnosis: Interior design mania”).