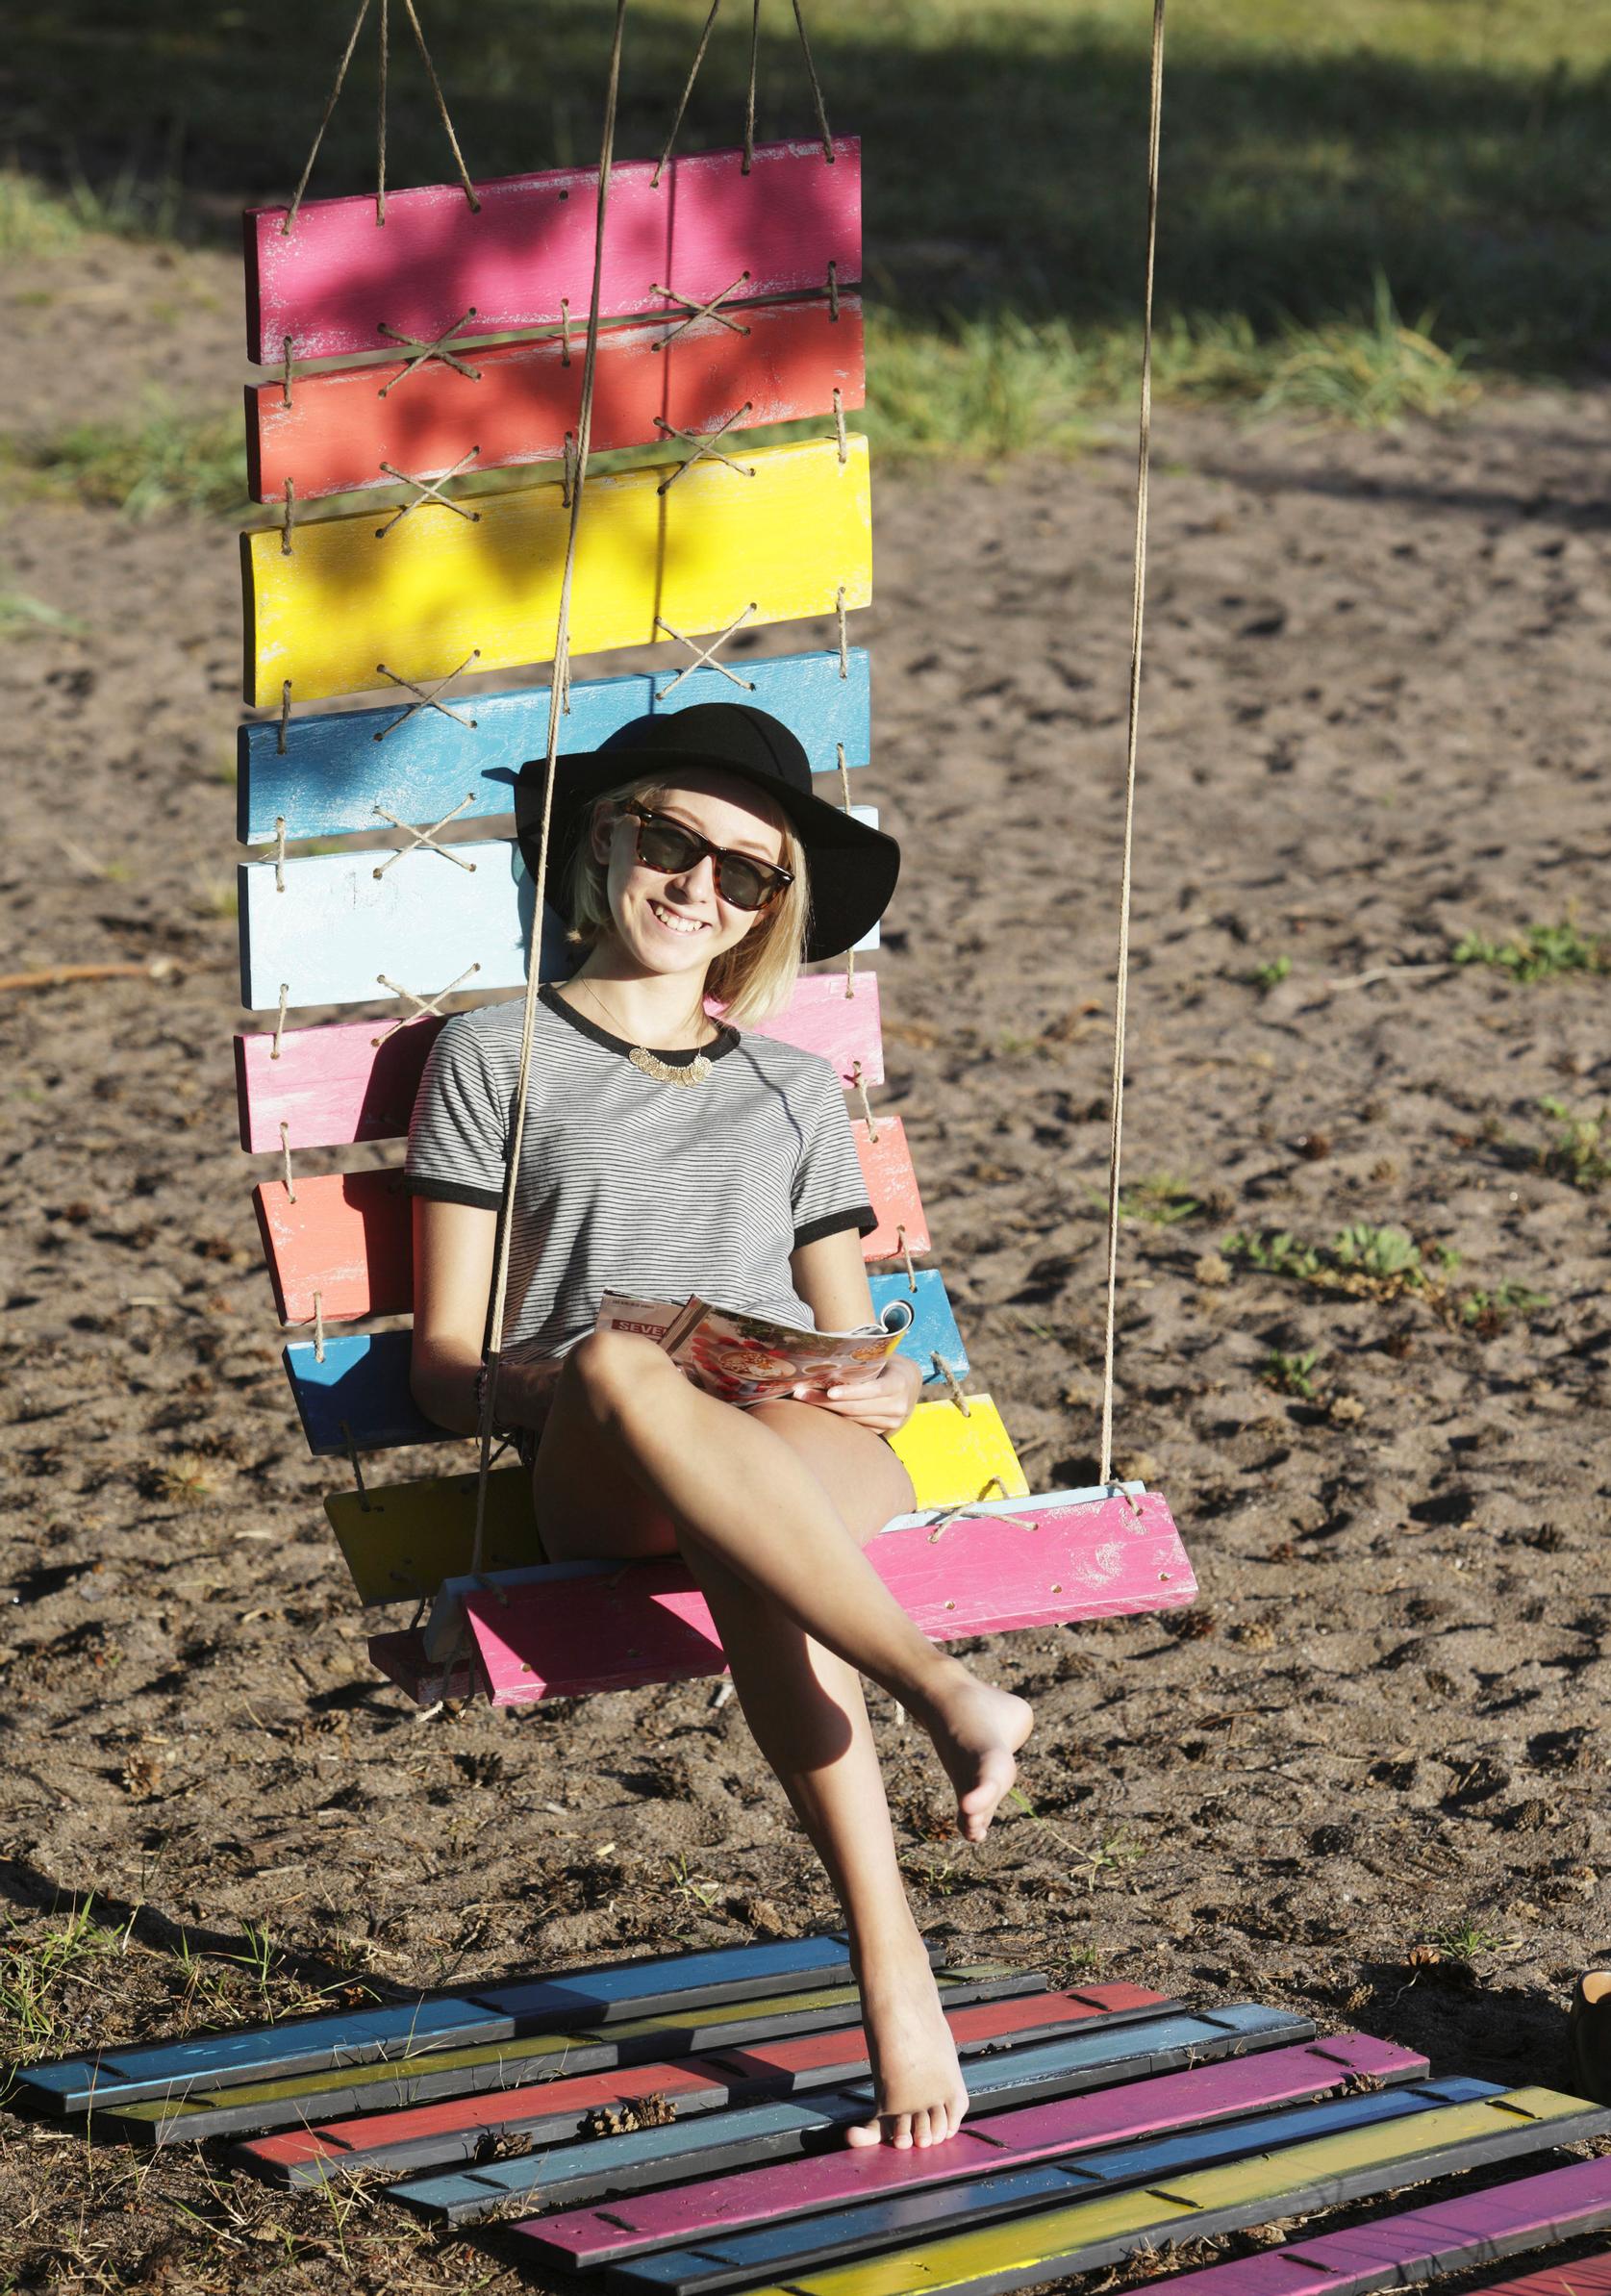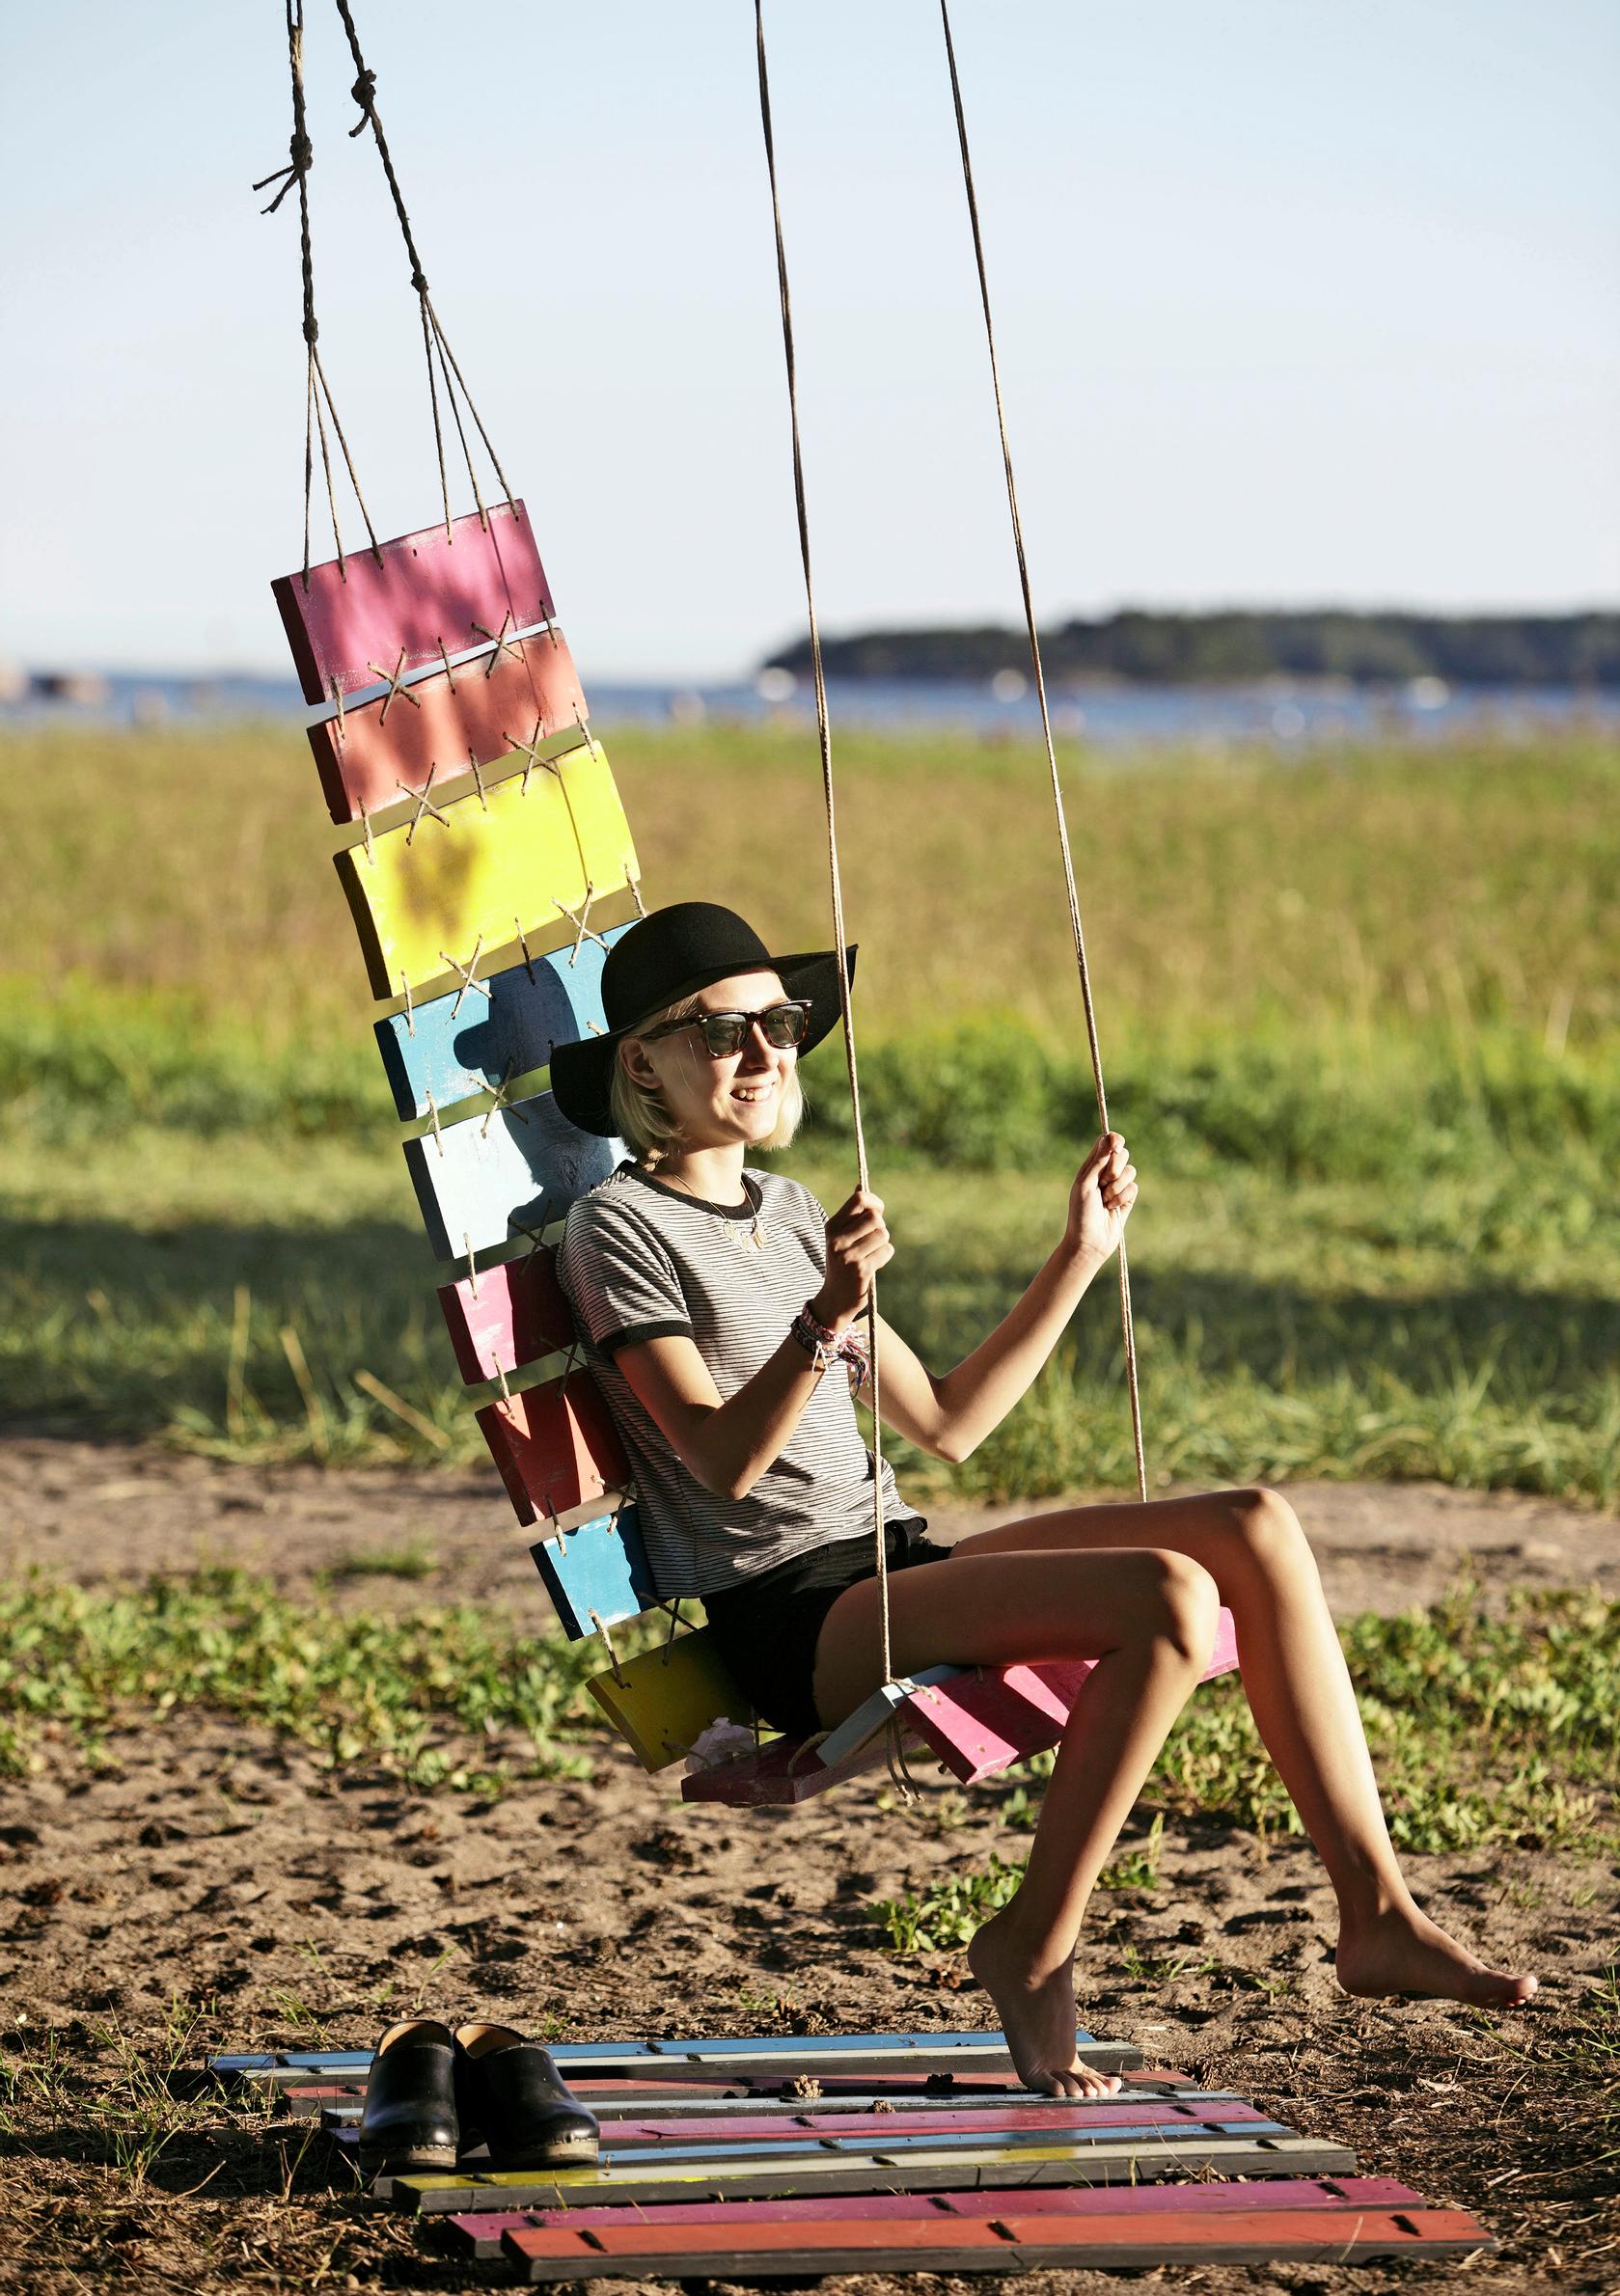
Make a playful hammock from leftover planks—see our guide!
An assortment of leftover boards makes a fun hammock. If you have enough boards, you can also make a rug to go underneath.
Materials:
- 8 m of sawn boards for the seat
- 8 m of planed boards for the rug
- A saw and a drill
- Primer
- Outdoor furniture paint
- Mineral spirits for thinning the paint
- Sandpaper and a paintbrush
- Thick rope, tape, and scissors
A hammock from leftover planks—instructions:

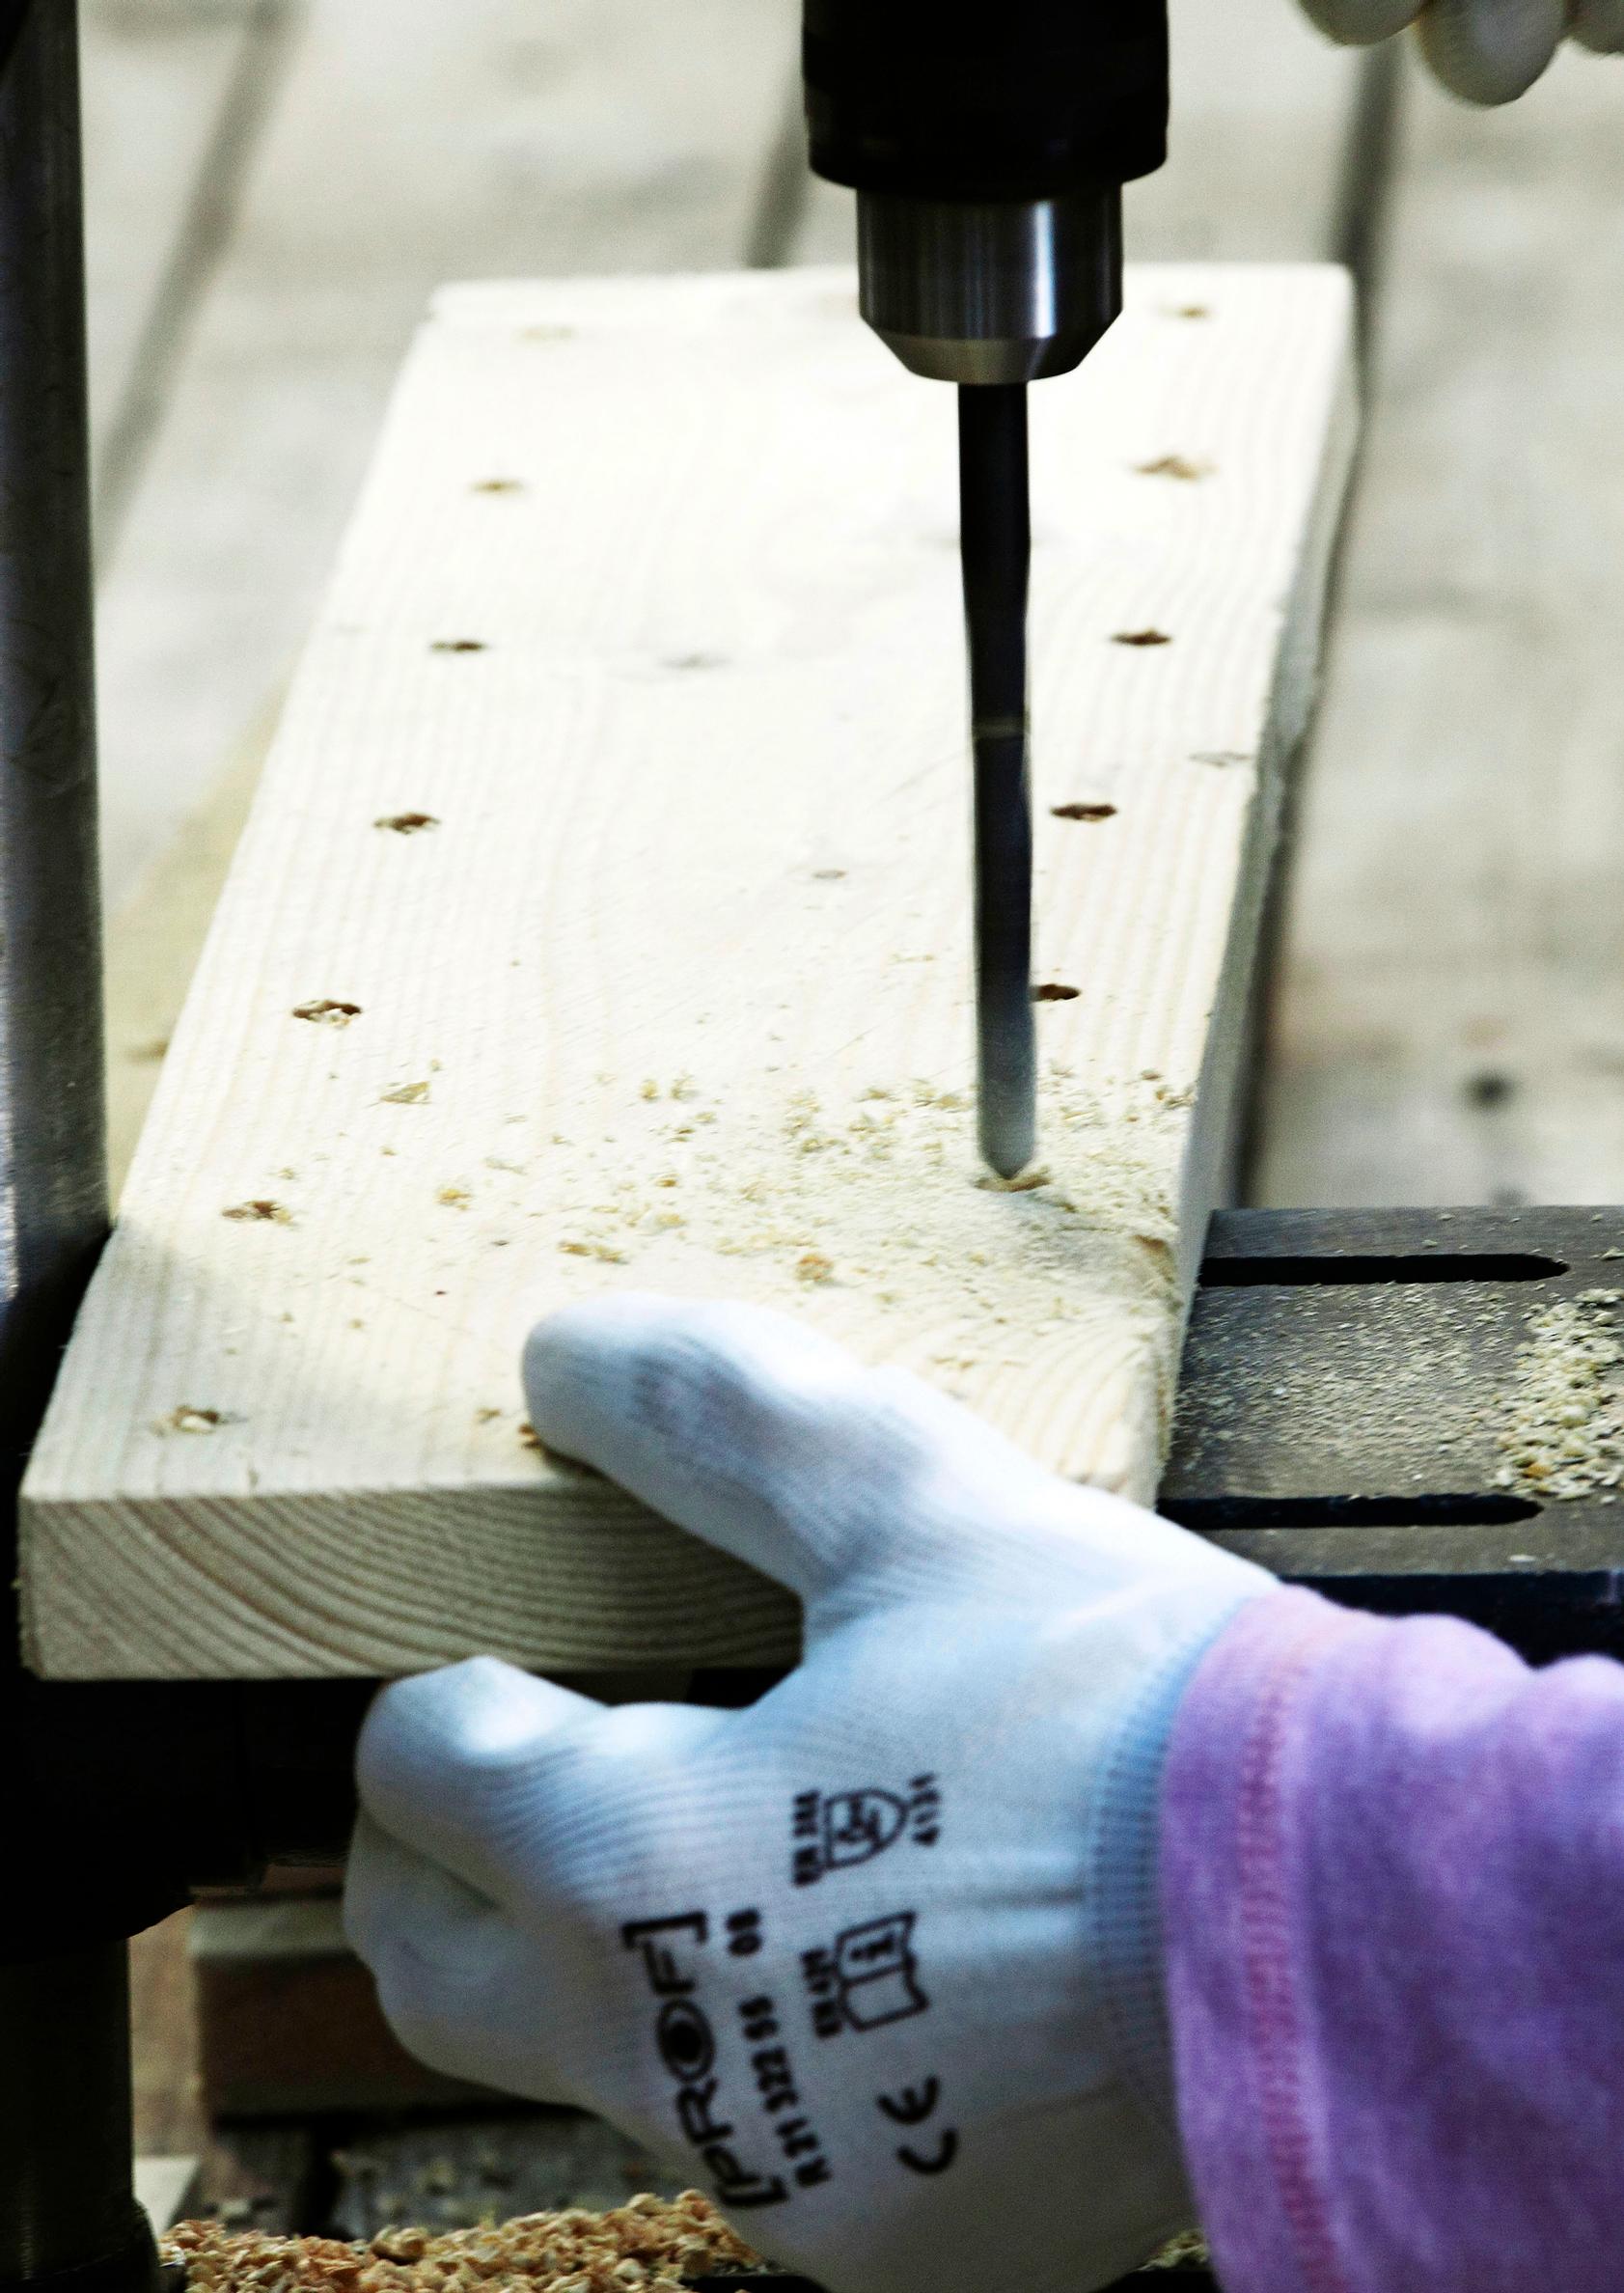
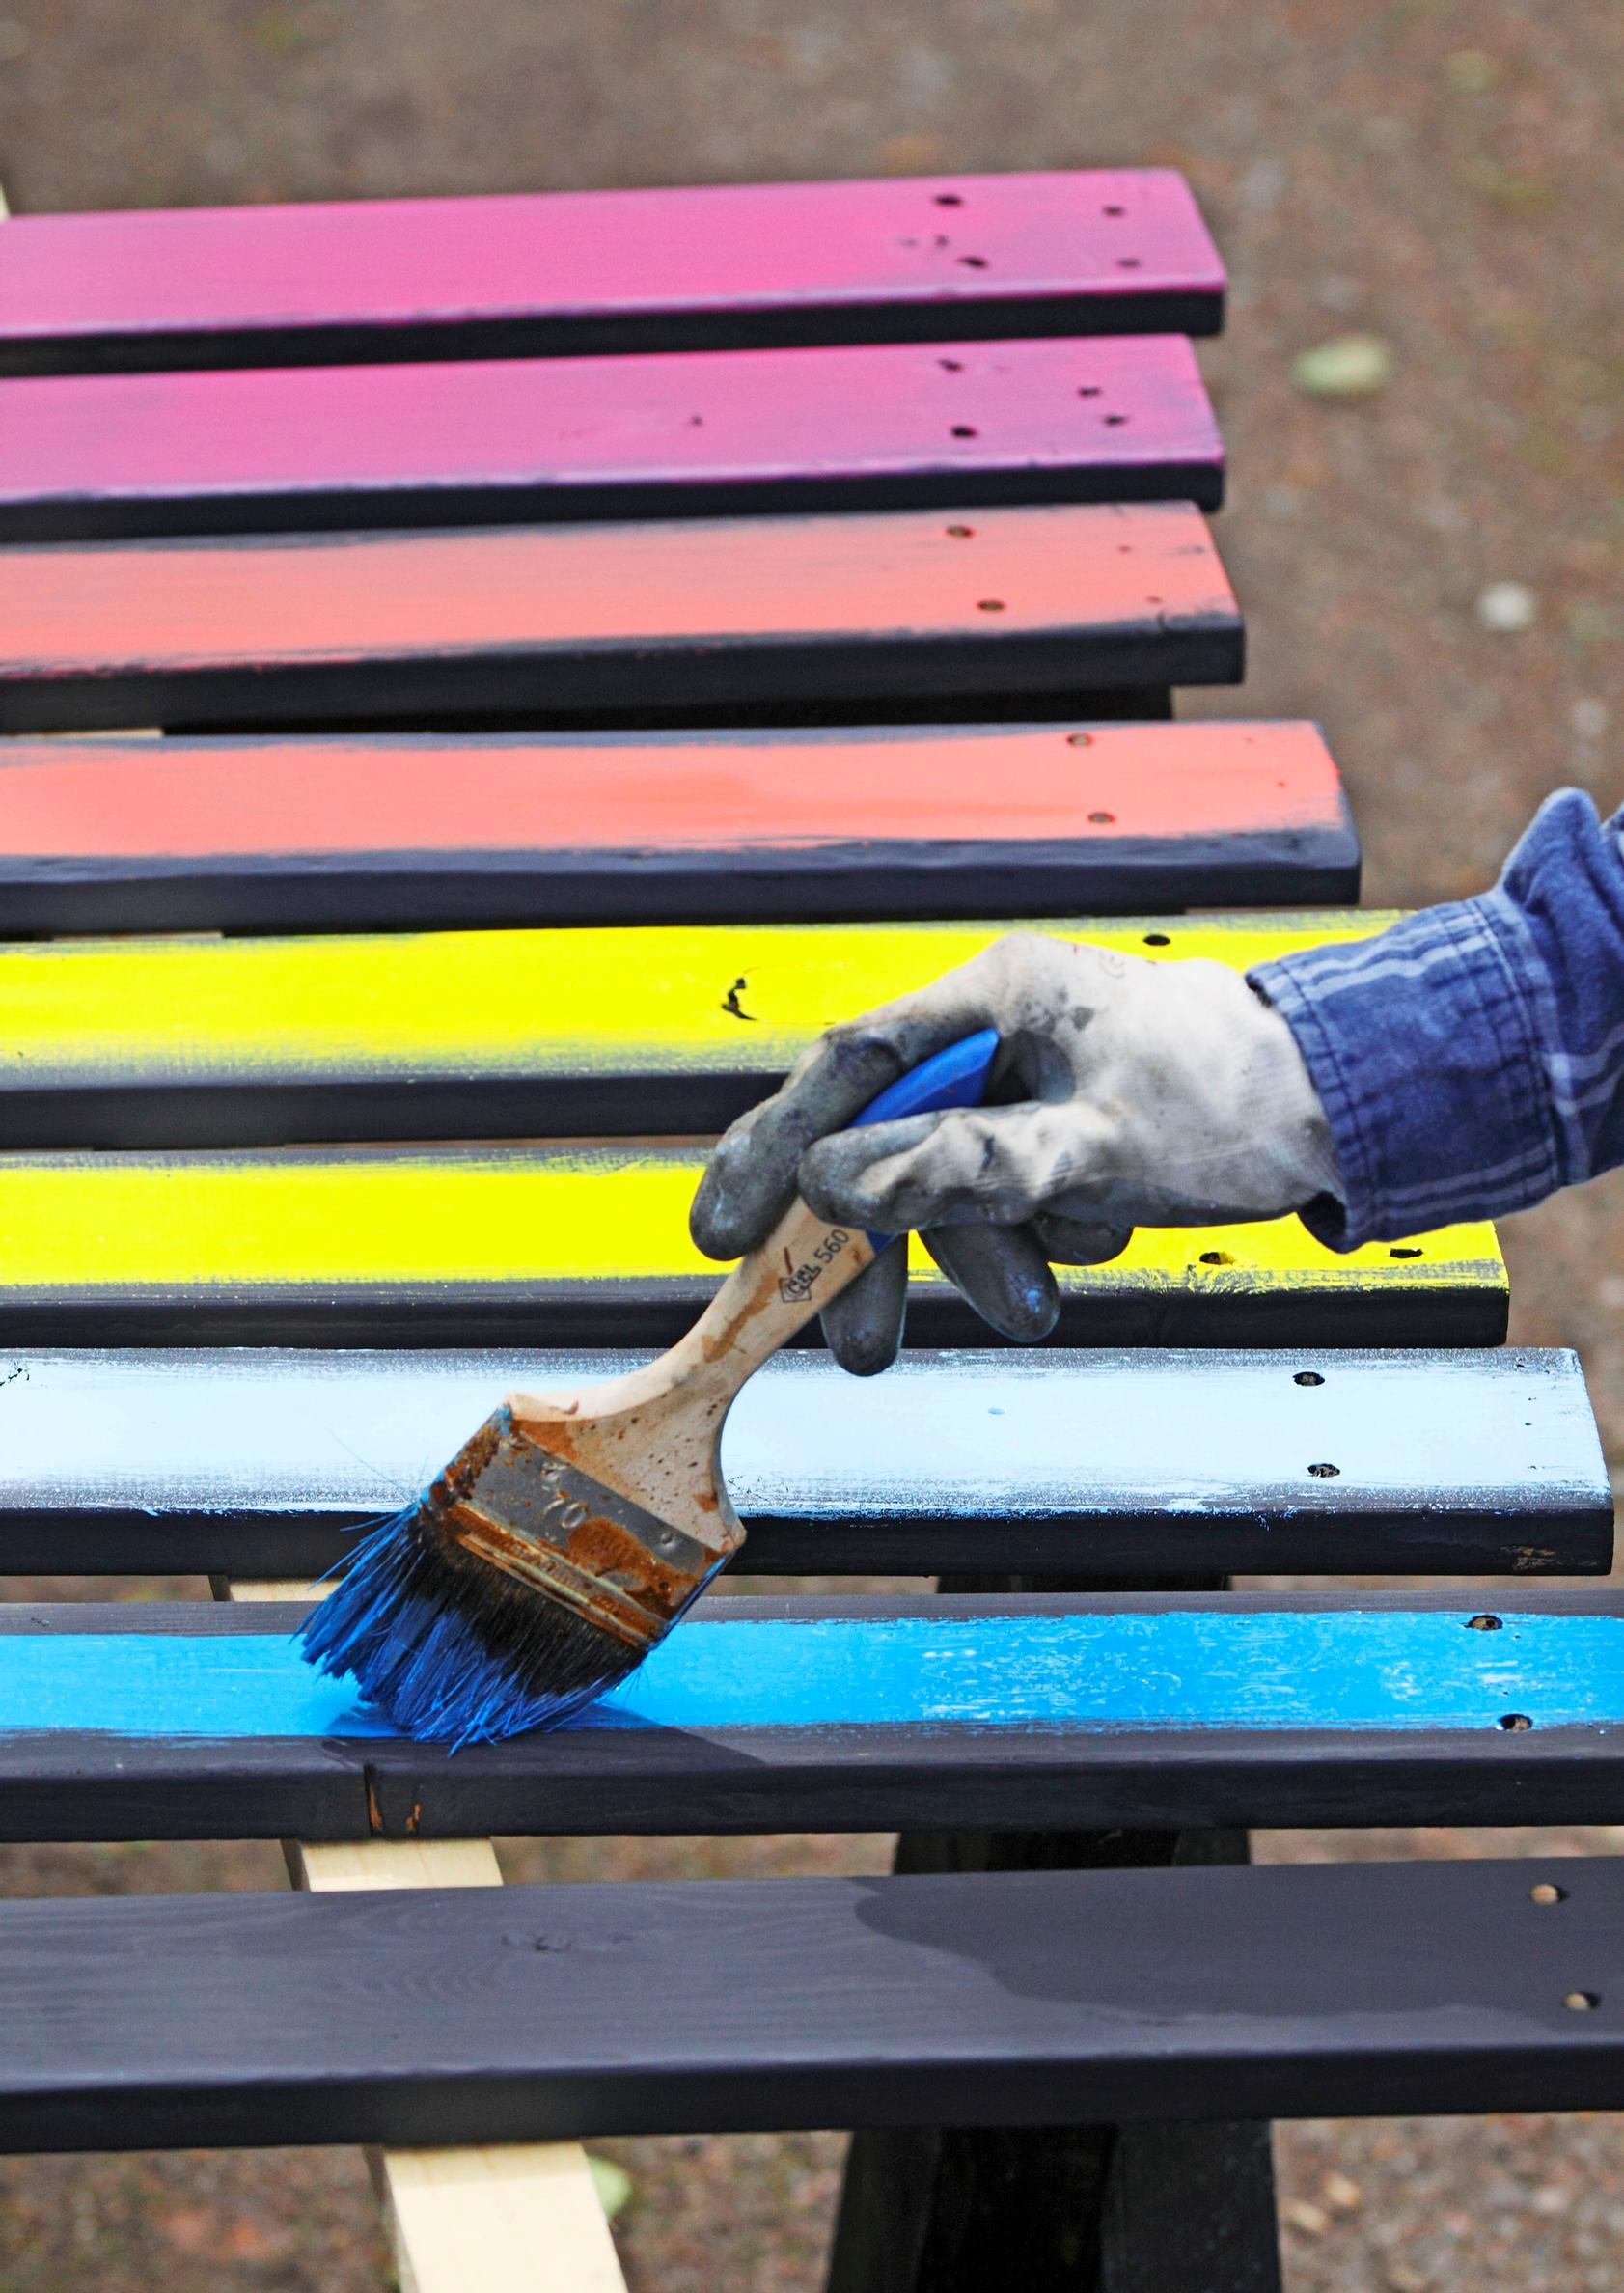
1. Saw twelve 60-centimeter-long boards for the seat. The boards can be different widths and slightly different thicknesses. Drill 6–7 evenly spaced holes on each side with an approximately 8 mm drill bit. Sand the sides and ends.

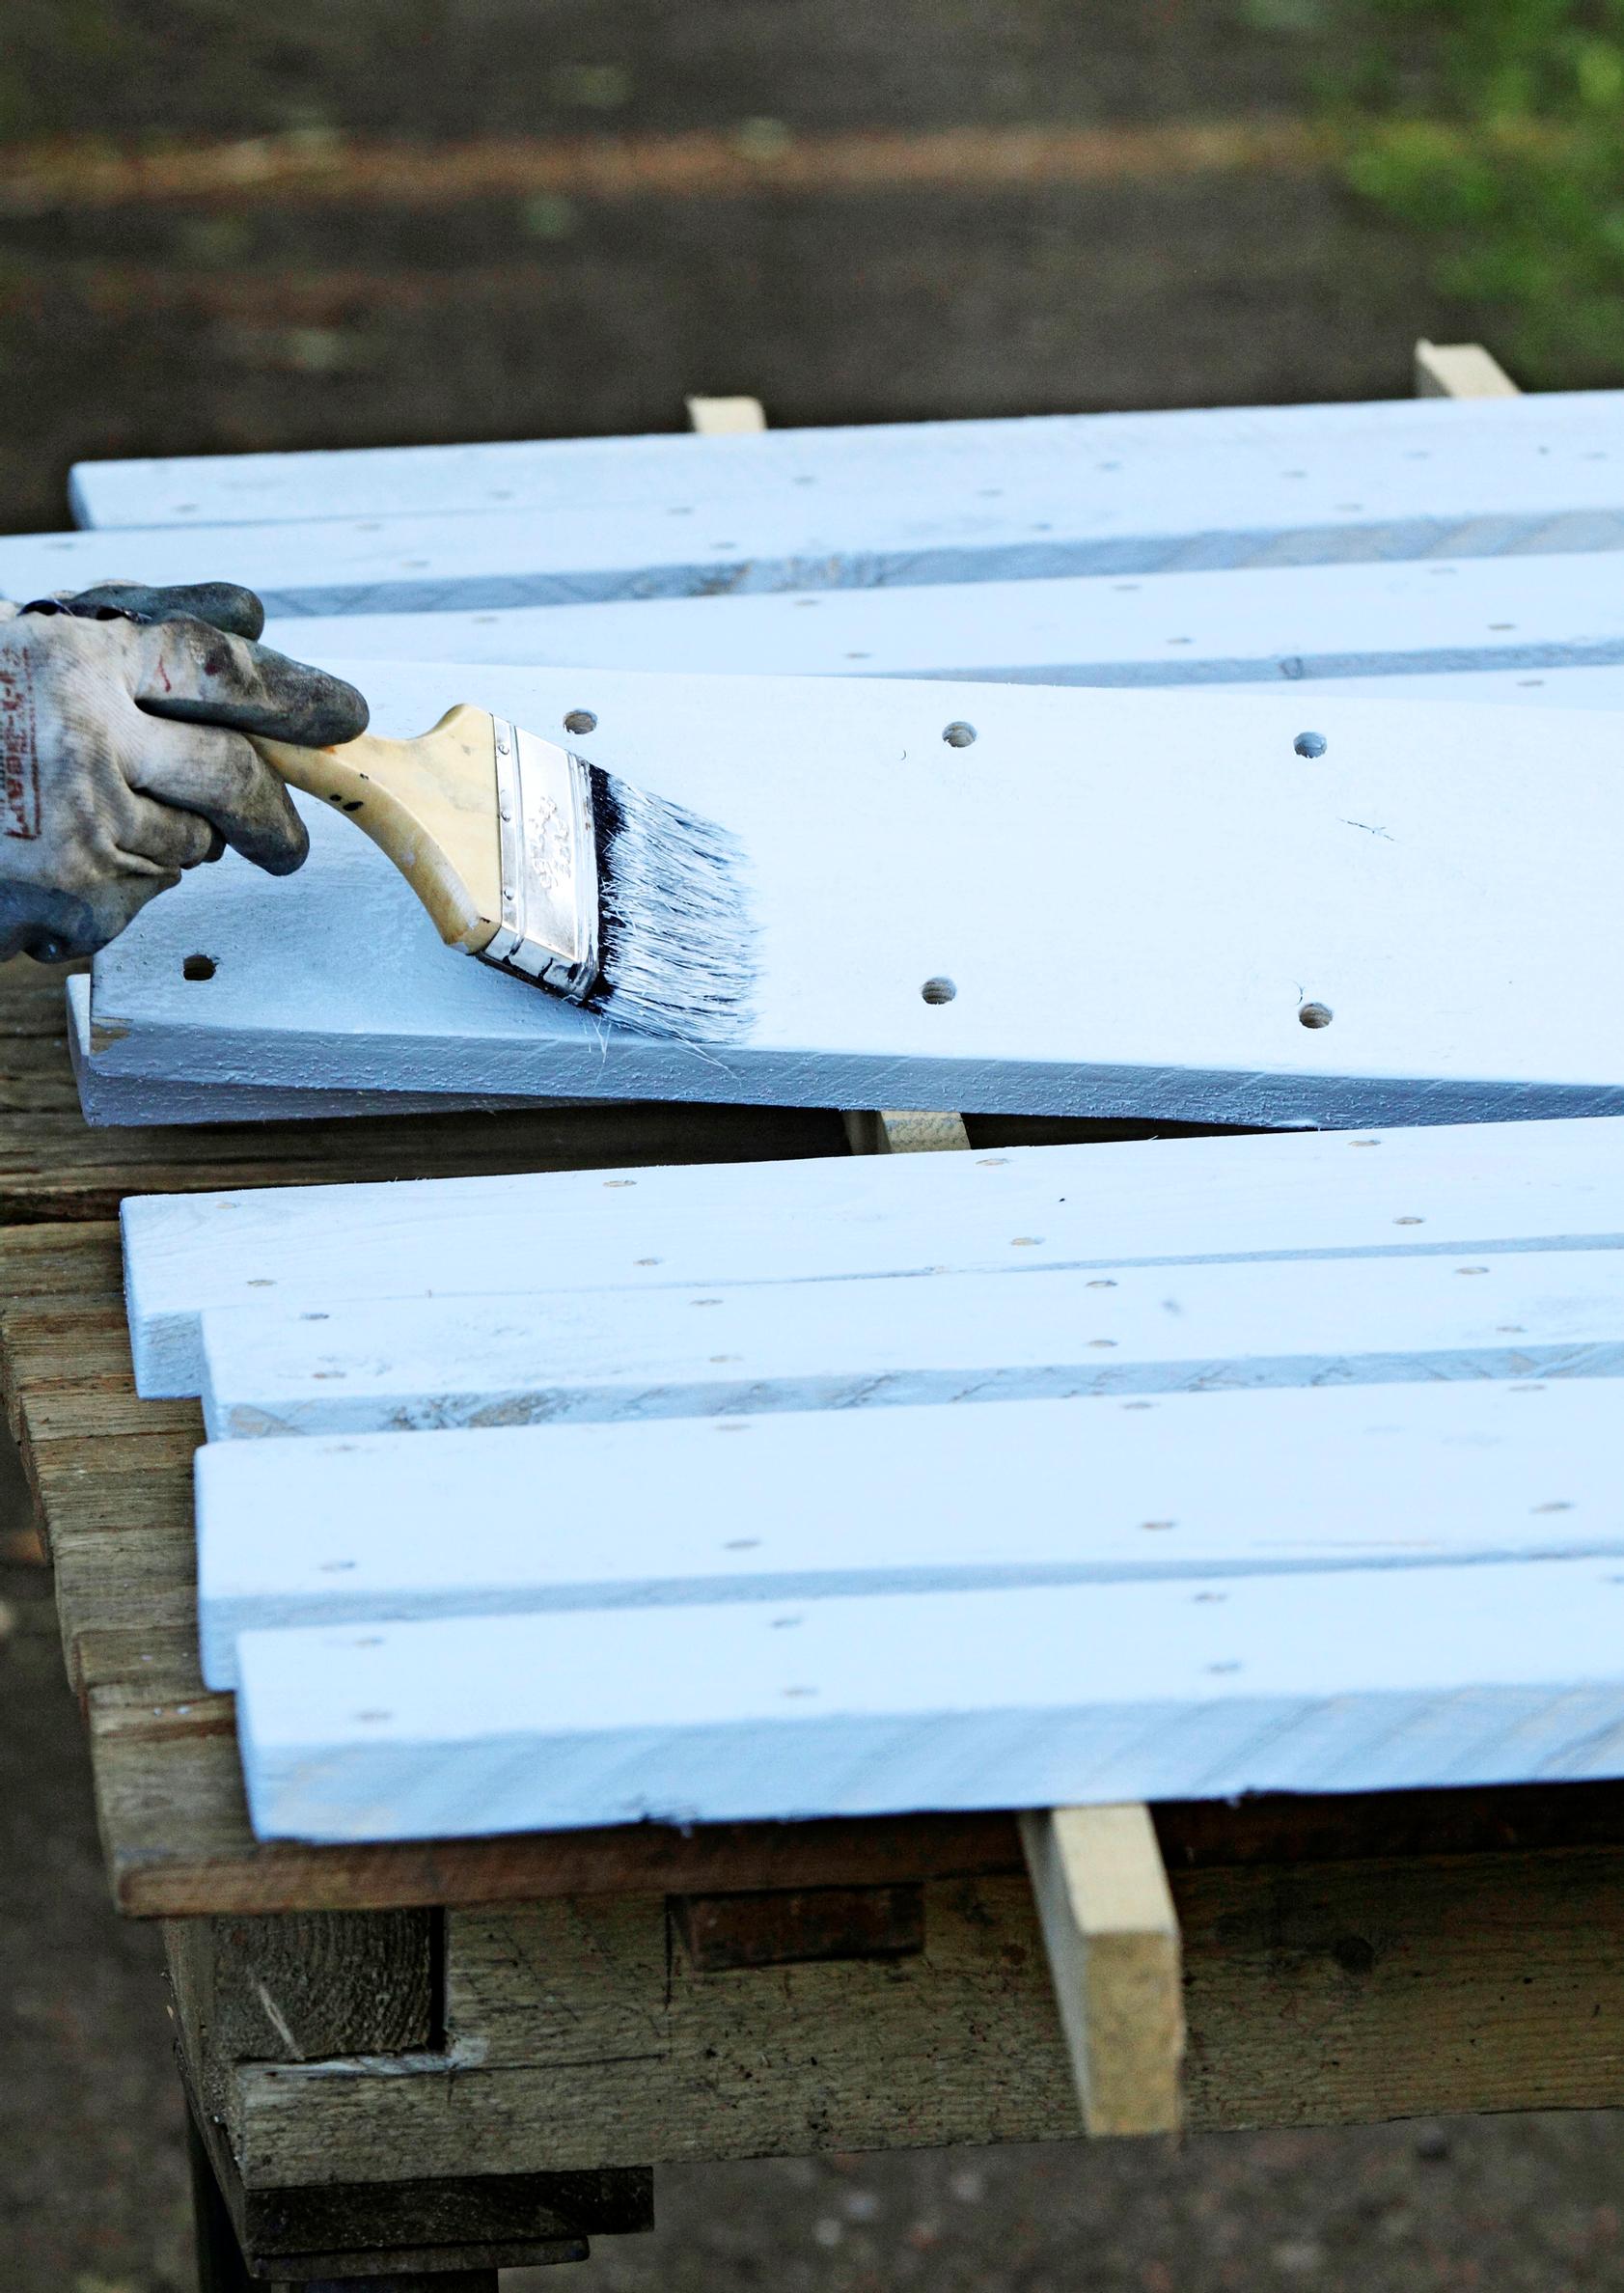
2. Coat the wood with a light primer. If you don’t have a suitable primer, you can apply the first coat using outdoor furniture paint thinned with mineral spirits. Both methods make a good base for the topcoat.

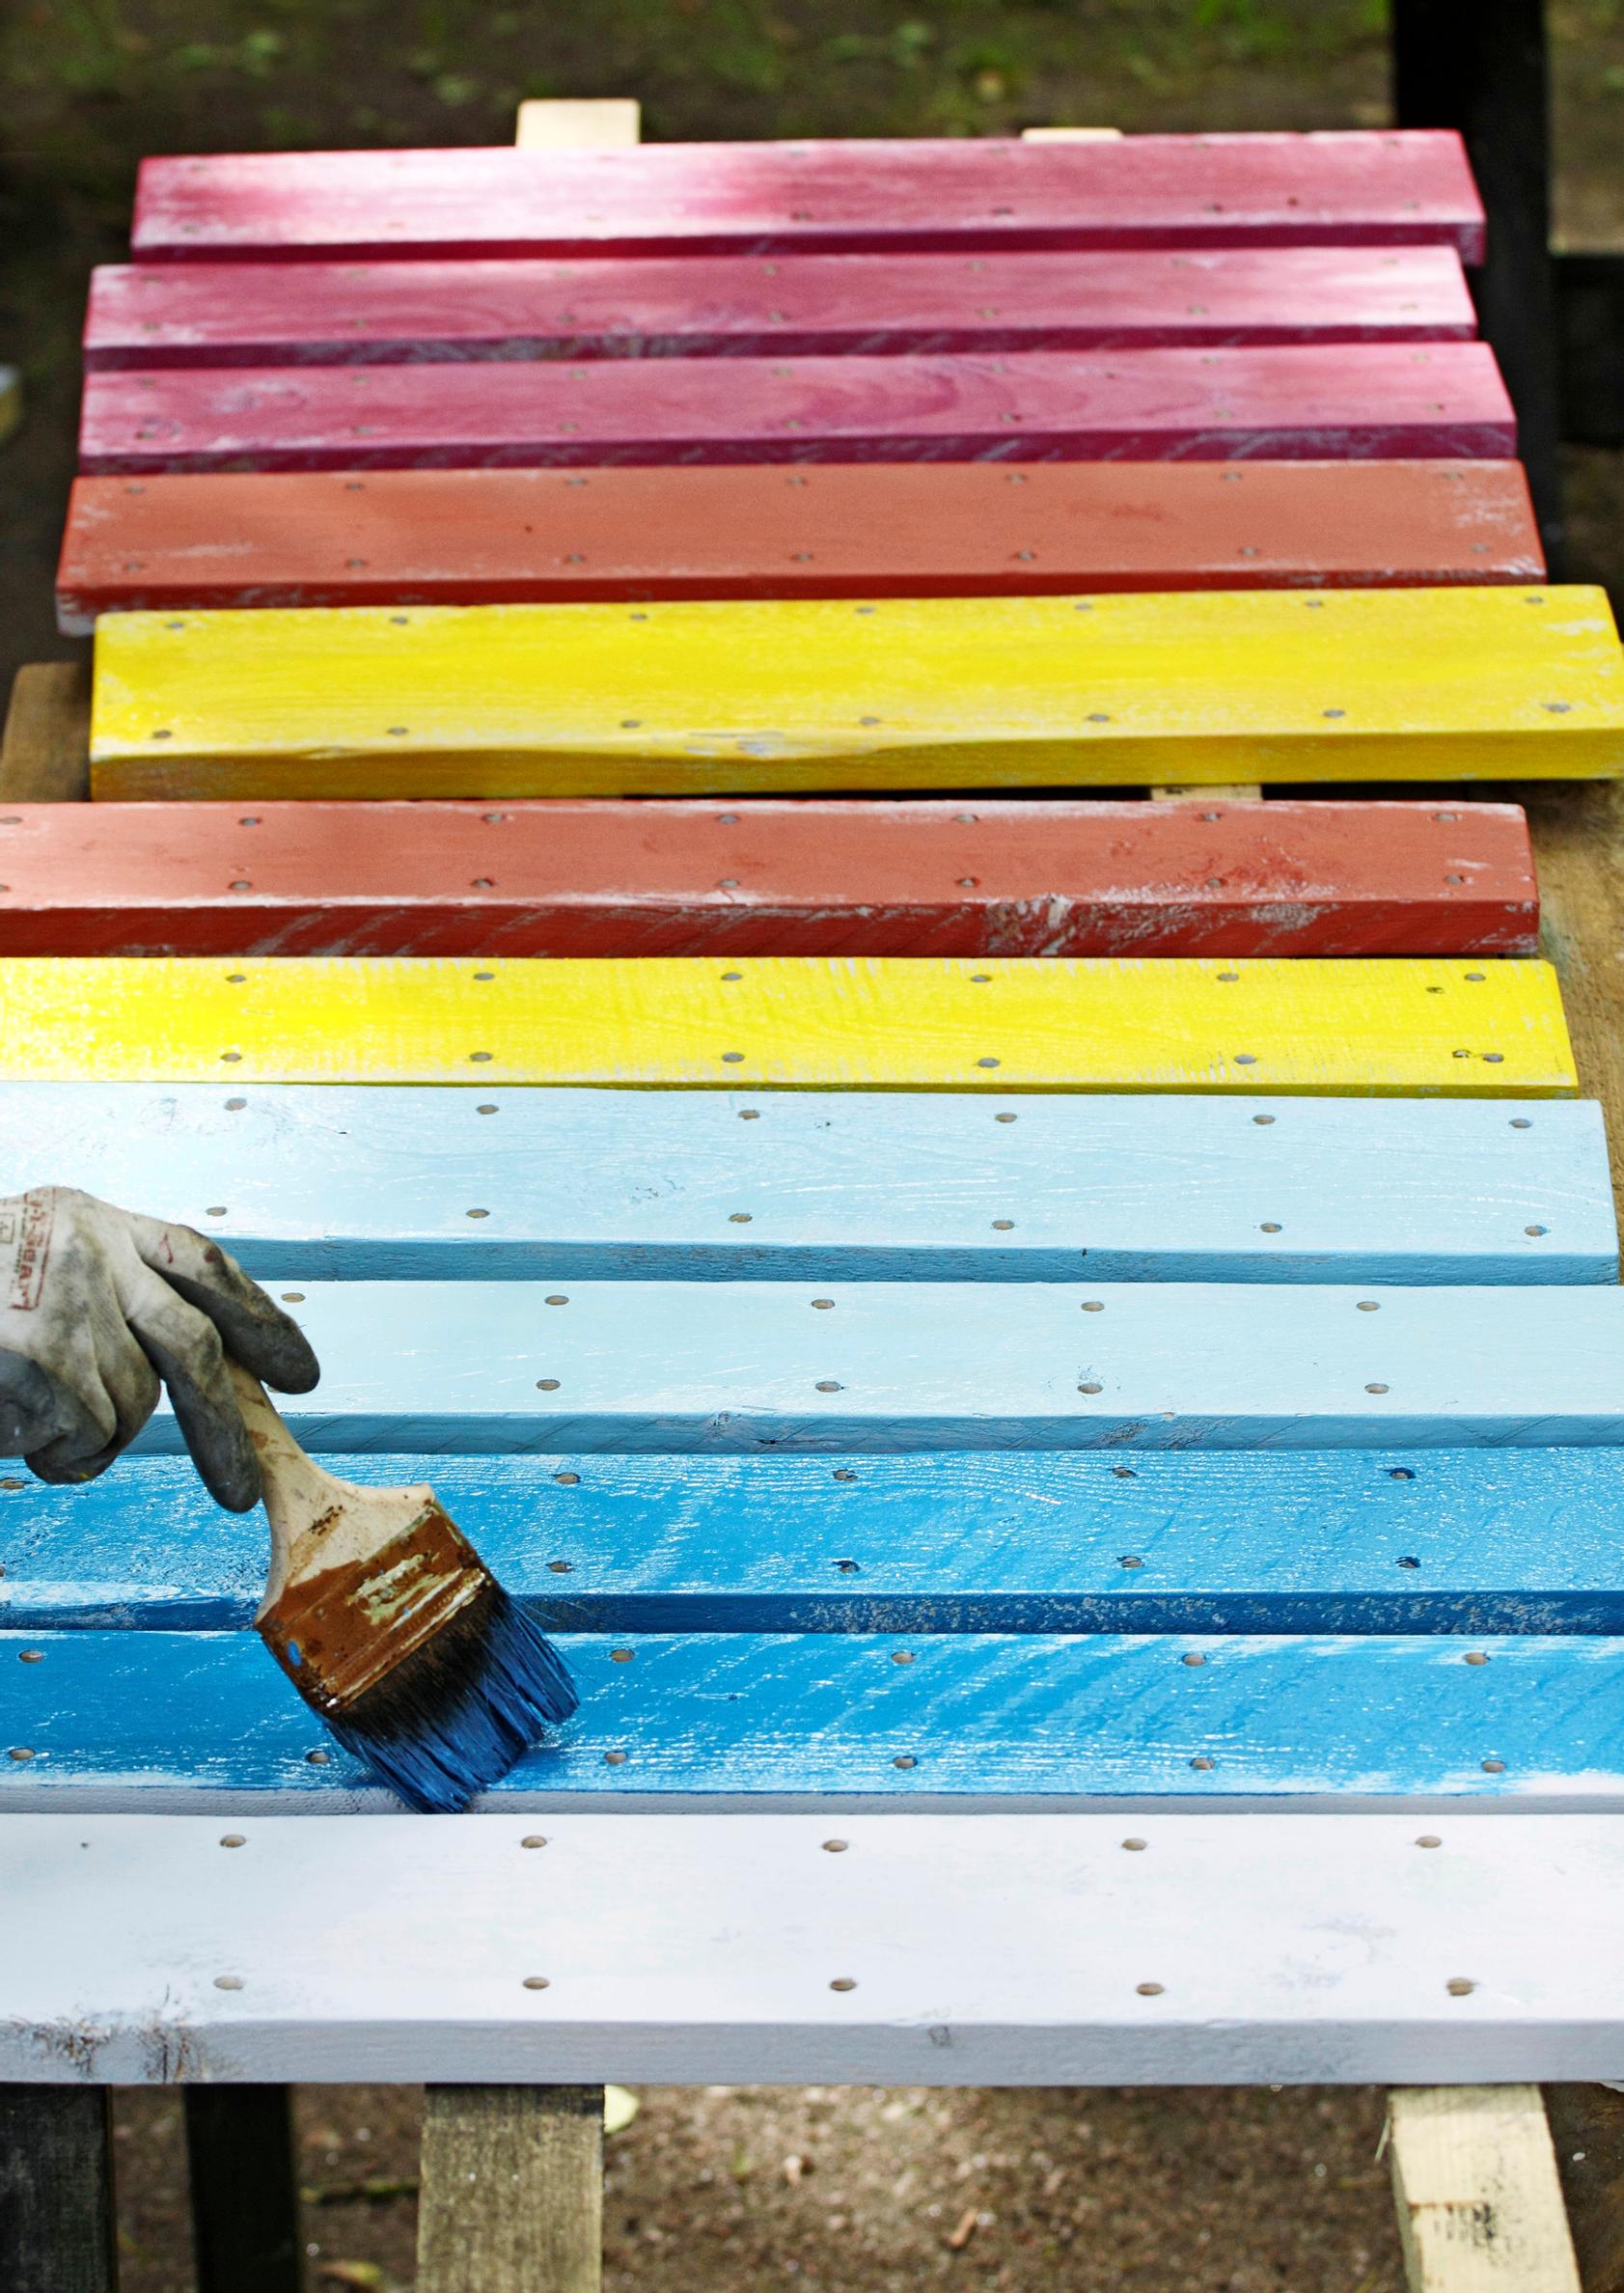
3. Paint the seat boards once the primer is dry. For a relaxed look, brush the paint on loosely so it doesn’t reach all the way to the edges. Let them dry, flip them over, and paint the other sides too.

4. For the rug, use leftover planed boards with a smooth surface. Drill pairs of holes in the center and at the ends. Sand the surfaces. You can prime them with a dark primer. After it dries, paint stripes of furniture paint along the center using casual brushstrokes.

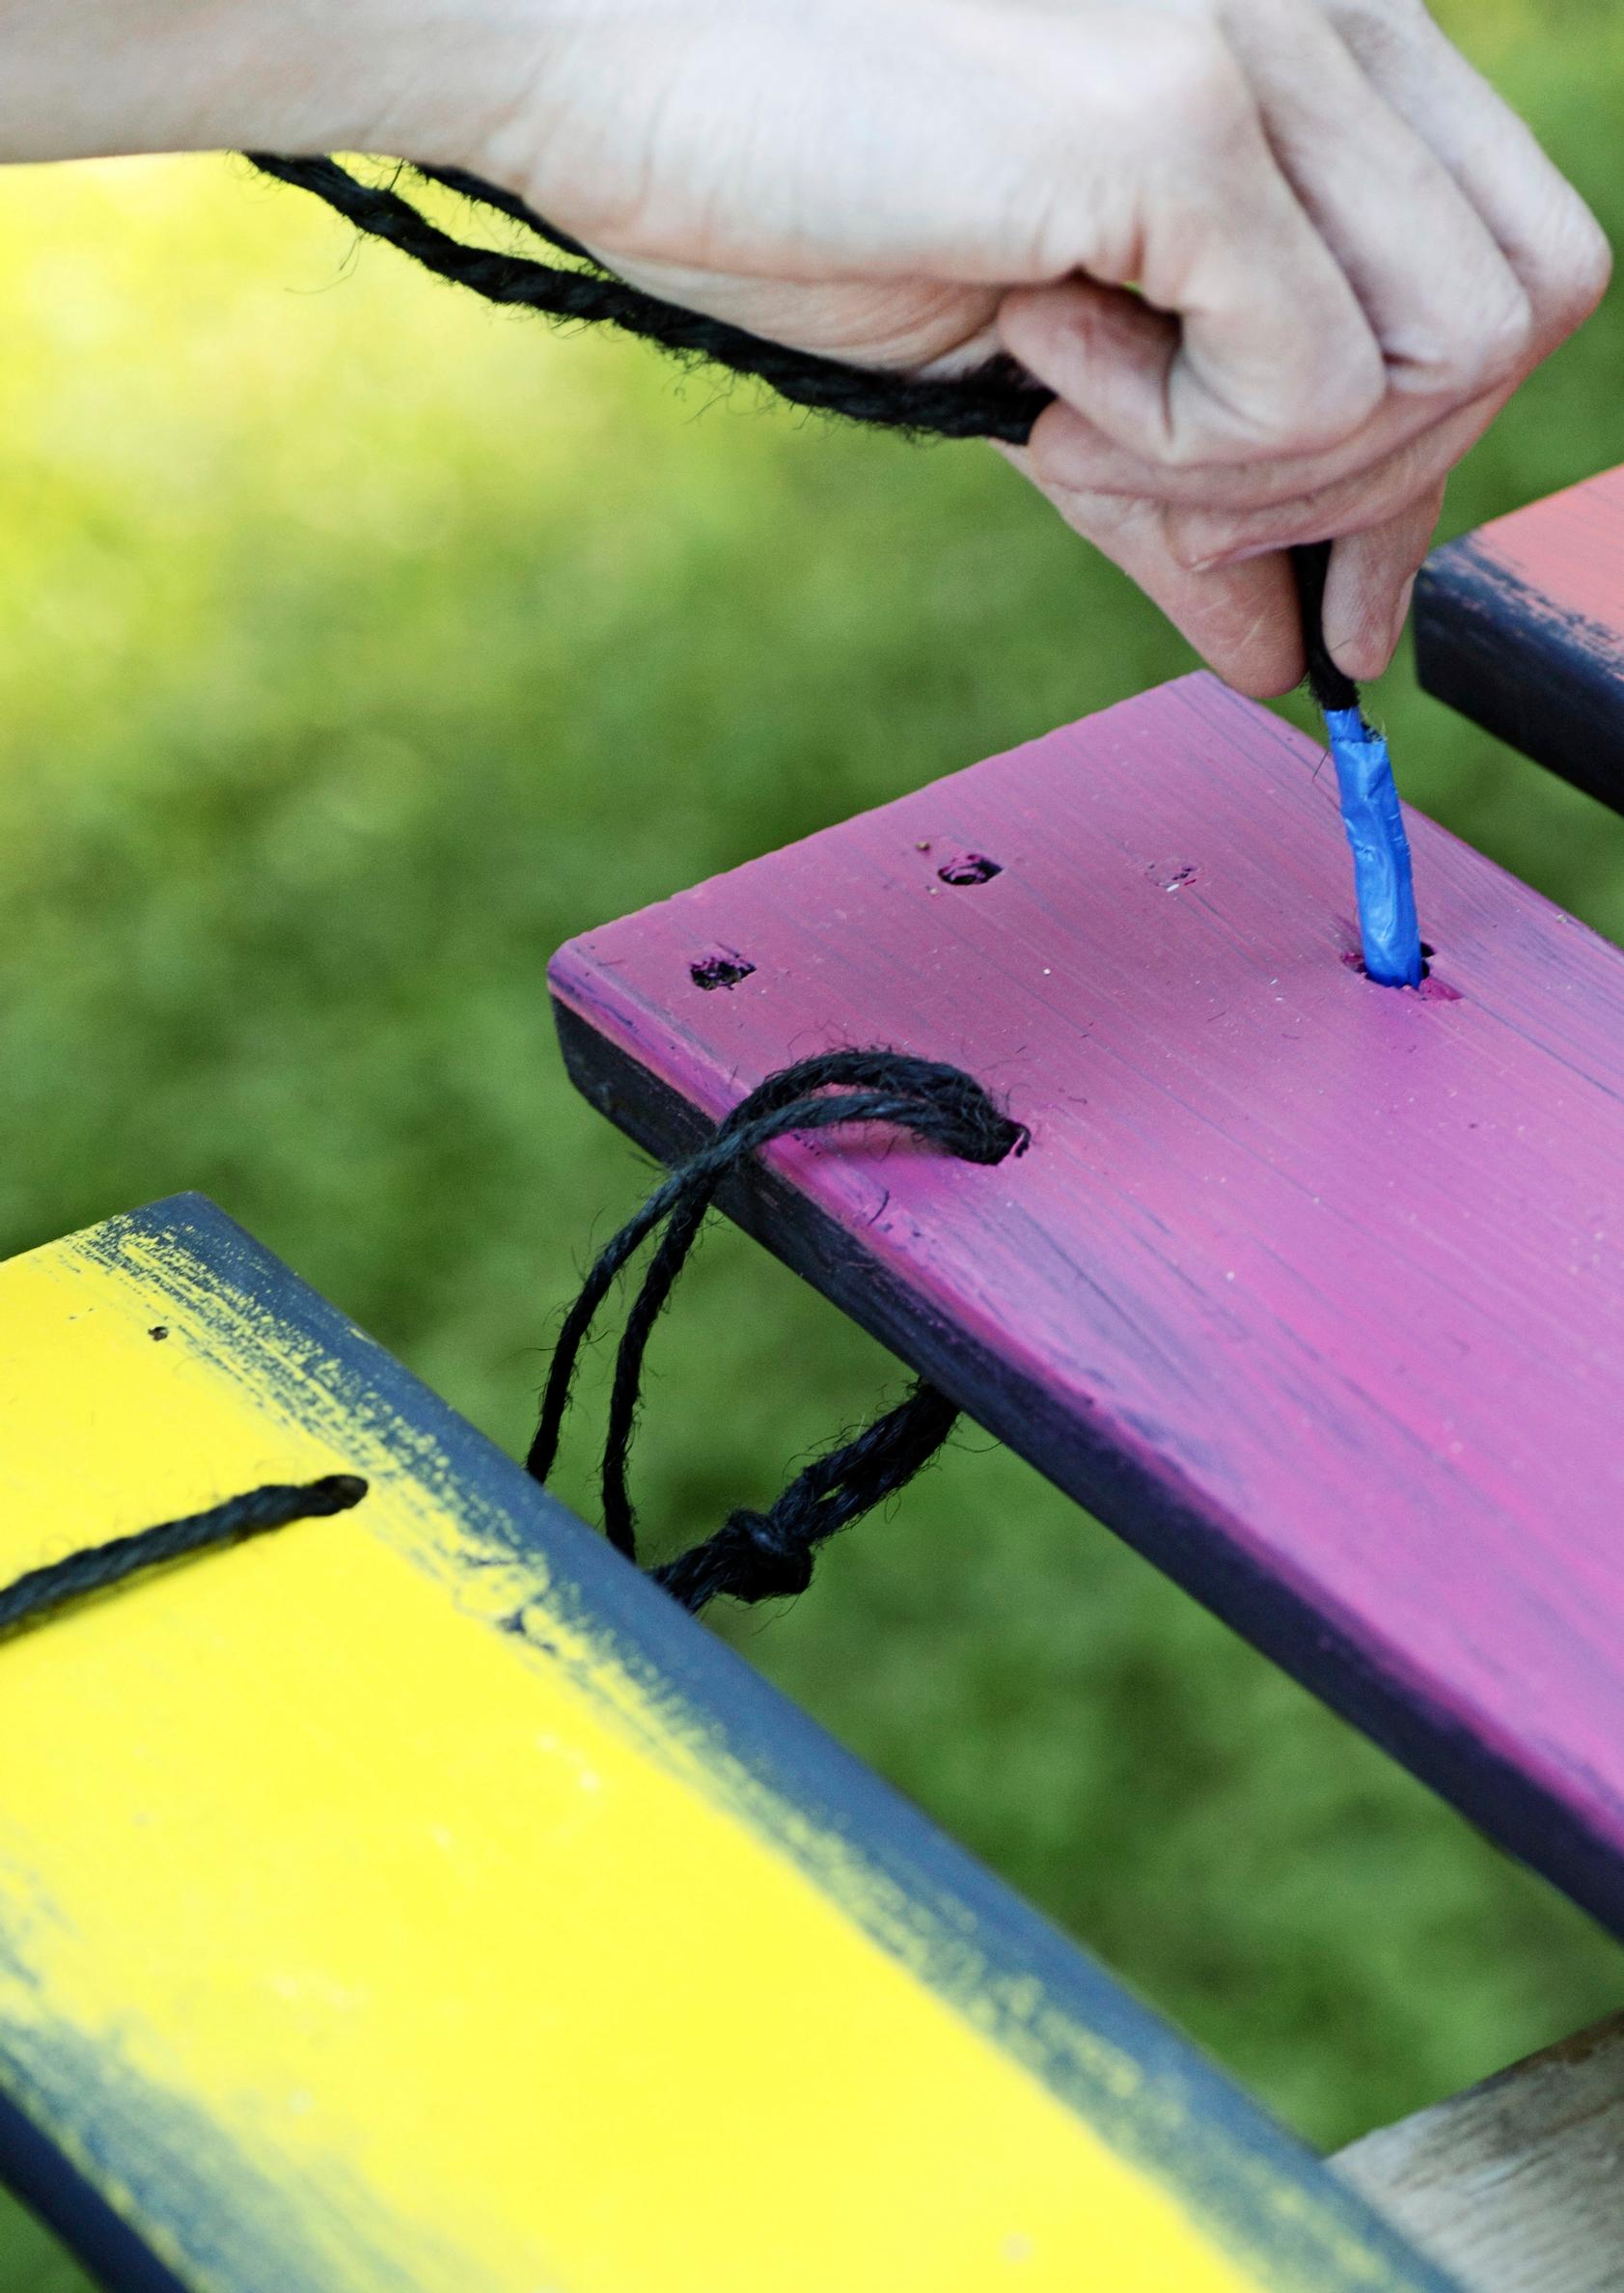
5. Take a fairly thick rope or double a thinner one. Wrap a piece of tape around one end like a makeshift needle. Thread the boards together into a rug. Tie sturdy knots underneath at each hole so there are small gaps between the boards.

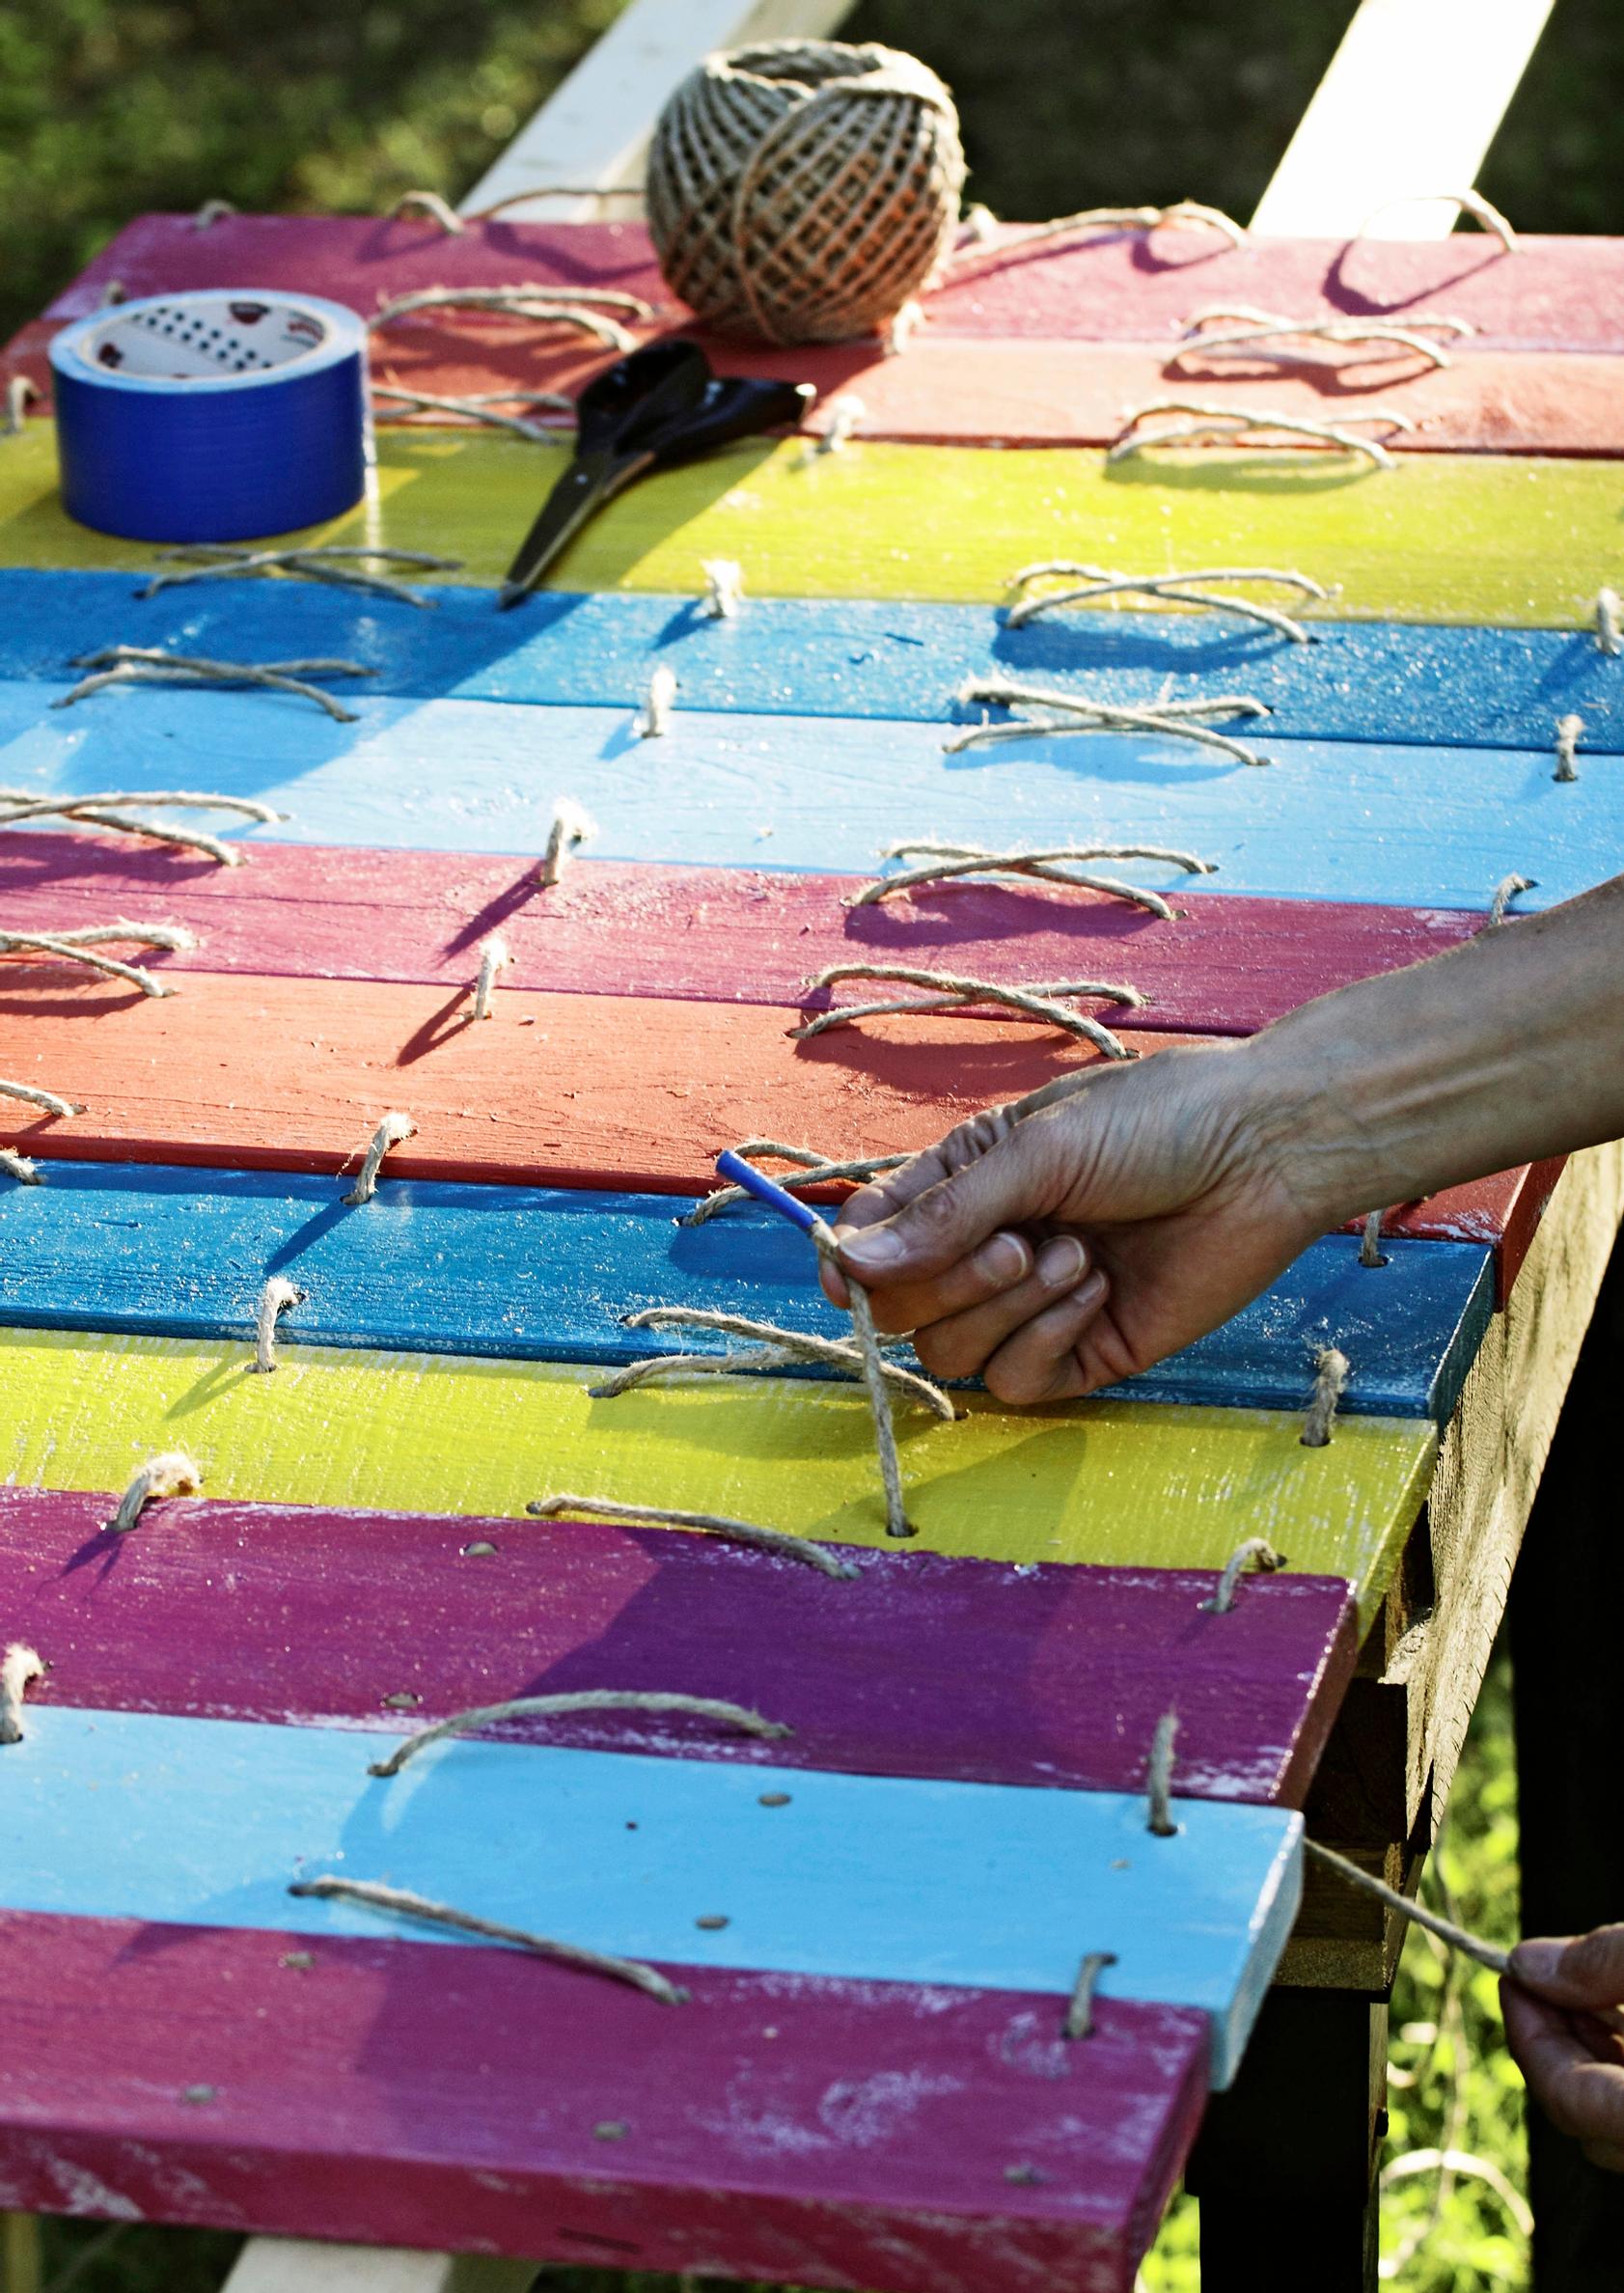
6. Enlarge two of the seat holes so the hanging ropes can fit through. Leave about 1–2 meters of rope at one end, then thread it through each board. Leave long ends on the remaining ropes and gather three ropes together at the edge to form a hanging rope.