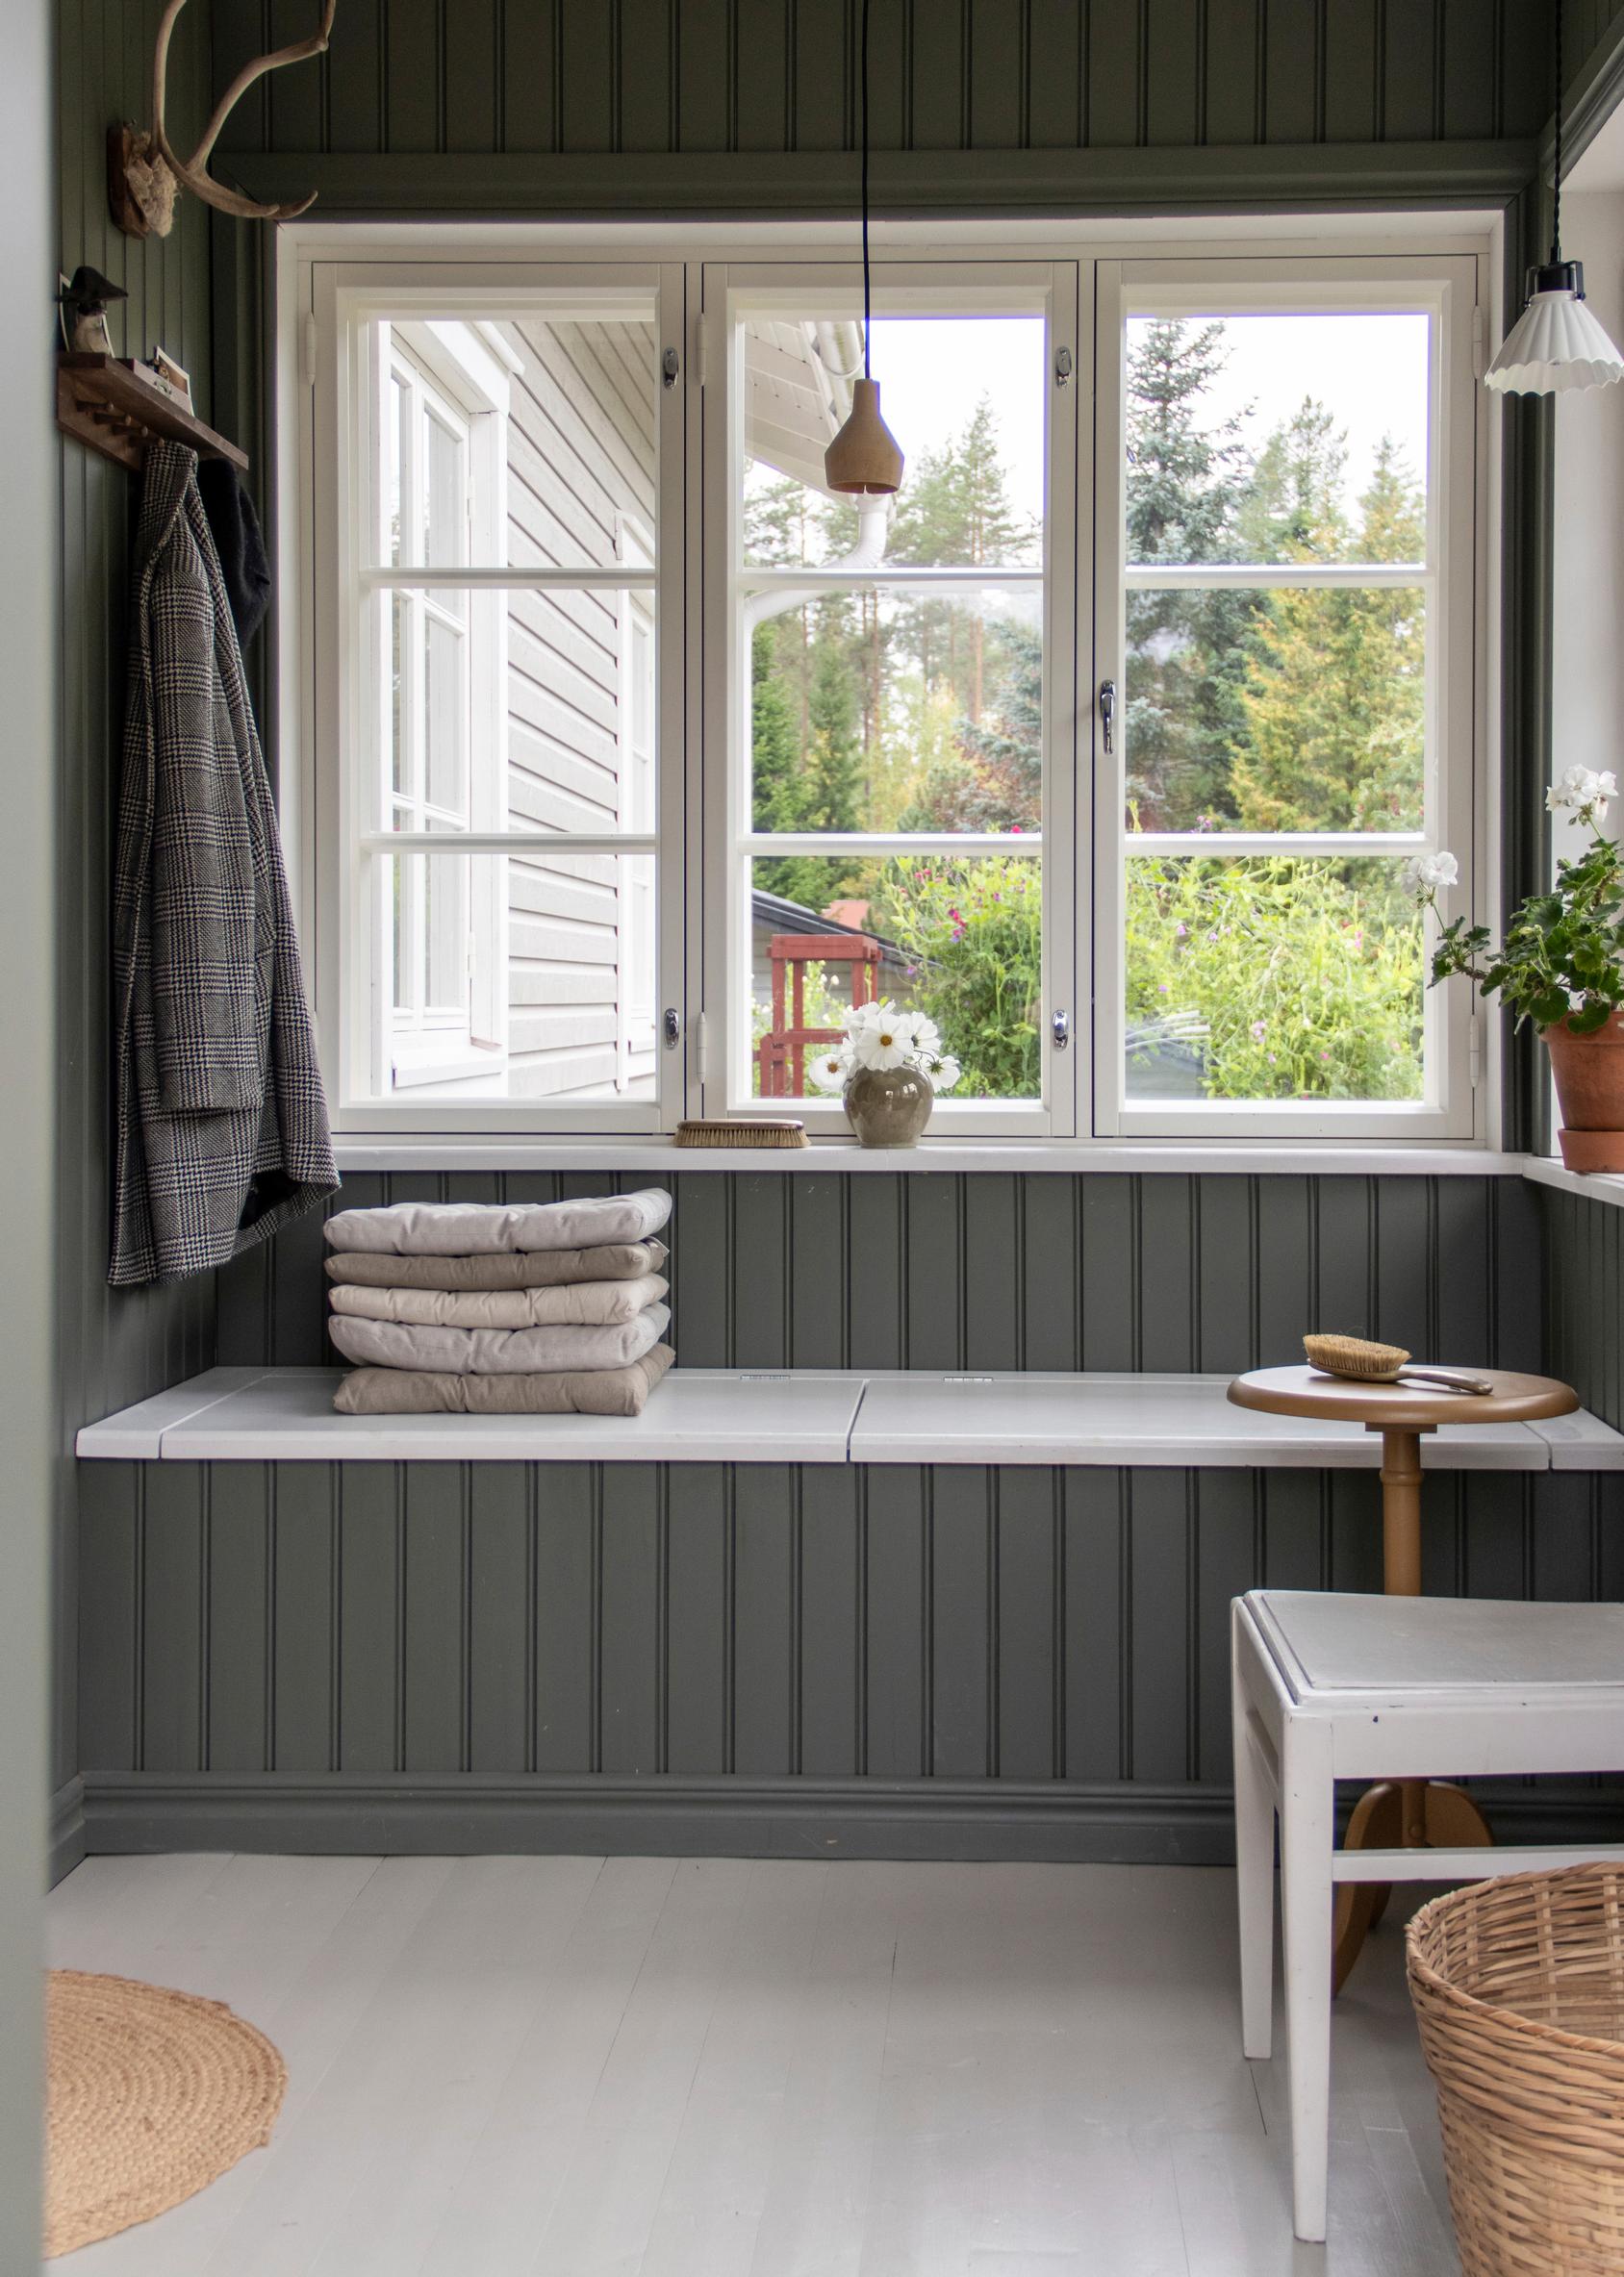
Rilla Tervonen crafted a bench seat with storage for her porch—check out the instructions!
A self-made bench with storage works as a porch seat and offers plenty of storage. The frame was painted in the same shade as the wall.
Built-in storage bench—supplies
- measuring tape and pencil
- circular saw or hand saw
- beadboard paneling
- wood glue and finishing nails
- long screws (5 × 80 mm) and a power driver
- stain-blocking primer
- a brush and panel paint
- a small roller and furniture paint
- laminated board, plywood, or similar wood board (thickness 9–20 mm)
- frame wood, 48 × 48 mm timber or similar
- 4 cabinet hinges (25 × 19 mm)
- (finishing strips for the front edge and bottom)
Built-in bench seat with storage—instructions
1. Measure and cut four pieces of frame wood to match the width of the bench. These pieces form the horizontal supports for the top and bottom of the frame.
2. Measure the bench’s height and cut the required number of vertical supports from the frame wood. The vertical supports are spaced every 40 cm between the horizontal supports, so subtract the thickness of the horizontal supports from your height measurement. Subtract the thickness of the seat from the vertical supports’ height also.
3. Measure and cut six pieces of frame wood to match the depth of the bench. Subtract the thickness of the horizontal supports from this measurement.
4. Assemble the front and back frames. Lay the front frame wood (horizontal and vertical supports) on the floor. Join the supports with screws and glue. Assemble the back frame in the same way. Screw the depth supports between the front and back frames at the corners and the center.

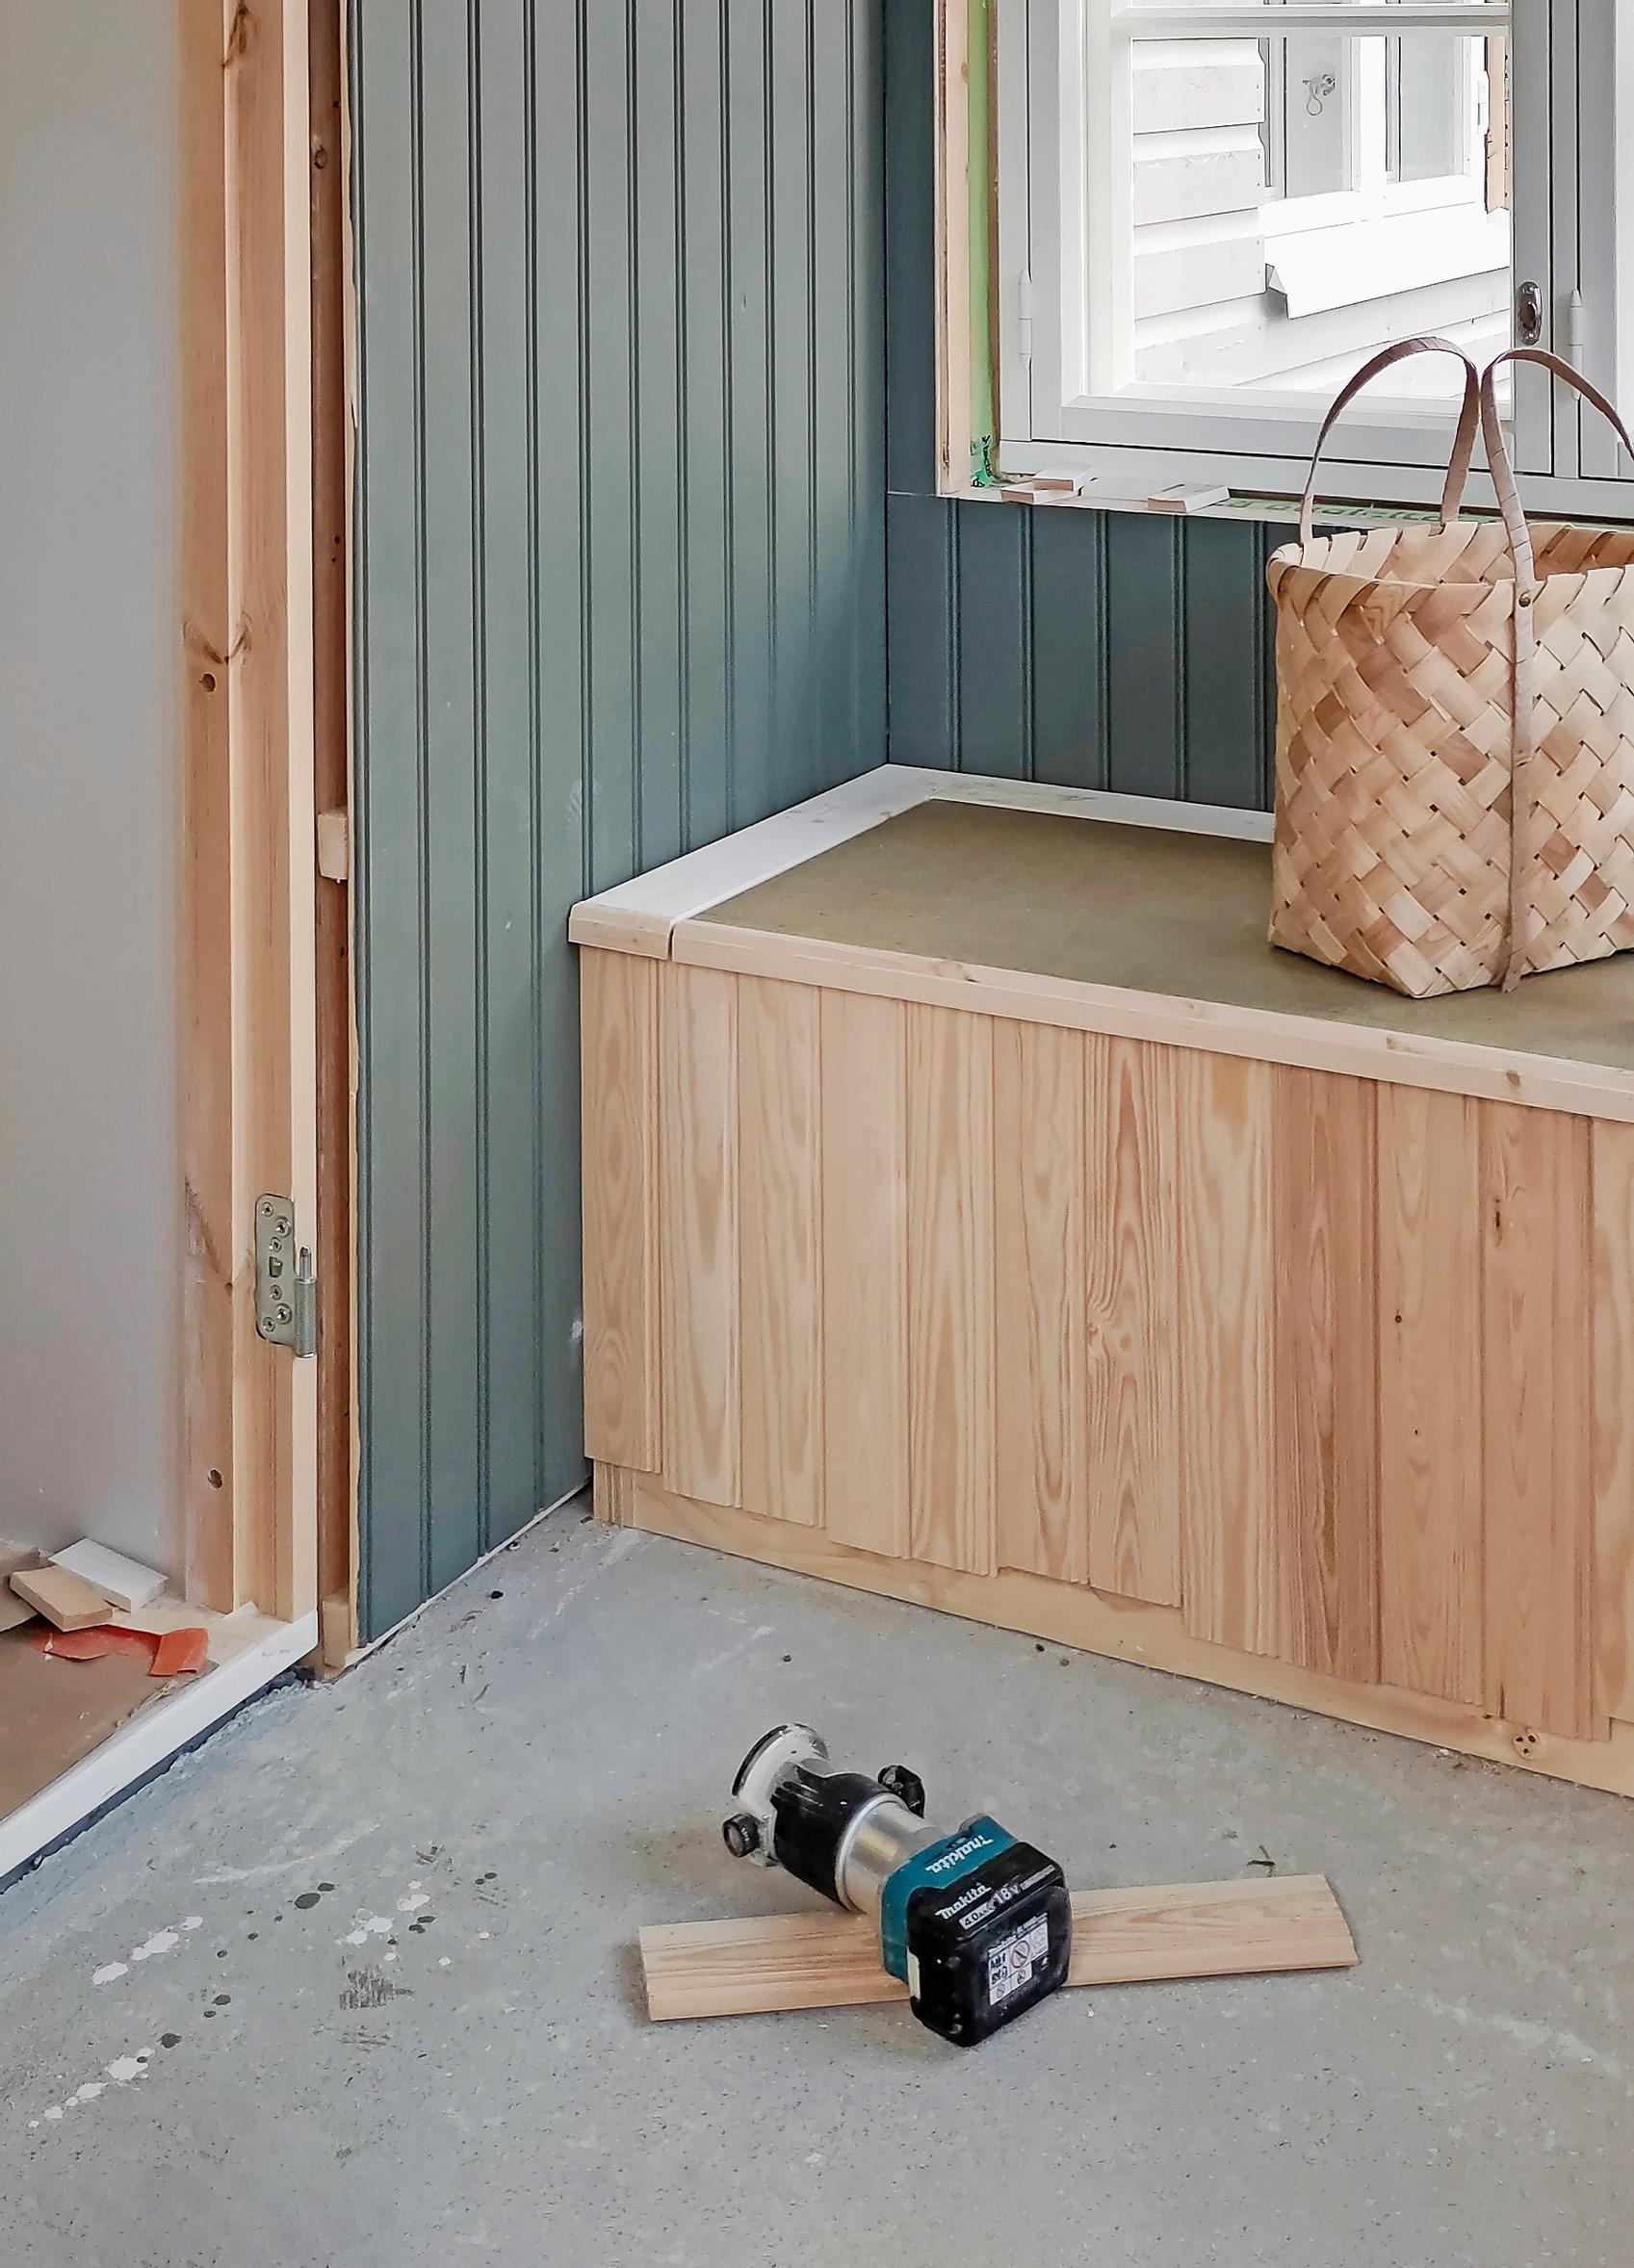
5. Cover the front wall with paneling using a nailer. If you want, add a baseboard at the bottom.
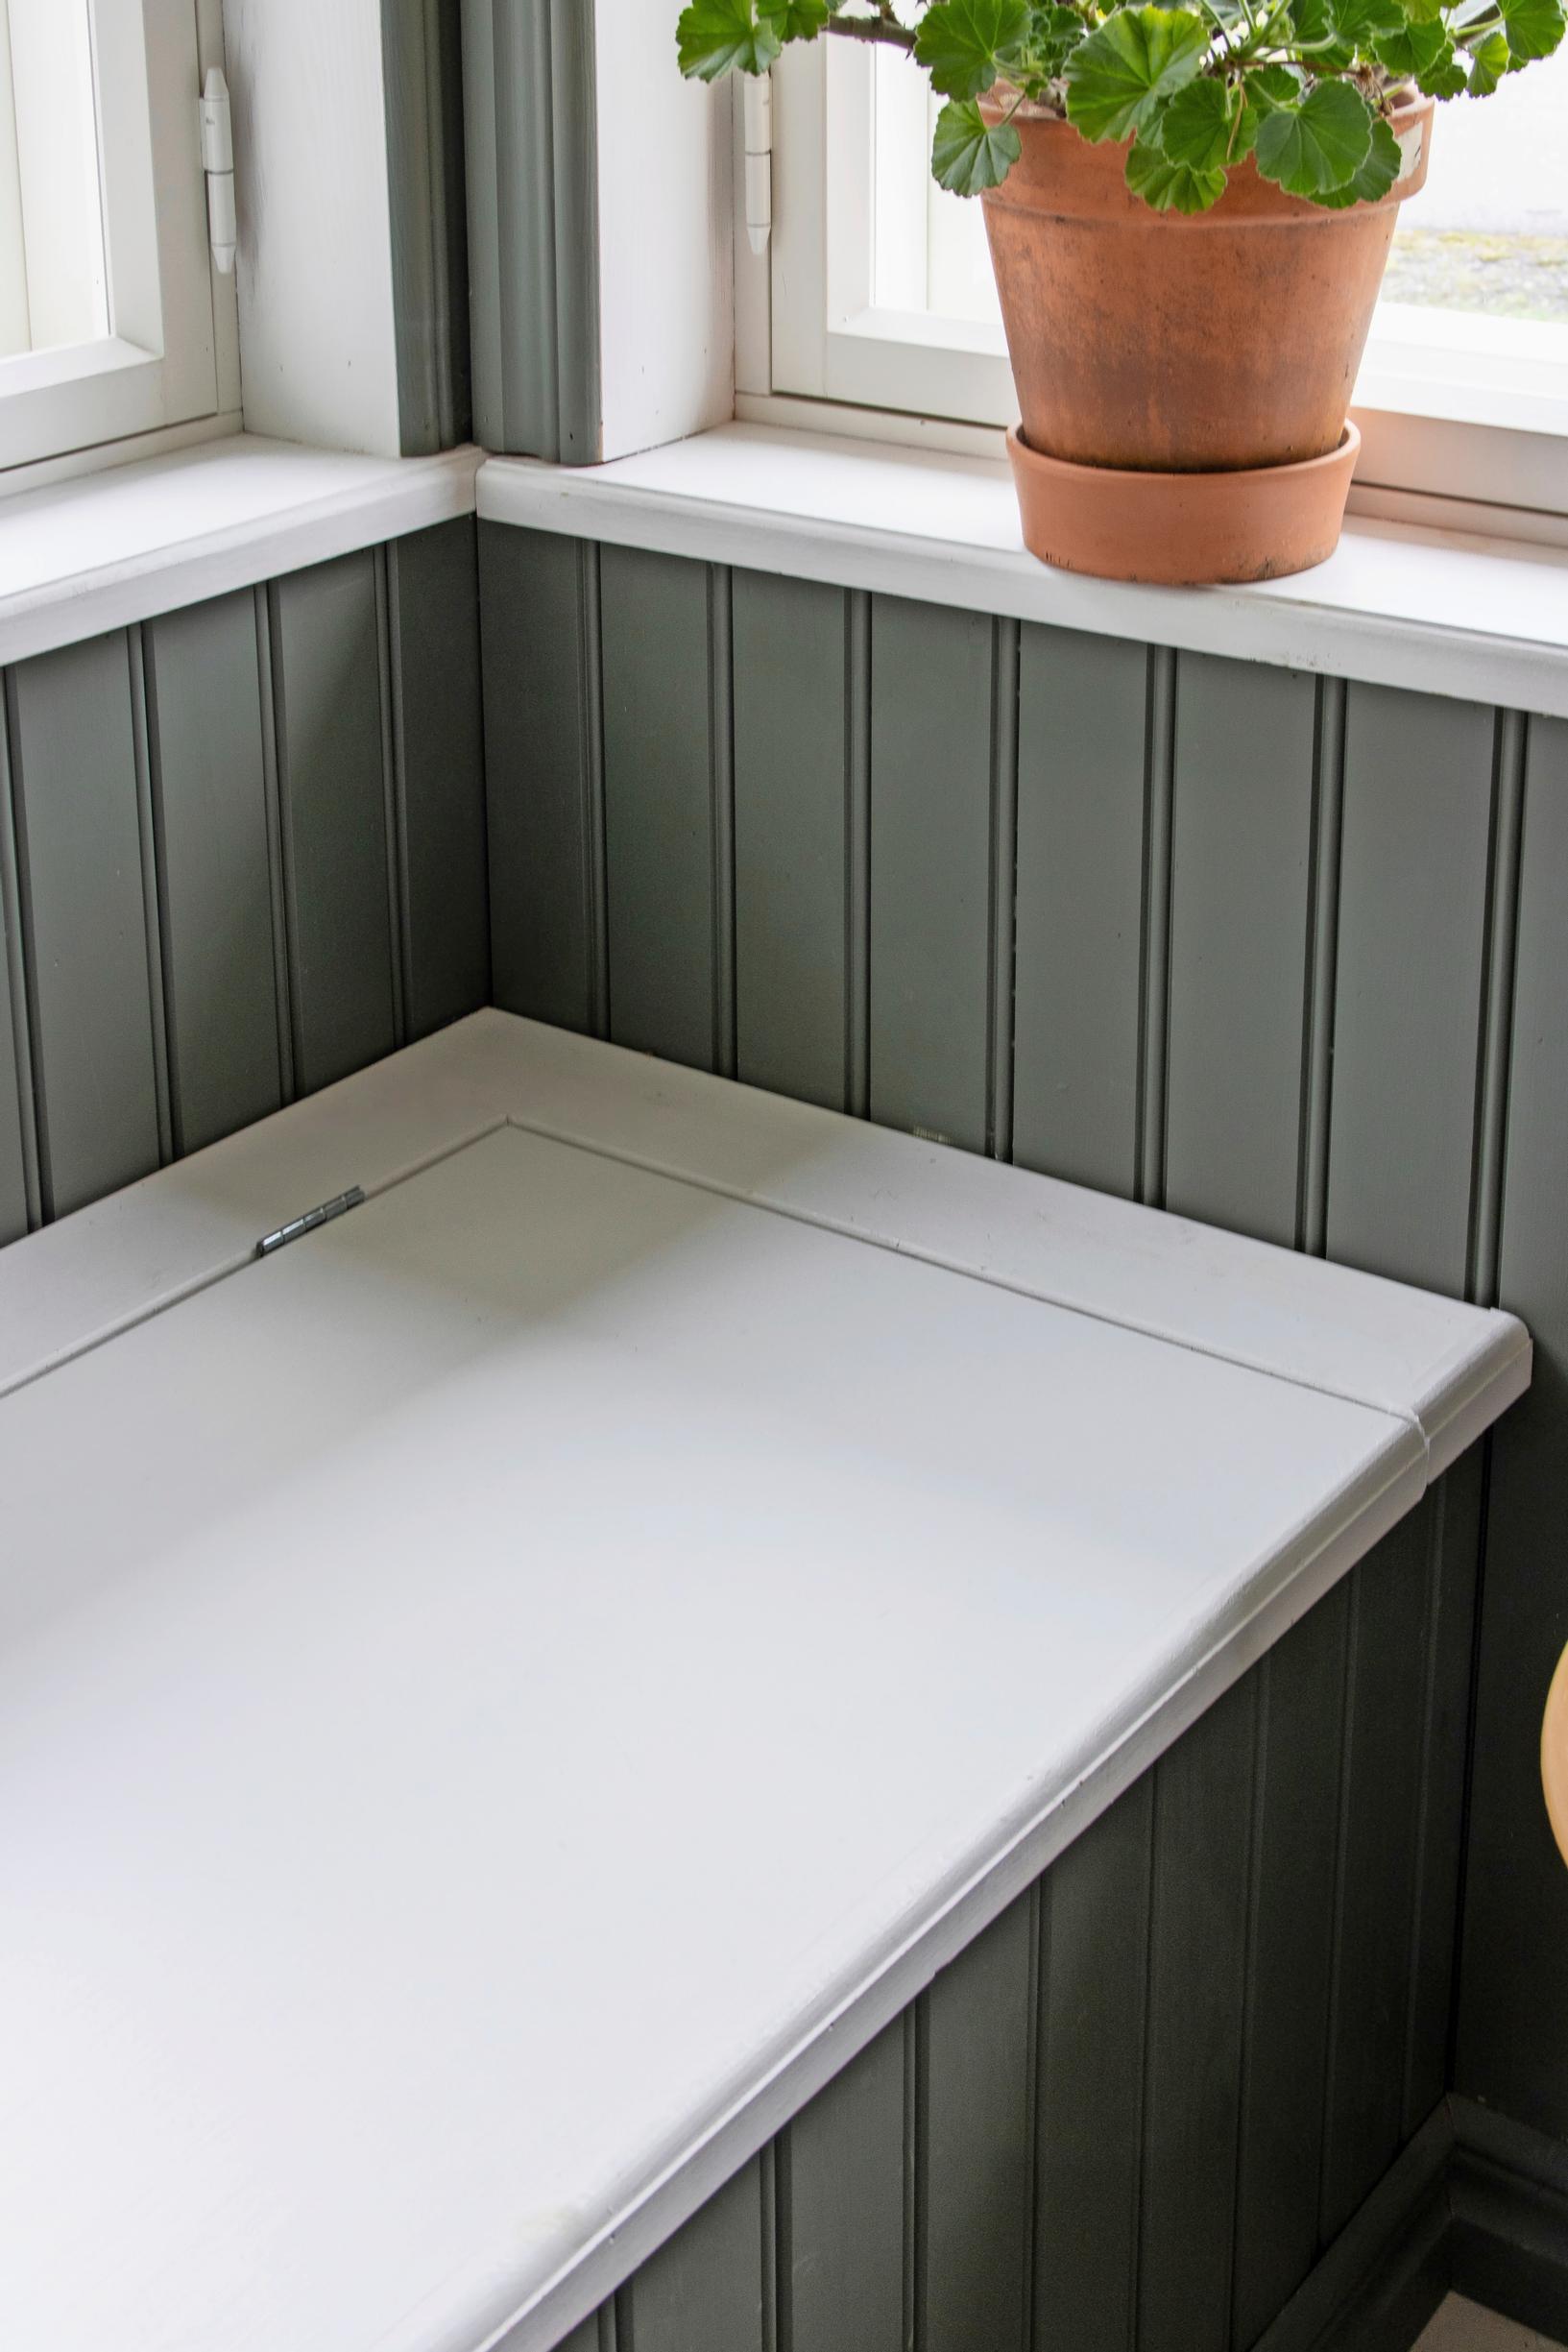
6. Measure and cut 25–50 mm-wide edge pieces from the lid board for the sides and back of the bench. Glue and nail the pieces to the frame. Make the lids from two lid boards. Attach the hinges to the lid boards and the back edge piece. Leave 4 mm gaps between the lid boards and on their sides.

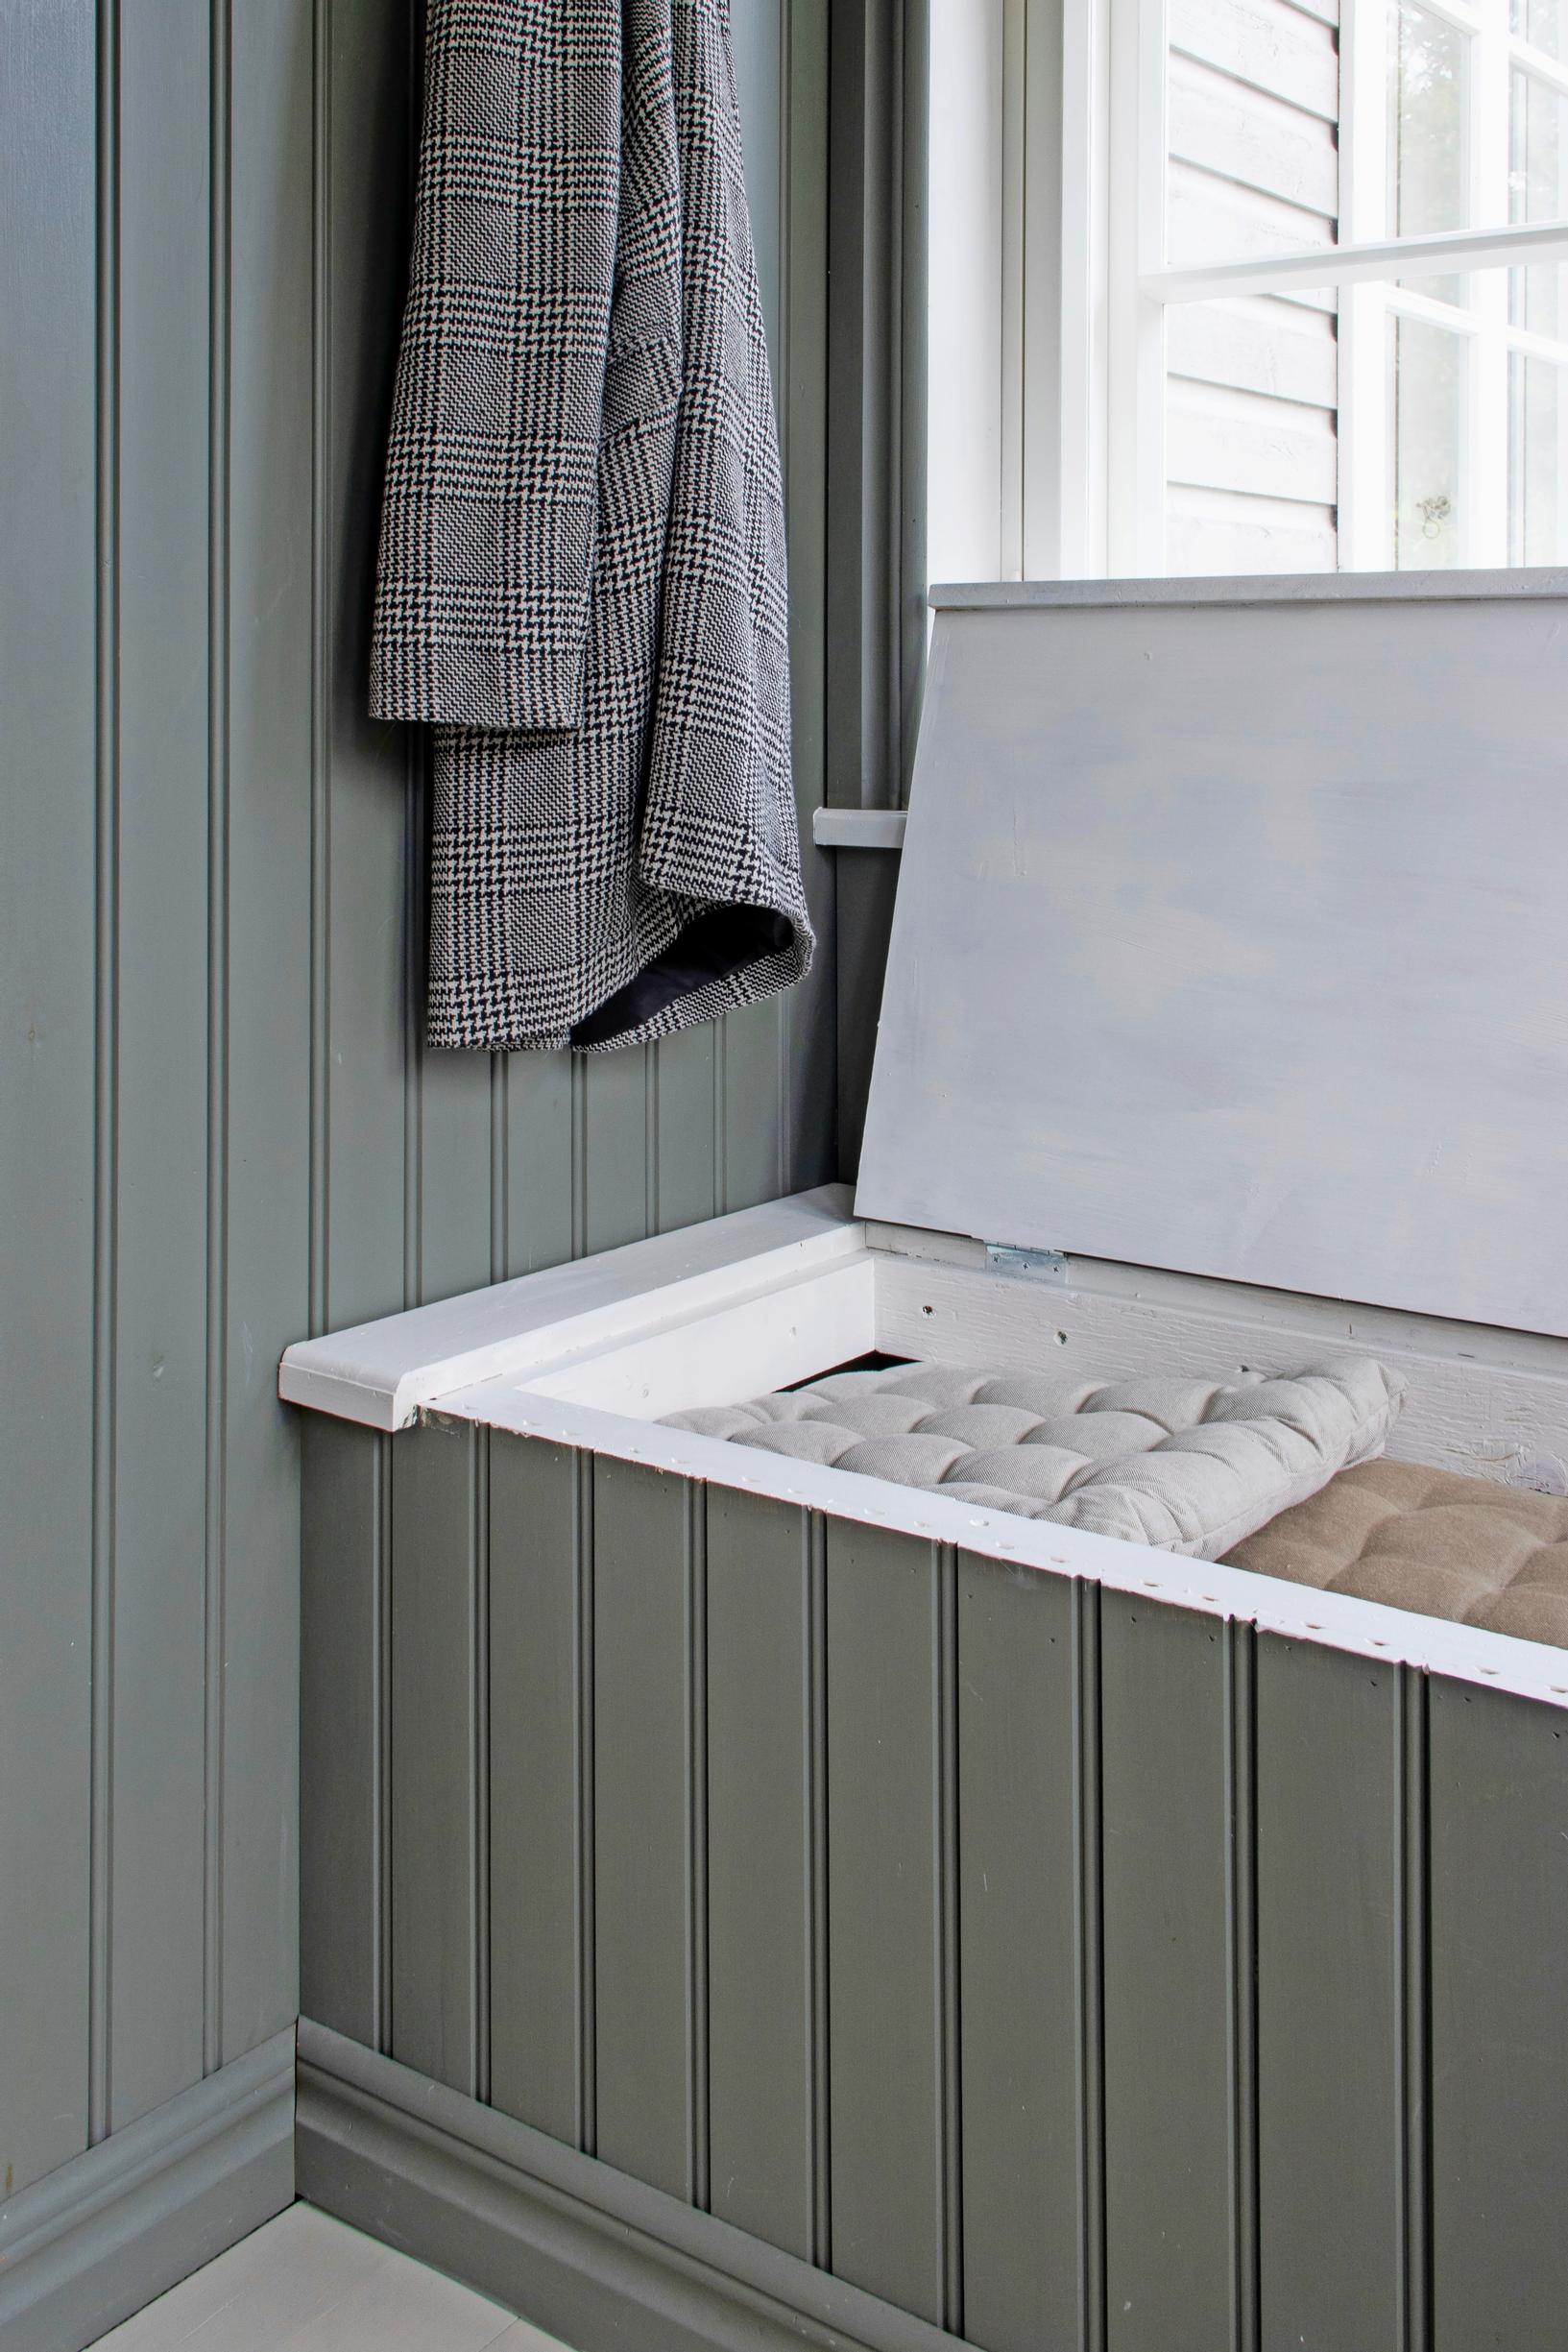
7. If you like, nail a finishing strip to the front edge of the bench. Paint the seating area with stain-blocking primer and furniture paint, and paint the paneling with panel paint.

A bench seat with storage can keep your porch tidy and welcoming. Consider variations like a porch bench seat with storage or a diy bench seat with storage.