
Hilla built radiator covers in just a few hours for under one hundred euros, inspired by a Danish carpenter’s creation
“We need to hide the electric radiators,” thought Hilla Stenlund toward the end of her family’s single-family home renovation. She built a radiator cover that also doubles as a lovely windowsill. See how it’s done!
Hilla, how did you come up with the idea for these radiator covers?
We renovated our single-family home three years ago. I wanted to hide the electric radiators. At first, we looked for off-the-shelf radiator covers in stores, but the selection was limited. I found maybe one model in our local hardware stores, but it didn’t fit our radiators’ dimensions. Covers from foreign online stores were expensive. We figured building our own covers couldn’t be too hard.


How did you settle on this particular design?
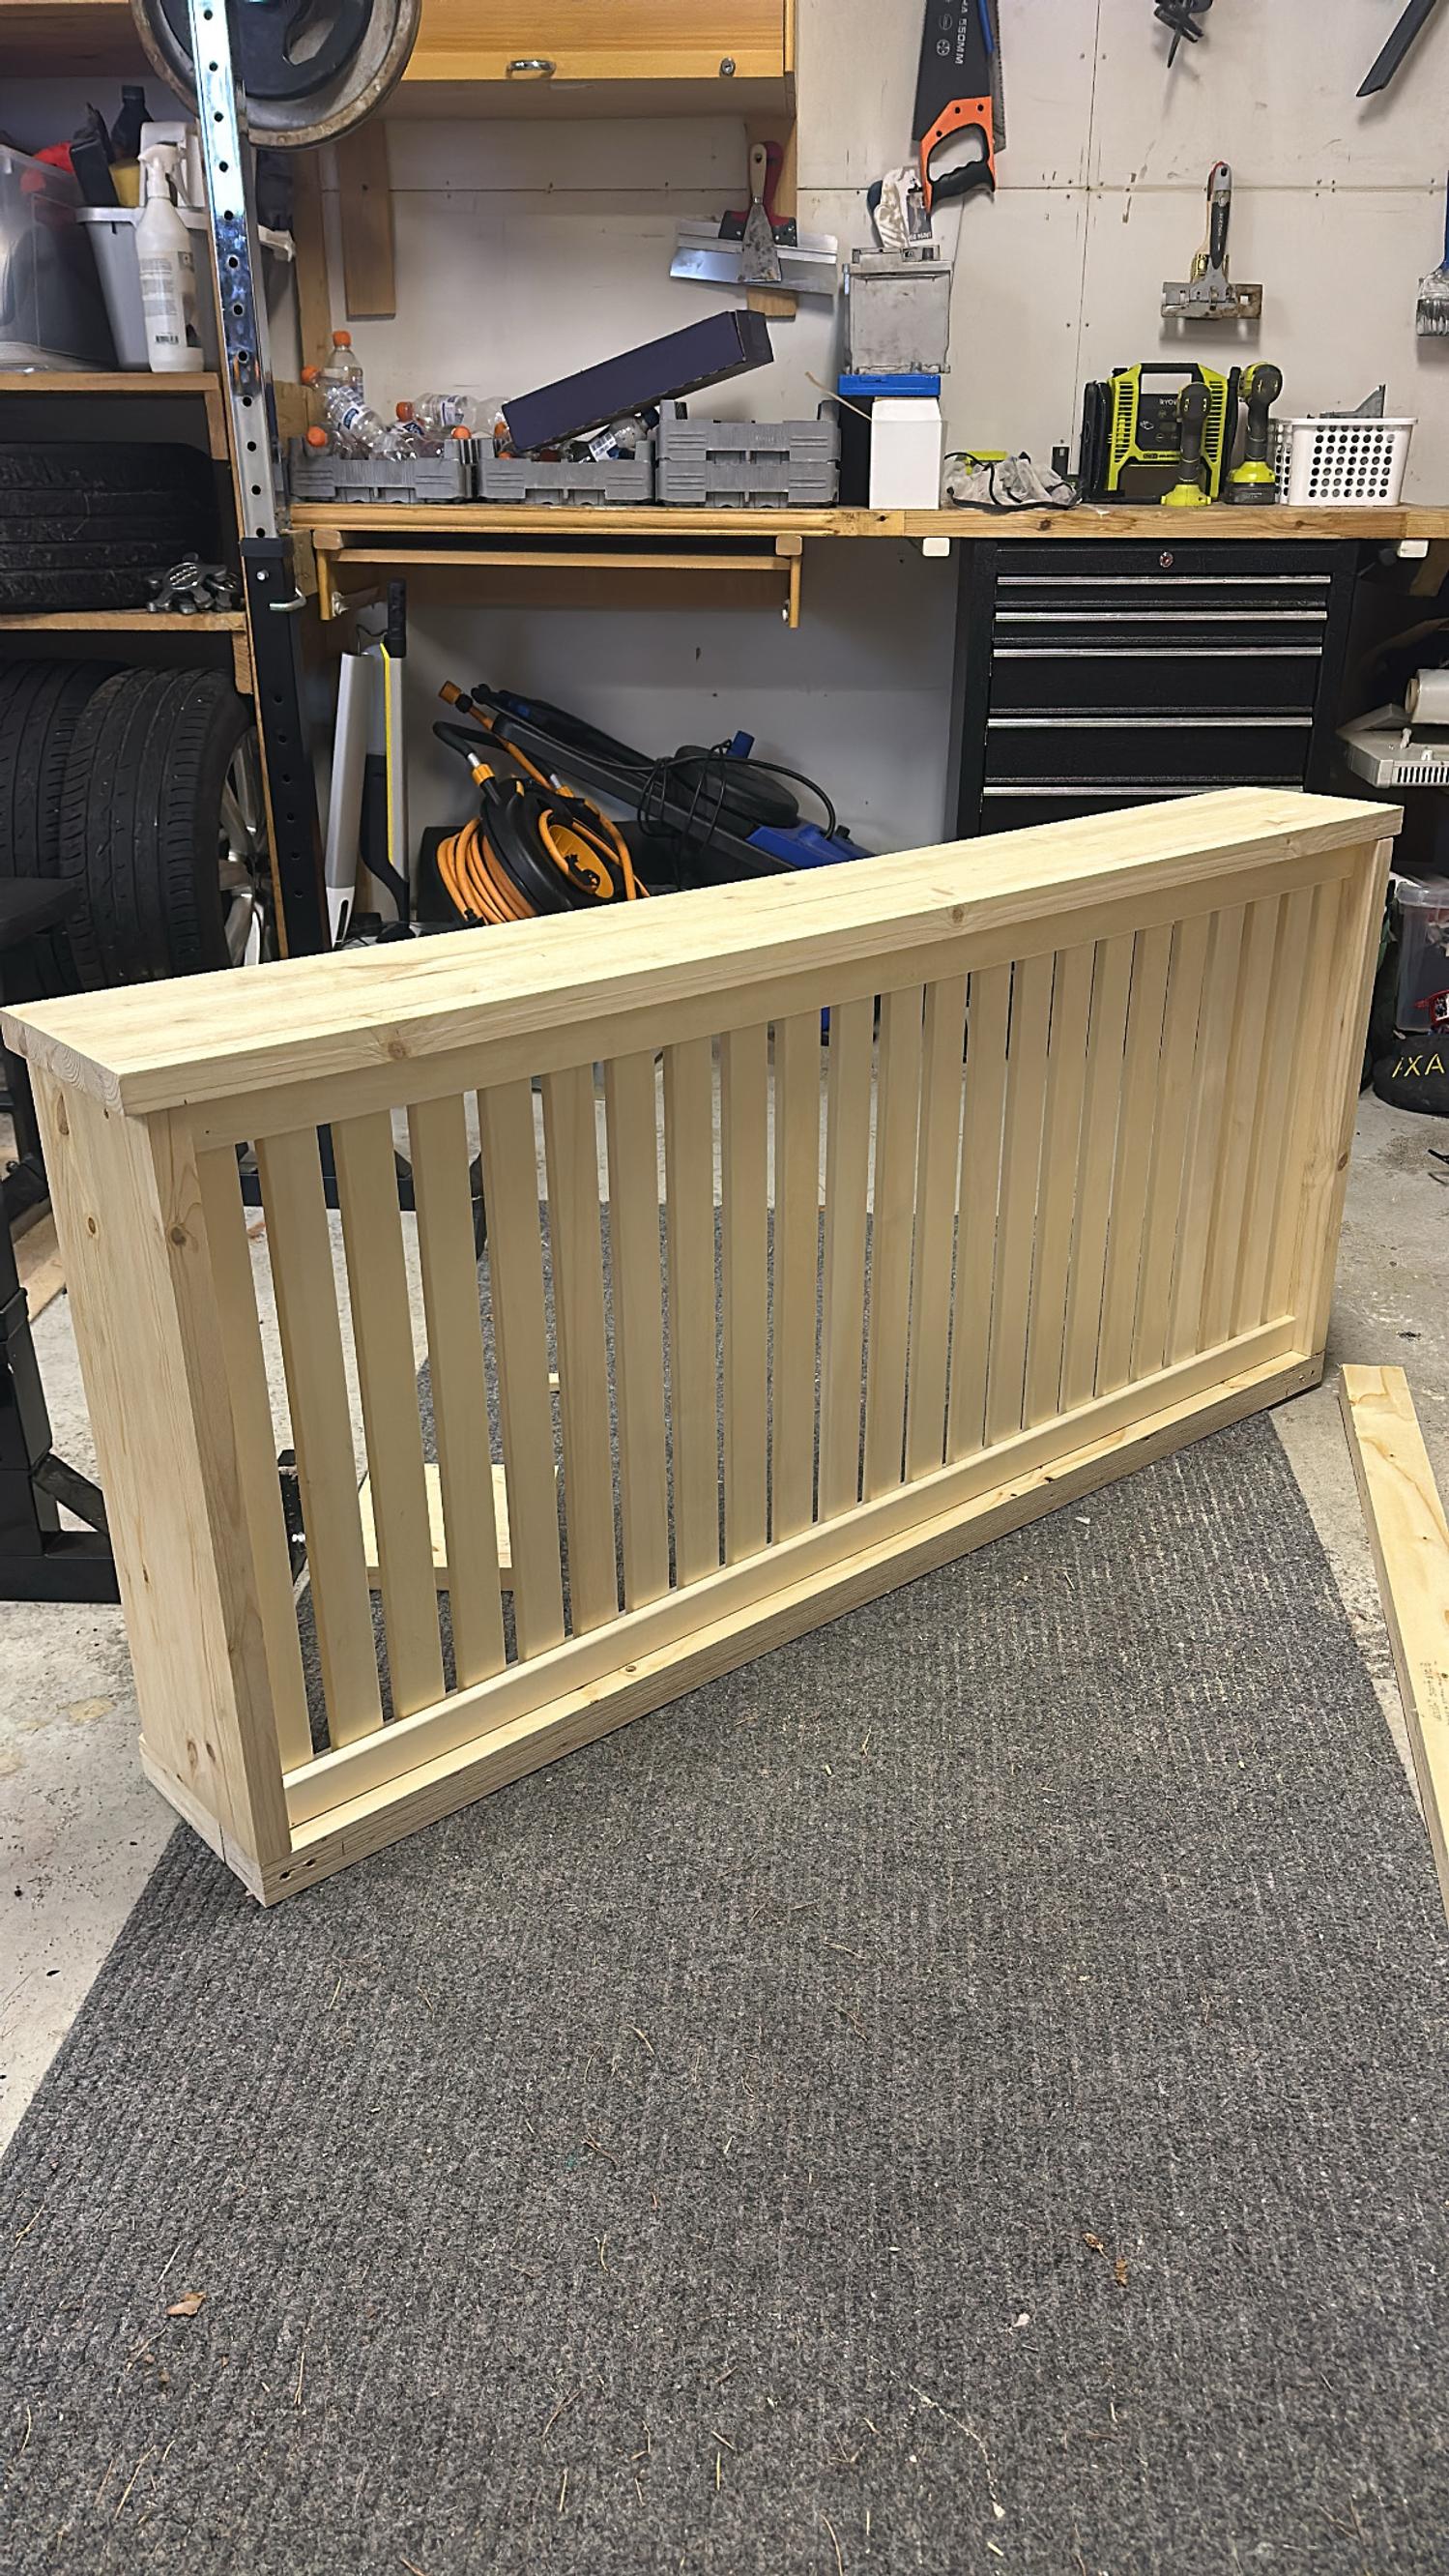
I wanted covers with a timeless, classic look. I saw some beautiful covers made by a carpenter on a Danish Instagram account and used them as a guide.
We planned the covers’ dimensions to give the radiators plenty of space, allowing air to circulate inside the cover and preventing overheating. The cover is also spaced away from the wall so air can flow in between, and it can be easily moved aside for cleaning.
The radiator cover is deep enough to act as a windowsill. You can place a lamp, small decorative items, or spring seedlings on top. For many seedlings, it’s actually the perfect spot since they get both light and warmth right under the window, above the radiator.


How much time and money did it take to make the radiator covers?
It took about three hours to build one cover, plus painting time. Each one cost around 70 euros.
We first made two covers, then added two more later on. Now I’d like a few upstairs as well. Naturally, it makes the most sense to buy all the materials for every cover at once and cut them to size in one batch, which saves time and effort compared to building them individually.


