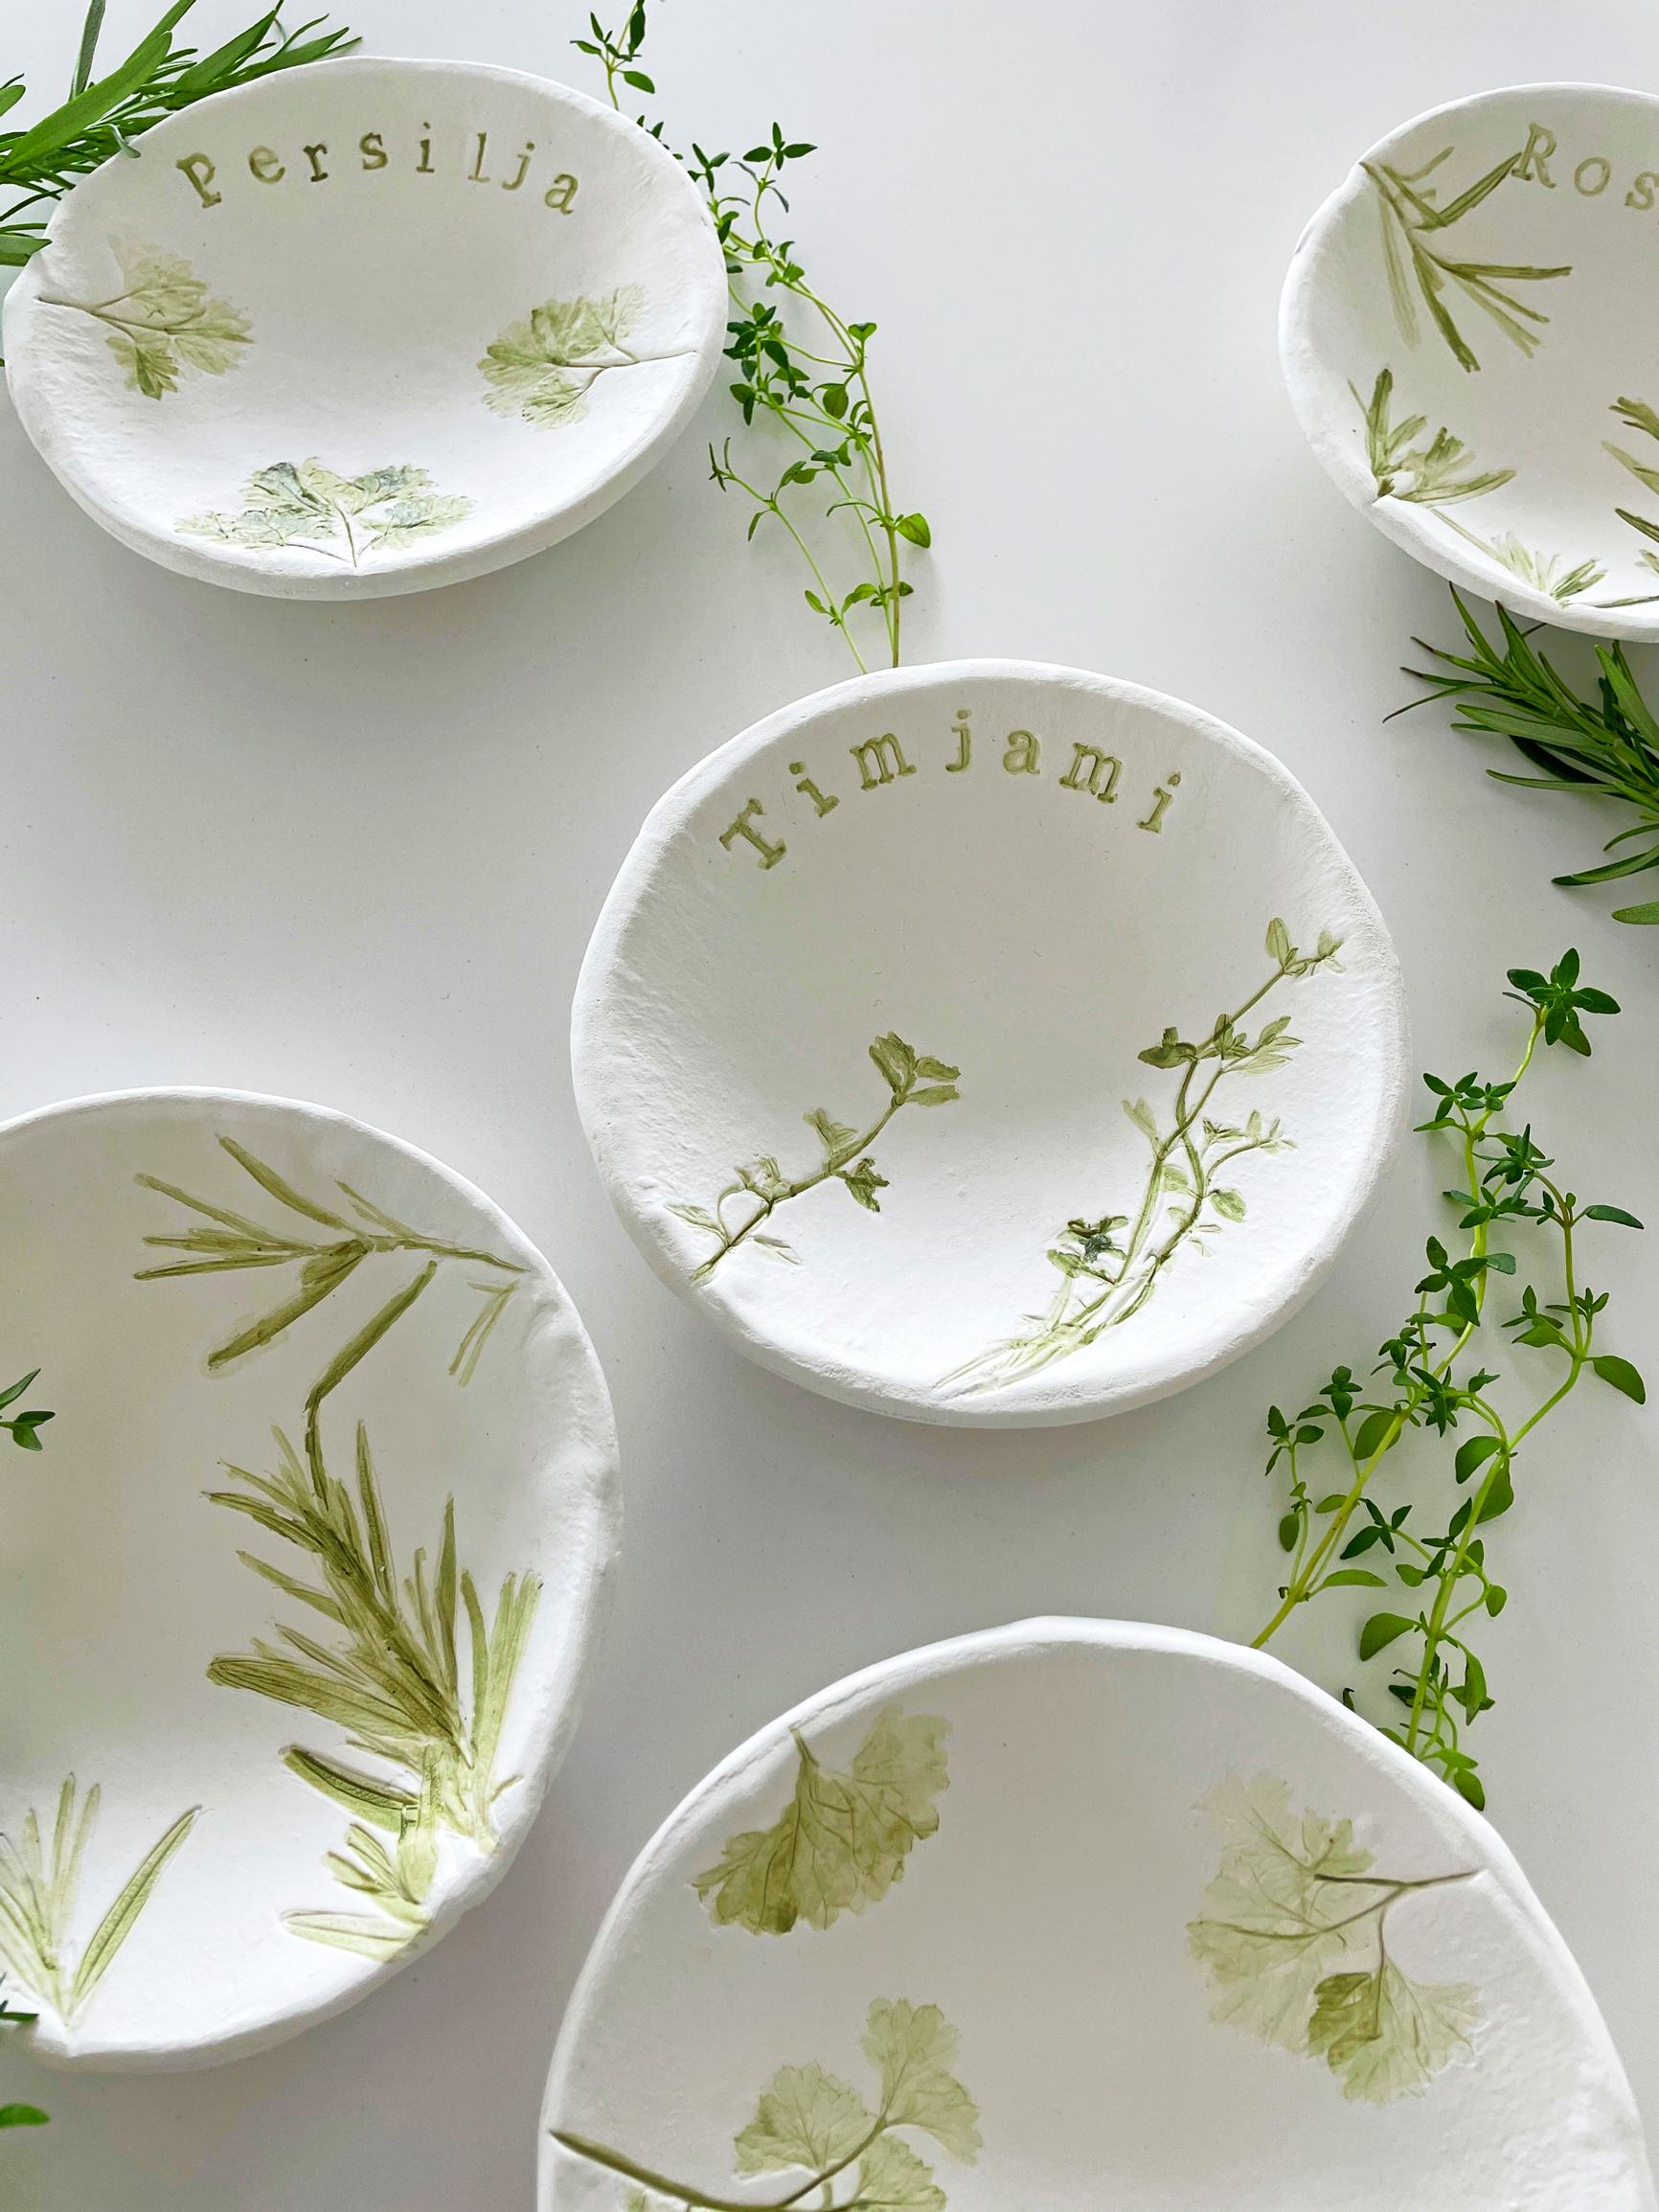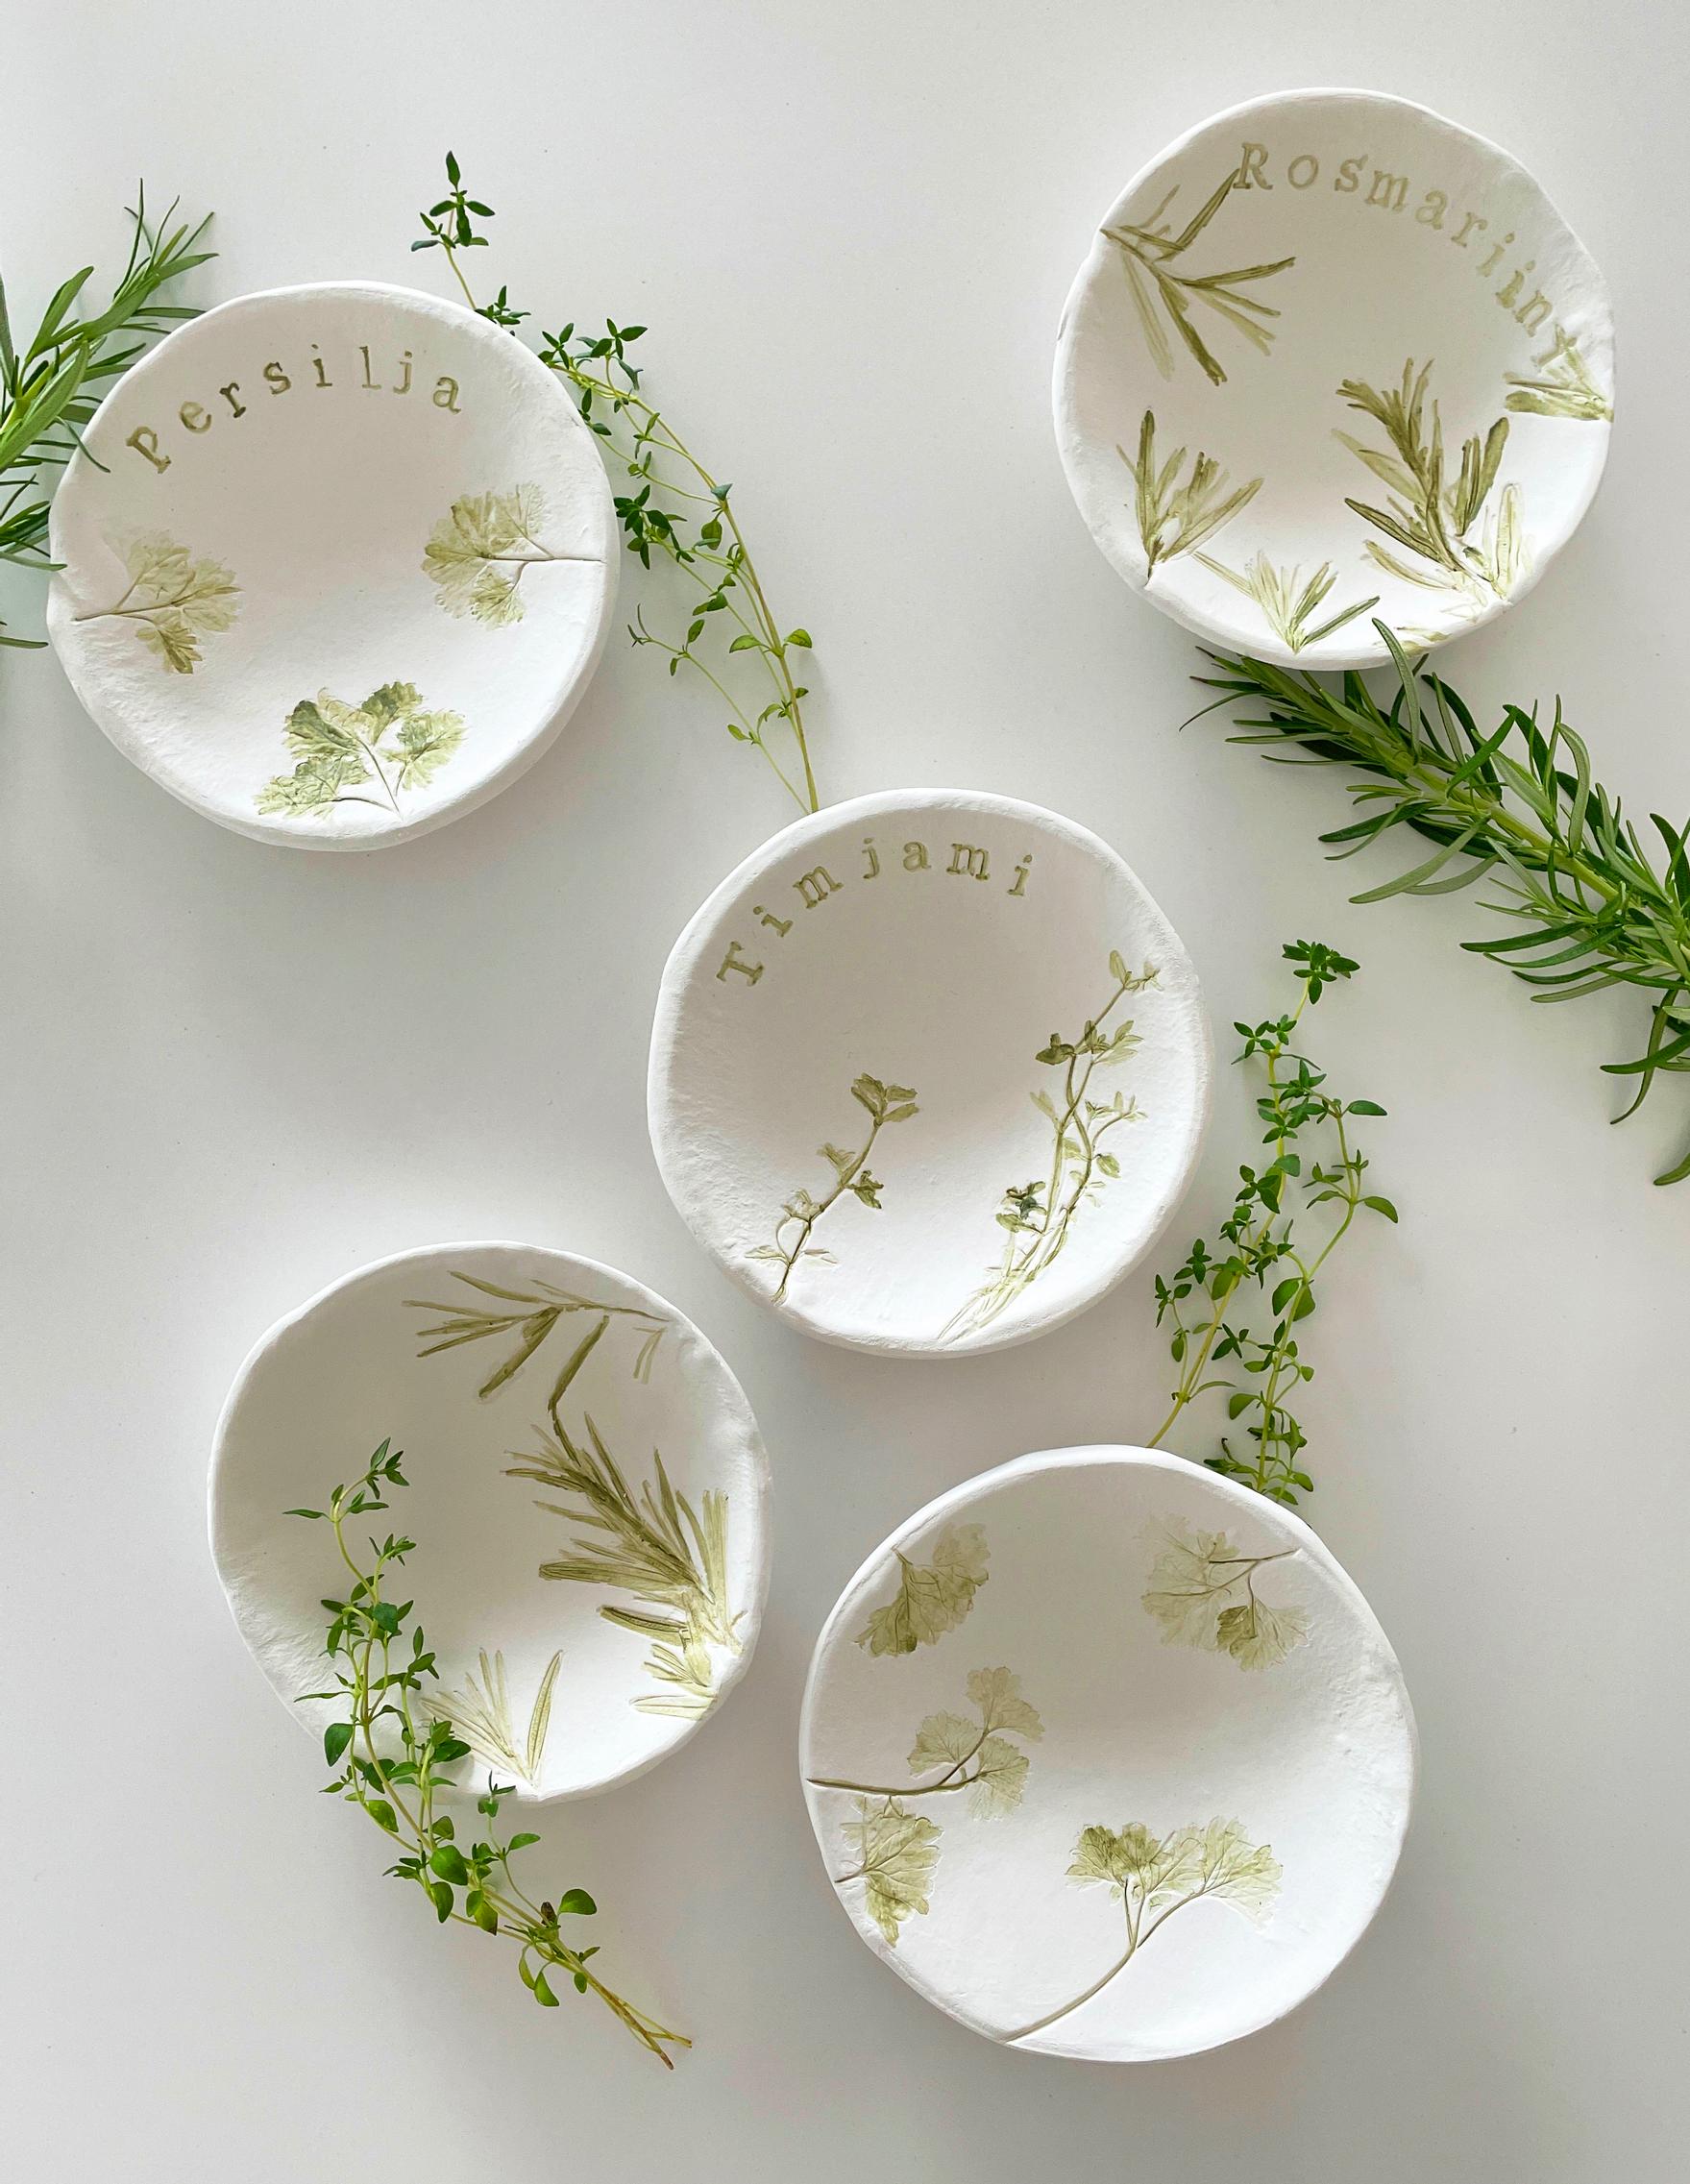
Herb plates from air-dry clay—decorate small plates with fresh herbs
Make little herb plates from air-dry clay! Press fresh herbs onto the clay to capture the tiniest details. This simple clay project is also fun to do with kids.
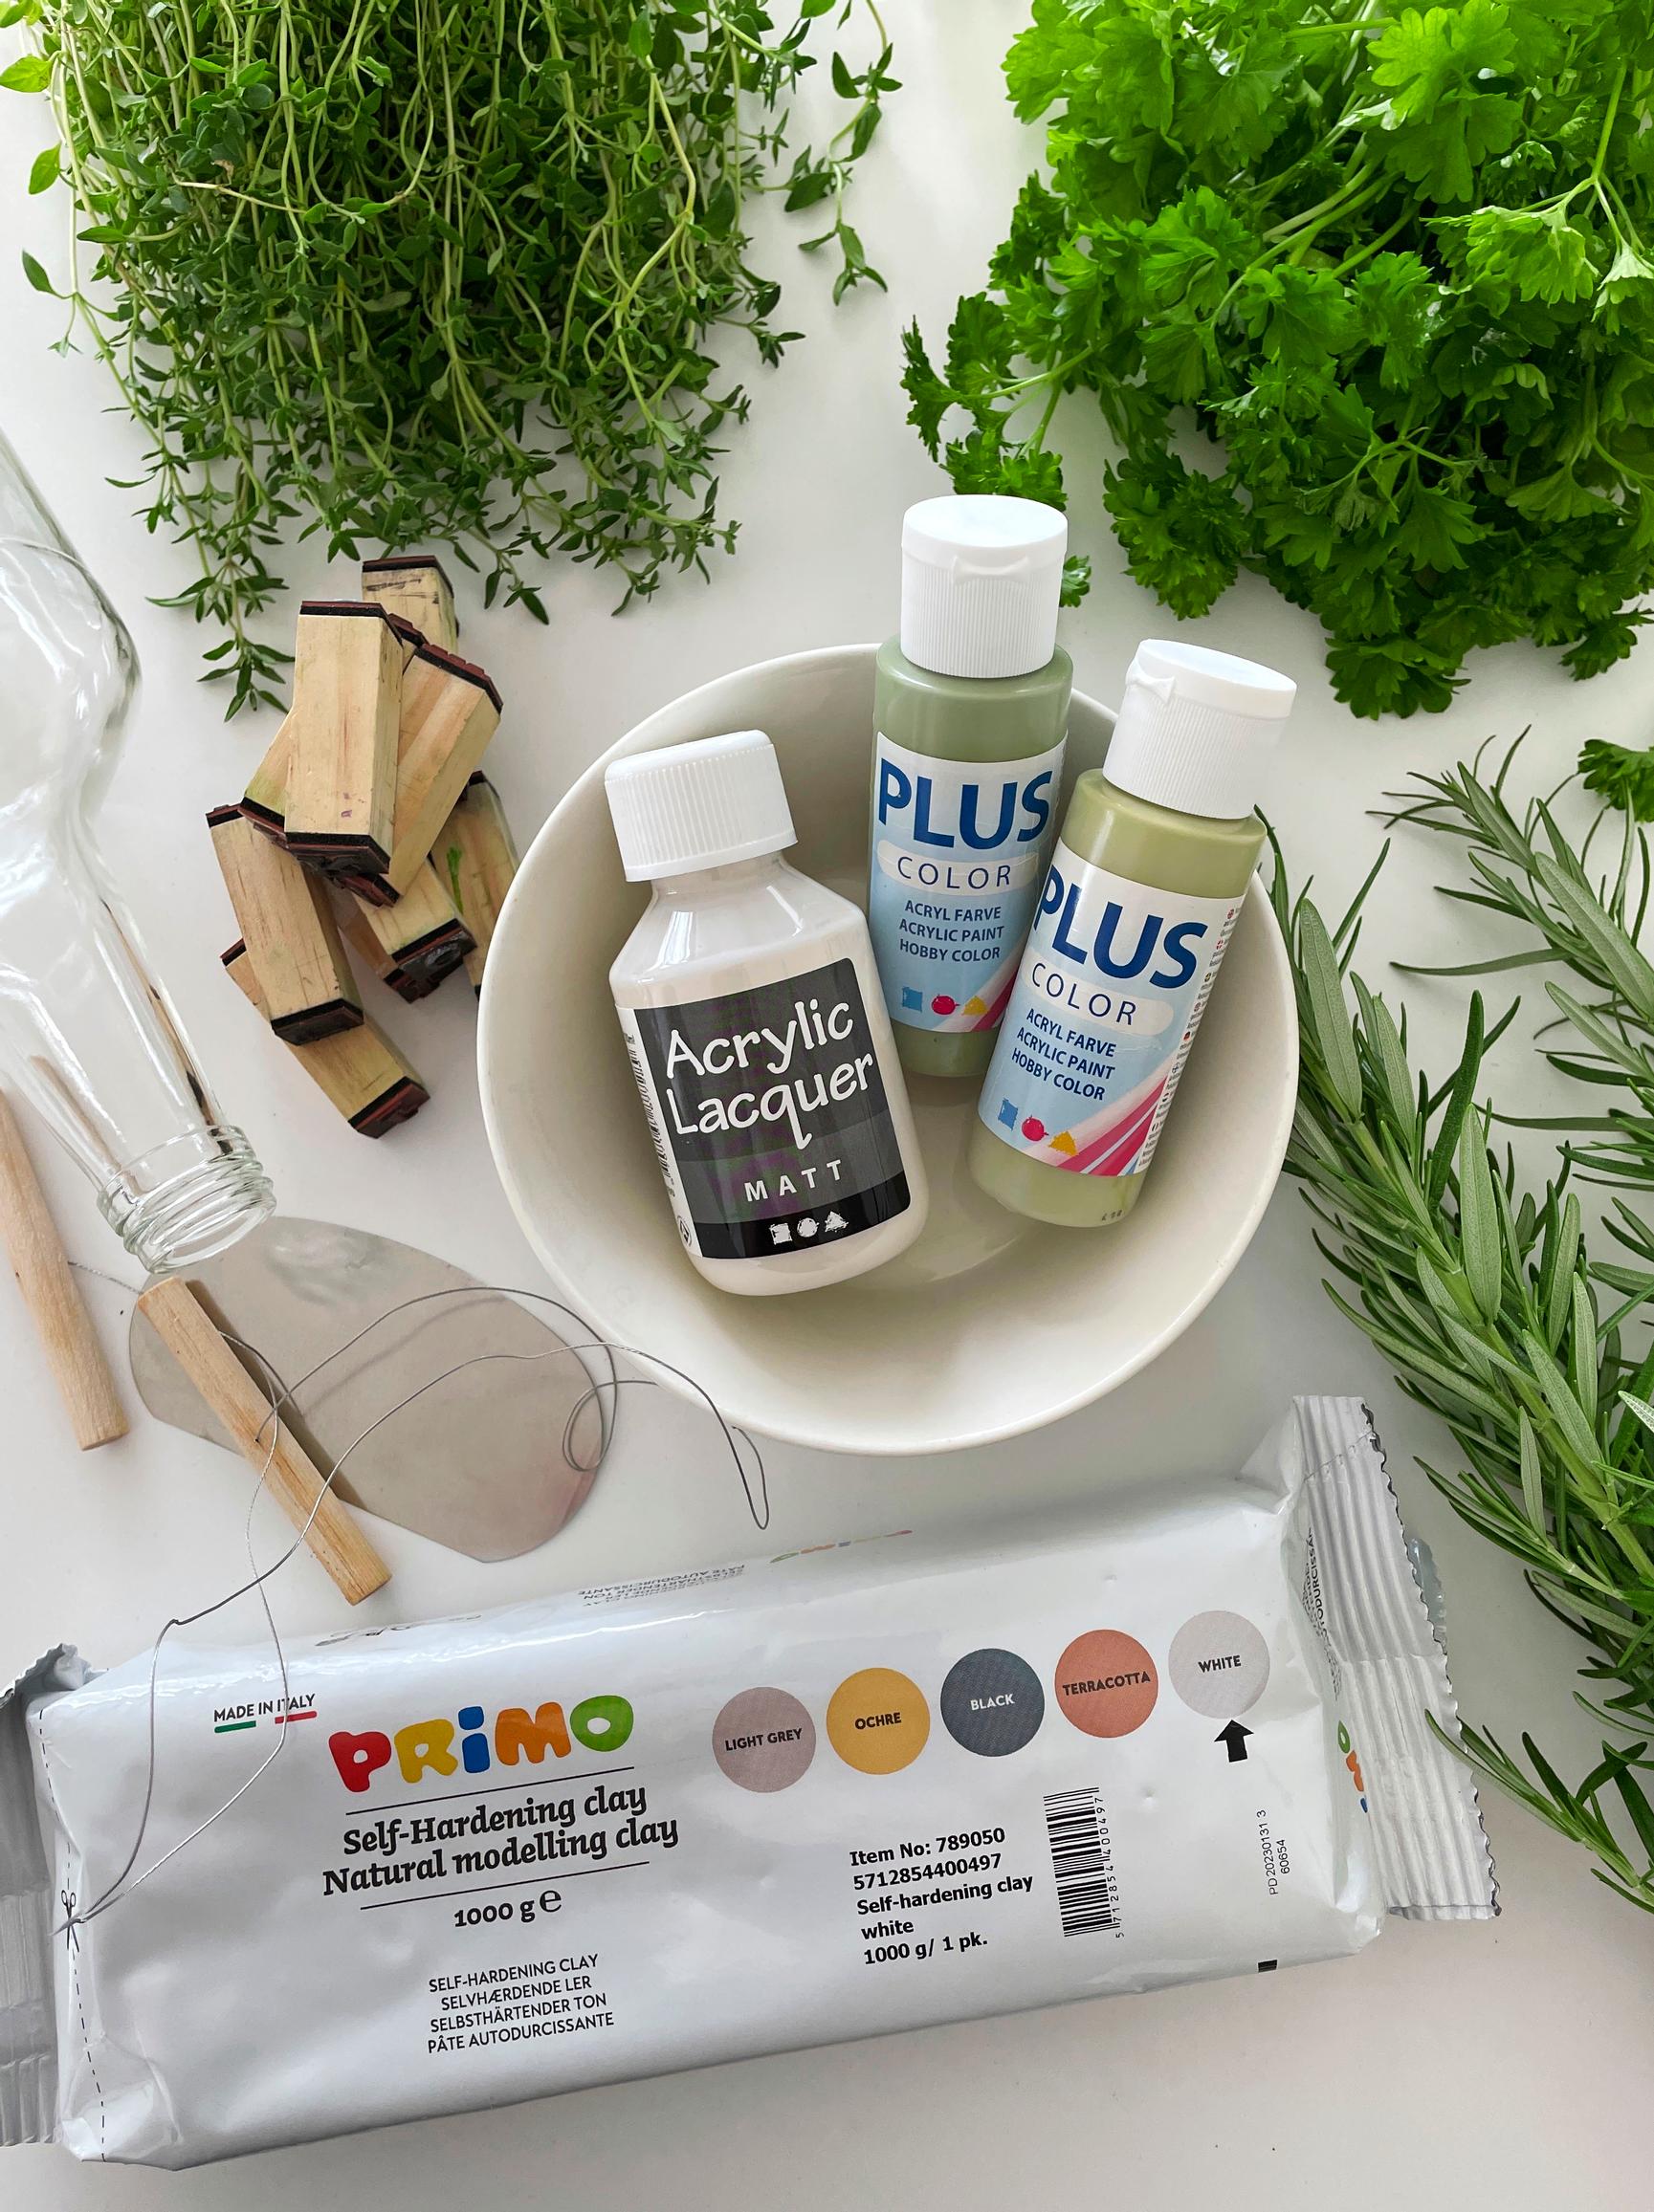
Herb plates—supplies:
- air-dry clay, such as Primo
- herbs, such as thyme, parsley, and rosemary
- letter stamps
- rolling pin or a glass bottle
- modeling set
- green craft paint and a paintbrush
- acrylic varnish
- a bowl to be used as a mold
- craft mat or other suitable work surface
- fine sandpaper

Herb plates—instructions:
1. Cut a small piece of clay. Knead it in your hands until it softens, then shape it into a ball.

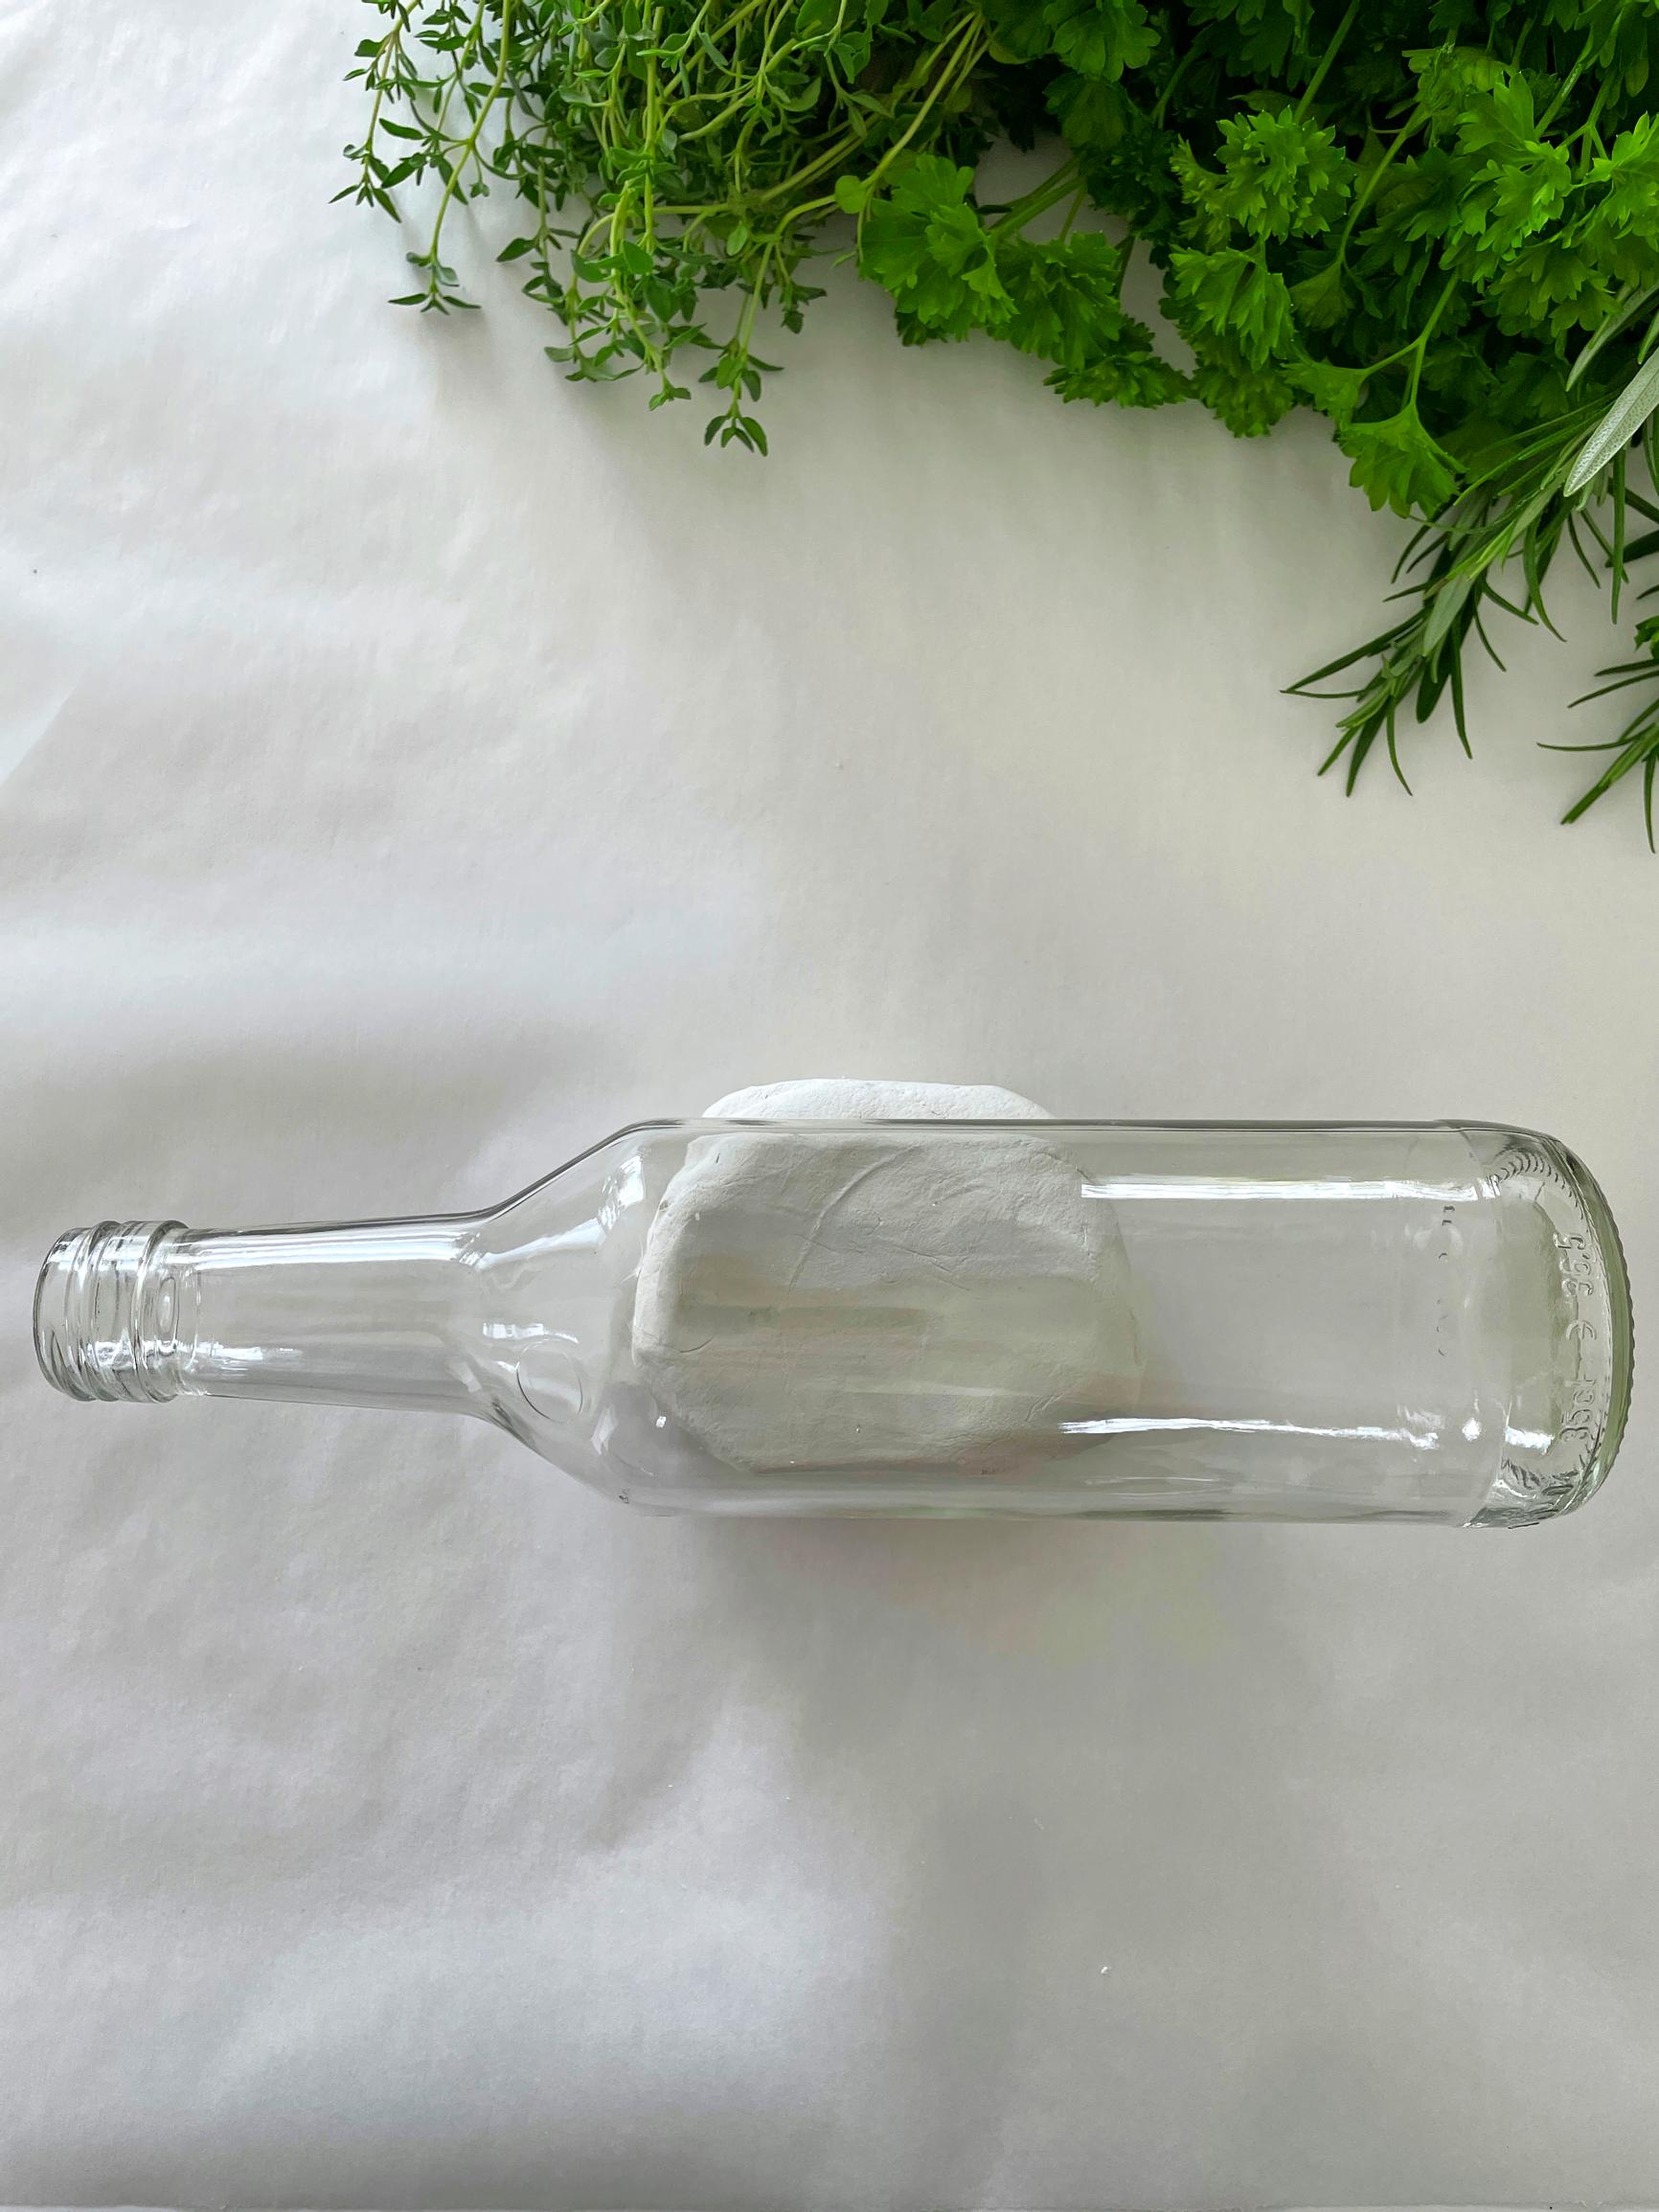
2. Place the clay ball on your work surface and flatten it slightly. Roll it out until it’s about 3–5 mm thick. You can also use a glass bottle instead of a rolling pin.

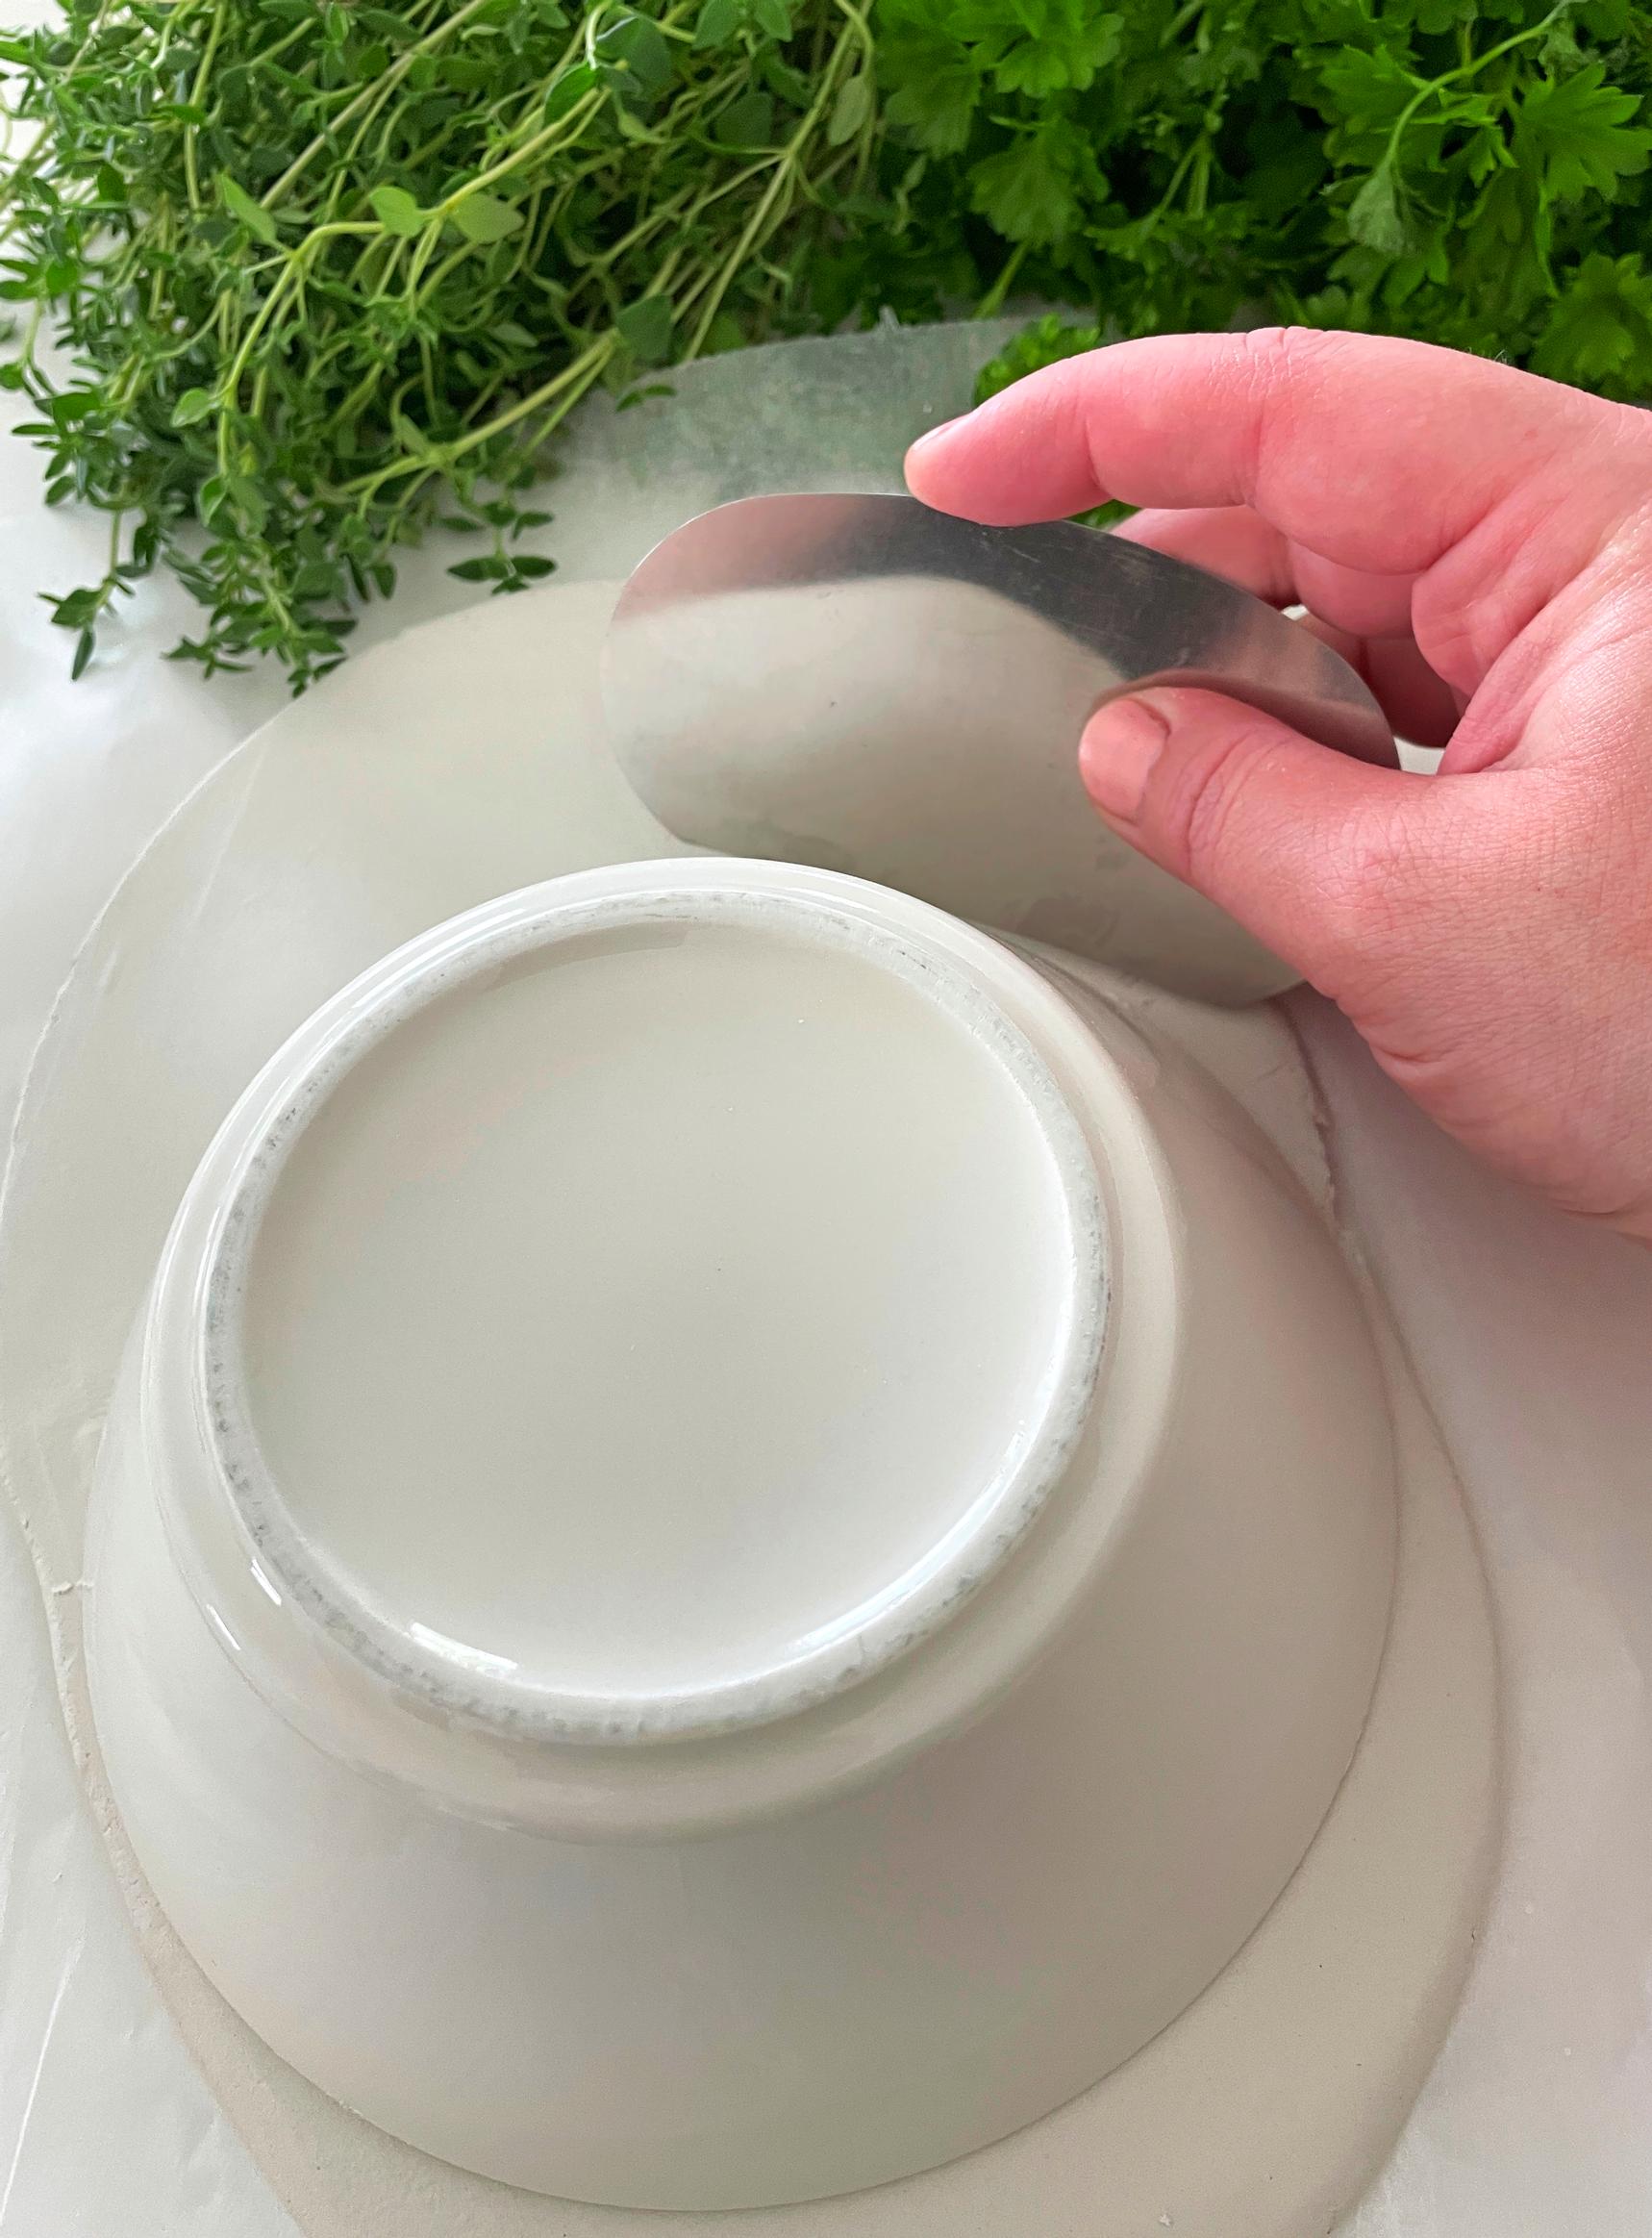
3. Use a bowl to cut a round shape from the clay sheet.

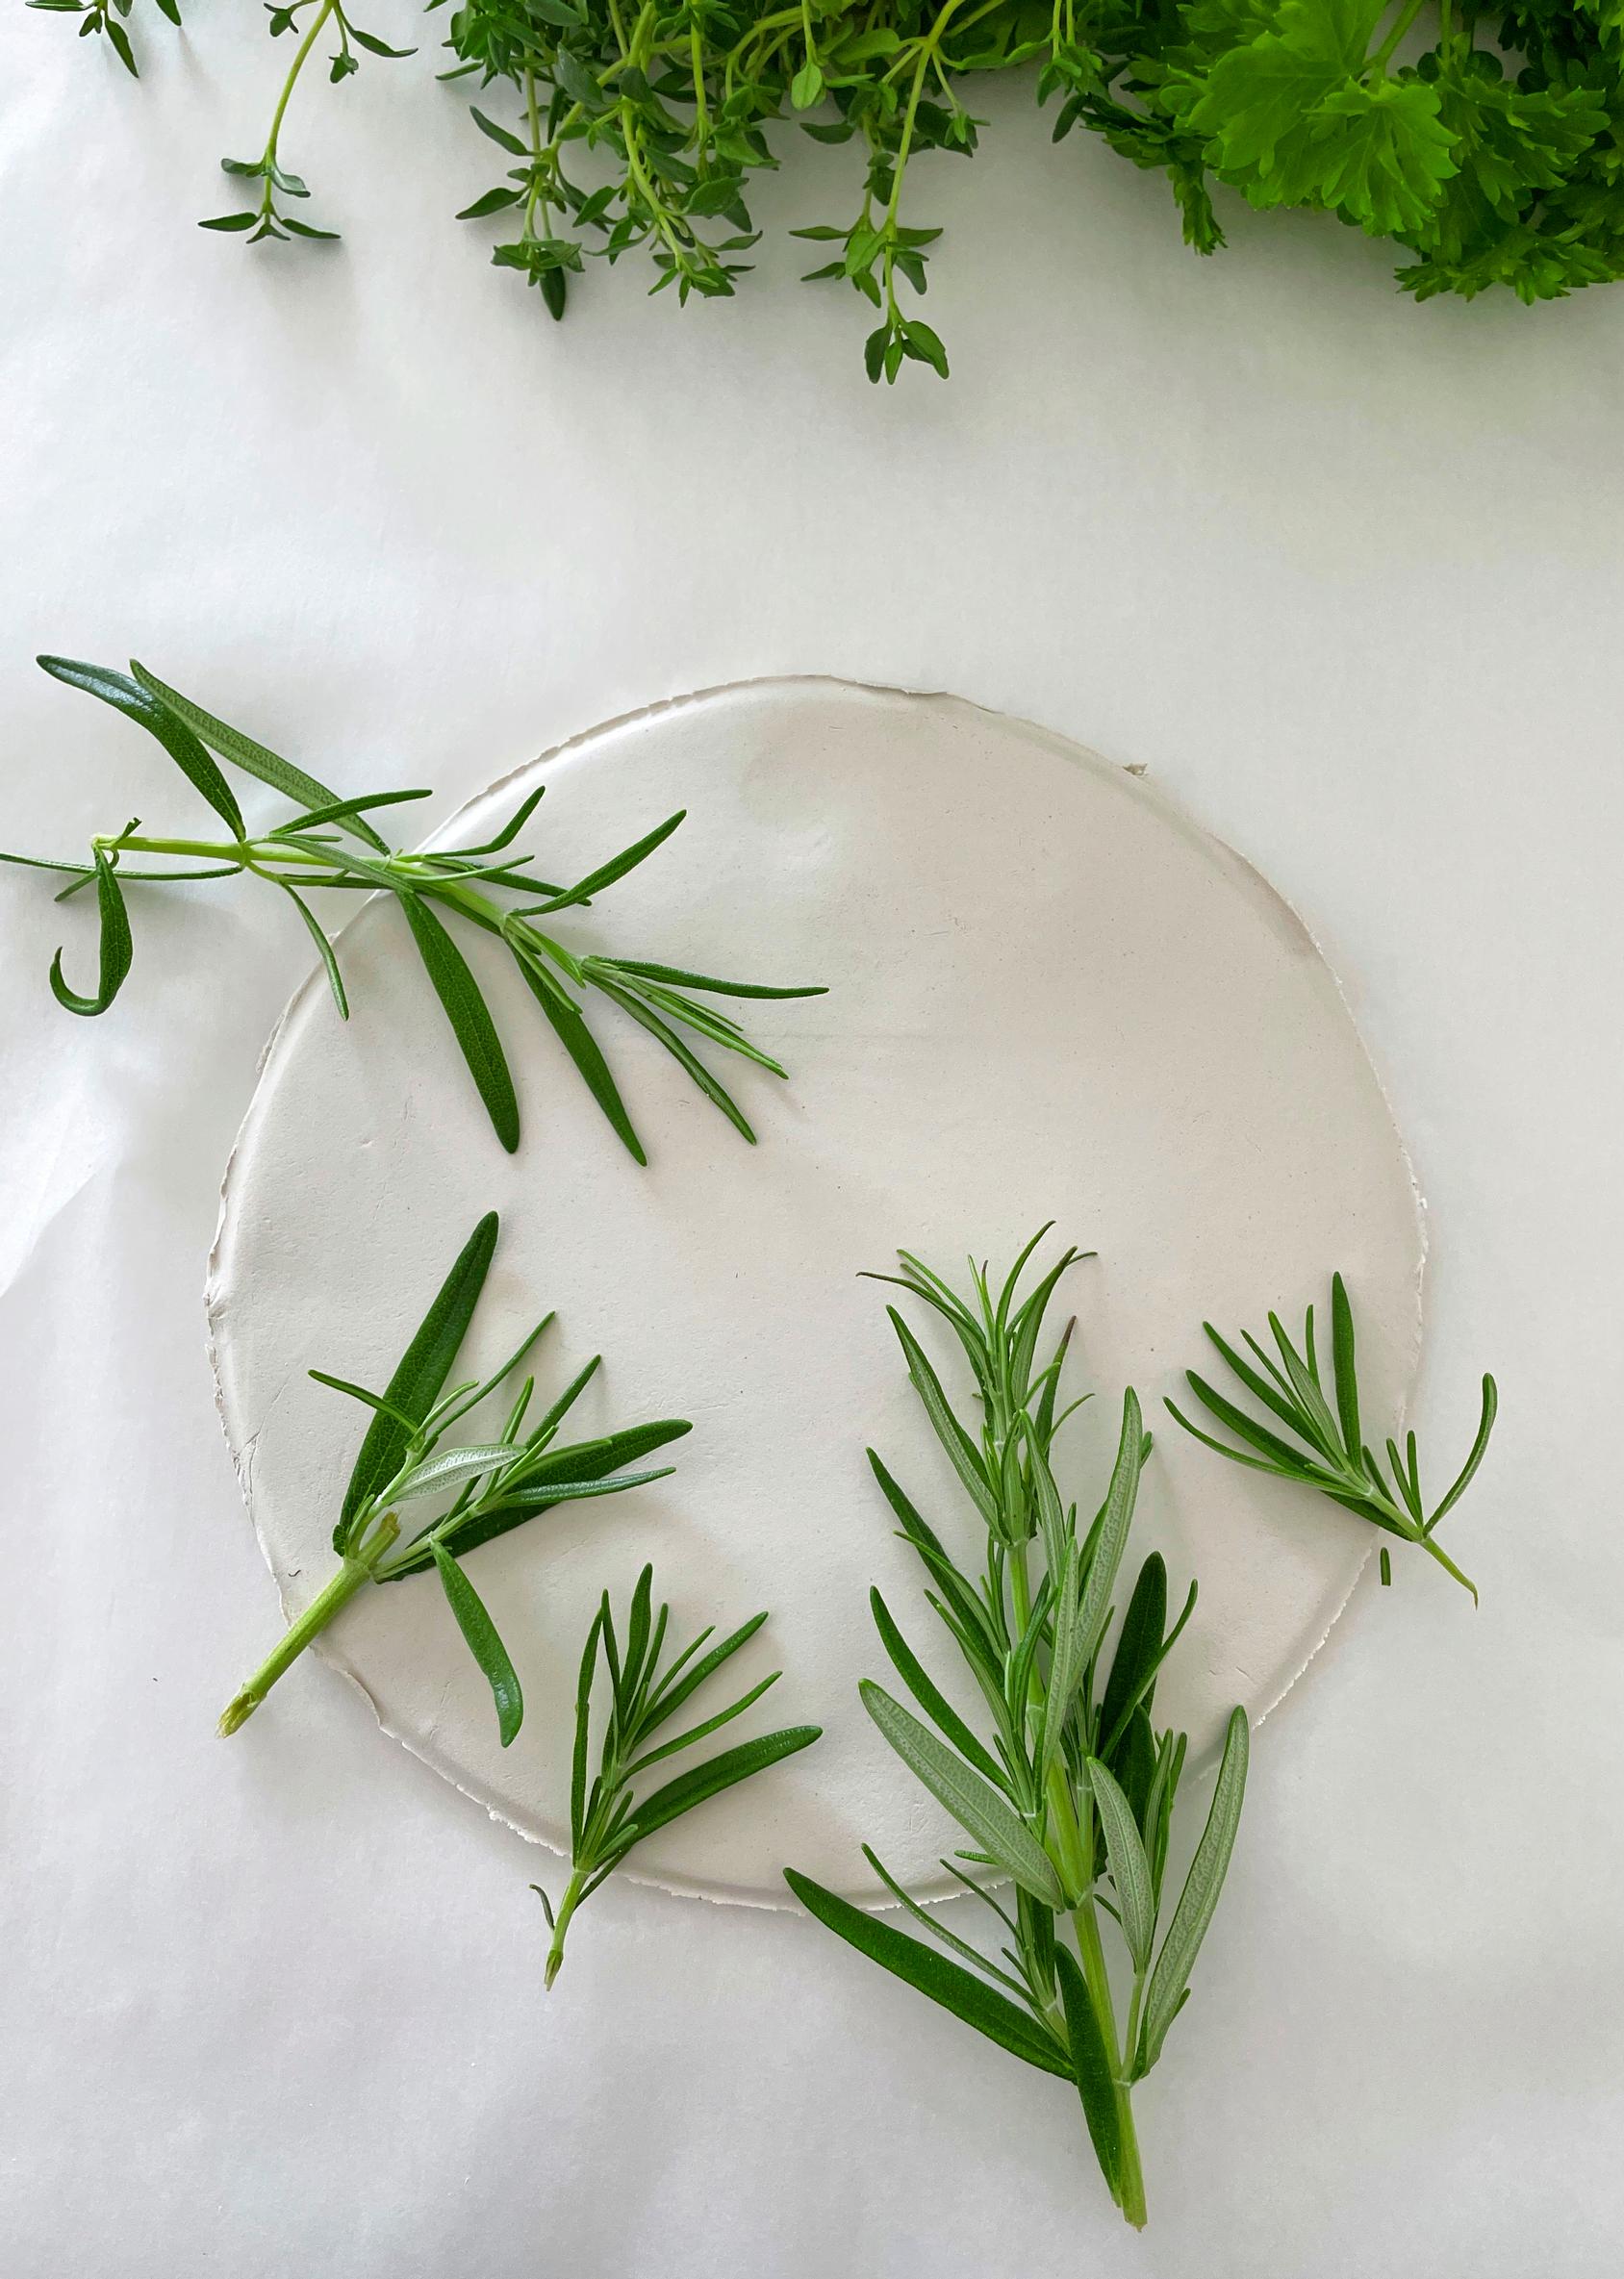
4. Arrange the herbs on the clay in any pattern you like, then gently roll over them so their shapes imprint. The details will remain visible in the clay.

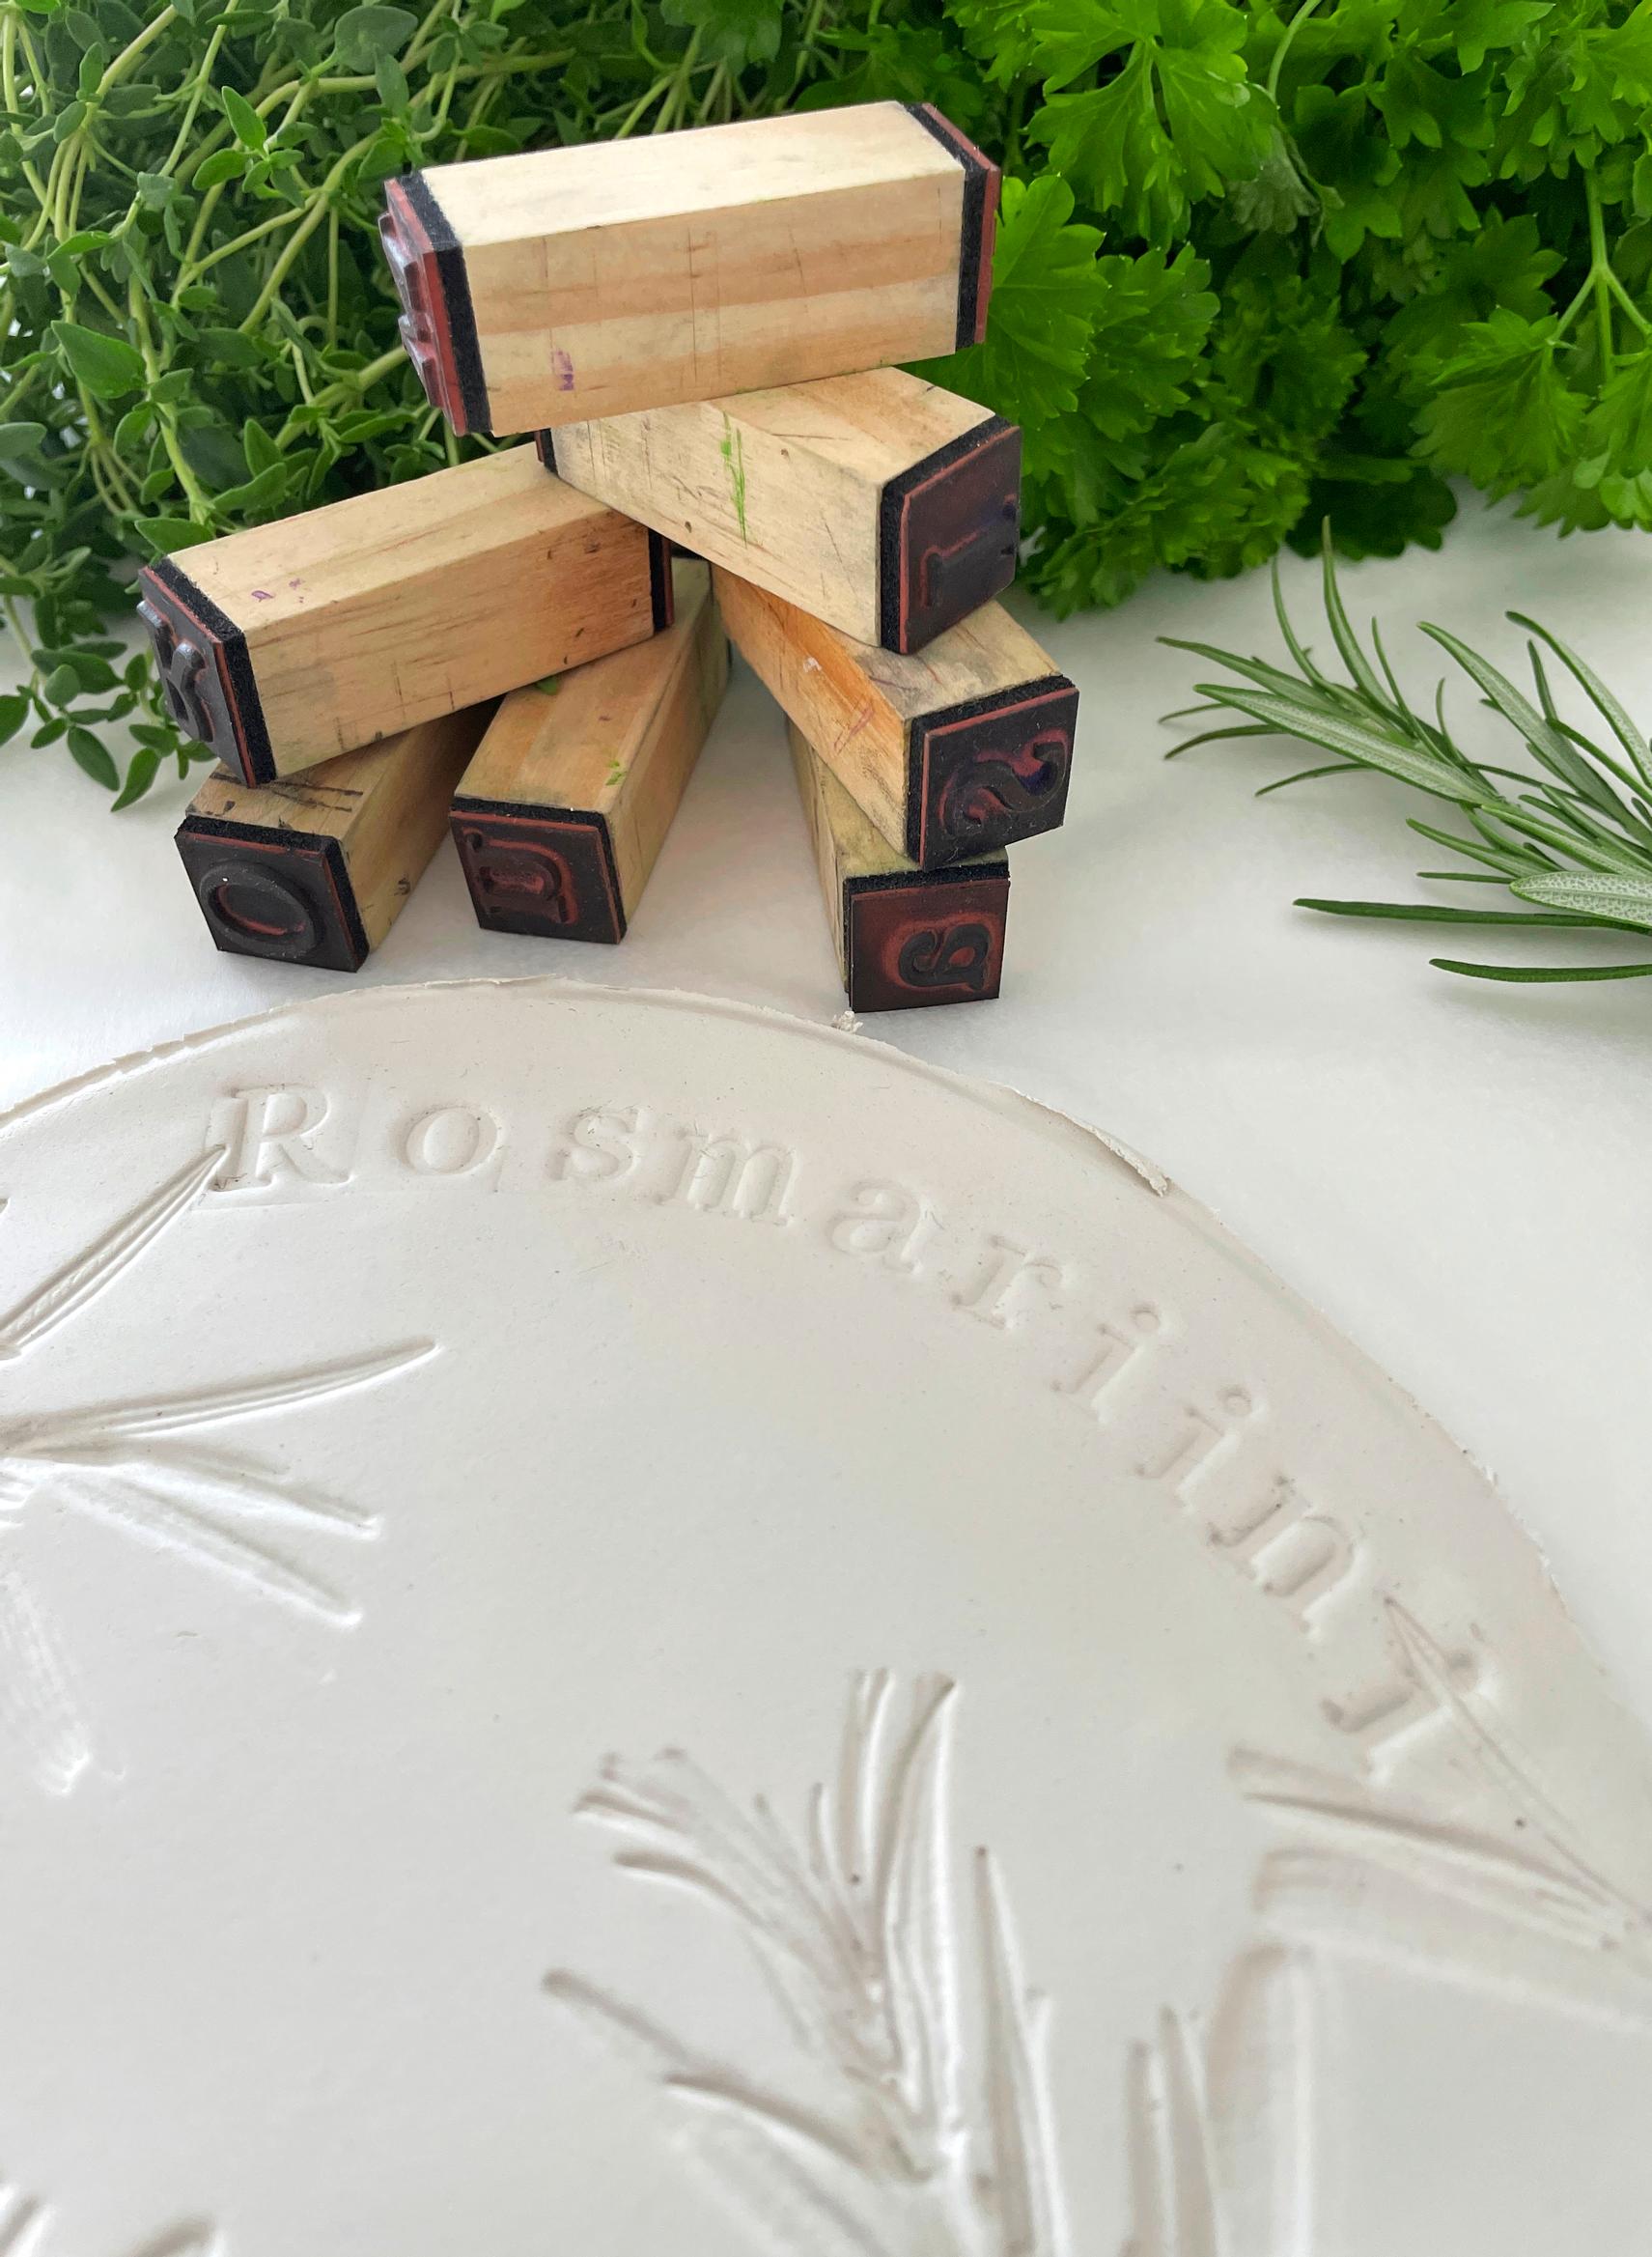
5. Press the herb’s name into the moist clay with letter stamps.
6. Smooth the plate with slightly moistened fingers so the edges are neat.
7. Place the plate inside the bowl, gently pressing it against the sides. Let it dry for 1–2 days. If the clay still feels cool, it’s not fully dry yet. Remove the piece from the mold and, if needed, allow it to finish drying upside down.
8. Tidy the dried plate’s edges with fine sandpaper and wipe off any dust.

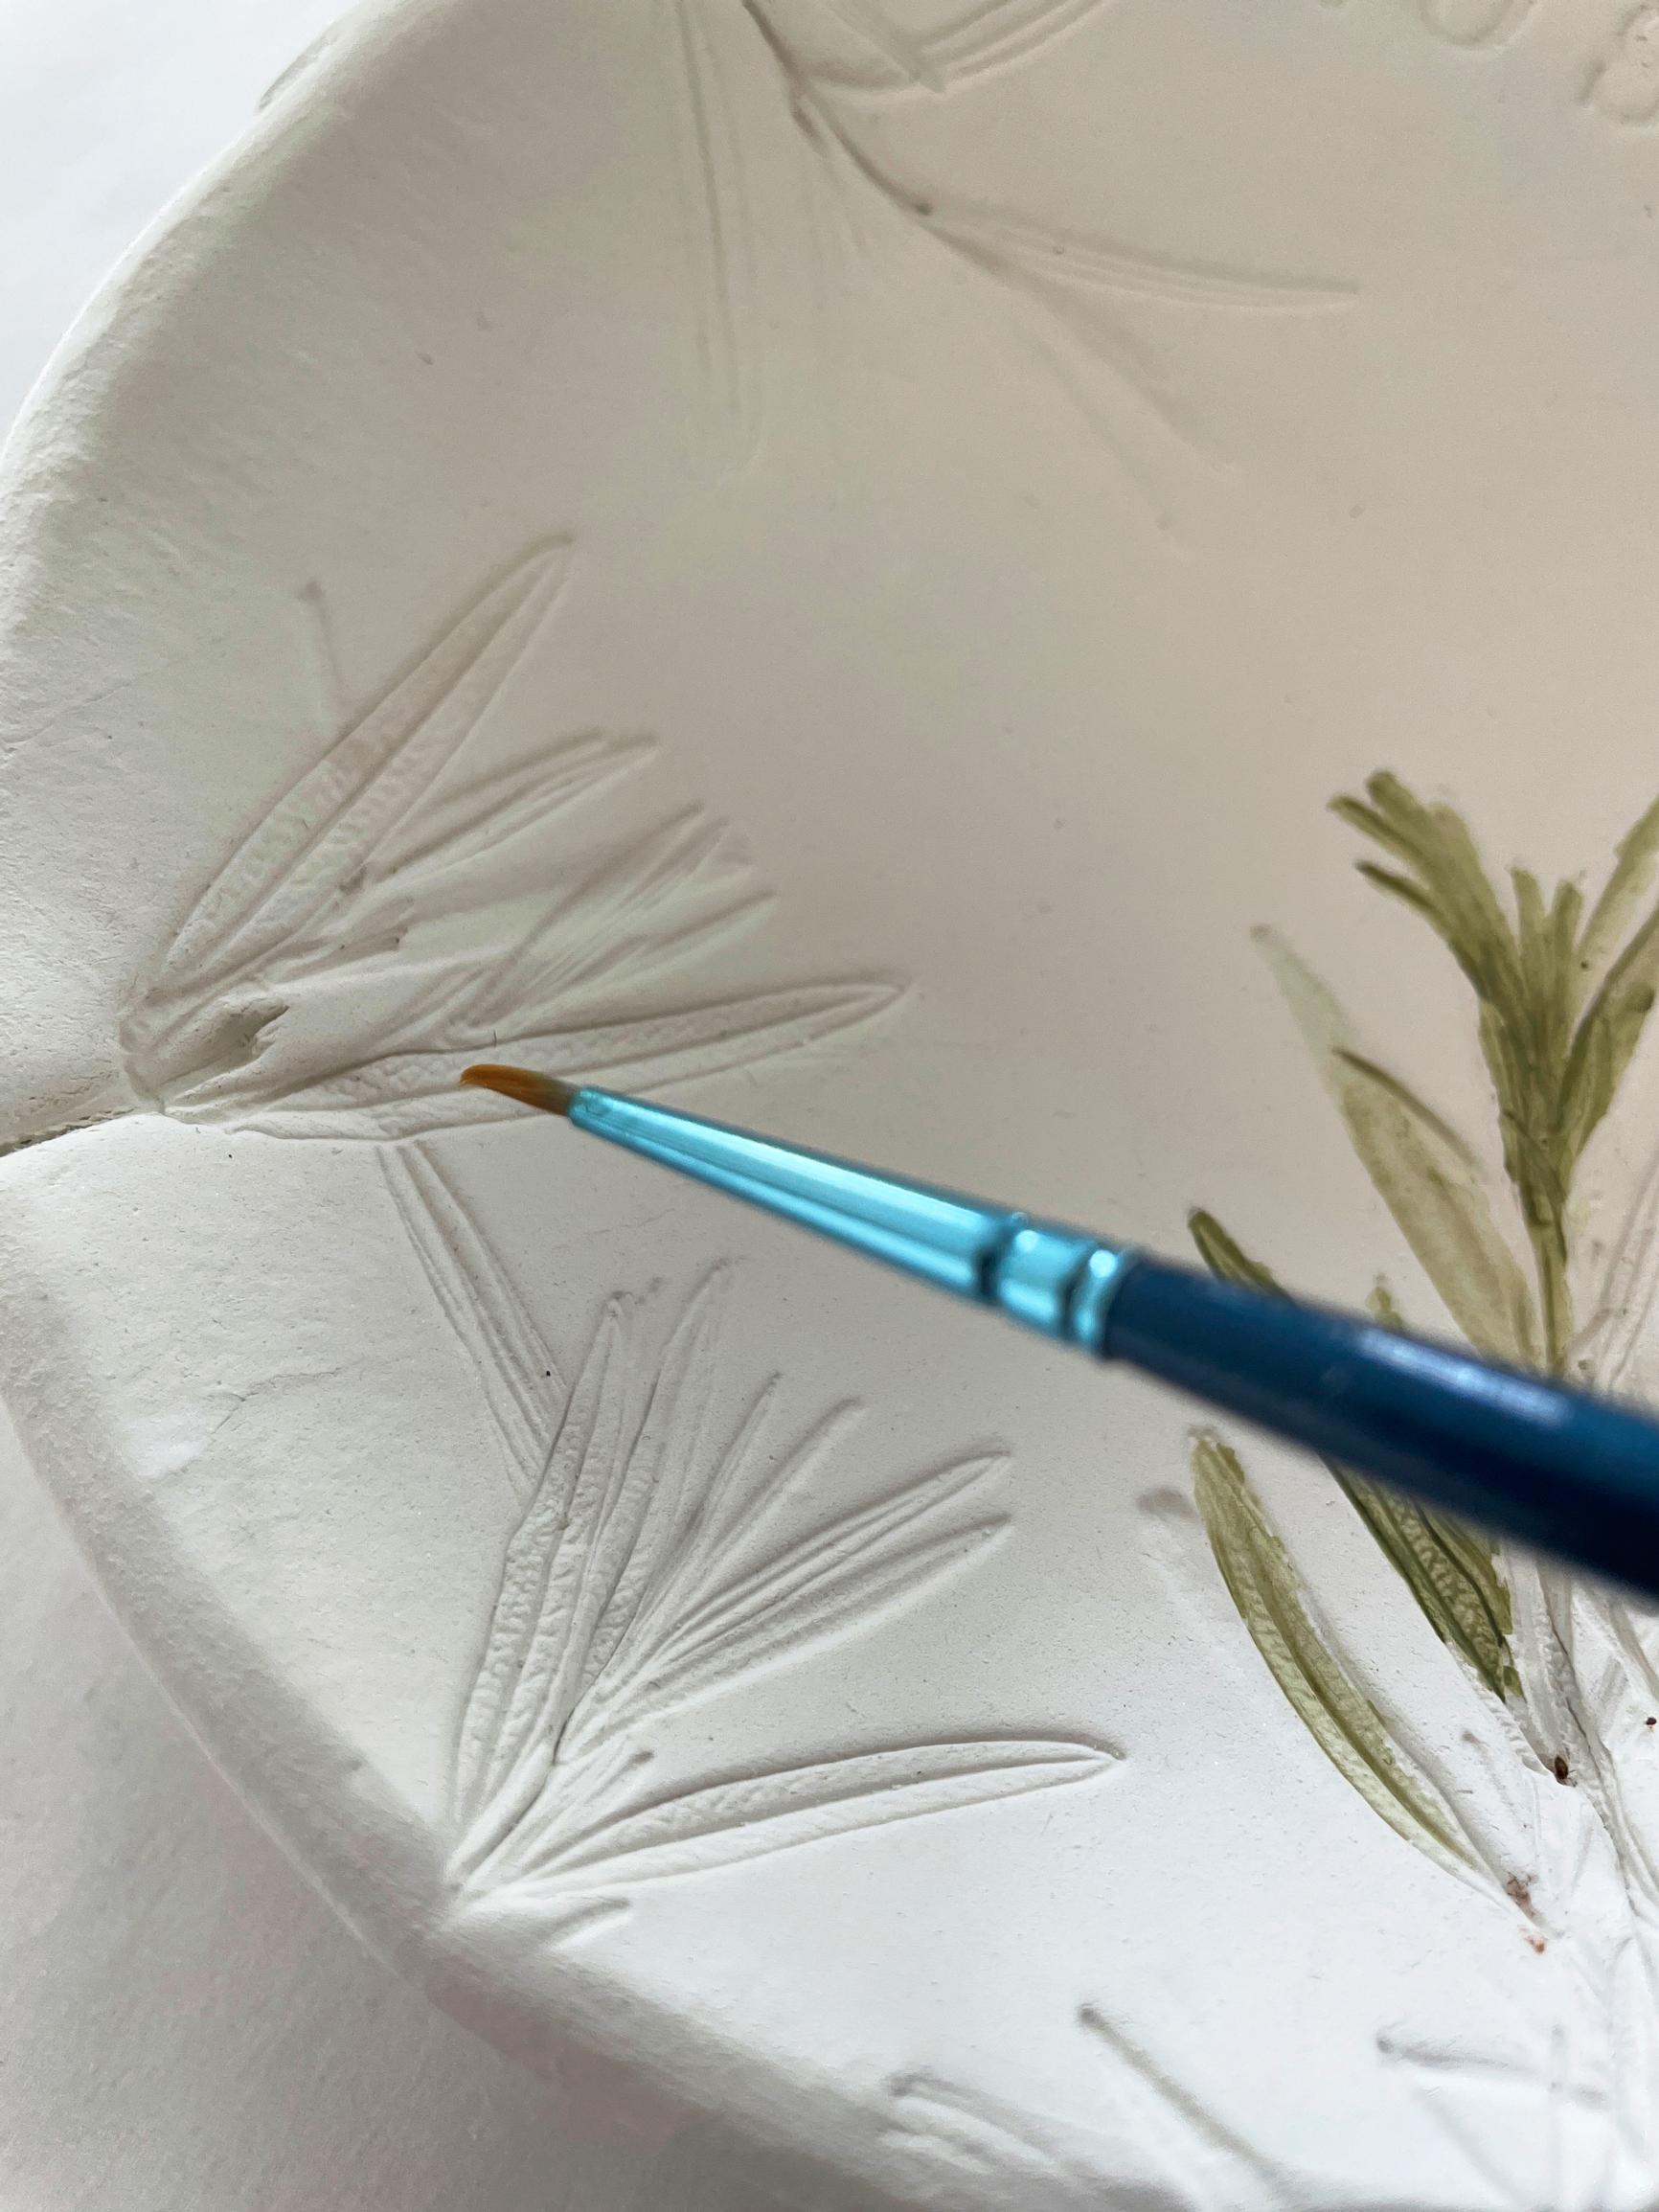
9. Use green craft paint to make the patterns and text stand out. Lightly dampen a fine-tip brush, and paint with a small amount of color.
10. If you like, finish the dried piece with 3–5 coats of acrylic varnish to make the surface more durable.