This dad turned an old bunk bed into a smart closet fix—and it cost next to nothing
When Jussi’s kids moved from their bunk bed to their own rooms, he intended to get rid of it. But then he had an idea: Could the bed be repurposed for making his impractical sliding-door closet more functional?
Jussi, how did you come up with the idea for your upcycled closet?
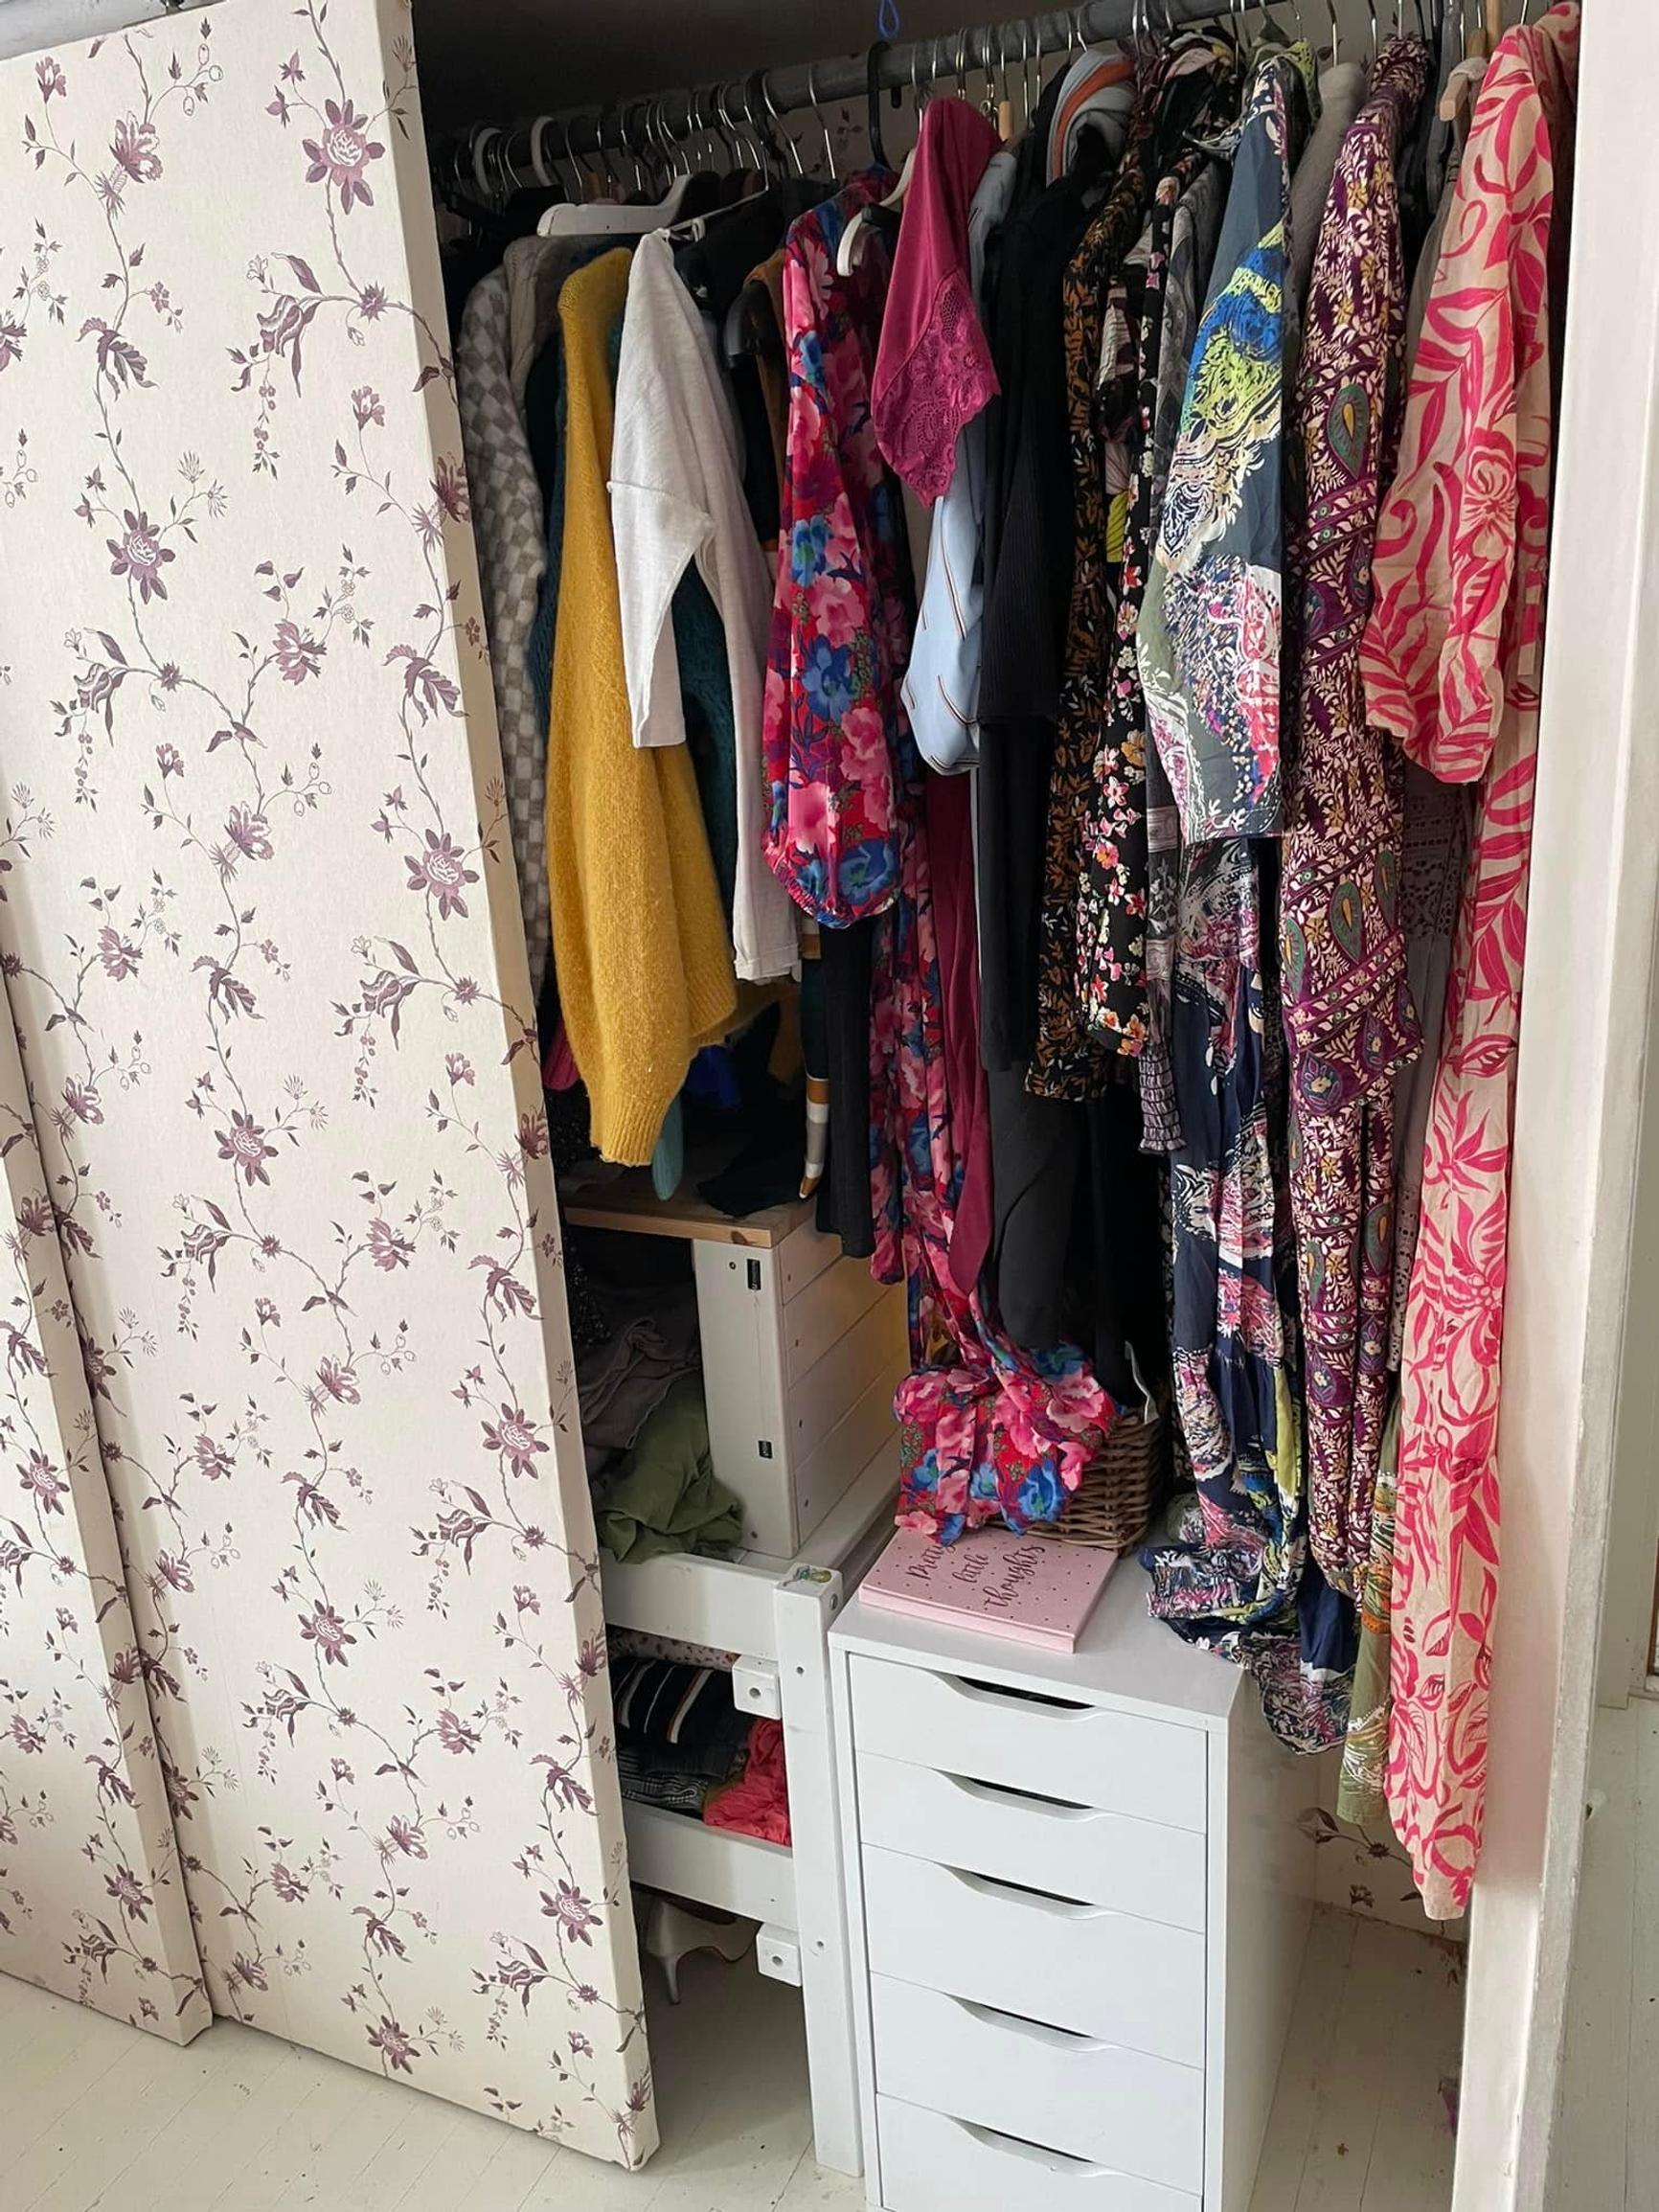
In our bedroom, behind the sliding doors, we had metal mesh baskets for storing clothes. They were frustrating because we had to open the doors all the way just to pull out a drawer, and then rummage around at the bottom of the basket. We had talked about how open shelving would work better in the sliding-door closet.
A year ago, our children moved from sharing a room to having separate rooms upstairs. That meant we had to dismantle their bunk bed. It was made of solid wood and still in great shape, so I didn’t want to throw it away.
I sat there for maybe ten minutes, thinking about what pieces I could salvage and what I might do with them. Then it clicked: these parts would be perfect for redoing the inside of the sliding-door closet.

How did you actually go about building the closet?
First, I measured the closet interior and the bed, and planned the parts I needed. Then I dismantled the bed and used a circular saw to cut the slats, ends, and posts to the right dimensions.
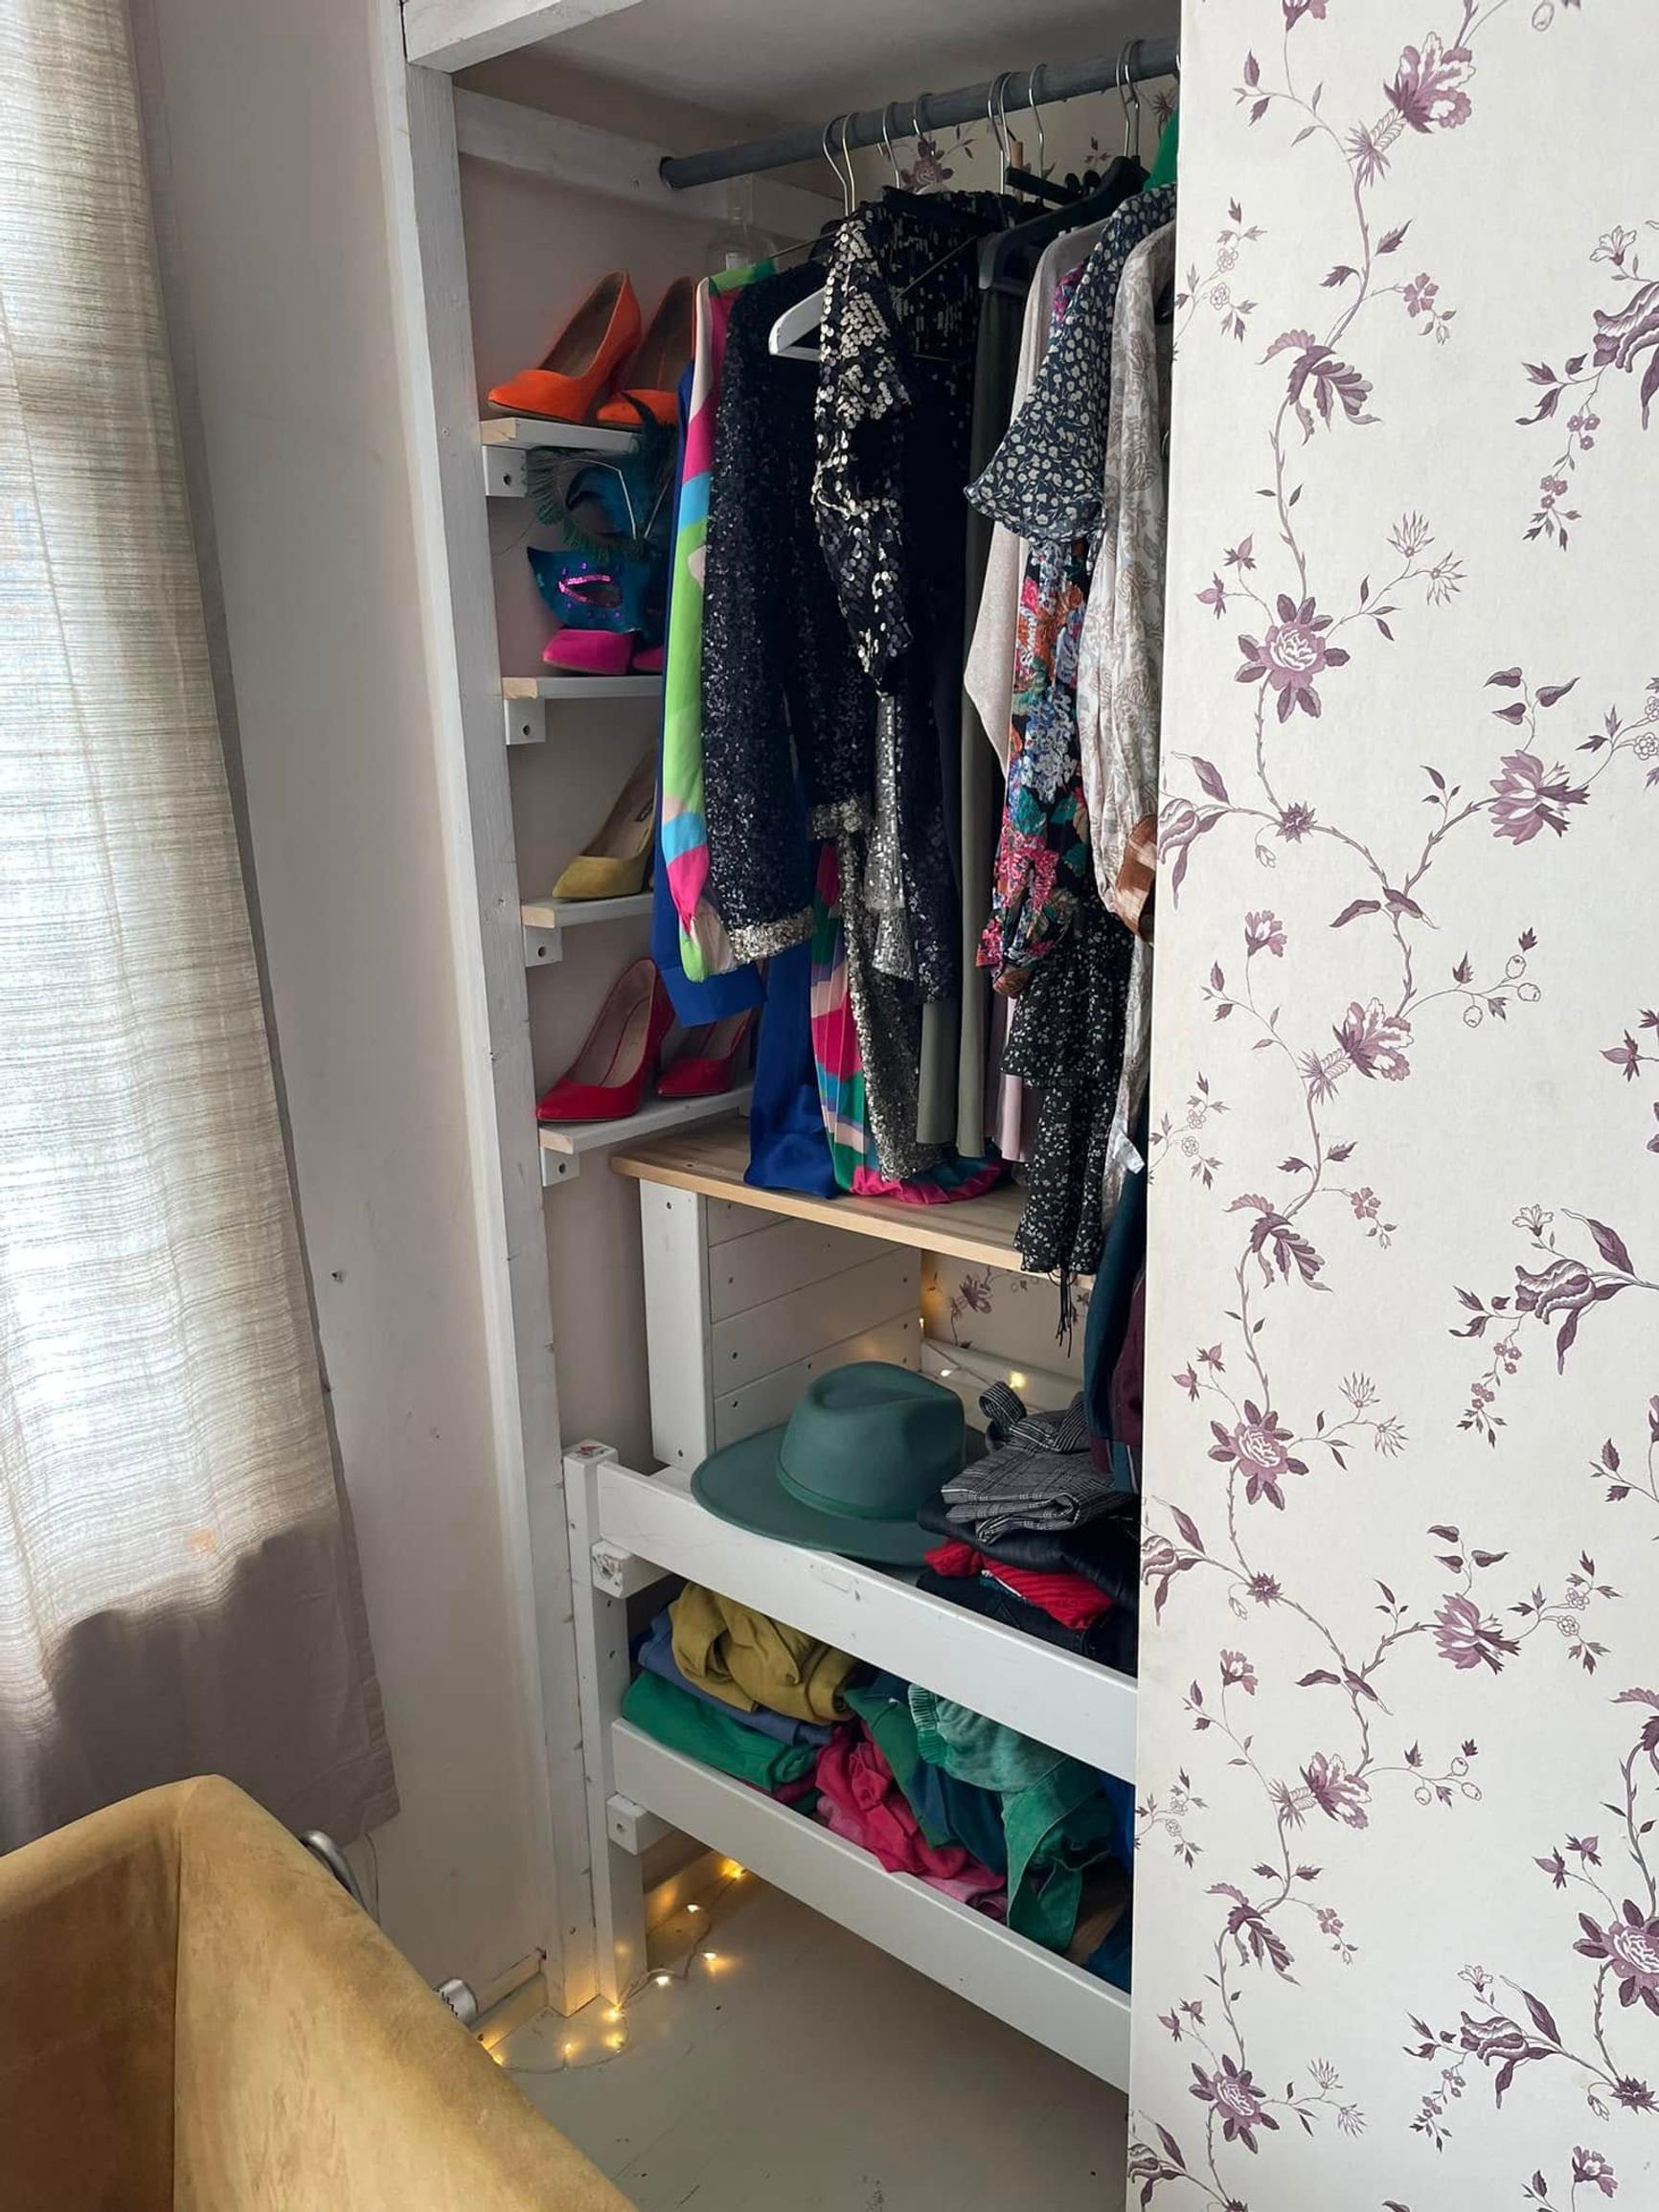
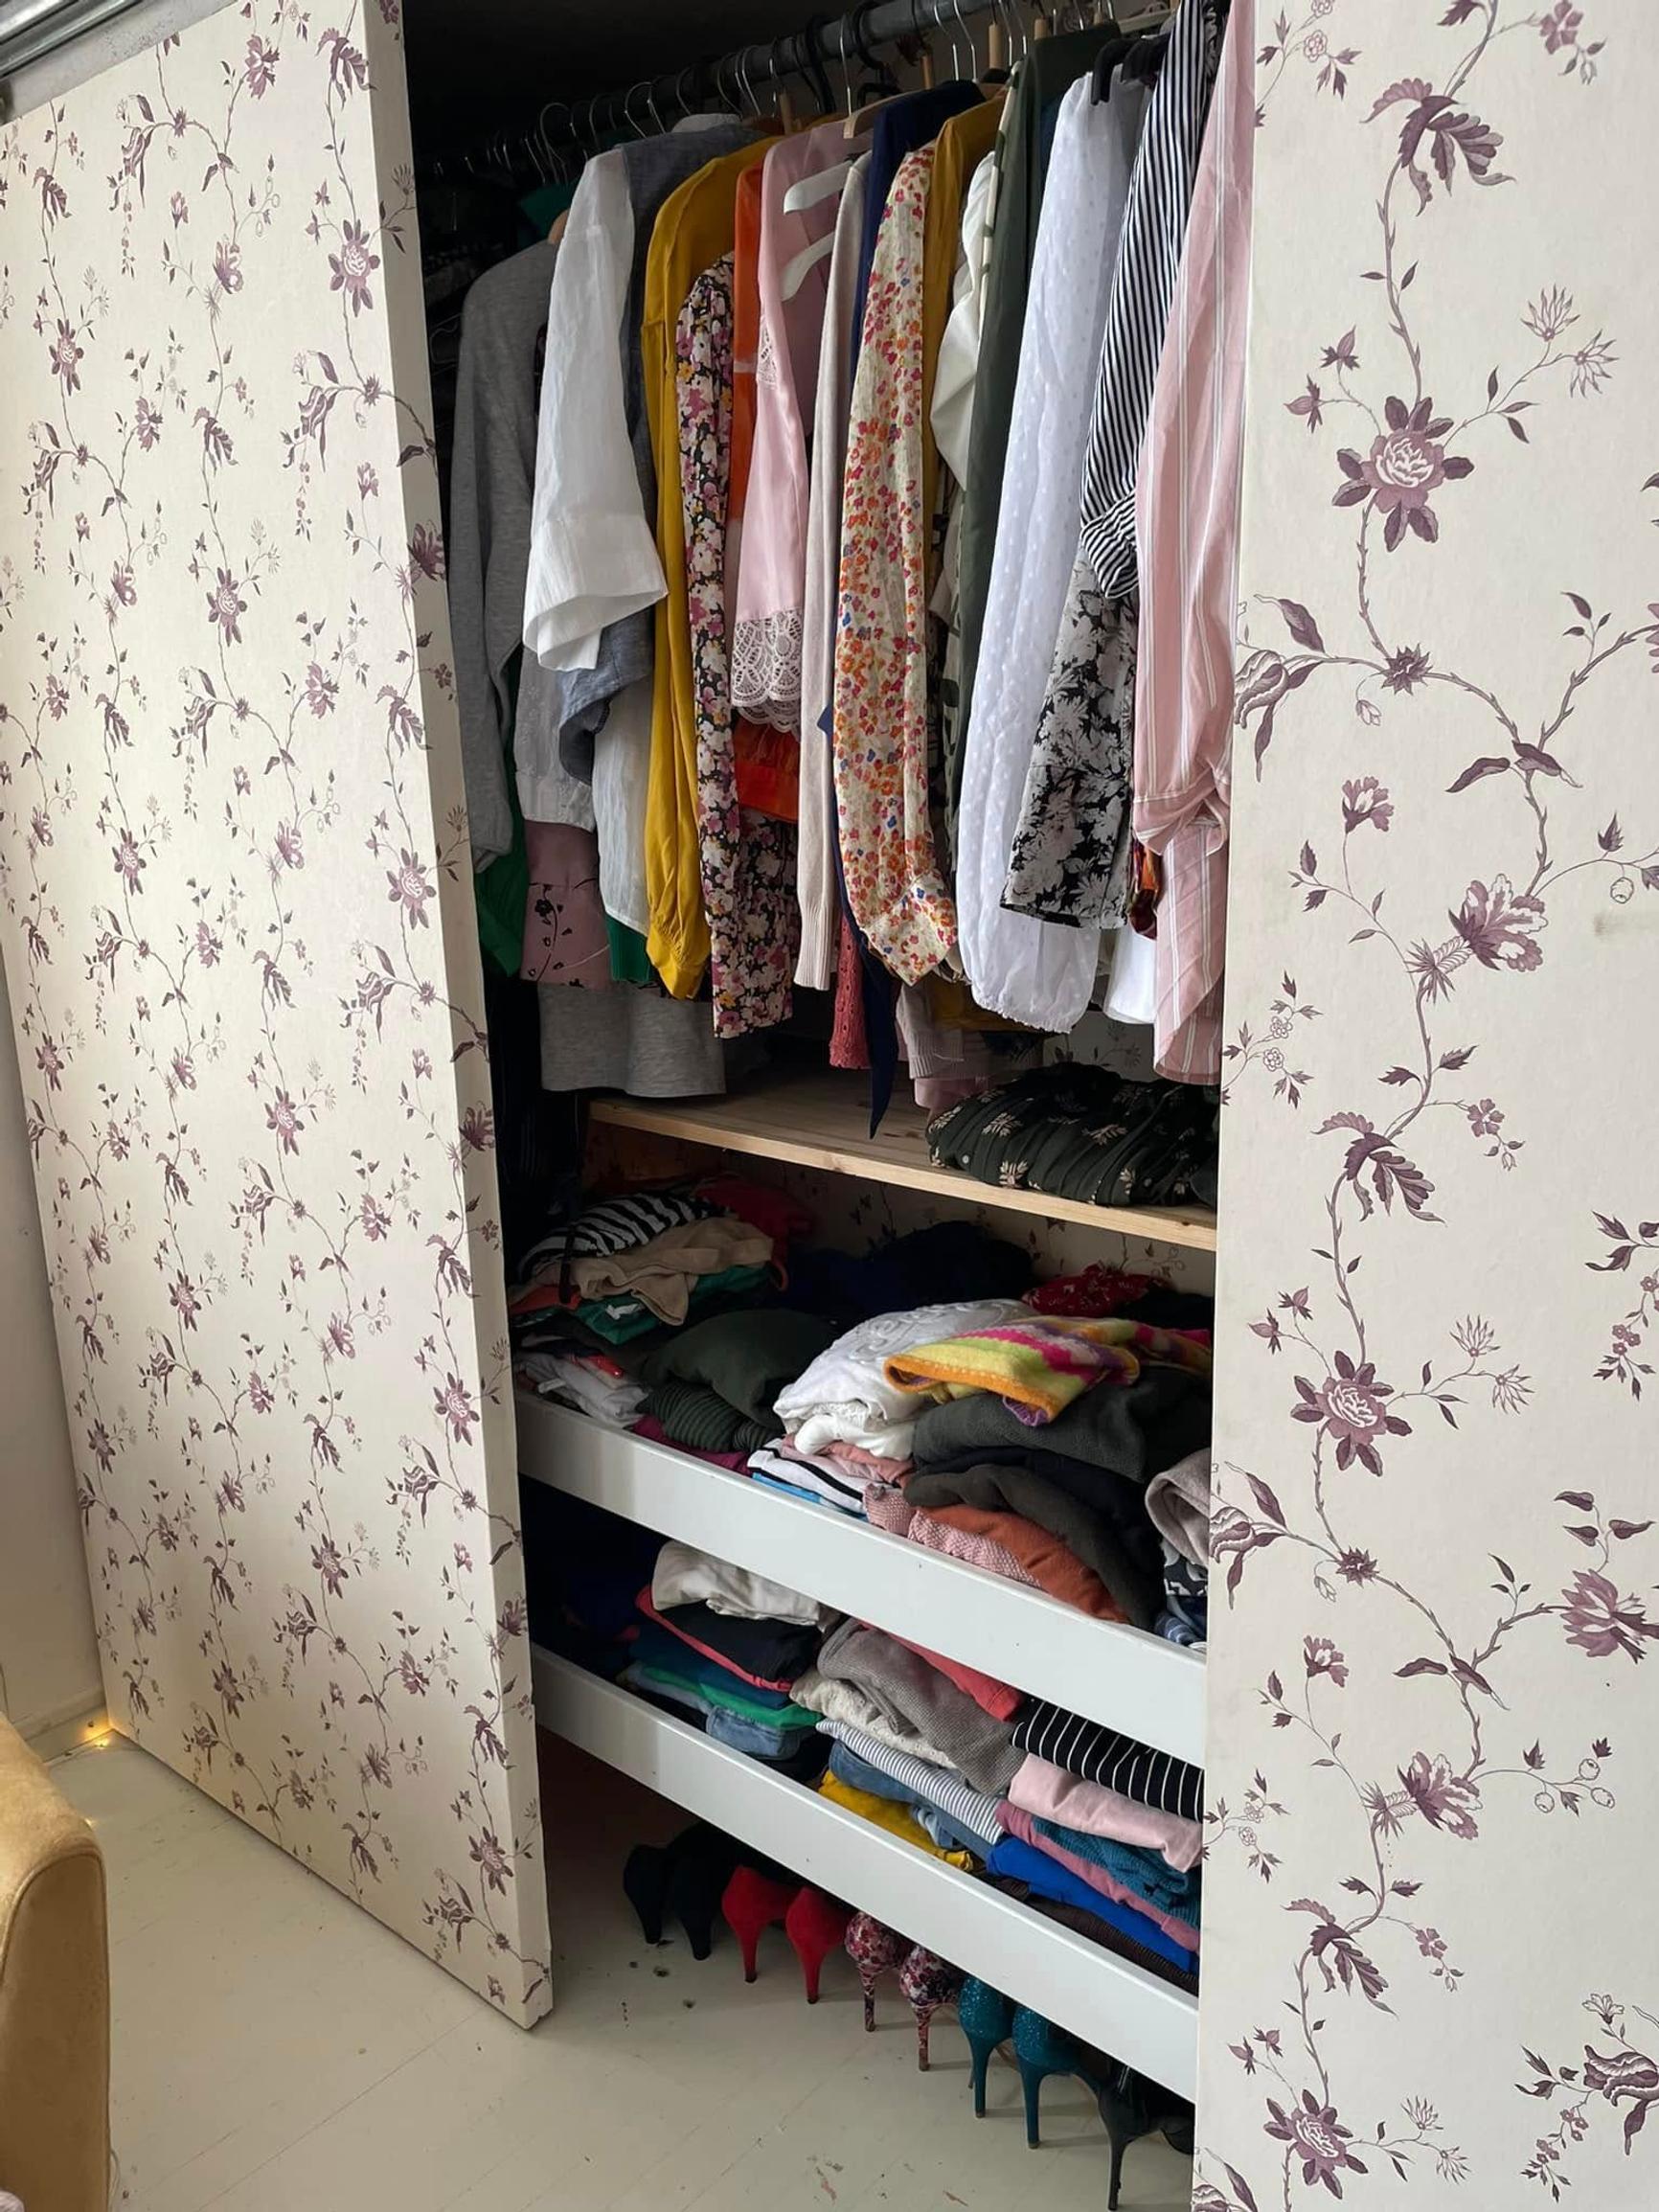
The closet already had a long rod for hanging clothes. I used the bunk bed frame to create new open shelves in the lower portion of the closet, where the mesh baskets used to be. The topmost shelf is a piece of glued-laminated board that used to be in the kids’ toy cabinet, which we also dismantled at the same time.
After I cut the shelves, I had some leftover pieces from the bed, which I attached to the inside wall of the closet for my wife’s high heels. We also installed electric string lights inside the closet to make it easier to see the clothes.


How long did the work take and what did it cost?
It was finished the same evening. Overall, planning and building took only a few hours.
I used only the materials we already had. Later, we added a white drawer unit that our child no longer needed.
The only thing I bought new was a bag of loose screws, which cost about 85 cents.