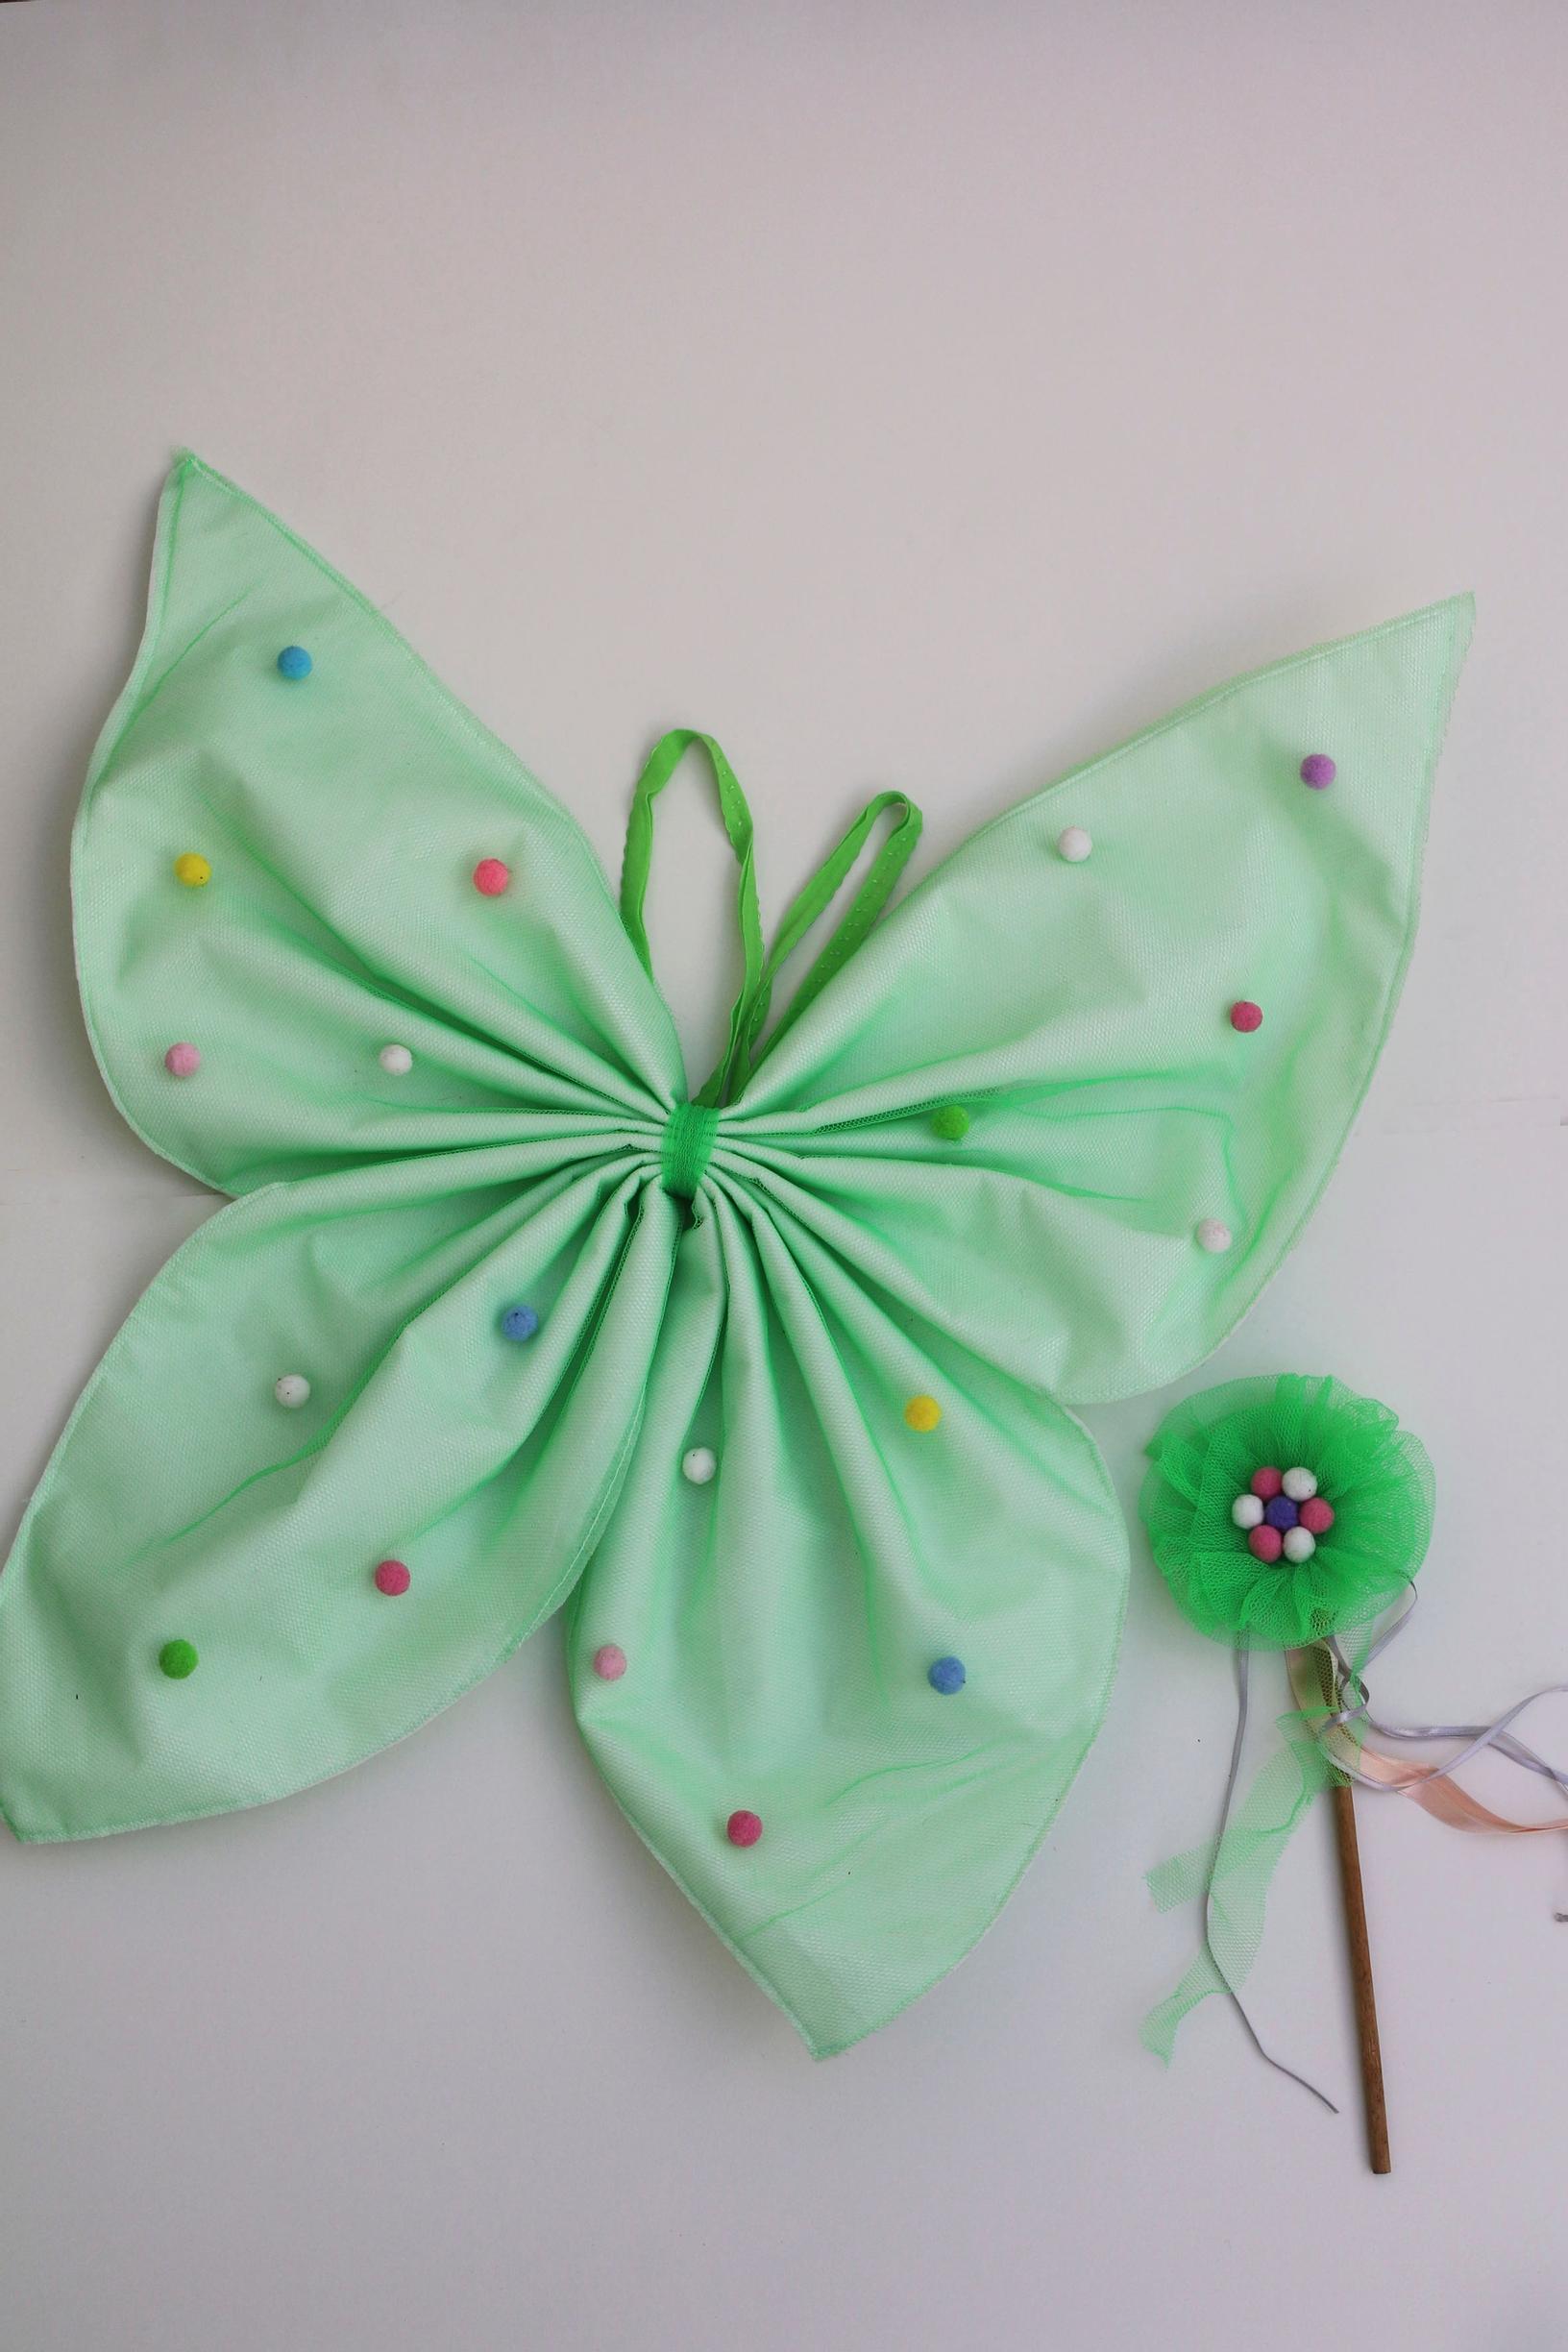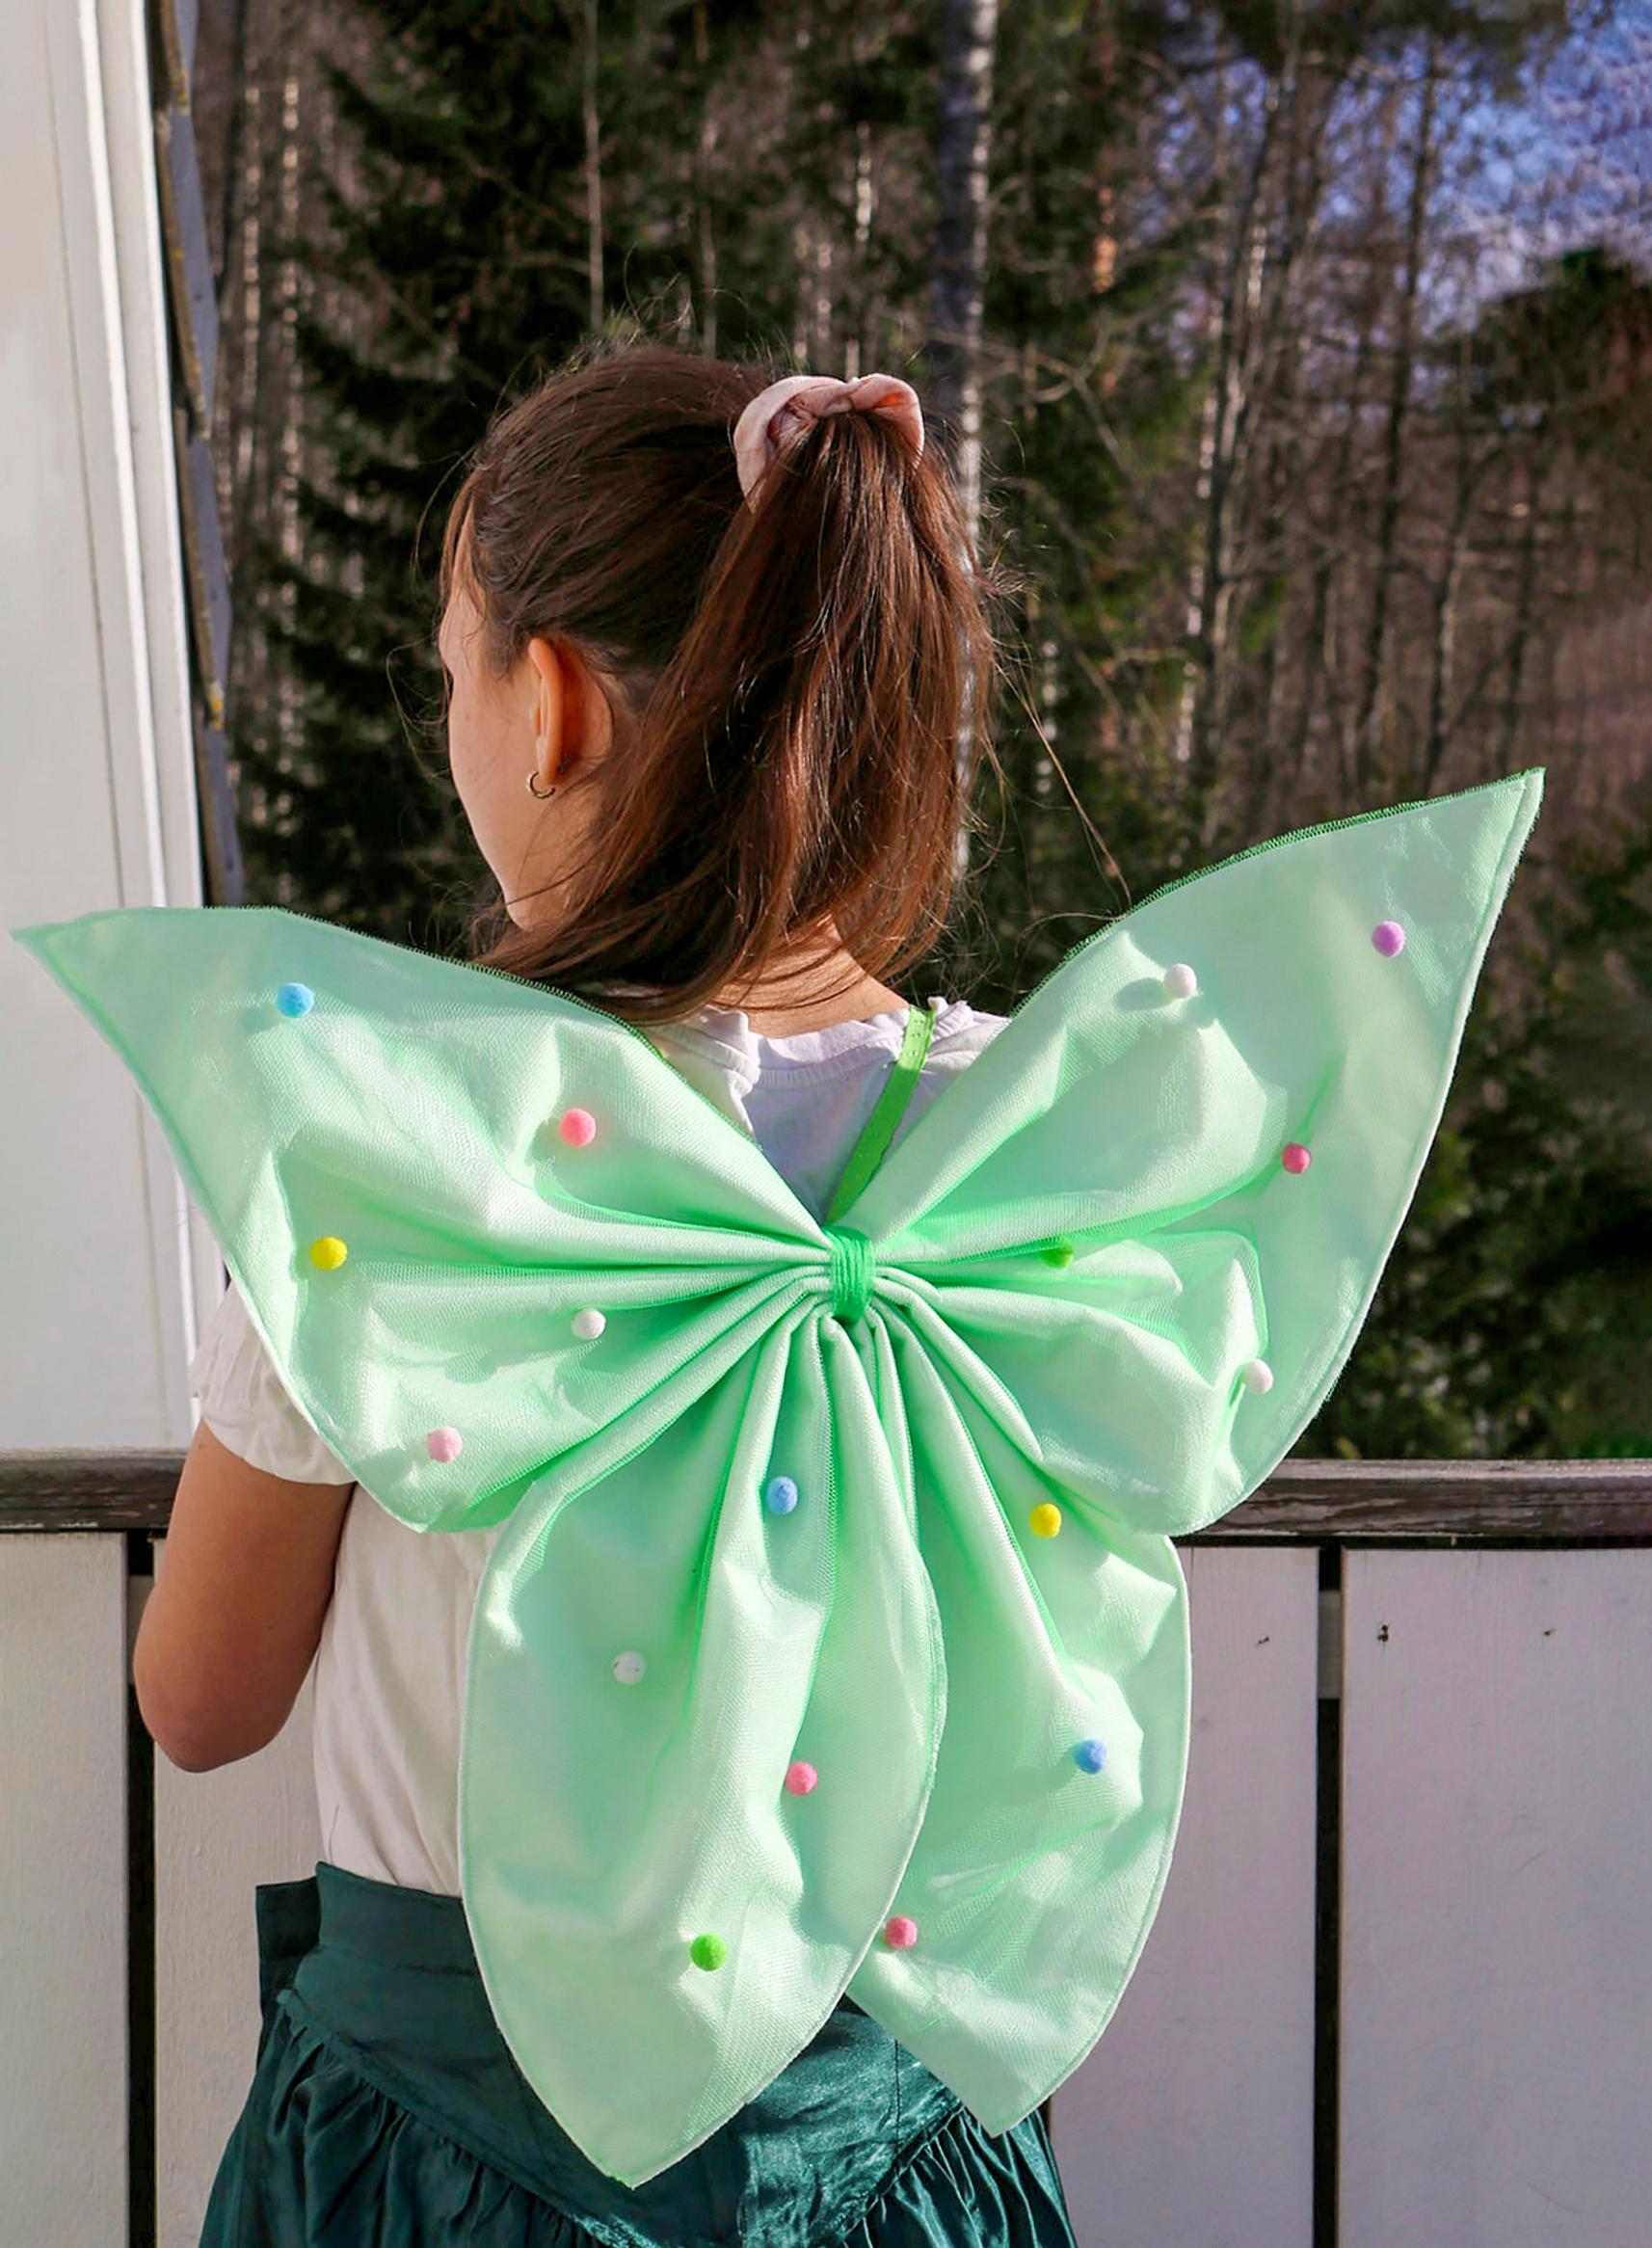
A sprinkle of fairy dust! Adorable fairy wings made easy with a disposable sheet and tulle—see our tutorial
These fairy wings gain their volume from layers of a disposable sheet folded inside the tulle. You’ll only need to run a few straight seams on the sewing machine.
Fairy wings—instructions:
Disposable sheet, 240 × 140 cm
70 cm of tulle (about 145 cm wide)
Soft mini pompoms or other embellishments
Narrow elastic for shoulder straps
Water-soluble marking pen
Hot glue gun and glue sticks
Sewing machine and basic sewing supplies
Fairy wings—instructions:
The sample wings measure about 55 cm tall and 48 cm wide.
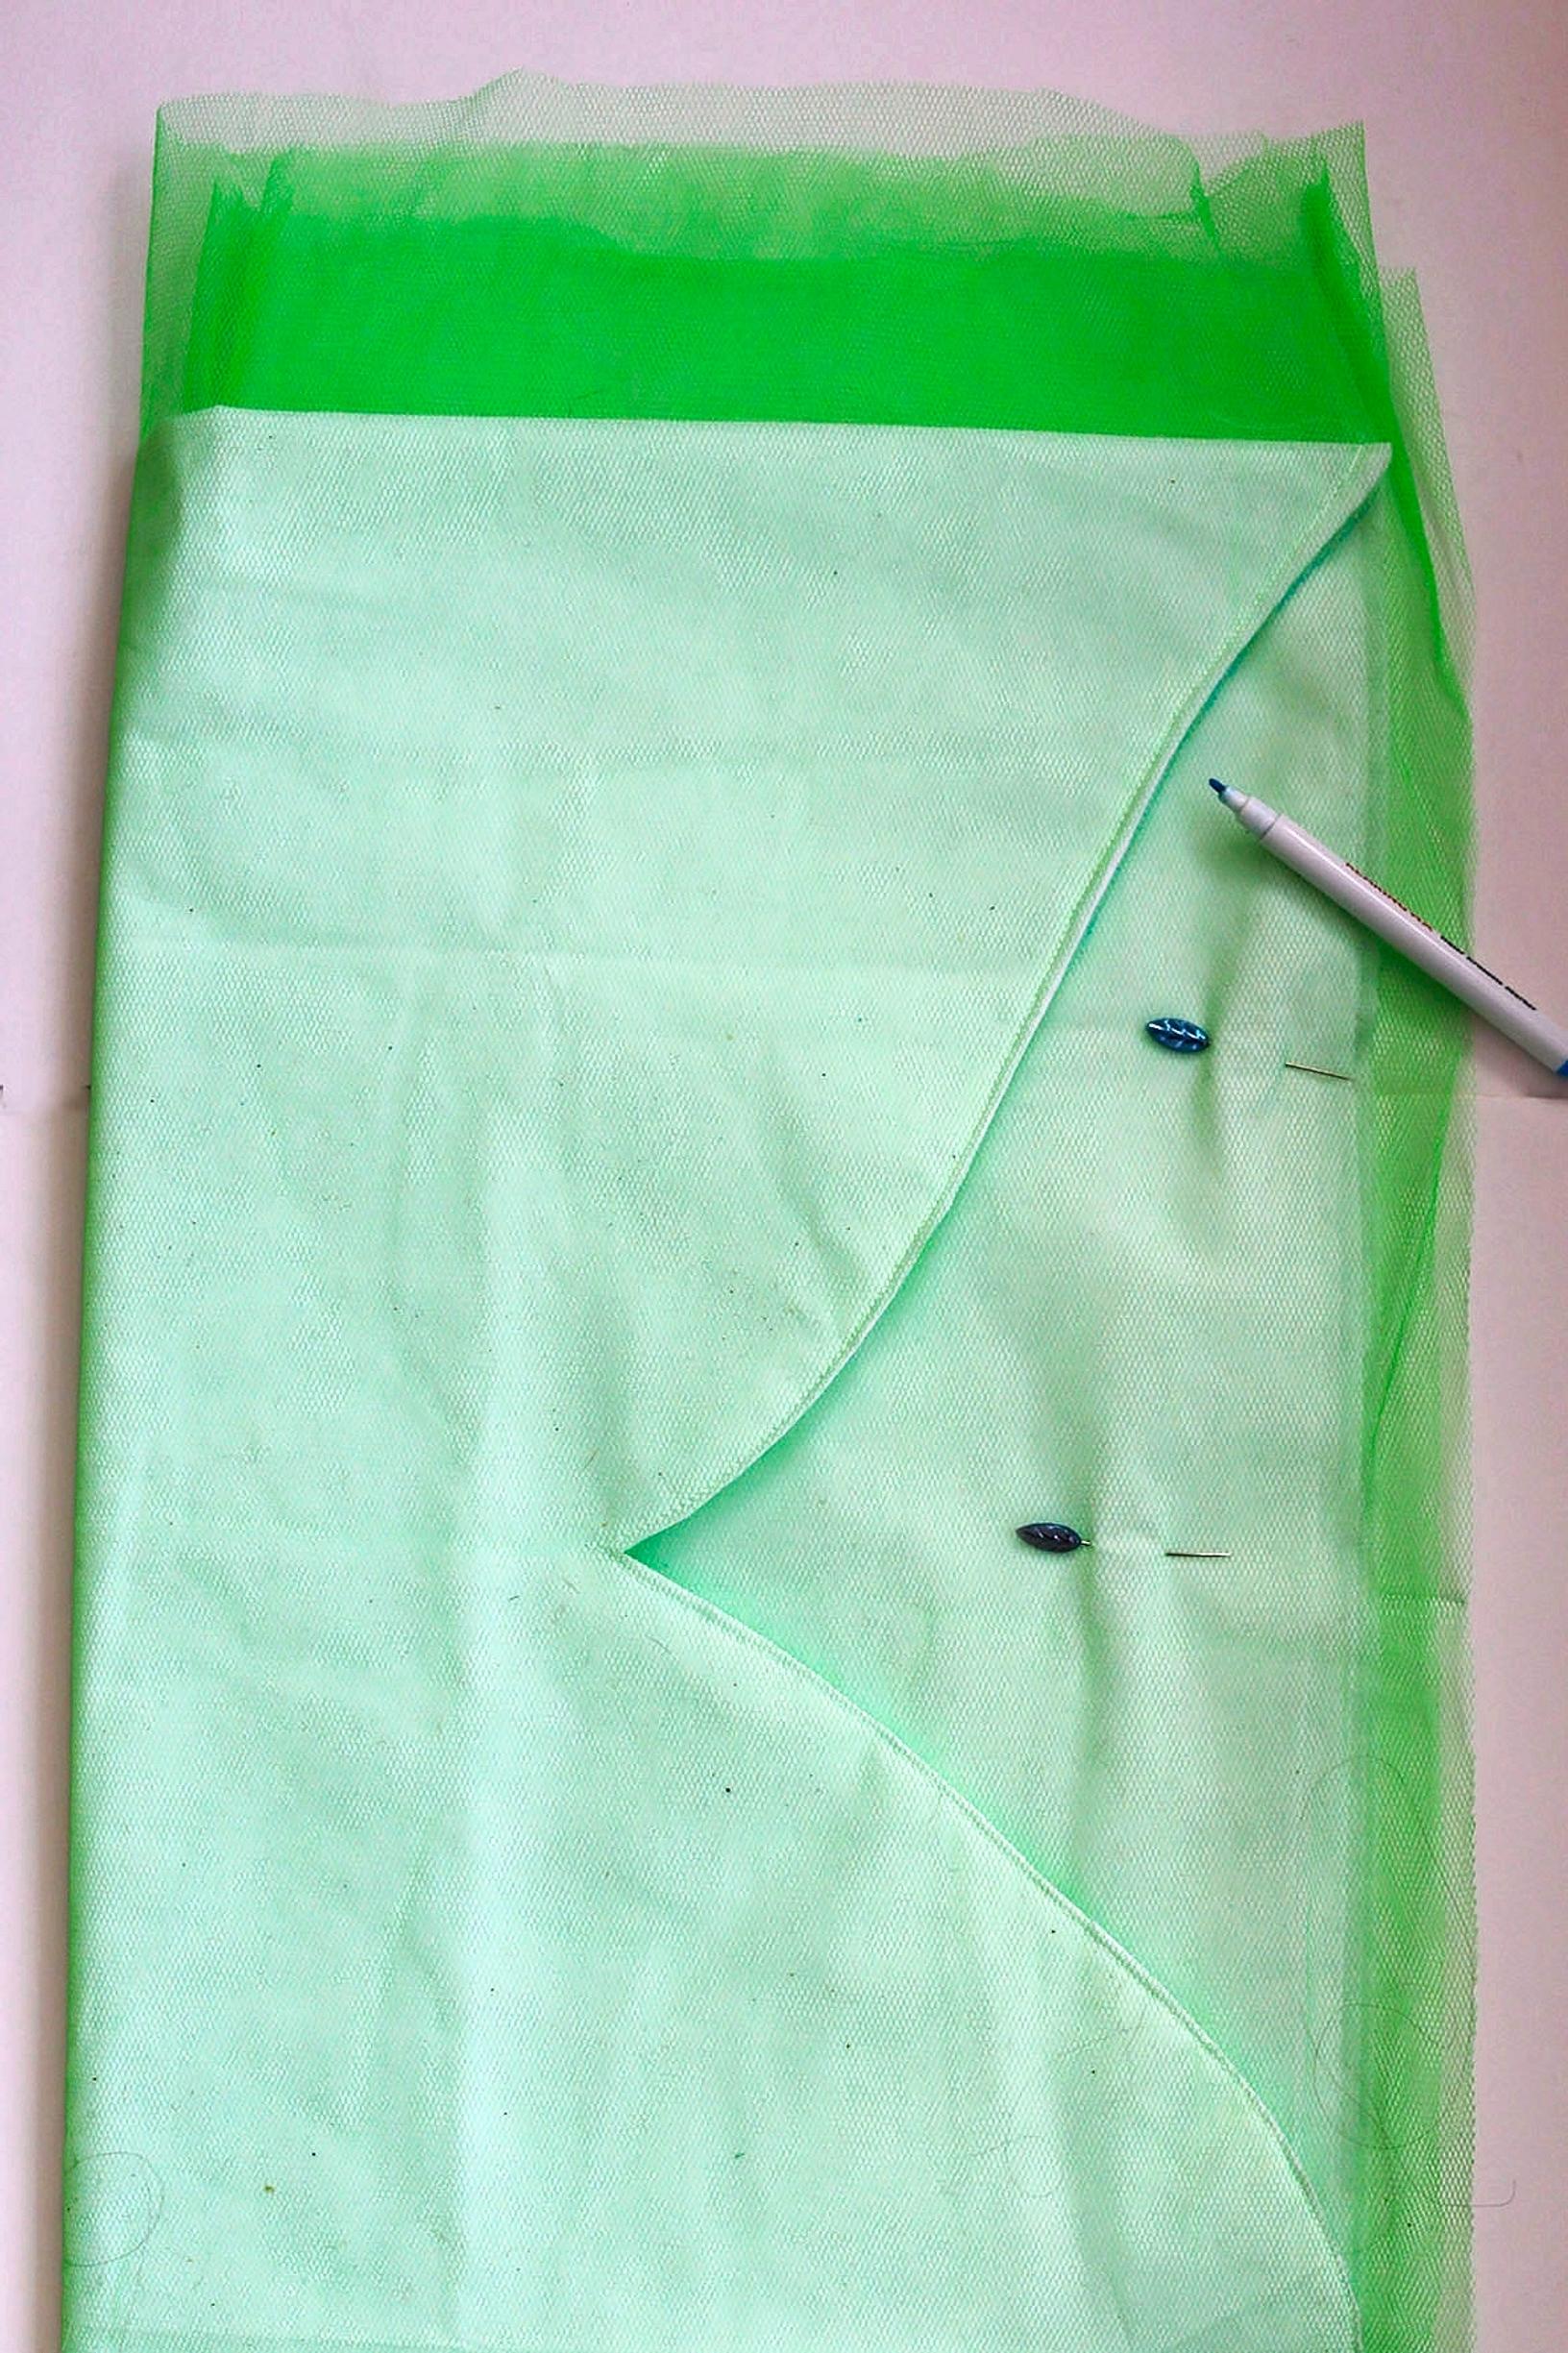
1. Fold the disposable sheet in half lengthwise, then in half widthwise, and then once more lengthwise (you’ll end up with a piece about 70 × 60 cm). Fold the tulle in half widthwise.
2. Sandwich the sheet between the layers of tulle, and pin around the edges.

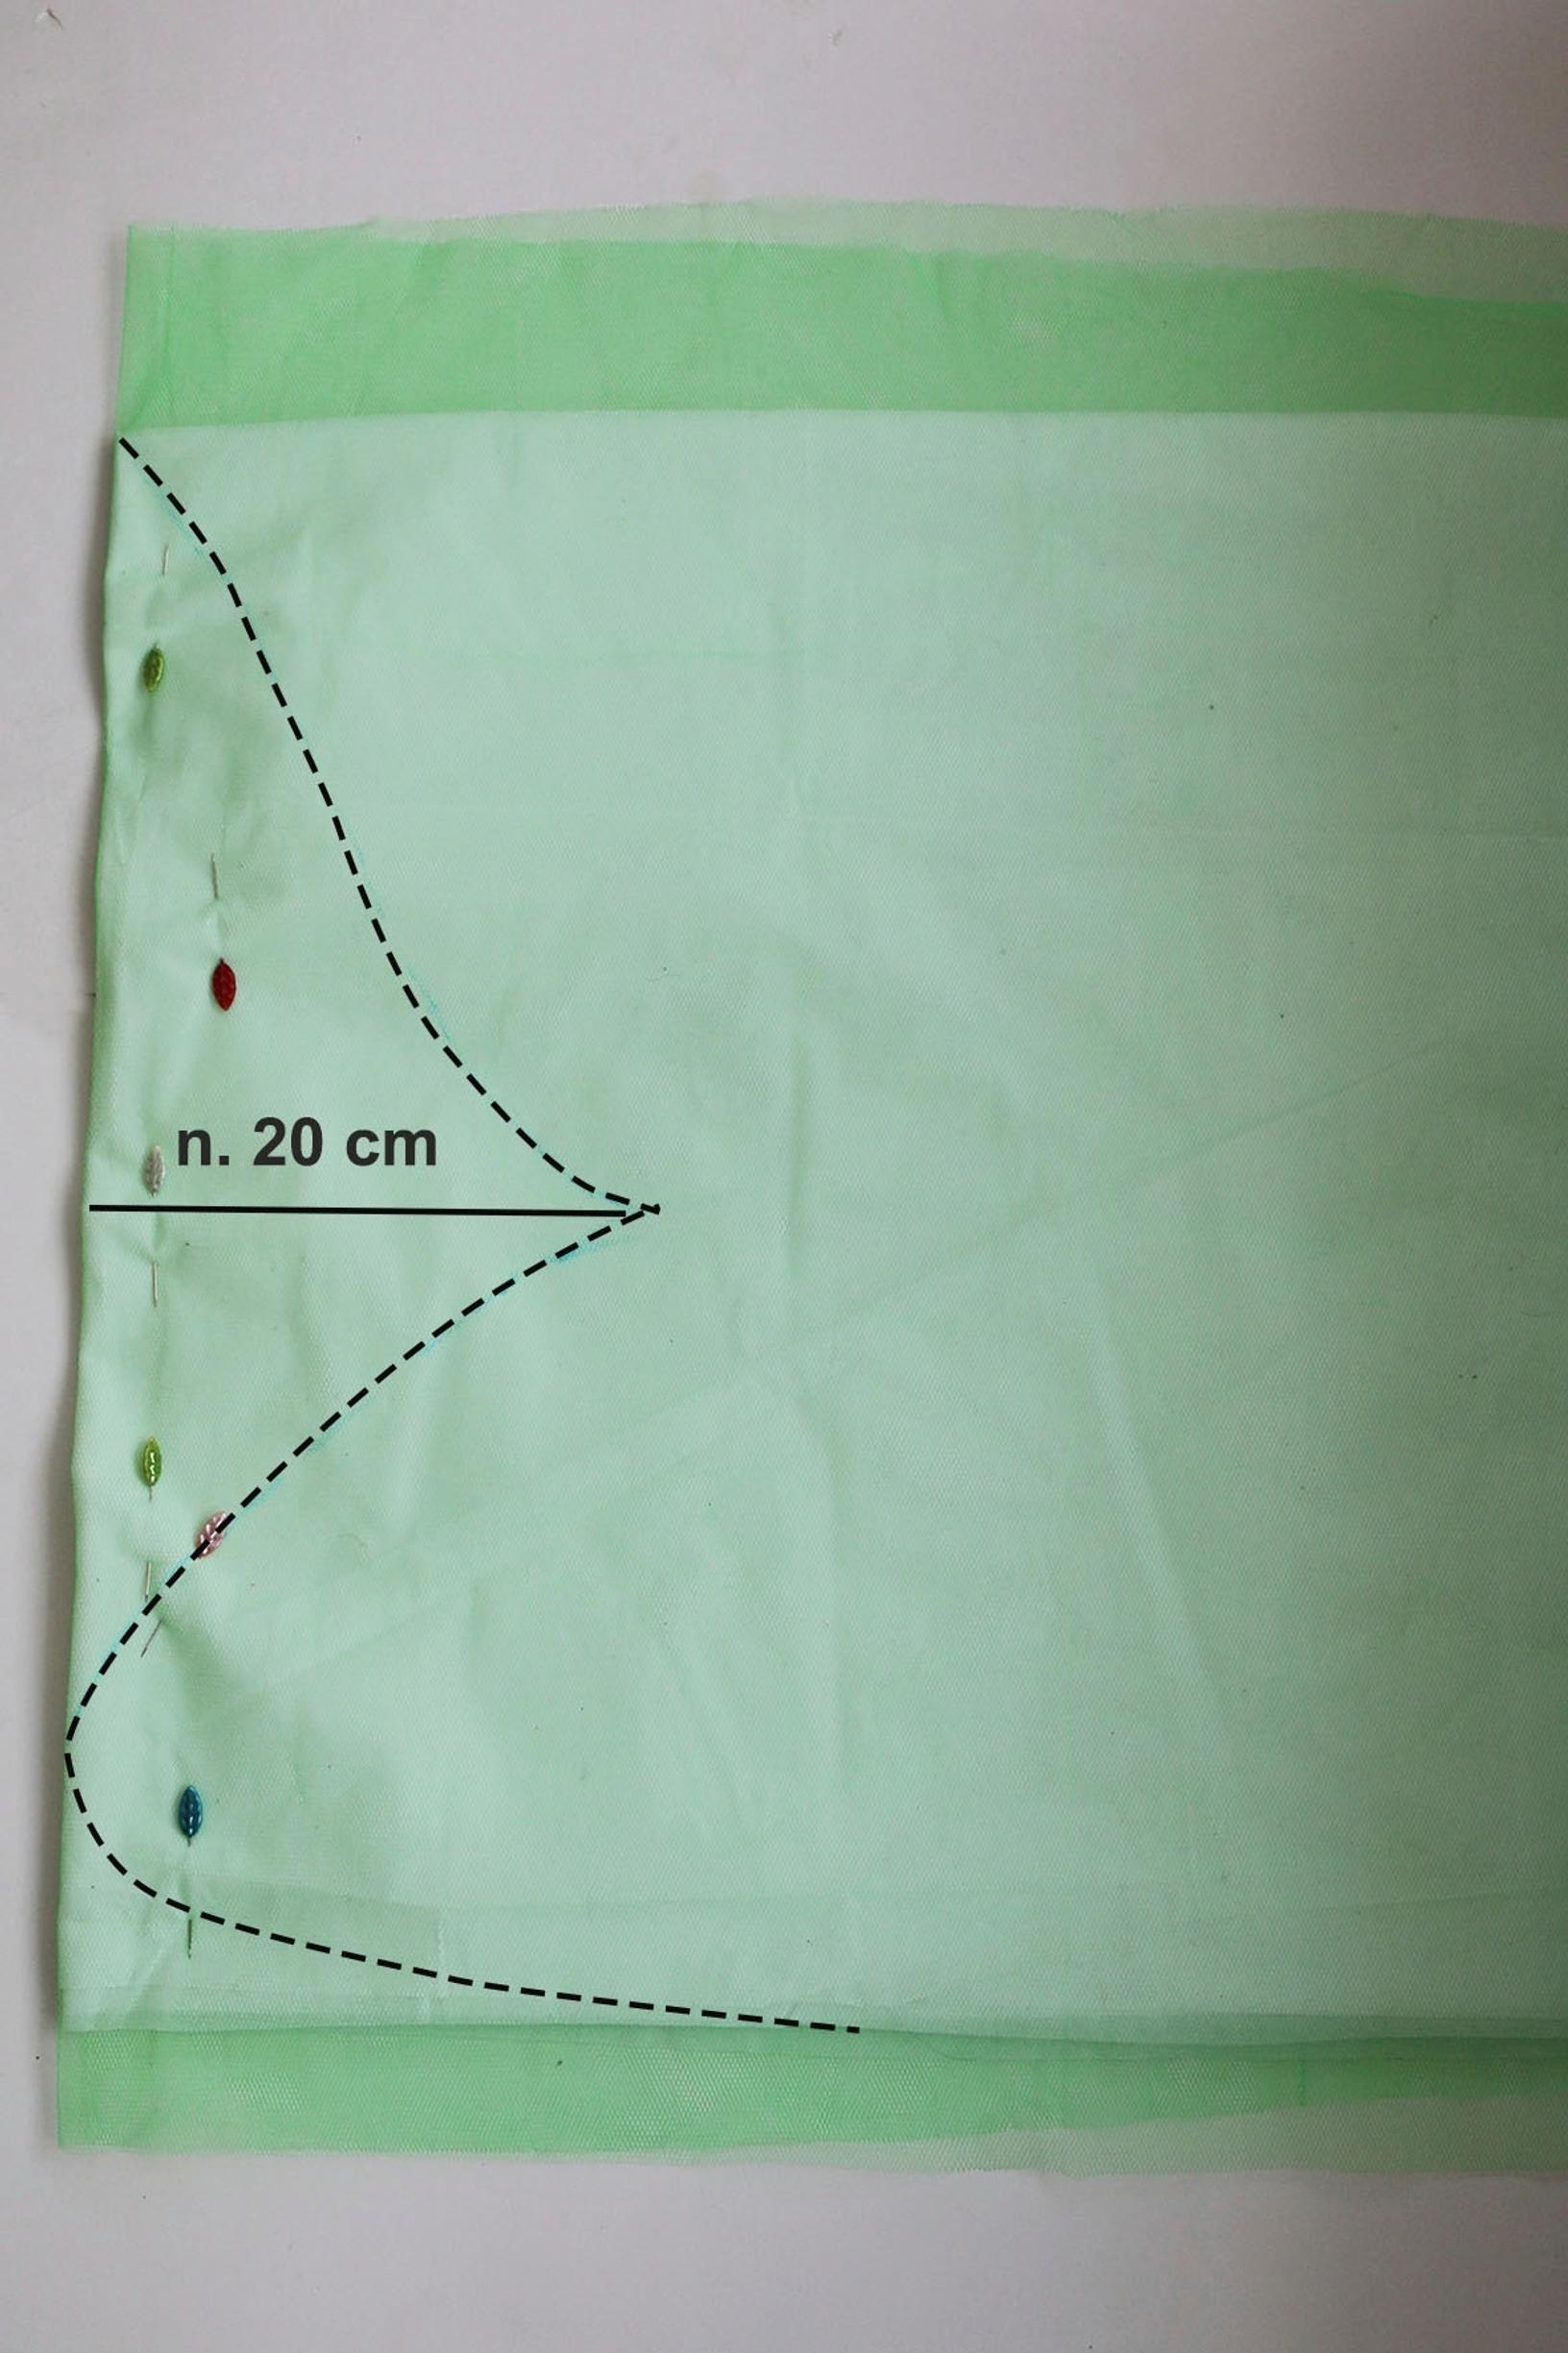
3. Draw the outline of the wings along one edge in any shape you like.

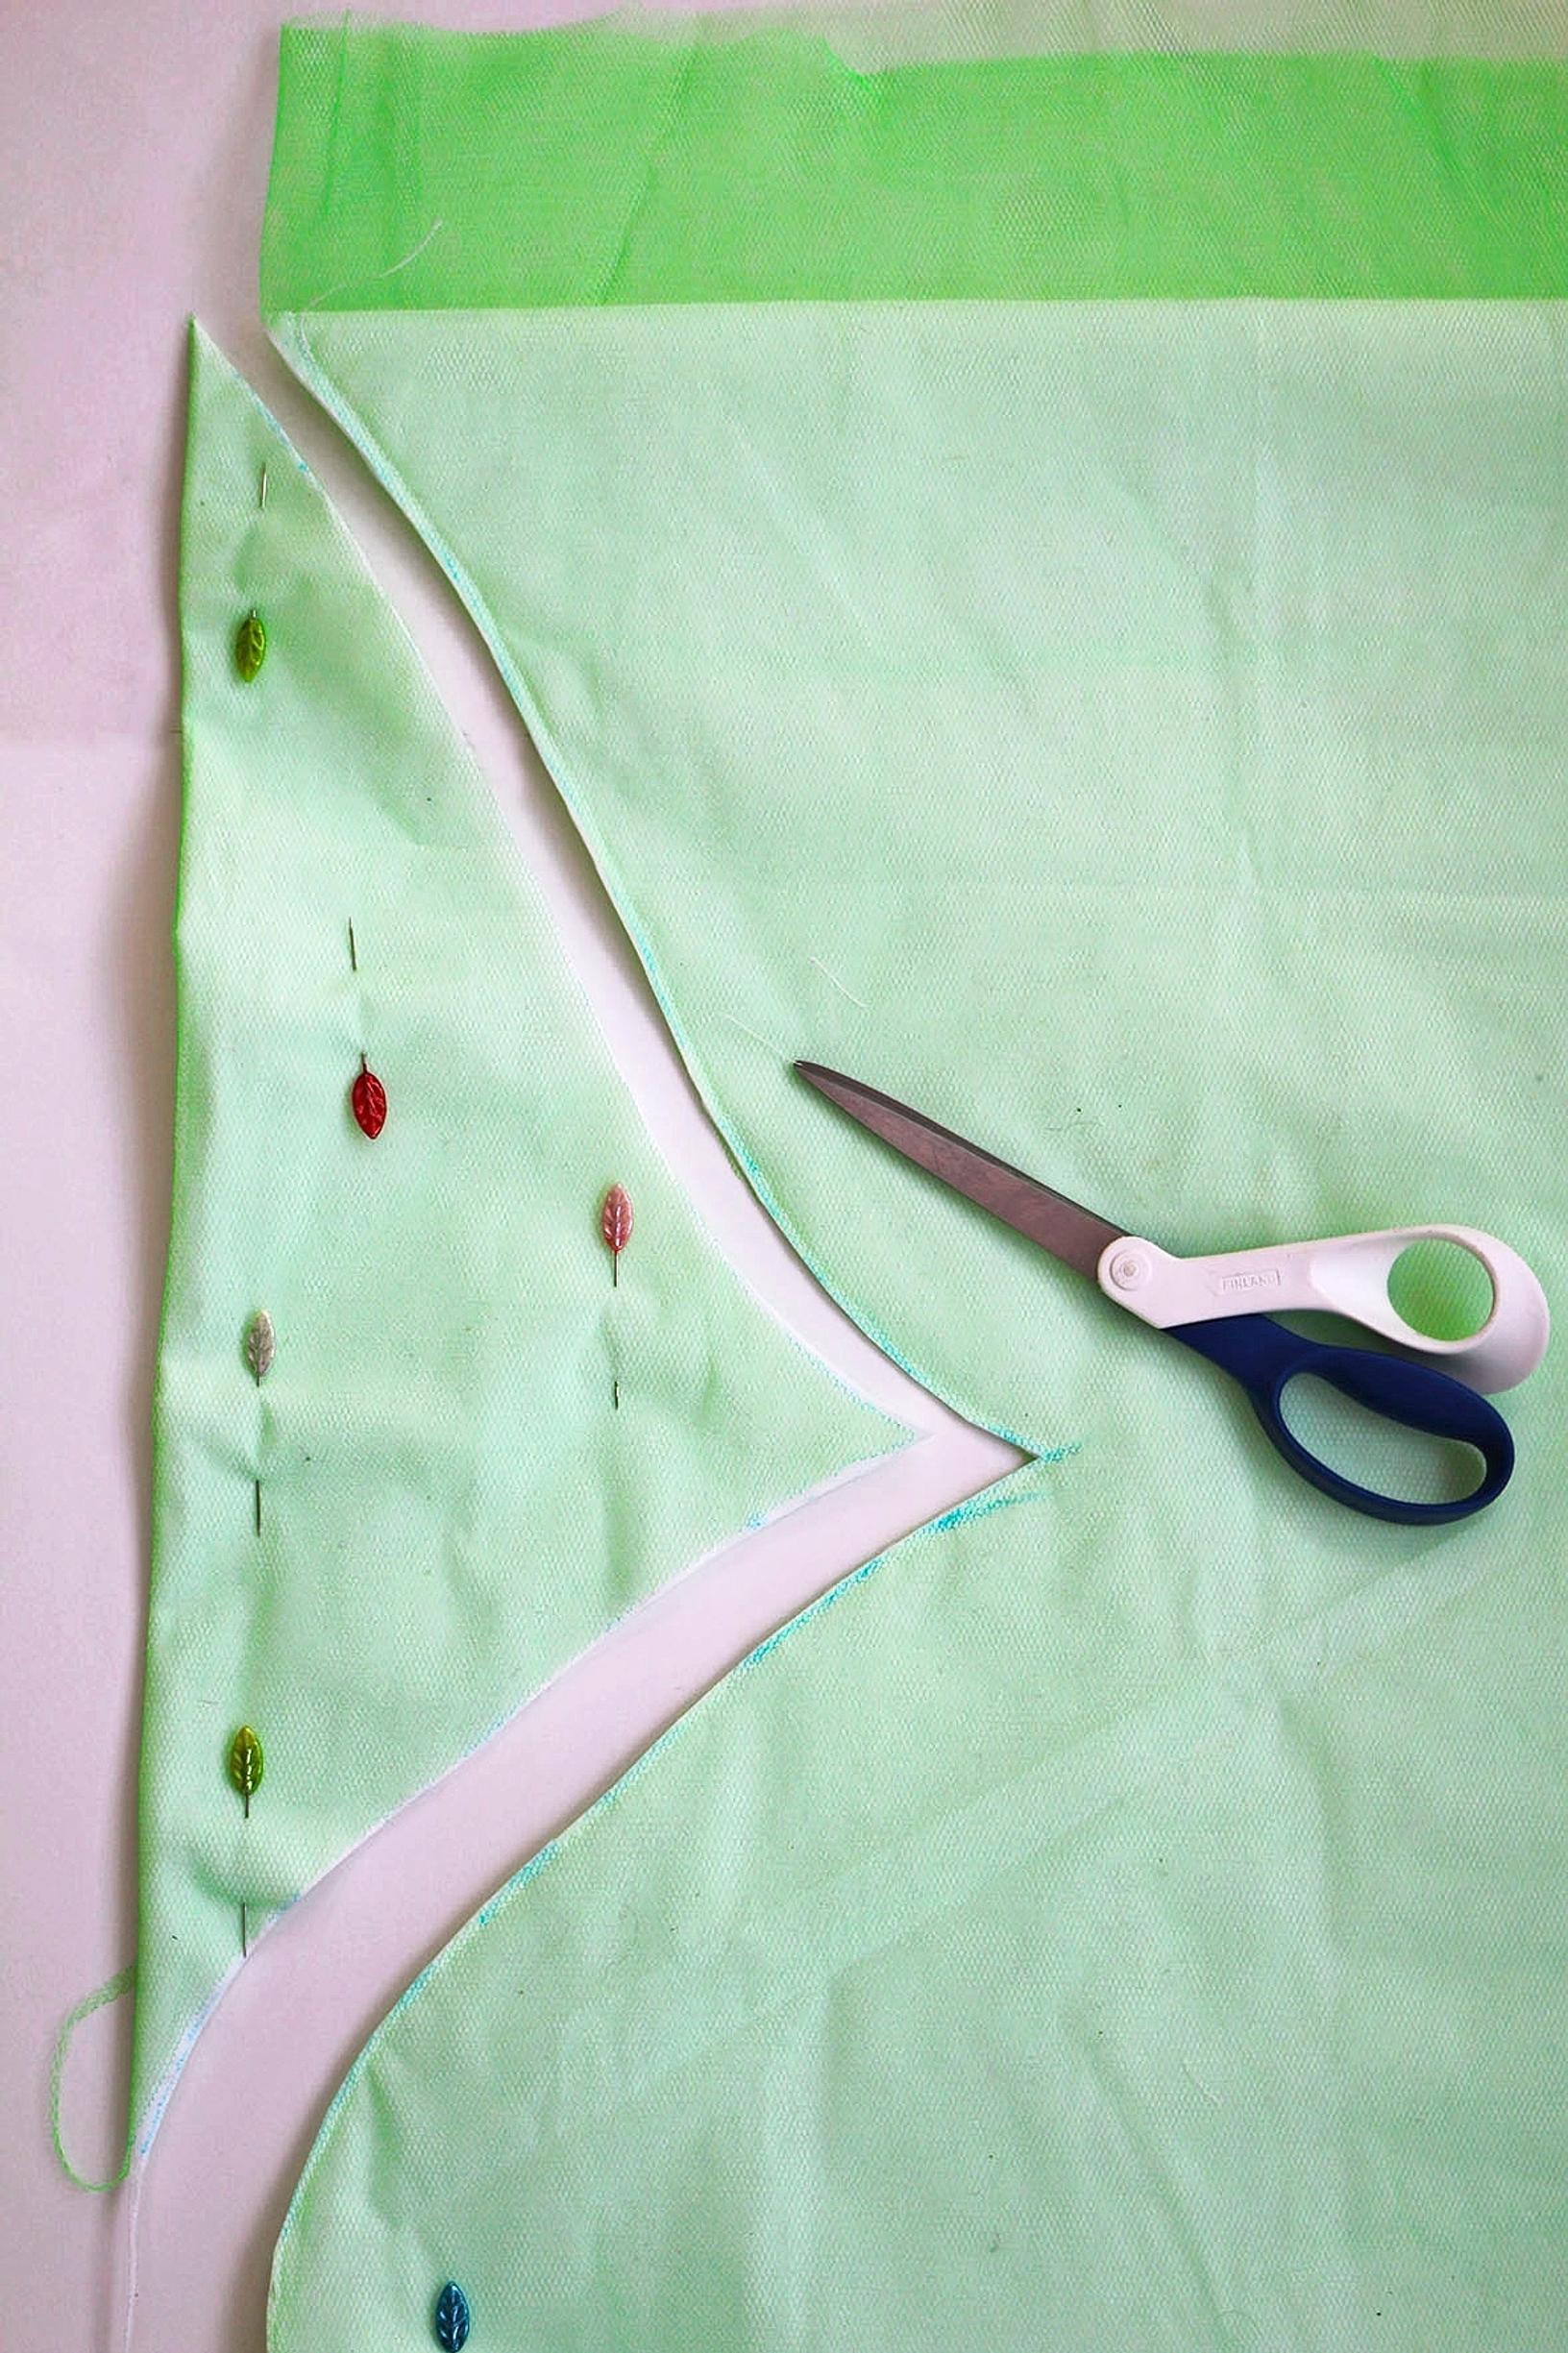
4. Use a straight stitch to sew the layers together just outside the drawn line. Trim away the excess sheet and tulle close to the seam.

5. Mirror the wing shape onto the opposite edge by folding the piece at the center. Stitch again just outside the drawn line. Then top-stitch the sheet and tulle together along the bottom and top edges. Trim the sheet and tulle close to the seam, and snip off any excess tulle at the top and bottom. If needed, wipe away pen marks with a damp cloth.

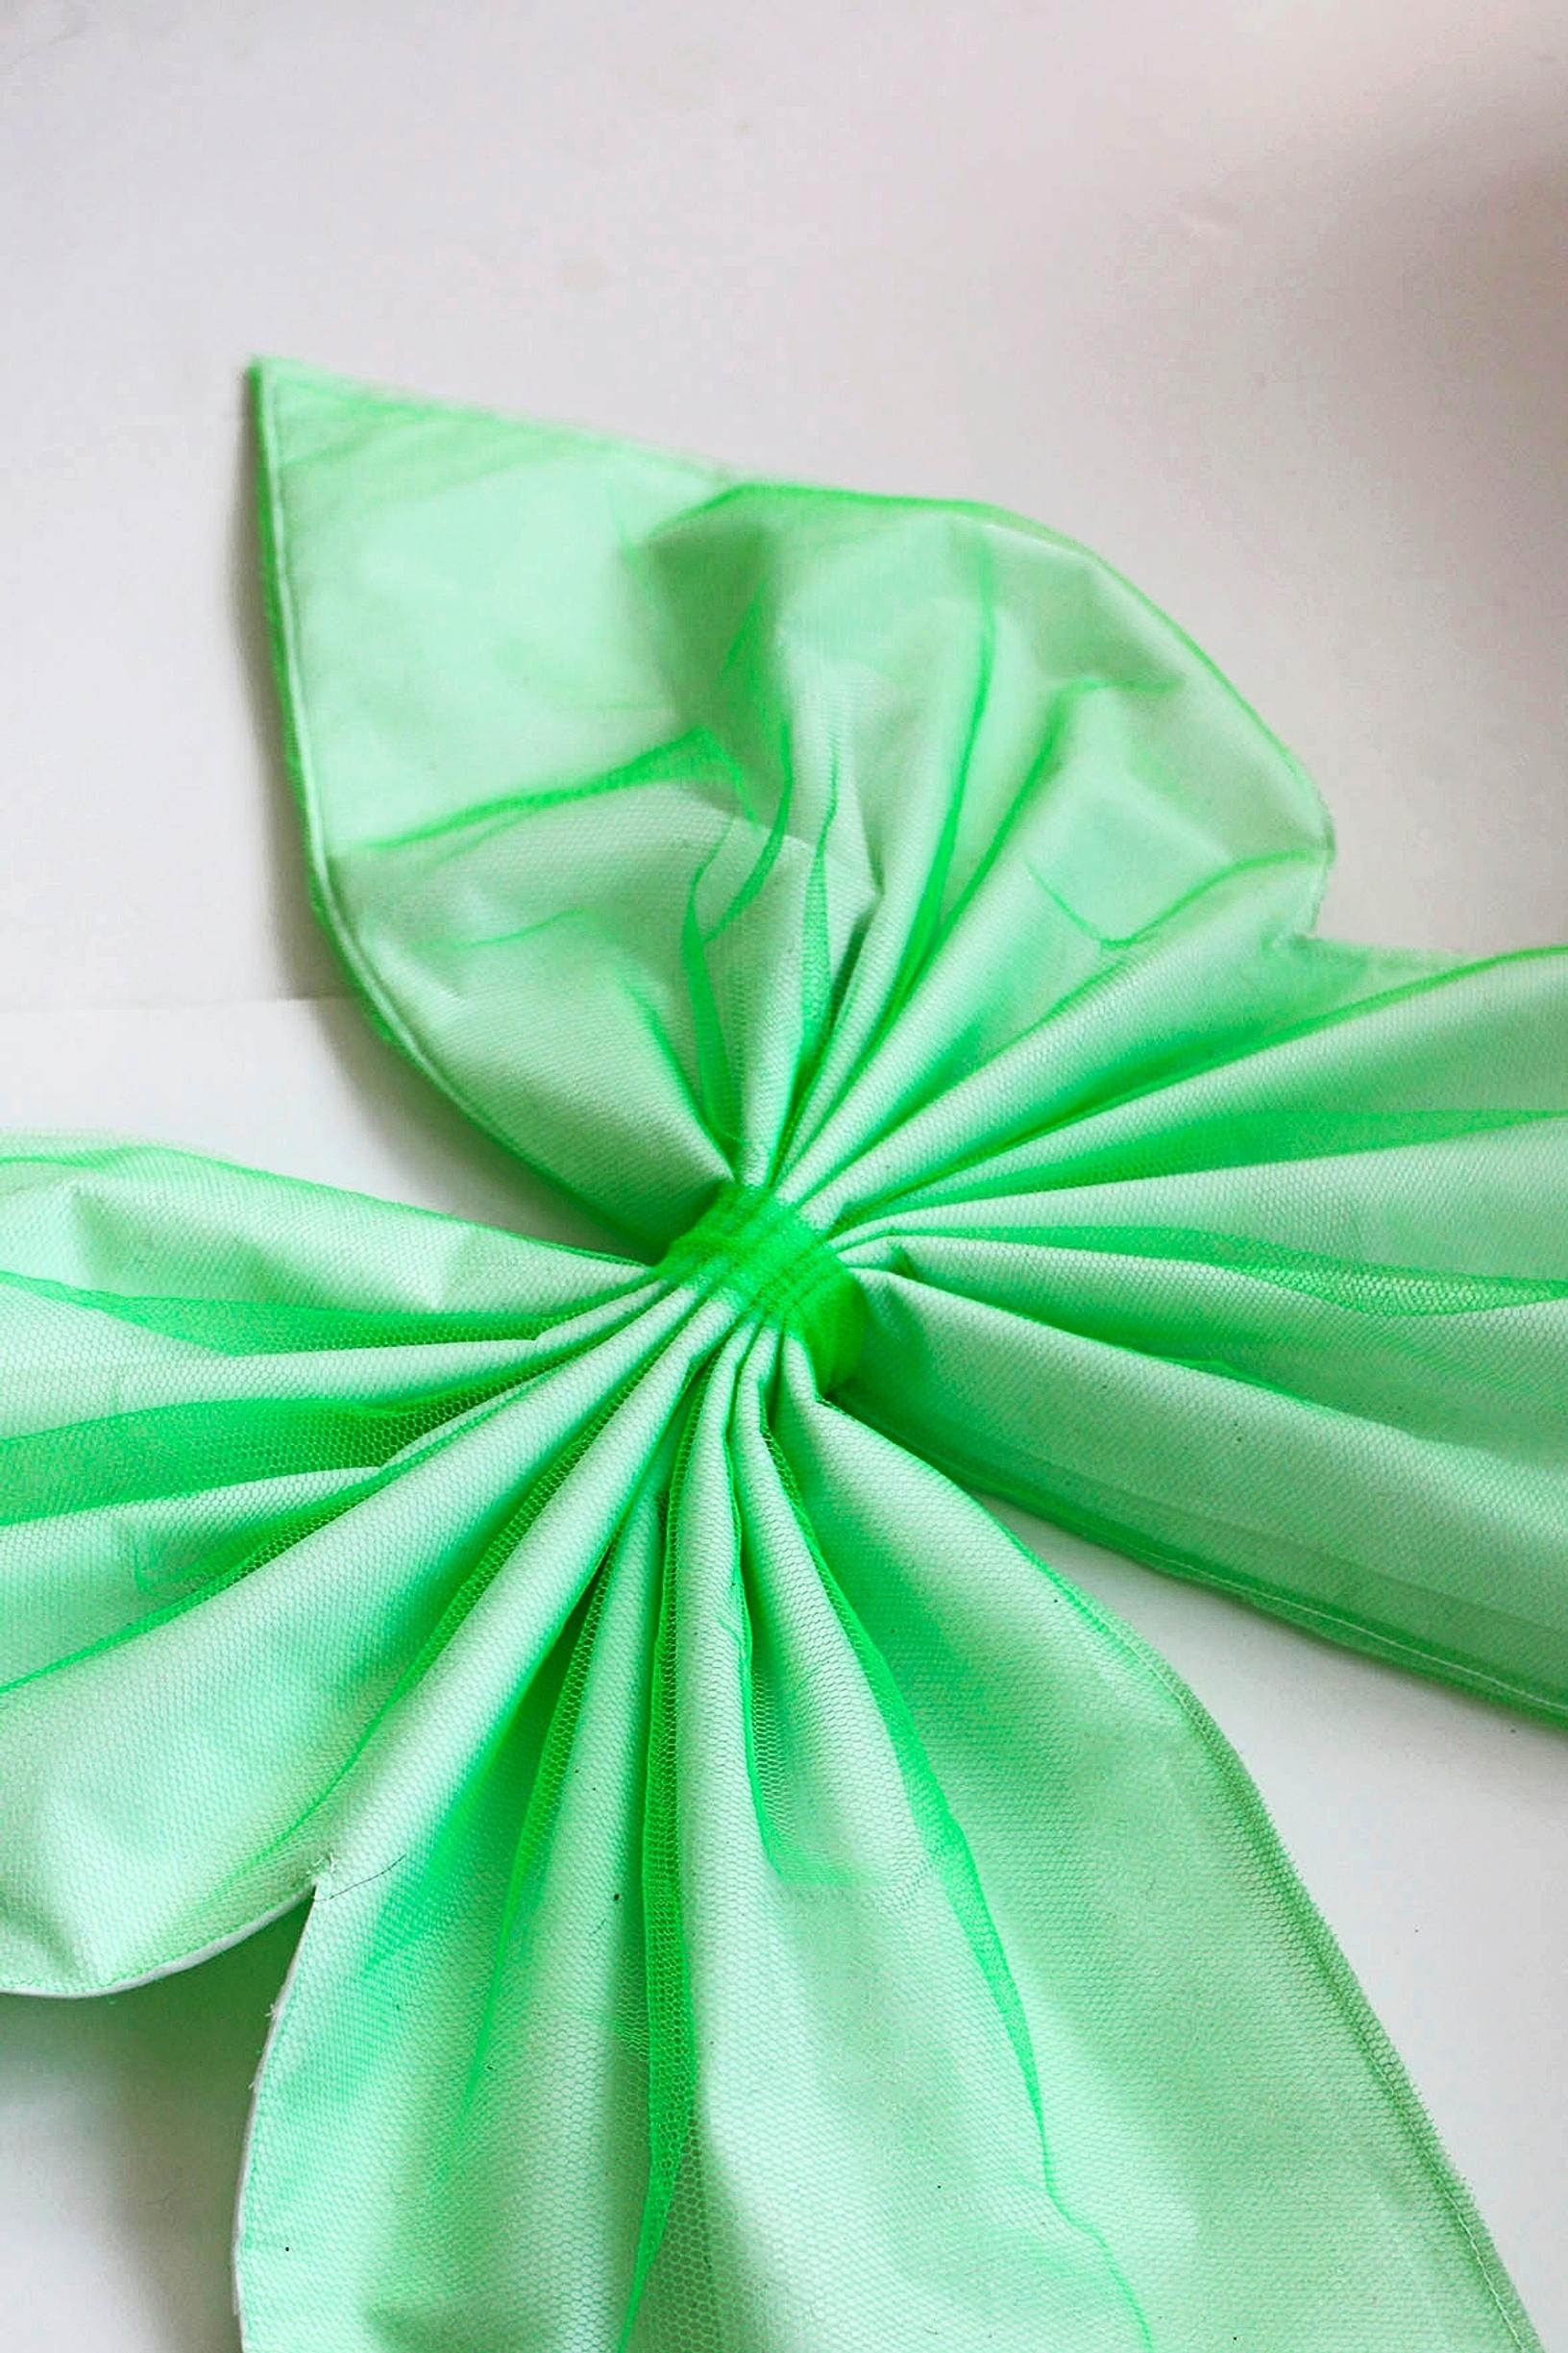
6. Cut a tying strip from the leftover tulle. Then accordion-fold the wings at the center and tie them firmly with the tulle strip, knotting it on the back side.

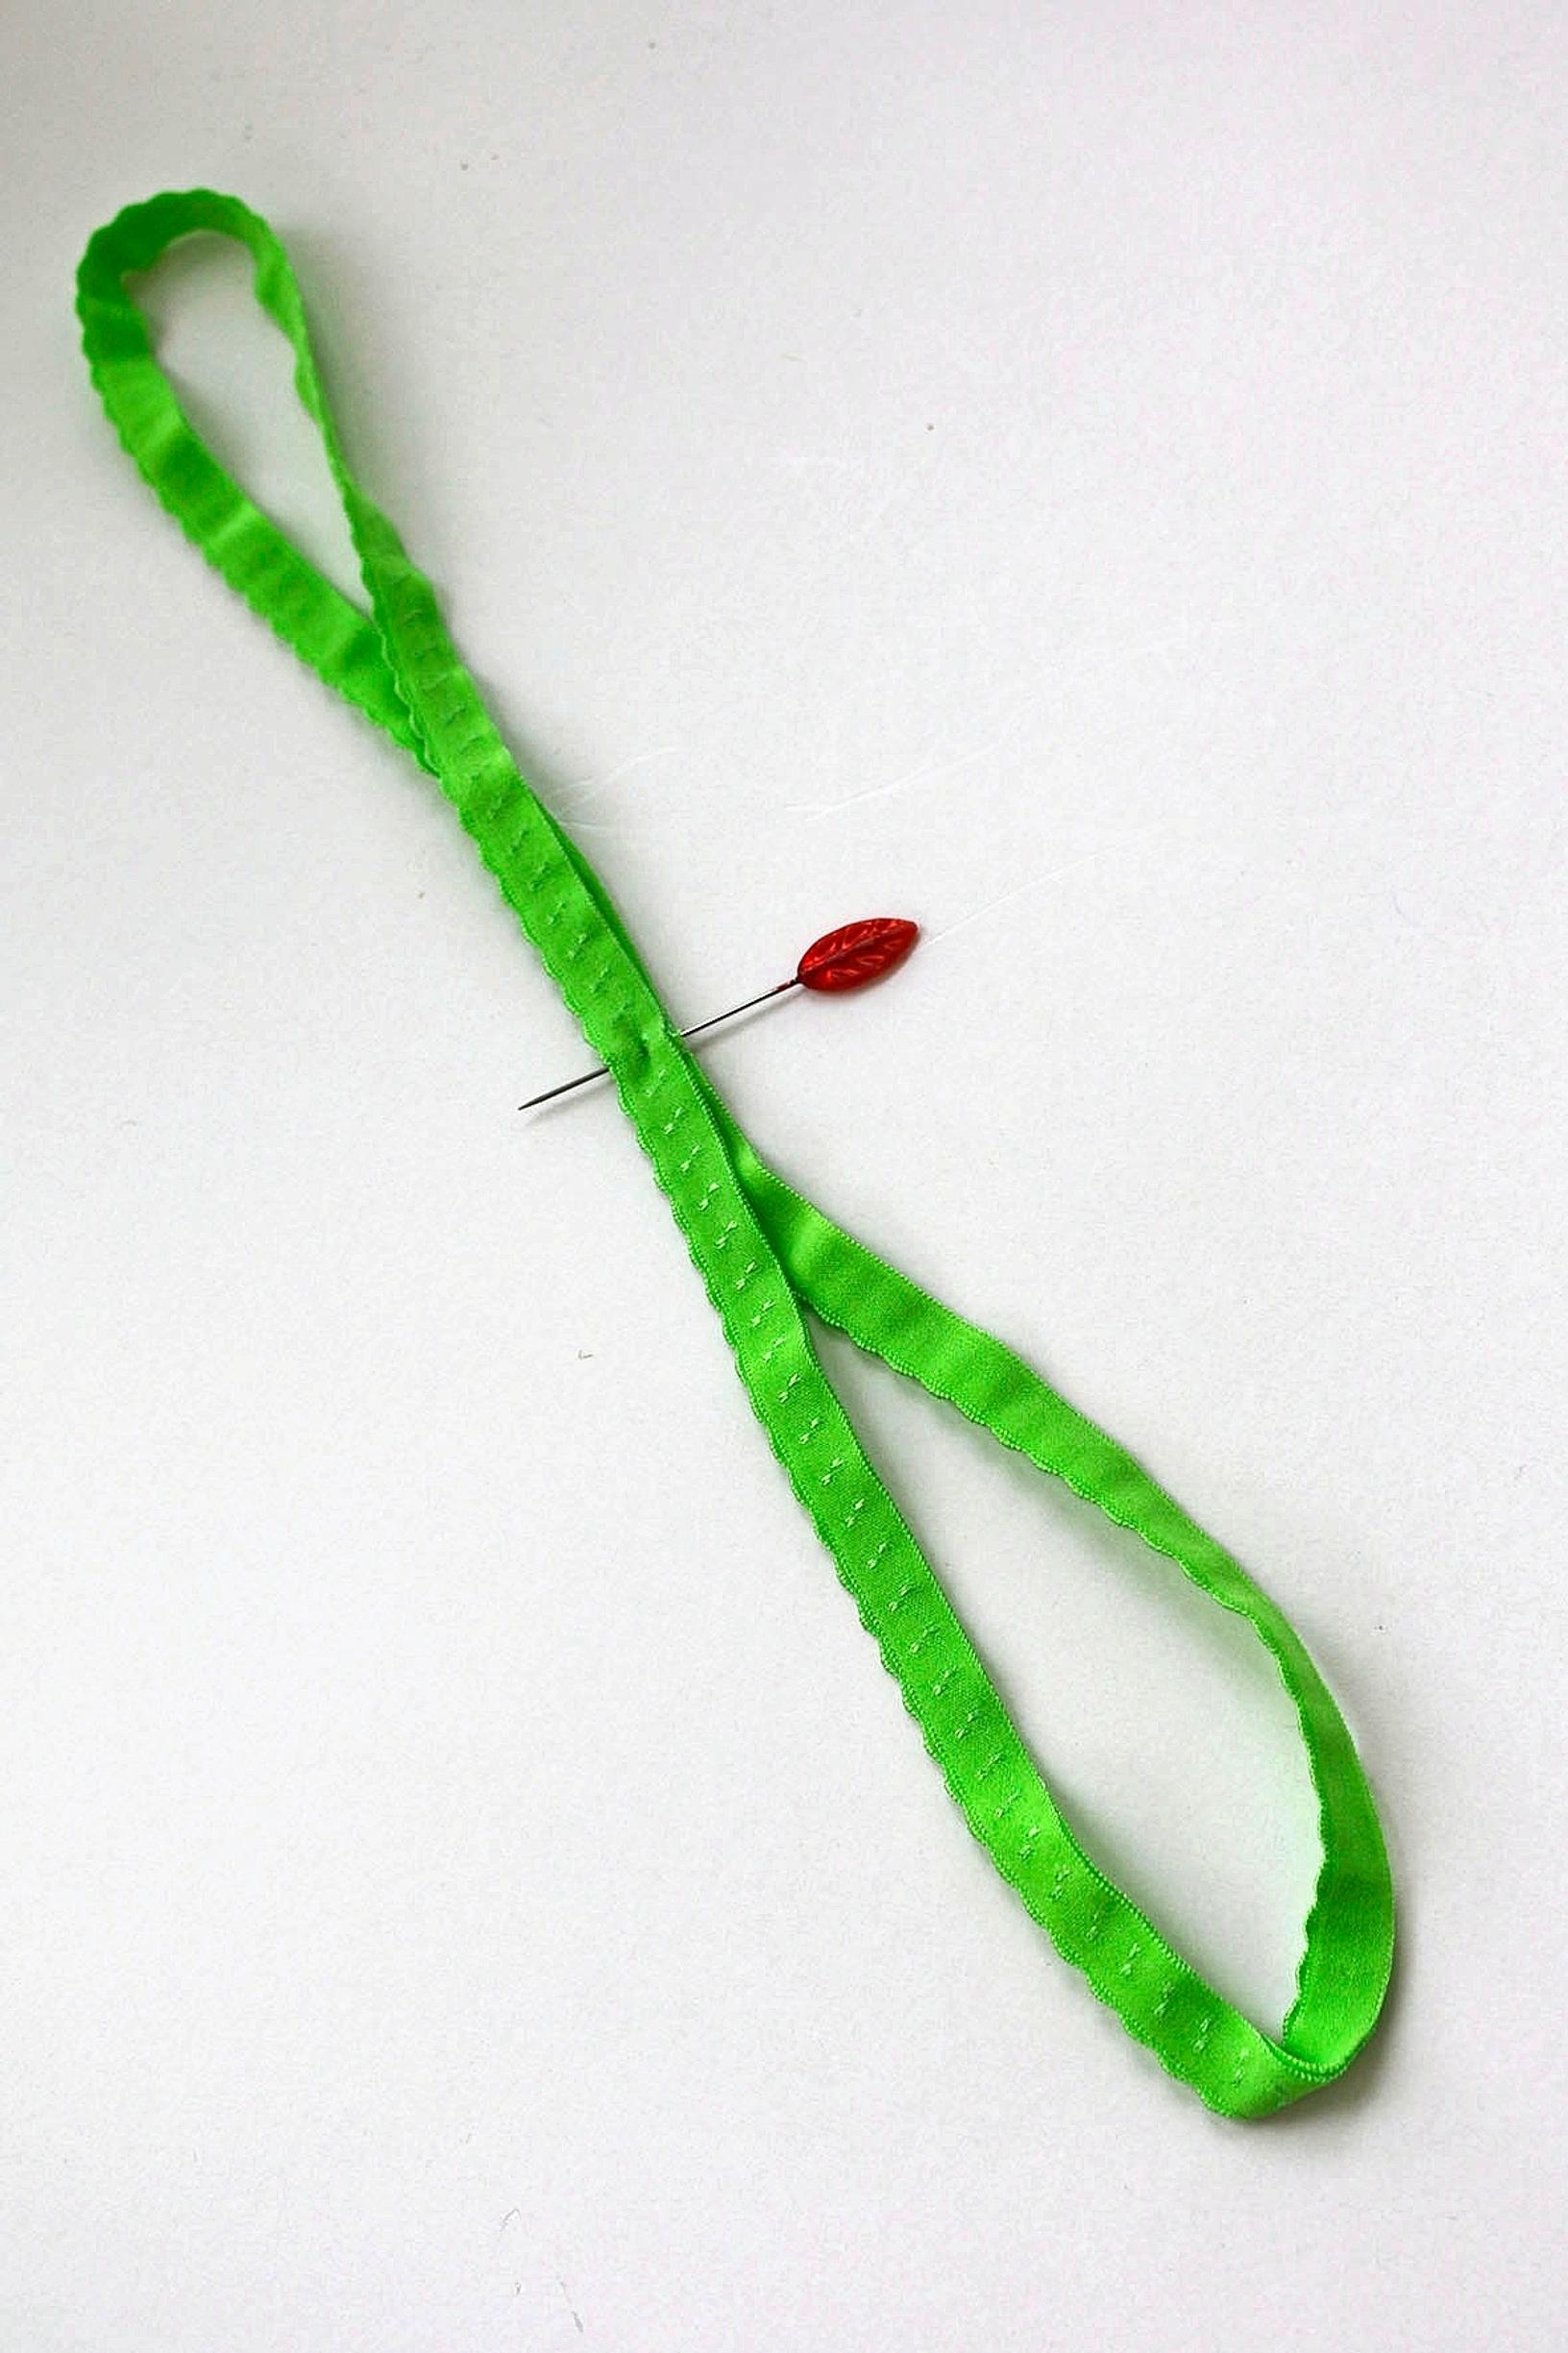
7. Measure a comfortable shoulder-strap length of elastic for the child and sew the ends together. Fold the elastic in half with the seam in the middle, and stitch through the center to hold the layers together.

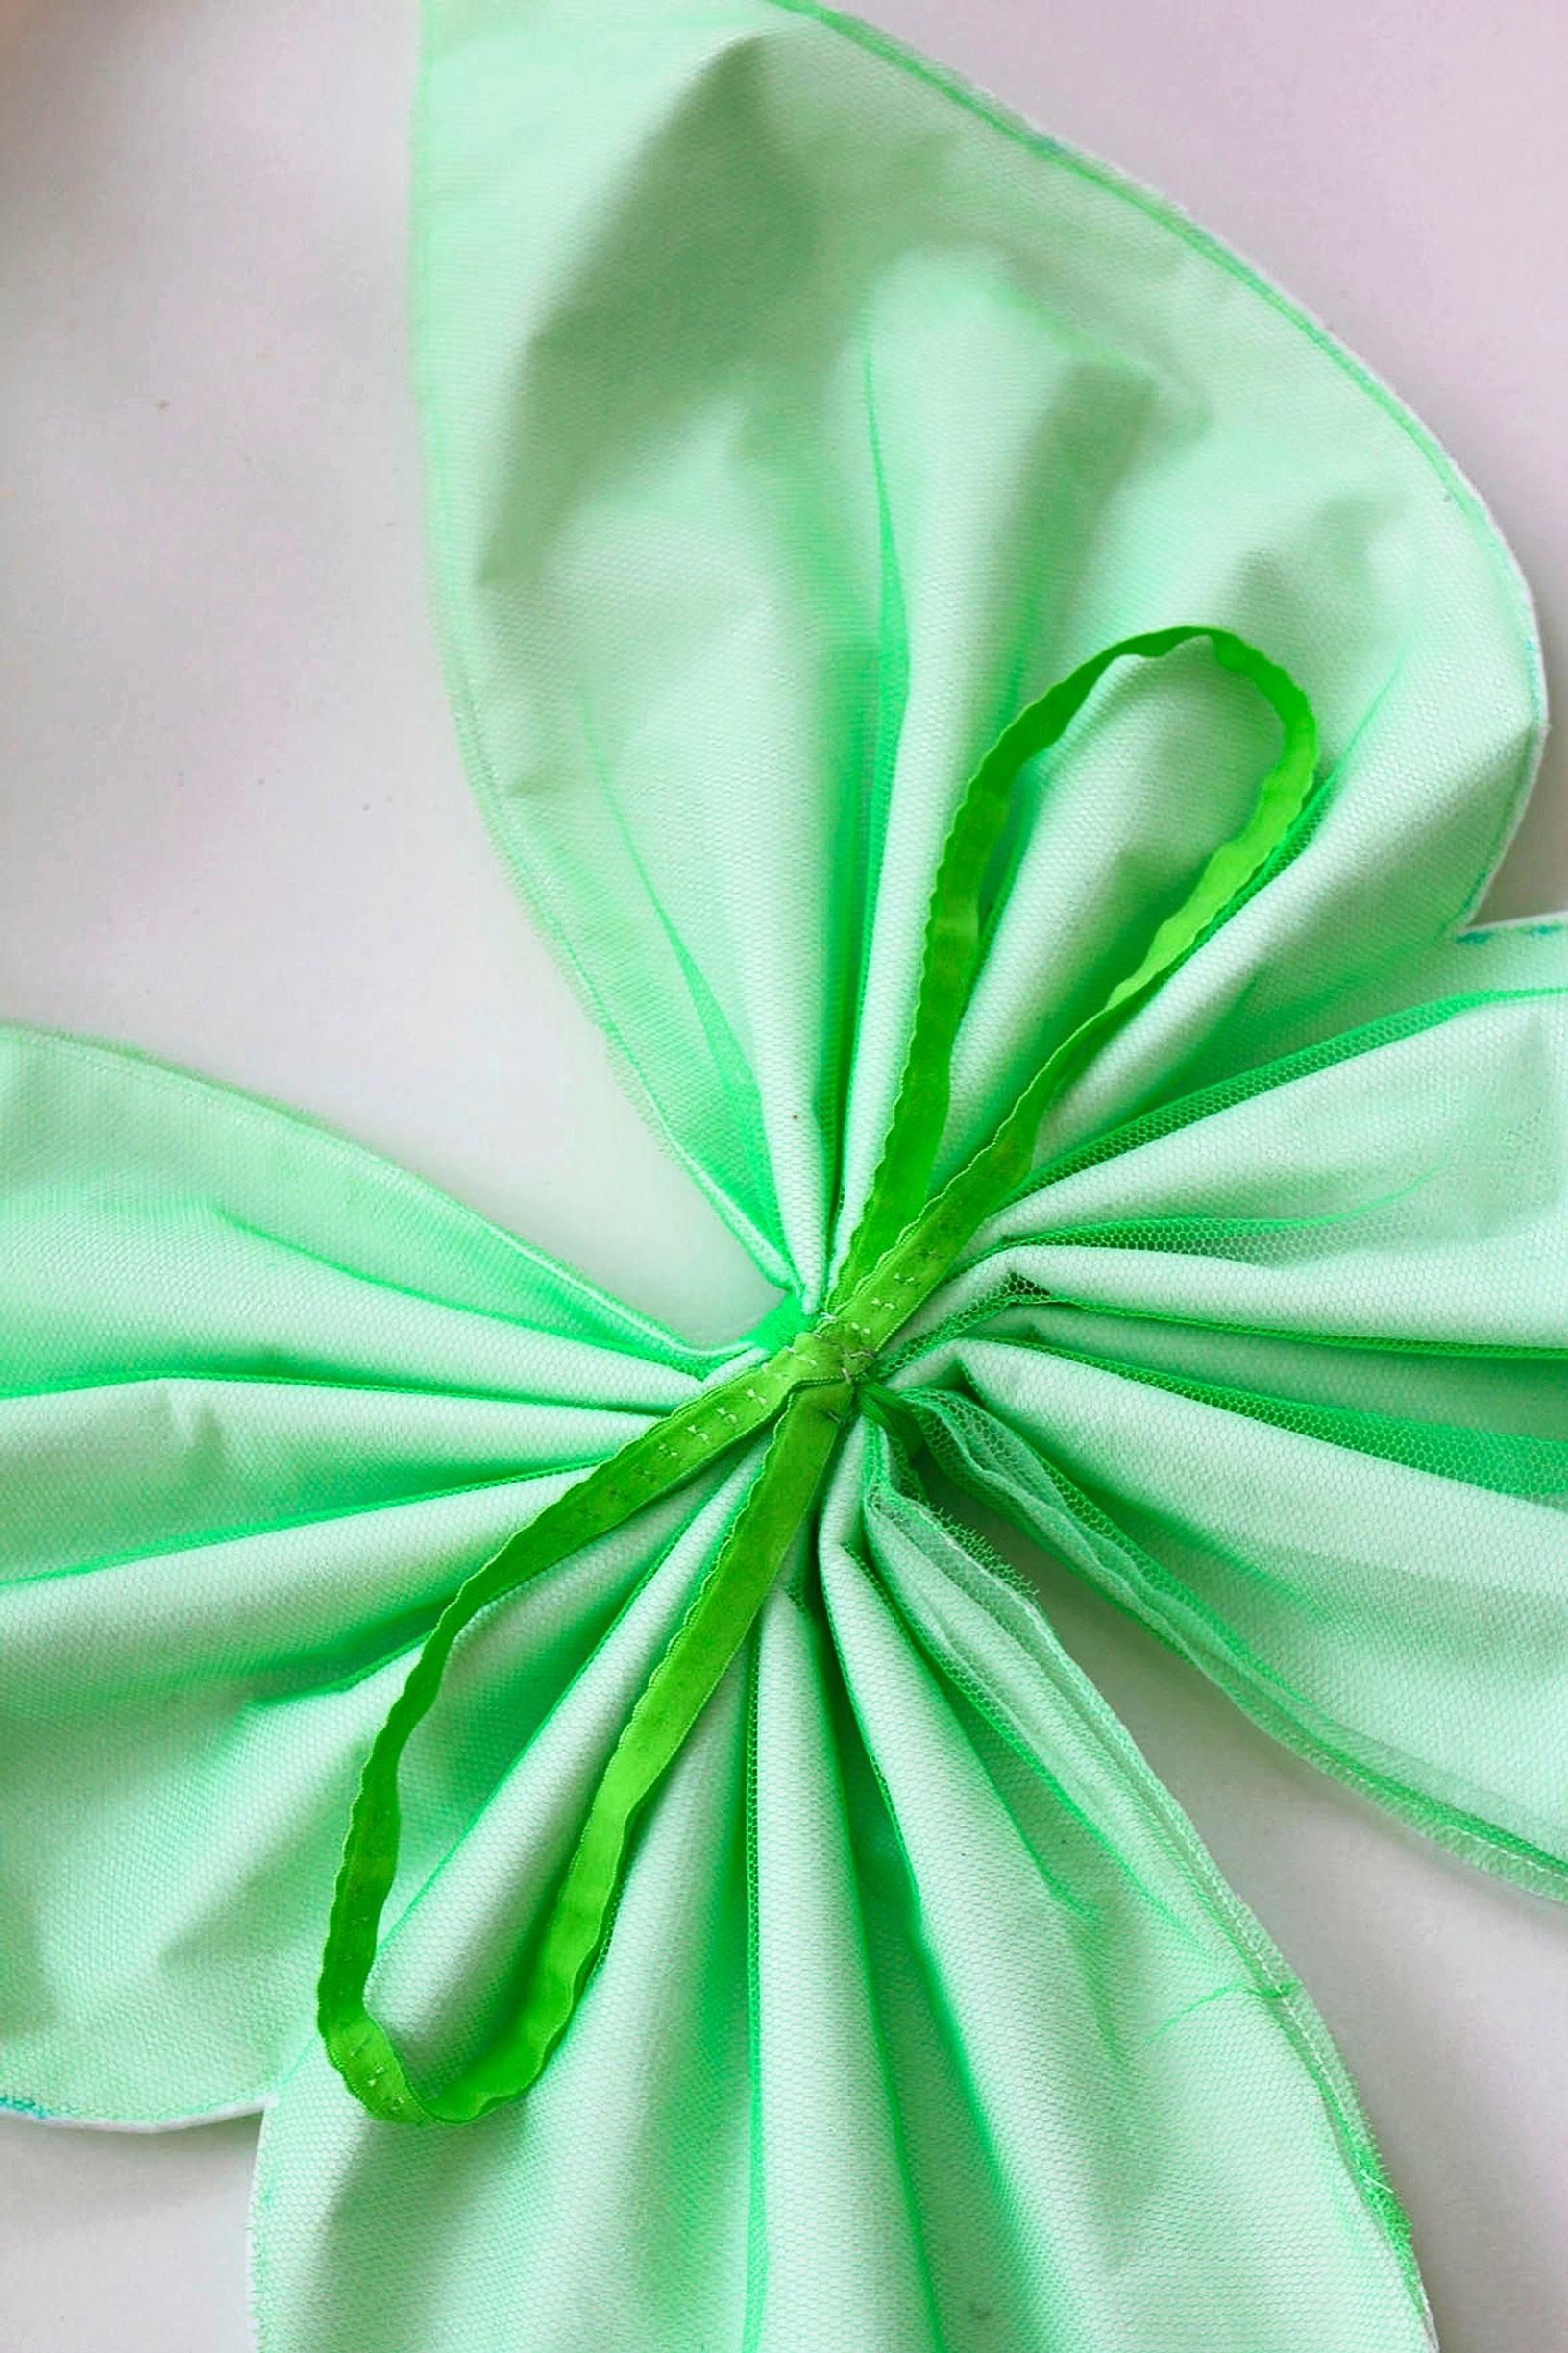
8. Hand-stitch the midpoint of the elastic to the back of the wings, right over the knot.
9. Hot-glue mini pompoms or other decorations to the front of the wings, and let them dry.