Corner pantry DIY : build a traditionally styled cupboard with recycled materials
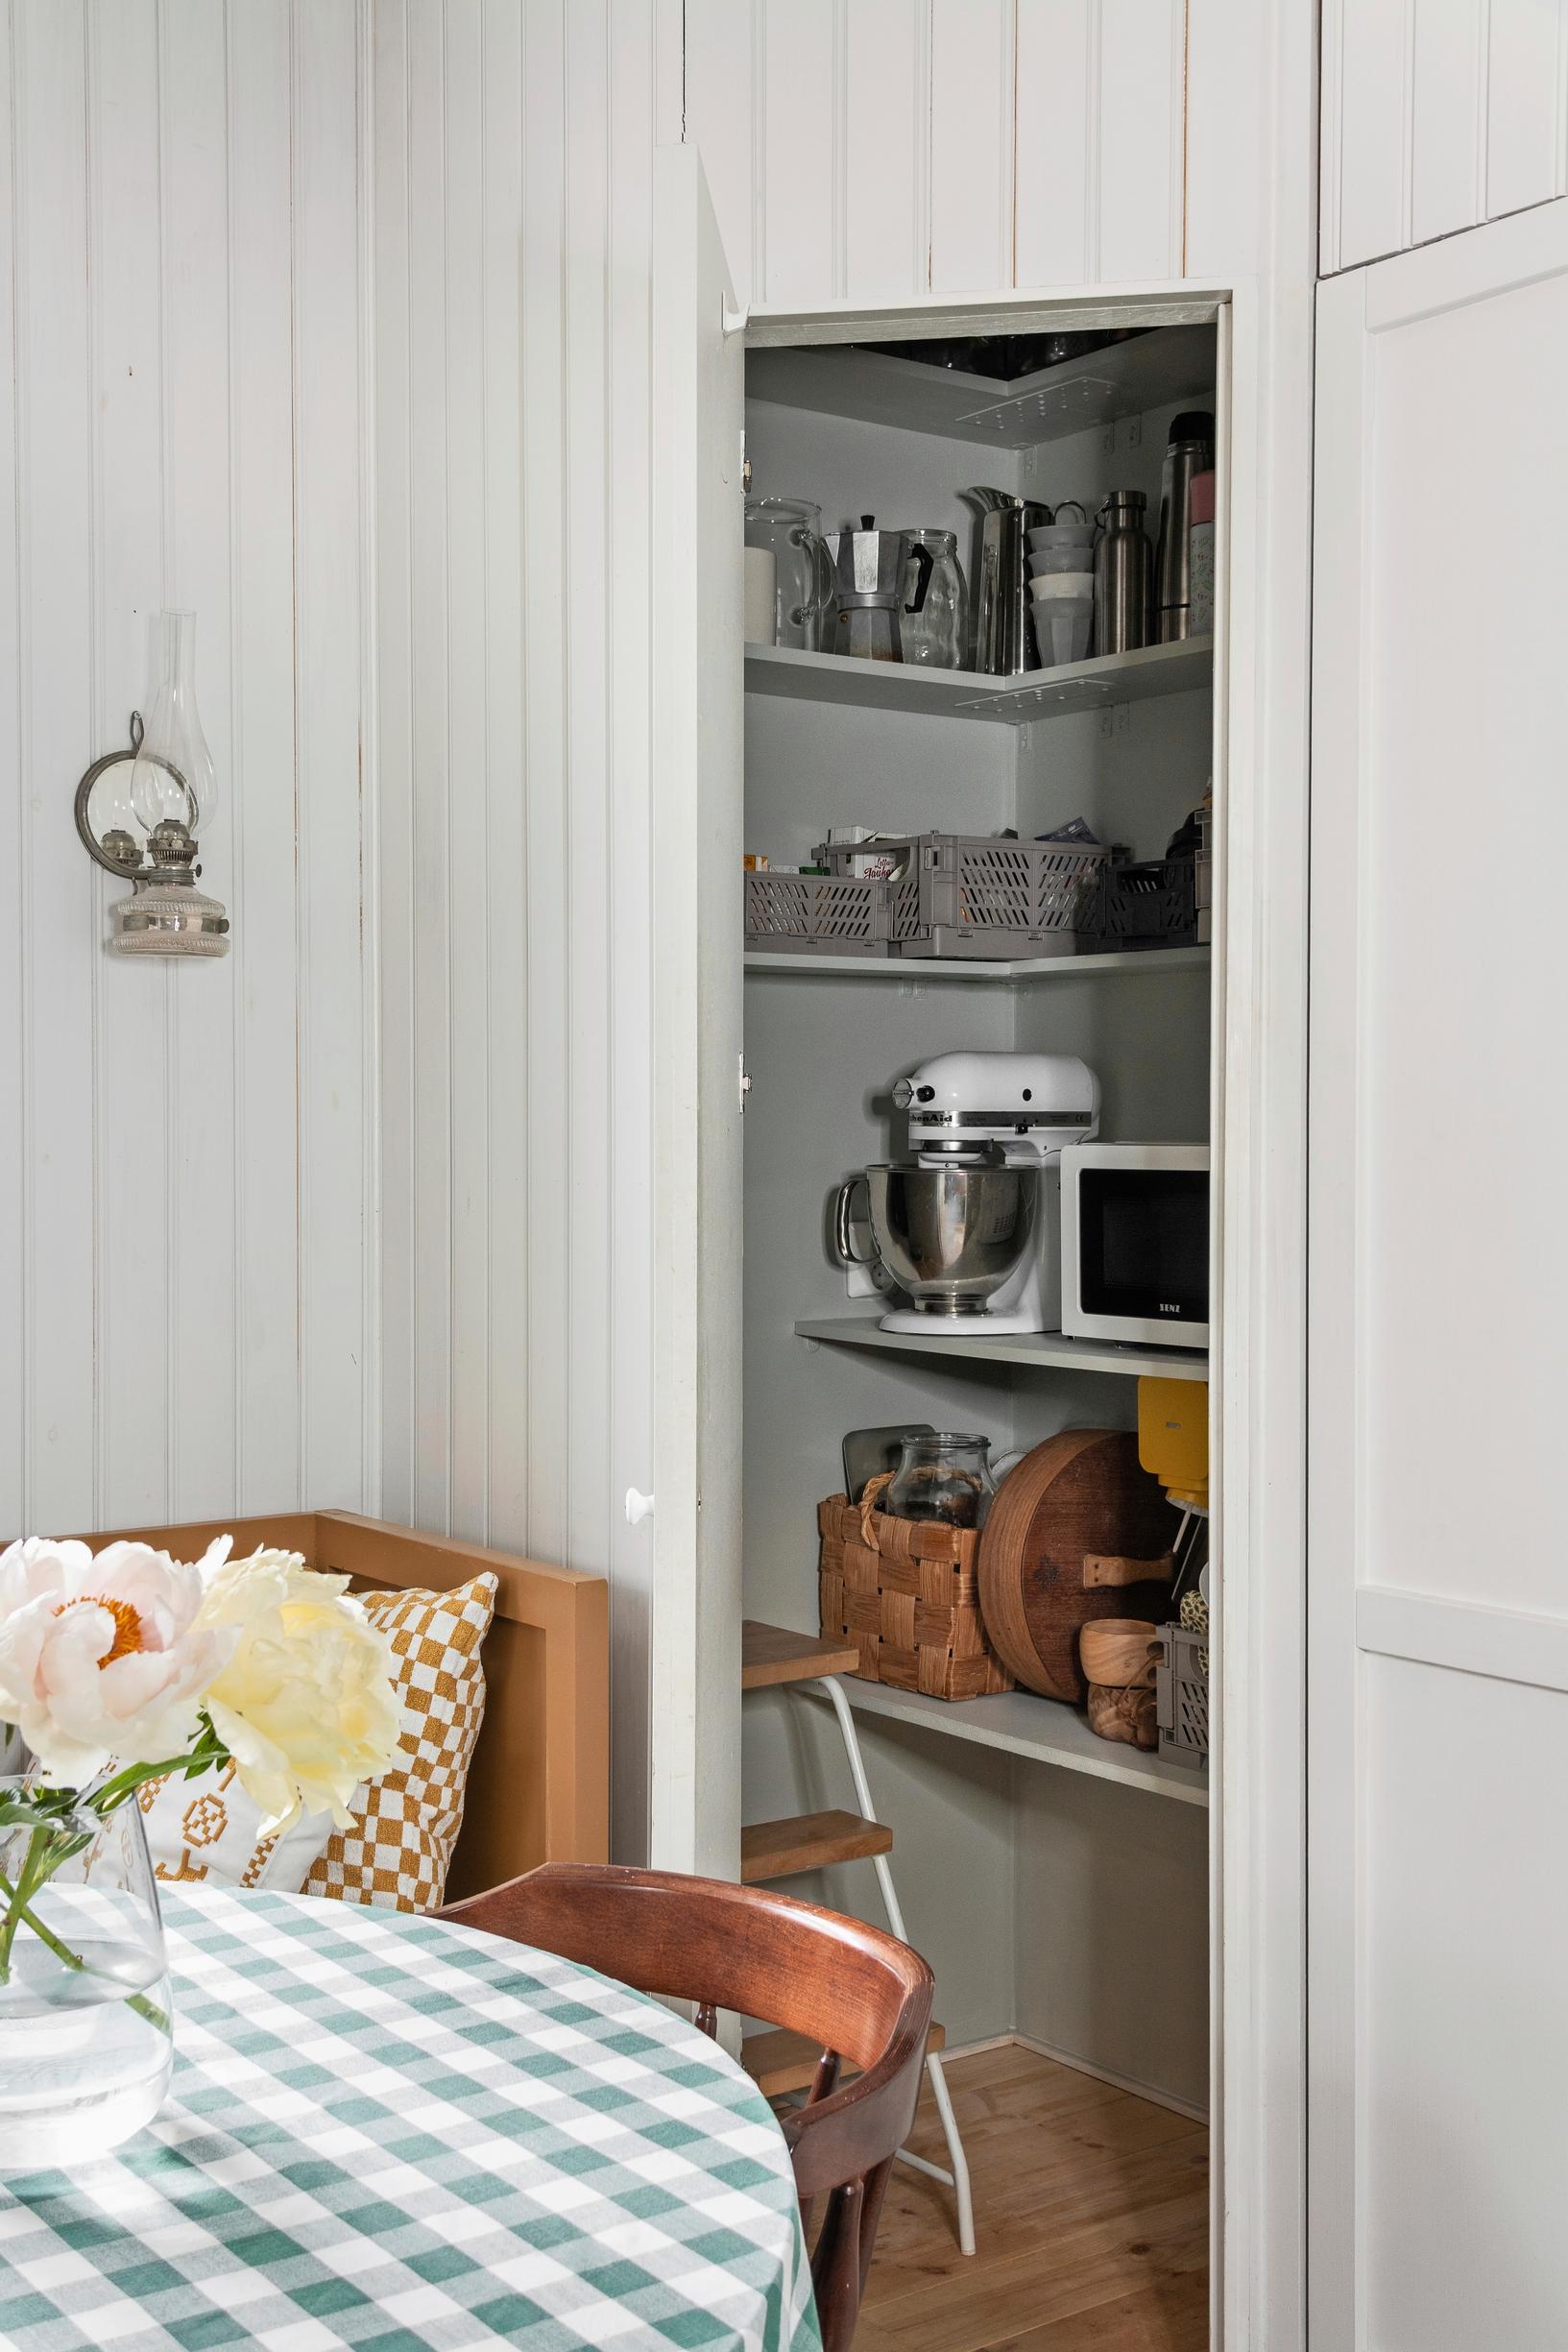
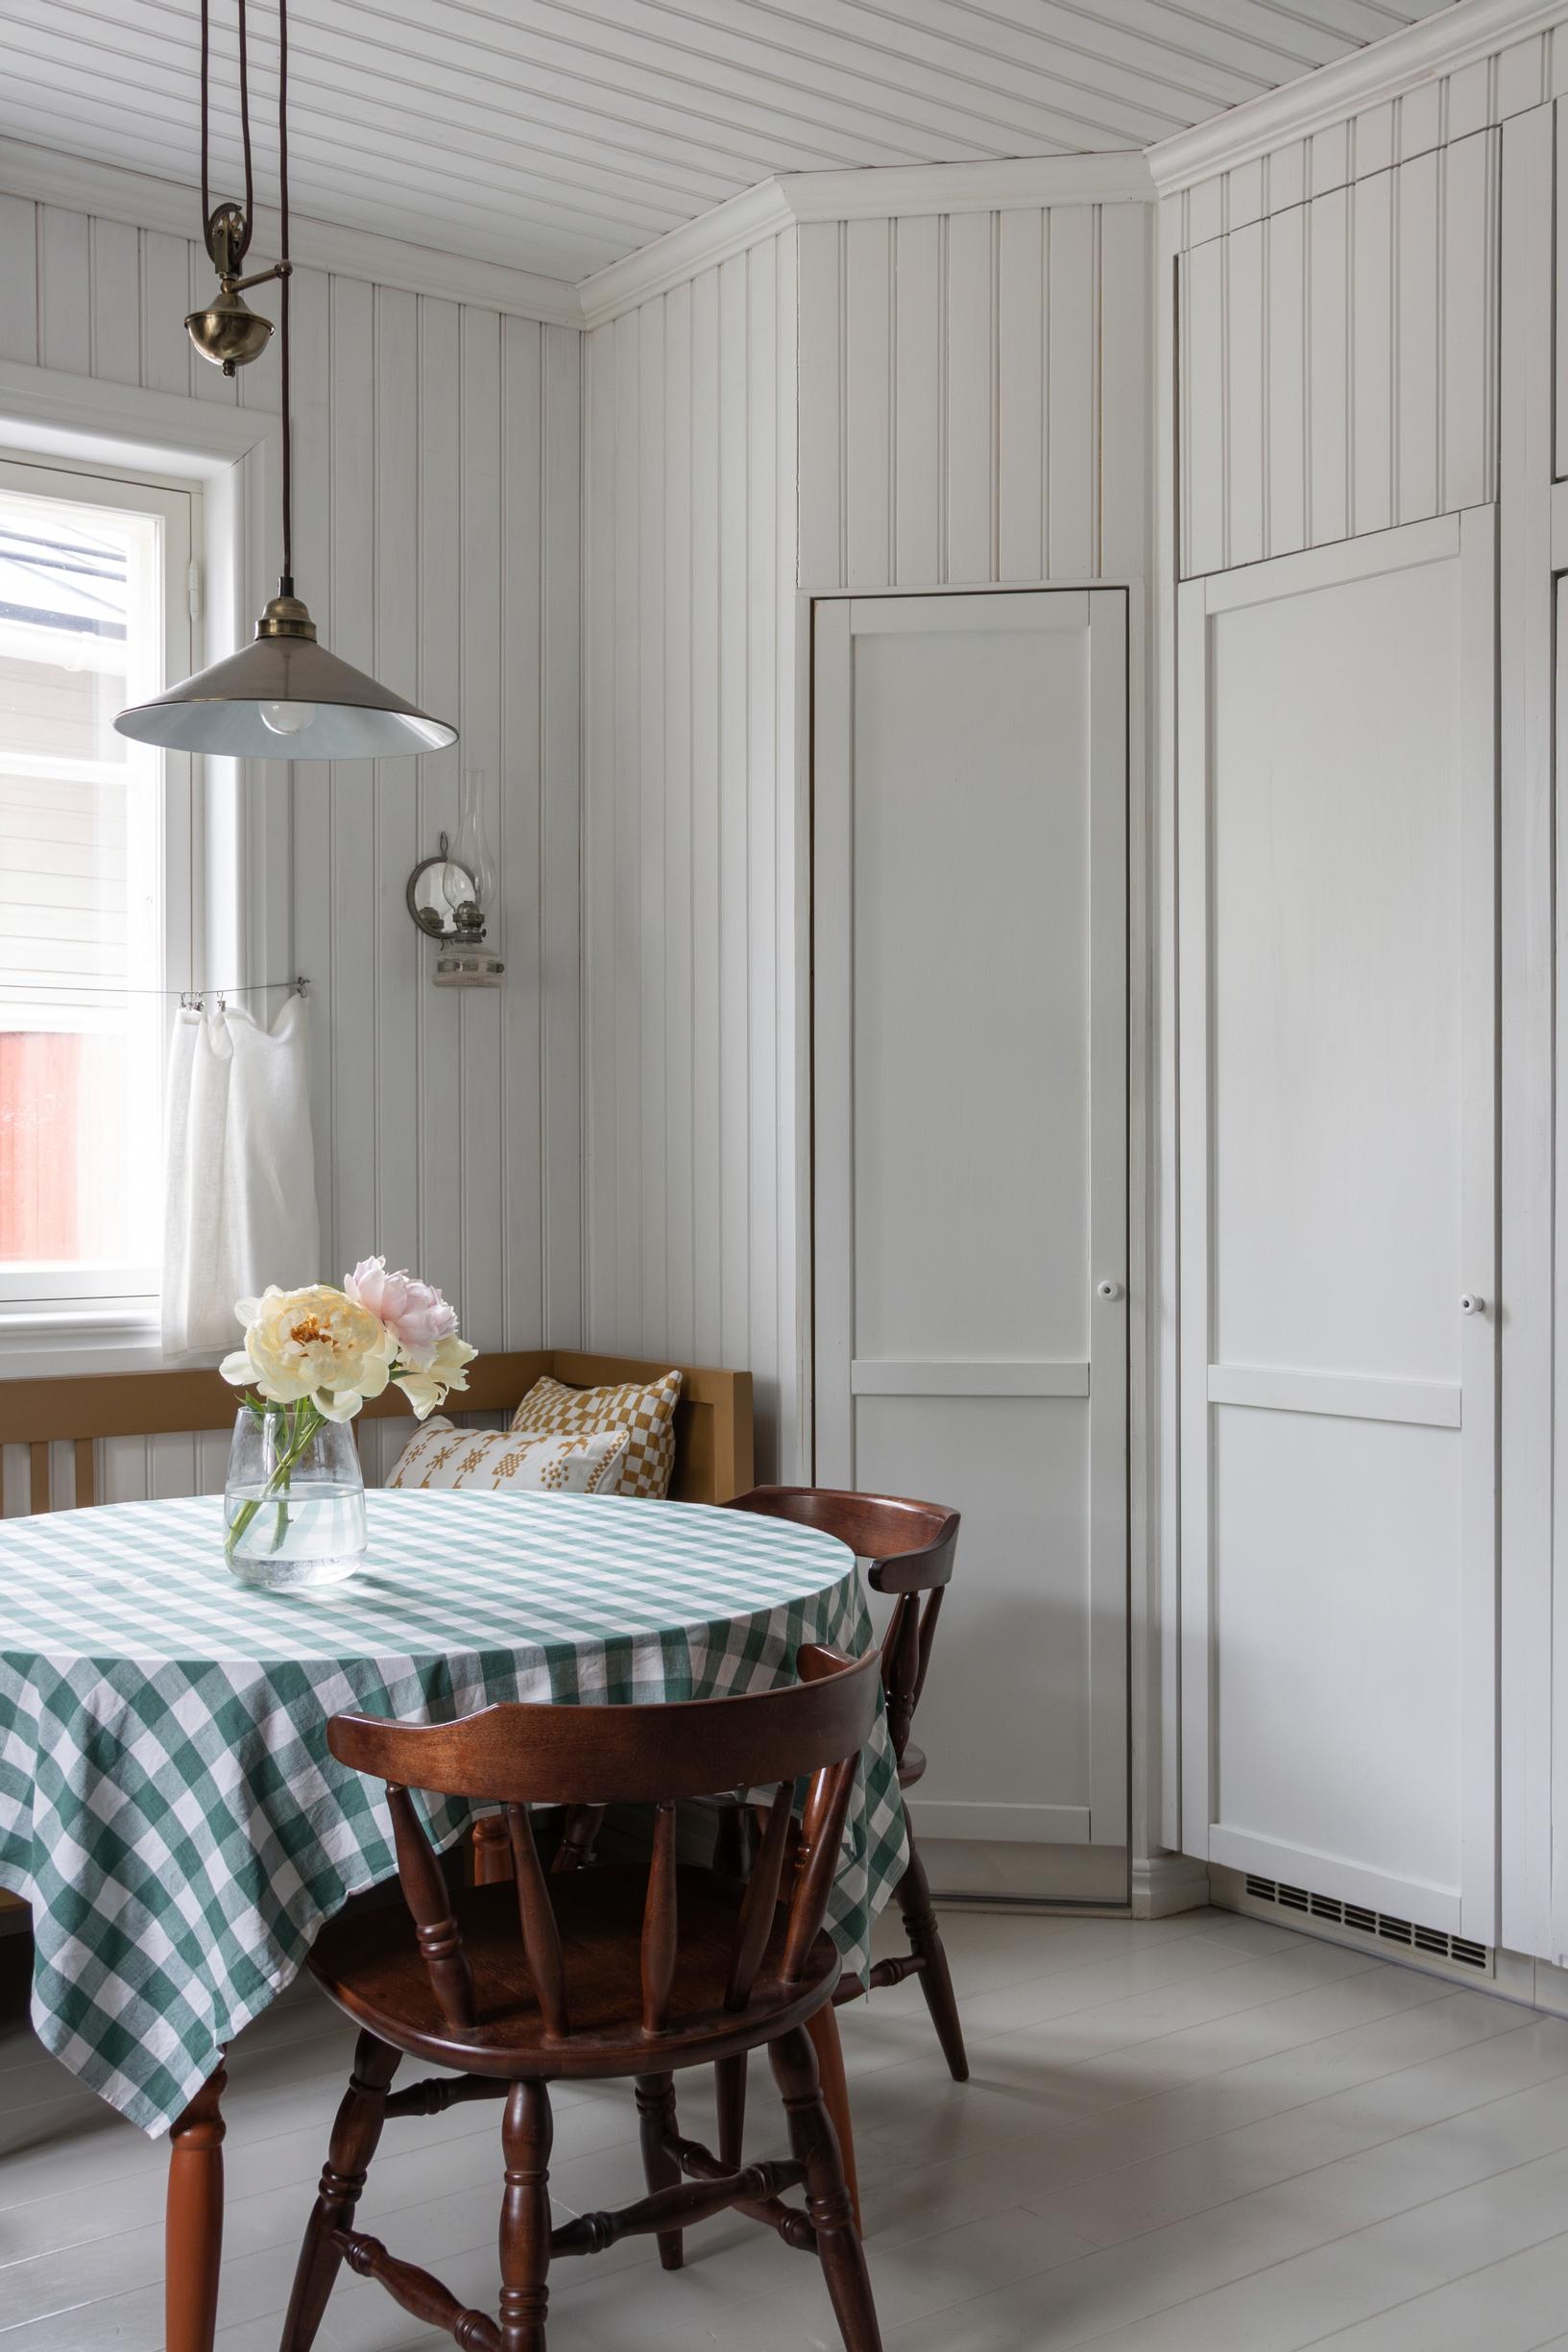
Rilla Tervonen built a traditional pantry in her new home’s kitchen, then extended it with a multifunctional cabinet. A microwave, freezer, and recycling bin are all neatly hidden behind the doors.
Pantry and cabinetry—supplies
- a measuring tape and a pencil
- a circular saw or hand saw
- a level or laser level
- beadboard paneling
- finishing nails
- 5 × 80 mm screws and a screwdriver
- panel paint and a paintbrush
- edge-glued board or plywood (16–20 mm) and framing lumber measuring 39 × 66 mm
- partition studs or similar
- adhesive compound (e.g. Casco Xtremefix)
- hinges (25 × 19 mm cabinet hinge)
- doors and handles
Pantry—instructions:

1. Measure and cut six floor-to-ceiling vertical supports from your framing lumber. Then cut 12 horizontal supports measuring 46.2 centimeters.
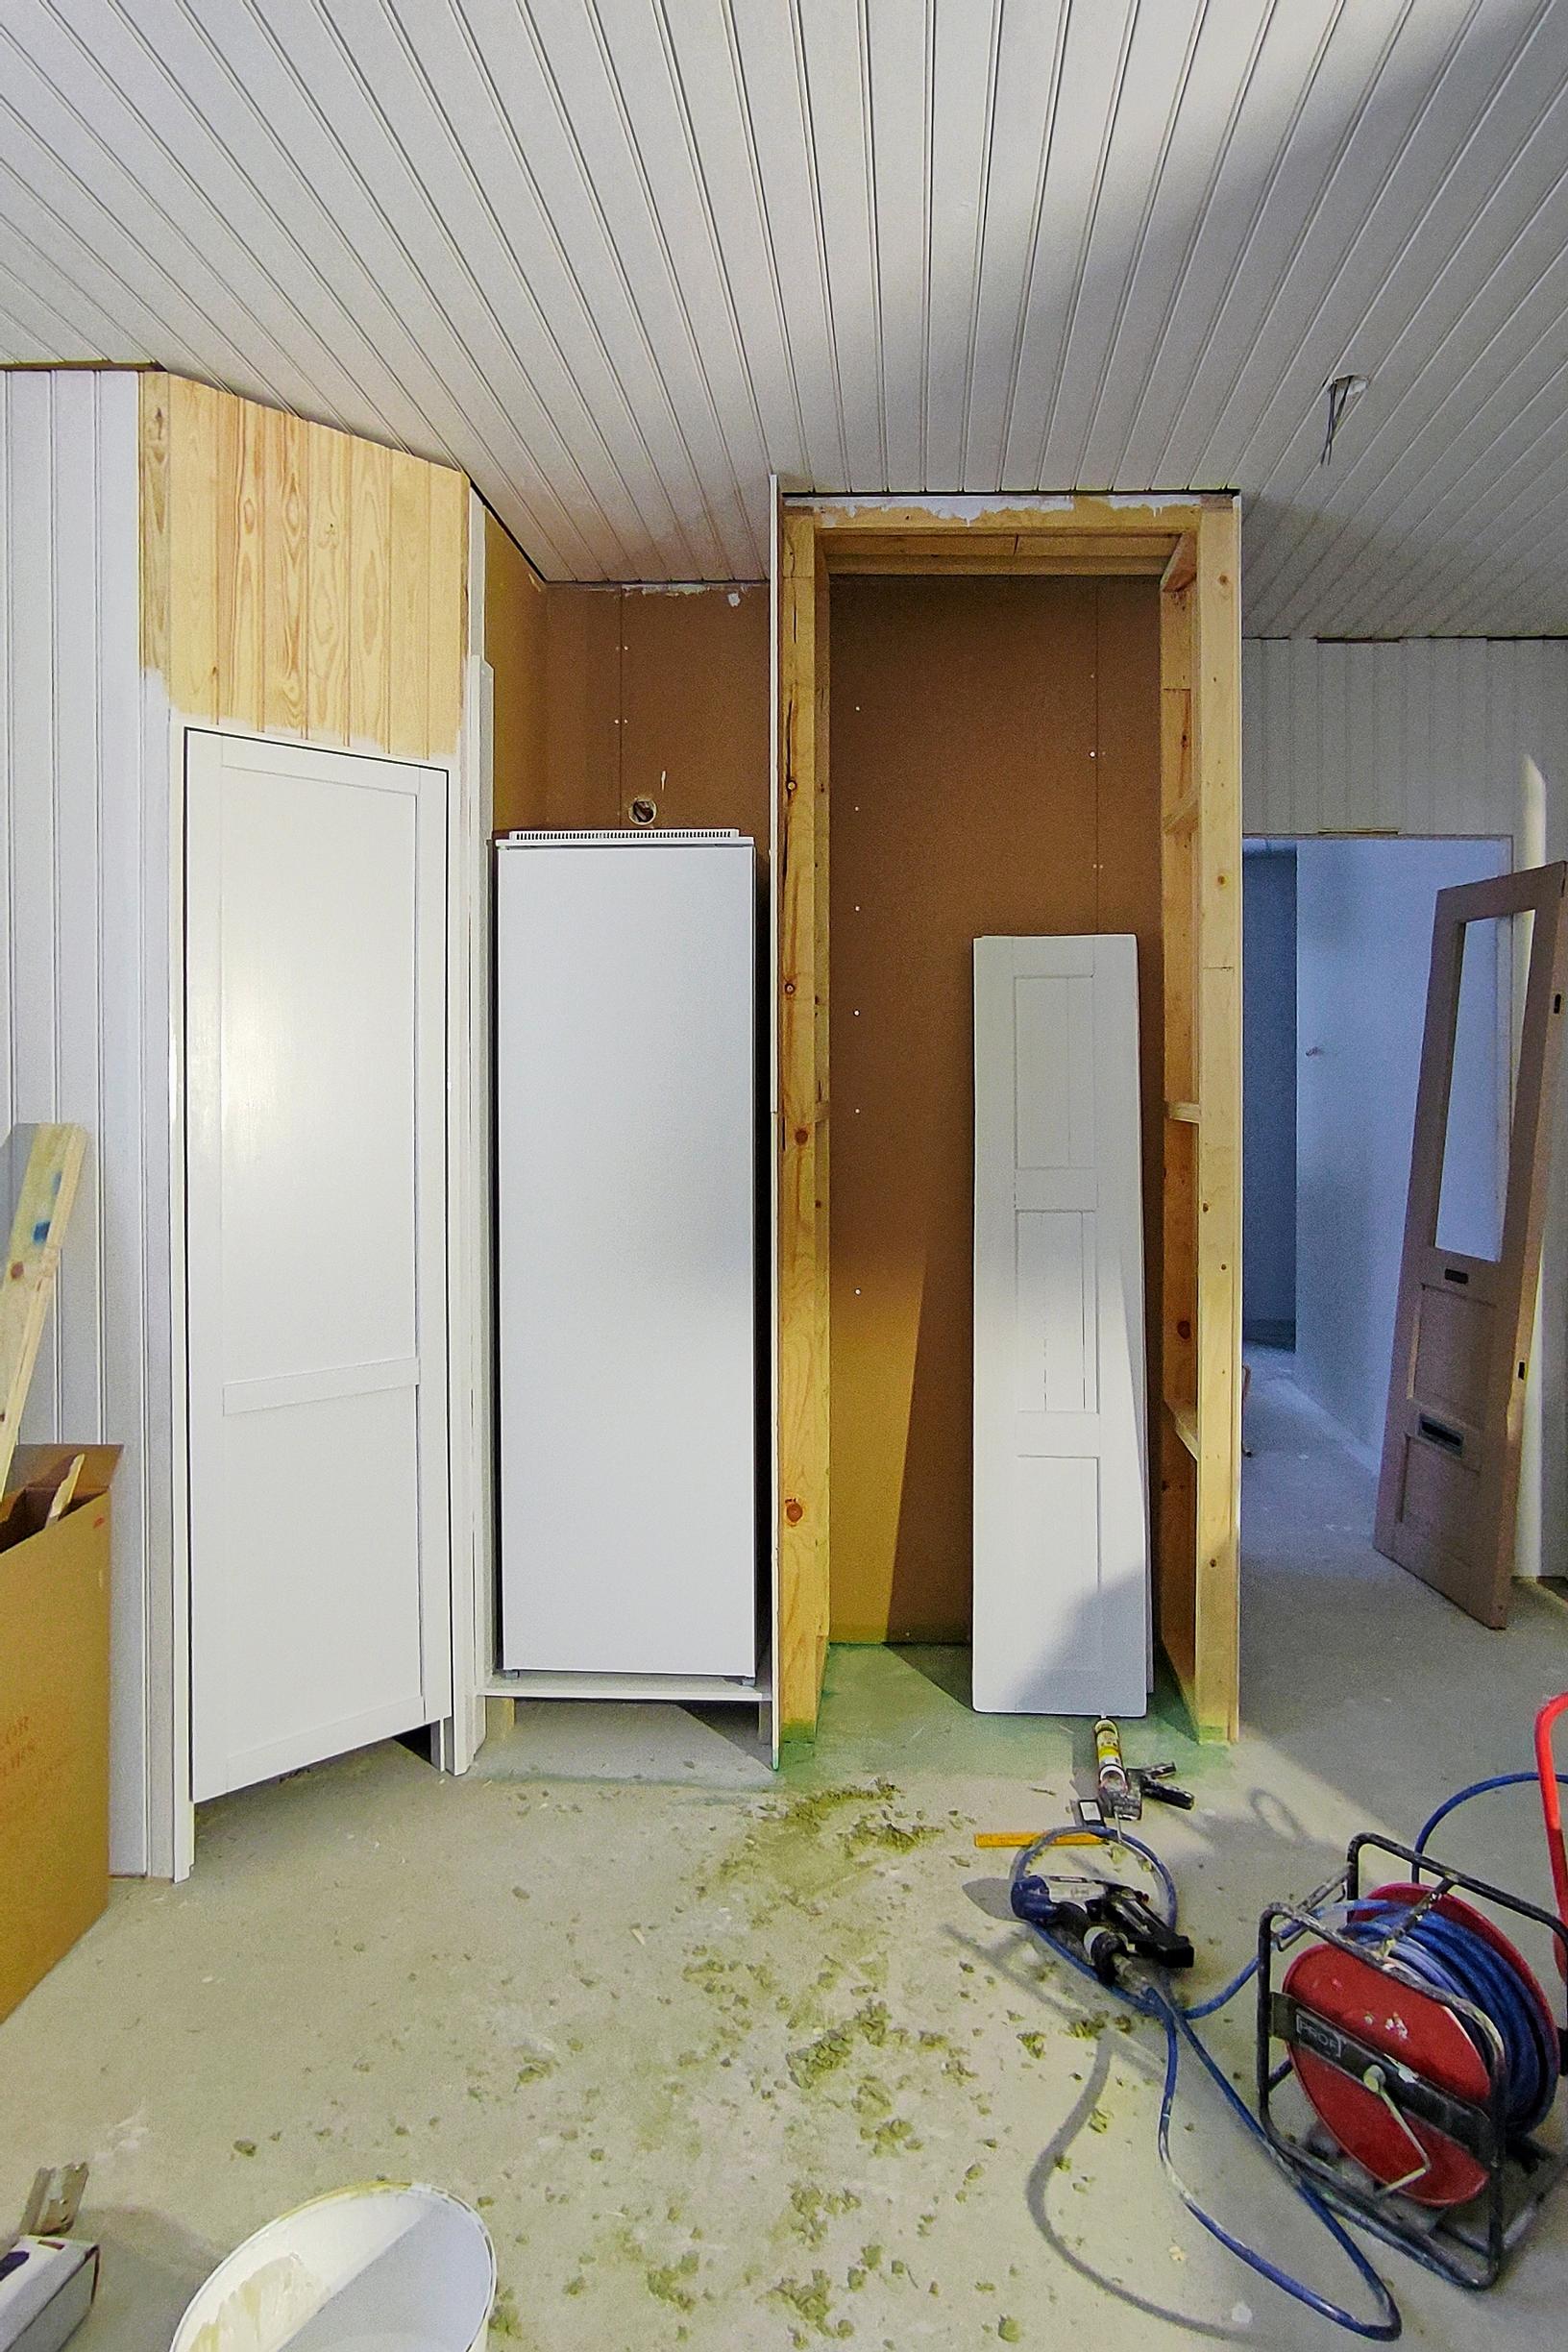
2. Screw horizontal supports between the vertical supports at 60 centimeter intervals. Build two identical frames with the horizontal supports between the vertical pieces. Mark where the frames will go. Measure from the corner in both directions and draw lines at 90 centimeters and 96.6 centimeters. Set the frames between those lines at a 90-degree angle. With these measurements, the wall frame matches the depth of the adjacent freezer cabinet, so the freezer fits inside. Screw the elements to the wall and ceiling, and attach the parts to the floor with adhesive compound.

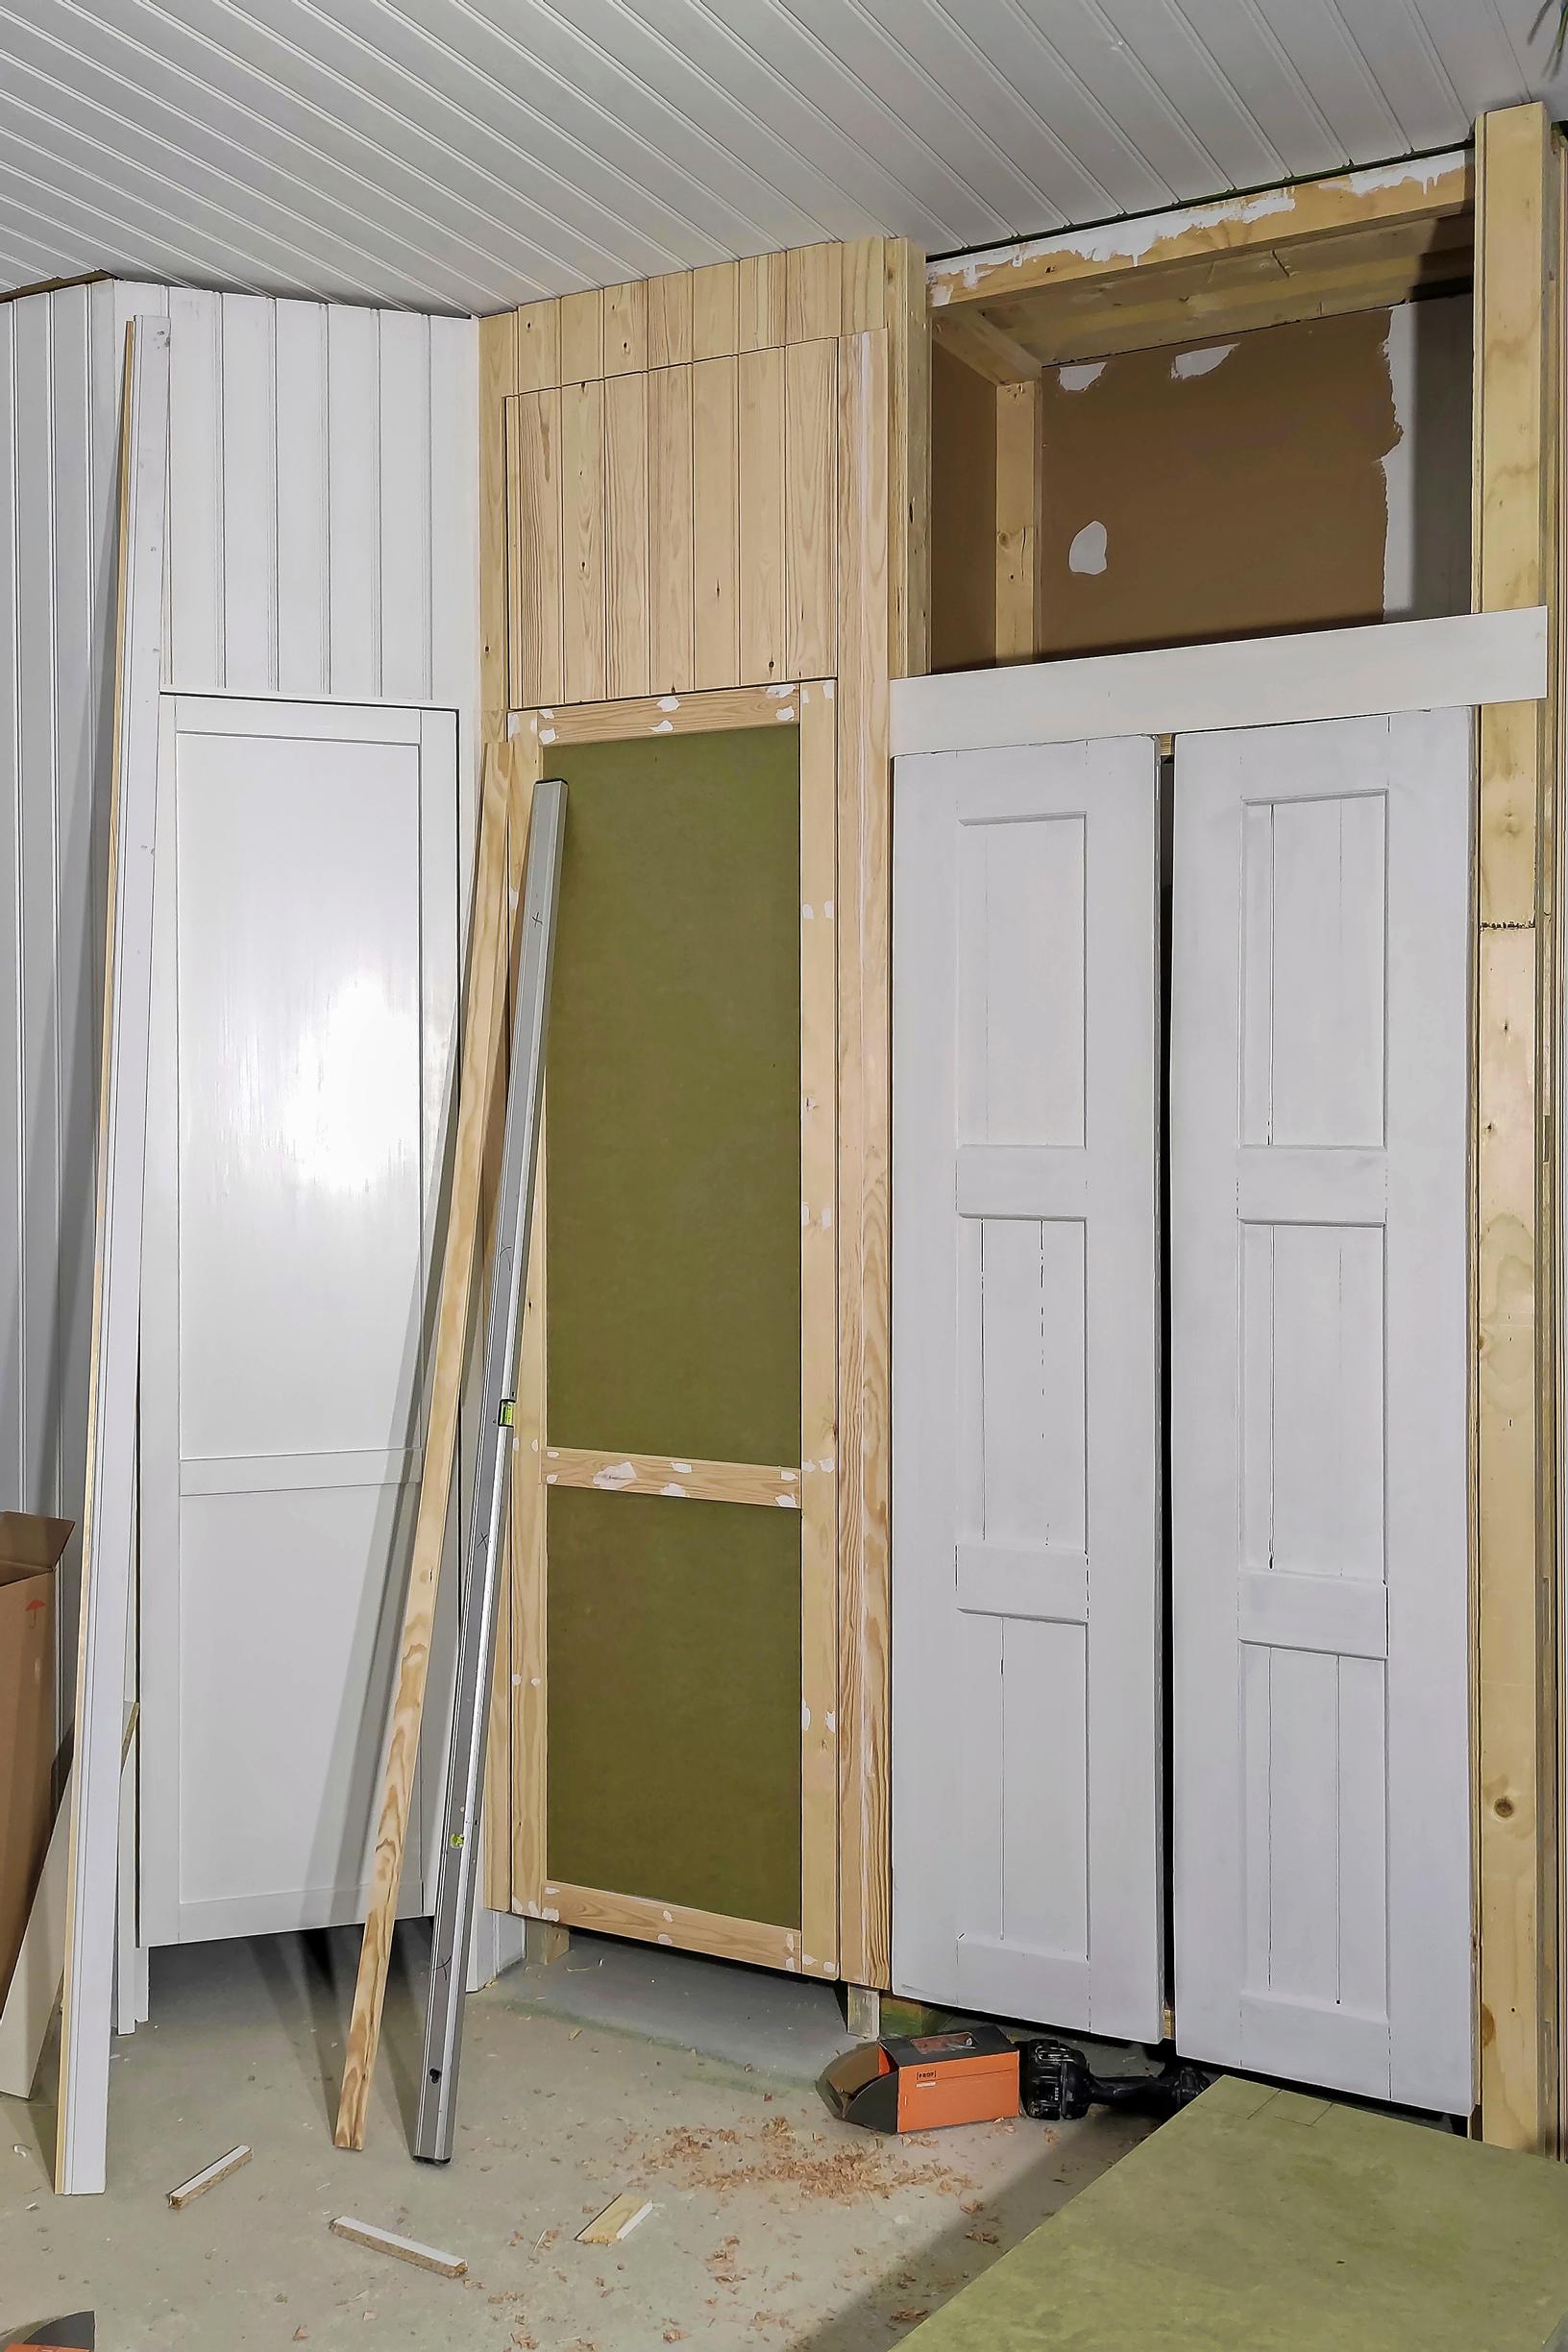

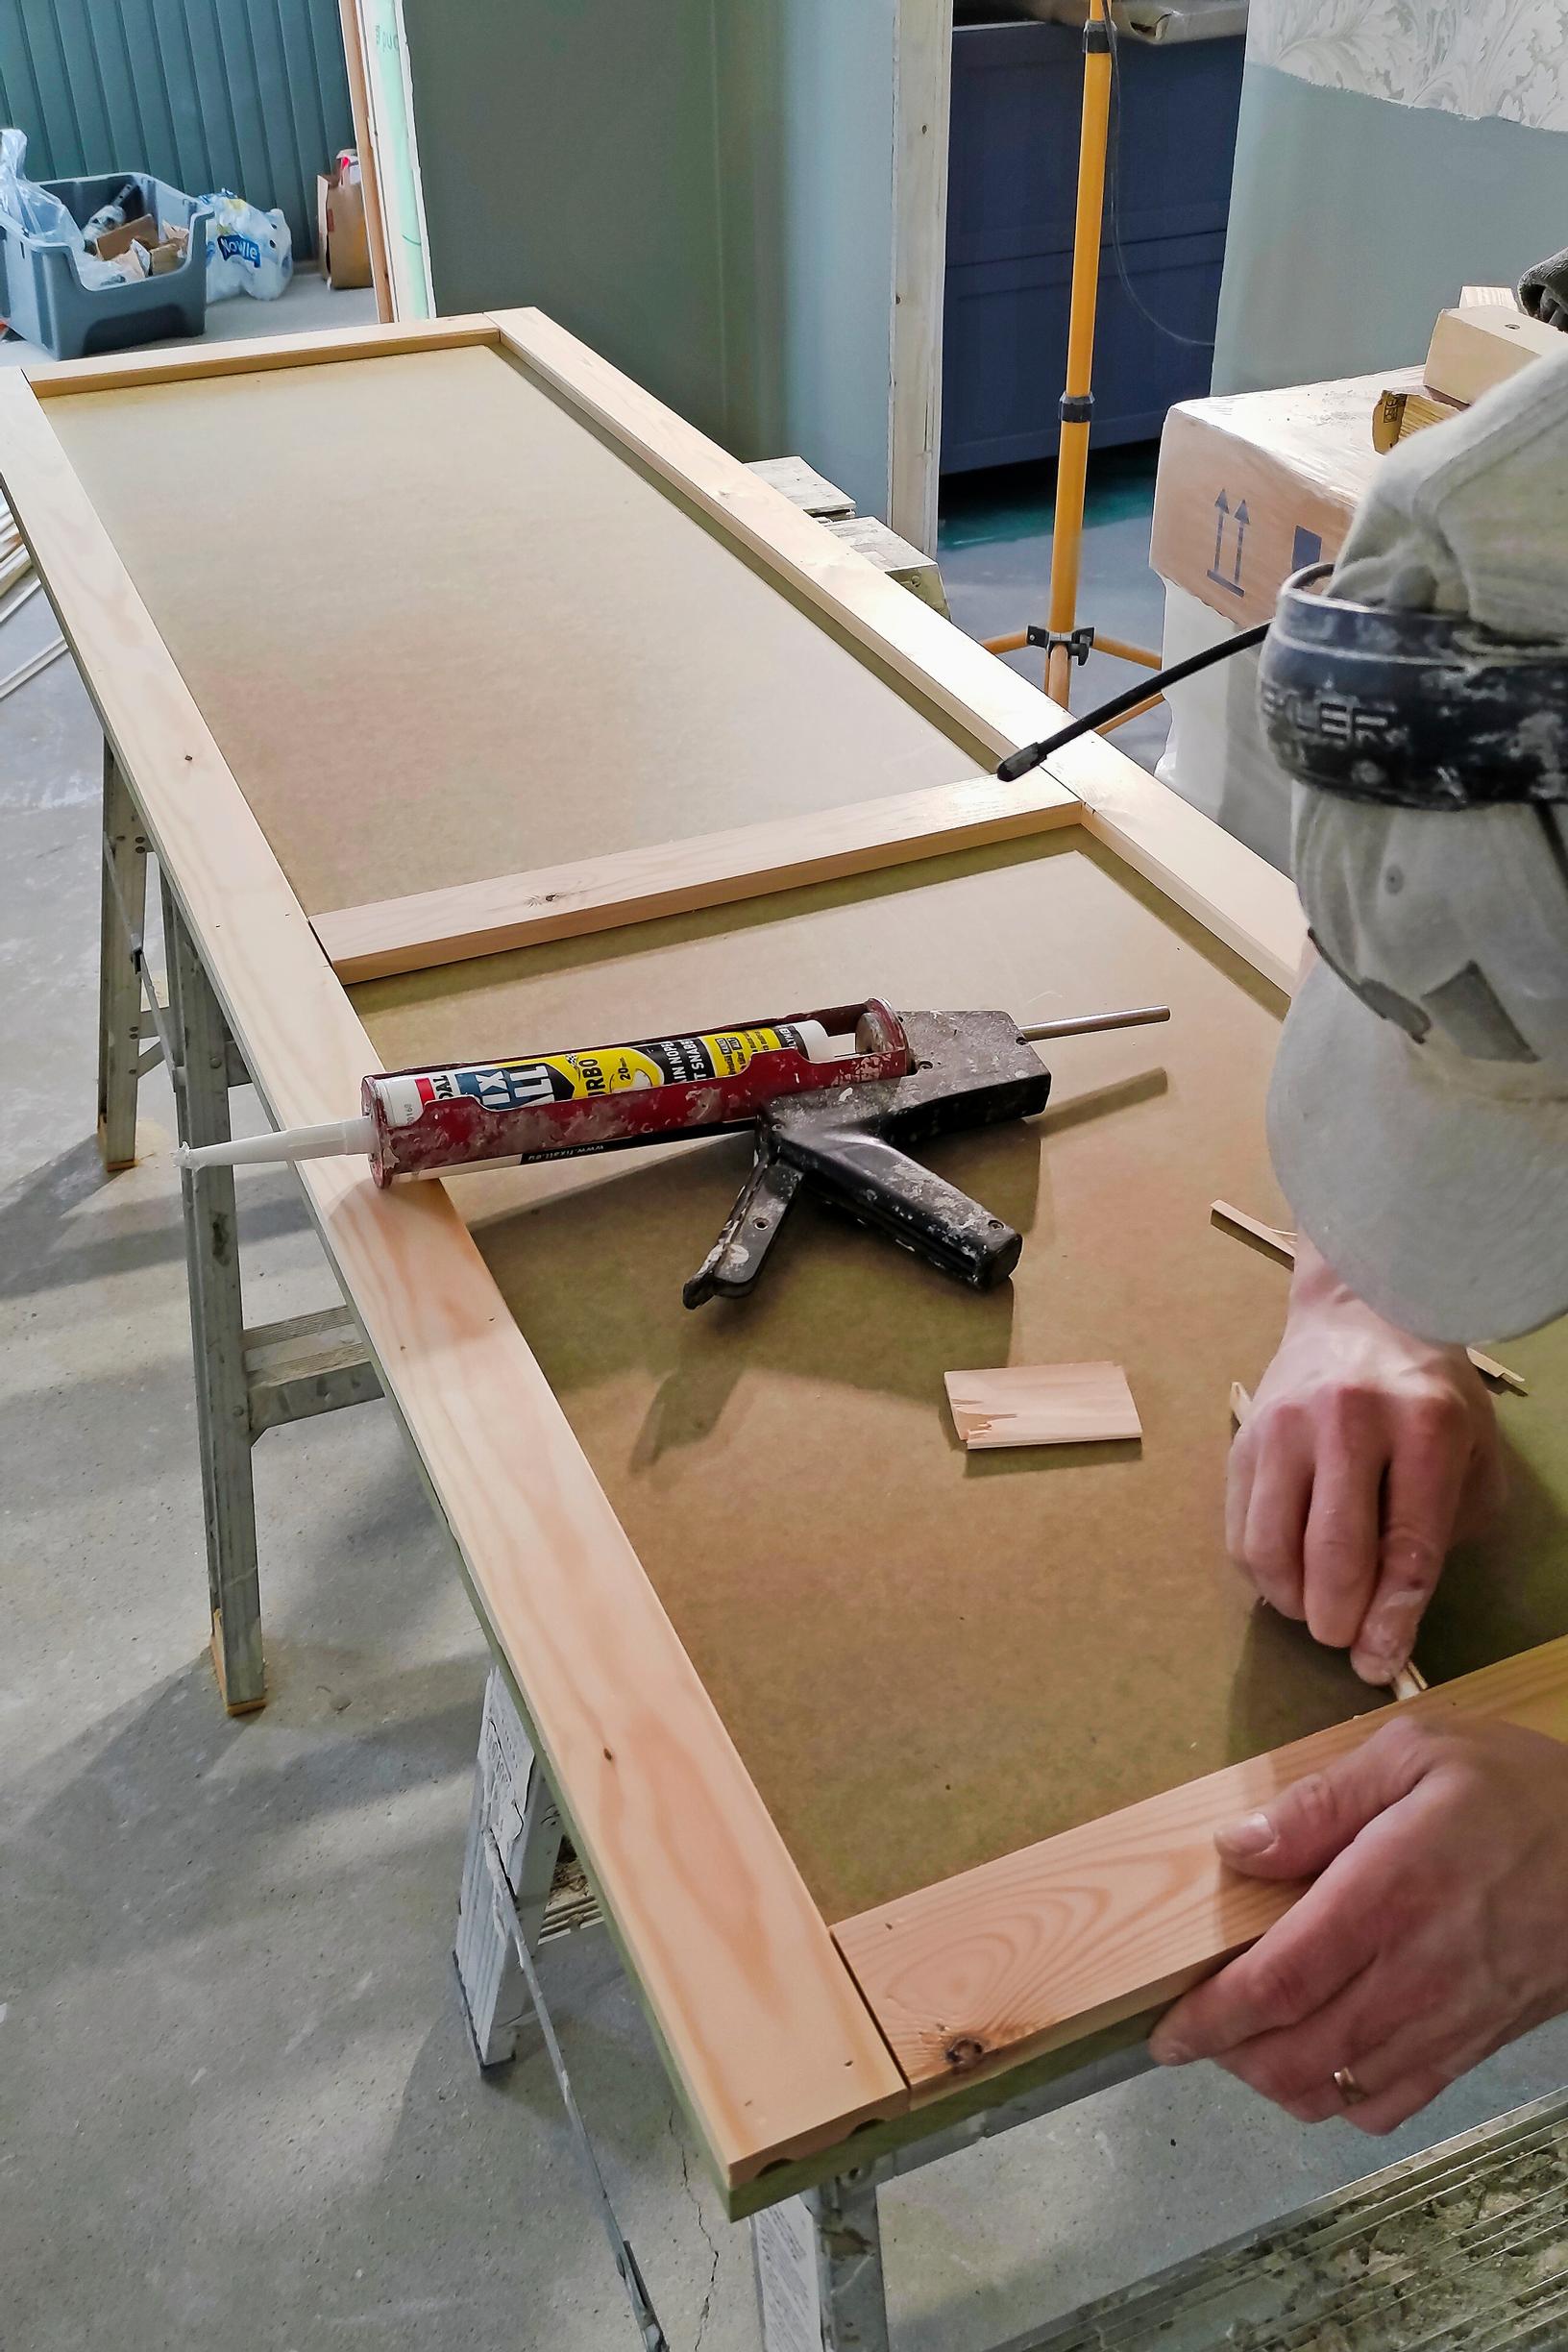
3. Build the frame for the doorway. You’ll need two vertical supports and two horizontal pieces at 49.4 centimeters. Fasten one horizontal piece near the top of the supports and another about 0.5 centimeters above the door’s height. Install the frame at a 45-degree angle between the two previously assembled wall frames. If you like, you can also panel the inside of the pantry.
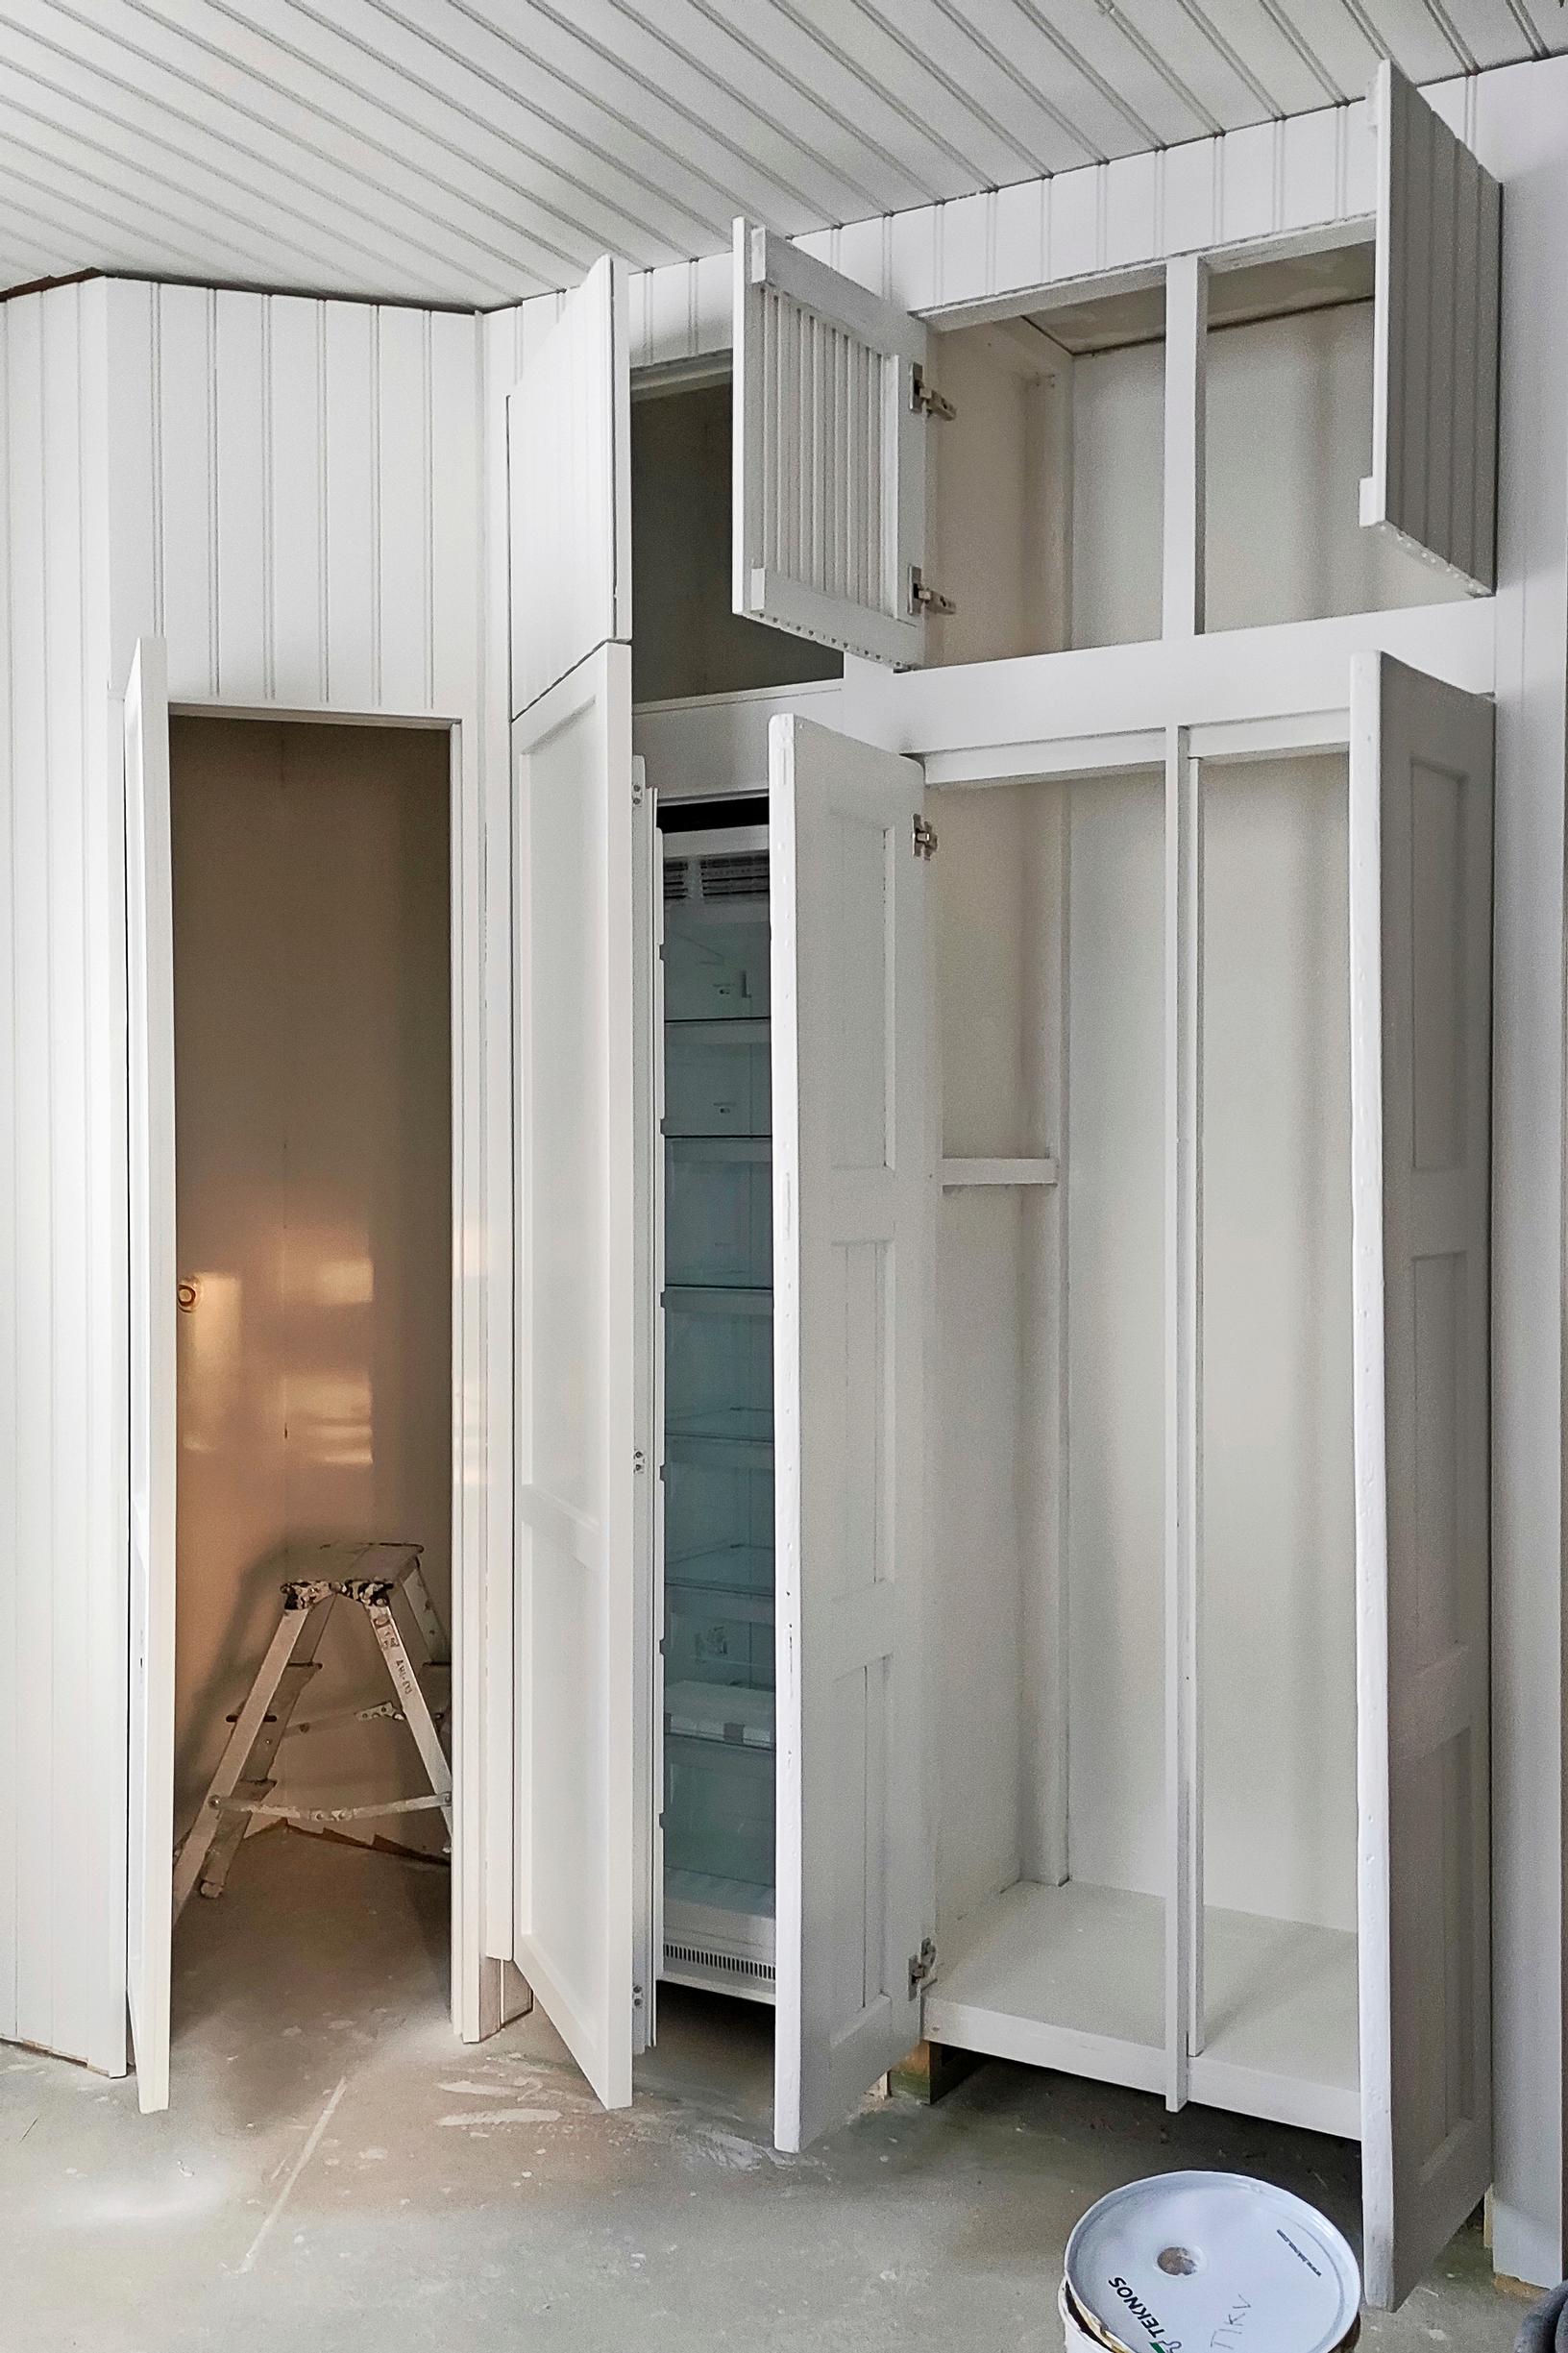
4. Cover the pantry exterior with beadboard paneling and install the door. You can build your own door or use a ready-made one—these measurements fit a 48-centimeter wide door. To complete, you can also build the freezer cabinet and recycling cabinet, then paint everything to finish.

If you prefer, you can use drywall instead of plywood or paneling for the pantry interior and cabinet partitions.
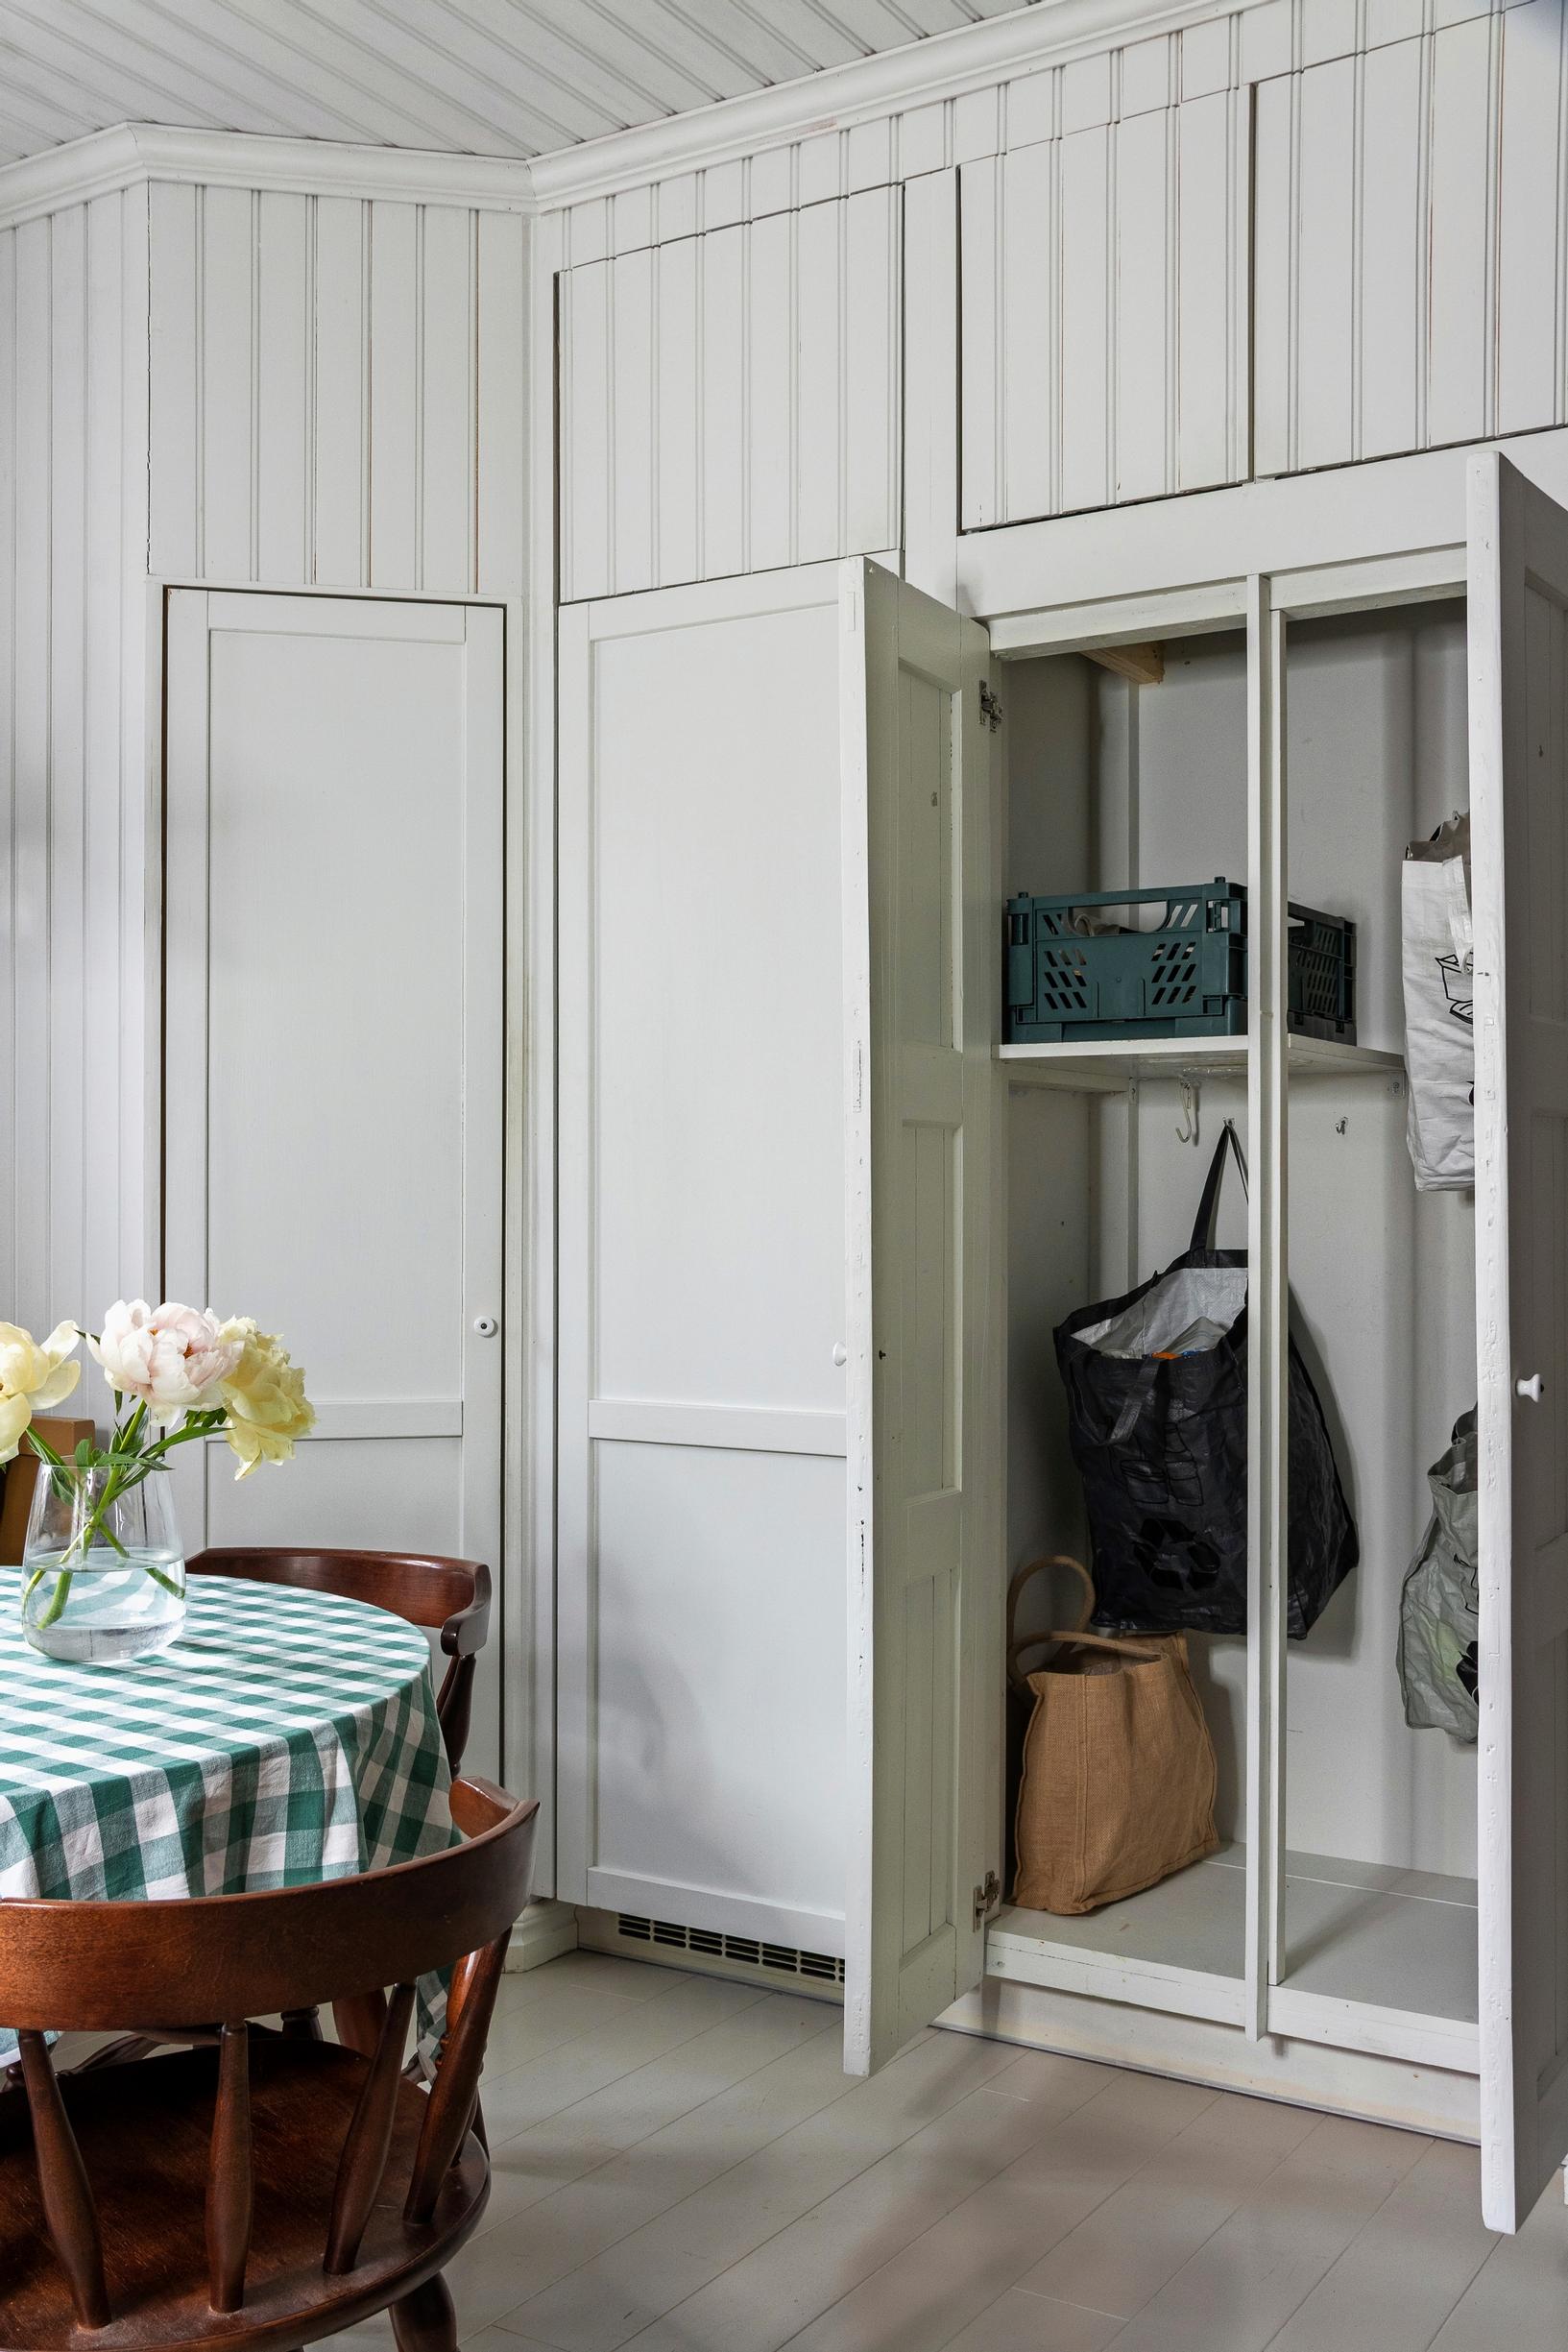
Freezer cabinet and recycling cabinet—instructions:
5. Cut two floor-to-ceiling vertical supports from your framing lumber for the side of the cabinet. Cut six horizontal supports measuring 49.3 centimeters for the side frame. Measure and mark lines on the pantry wall at 154.4 centimeters and 161 centimeters. Assemble and install this side frame element between those lines.
6. Cut three more floor-to-ceiling vertical supports from your framing lumber, unless you want a toe kick for your cabinets—then make them about 15 centimeters shorter. Cut six horizontal pieces at 49.3 centimeters. Attach one vertical support against the pantry’s side where the freezer cabinet front goes, leaving enough clearance for the freezer door to open fully. Build a partition element from two vertical supports, the horizontal pieces, and plywood. Install this partition between the freezer cabinet and the recycling cabinet, ensuring there is enough space for the freezer. Use plywood or edge-glued board to create shelves inside the recycling cabinet.
7. Cover the cabinet frames with beadboard paneling and install the doors. Paint the entire unit with panel paint and a brush.

8. If you wish, build upper cabinets on top. Use beadboard paneling or ready-made doors. The door opens with a push-to-open hinge.
If you’re building a cabinet for an integrated cooling appliance, ensure there’s enough ventilation space to prevent overheating.