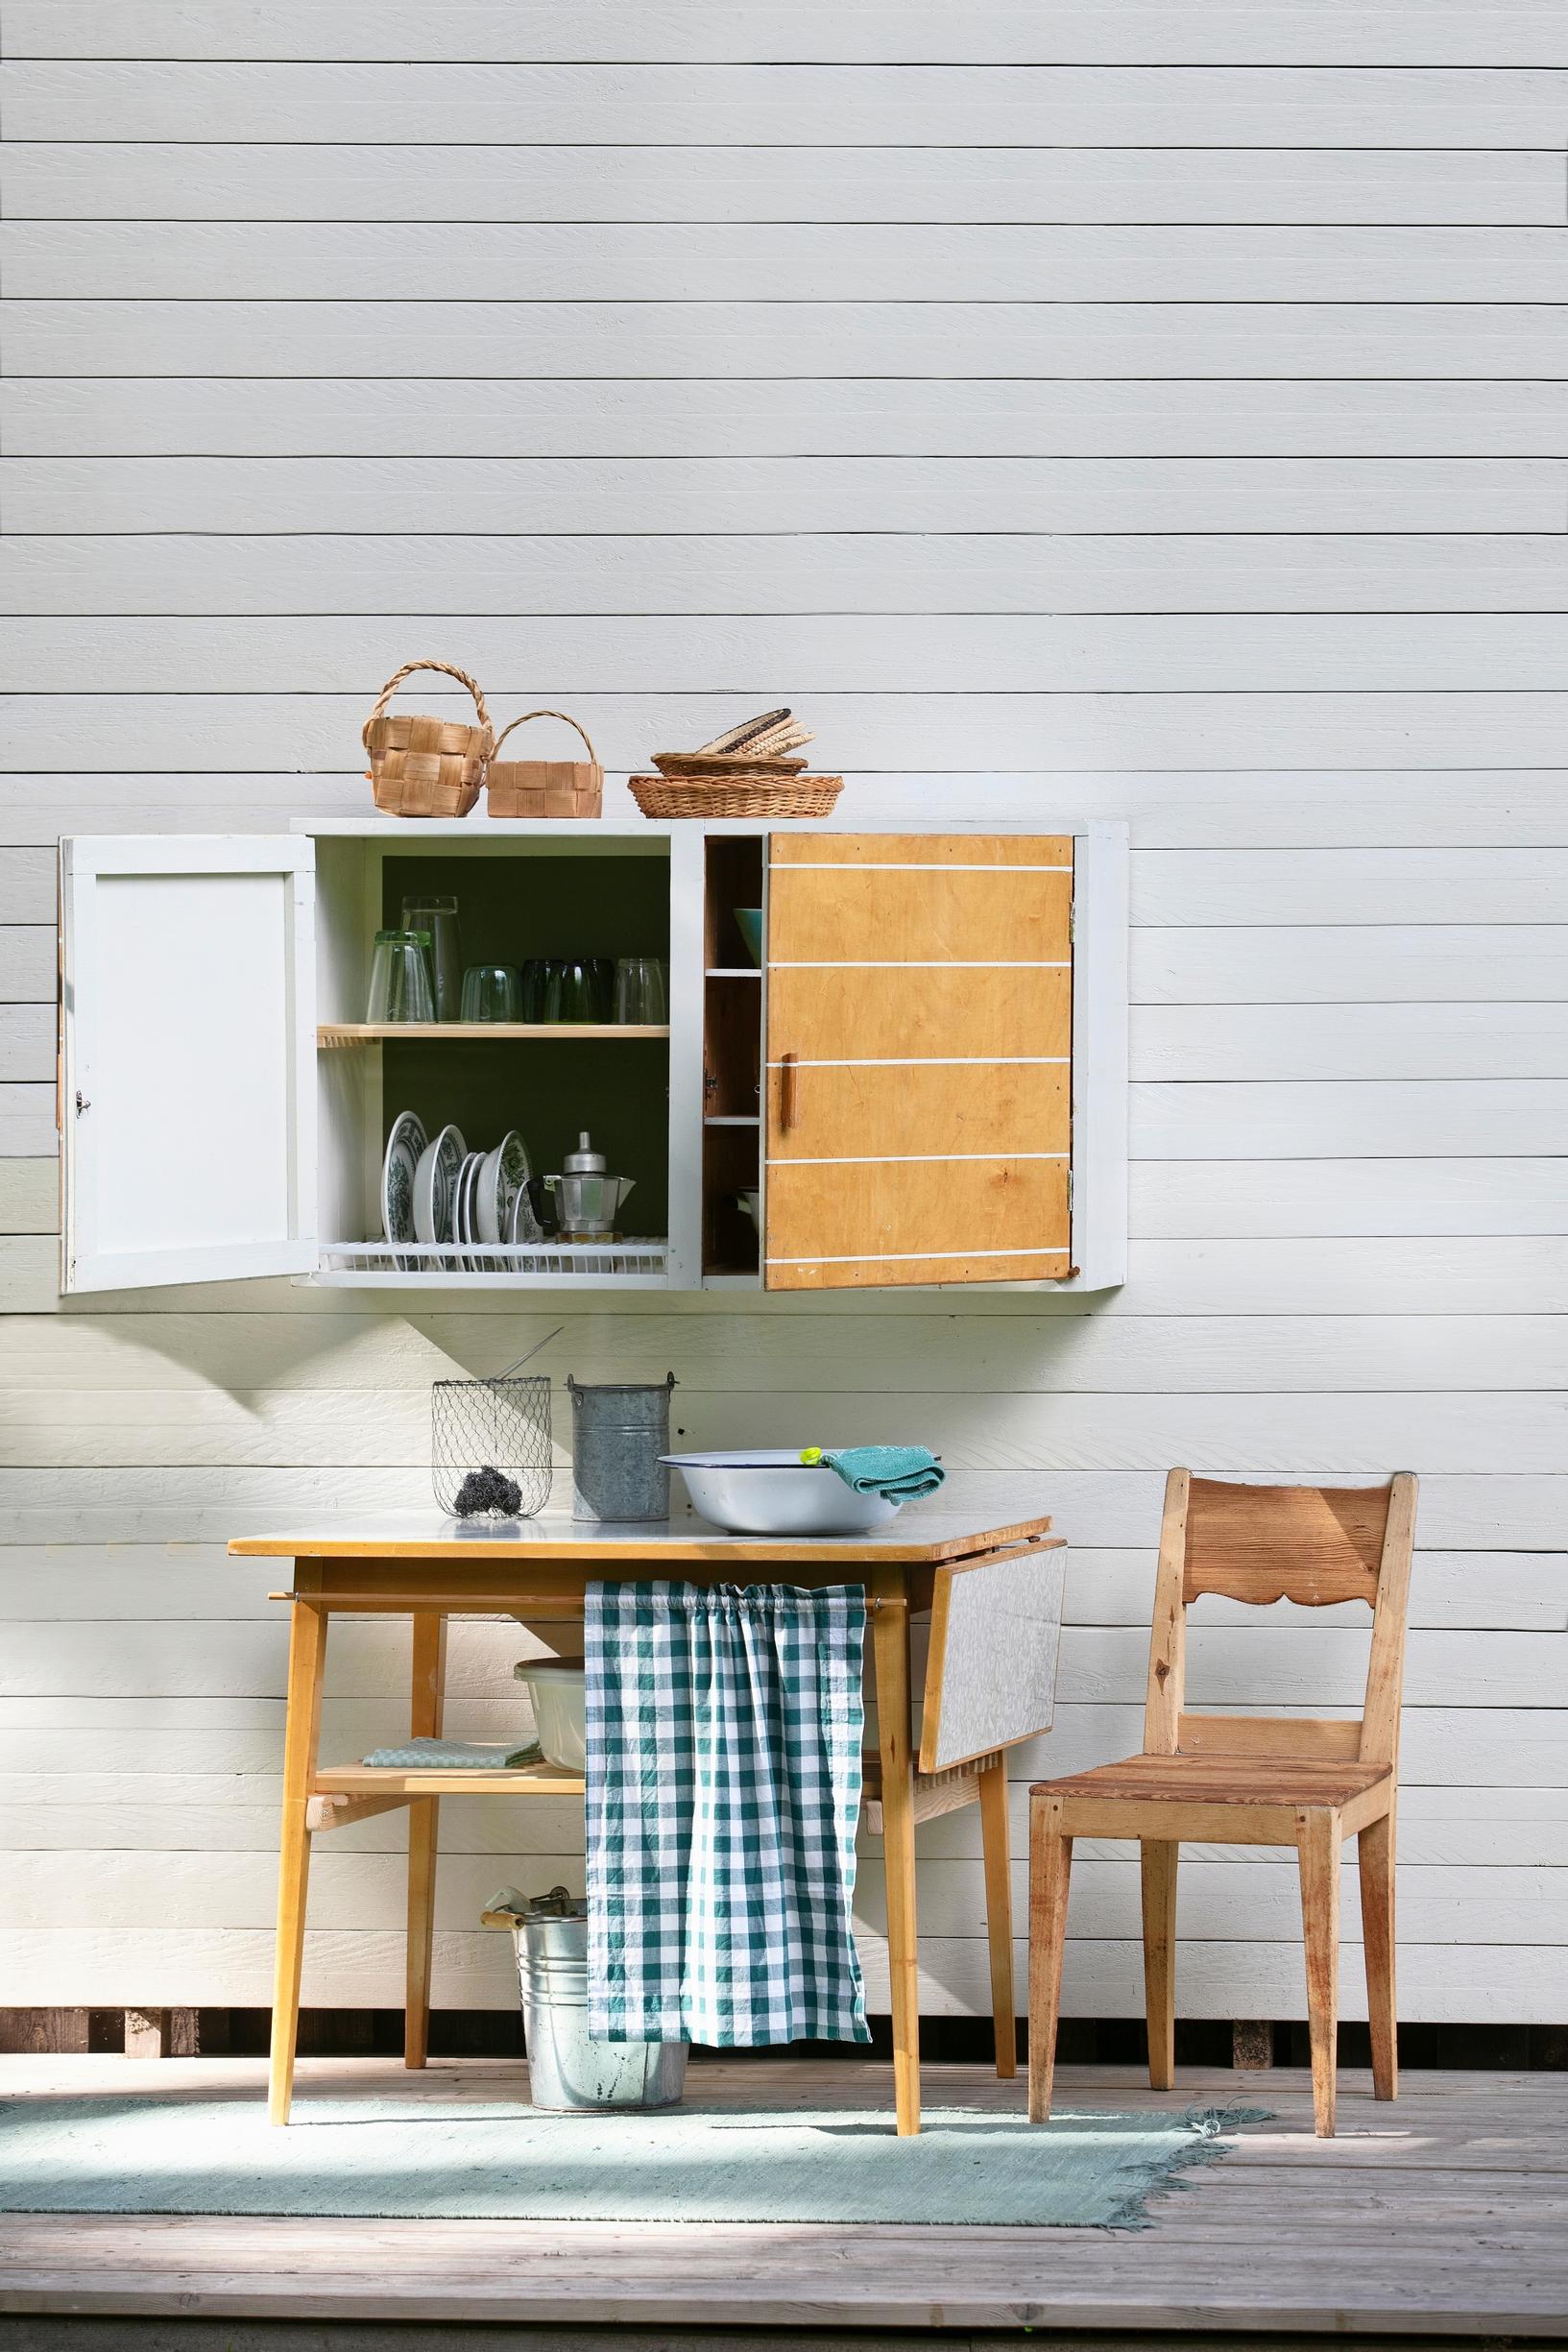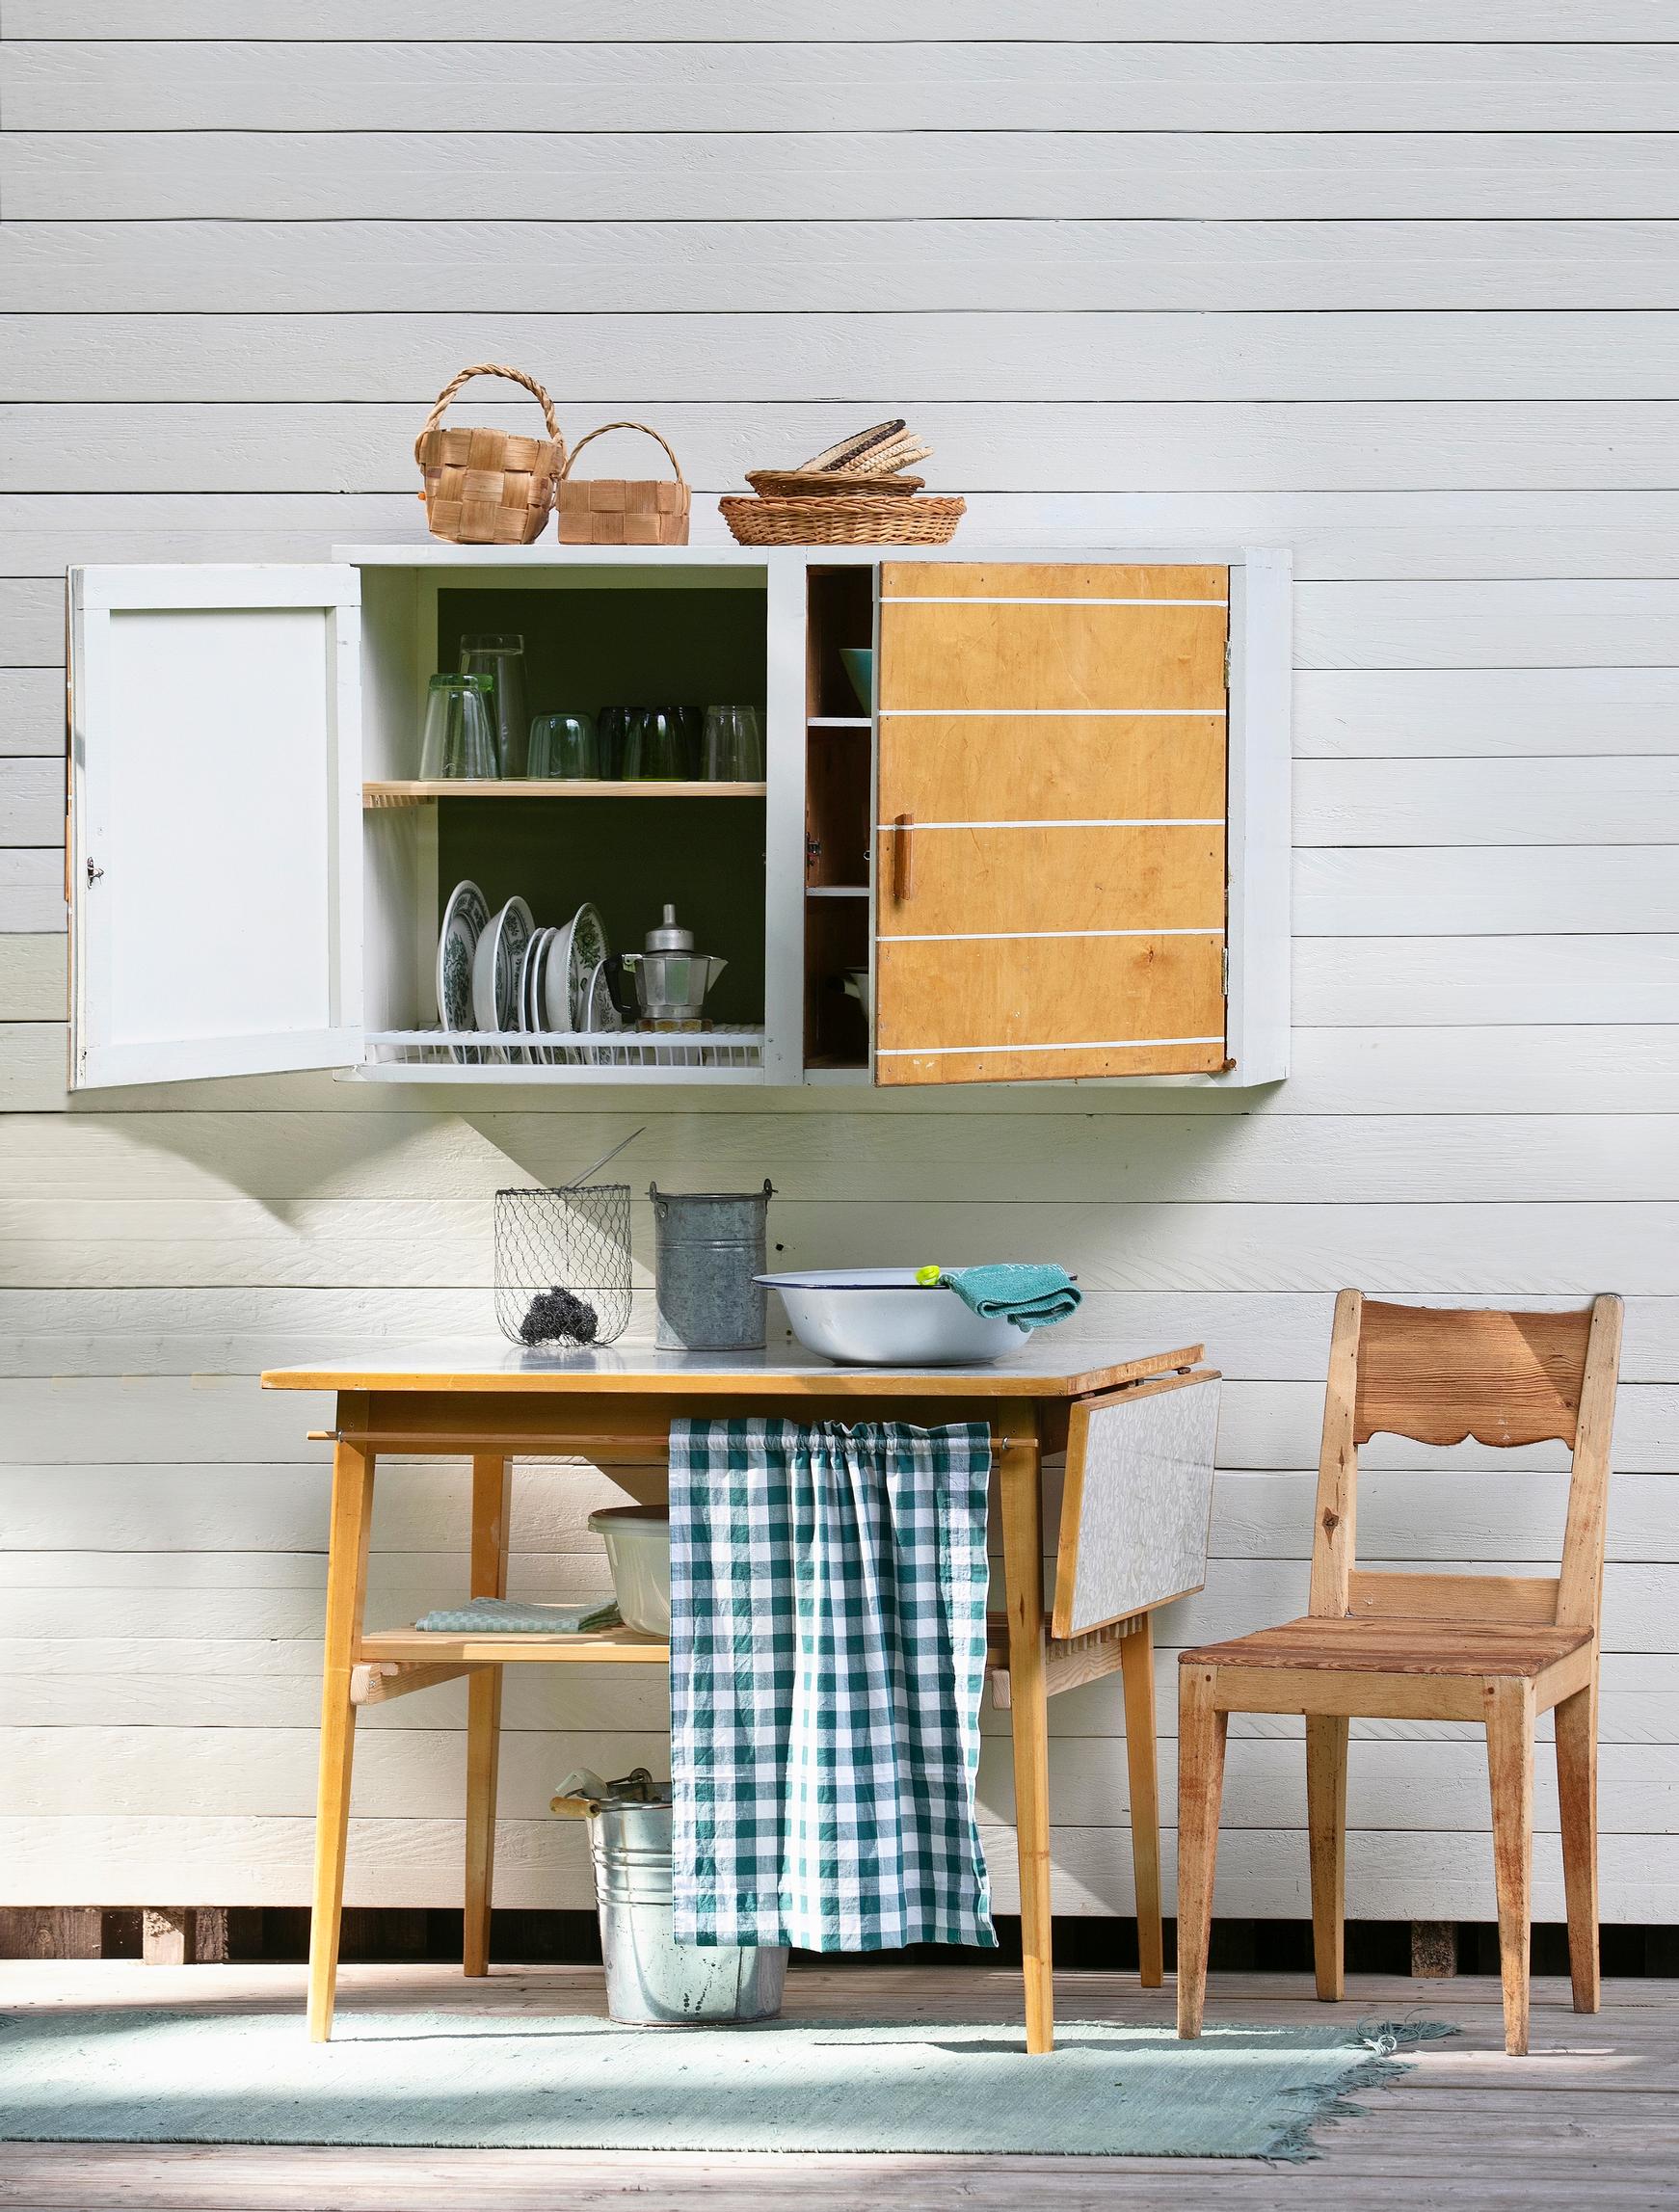
Turn an old cupboard and table into a functional washing station—complete with a dish-drying cabinet
Turn a solid-wood overhead cabinet and a laminate-coated table into a practical dish station, perfect for a small cabin without running water. The dish-drying cabinet is an essential helper, and washbasins and water buckets stay out of sight behind the curtain.
Dish-drying cabinet and and wash station—supplies:
a wooden cabinet and a table coated with high-pressure laminate
planed pine molding: 21 × 45 mm, 15 × 18 mm, 10 × 15 mm (approximately 0.8 × 1.8 in, 0.6 × 0.7 in, 0.4 × 0.6 in)
round dowel, diameter 12 mm (about 0.5 in), and eye screws
countersunk screws in various lengths
a trim saw and a jigsaw, a drill, a screwdriver, an angle grinder, and a sander
a pair of clamps
moisture-resistant wood or all-purpose glue
Futura Aqua furniture paint and a synthetic-bristle brush
Osmo Color Top oil and a cloth
a tape measure, a square, a ruler, and a pencil.
Dish-drying cabinet—instructions:

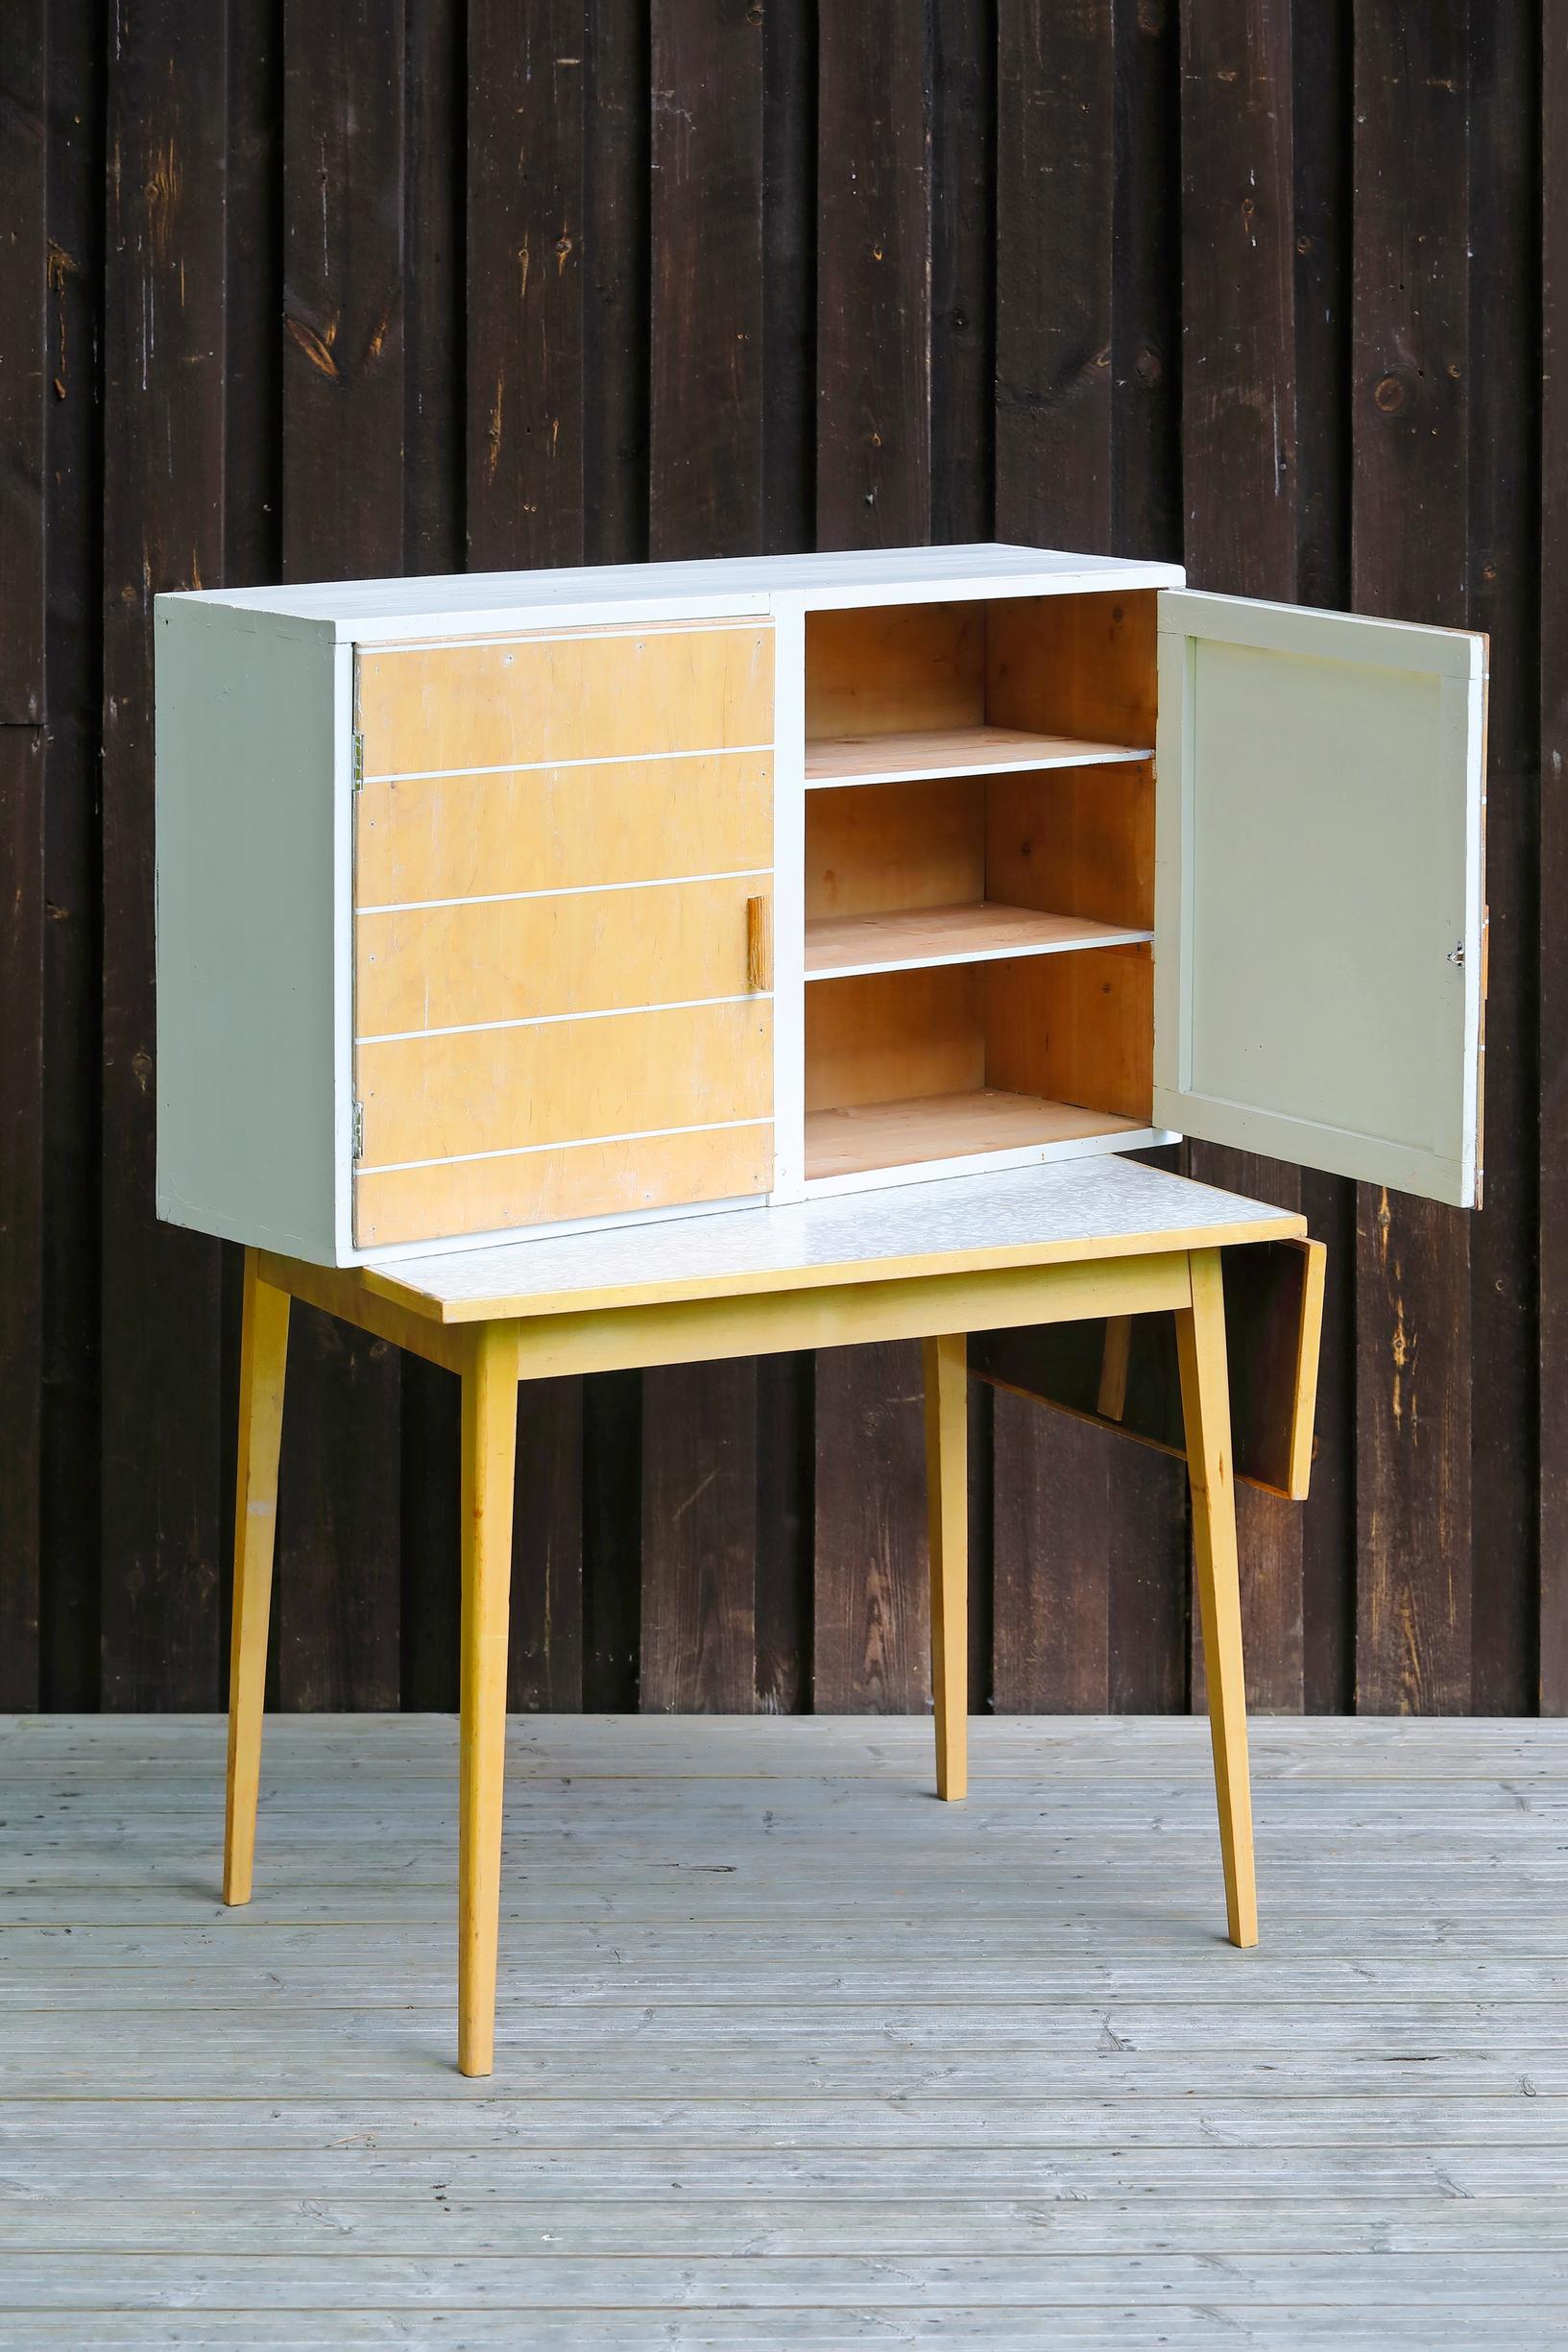
1. Transform a solid-wood cabinet from the flea market to fit your vibe! Remove the paint layer, paint the frame white, varnish the plywood doors for protection, and add racing stripes for decoration. A table with a high-pressure laminate surface holds up well to water.

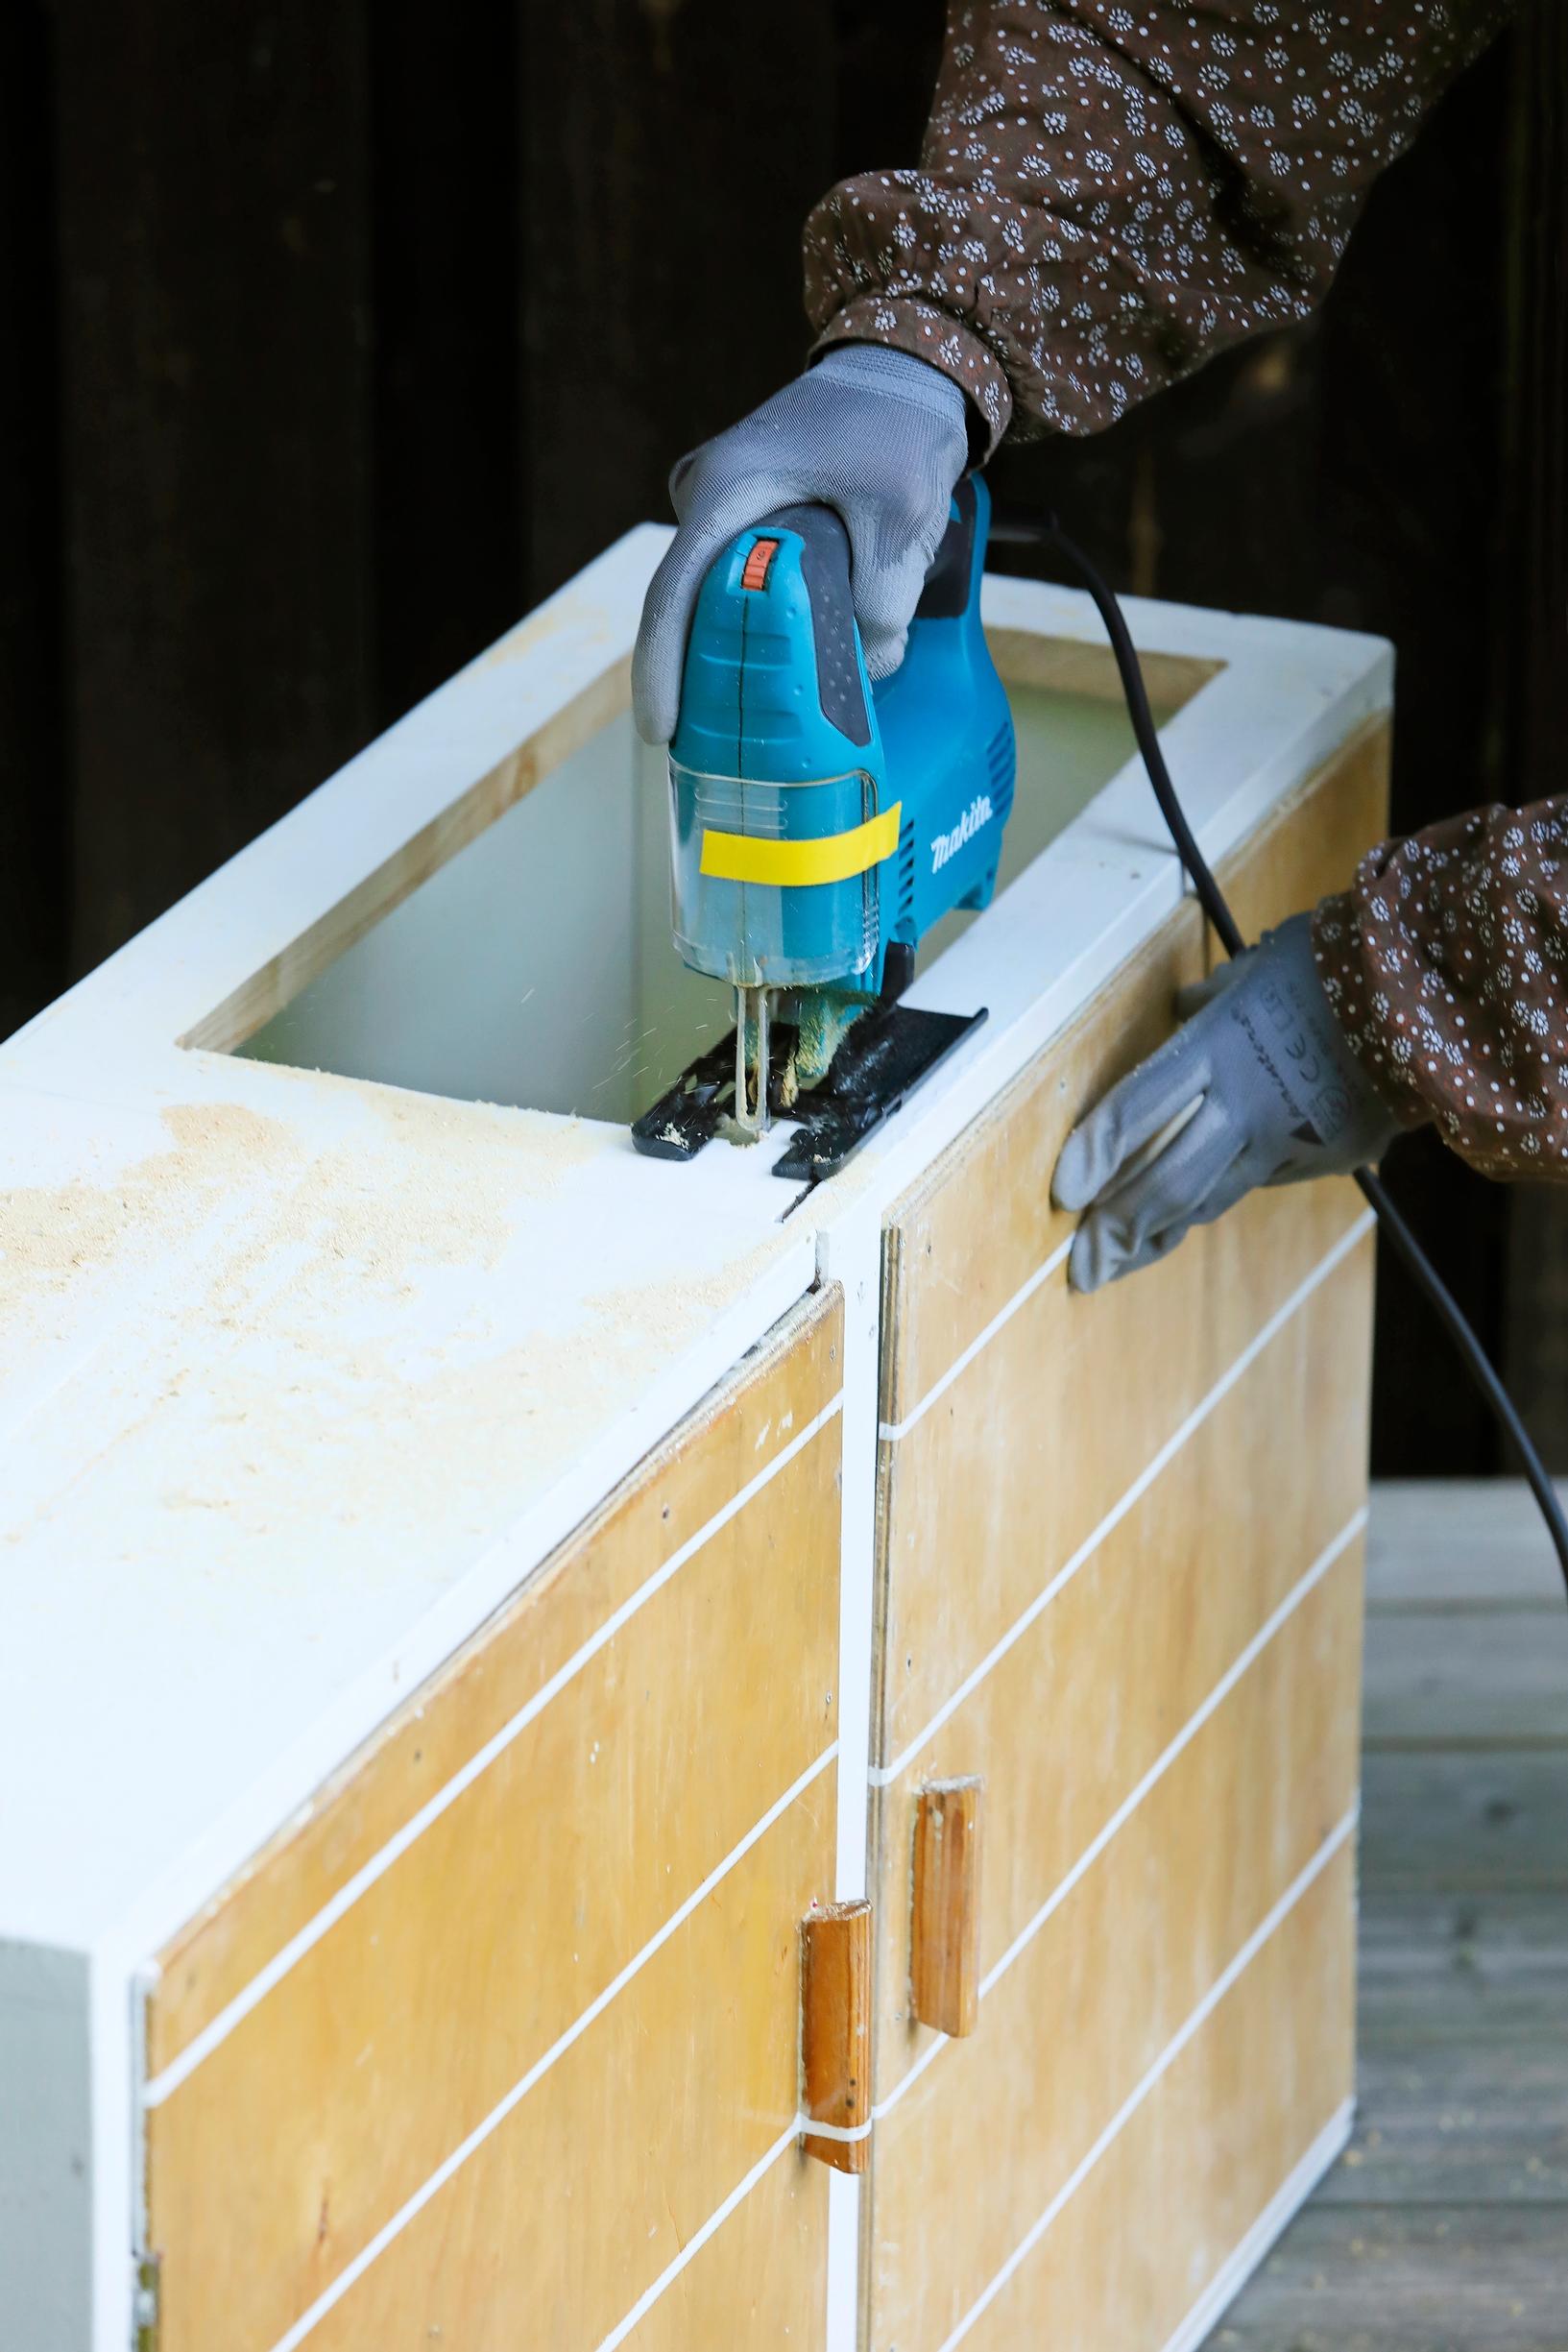
2. Draw an opening for the plate rack on the lower part of the cabinet. Drill generously sized holes in the corners and saw out the piece with a jigsaw. Sand the edges of the opening until smooth and neat. Remove any unnecessary supports inside the cabinet and sand the walls.

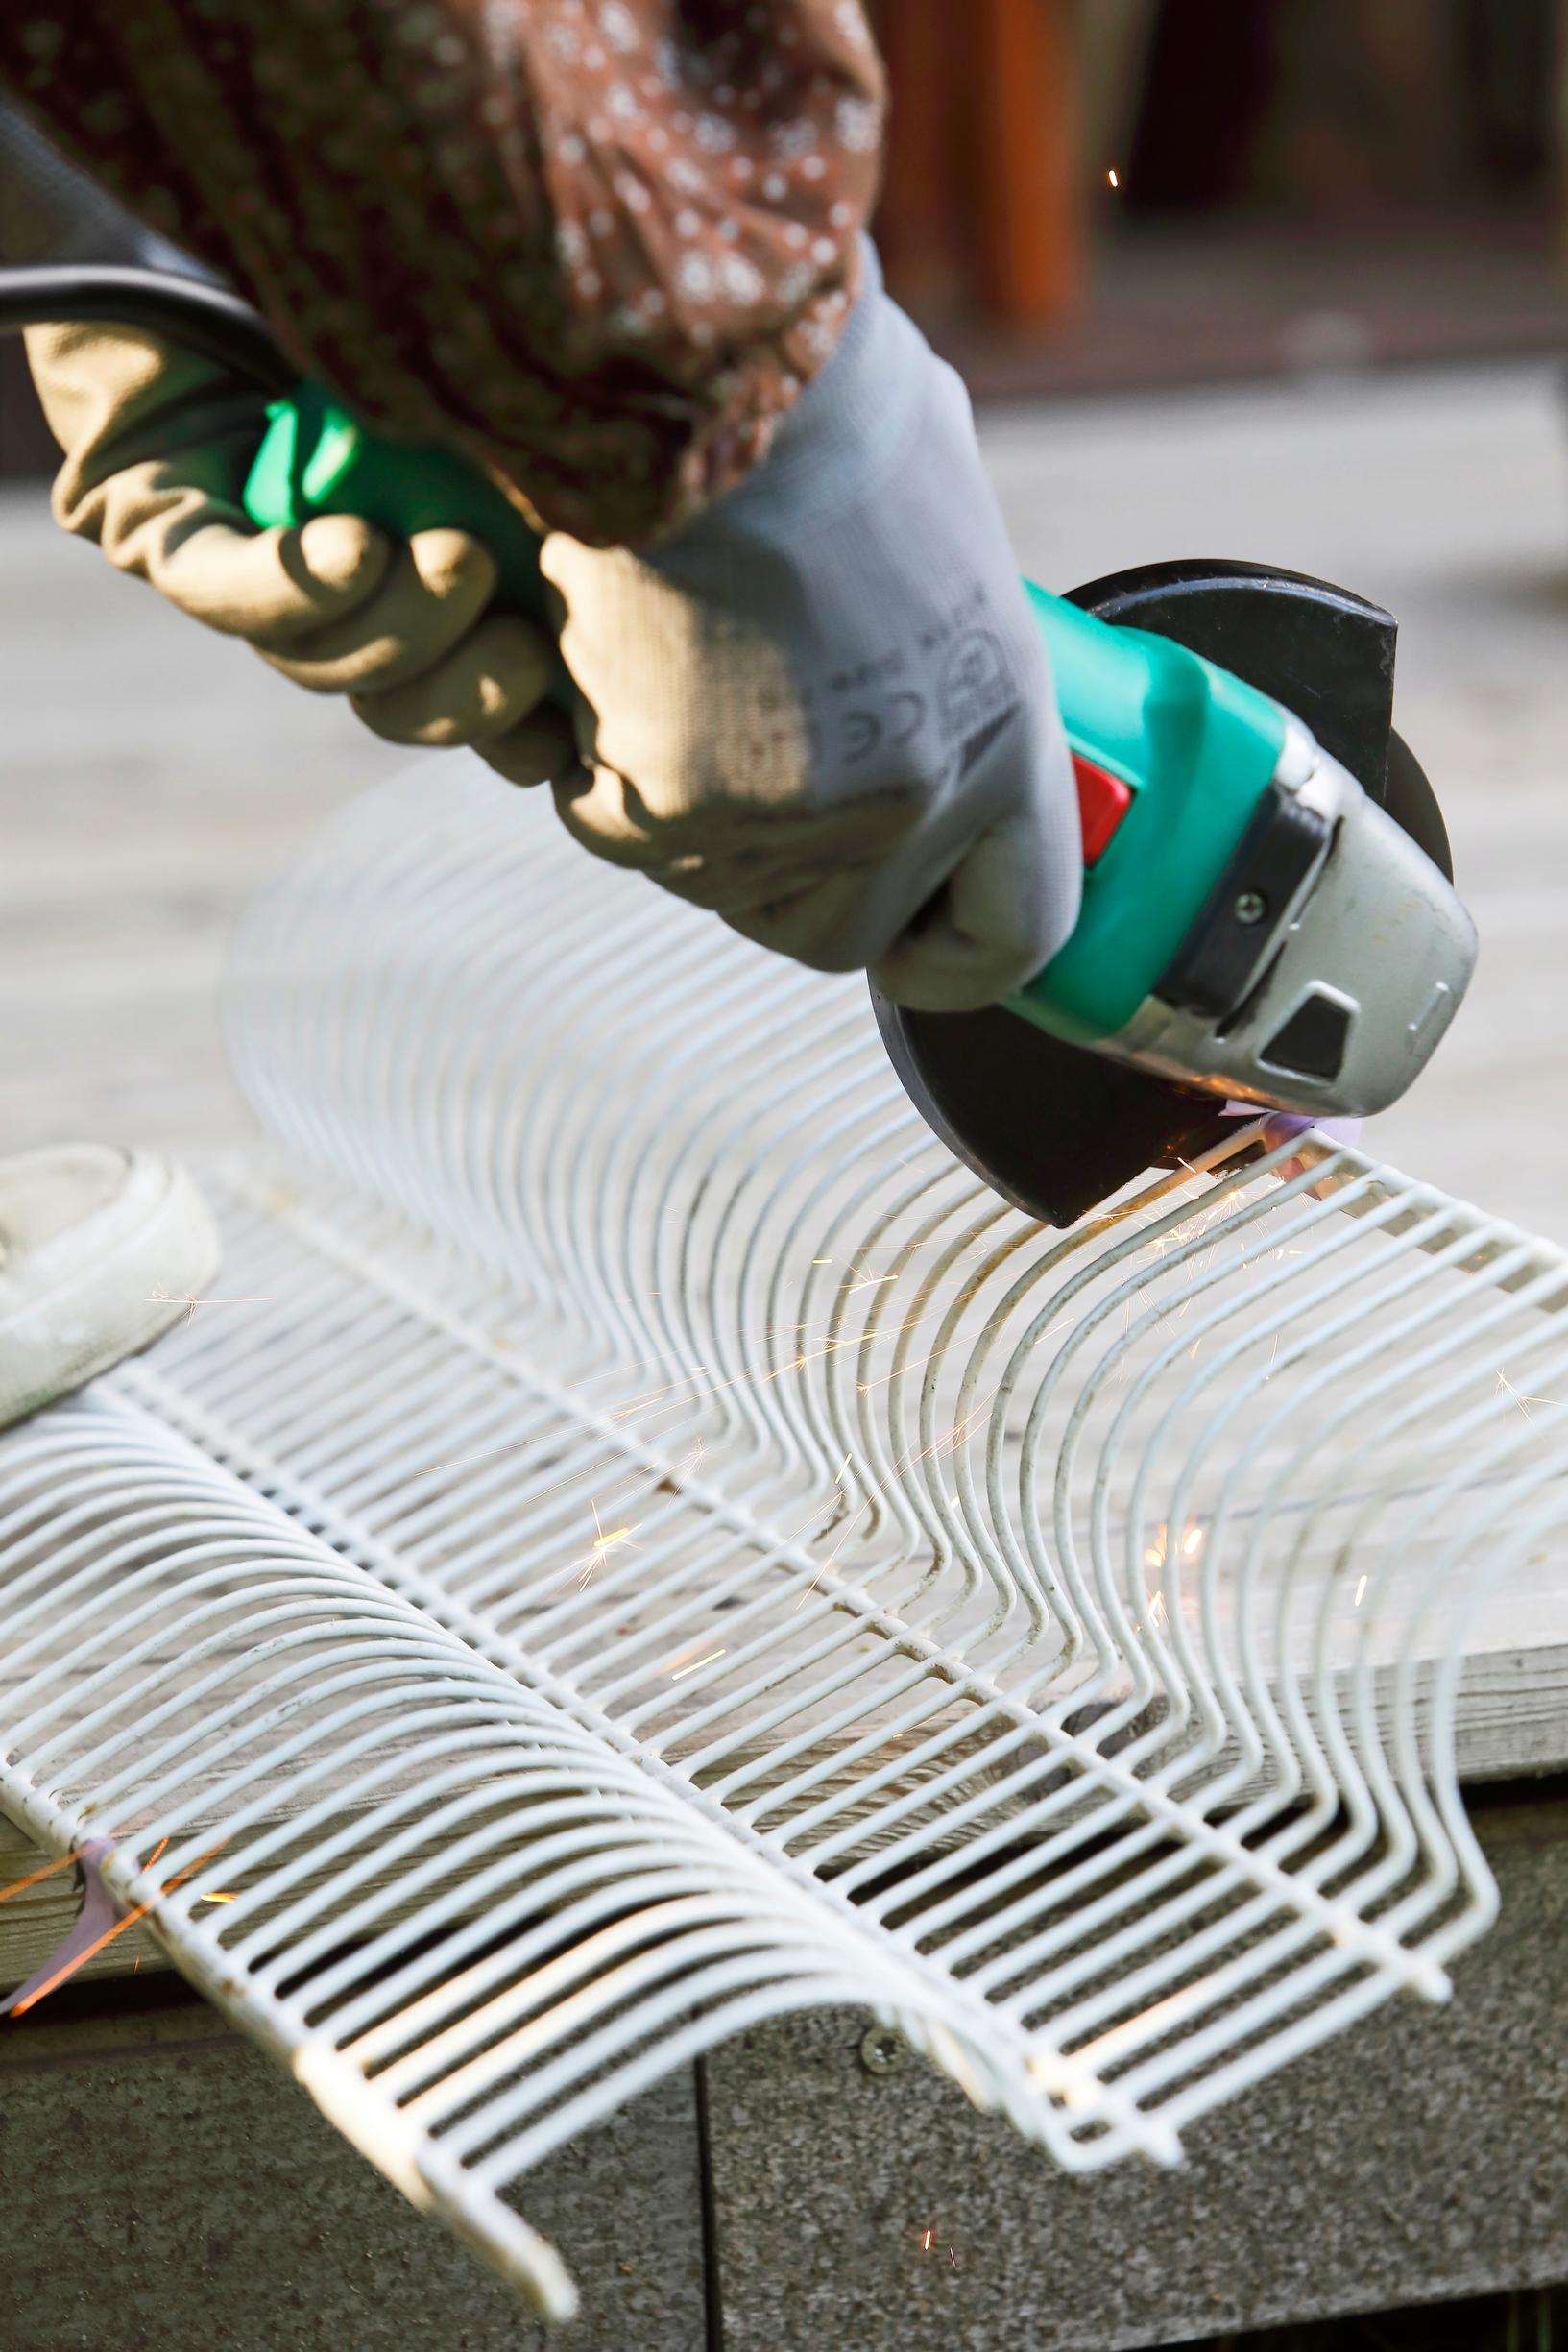
3. Measure the inside of the cabinet and cut the metal dish shelf to length with an angle grinder. If you want one or two shelves for glasses and cups made from the same material, shorten them in the same way.

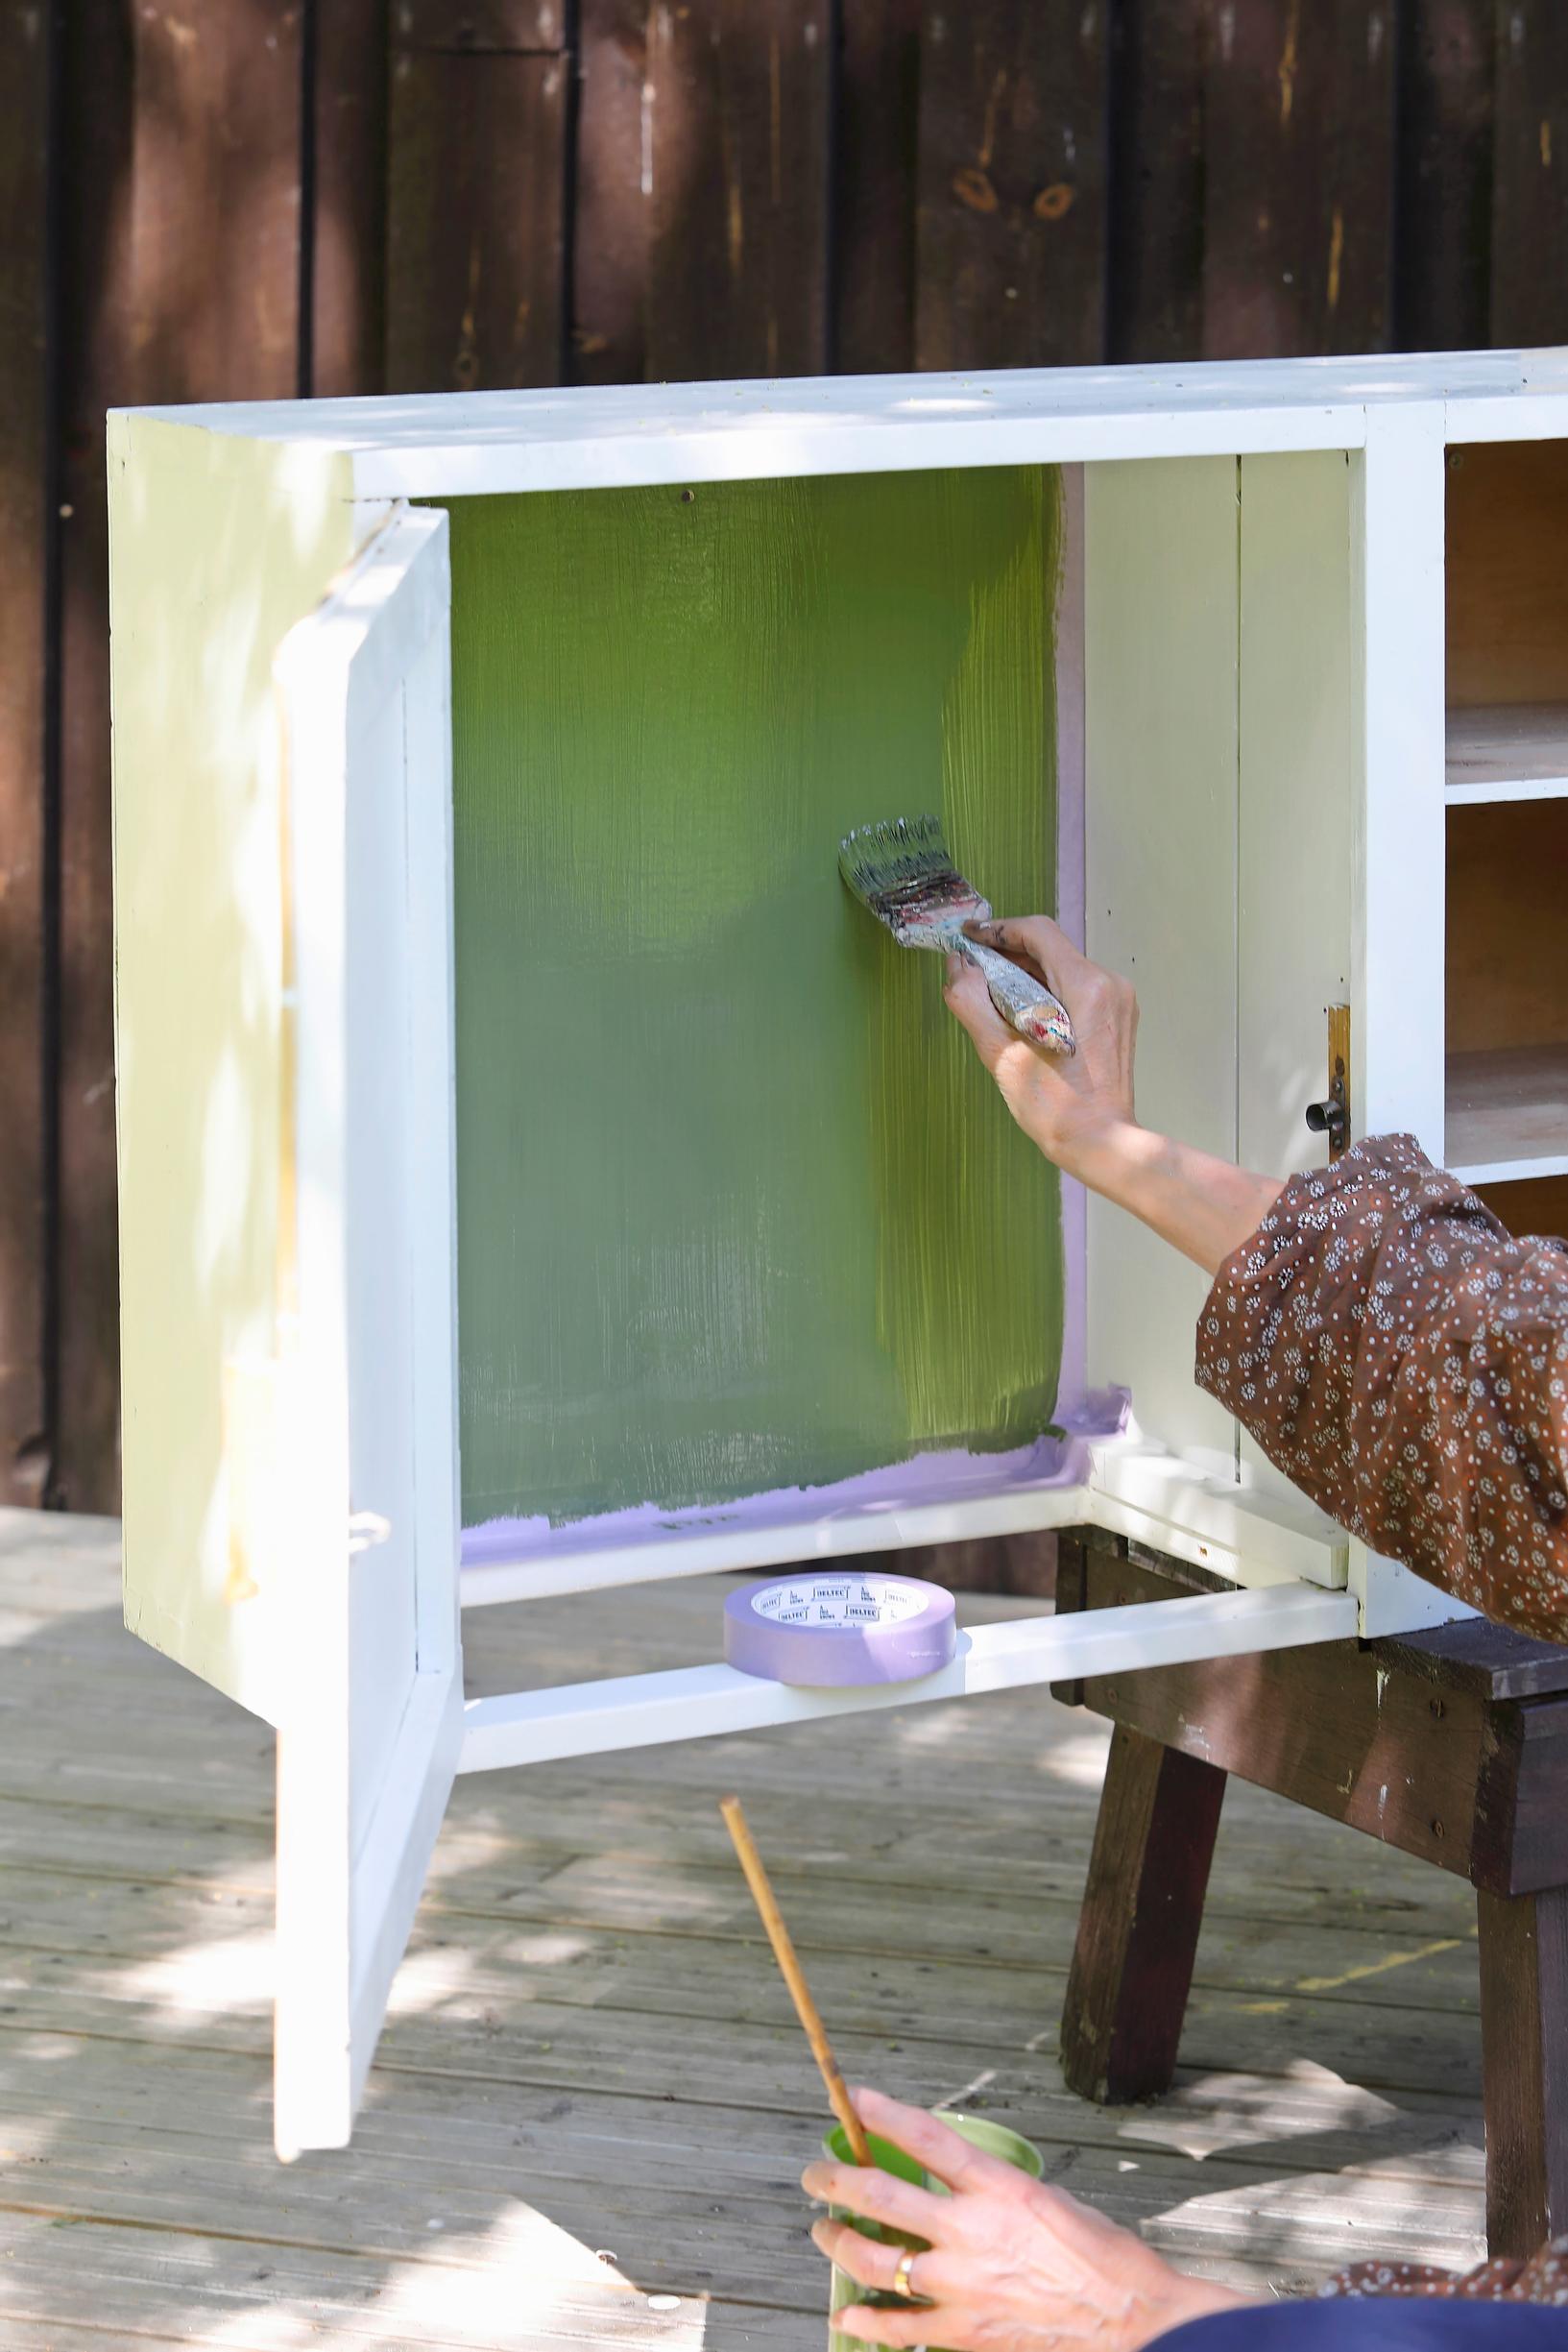
4. Remove the old shelf brackets and trim. Sand the inside of the cabinet, then paint it white. Tape off the edges of the back panel, then apply two or three coats of green or any color you prefer. Remove the tape immediately after painting.

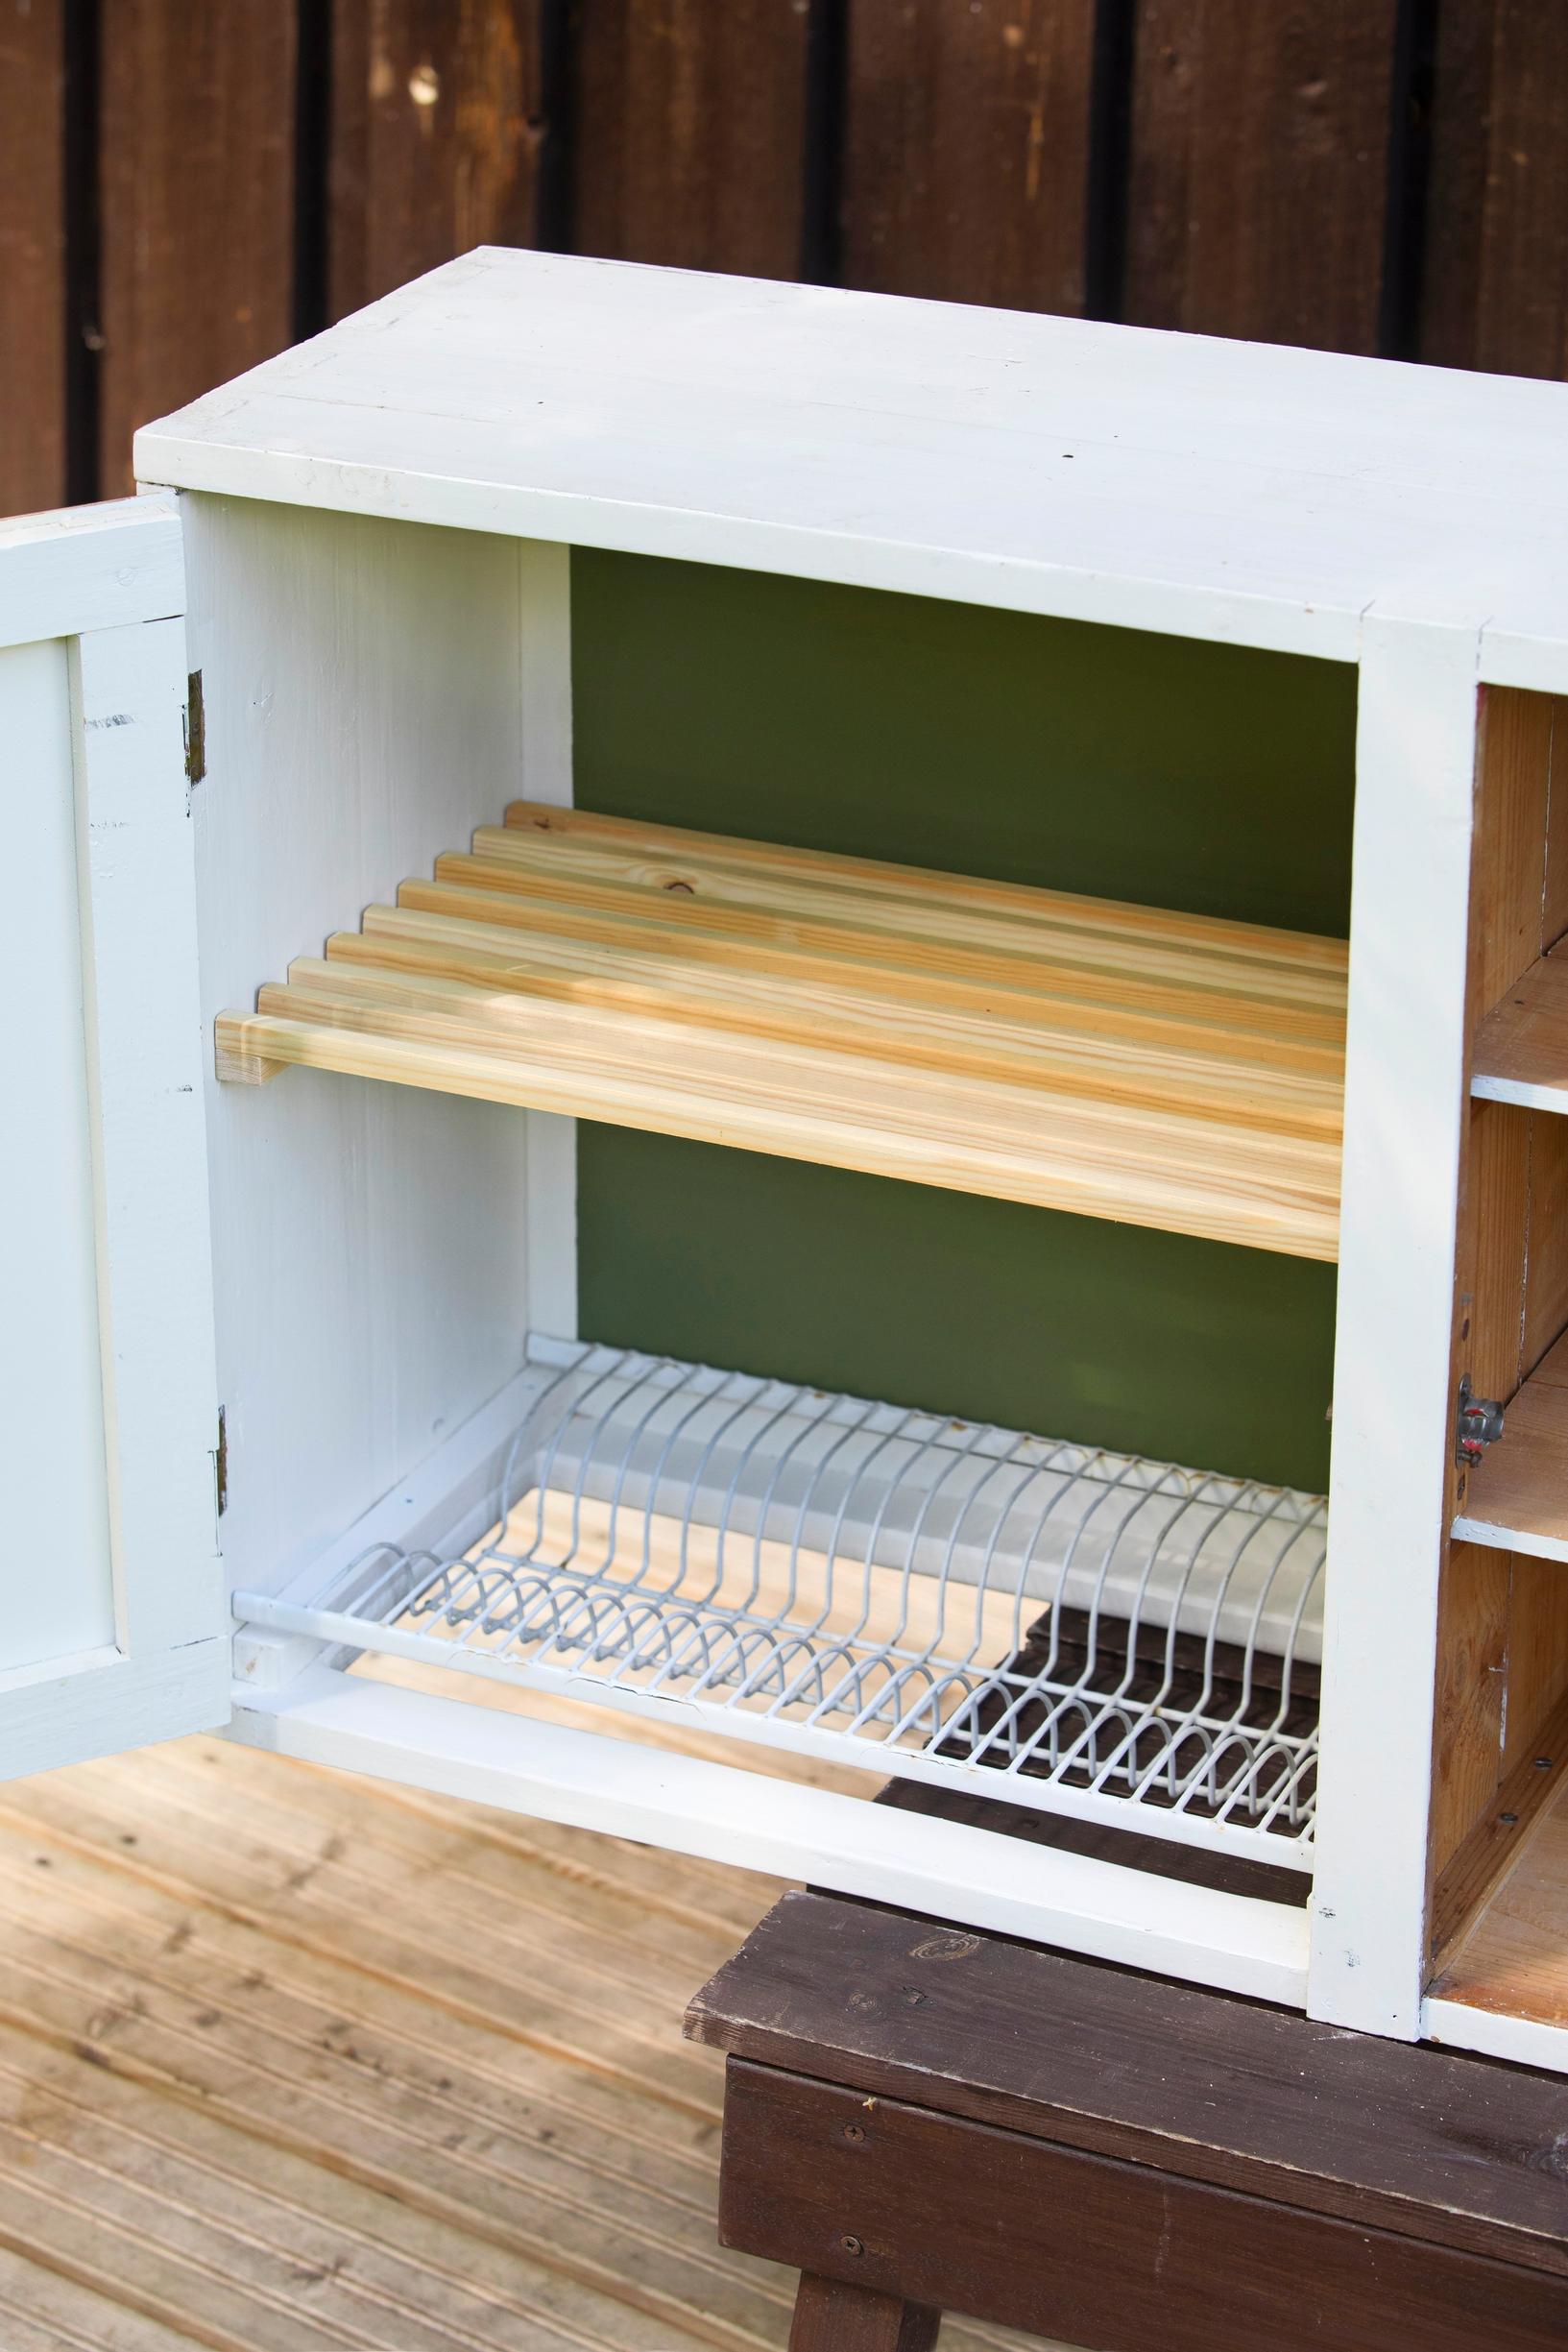
5. Measure the dish-drying cabinet for the top shelf. Drill a couple of countersunk holes in the shelf supports. Glue light moldings on top of the supports. Then fasten the moldings to the supports from underneath using screws. Protect the shelf with oil and secure it in place.
Wash station—instructions:

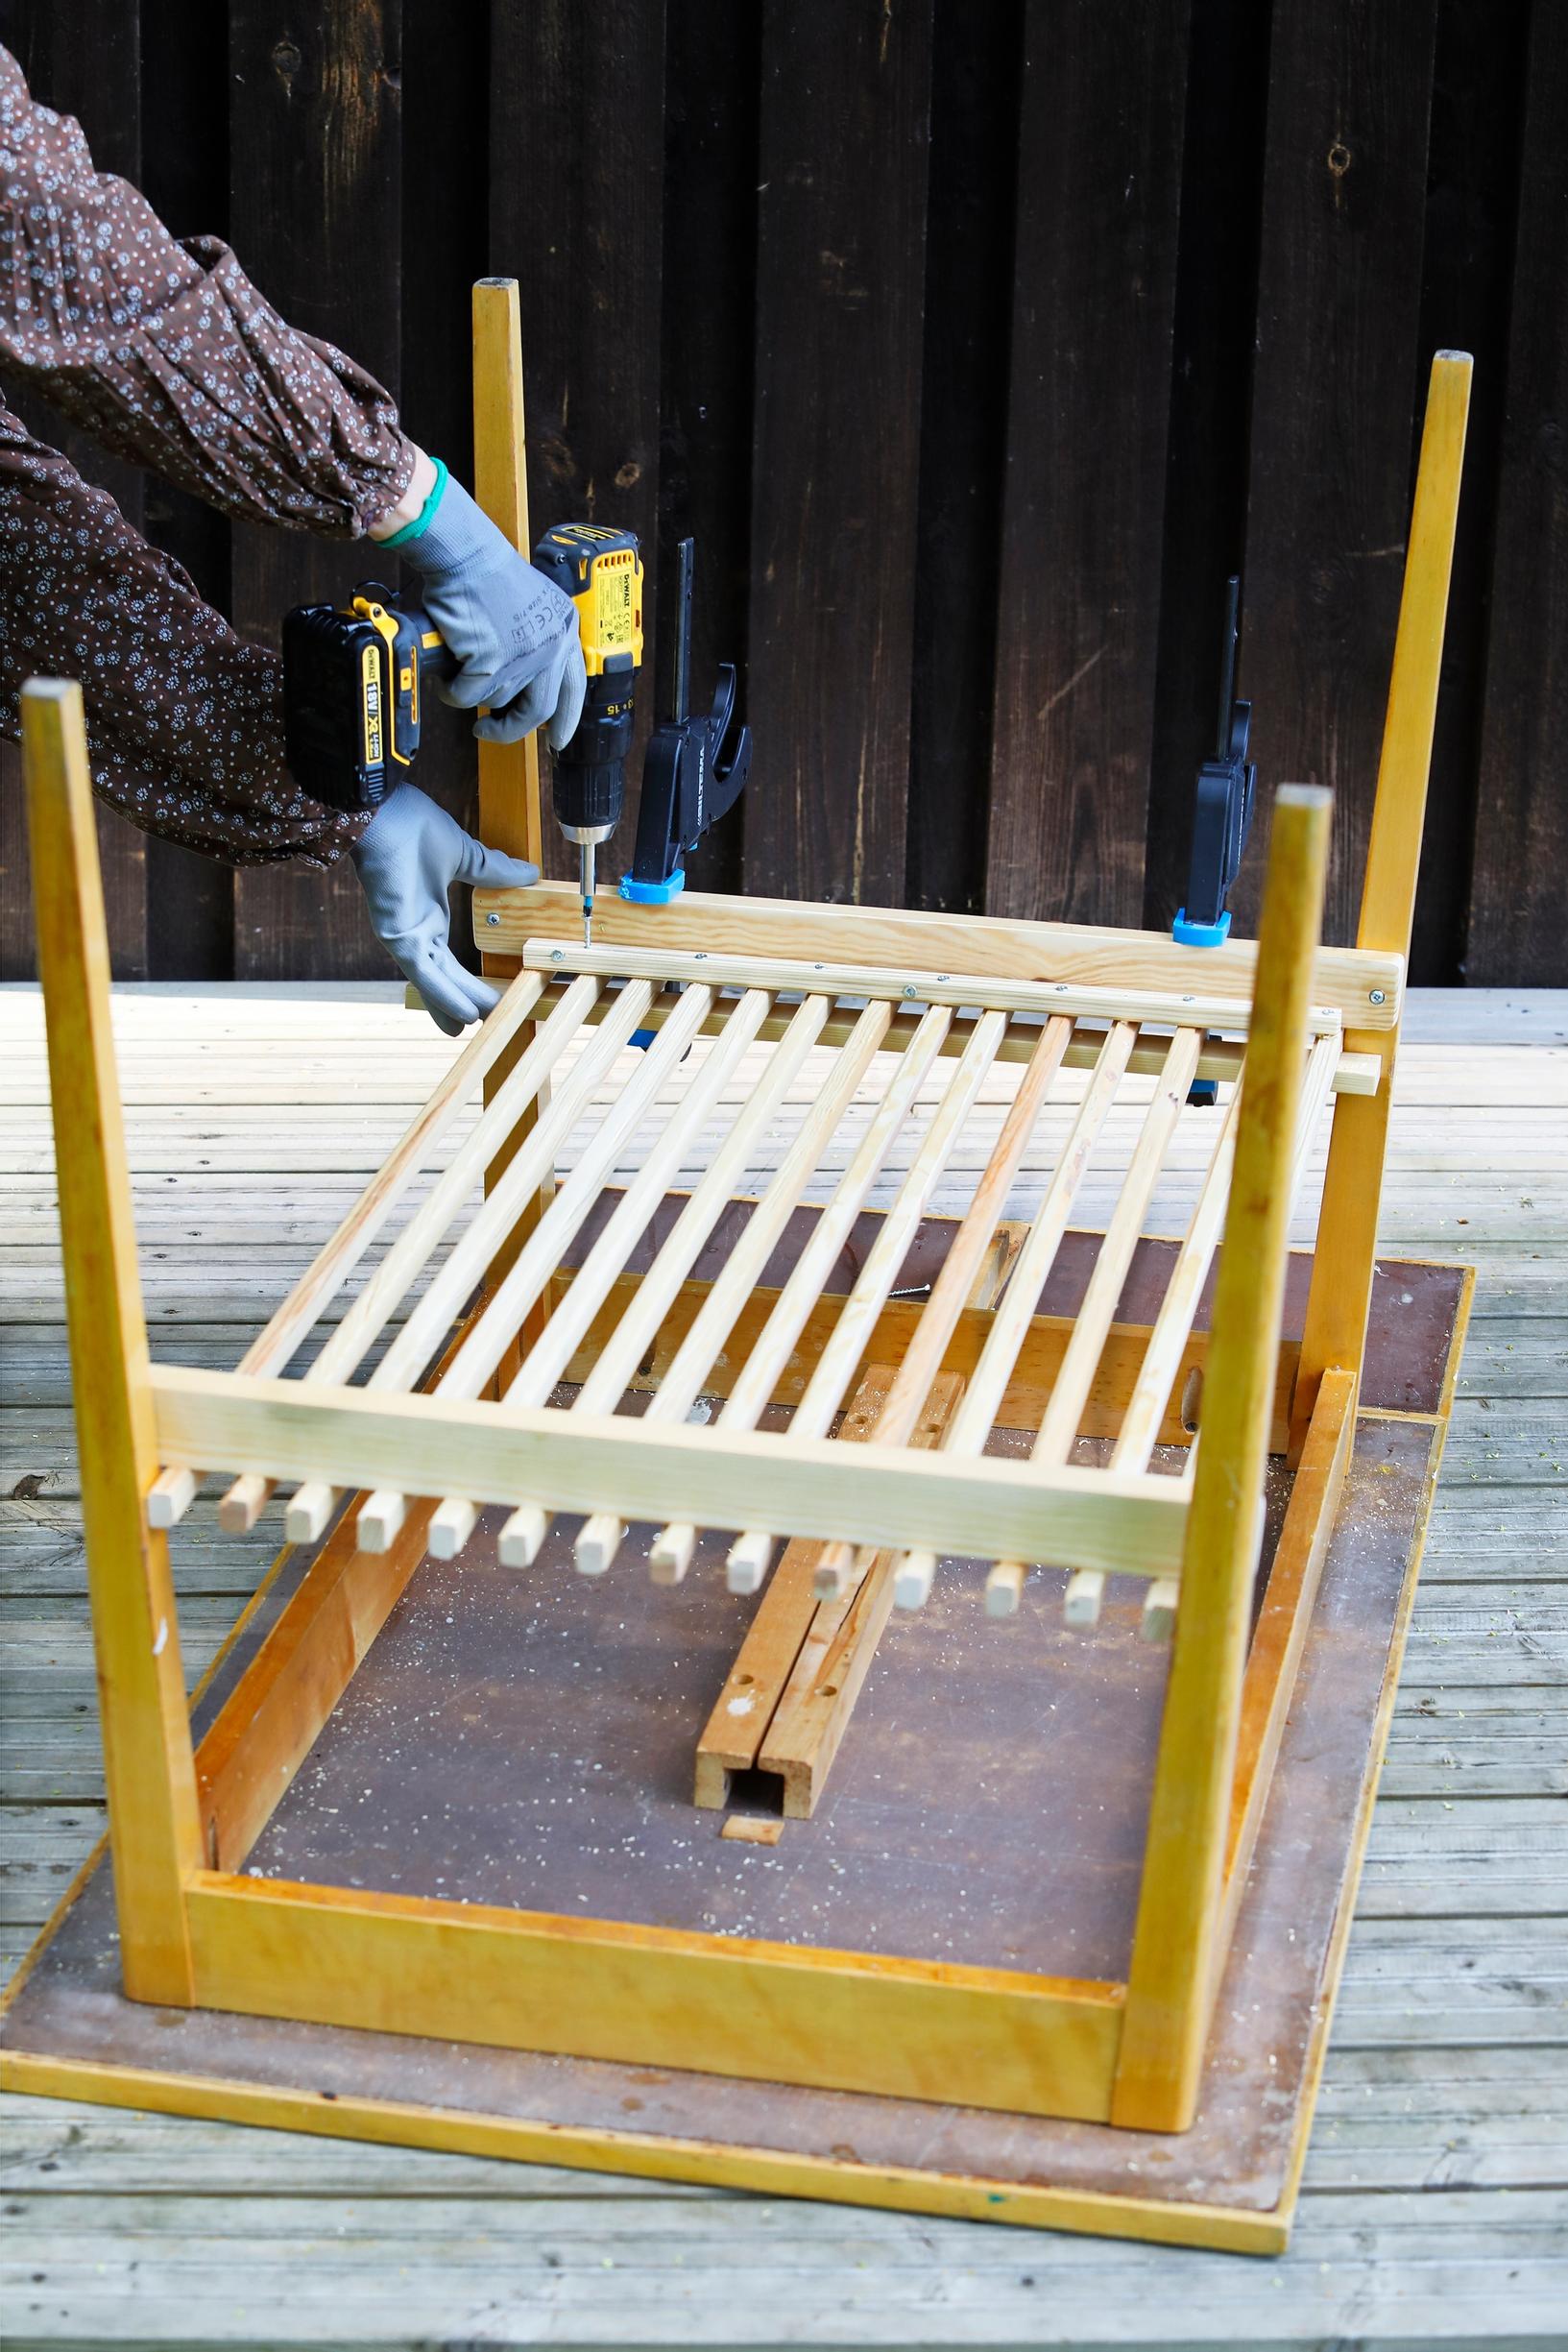
1. Attach shelf supports to the inside of the table legs. Glue the shelf slats onto the supports. Flip the table upside down. Once the glue is dry, screw a strip of molding into the shelf supports and slats.
2. Attach the round dowel for the curtain with eye screws.