Easy DIY upgrade: give wooden cabinets a fresh look with chalk paint and wallpaper
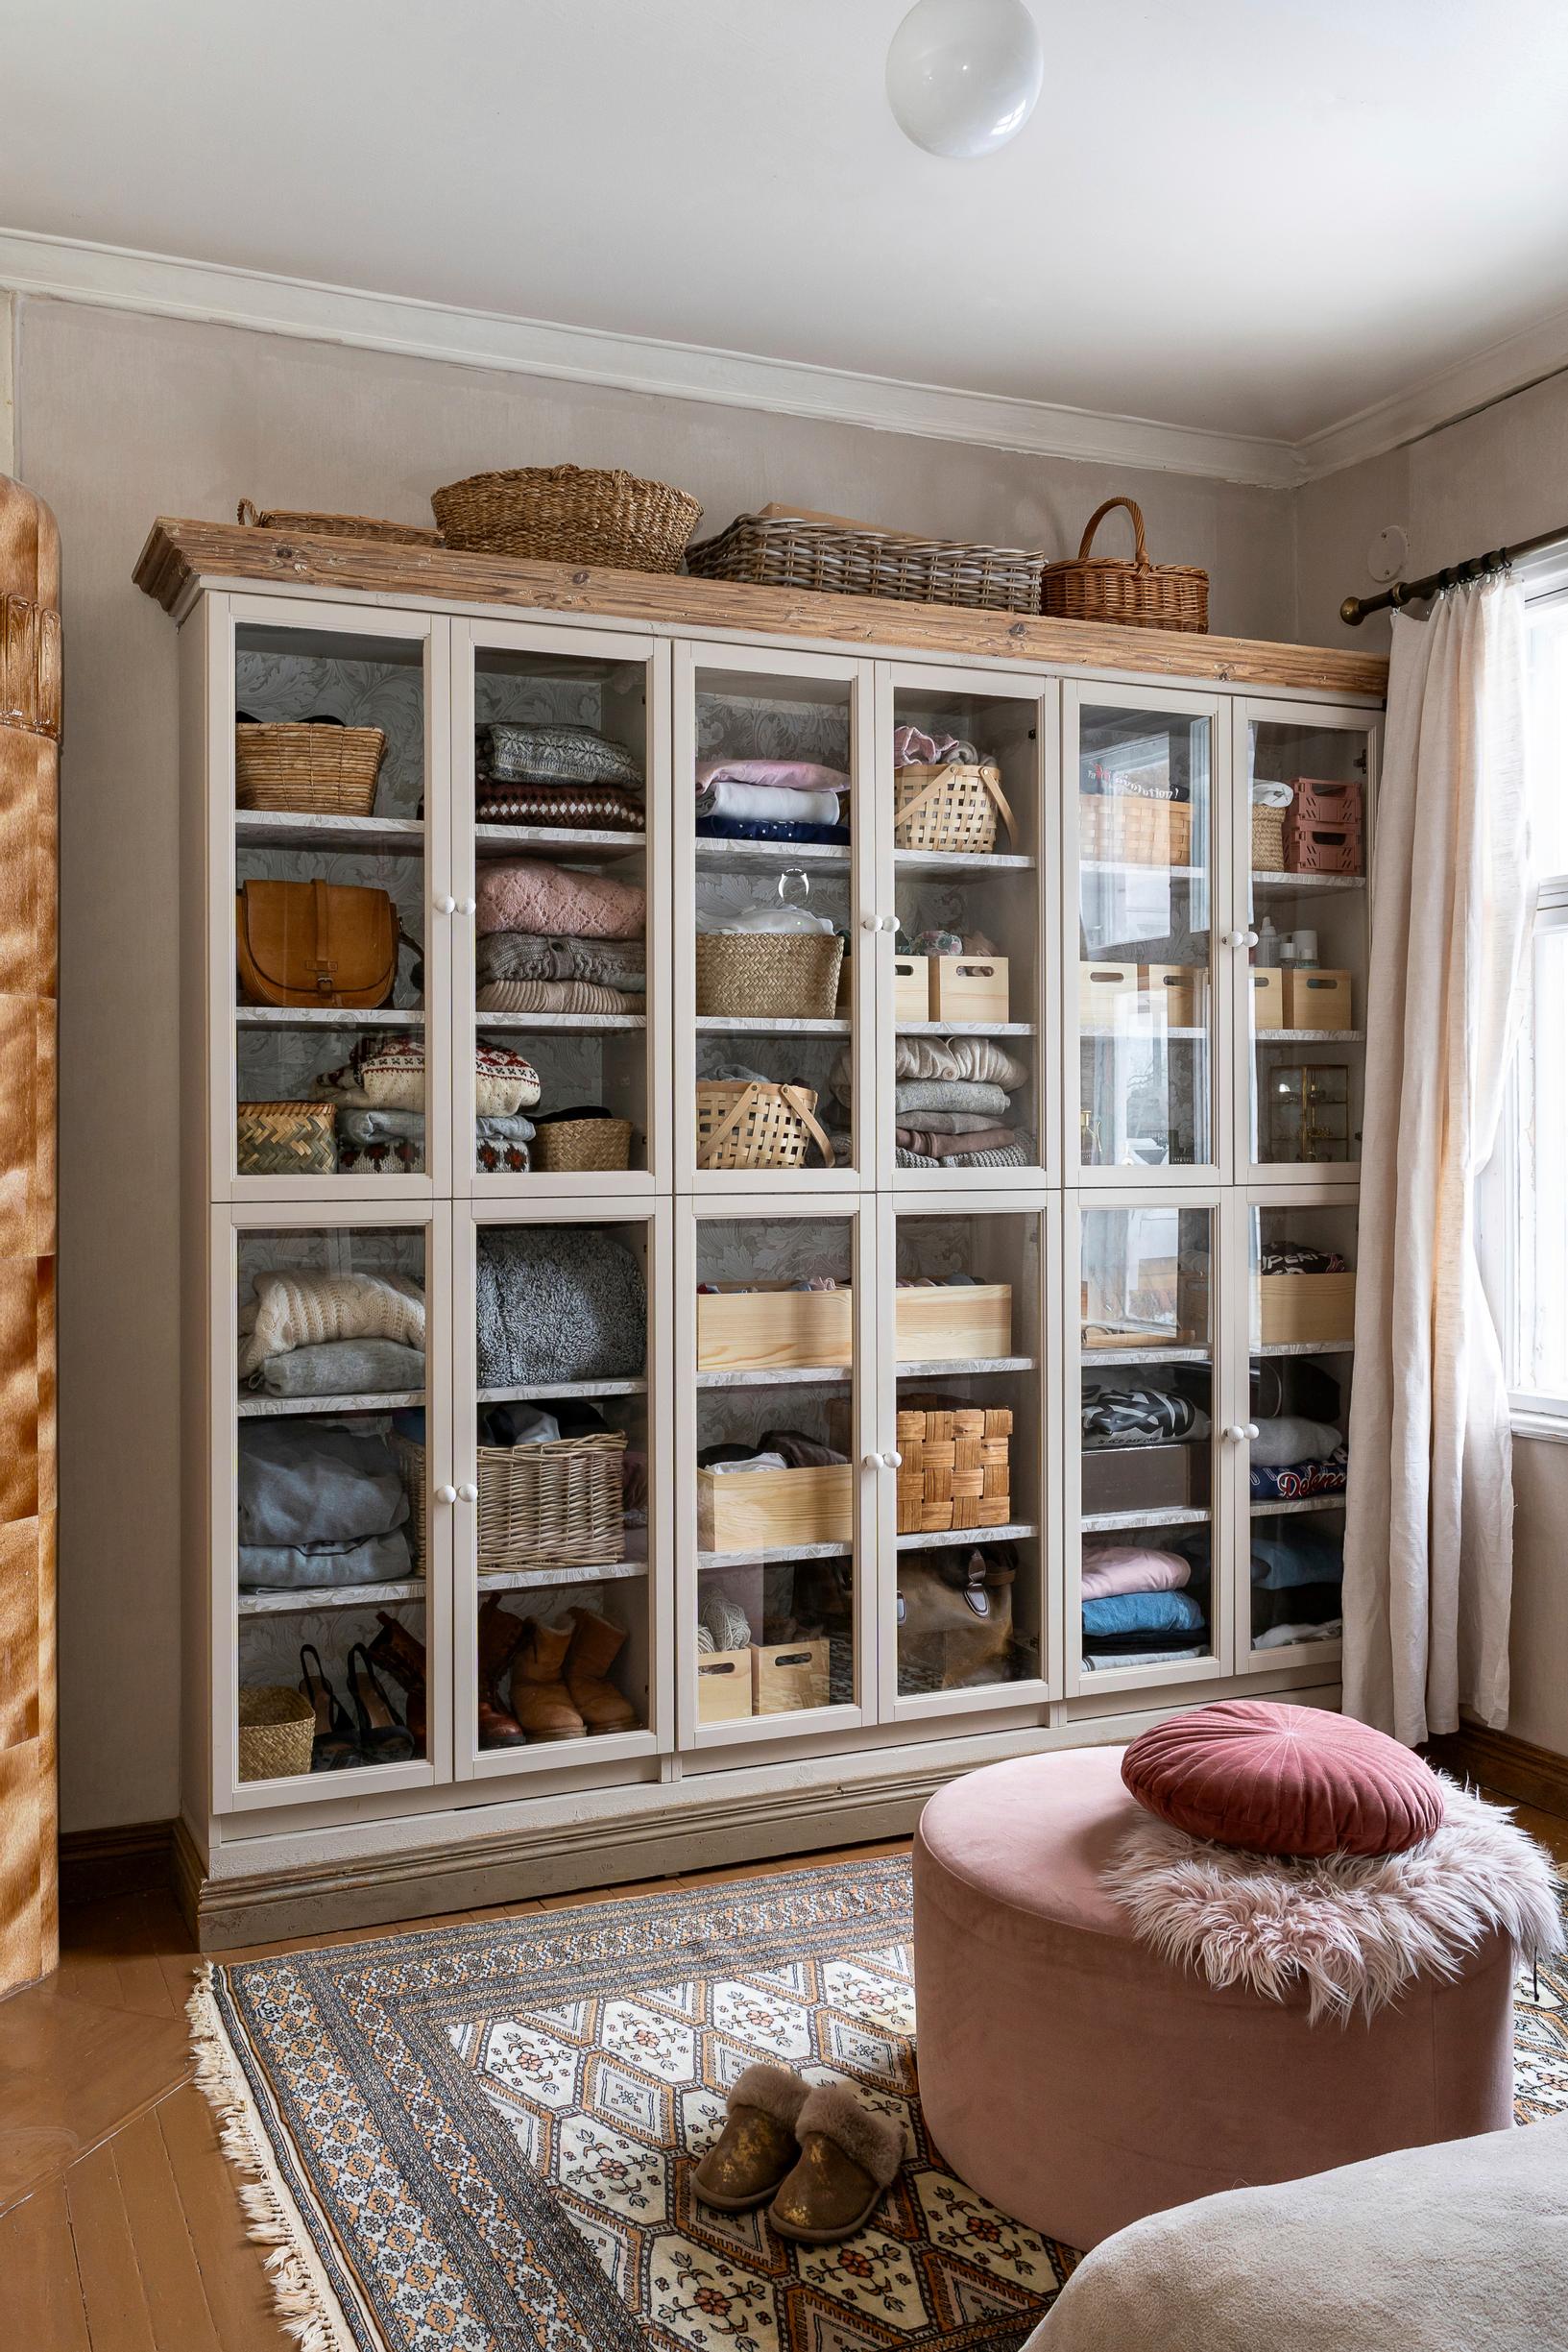
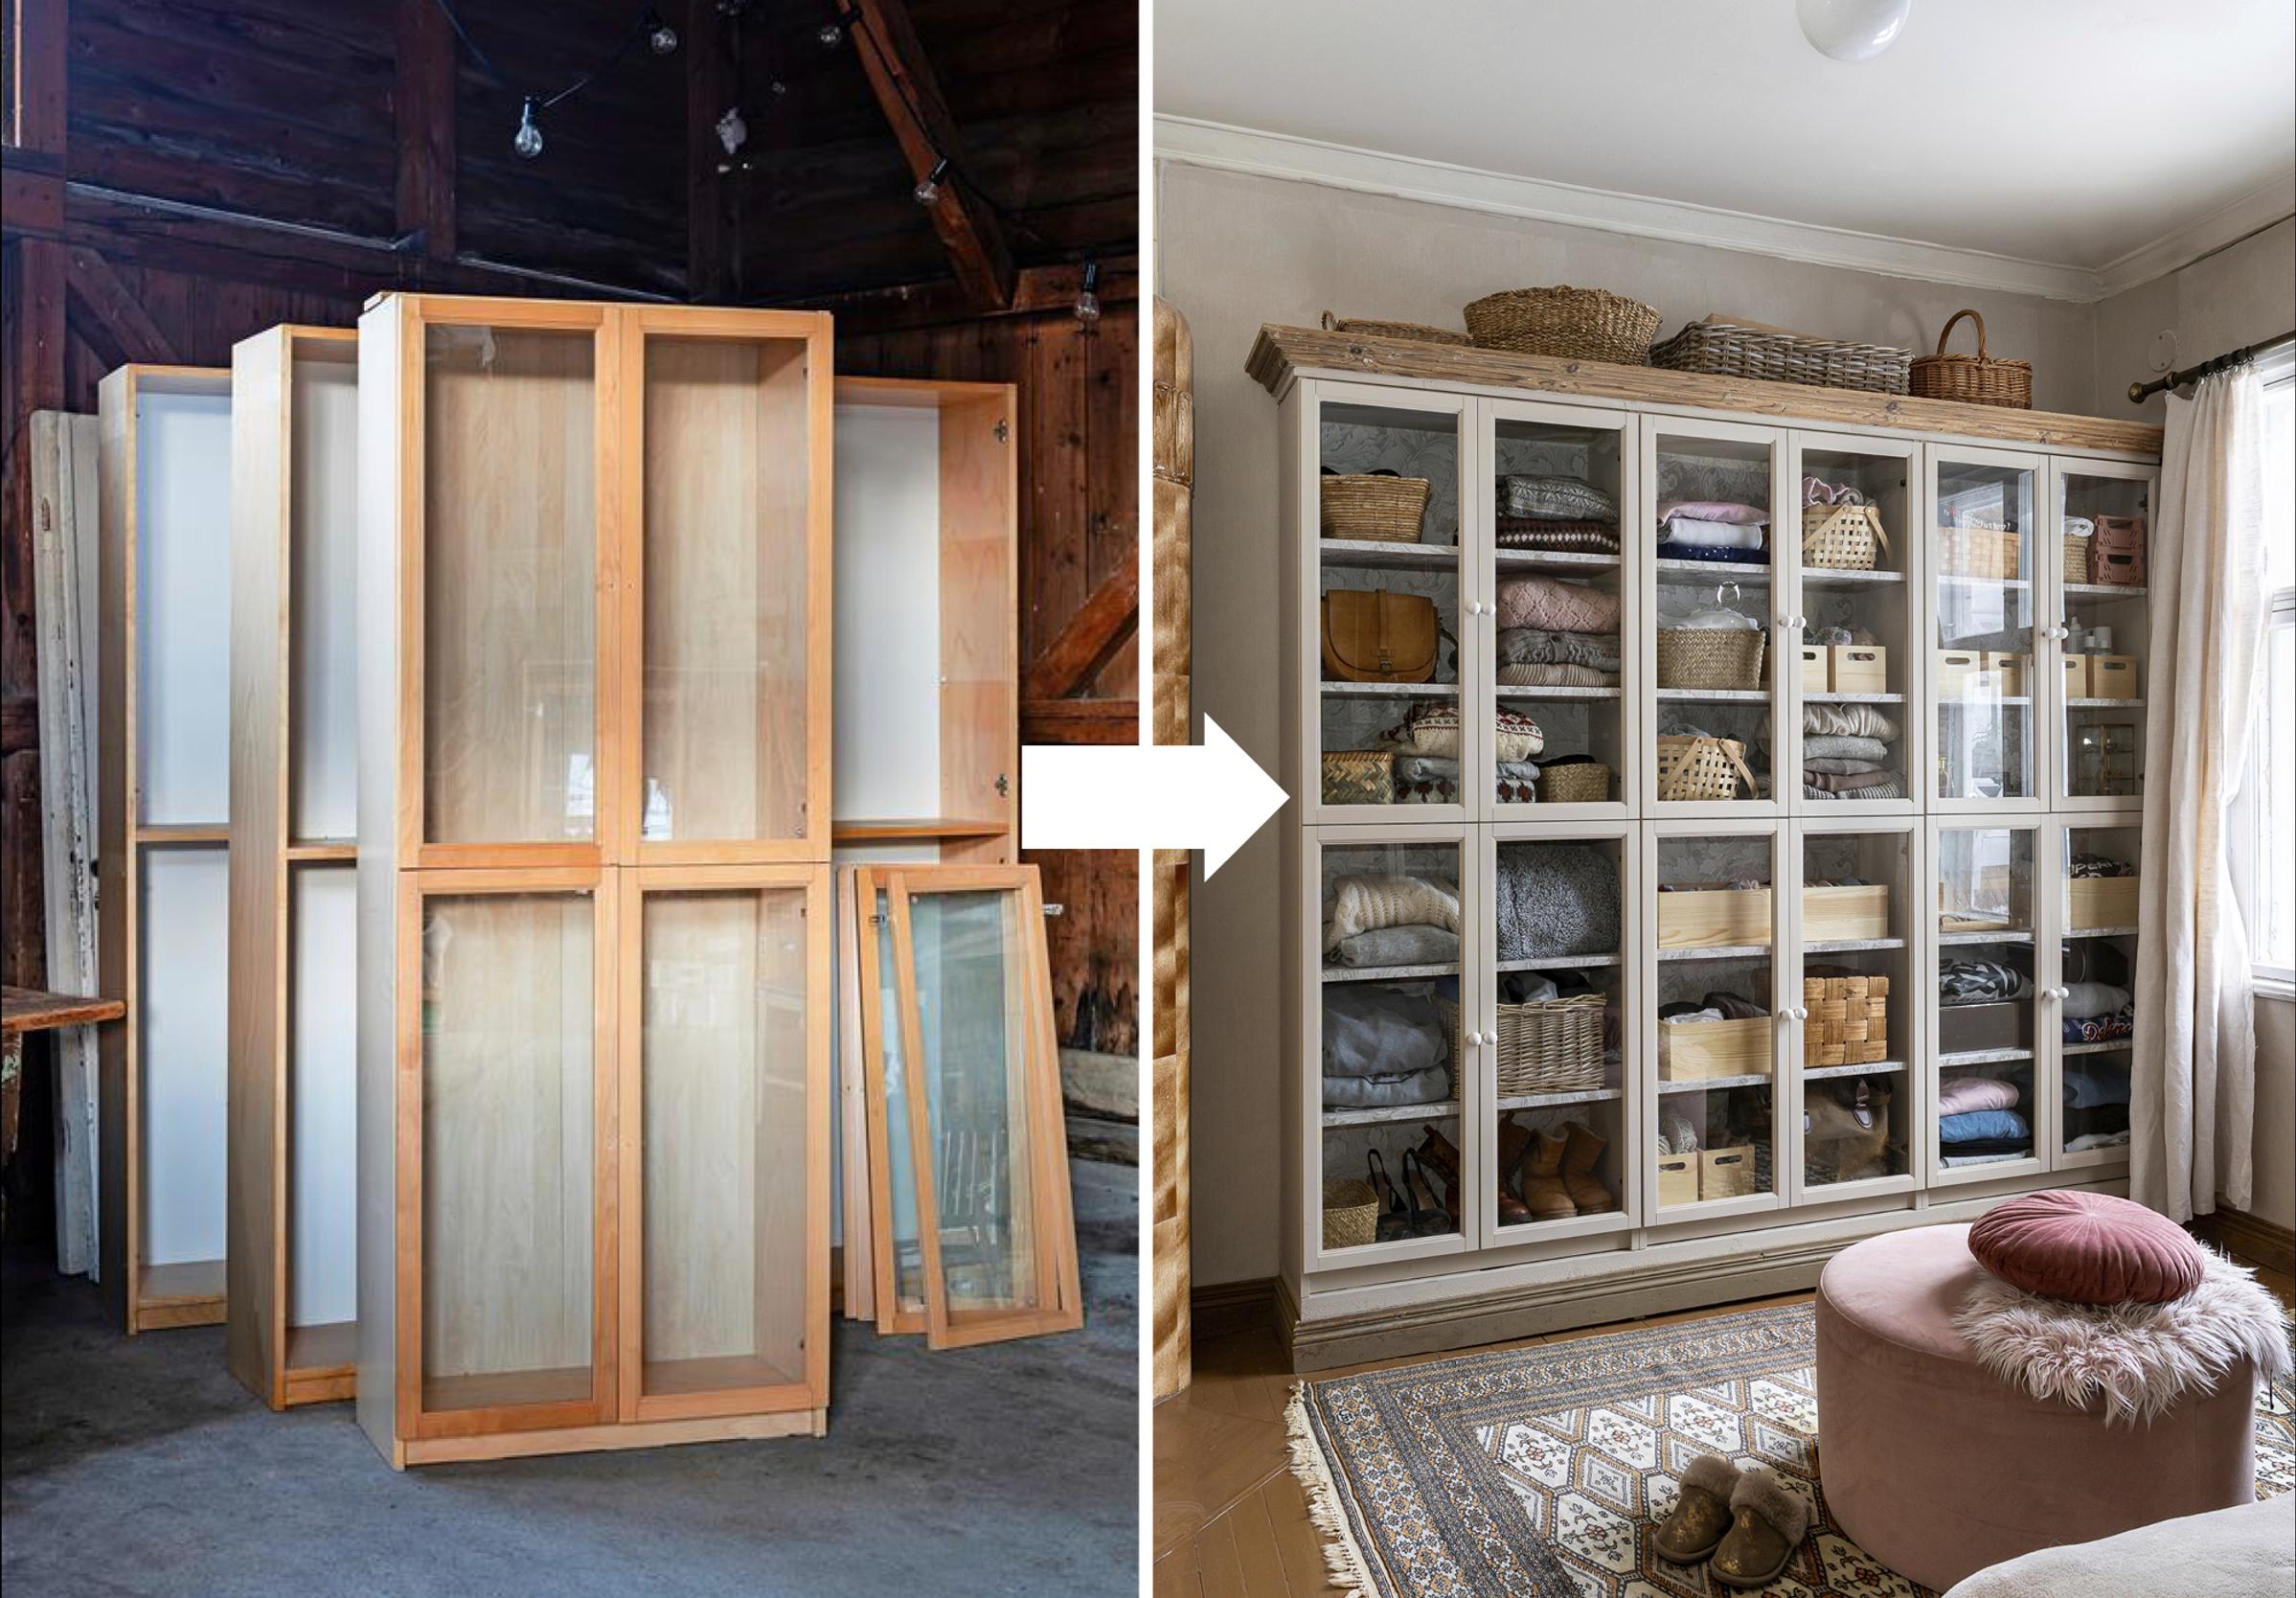
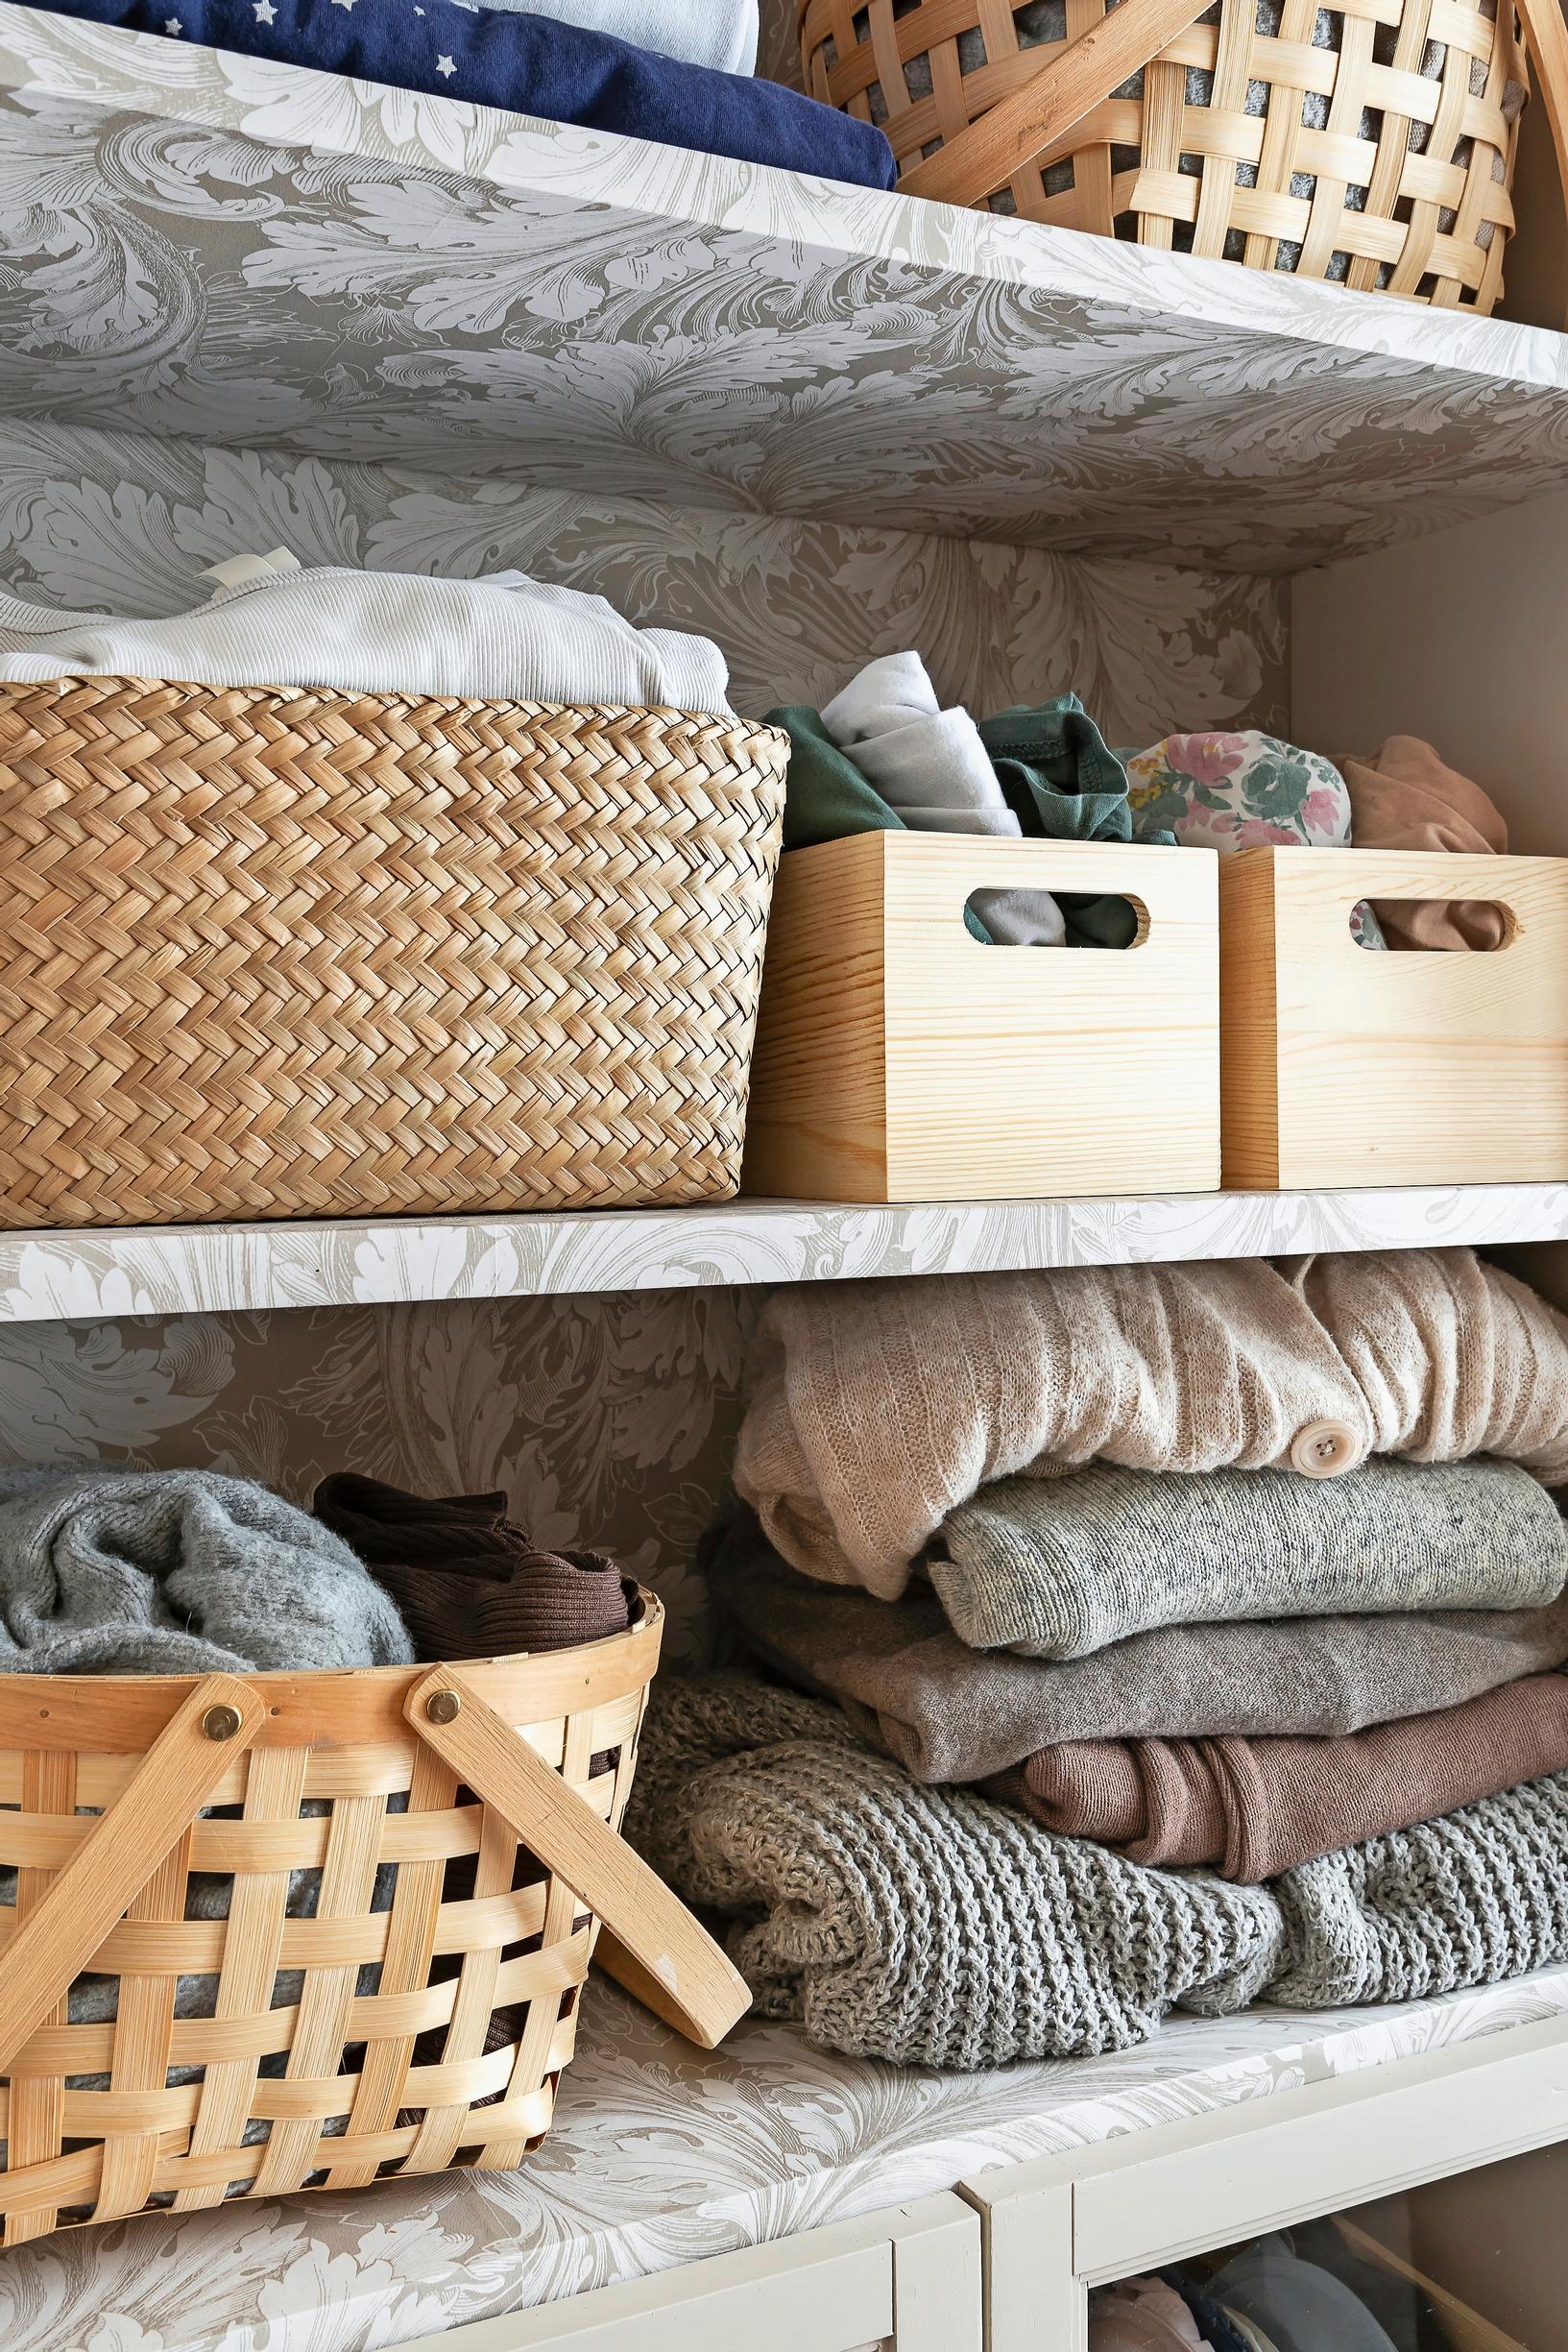
Vintage display cabinets got a fresh coat of paint and wallpaper, transforming them into a wardrobe. The wide cabinets look light thanks to the glass doors, and baskets keep things organized. See instructions for painting wooden display cabinets!

Revamped book display cabinet – materials:
Glass-front bookcase or display cabinet, one or more
Screwdriver
Painter’s tape or window scraper
80-grit sandpaper
Wood filler
Wallpaper
Wallpaper paste powder
Wood glue
Lidded container and whisk
Two brushes and a cloth
Wallpaper smoother and utility knife
Scissors, ruler and measuring tape
Chalk paint, e.g., Frenchic Lazy Range in Stone Rosie
Revamped book display cabinet—instructions:
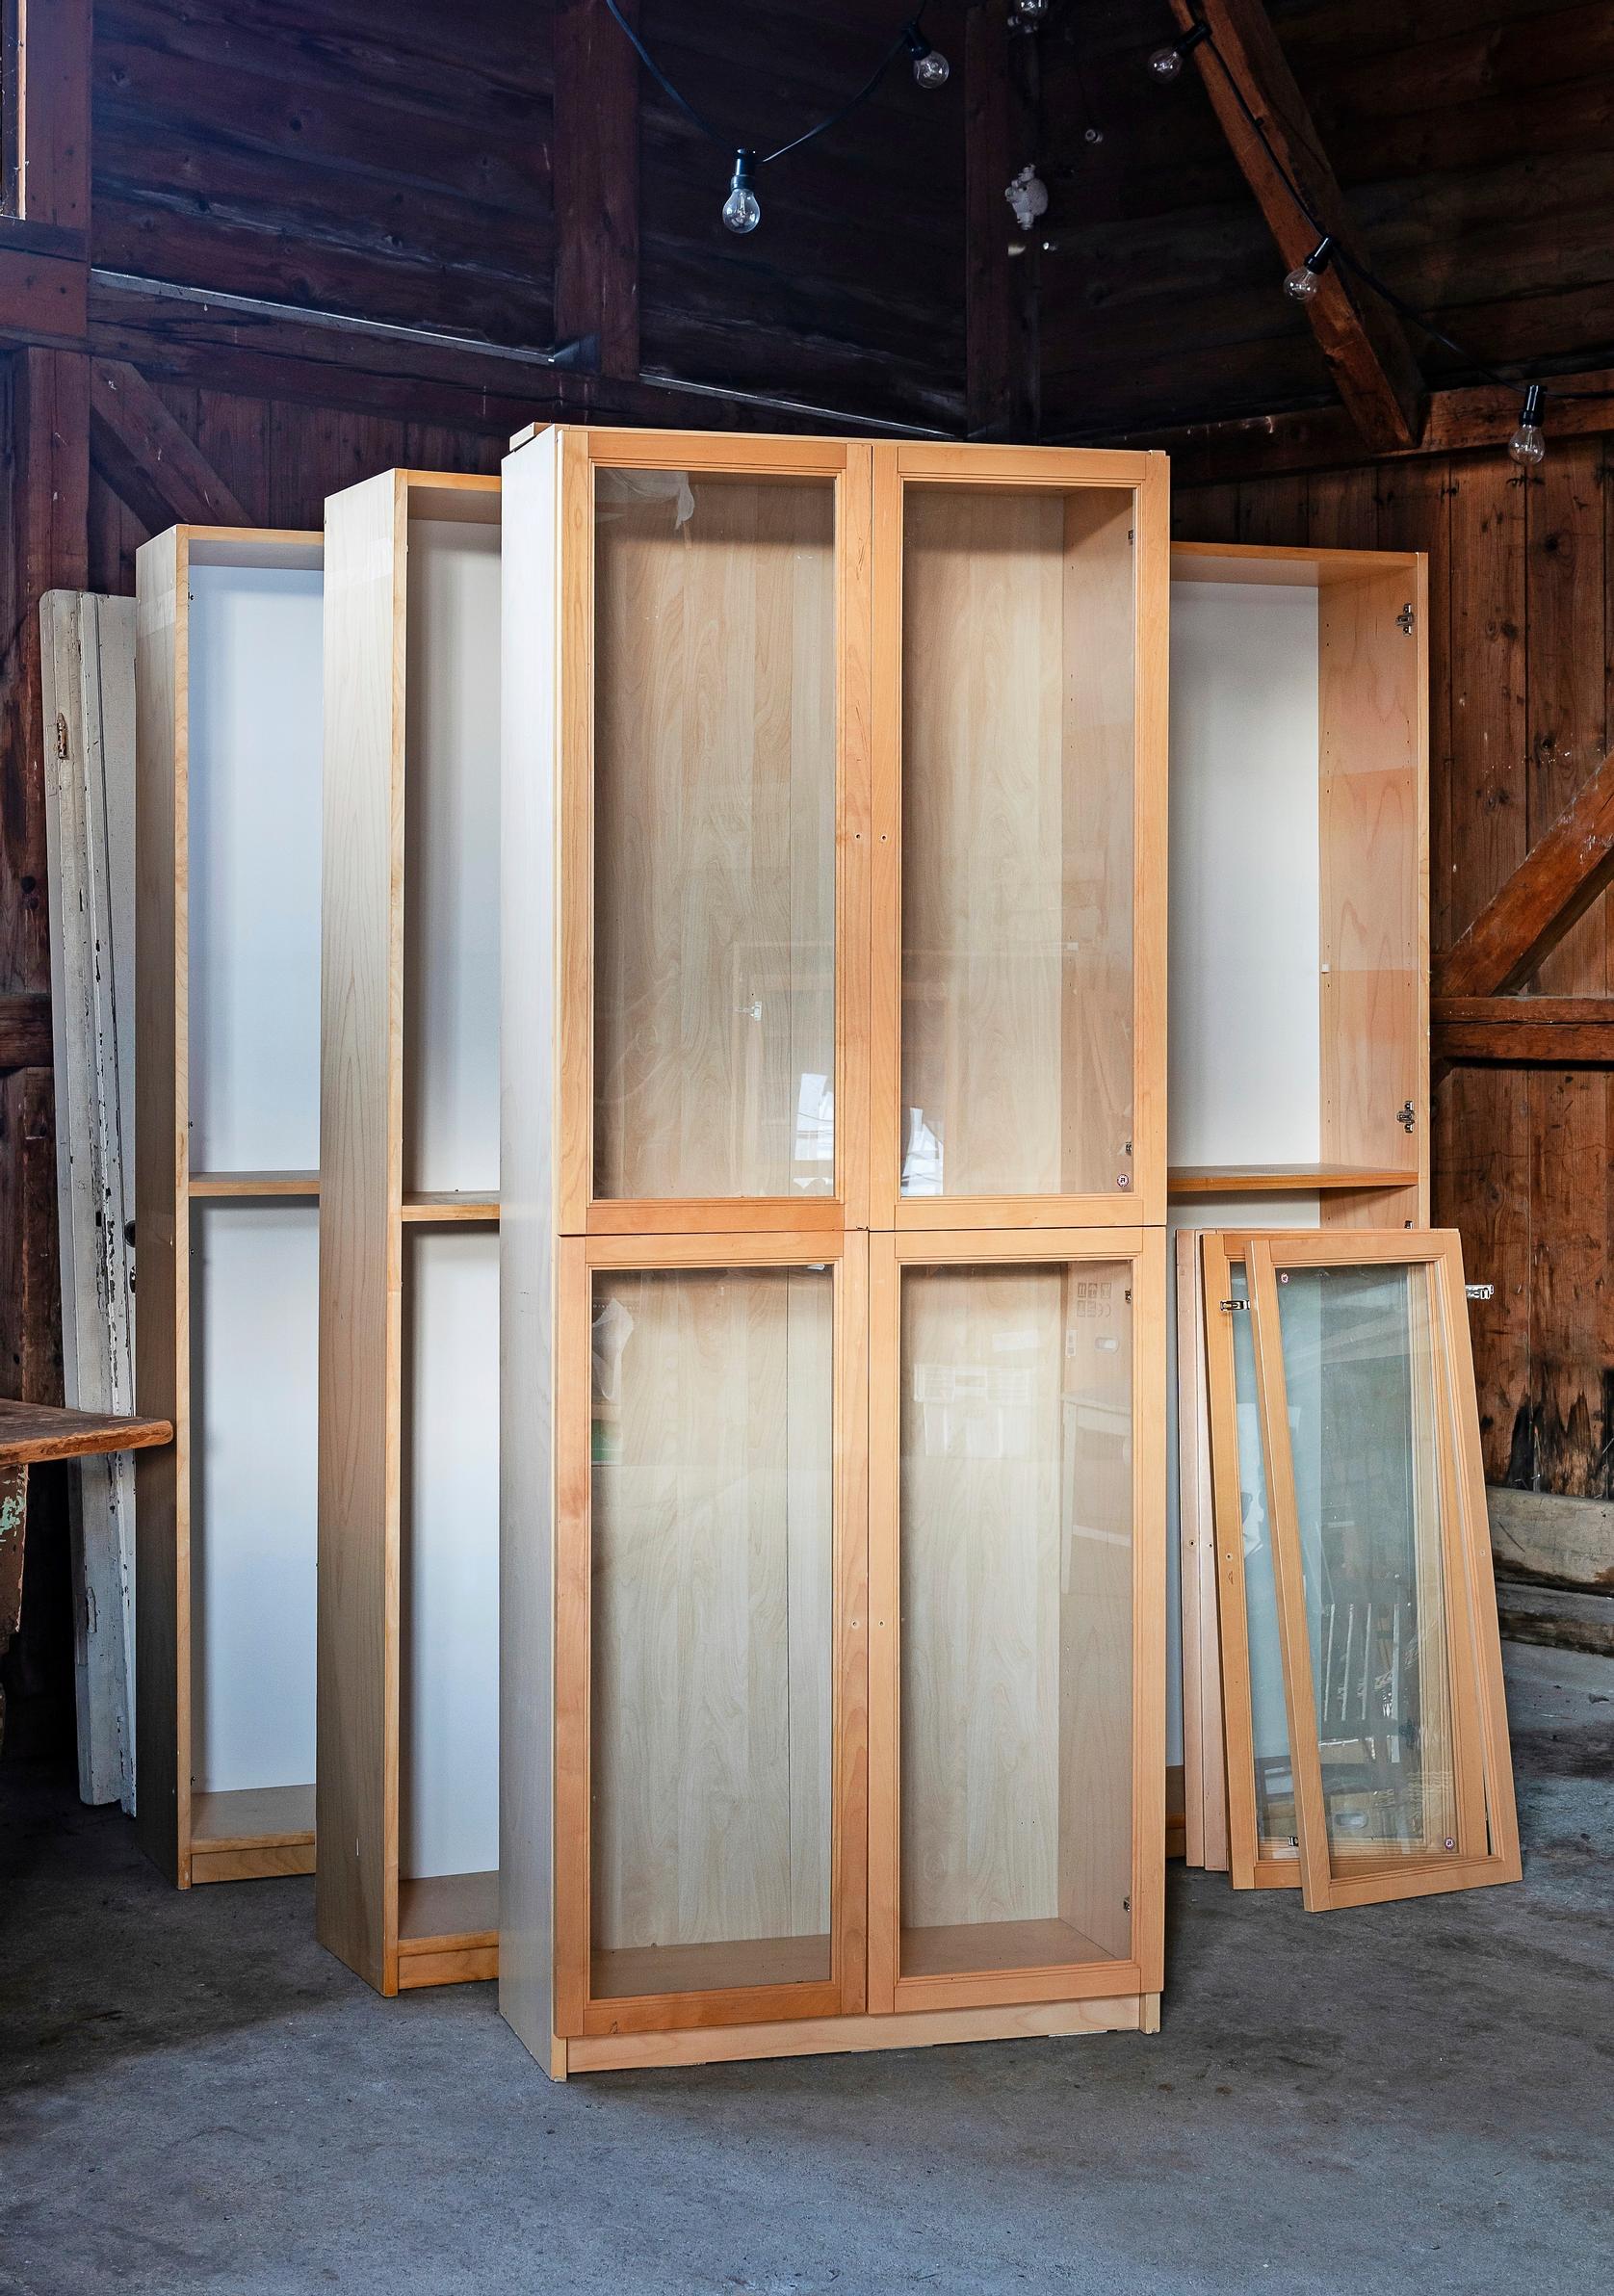
1. Remove all the doors, shelves, hinges and knobs first. Wipe off dust and stains with a cloth and, if needed, mild detergent. Fill dents with wood filler. Lightly hand-sand every wooden or laminate surface that will be painted. Protect the glass edges in the doors with painter’s tape, or scrape off any stray paint later with a window scraper. Apply two coats of chalk paint to the doors and cabinet sides.

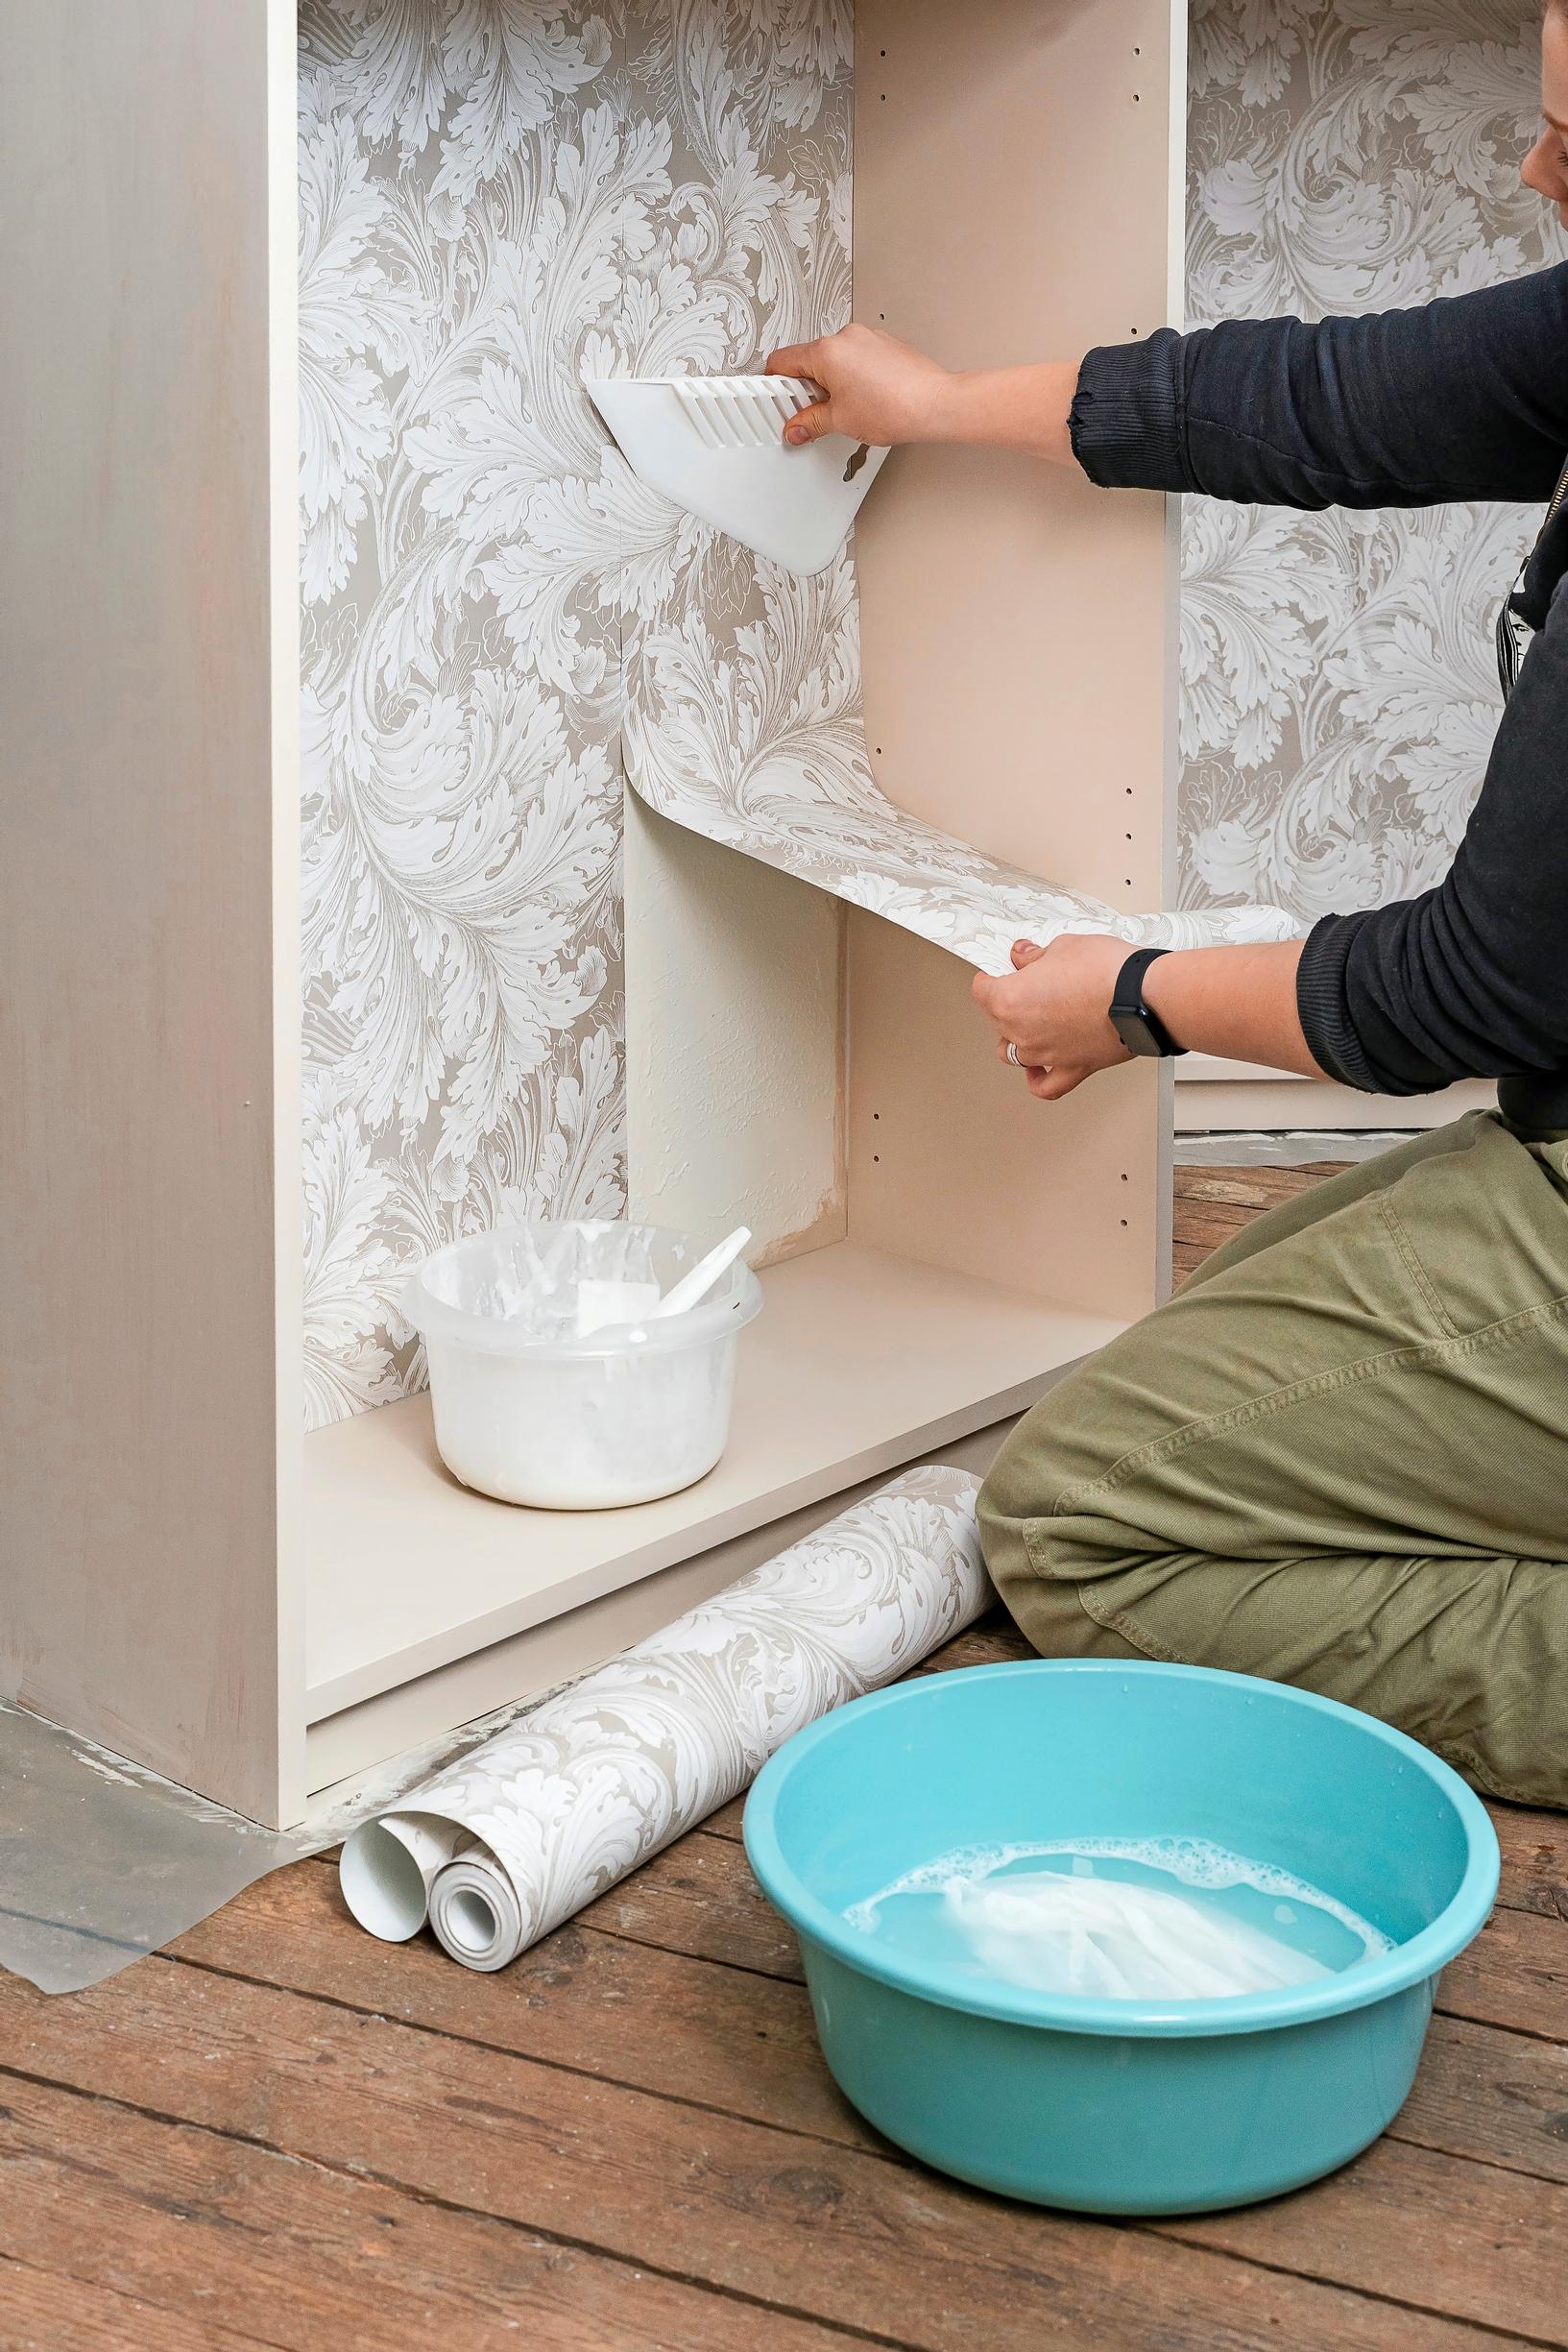
2. Mix wallpaper paste powder with water according to the package directions. Combine equal parts wood glue and the finished paste in a lidded container. Stir with a whisk or immersion blender.
3. Measure the wallpaper for the cabinet’s back wall and cut the lengths, leaving a little extra. Brush a generous layer of the glue-paste mixture onto the surface. Press the wallpaper in place with a smoothing tool and wipe off excess adhesive right away with a damp cloth.
4. Wallpaper the shelves in the same way. Trim the edges with scissors or a utility knife, then re-attach the shelves and doors.

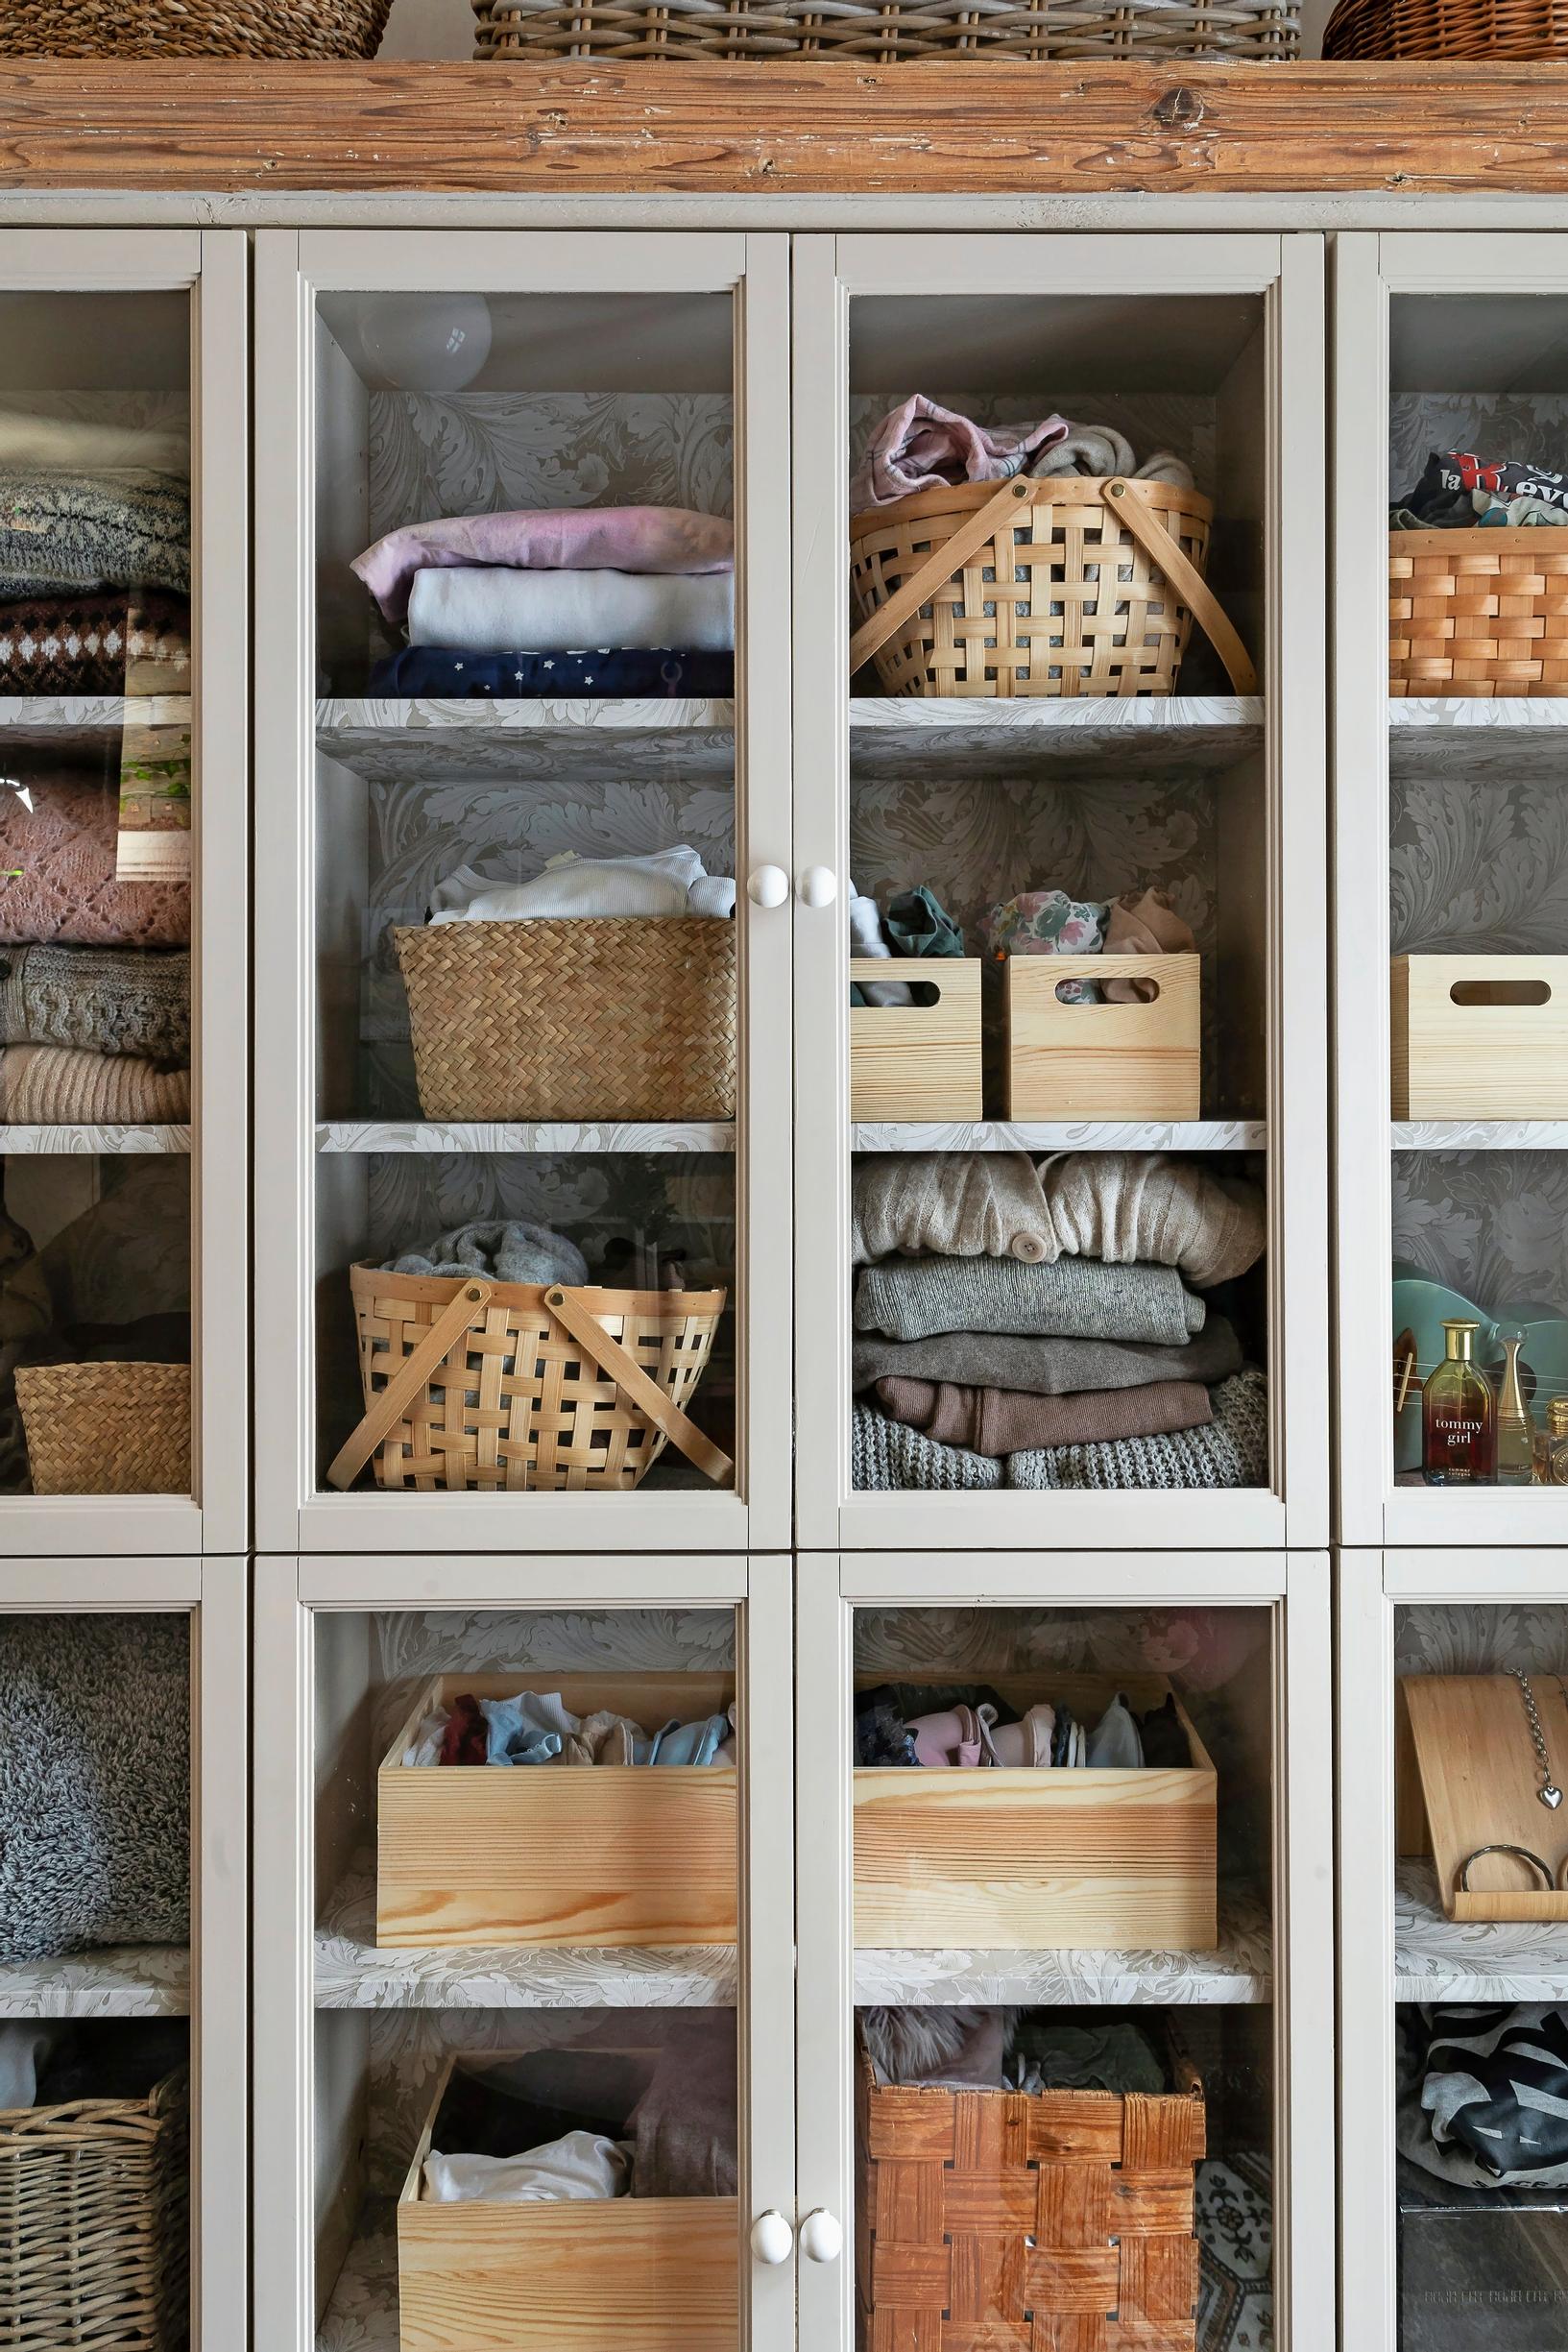

A plinth and decorative trim pull the cabinets together into one seamless unit.