
Daffodil candle holders for Easter—Here’s how to make these dazzling decorations
These beautiful daffodil candle holders glow like the springtime sun. They’re made from air-dry modeling clay and painted after drying. You can find the candle holder templates at the end of the article in PDF format and print them out for yourself.
Daffodil candle holders: supplies
air-dry modeling clay
rolling pin or smooth glass bottle
narrow-bladed knife
modeling surface
water
small, wide-headed nail
P320-grit sandpaper
acrylic paints and brushes
glossy varnish
Daffodil candle holders: instructions
1. Roll out the modeling clay into a smooth, thin sheet.

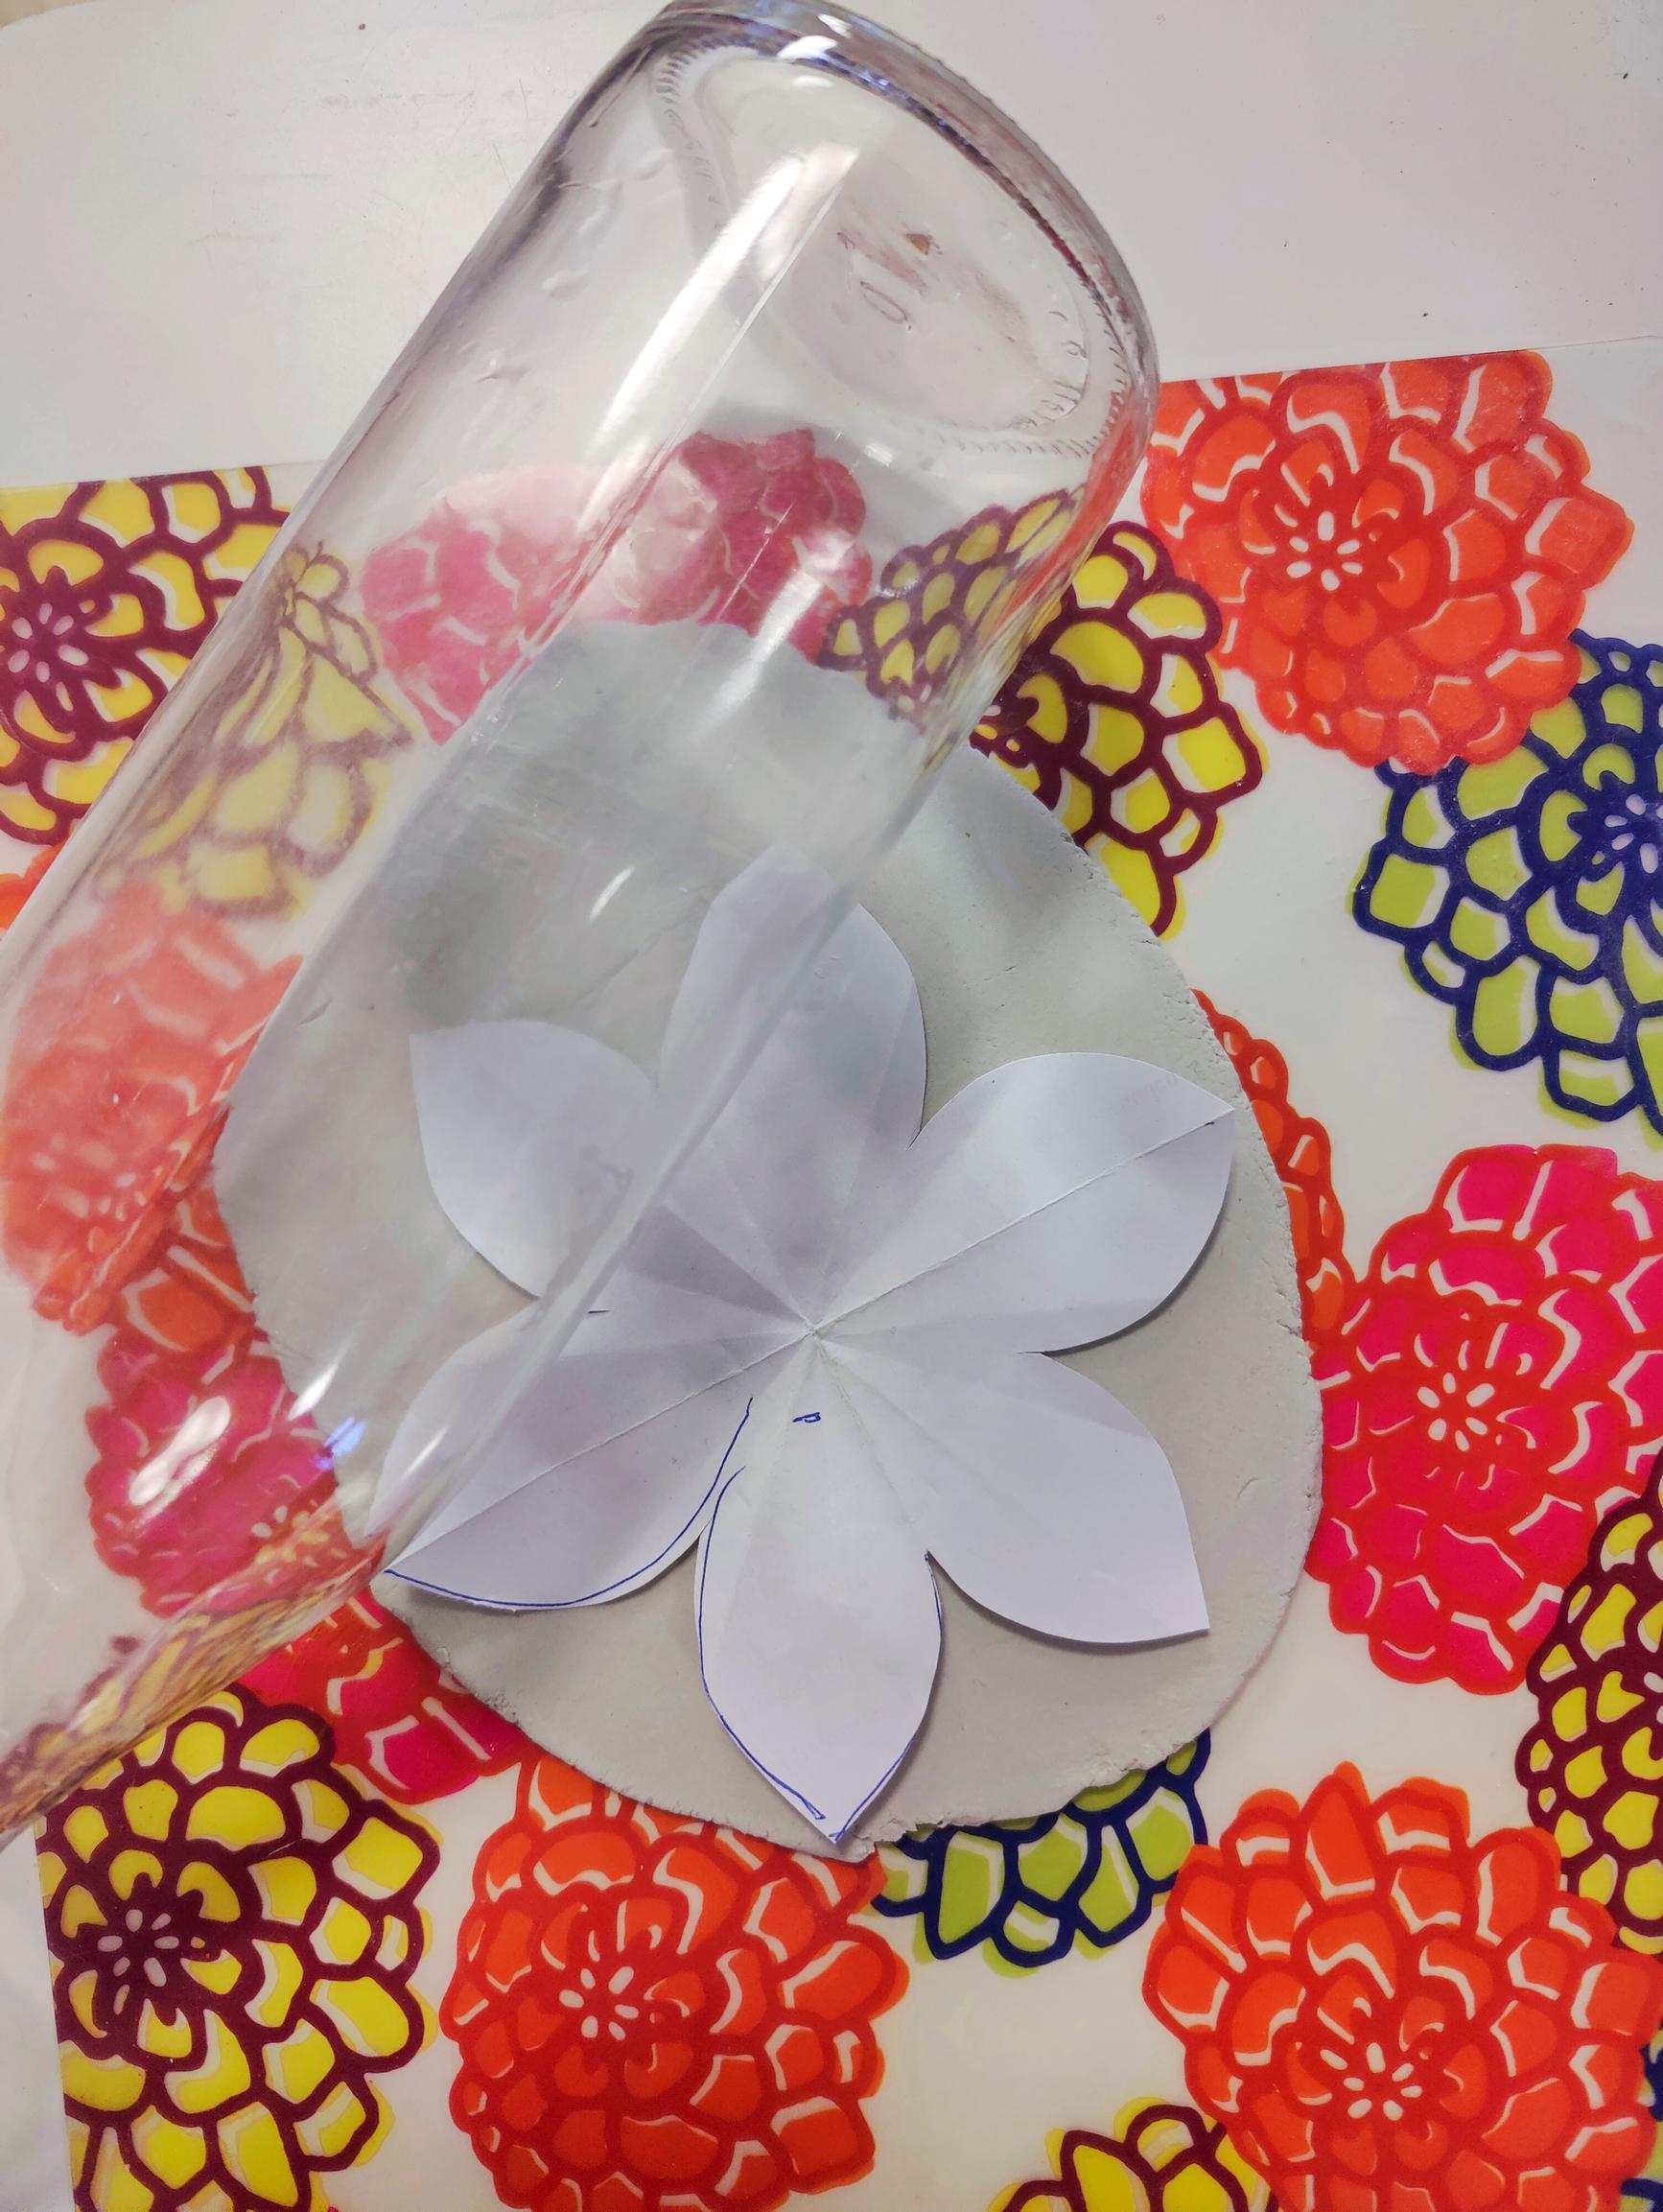


2. Cut a flower shape from the sheet freehand or use the template (the size of the flower is about 15 cm). You can find the printable template at the end of this article in PDF format.

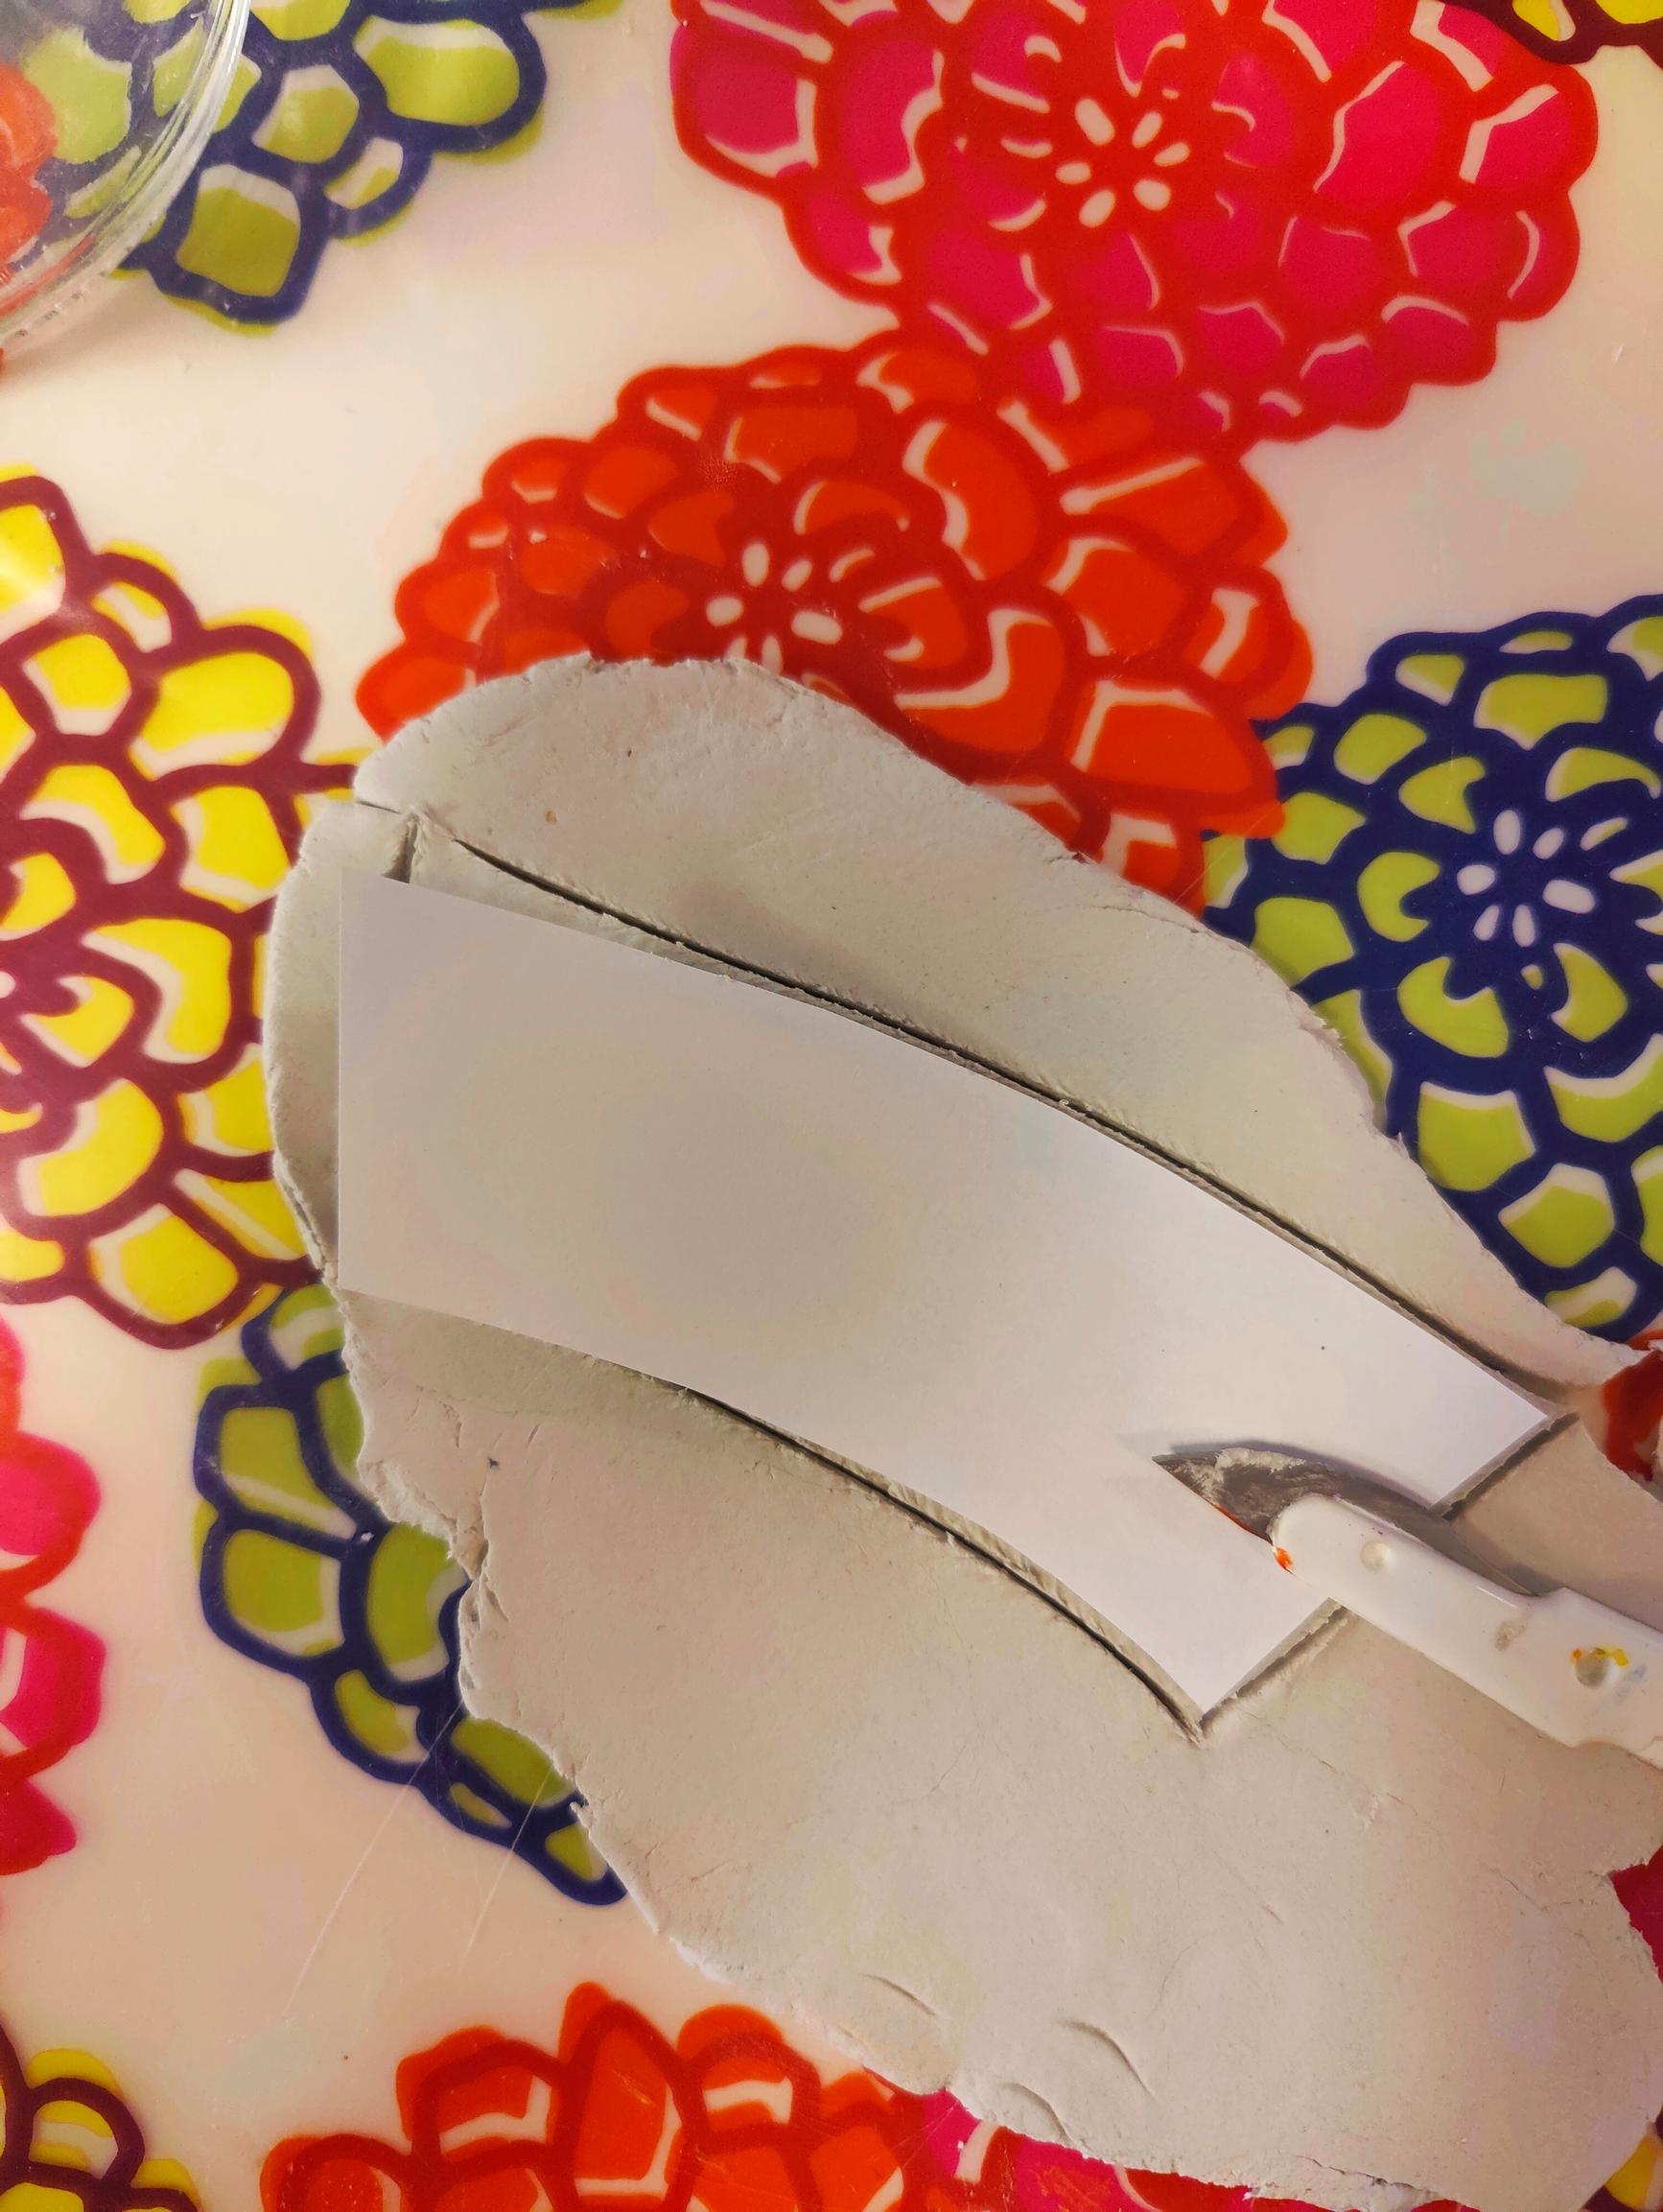
3. Cut a center piece for the flower from the clay sheet.
4. Shape the center into a cylinder. Thin the edges to be joined, place them on top of each other, and attach them using your fingernail or a sculpting tool. You can use a drop of water as glue.


5. Place the center in the middle of the flower and mark its position. Roughen both surfaces at the connection point.
6. Place the center on the flower and secure it by gently pressing the clay from inside and outside of the center. Be careful not to thin the center too much.
7. Take a small ball of clay and push a thin nail through it. Shape the ball into a flat, round disk that fits inside the center. Then place the disk and the nail inside the center and press them firmly against the bottom and sides of the center.


8. Use a knife to cut the top edge of the center into a crown shape and clean up all the edges.
9. Shape the petals as you like, supporting their position with small foil rolls if needed.
10. Let the flower dry for several days at room temperature, turning it occasionally. You can try placing it on a mirror and if you notice any fog, let it dry longer. The clay must be fully dry before the next step.

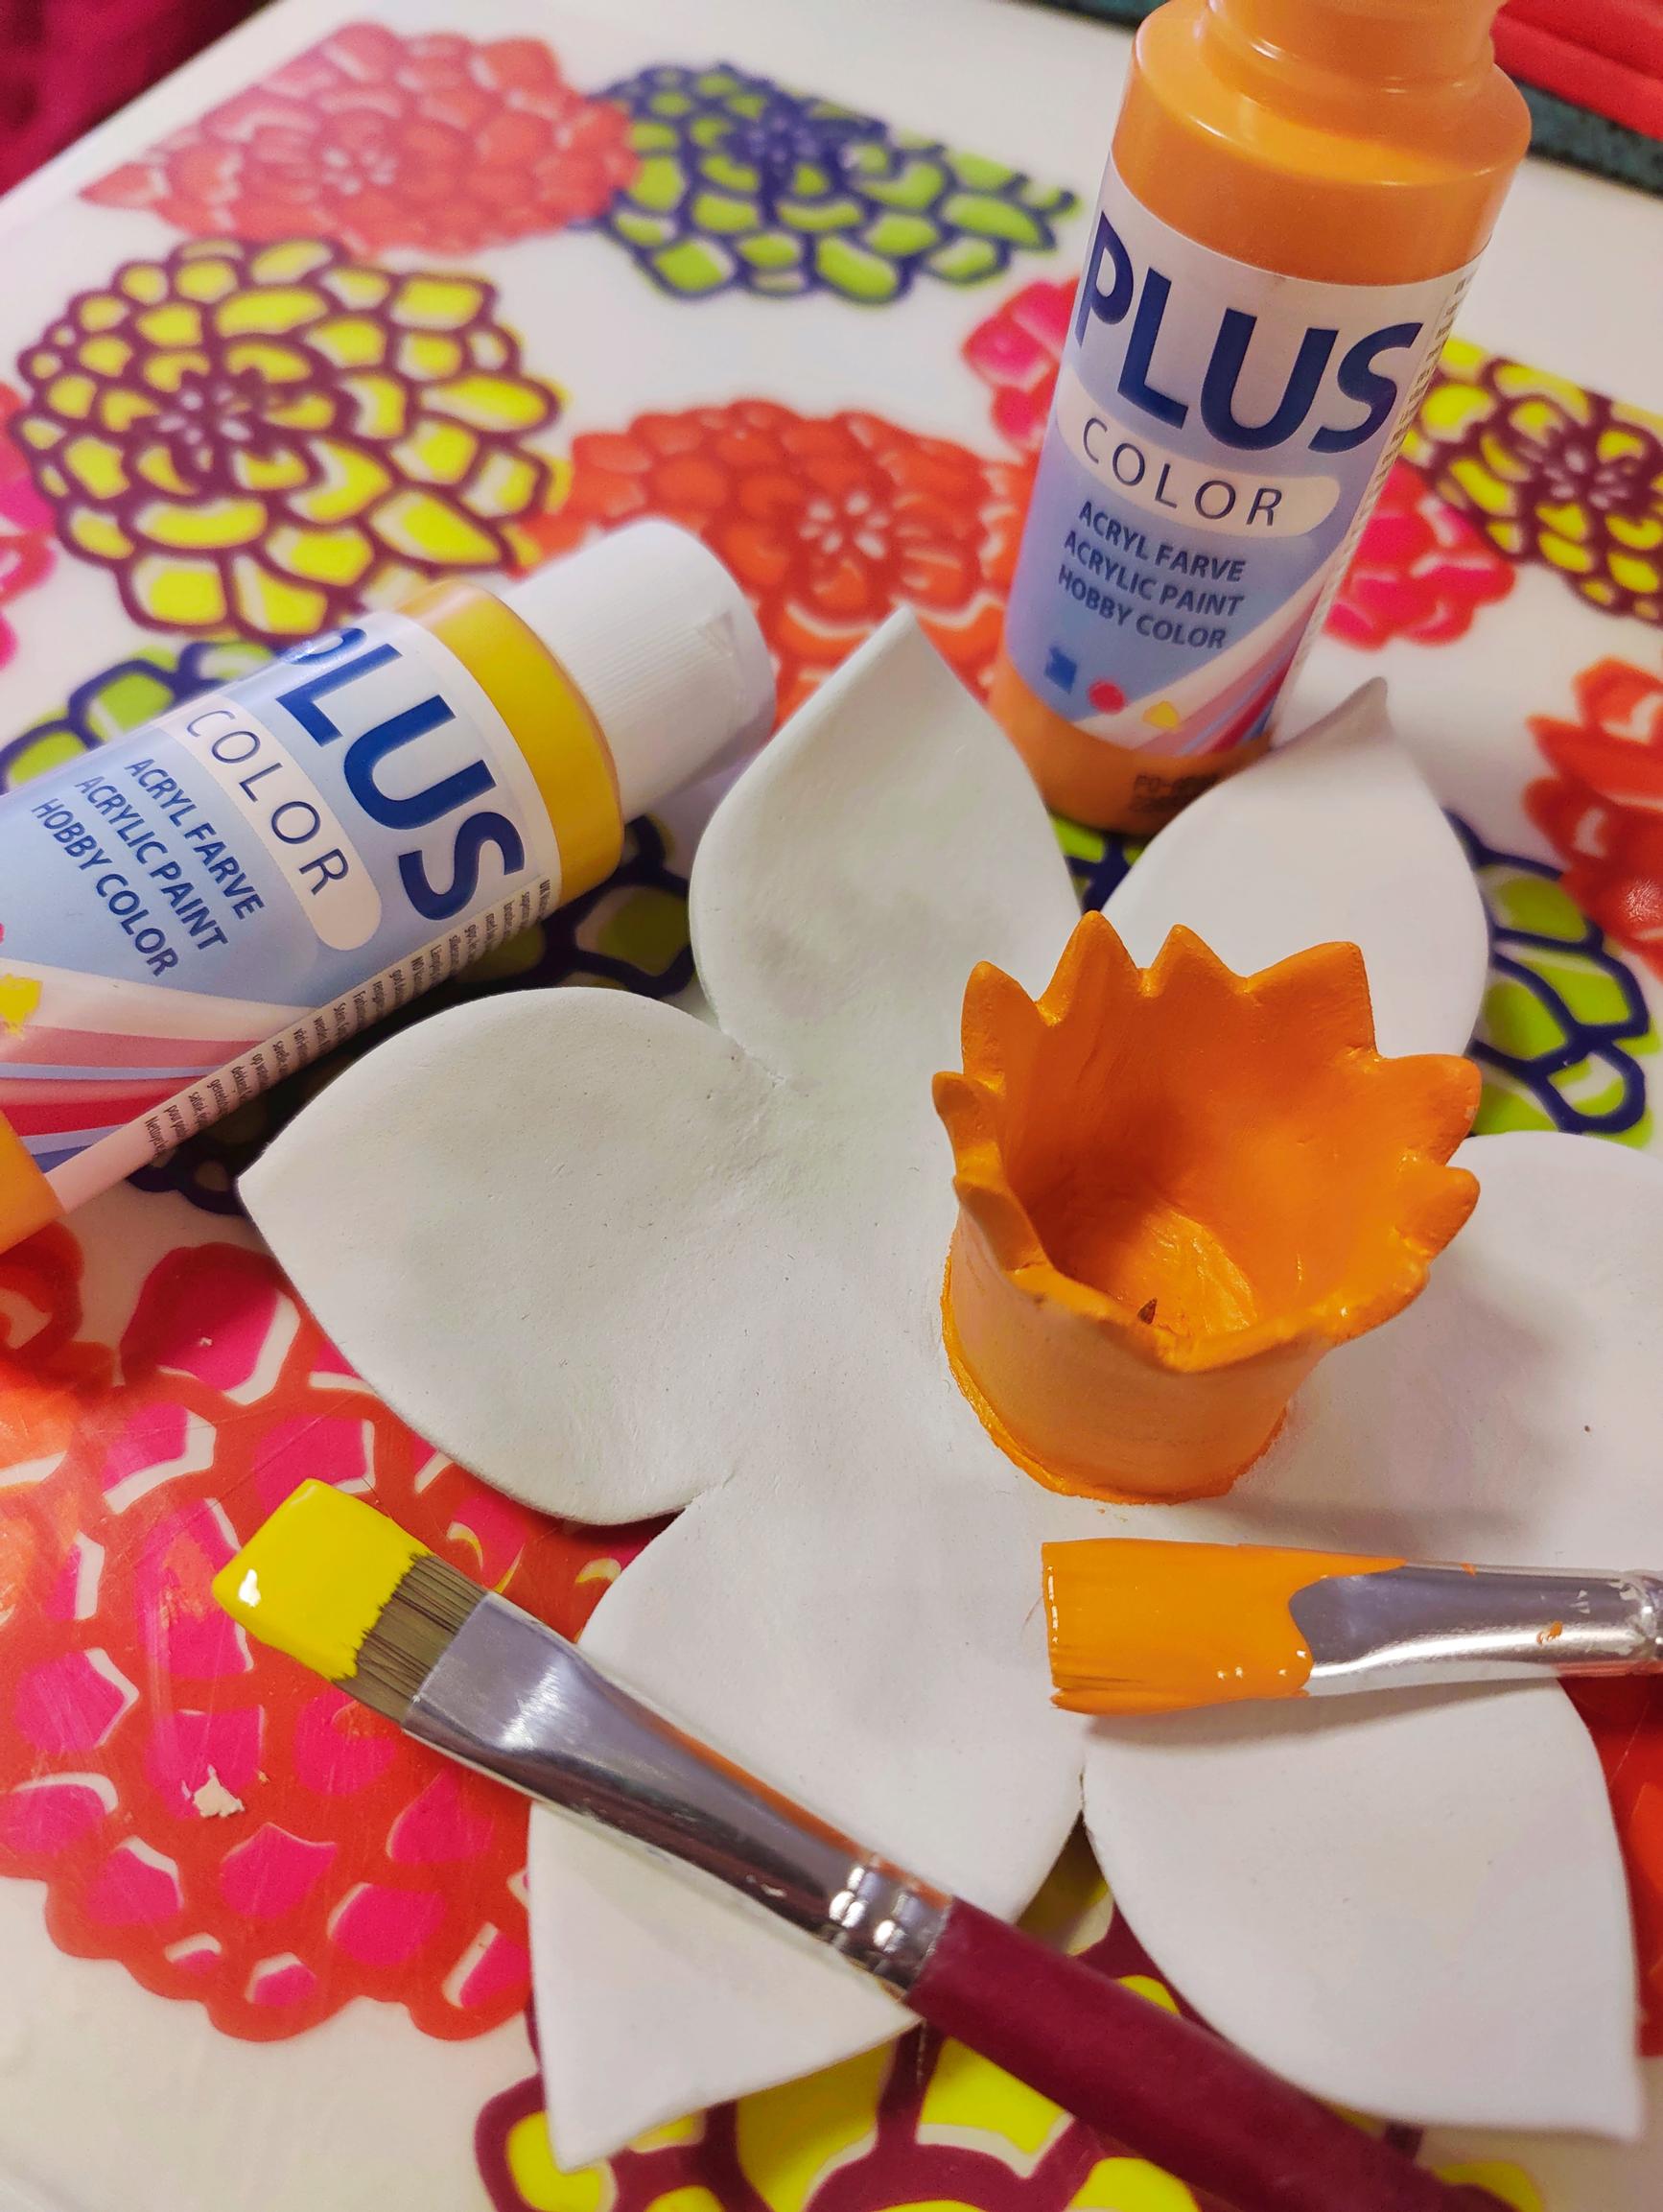
11. Sand off any rough spots and shape the petals if needed. Blow away the dust, then paint the flower with acrylic paints in one or two colors. Let dry.

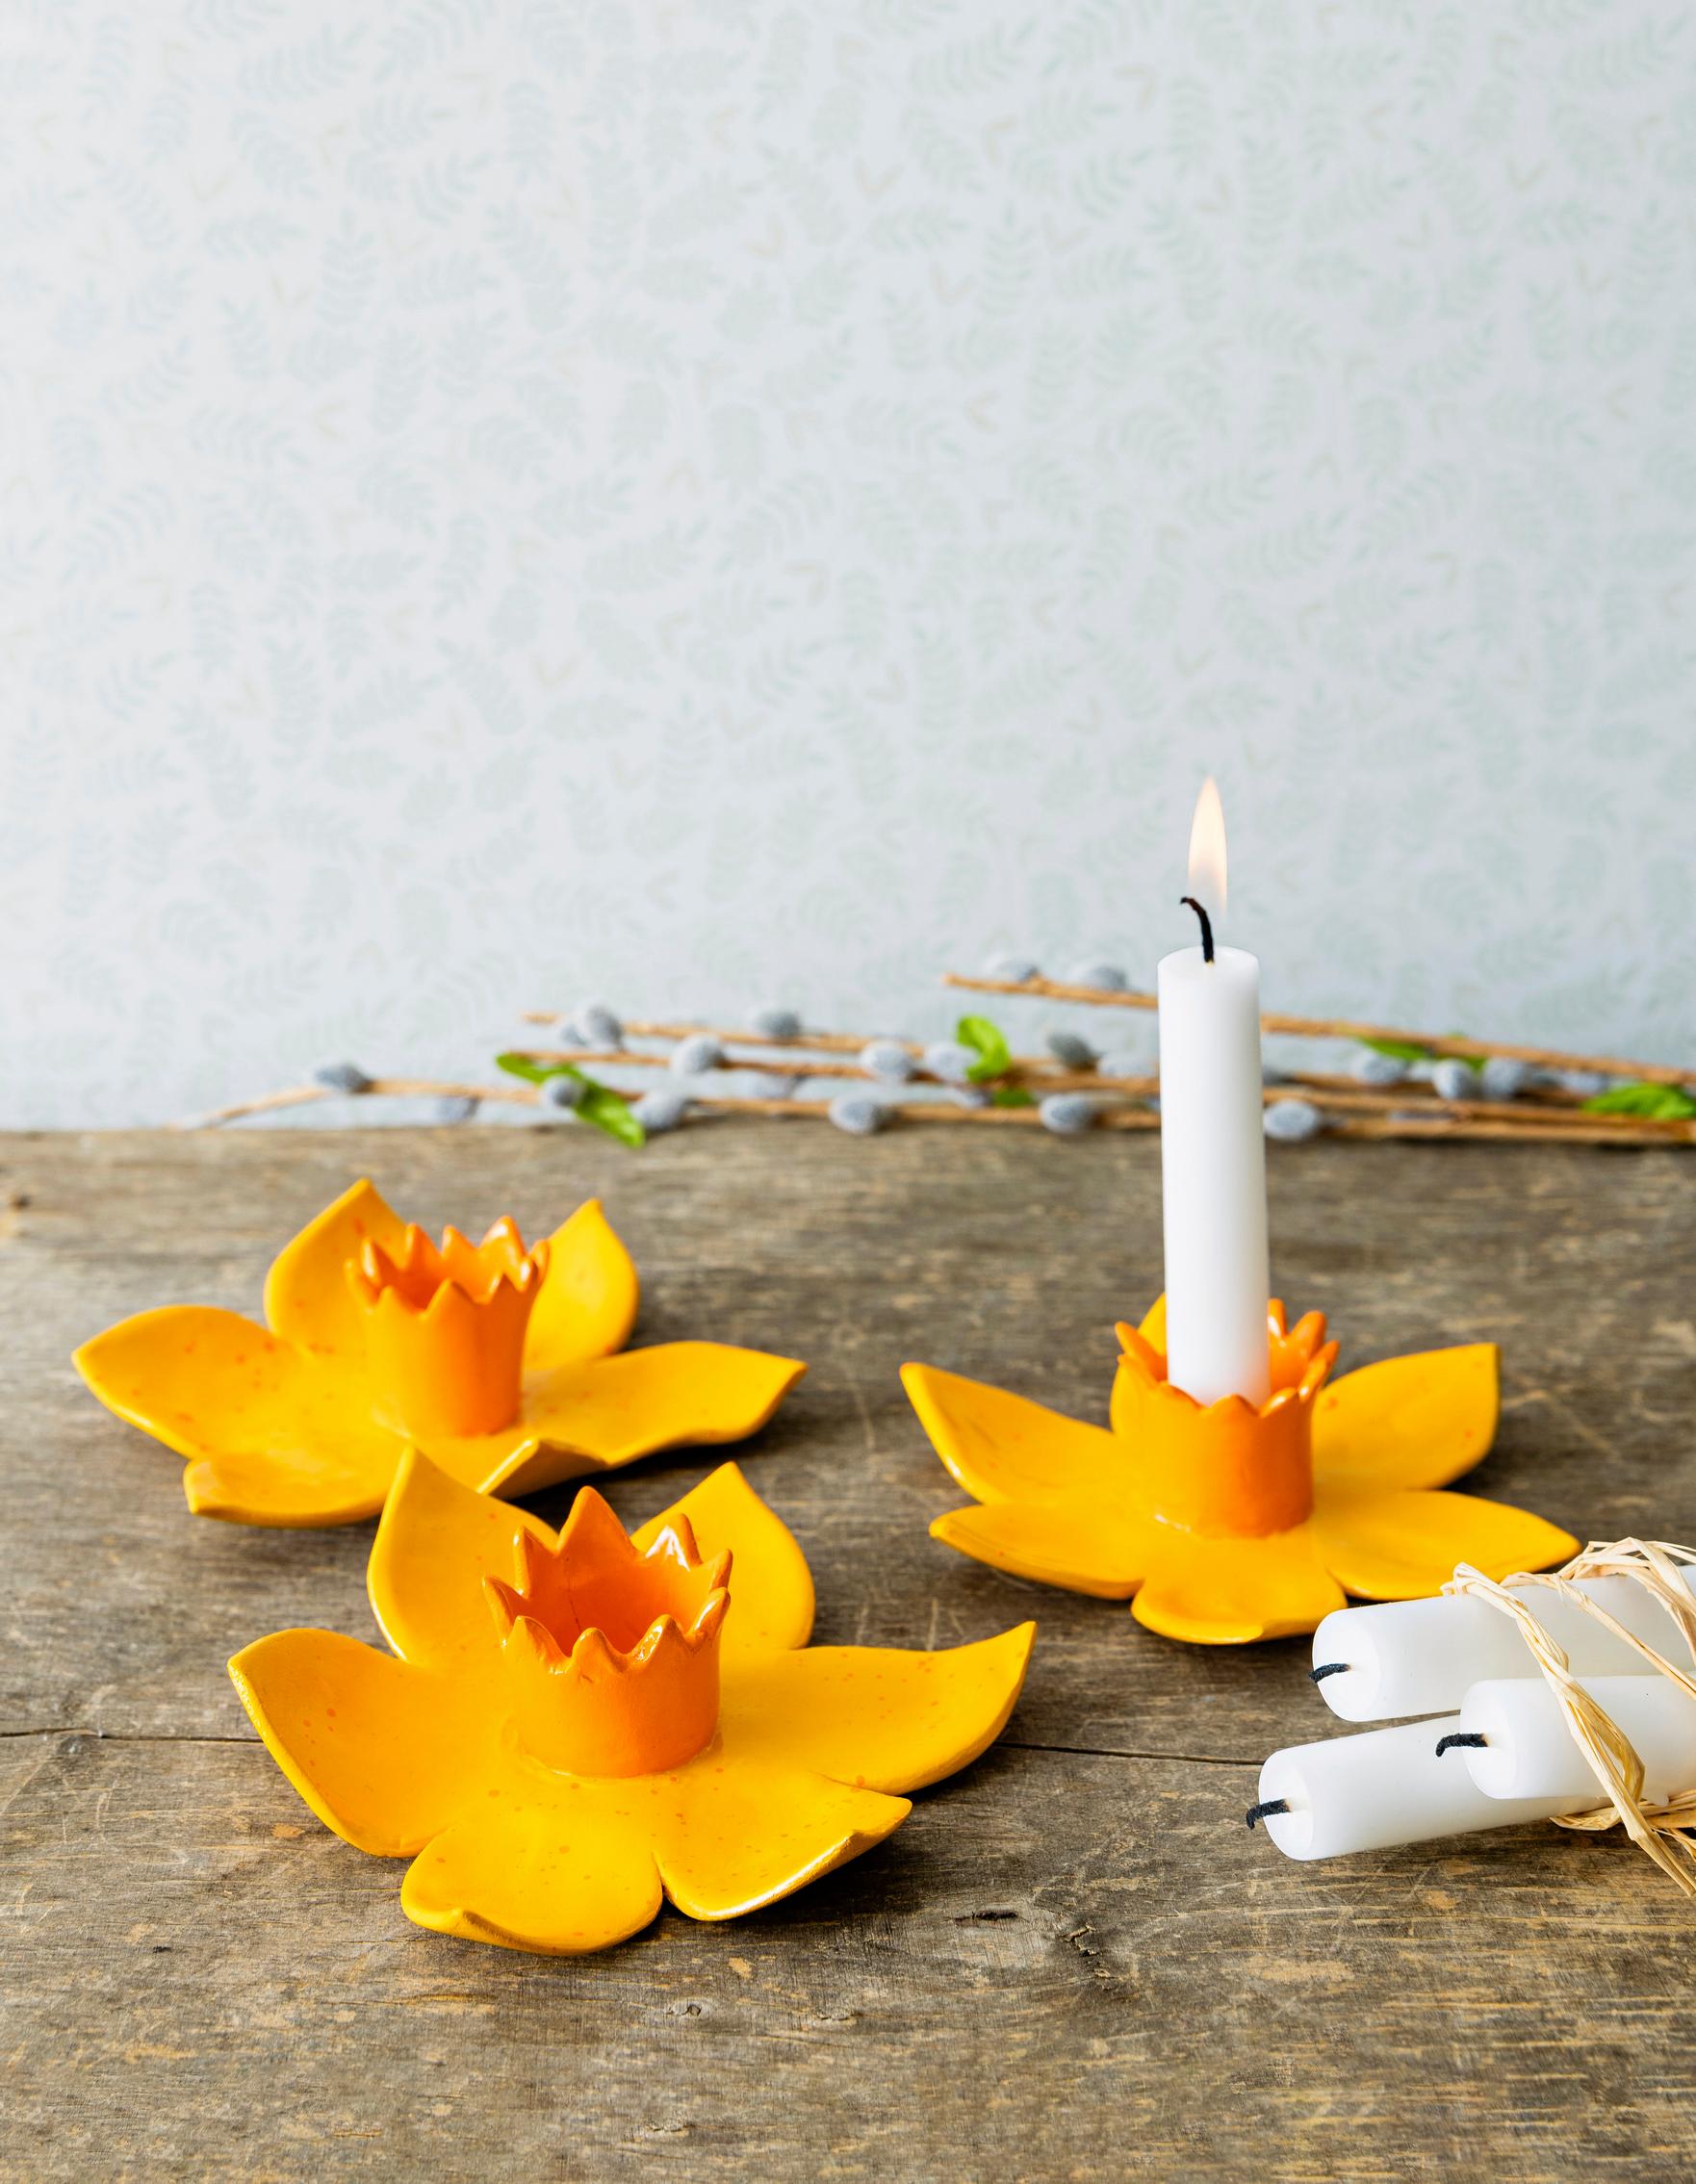
12. Finally, apply several thin coats of glossy spray varnish to the flower.
Download files
Daffodil candle holder, template(PDF)
Download