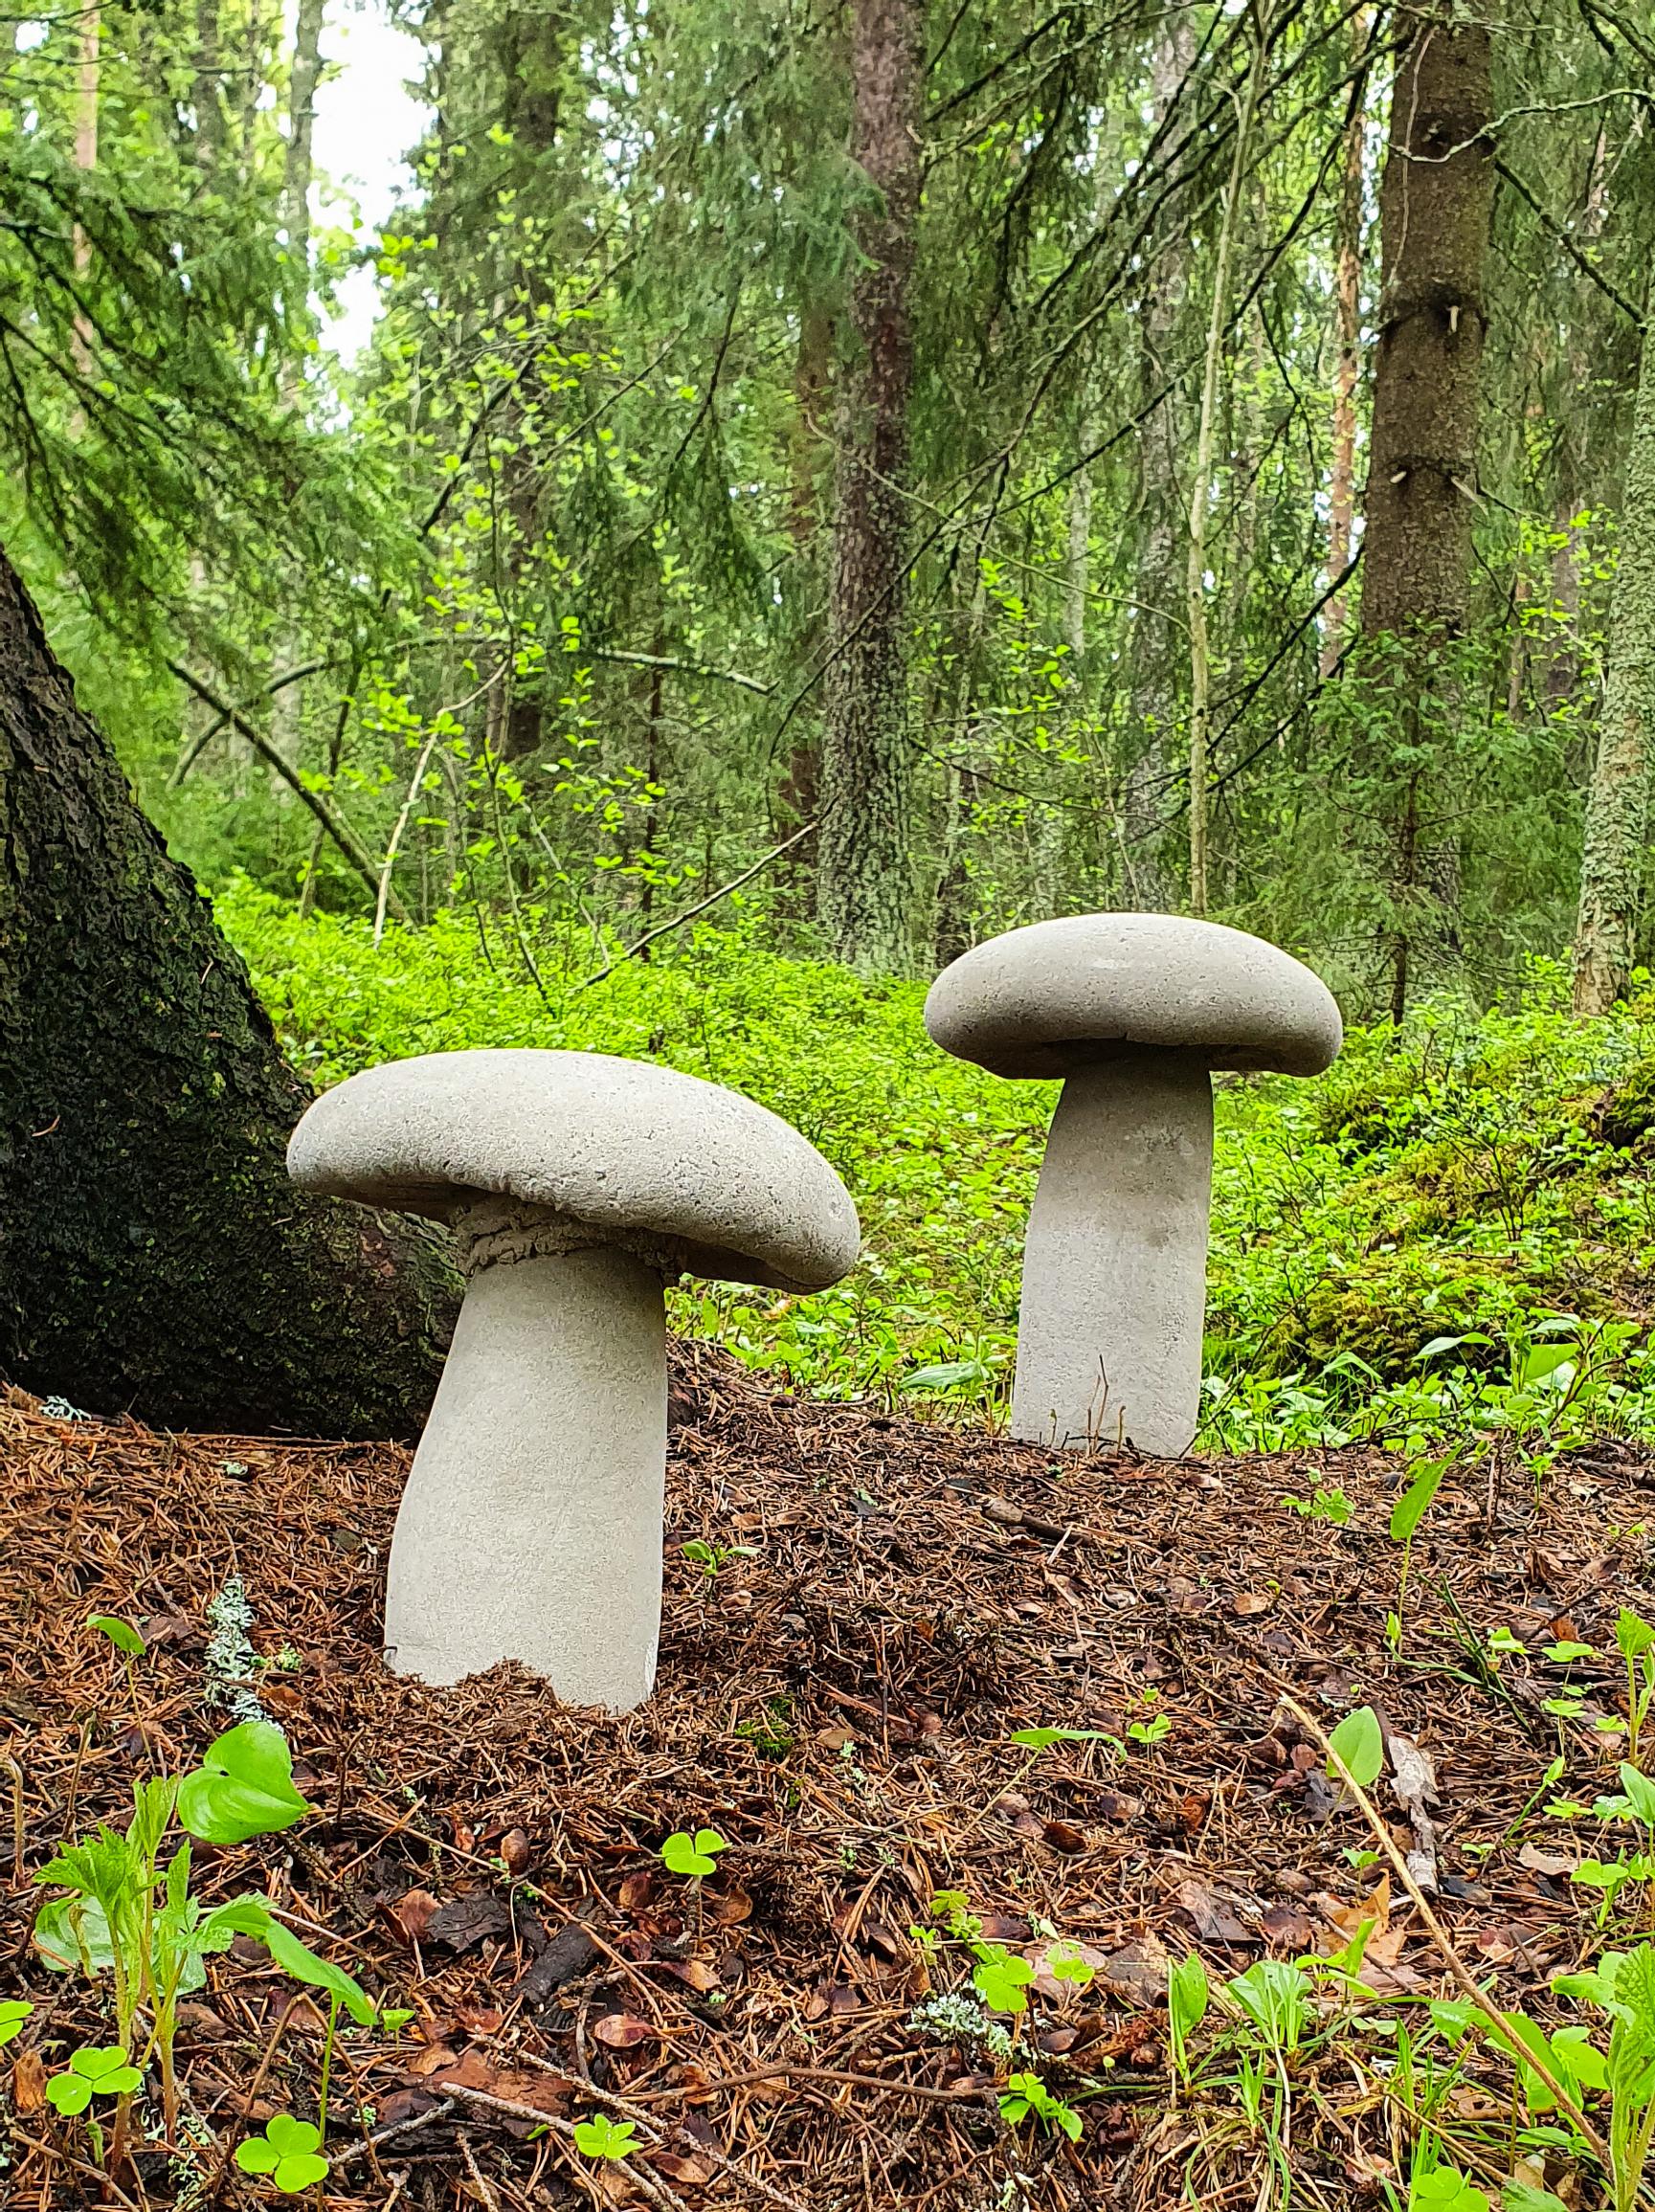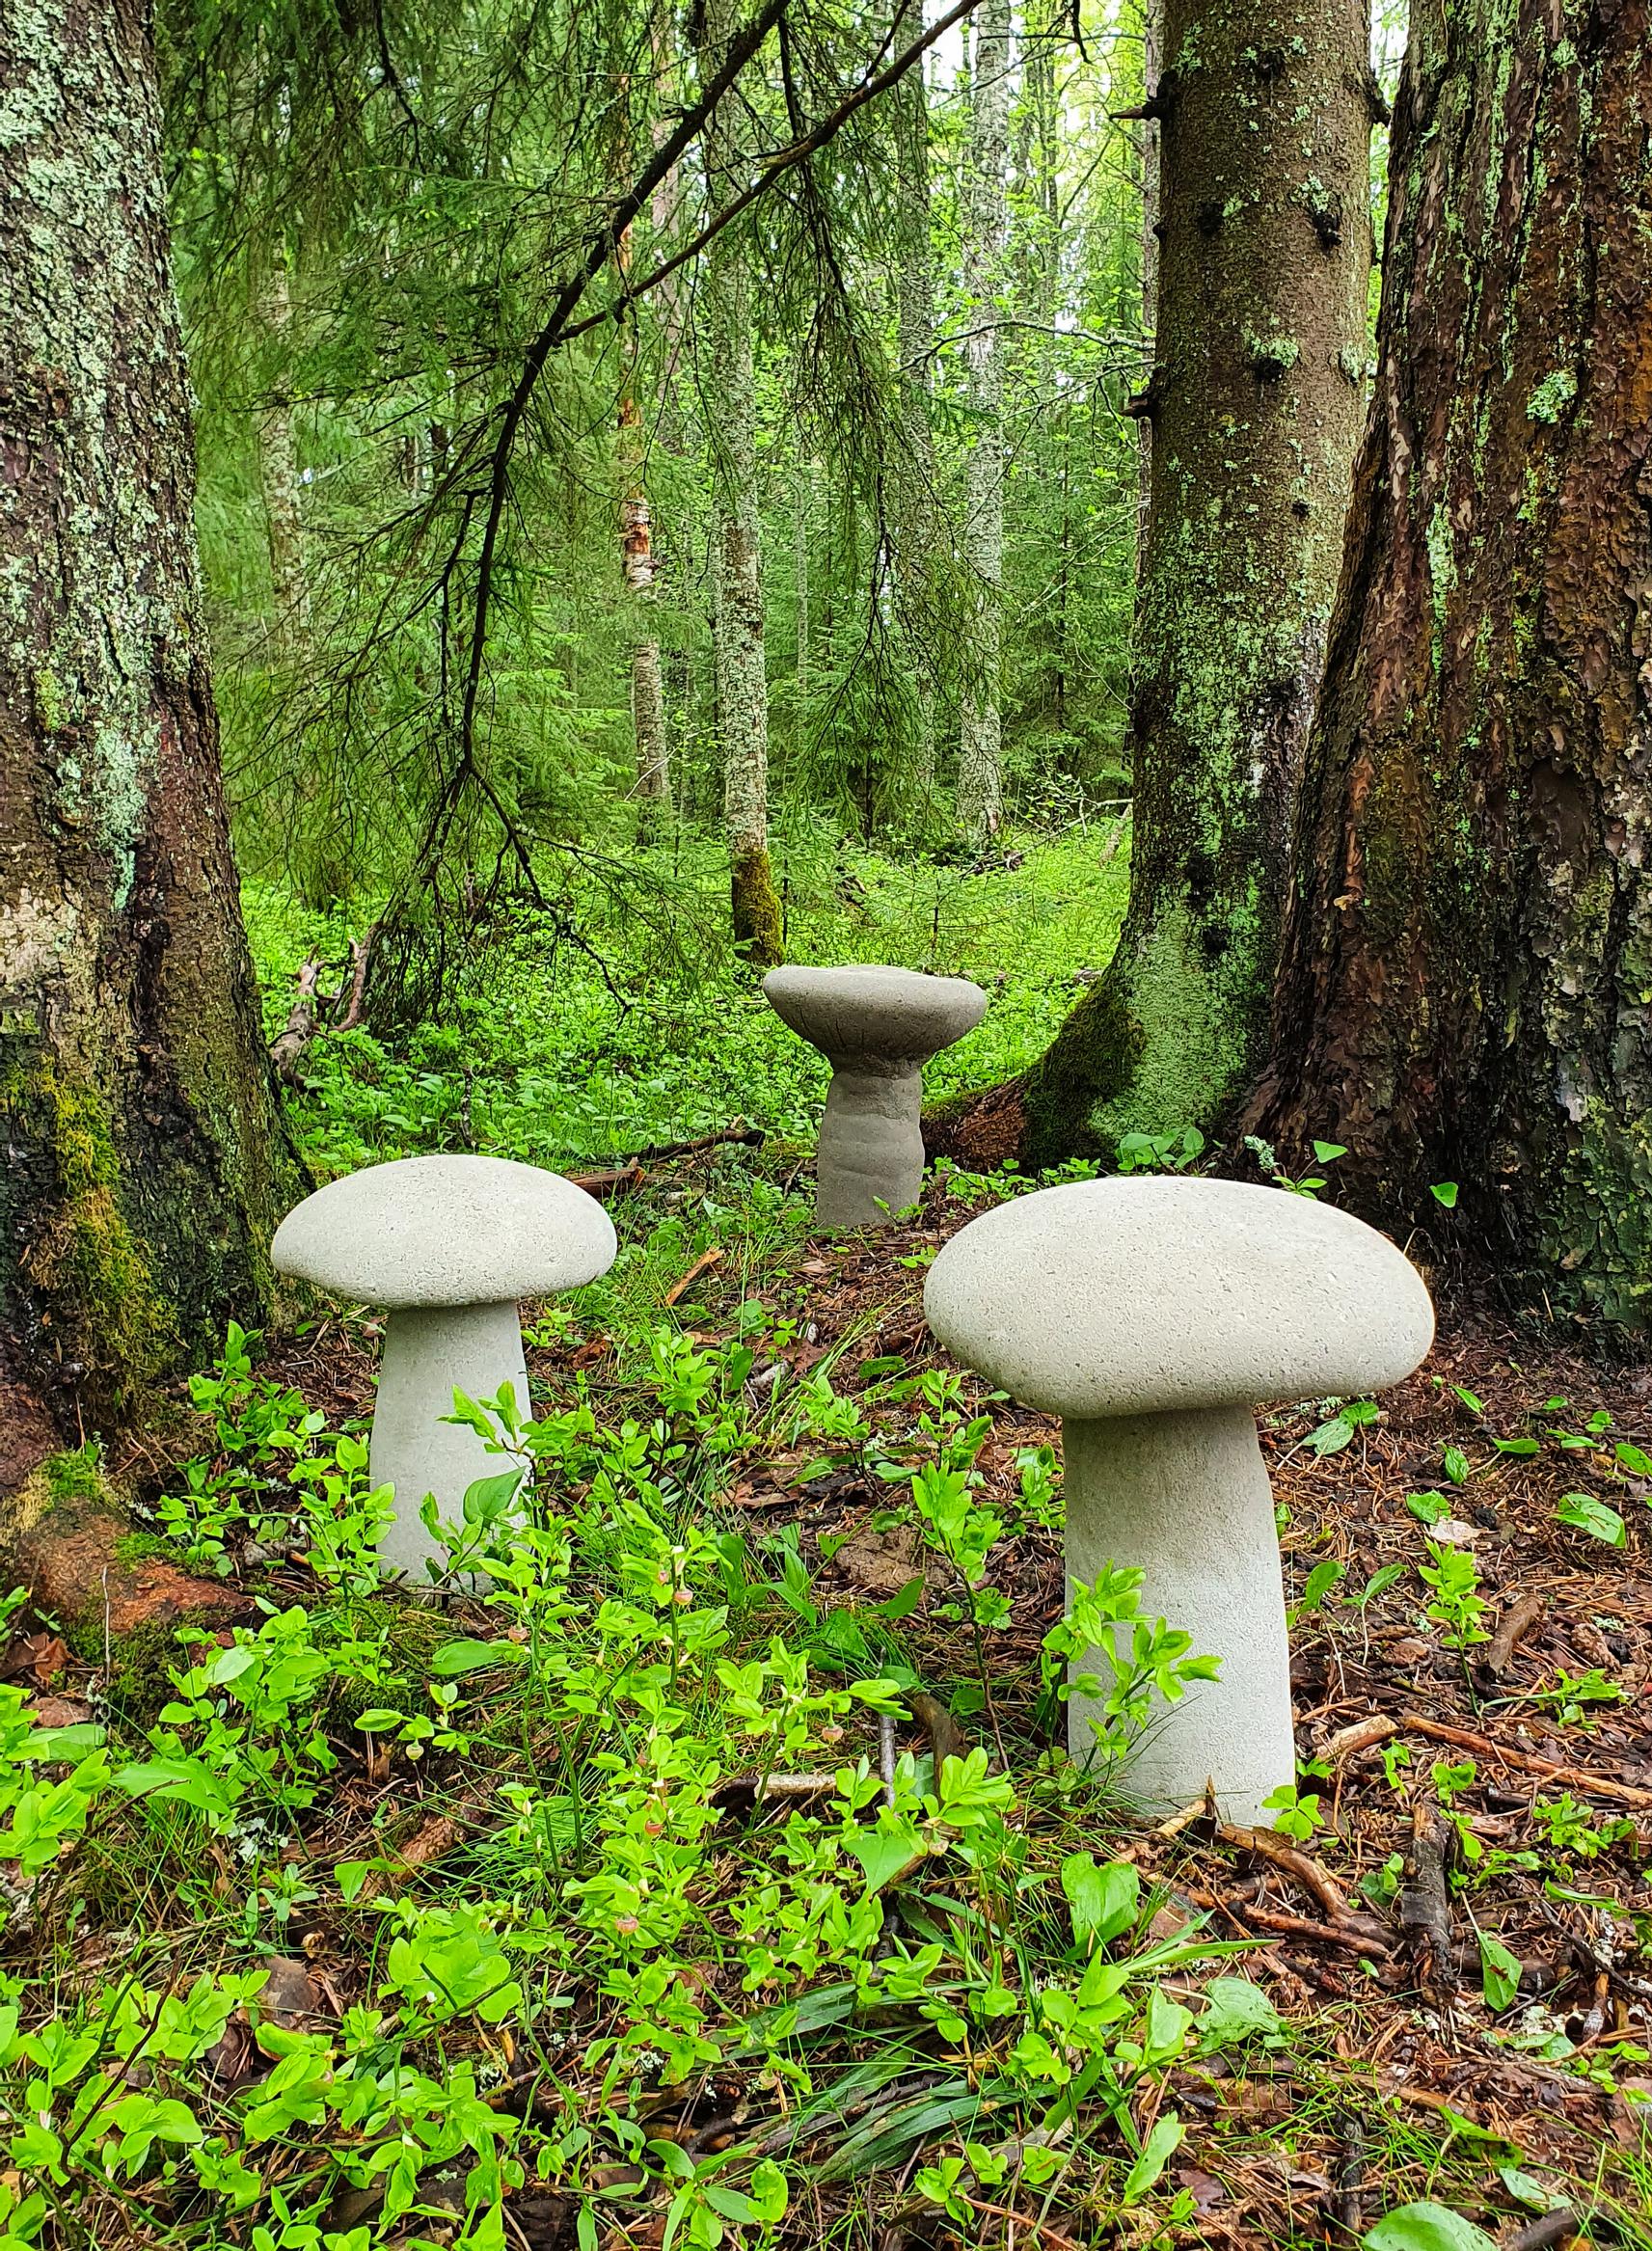
Add a fairy-tale forest vibe to your yard with frost-proof DIY concrete mushrooms
DIY Concrete mushrooms extend the mushroom season year-round. Arrange them in your garden, alongside a path, or at the edge of a flower bed to create a whimsical feel. You can paint them for a realistic look or leave them in their natural gray shade.
The finished mushroom size: height about 26–31 cm (10–12 in), stem height about 20 cm (8 in), stem circumference about 11 cm (4 in), cap diameter about 21–25 cm (8–10 in).
DIY DIY concrete mushrooms Concrete mushrooms: materials
- 25 kg or 55 lb of S100 dry concrete mix (one bag makes three mushrooms)
- pantyhose
- old jersey shirts
- string
- scissors
- plastic wrap
- tape
- mixing container, for example a large plastic bucket
- water
- a small plastic container, for example a 1 L (about 1 qt) yogurt bucket
- fine sandpaper
- extra containers for casting
- palette knife
- respirator
- protective gloves
- (about 15 cm or 6 in piece of rebar)


Concrete mixing and consistency
You can mix a small or large amount of concrete at once, depending on your own working style. These mushrooms were made by mixing a separate batch of concrete for each part. Pour about 3 dl (1.3 cups) of water into the bottom of the container to start. Add the concrete mix gradually and stir. Remember that you can always add more water, but you can’t remove it. The consistency is right when any lumps disappear and the mixture becomes thick and porridge-like. Once it’s ready, it will be easier to see if you have enough for your piece. When working with concrete, wear a respirator and protective gloves.
Concrete mushrooms: instructions
Getting started
Cut the legs from the pantyhose, separate the front and back sections of the shirt.
Forming the cap


1. Pile your desired amount of concrete onto the jersey fabric. Pull all the edges of the fabric together so the concrete mass is fully enclosed in the shirt.

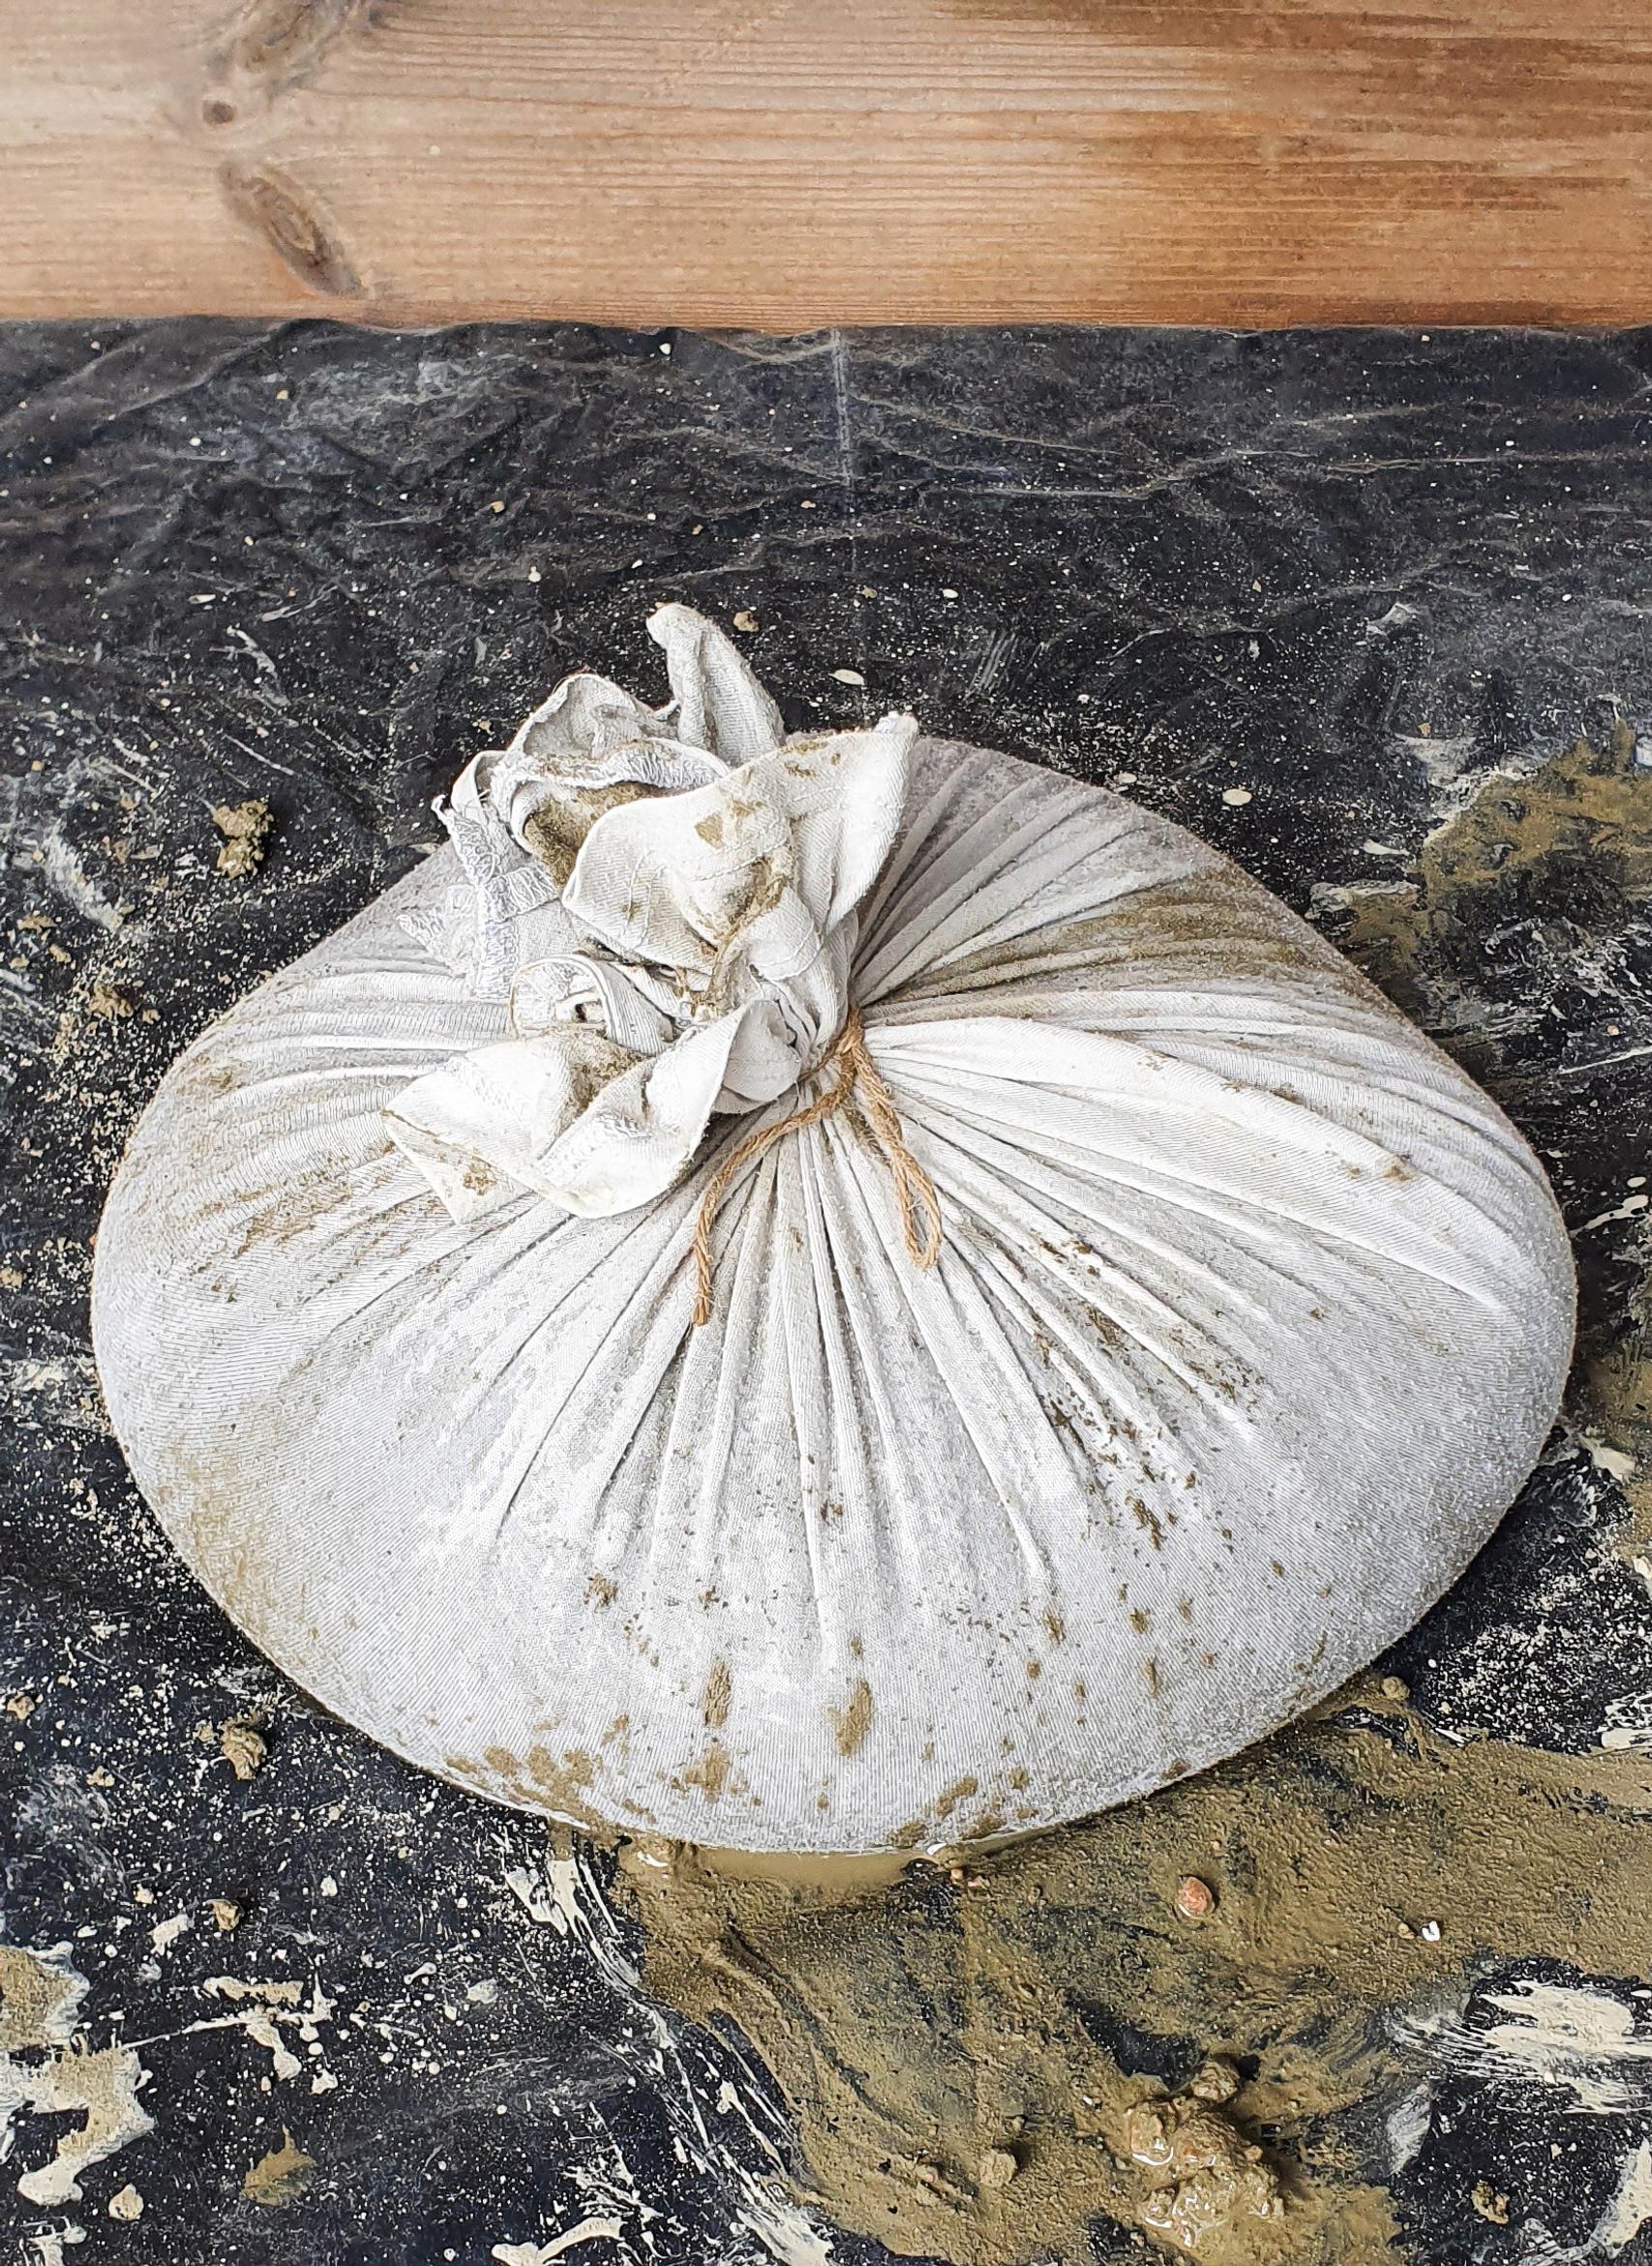
2. Tie the bundle tightly with string. Squeeze and pat the bundle for a short while to release any air bubbles.

3. For a porcini shape in the cap portion: Place the cap bundle upside down on a container that’s the right size (with the tied part centered underneath). It’s important that the bundle is securely tied so the concrete doesn’t leak.

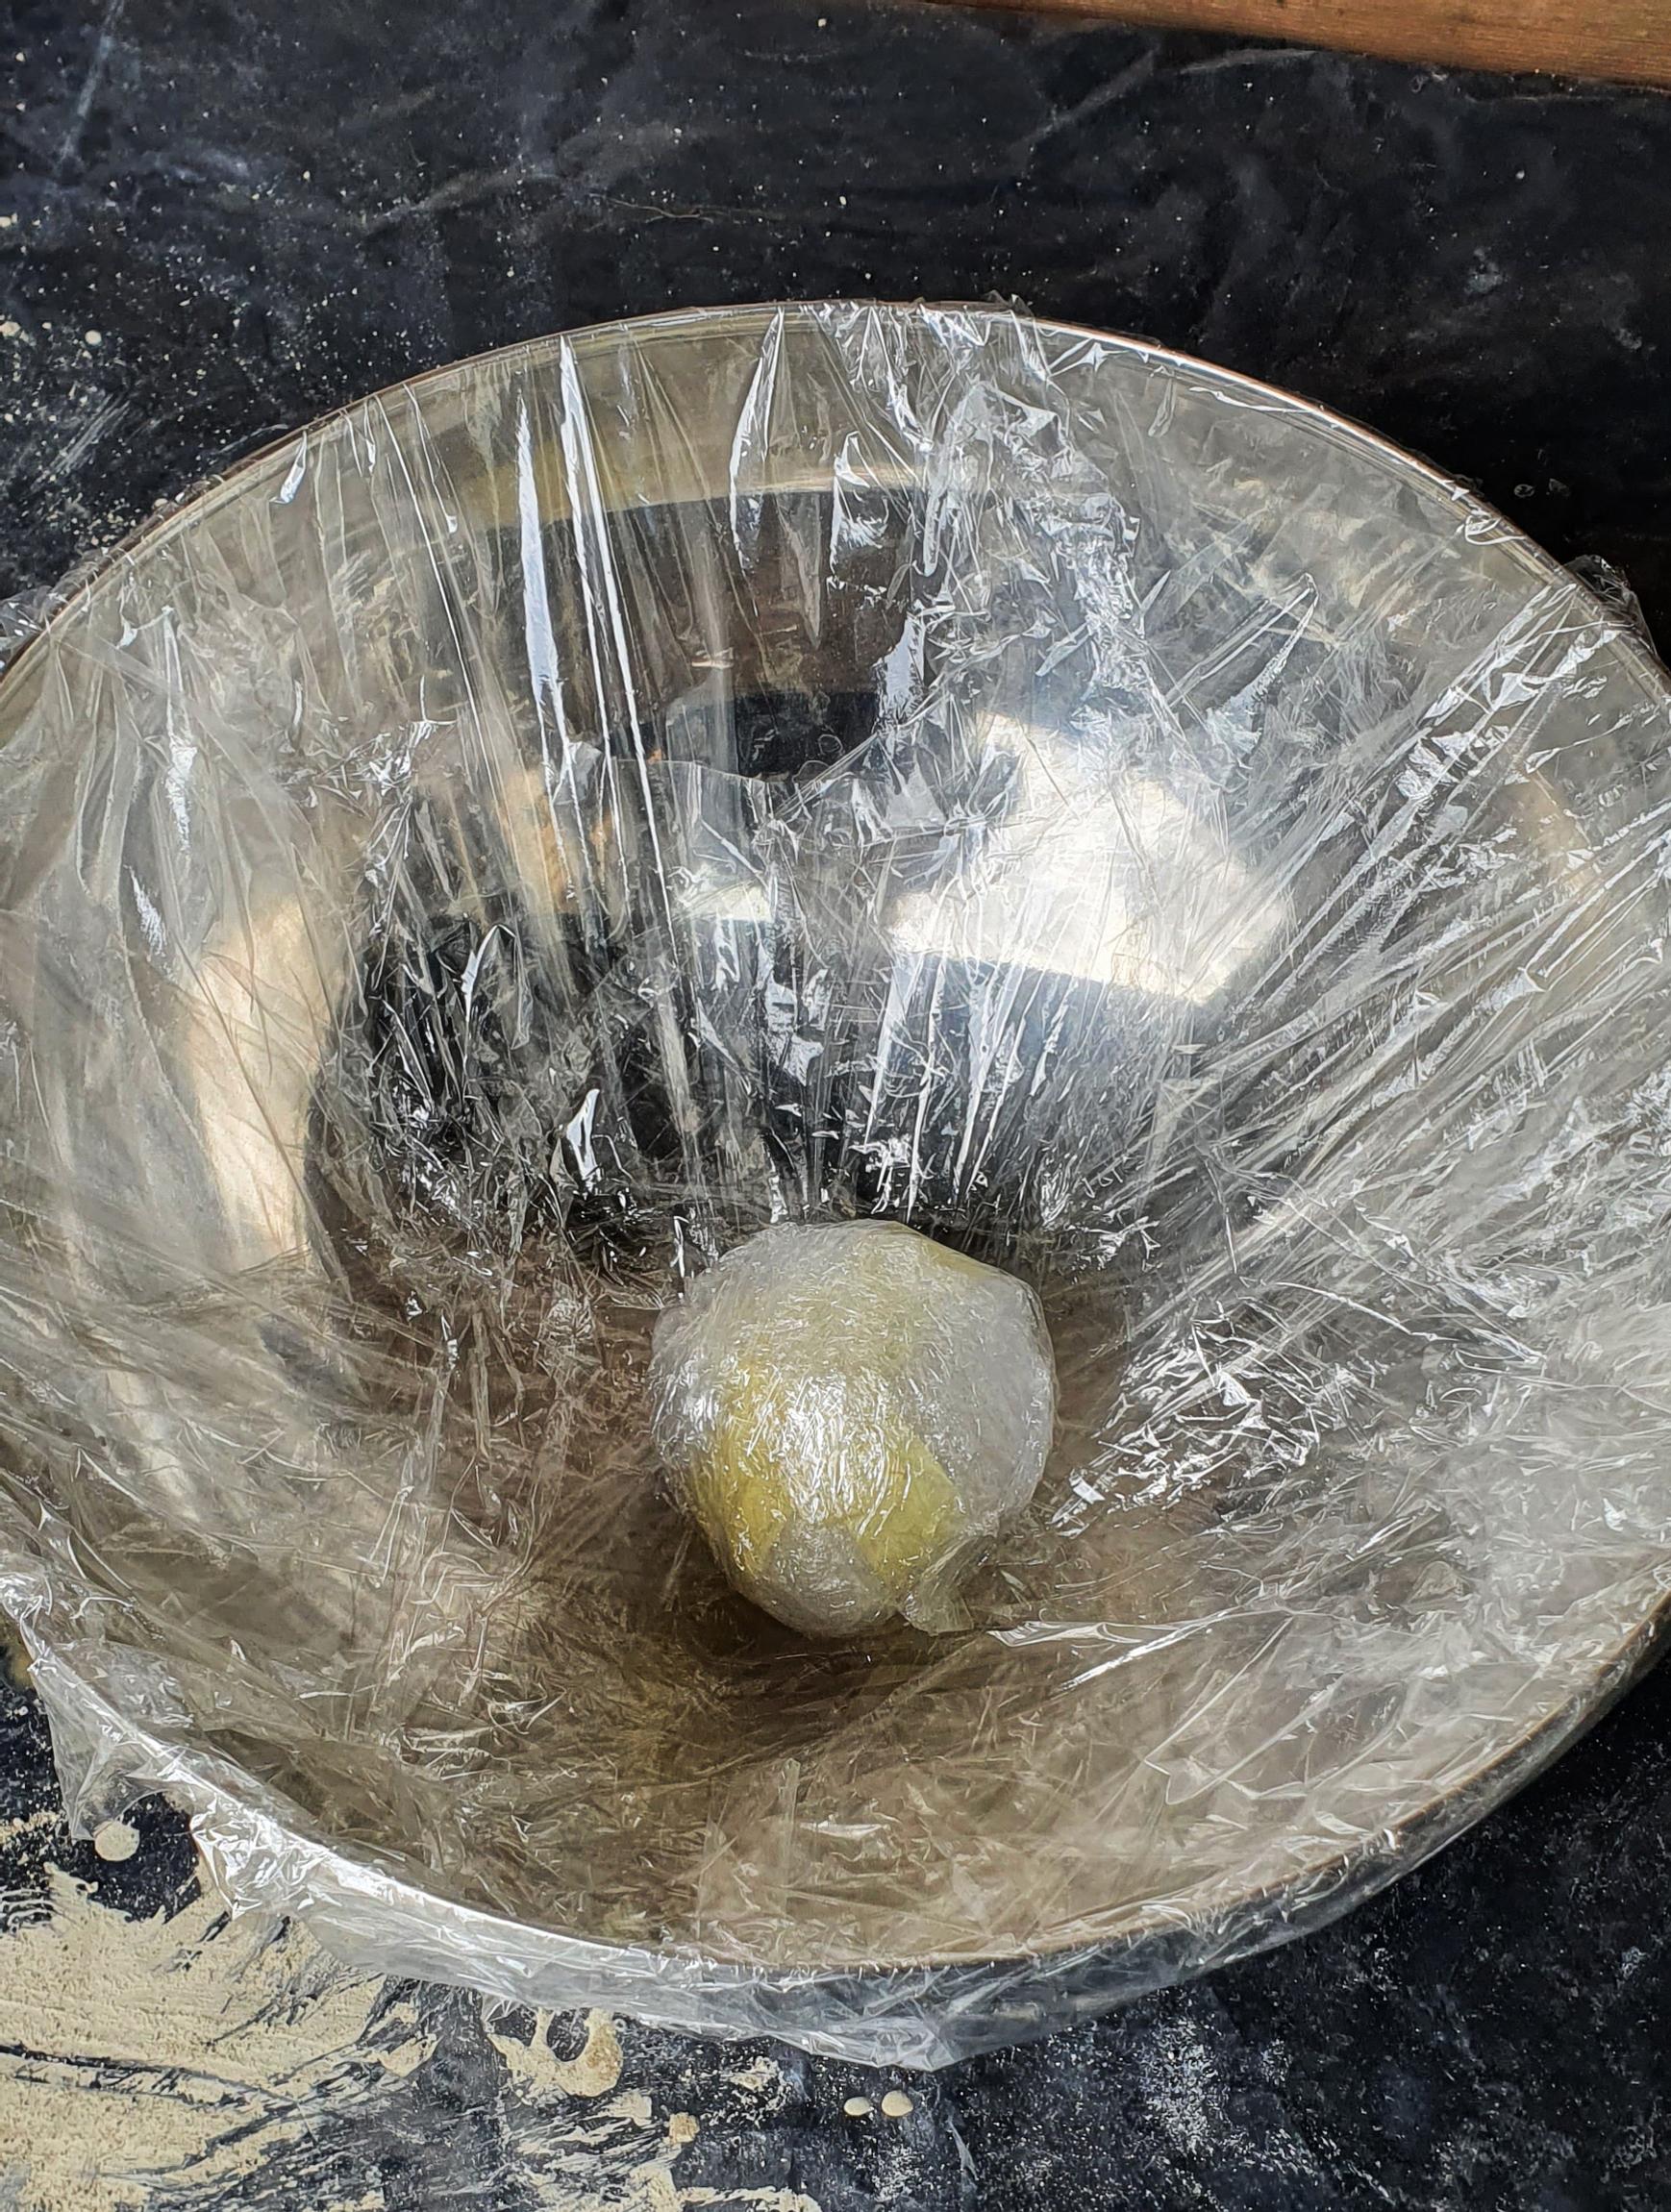


4. For a chanterelle shape in the cap portion: Protect the mold and place, for example, a plastic-wrapped wad at the bottom. Then set the cap portion inside a container that widens upward so it can dry.
Forming the stem

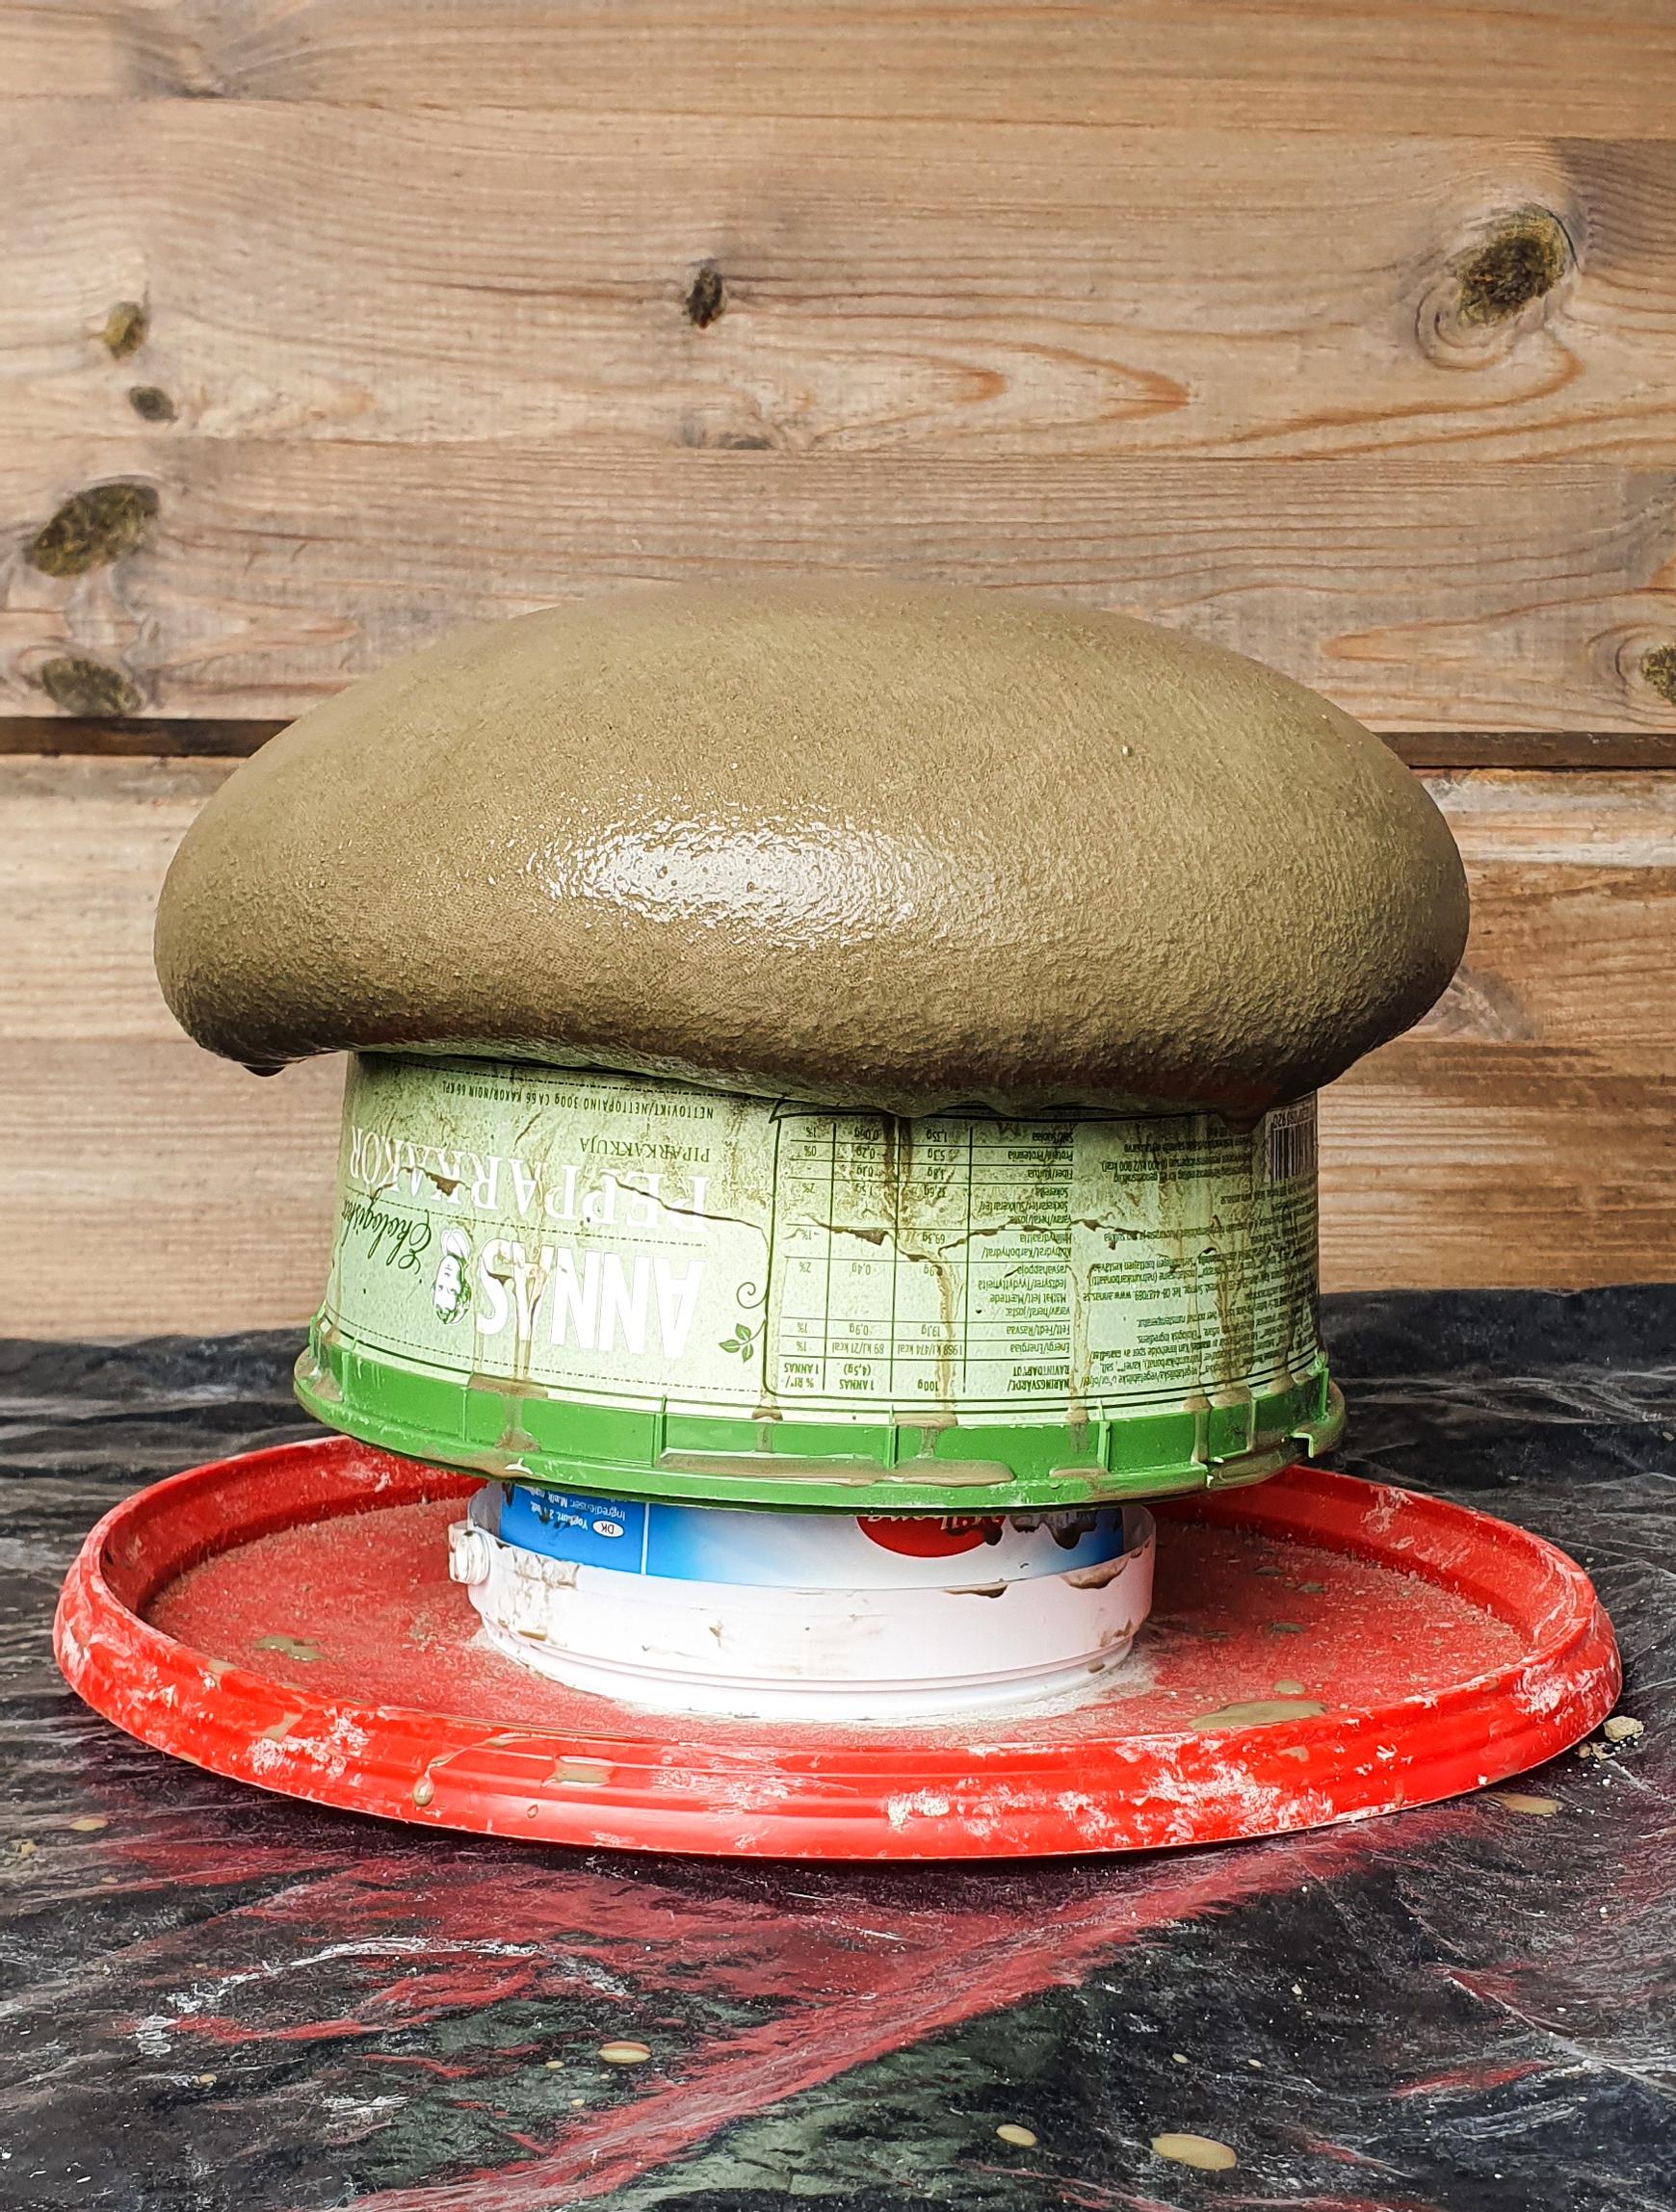
5. Place the pantyhose into a bucket. Scoop concrete into the pantyhose, squeeze it, and let it rest on a table in a horizontal position for about 15 minutes. To test if it’s ready, press the concrete and try setting the stem upright. If the stem feels too soft and starts to bend, let it set a bit longer. Once it begins to firm up, you can shape the stem as you like.

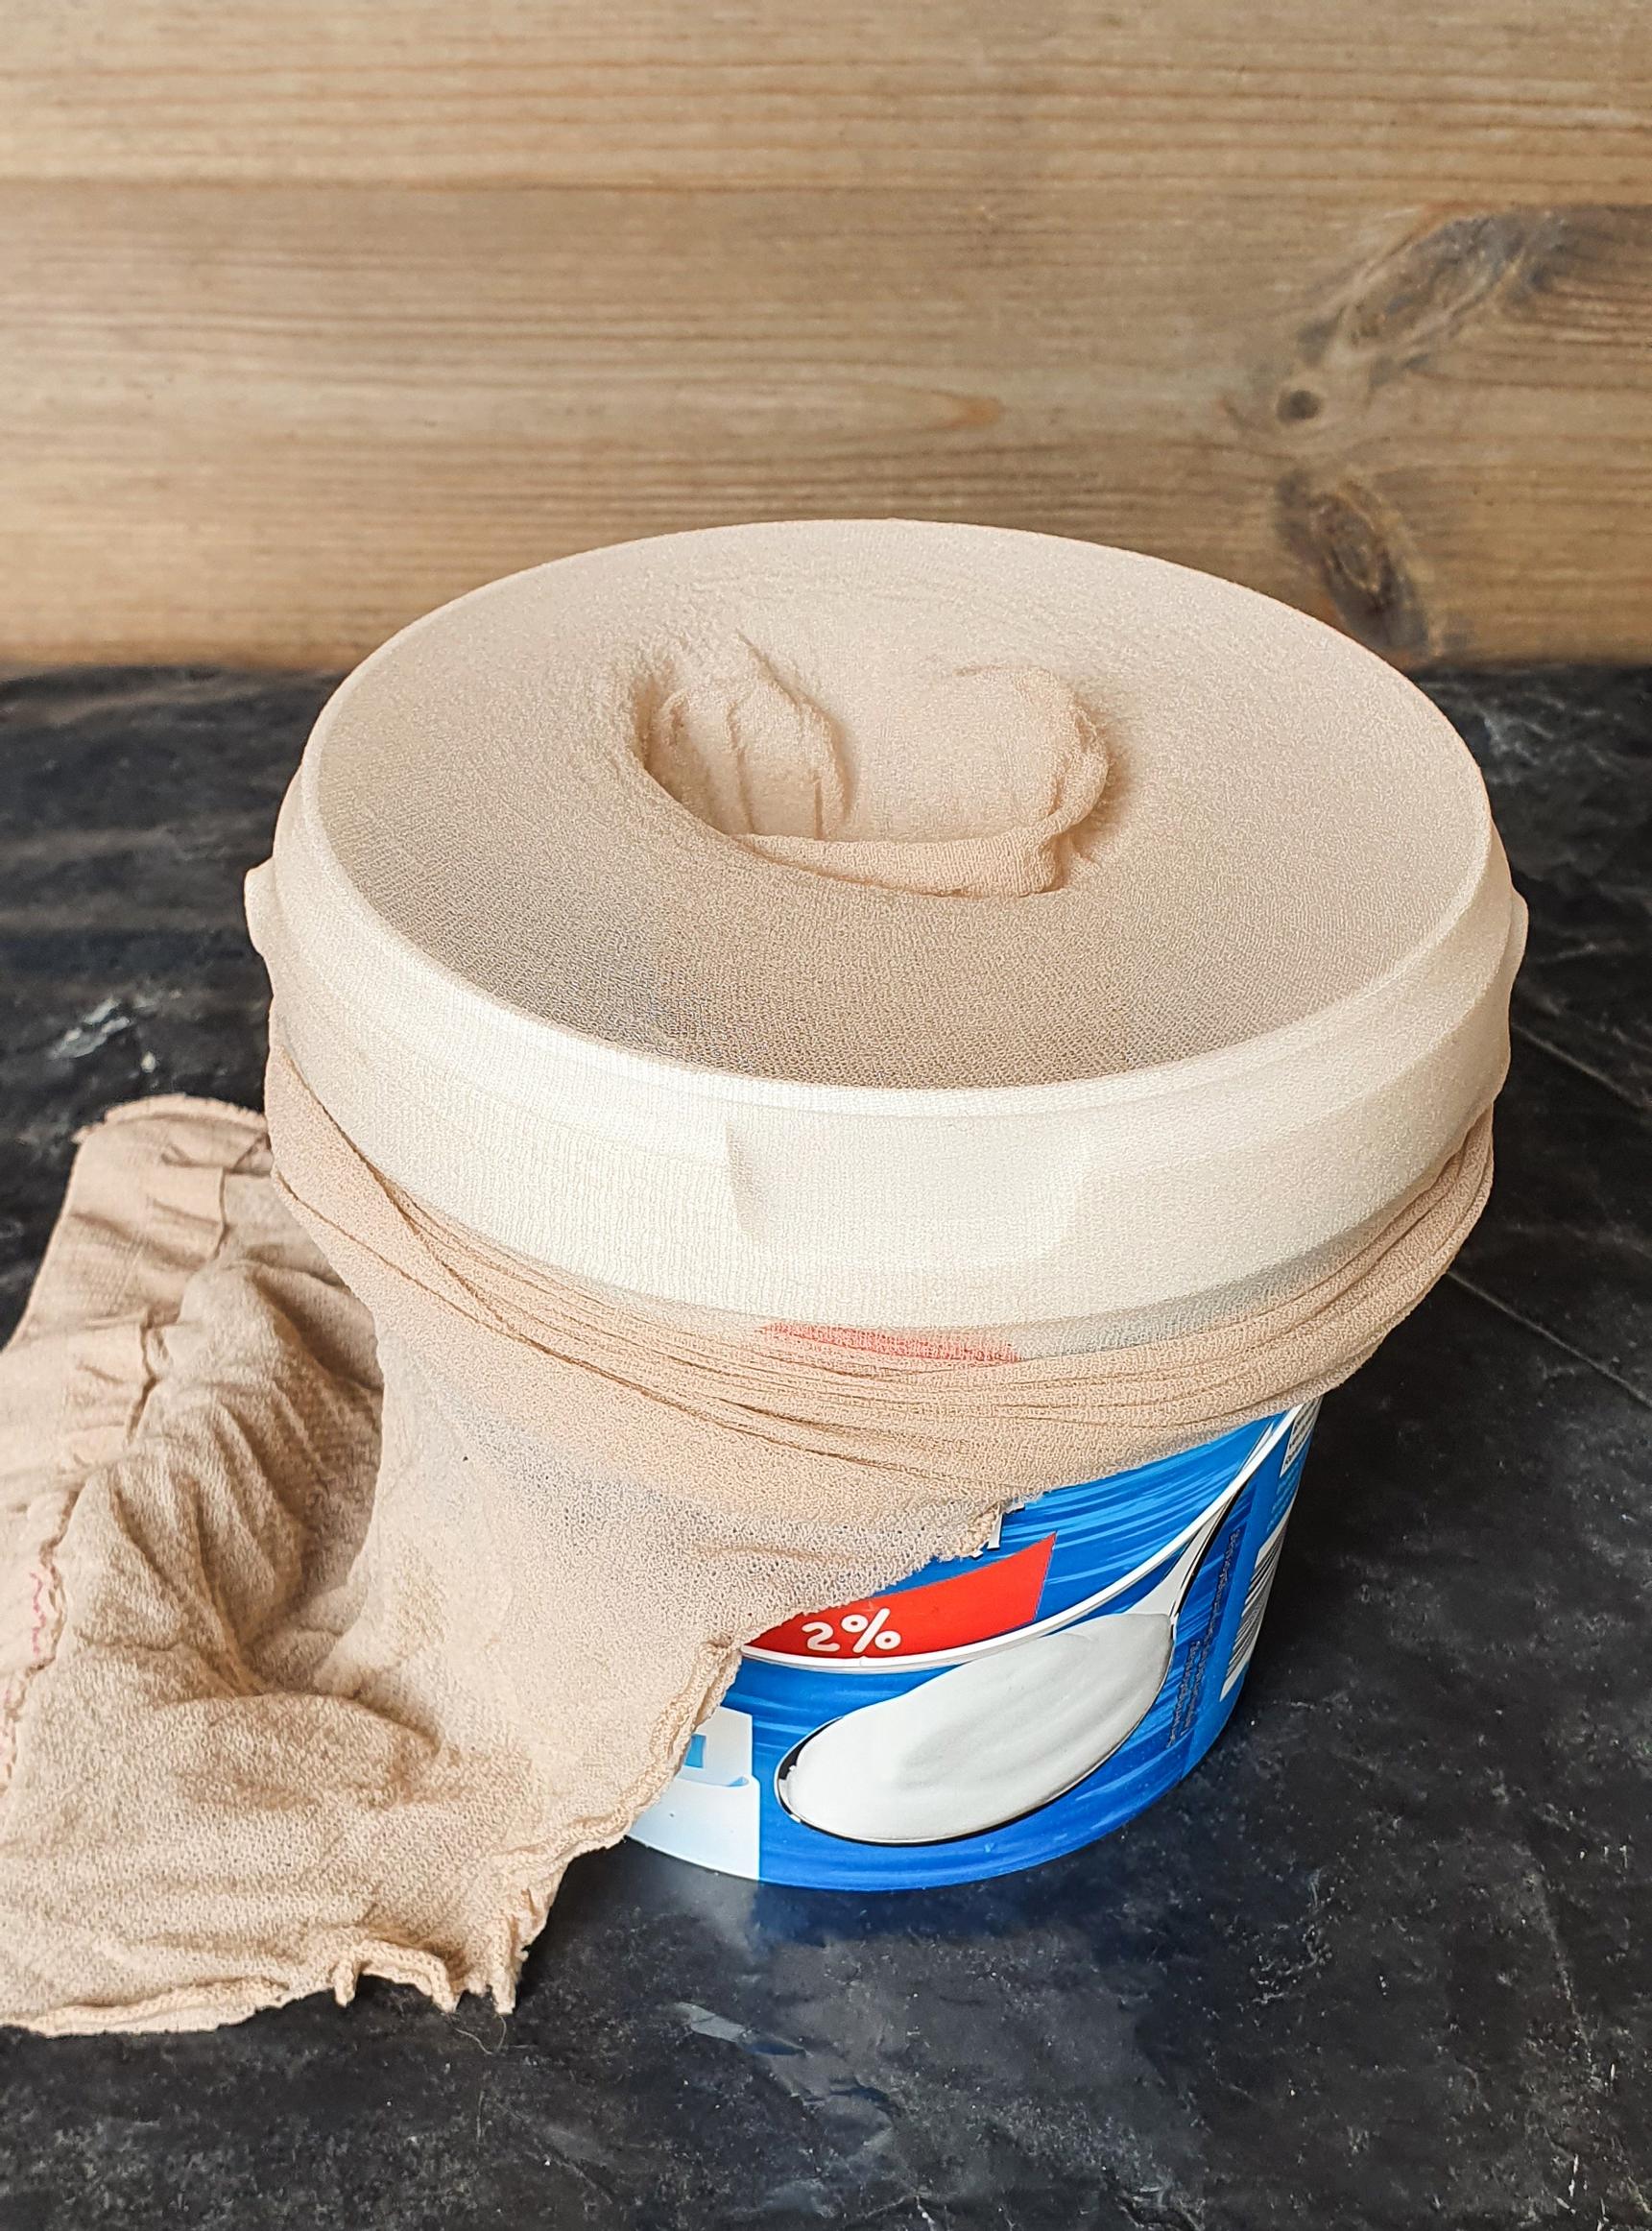
6. Use plastic wrap and tape to help it keep the shape you want. Set the stem in a yogurt container to dry. Paper towels can act as cushioning to prevent marks from the container’s rim. If you want to add rebar inside the stem, make a hole in the bottom of the bucket and push the rebar through styrofoam or a container of sand. That way, the rebar will remain exposed, and you can secure the mushroom into the ground.
Tip!
You can cast a piece of rebar inside the stem so the mushroom is easier to keep upright by anchoring the metal into the ground.
Drying
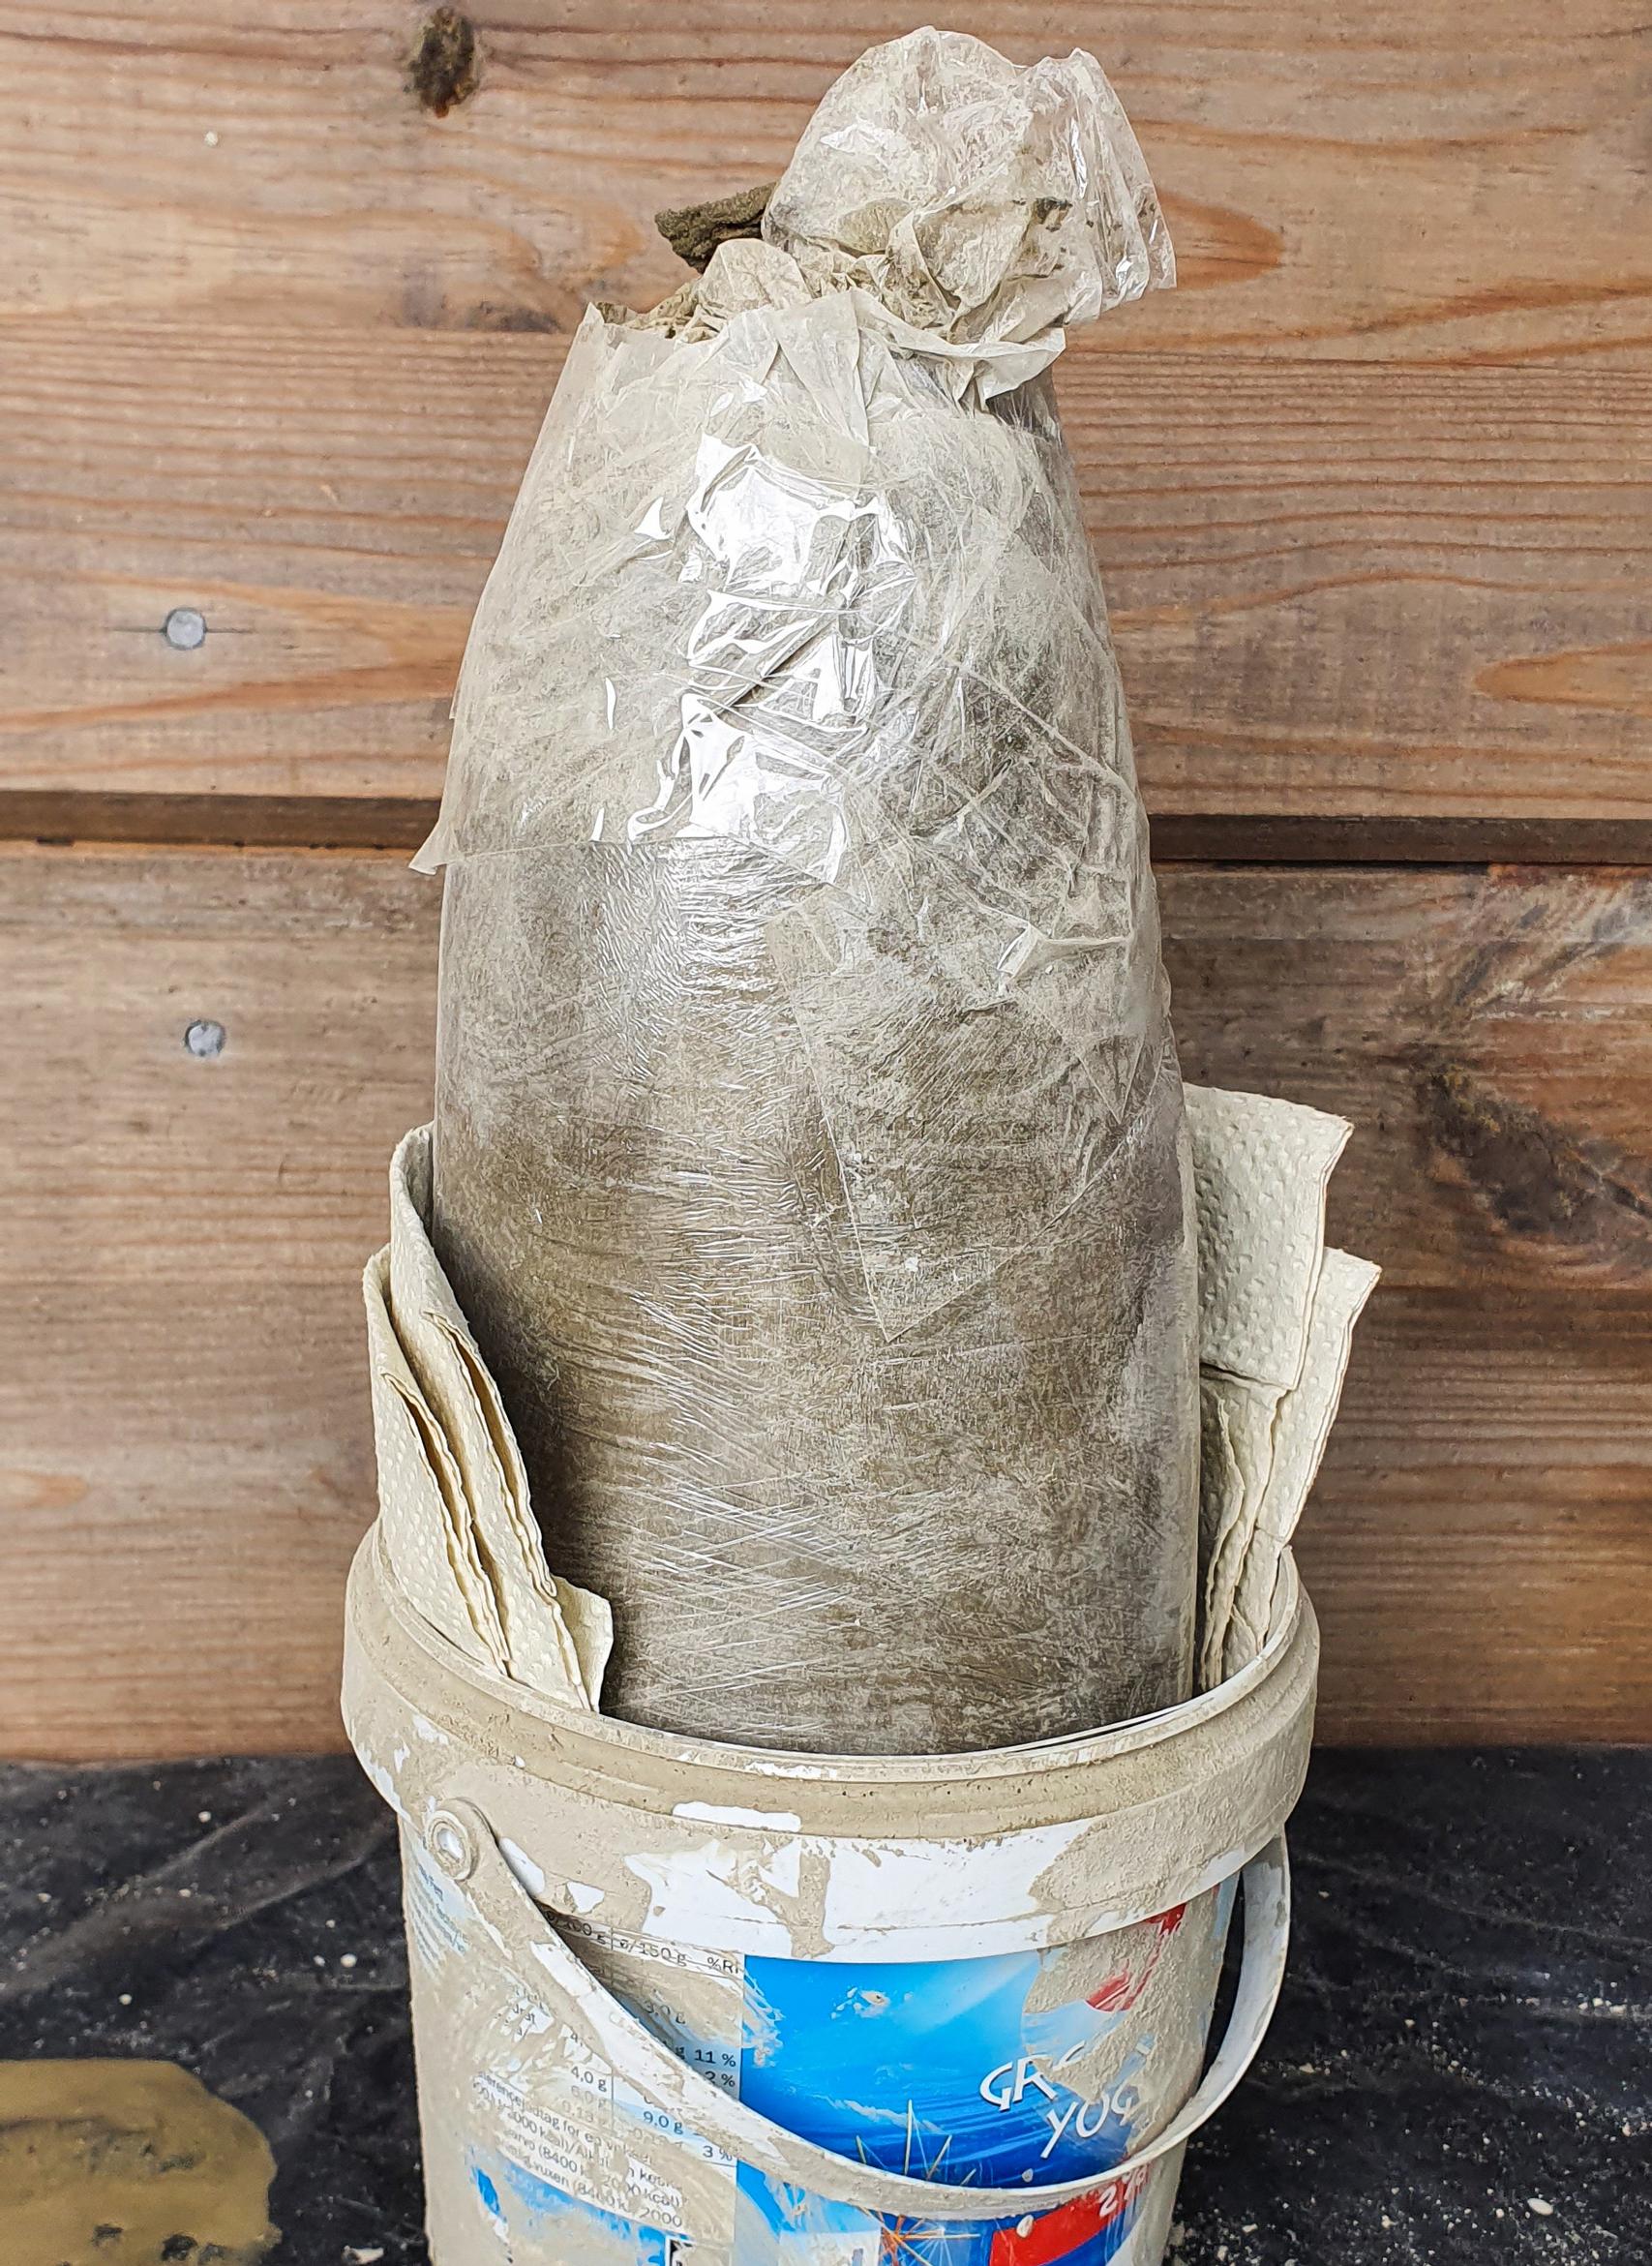
7. Spray your work, cover it with a plastic bag, and let it dry. Keep misting your project at least once a day. Don’t rush to remove the fabric because concrete reaches its final strength only after it has fully dried. Avoid drying in direct sunlight to prevent cracking.
8. After about four days of drying at room temperature (adjust based on size and conditions), you can remove the pantyhose and jersey fabric from the concrete pieces.
Joining the pieces

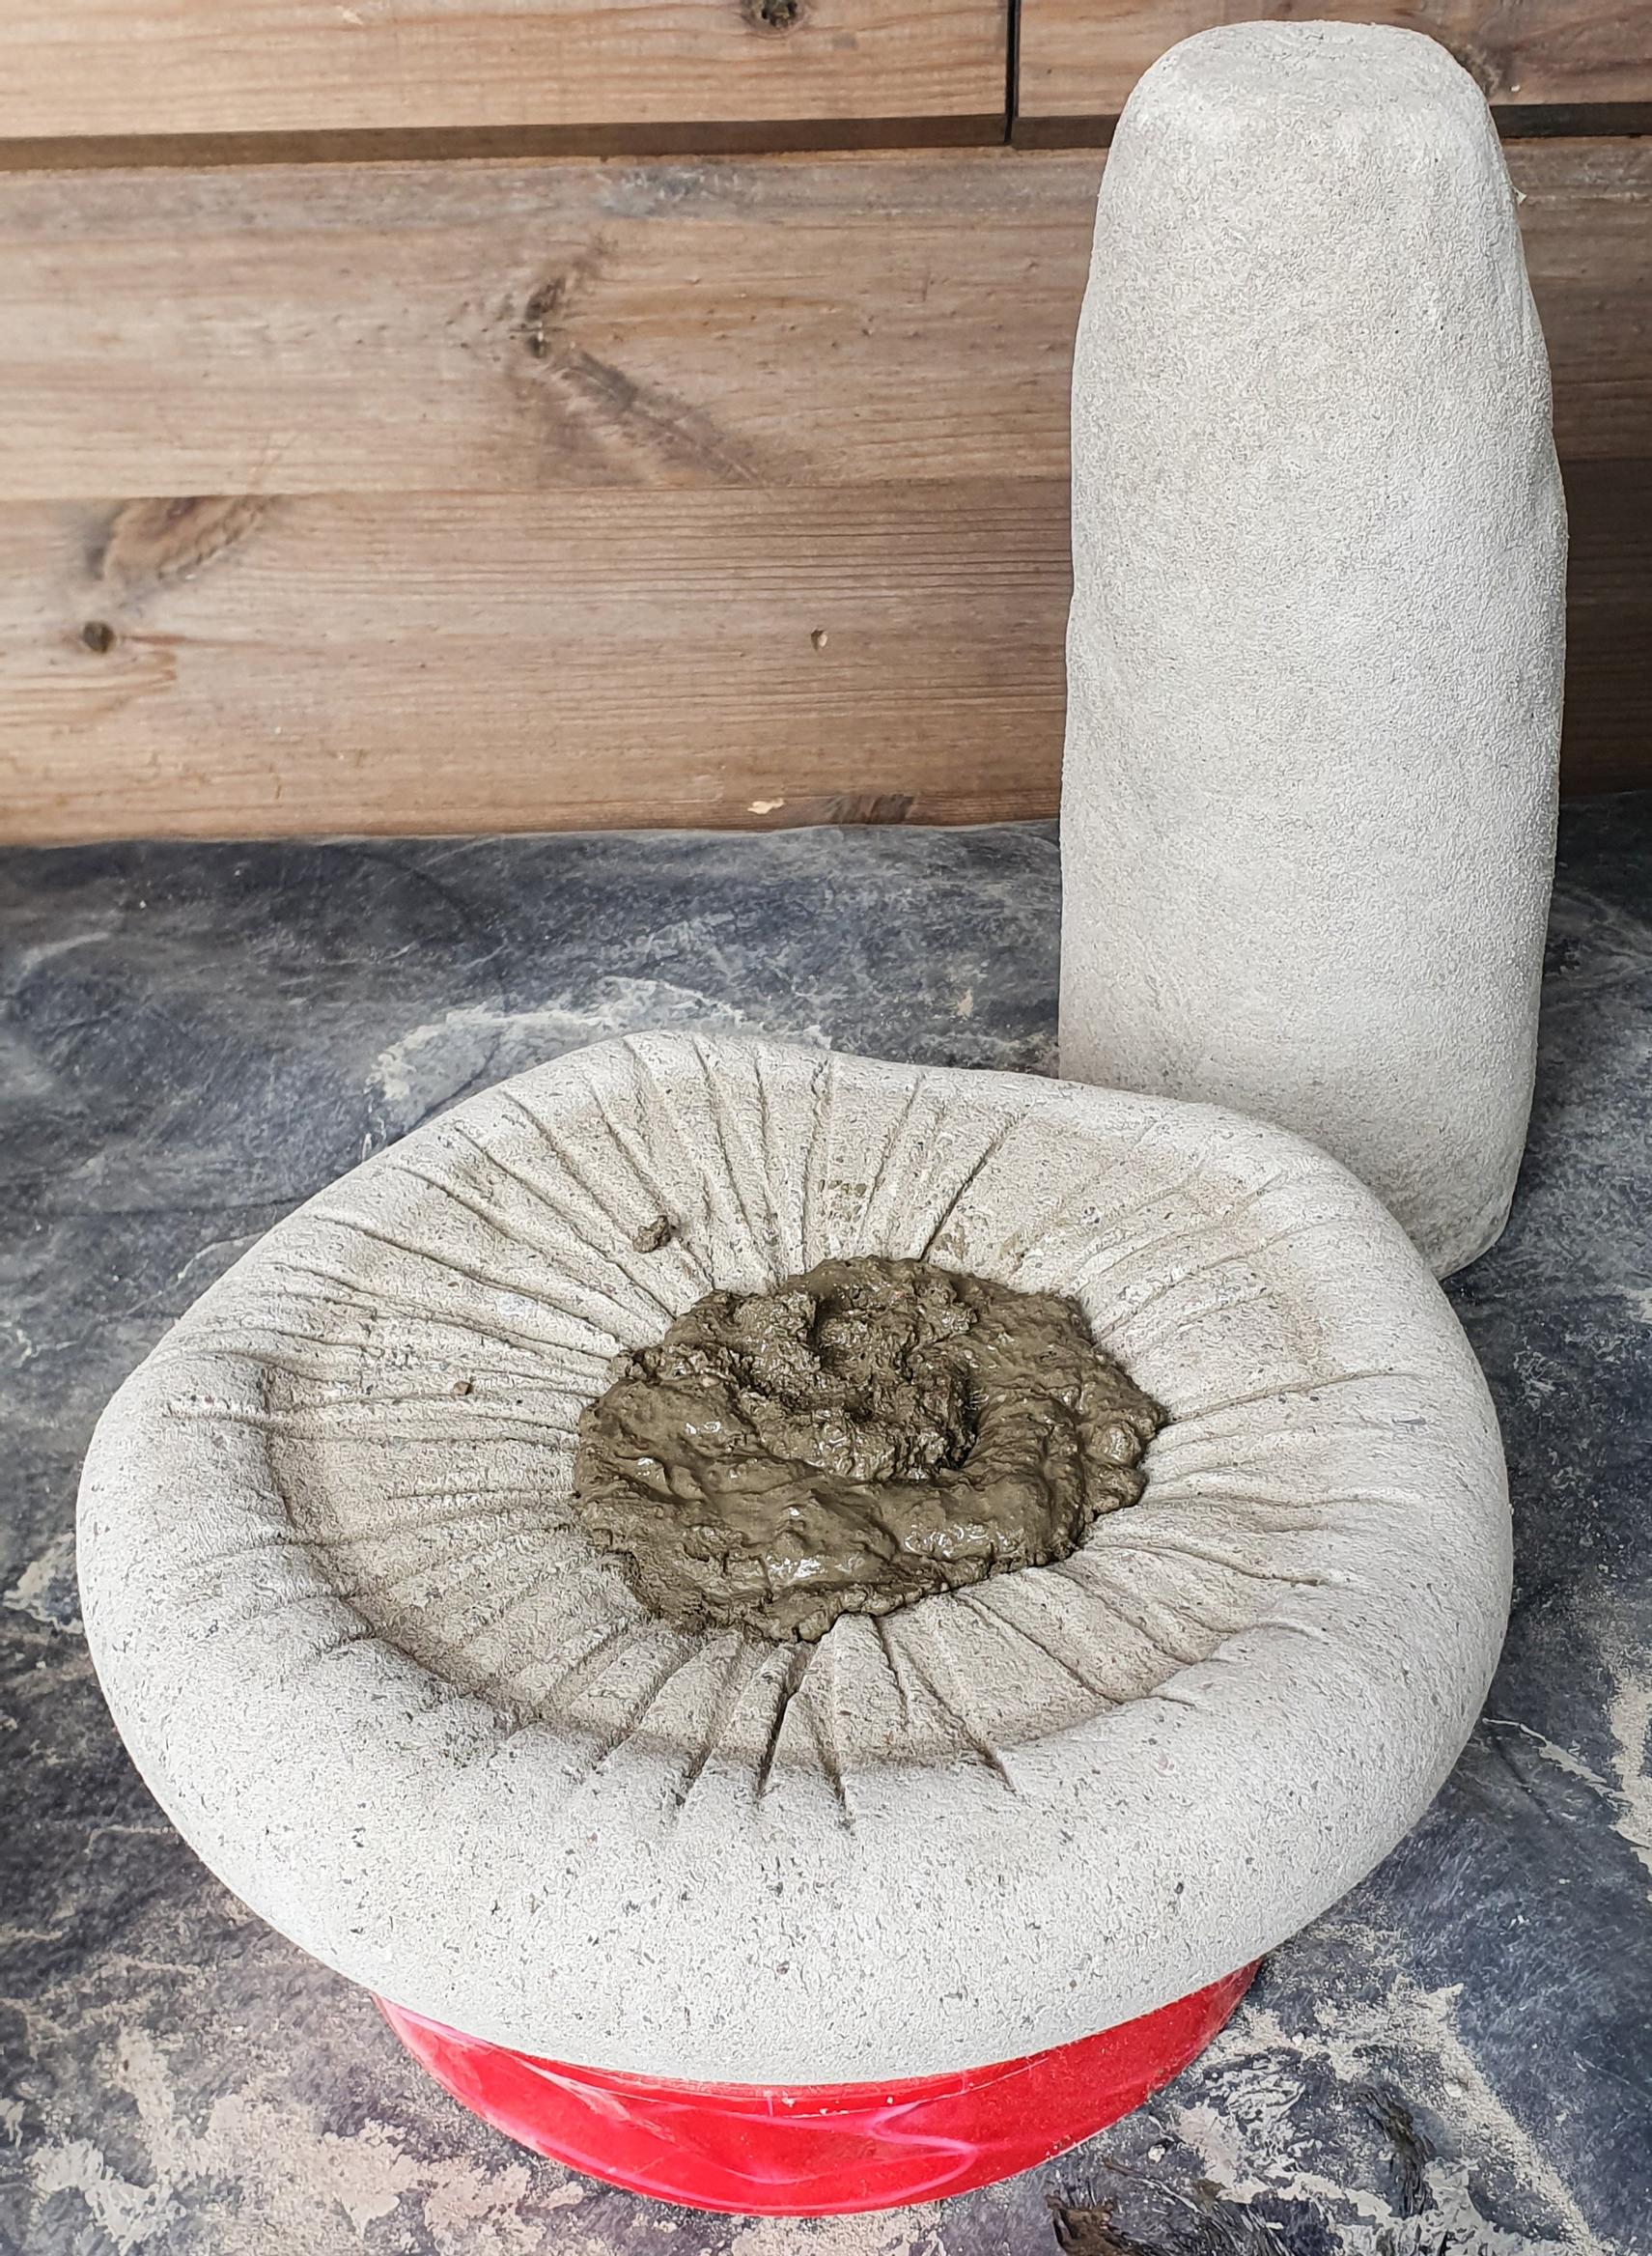
9. Decide how you want the stem and cap to join together. Clean away any loose dust from the surfaces. Flip the cap upside down on a round plastic container so it stays in place. Put a handful of fresh concrete in the hollow of the cap. Press the stem firmly into it.

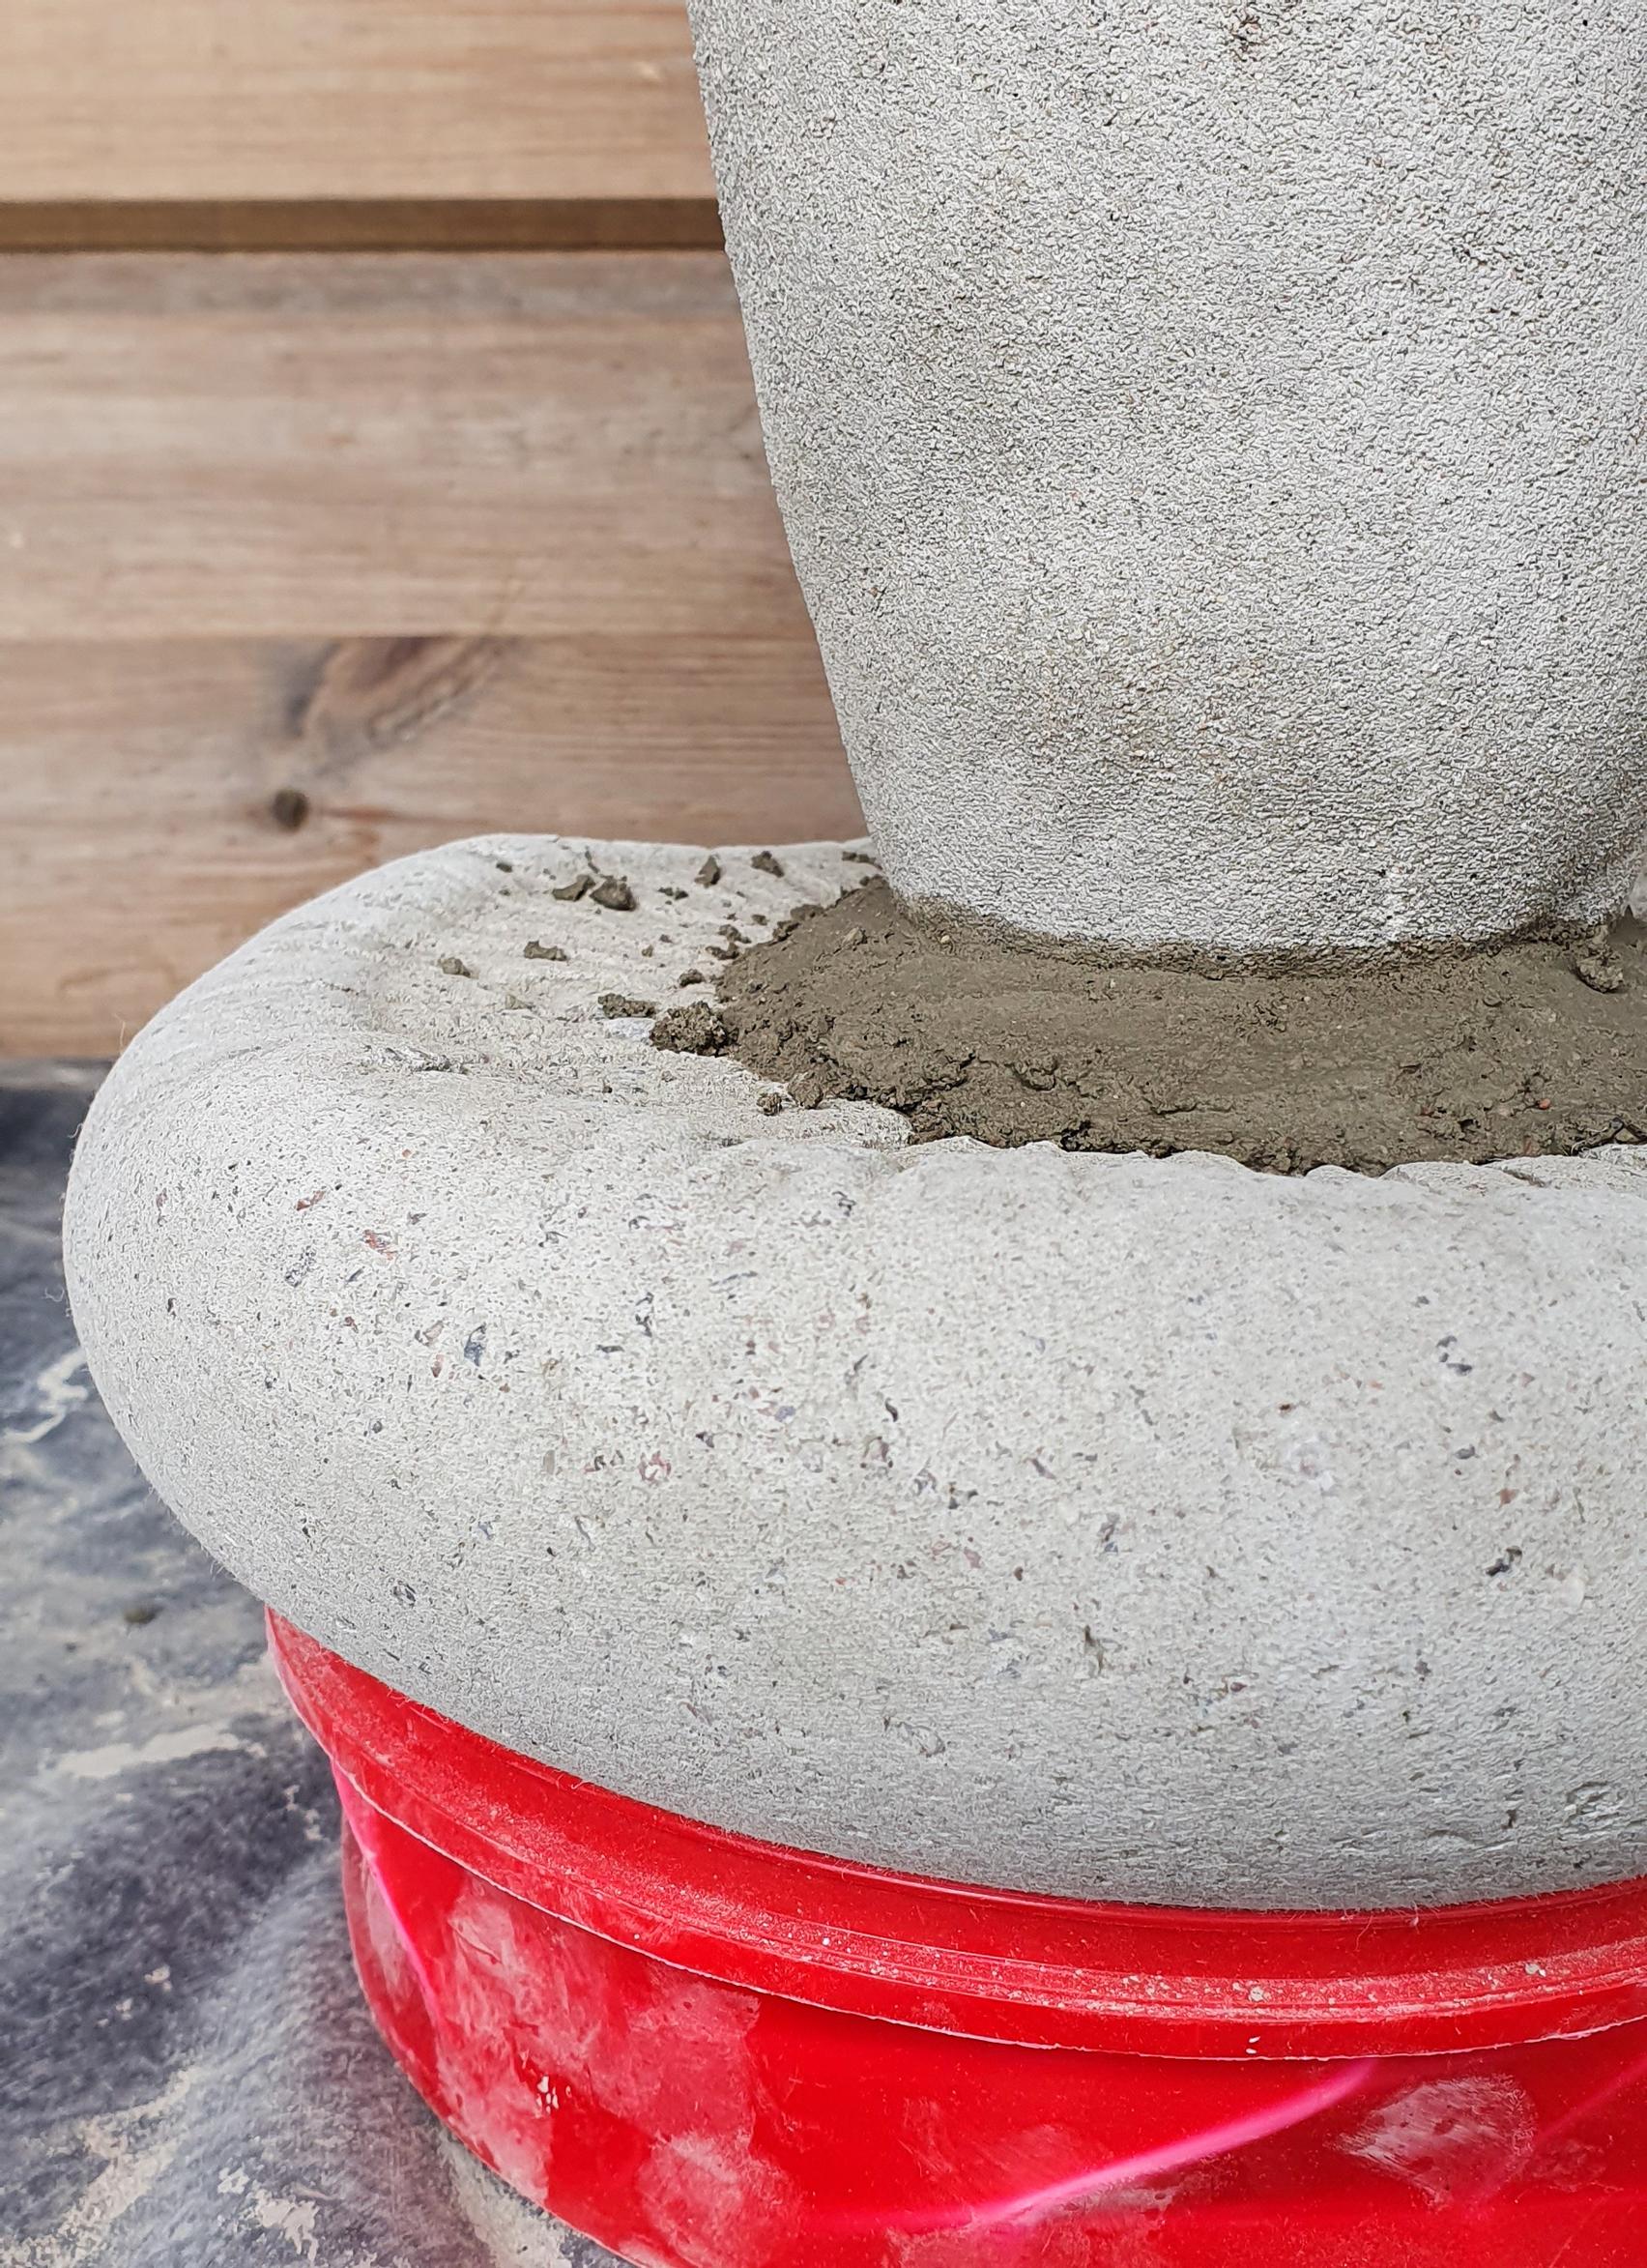
10. Press the concrete tightly around the stem with a palette knife. You can also form a small ring from the extra wet concrete that flows out. Let it dry for one to two days.
11. Once everything is fully dry, you can gently sand away any sharp edges, if desired.
Concrete mixing and consistency
You can mix a small or large amount of concrete at once, depending on your own working style. These mushrooms were made by mixing a separate batch of concrete for each part. Pour about 3 dl (1.3 cups) of water into the bottom of the container to start. Add the concrete mix gradually and stir. Remember that you can always add more water, but you can’t remove it. The consistency is right when lumps disappear and the mixture is thick and porridge-like. Once it’s ready, it’s easier to tell if you have enough for your piece. Always wear a respirator and protective gloves when handling concrete.
Tips!
- Scale the final size of your mushrooms to match the containers you use for drying.
- You can minimize air bubbles by gently shaking or squeezing the wet concrete piece.
- Create different-sized stems and caps on various molds, so you end up with many unique mushrooms.
- Also consider the ground where you’ll place your mushroom. In soft soil, you can simply push the stem in to keep it upright. The thicker the stem, the sturdier it will be without extra support.