
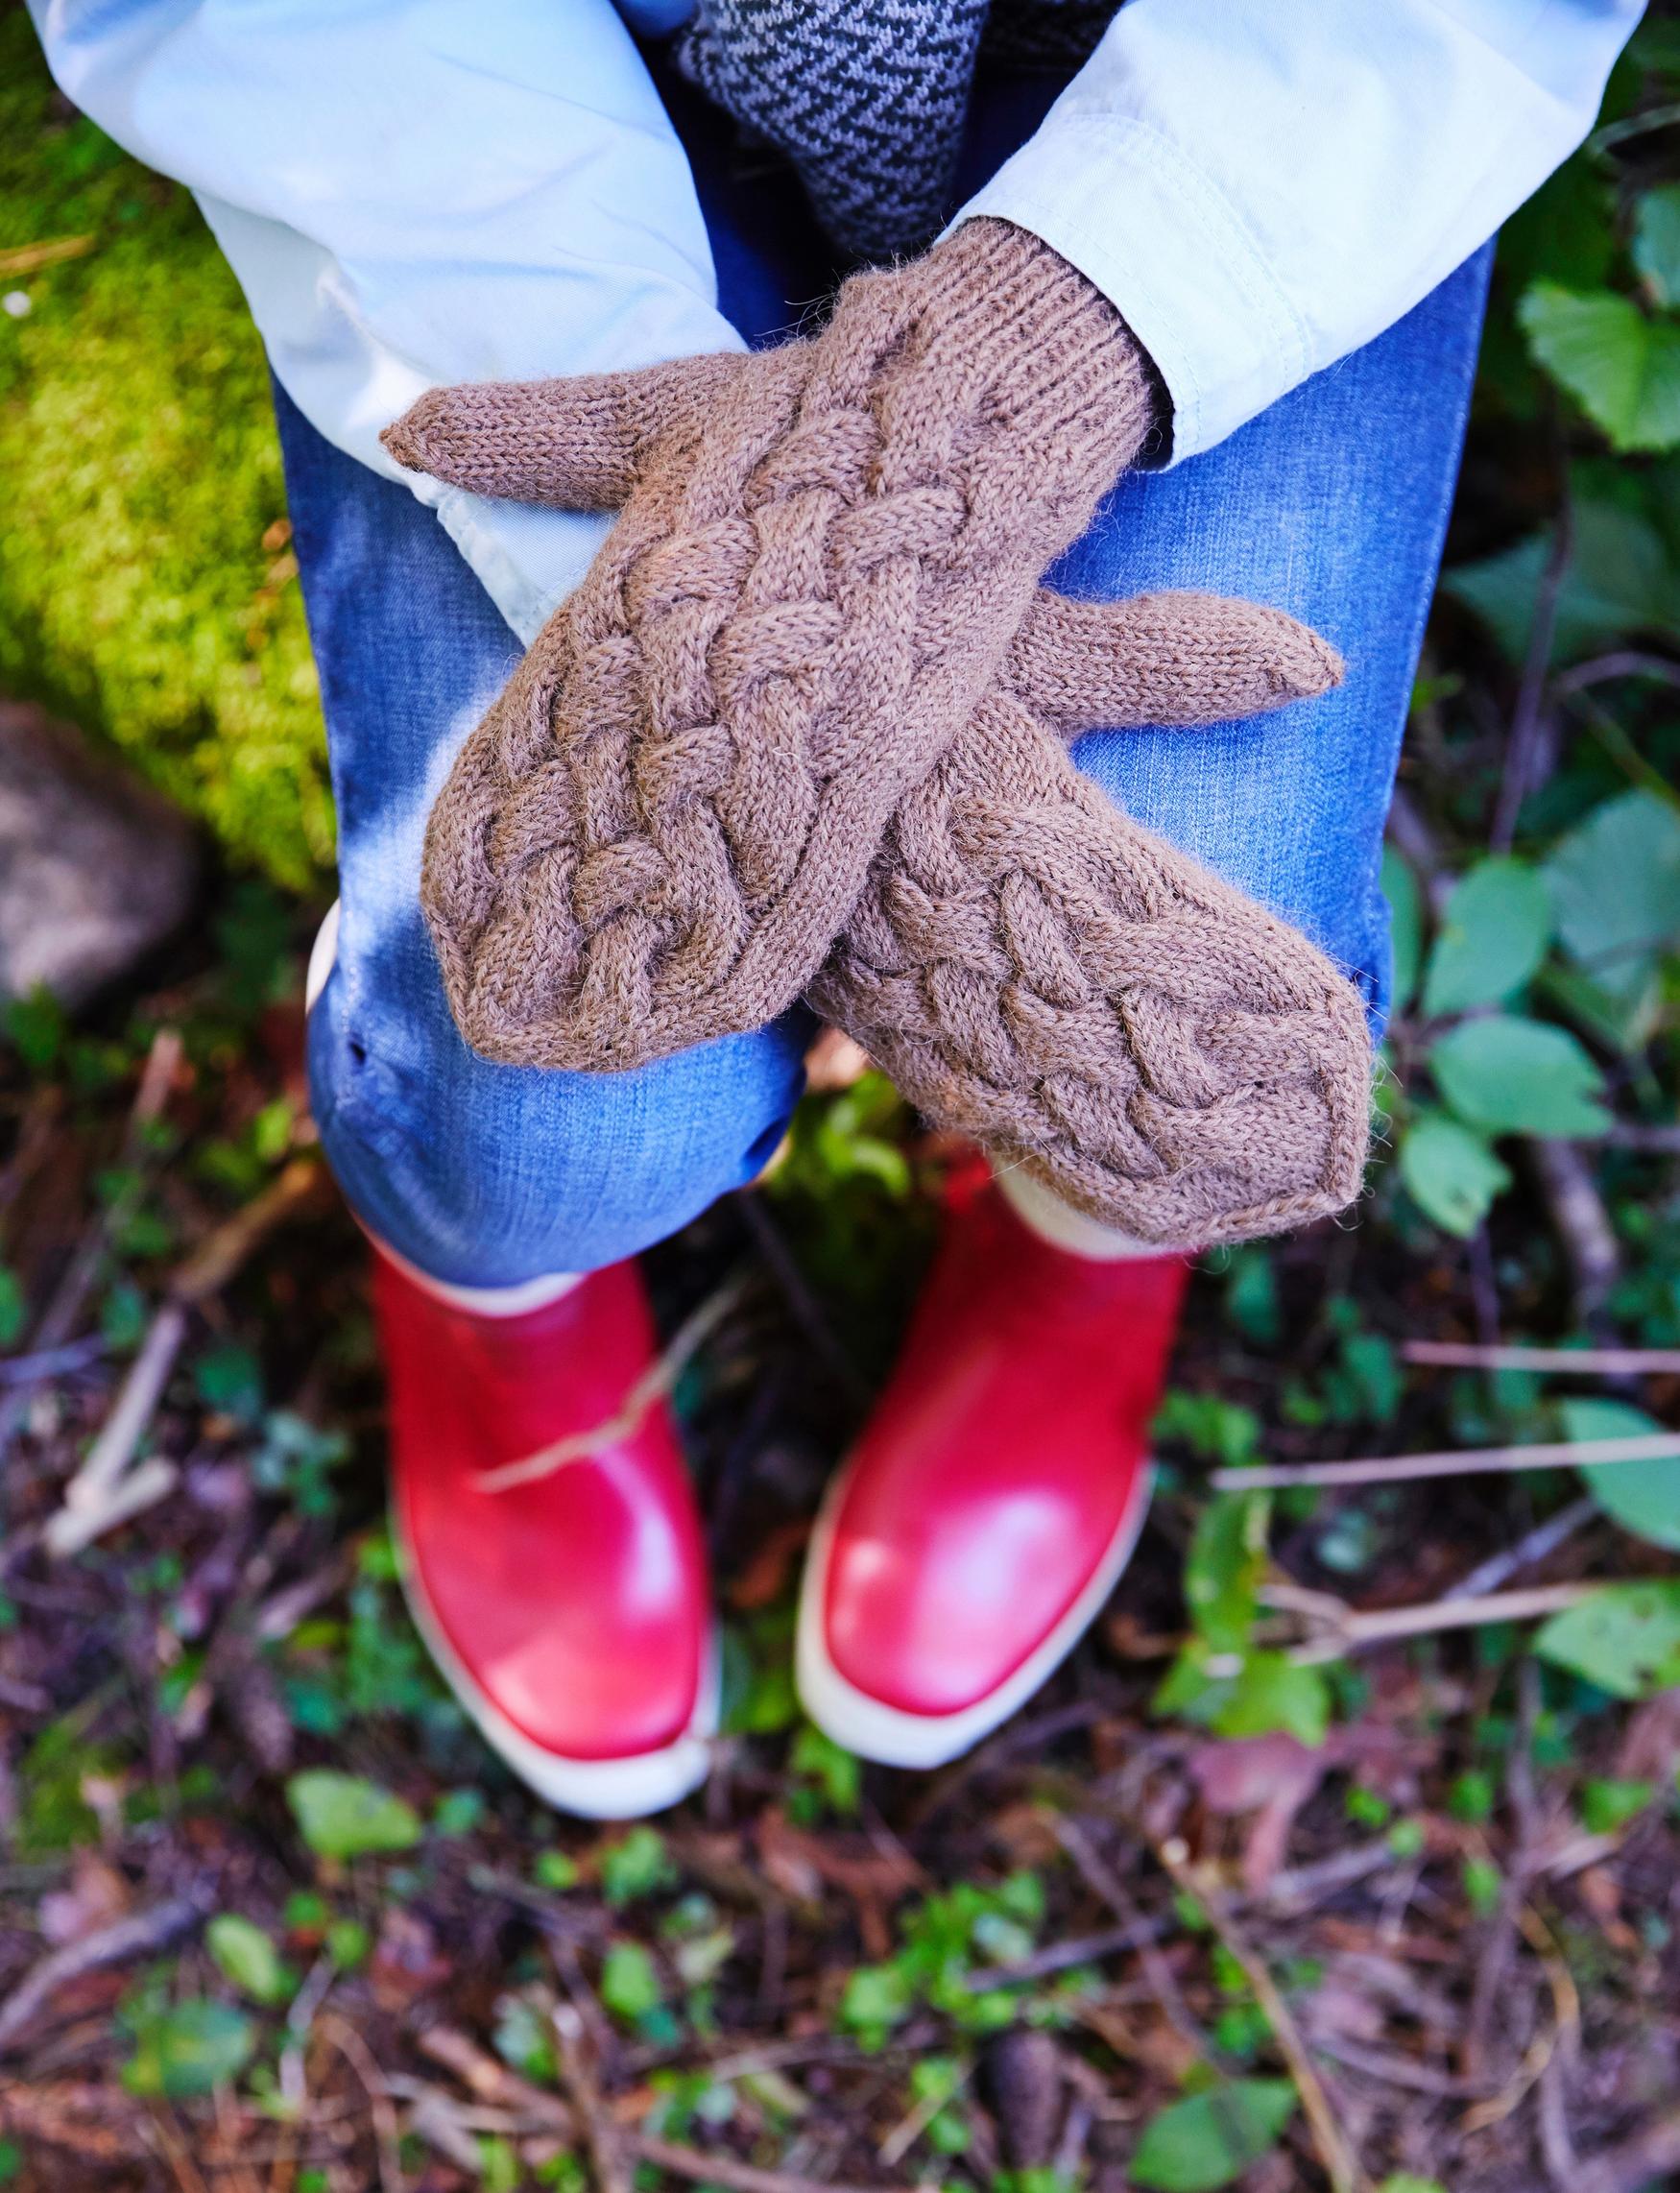
Knit these lovely cable mittens and master the easy Indian thumb gusset
These cable knit mittens are a beautiful winter accessory. If you’ve never knitted an Indian thumb gusset before, now is the perfect time to try. The Indian thumb creates a snug fit and is easier to knit than a regular gusset thumb.
Size: For women.
Cable knit mittens : supplies
- 100 g of Novita Alpaca Wool yarn (50% alpaca, 50% wool, 50 g = 100 m), shade Nutria (690)
- Double-pointed needles 4 mm (US 6) or the size needed for gauge.
Stitch patterns
Ribbing in the round: work *k1, p1*, repeat from * to *.
Stockinette stitch in the round: knit all sts on every round.
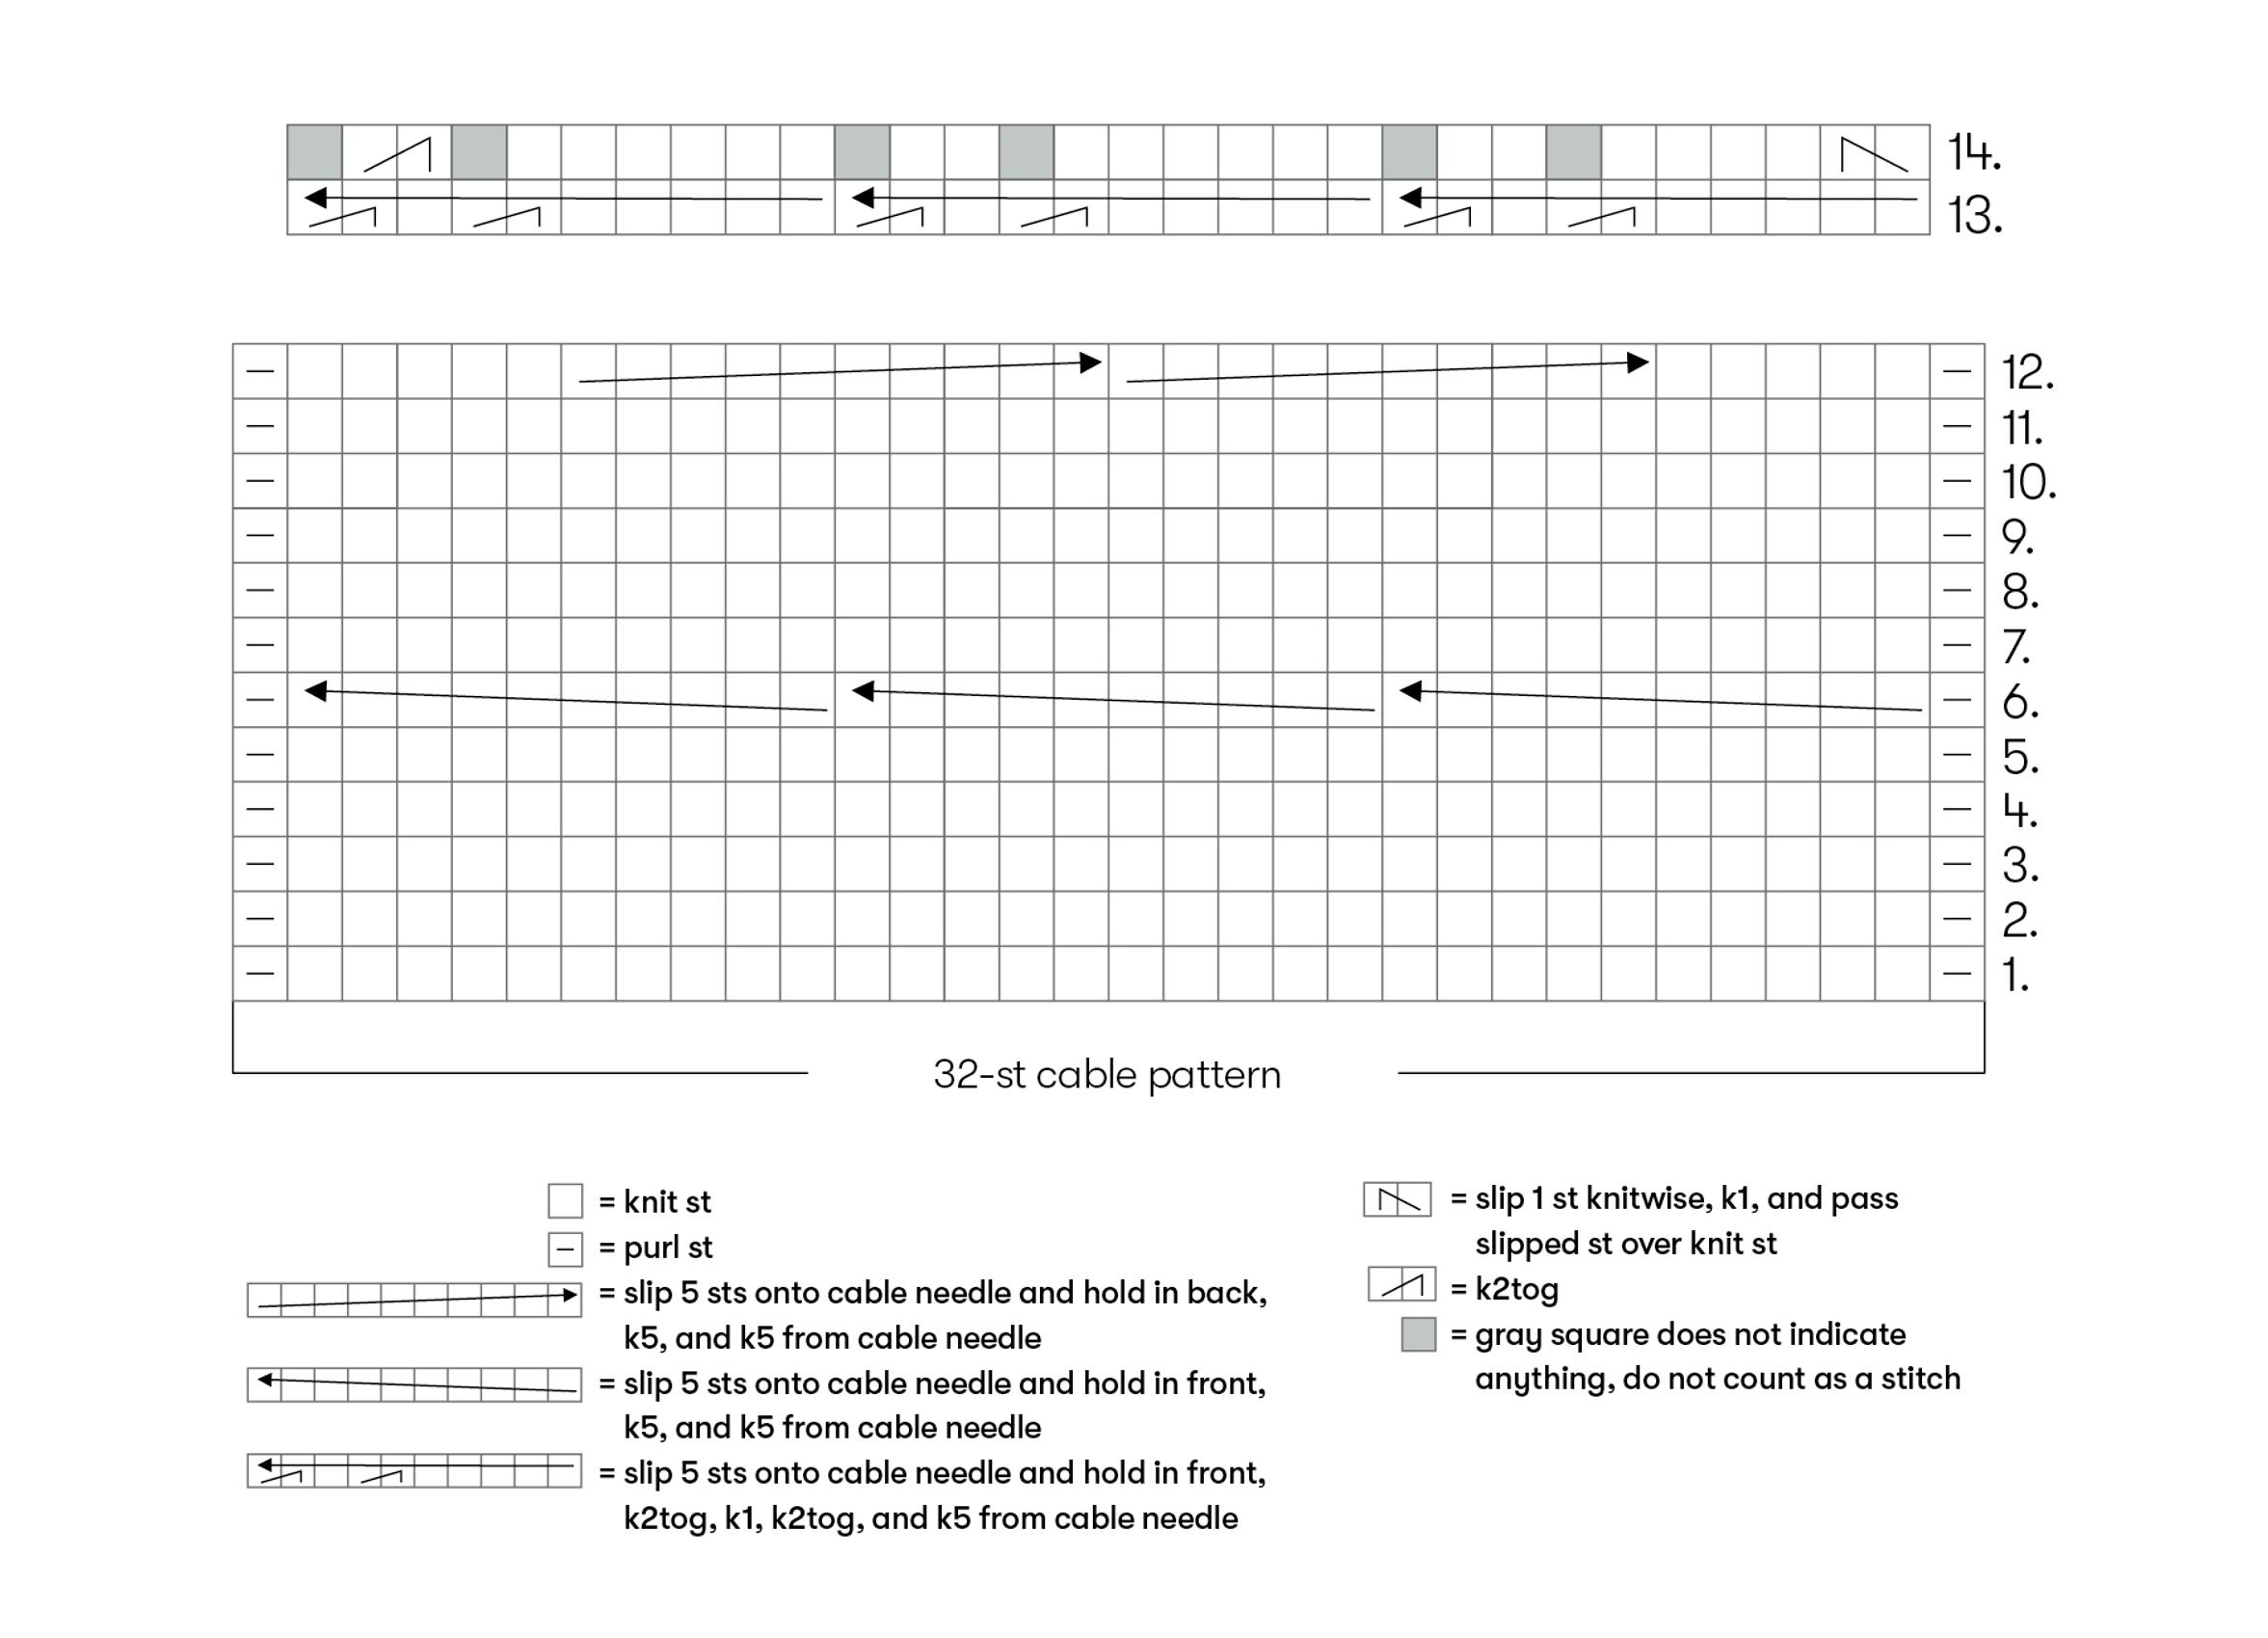
Cable pattern in the round: work according to the chart and instructions.
Gauge: 20 sts in stockinette stitch = 10 cm, the cable pattern is about 8 cm wide.


How to knit the cable mittens
Left-hand mitten
1. Cast on 44 sts onto double-pointed needles and divide them across four needles. The beginning of the round is between needles IV and I. Work ribbing in the round for 8 cm.
2. Start working stockinette stitch, and on the next round, increase 5 sts evenly on both needle III and needle IV = 54 sts.
3. Next, start the cable pattern from row 1 of the chart: knit 22 sts in stockinette on needles I and II, and work the 32-st cable pattern on needles III and IV. Repeat rows 1–12 of the chart for the cable.
4. After knitting 3 rounds, divide the sts for the Indian thumb gusset as follows: 4 sts, 18 sts, 16 sts, and 16 sts.


Begin the Indian thumb gusset increases:
1st increase round: knit the 4 sts on needle I, increase 1 st (lift the strand between needles I and II onto needle II and knit it through the back loop onto needle I), then knit to the end of the round. You now have 55 sts, and needle I has 5 sts.
2nd increase round: knit the 5 sts on needle I, increase 1 st (lift the strand between needles I and II onto needle II and knit it through the back loop onto needle I), then knit to the end of the round. You now have 56 sts, and needle I has 6 sts. Continue increasing in this manner on every round until needle I has 22 sts.
5. Now place the 18 sts on needle II on hold on a piece of scrap yarn for the thumb. Divide the sts on needle I so that needles I and II each have 11 sts.
6. Continue working the patterns with the 54 sts until you have repeated rows 1–12 of the cable chart a total of 3 times and then worked rows 1–4 once more (the length measured from the ribbing is about 17 cm).
7. Work row 5 of the chart and decrease the purl sts at the same time: at the beginning of needle III, k2tog, and at the end of needle IV, make an skp decrease (= slip 1 knitwise, k1, and pass slipped st over knit st) = 52 sts.
8. For the cable, work rows 13–14 of the chart. You now have 11 sts on each needle.
9. Work stockinette on all sts and begin the top decreases: at the beginning of needles I and III, k1, then work an skp decrease (= slip 1 knitwise, k1, and pass slipped st over knit st). At the end of needles II and IV, k2tog and then k1. Repeat these decreases on every round until 8 sts remain in total. Break the yarn, pull it through the remaining sts, and weave in the end.
Indian thumb
1. Return the sts on hold onto your needles and pick up 2 sts at the base of the thumb. Distribute these 20 sts across three needles and work stockinette in the round, decreasing 1 st on each needle.
2. After knitting 4.5 cm, or when half of your thumbnail remains visible, start the top decreases: k2tog at the end of each needle. Repeat the decreases on every round until 4 sts remain. Then k1 and pass the other sts over it from left to right. Break the yarn and secure it on the wrong side.
Right-hand mitten
Knit a mirror image of the left mitten, working the thumb gusset increases between needles III and IV onto needle IV. Steam the mittens lightly to finish.