DIY tutorial
Hey birds, dinner is served! Build a charming bird feeder house
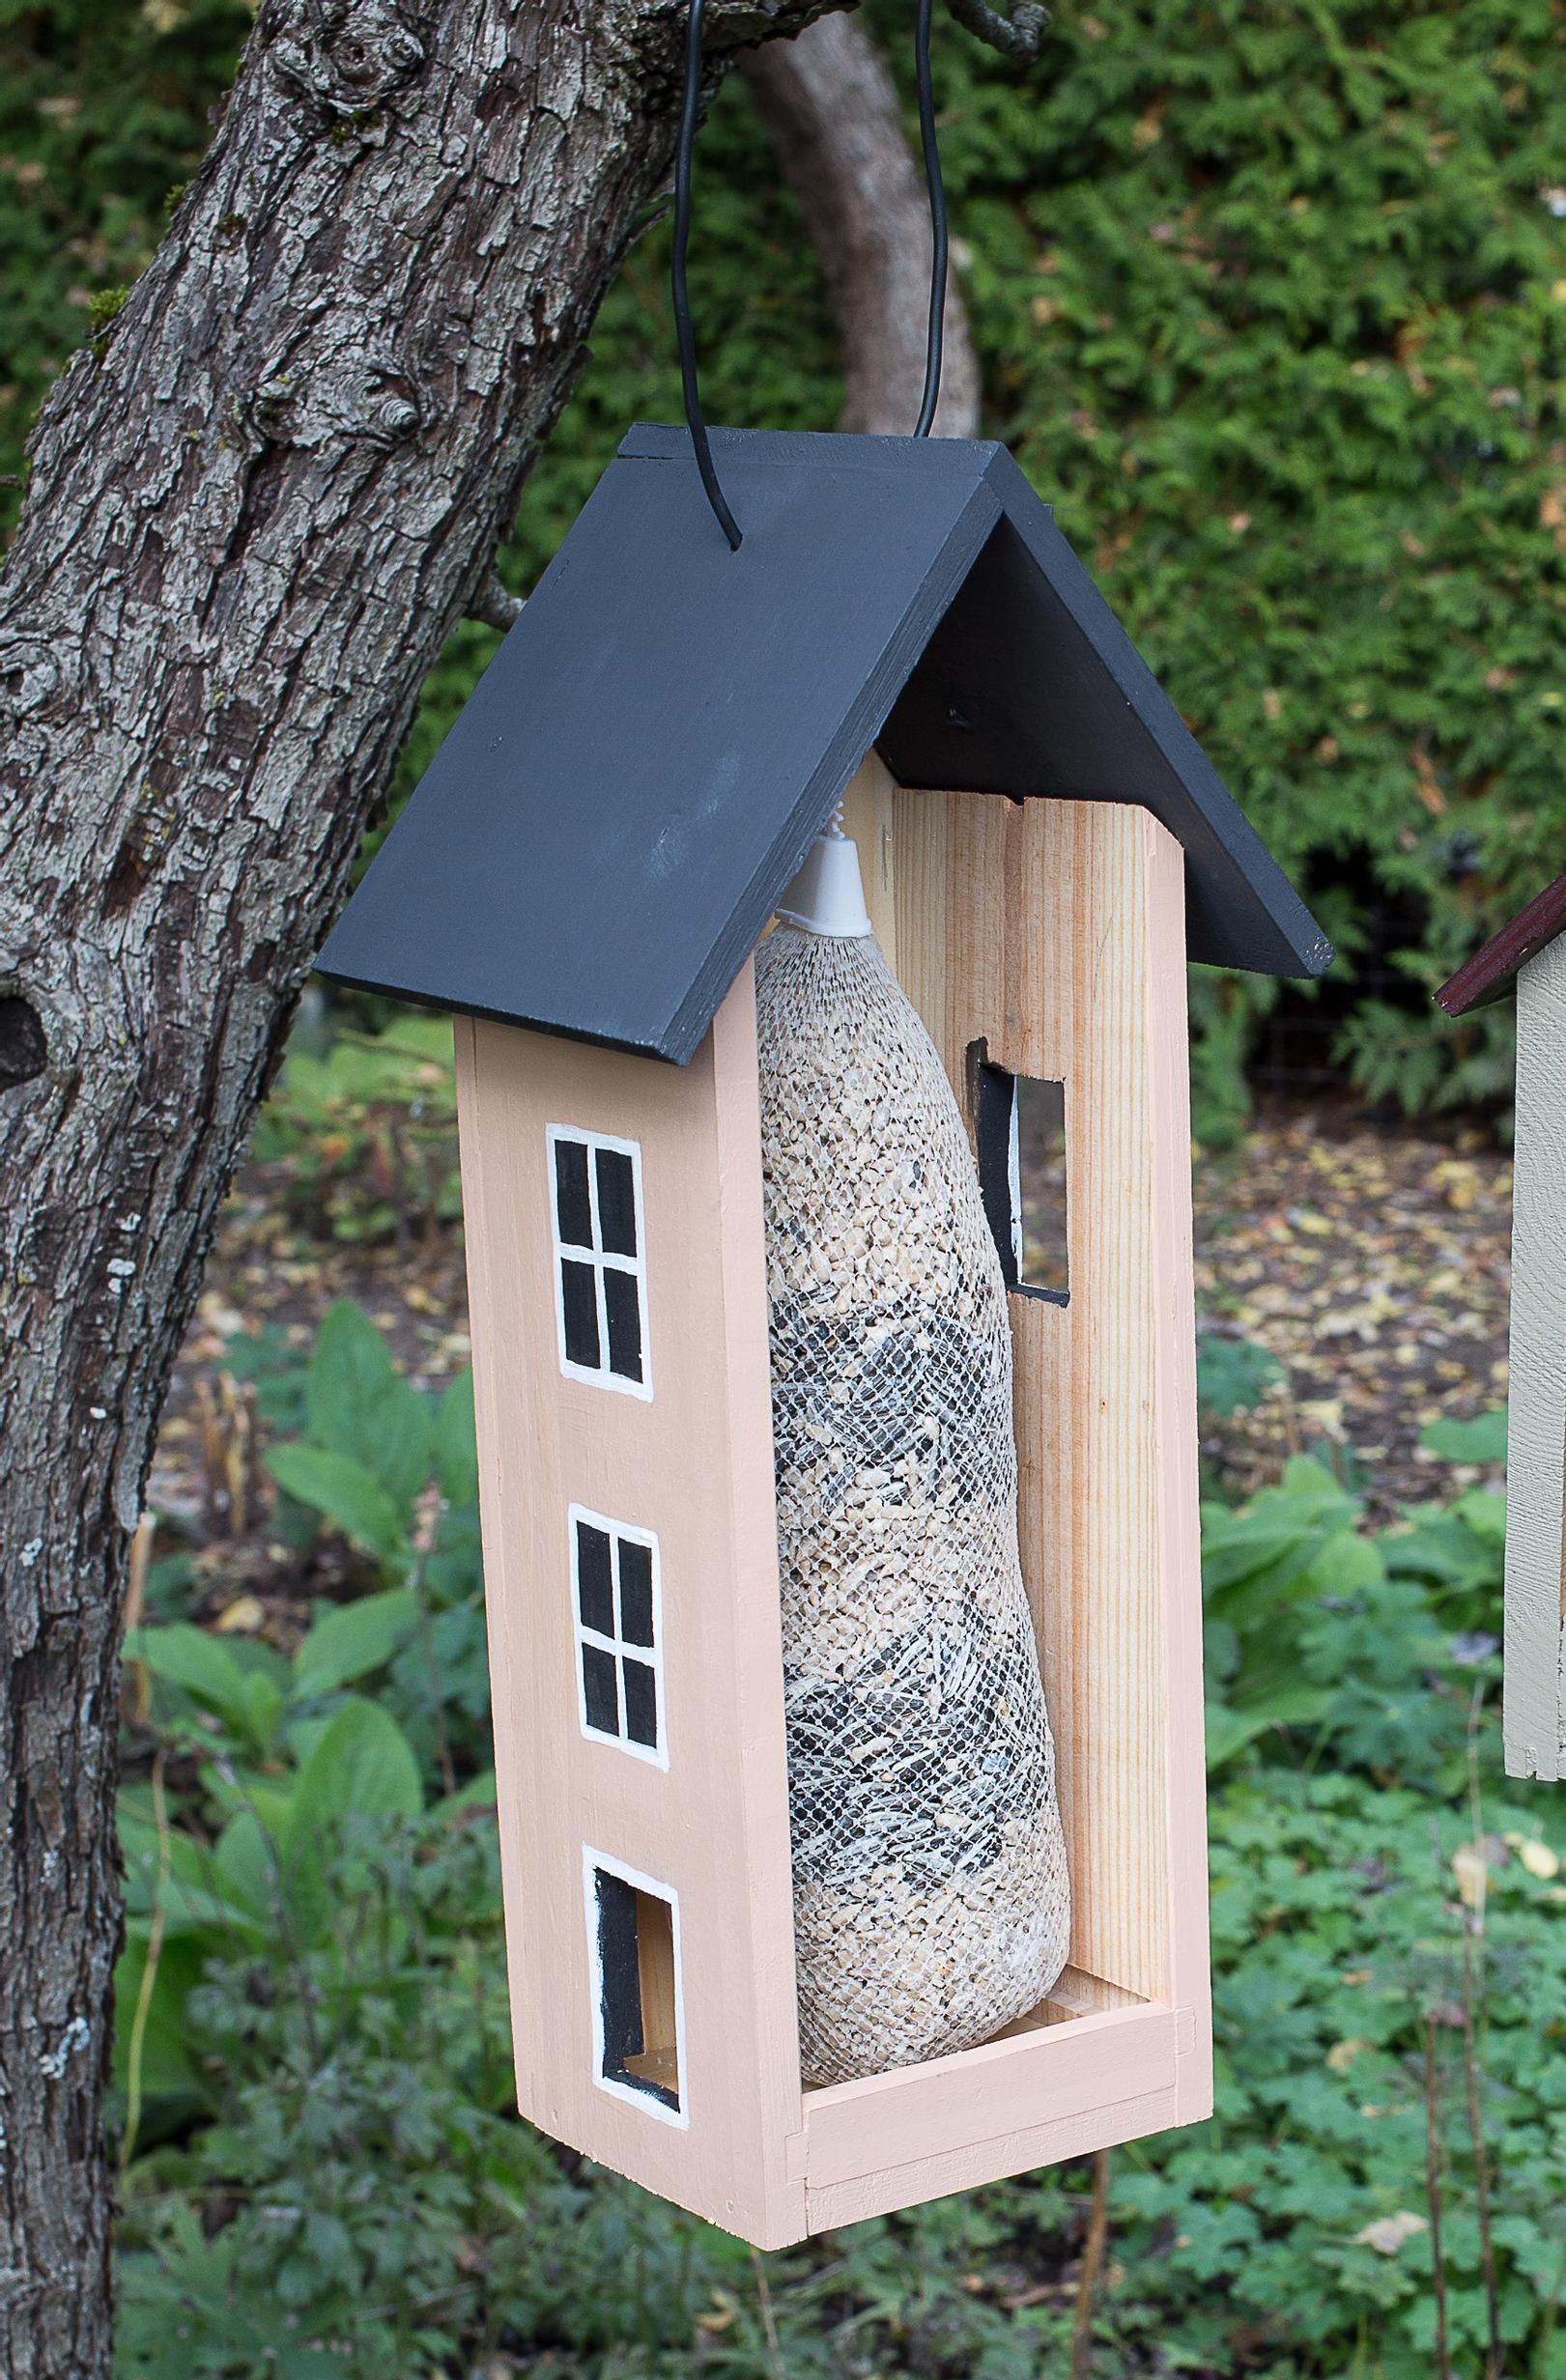
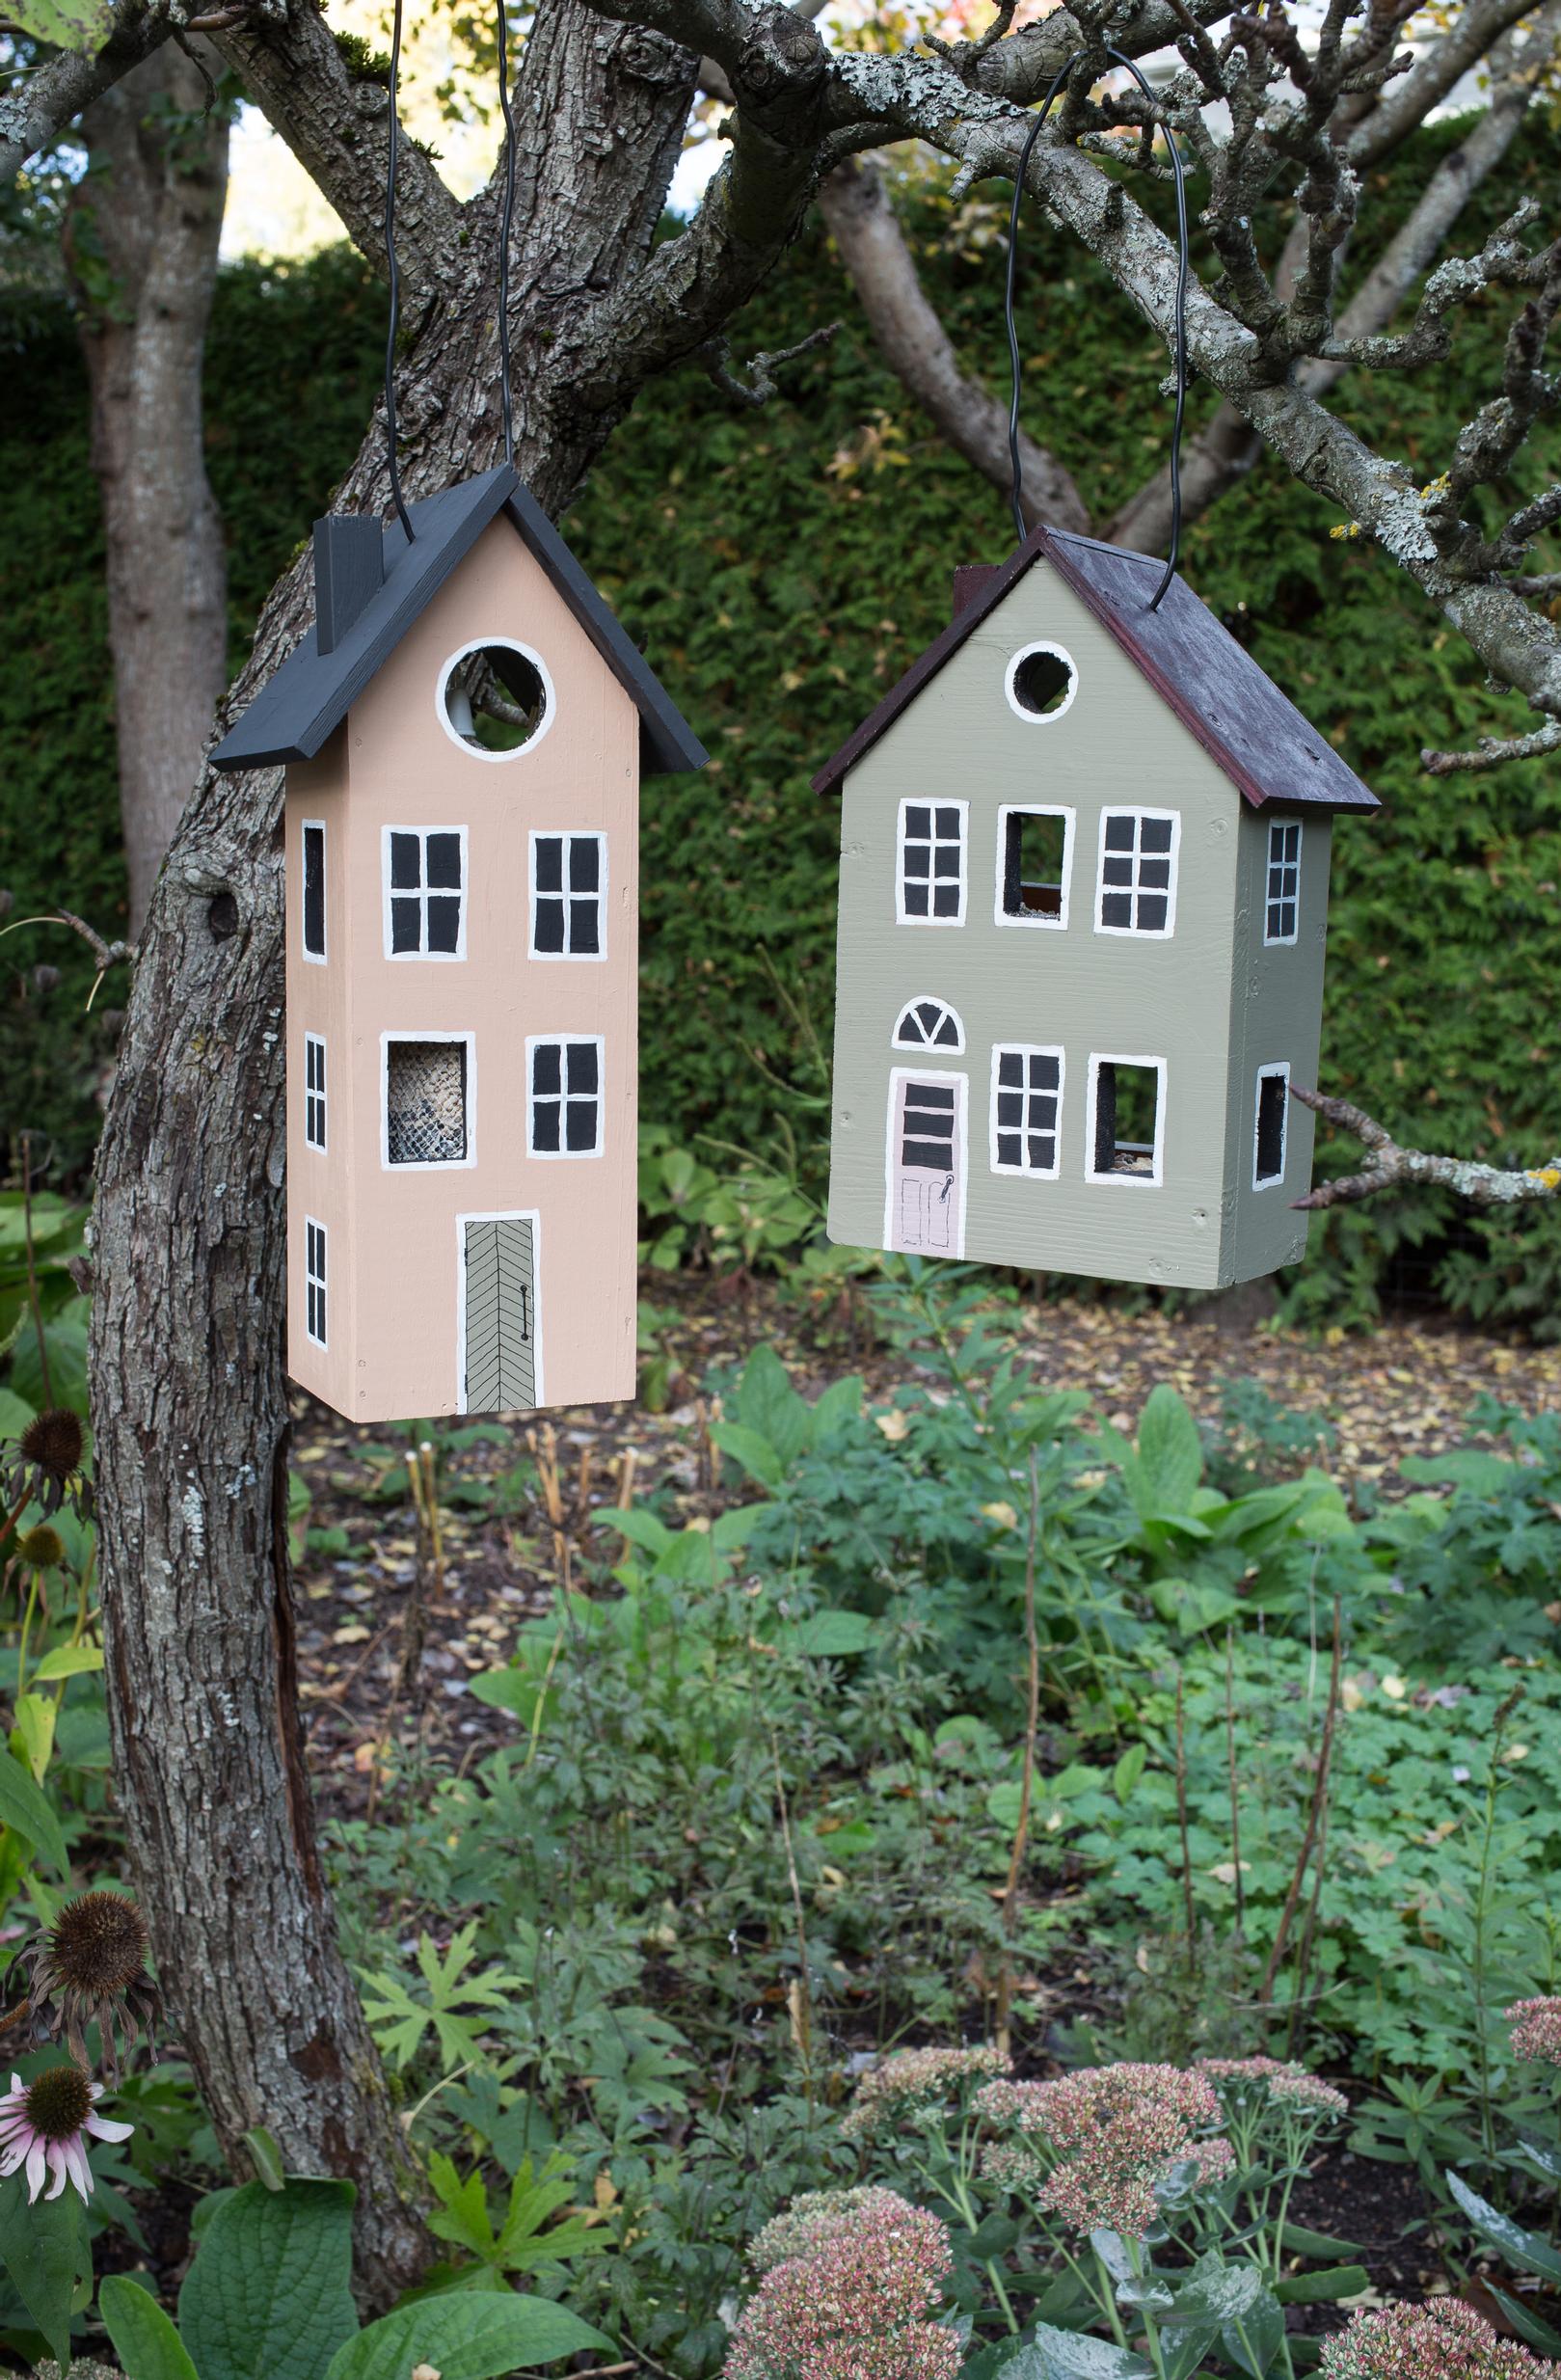
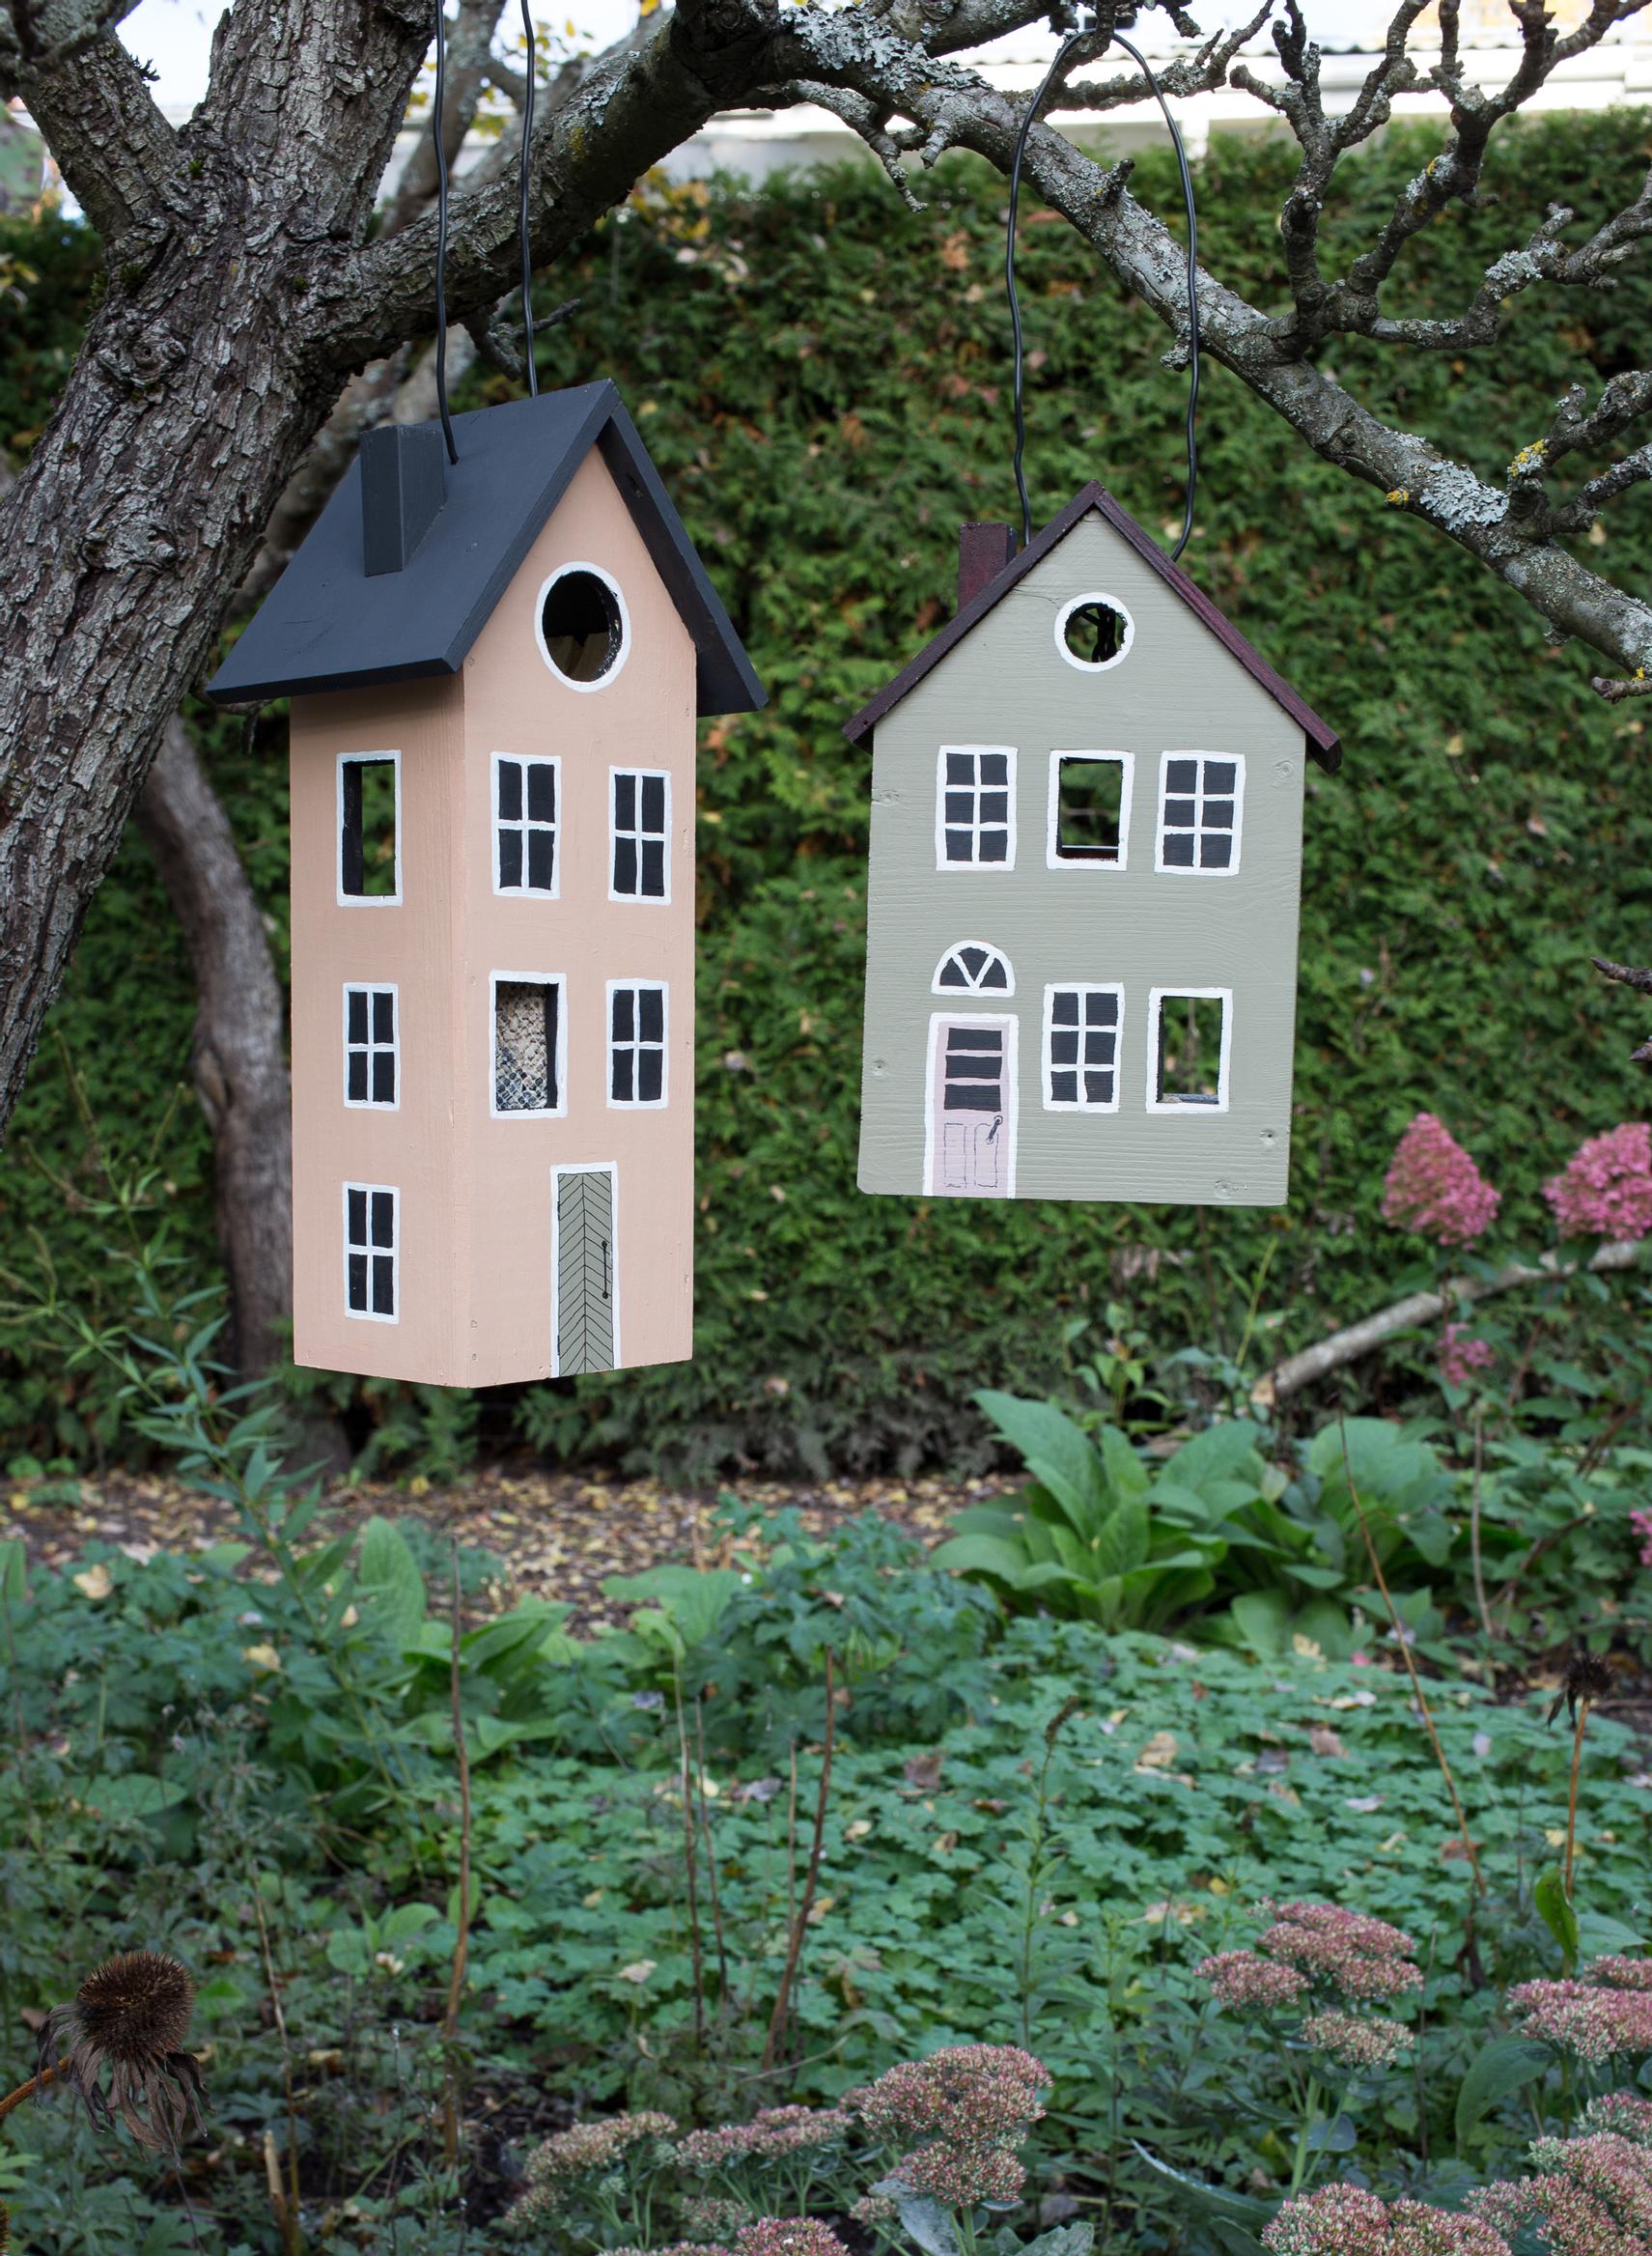
Craft an adorable little bird feeder house to feed birds in winter. You can use an old wooden shelf board or a wine crate as material. The house is open at the back to conceal a suet bar or fat balls.
Materials for the bird feeder house:
- Wood or plywood board for the roof (6 mm thick)
- Wood or plywood board for the walls (8–12 mm thick)
- Wooden strip (1.5–2 cm thick)
- Paint suitable for outdoor use and a brush
- Nails approximately 2–3 cm long and a hammer, or screws
- Wood glue
- Jigsaw, miter saw, cordless drill with screwdriver and drill bits
- String or wire for hanging


Instructions for the bird feeder house:
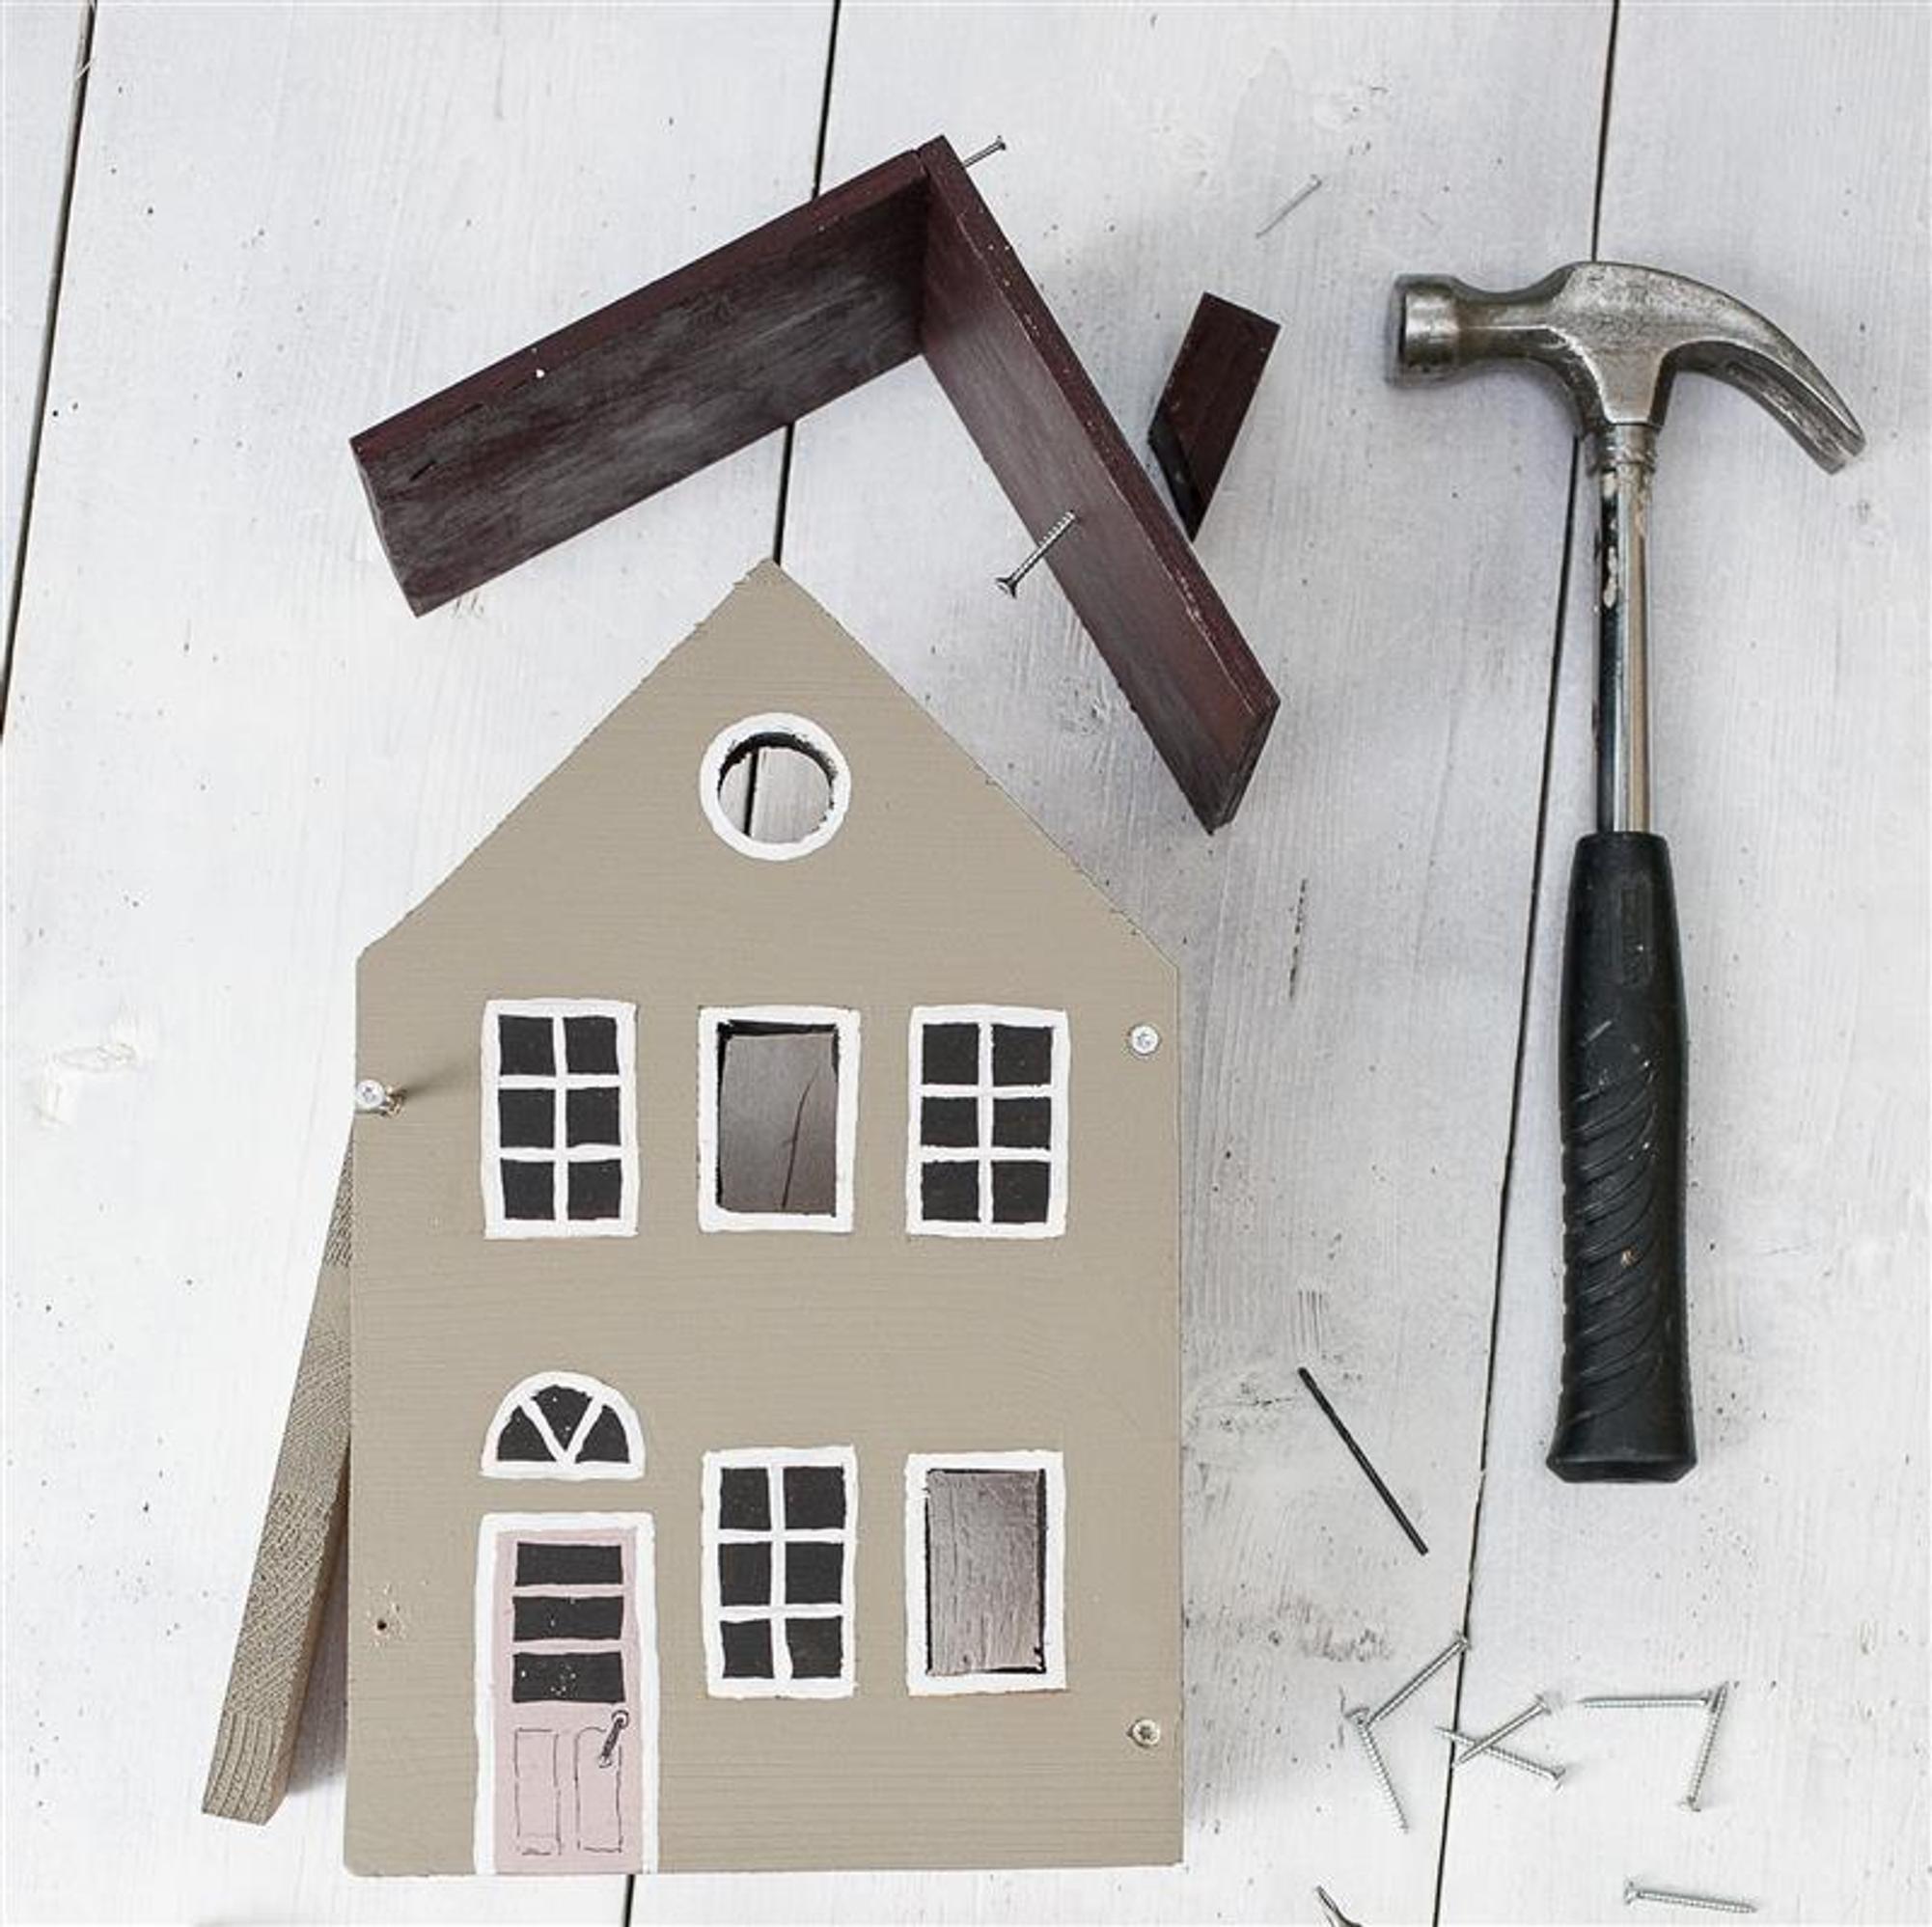
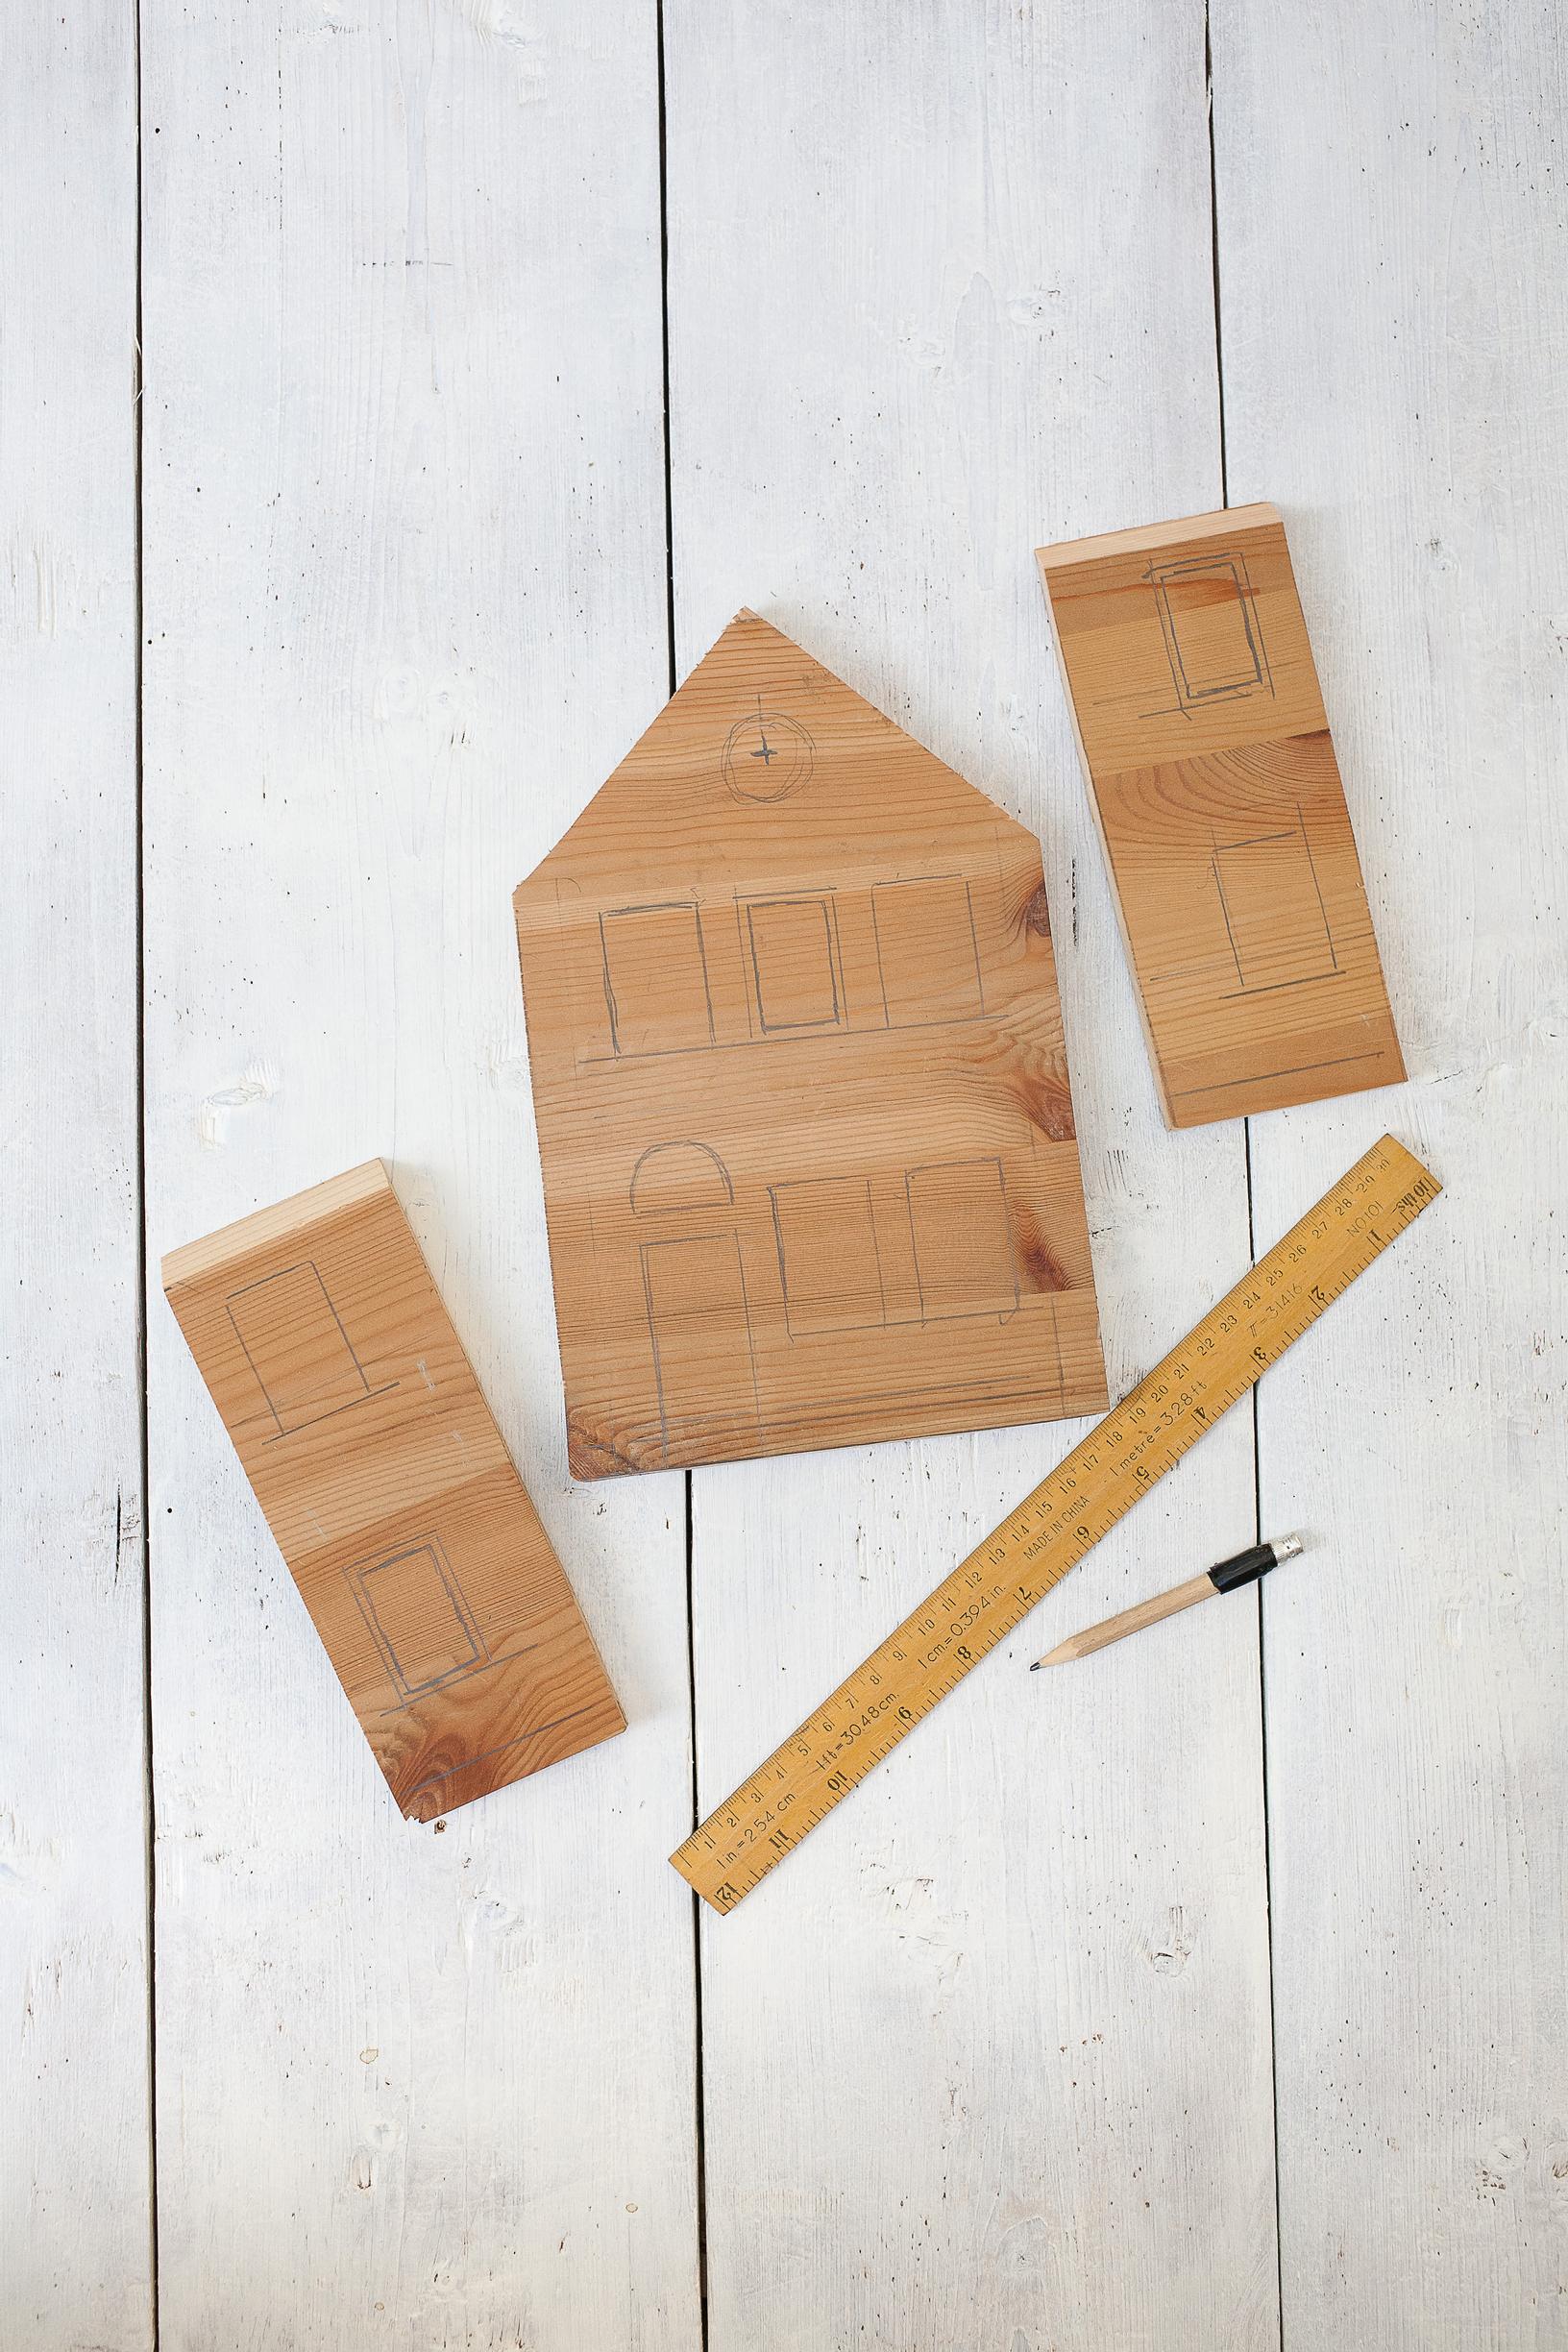
- Measure and draw a rectangular piece on the wooden board for the front wall. In the peach-colored sample house, the front wall is about 11 x 34 cm, and in the green one, 16 x 25 cm. You can make the house any size you like by adapting these instructions.
- Measure and cut the roof pieces from the 6 mm thick plywood, for example, 11 x 13 cm and 11 x 12.4 cm—note that one piece should be shorter than the other by the thickness of the board. Place the short sides together at a 90-degree angle, with the shorter piece on the inside. Then, using the shape of the roof as a guide, draw and cut the top shape of the front wall piece.
- Cut the side walls to match the height of the sides of the front wall piece, and bevel their upper edges to match the shape of the roof. Make the side walls slightly narrower than the roof; in these sample houses, the side wall width is about 9 cm.
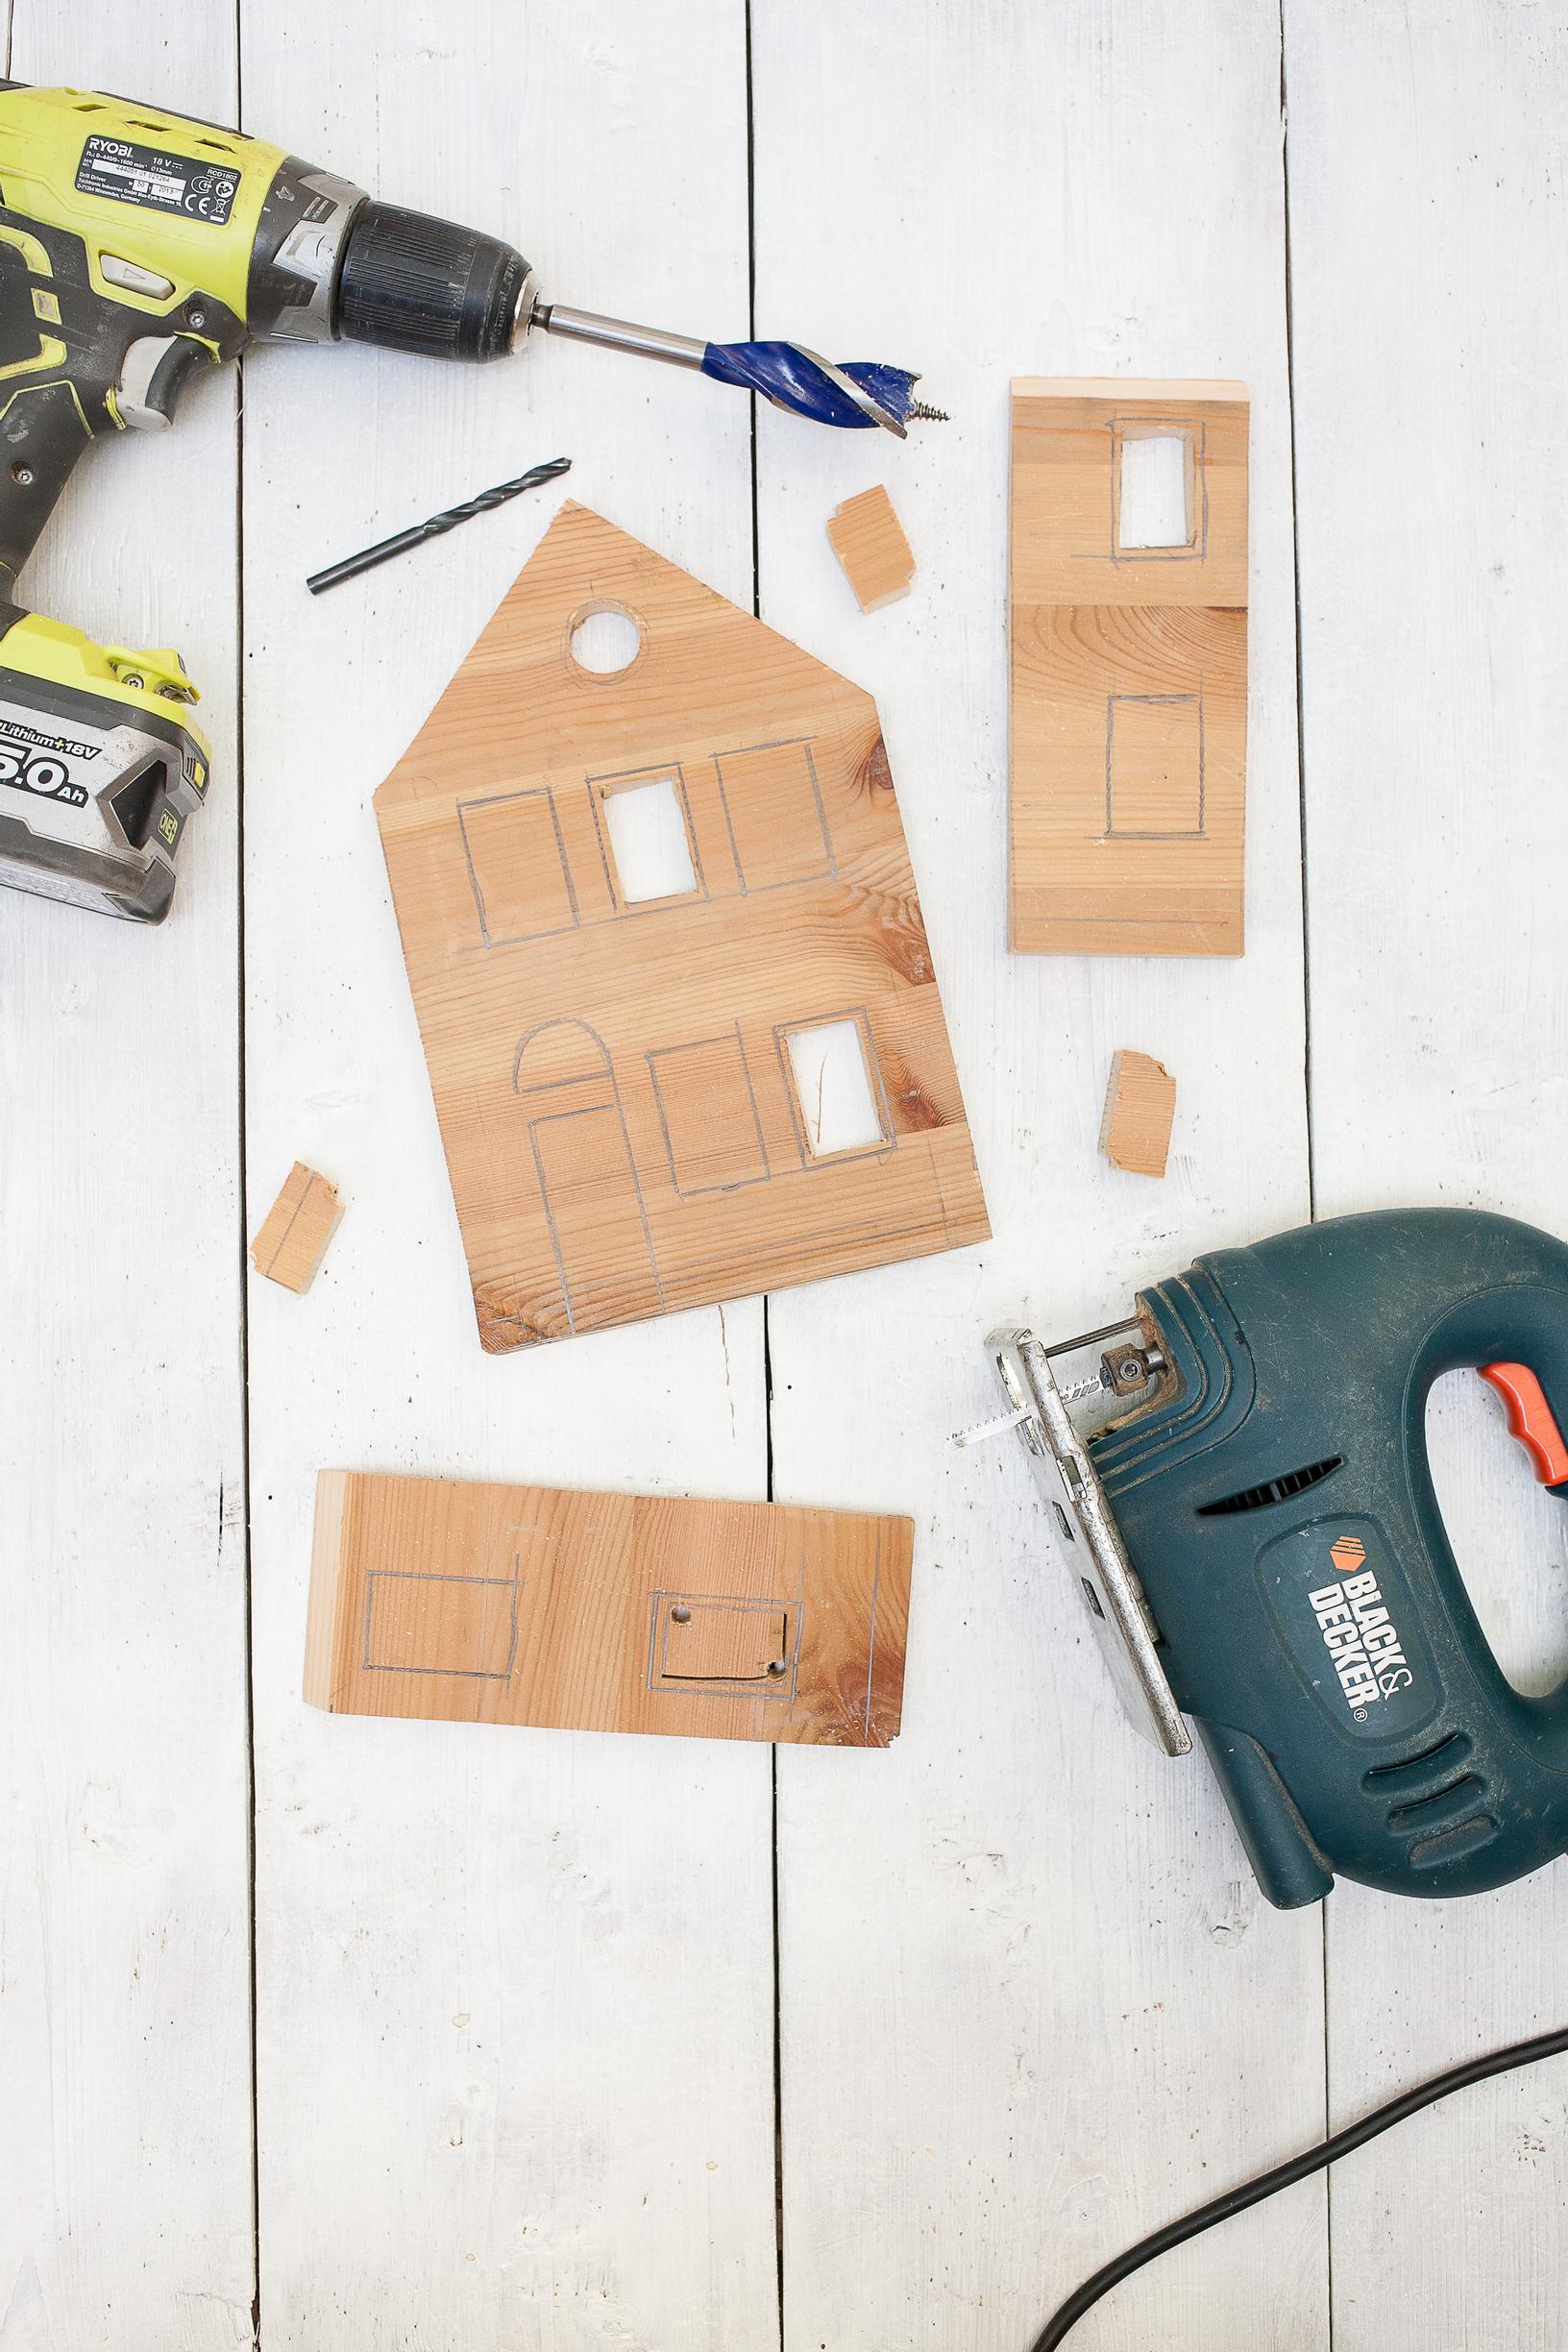
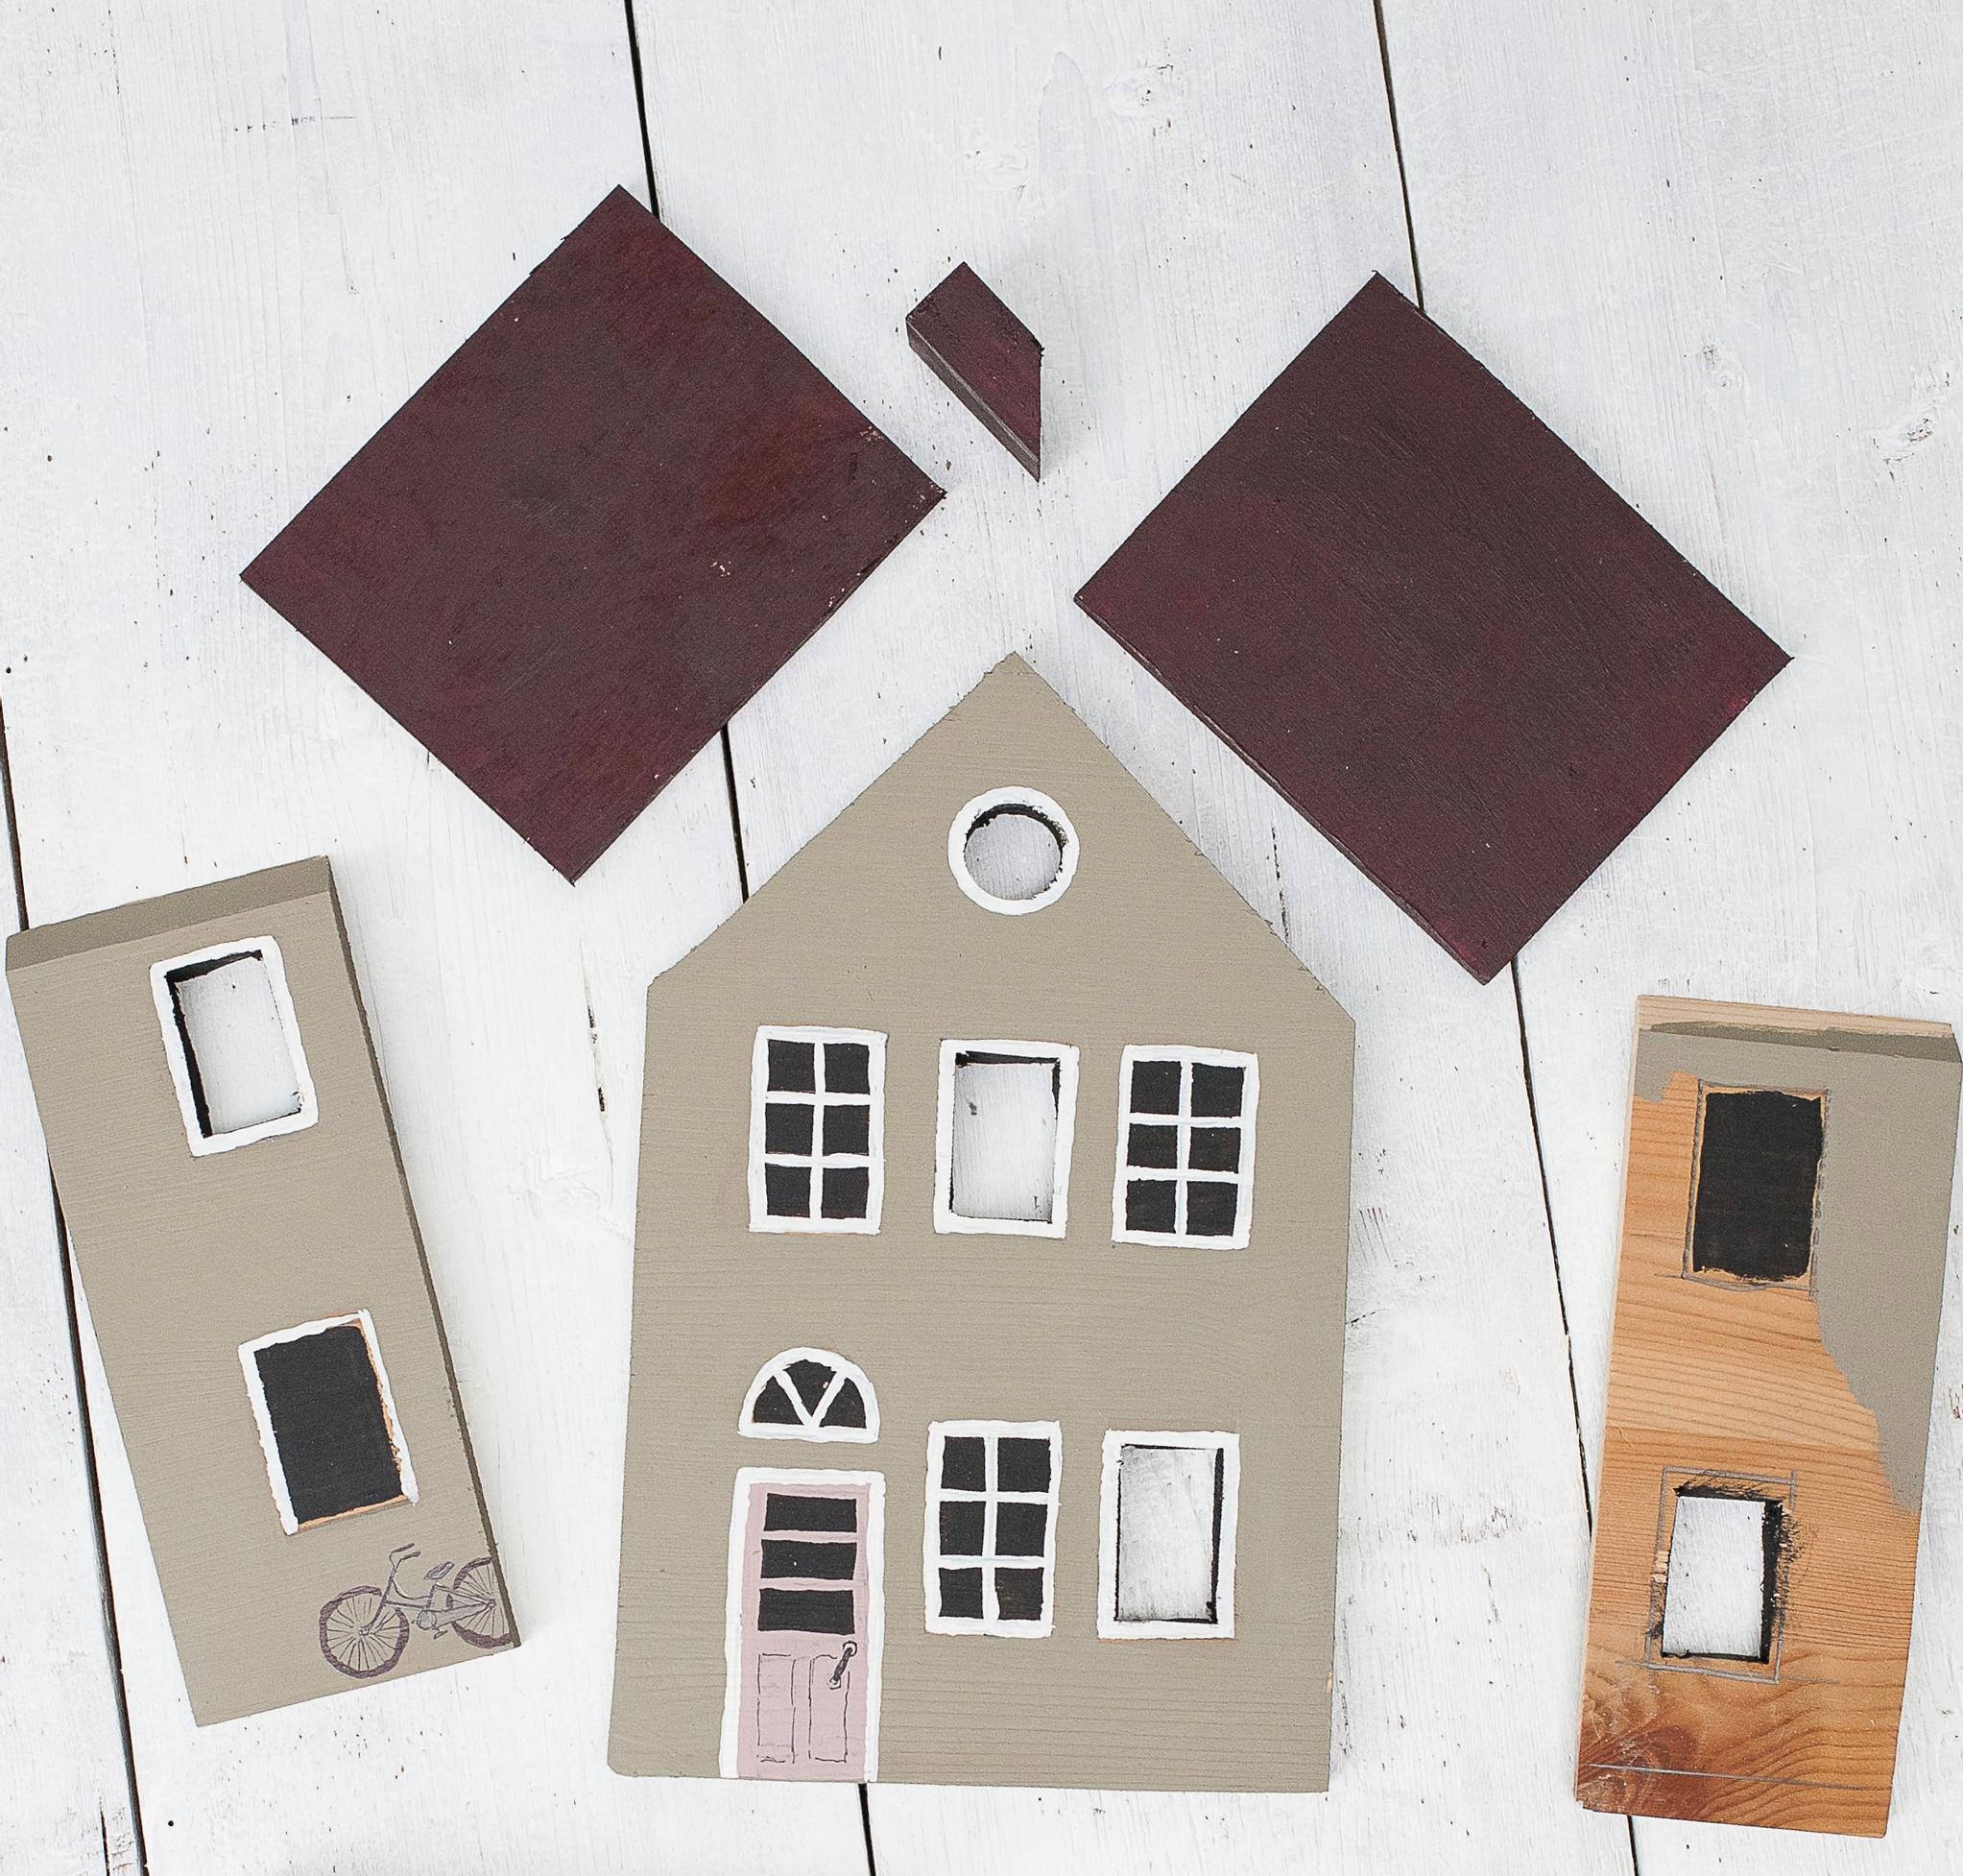
- Place the side walls onto the front wall piece in the right positions. Measure and cut a piece from the wooden strip to attach to the front edge inside the side walls; this connects the sides, makes them sturdy, and serves as a perch. Measure and cut a floor piece from the board, or leave the house open at the bottom. Cut a chimney from the wooden strip, shaped to match the roof.
- Draw the locations of windows and doors on the walls, and cut a few small bird-sized windows with a jigsaw and a round opening with a large drill bit.
- Draw and paint all the window panes, doors, and other decorations with exterior paints, as well as the roof, chimney, walls, window recesses, and the bottom edge strip. Leave the interior unpainted. Allow the pieces to dry before assembling the house.
- Screw or nail the side walls to the front wall from the front, the roof pieces to each other, and the chimney to the roof. Screw or nail the bottom edge strip and the optional floor in place. Attach the roof with wood glue in addition to screws or nails. Paint over the nail and screw heads to hide them.
- Balance the finished house on your finger from inside the roof ridge to find and mark the point where the house hangs straight. Drill holes there on both sides of the roof's centerline, about 3.5 cm from the ridge. Finally, thread the hanging string through the holes and tie it securely. Attach a feed bar to the hanging string so it hangs inside the house.