DIY beeswax candles: melt, dip, and glow
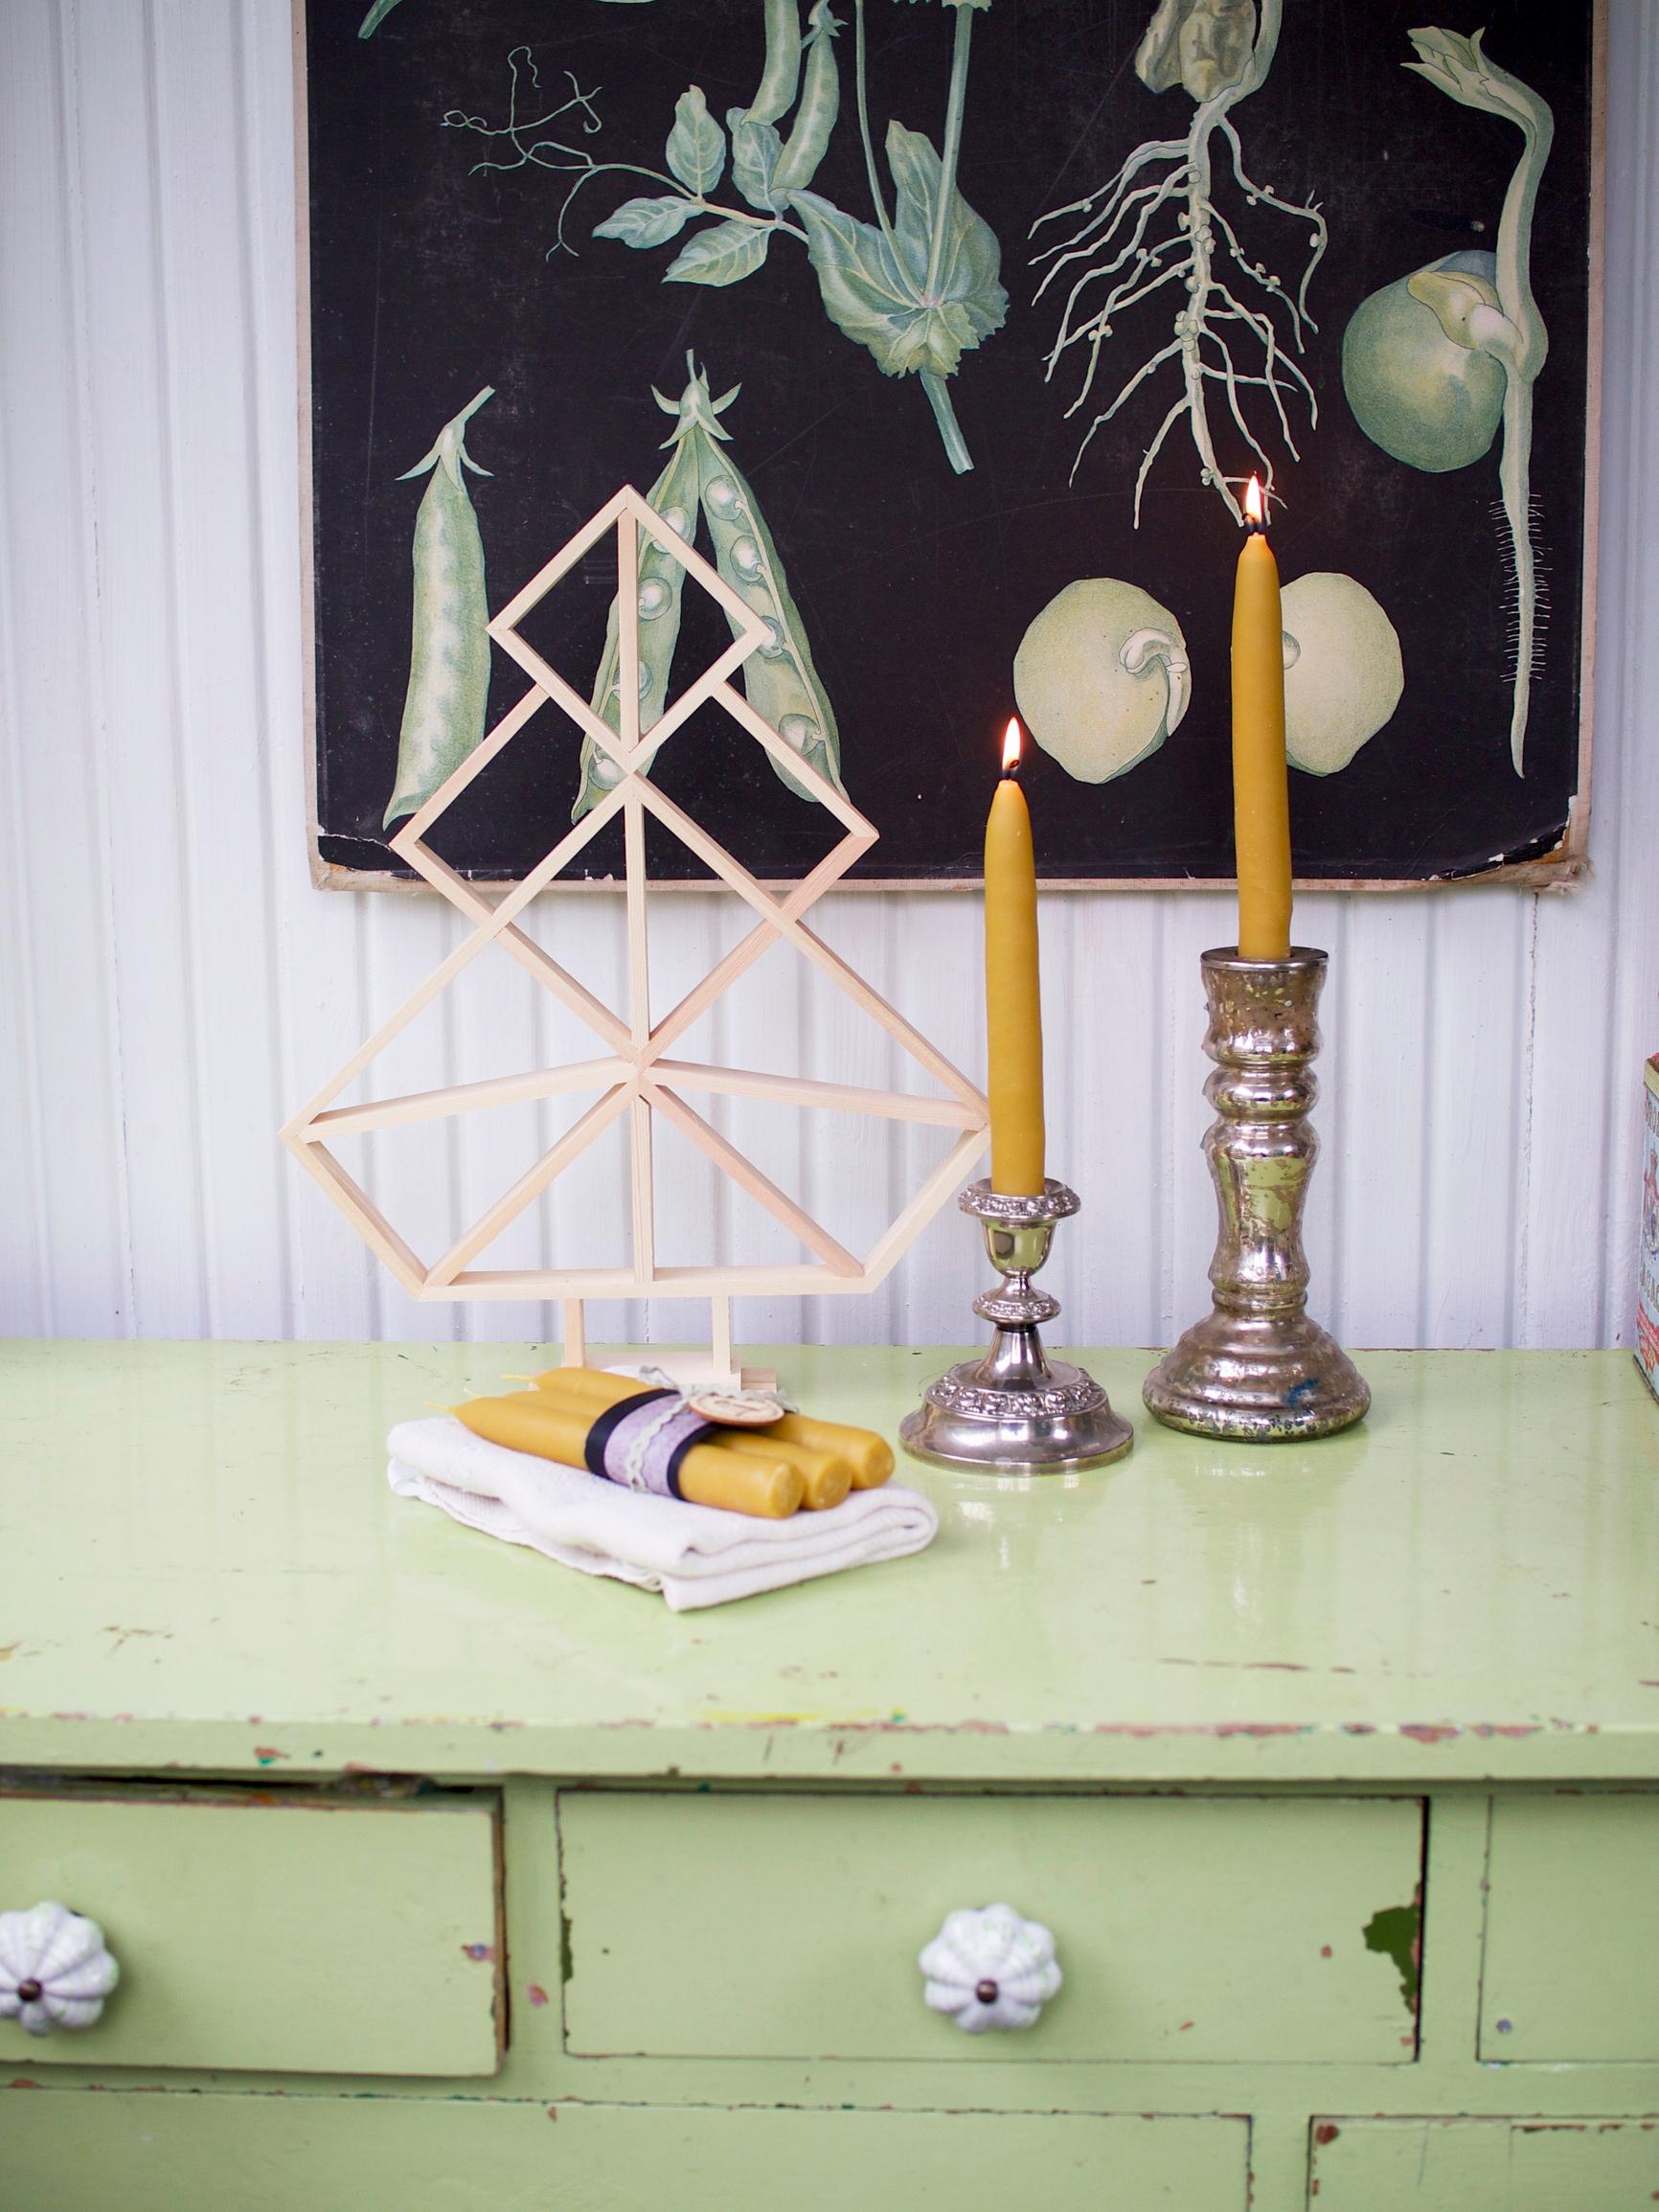
Beeswax candles come together quickly. As they burn, beeswax helps cleanse the air and gives off a delightfully sweet scent. Make them in different heights, shapes, and thicknesses. Style a striking cluster or wrap them as gifts.
Start with beeswax sheets and melt them in a water bath. These candles don’t drip or smoke as they burn. Beeswax helps cleanse the air and doesn’t release harmful substances into your home.
Beeswax candles—what you’ll need:
- about 20 beeswax sheets
- an old pot for melting
- a large pot for the water bath
- a hot plate
- a metal dipping container, such as a steel pail
- water
- wicking
- wooden sticks, such as plant stakes
- paper to protect the floor
- a knife
- scissors
- a thermometer
- protective gloves
- two chairs to act as a rack.
Beeswax candles—step-by-step:

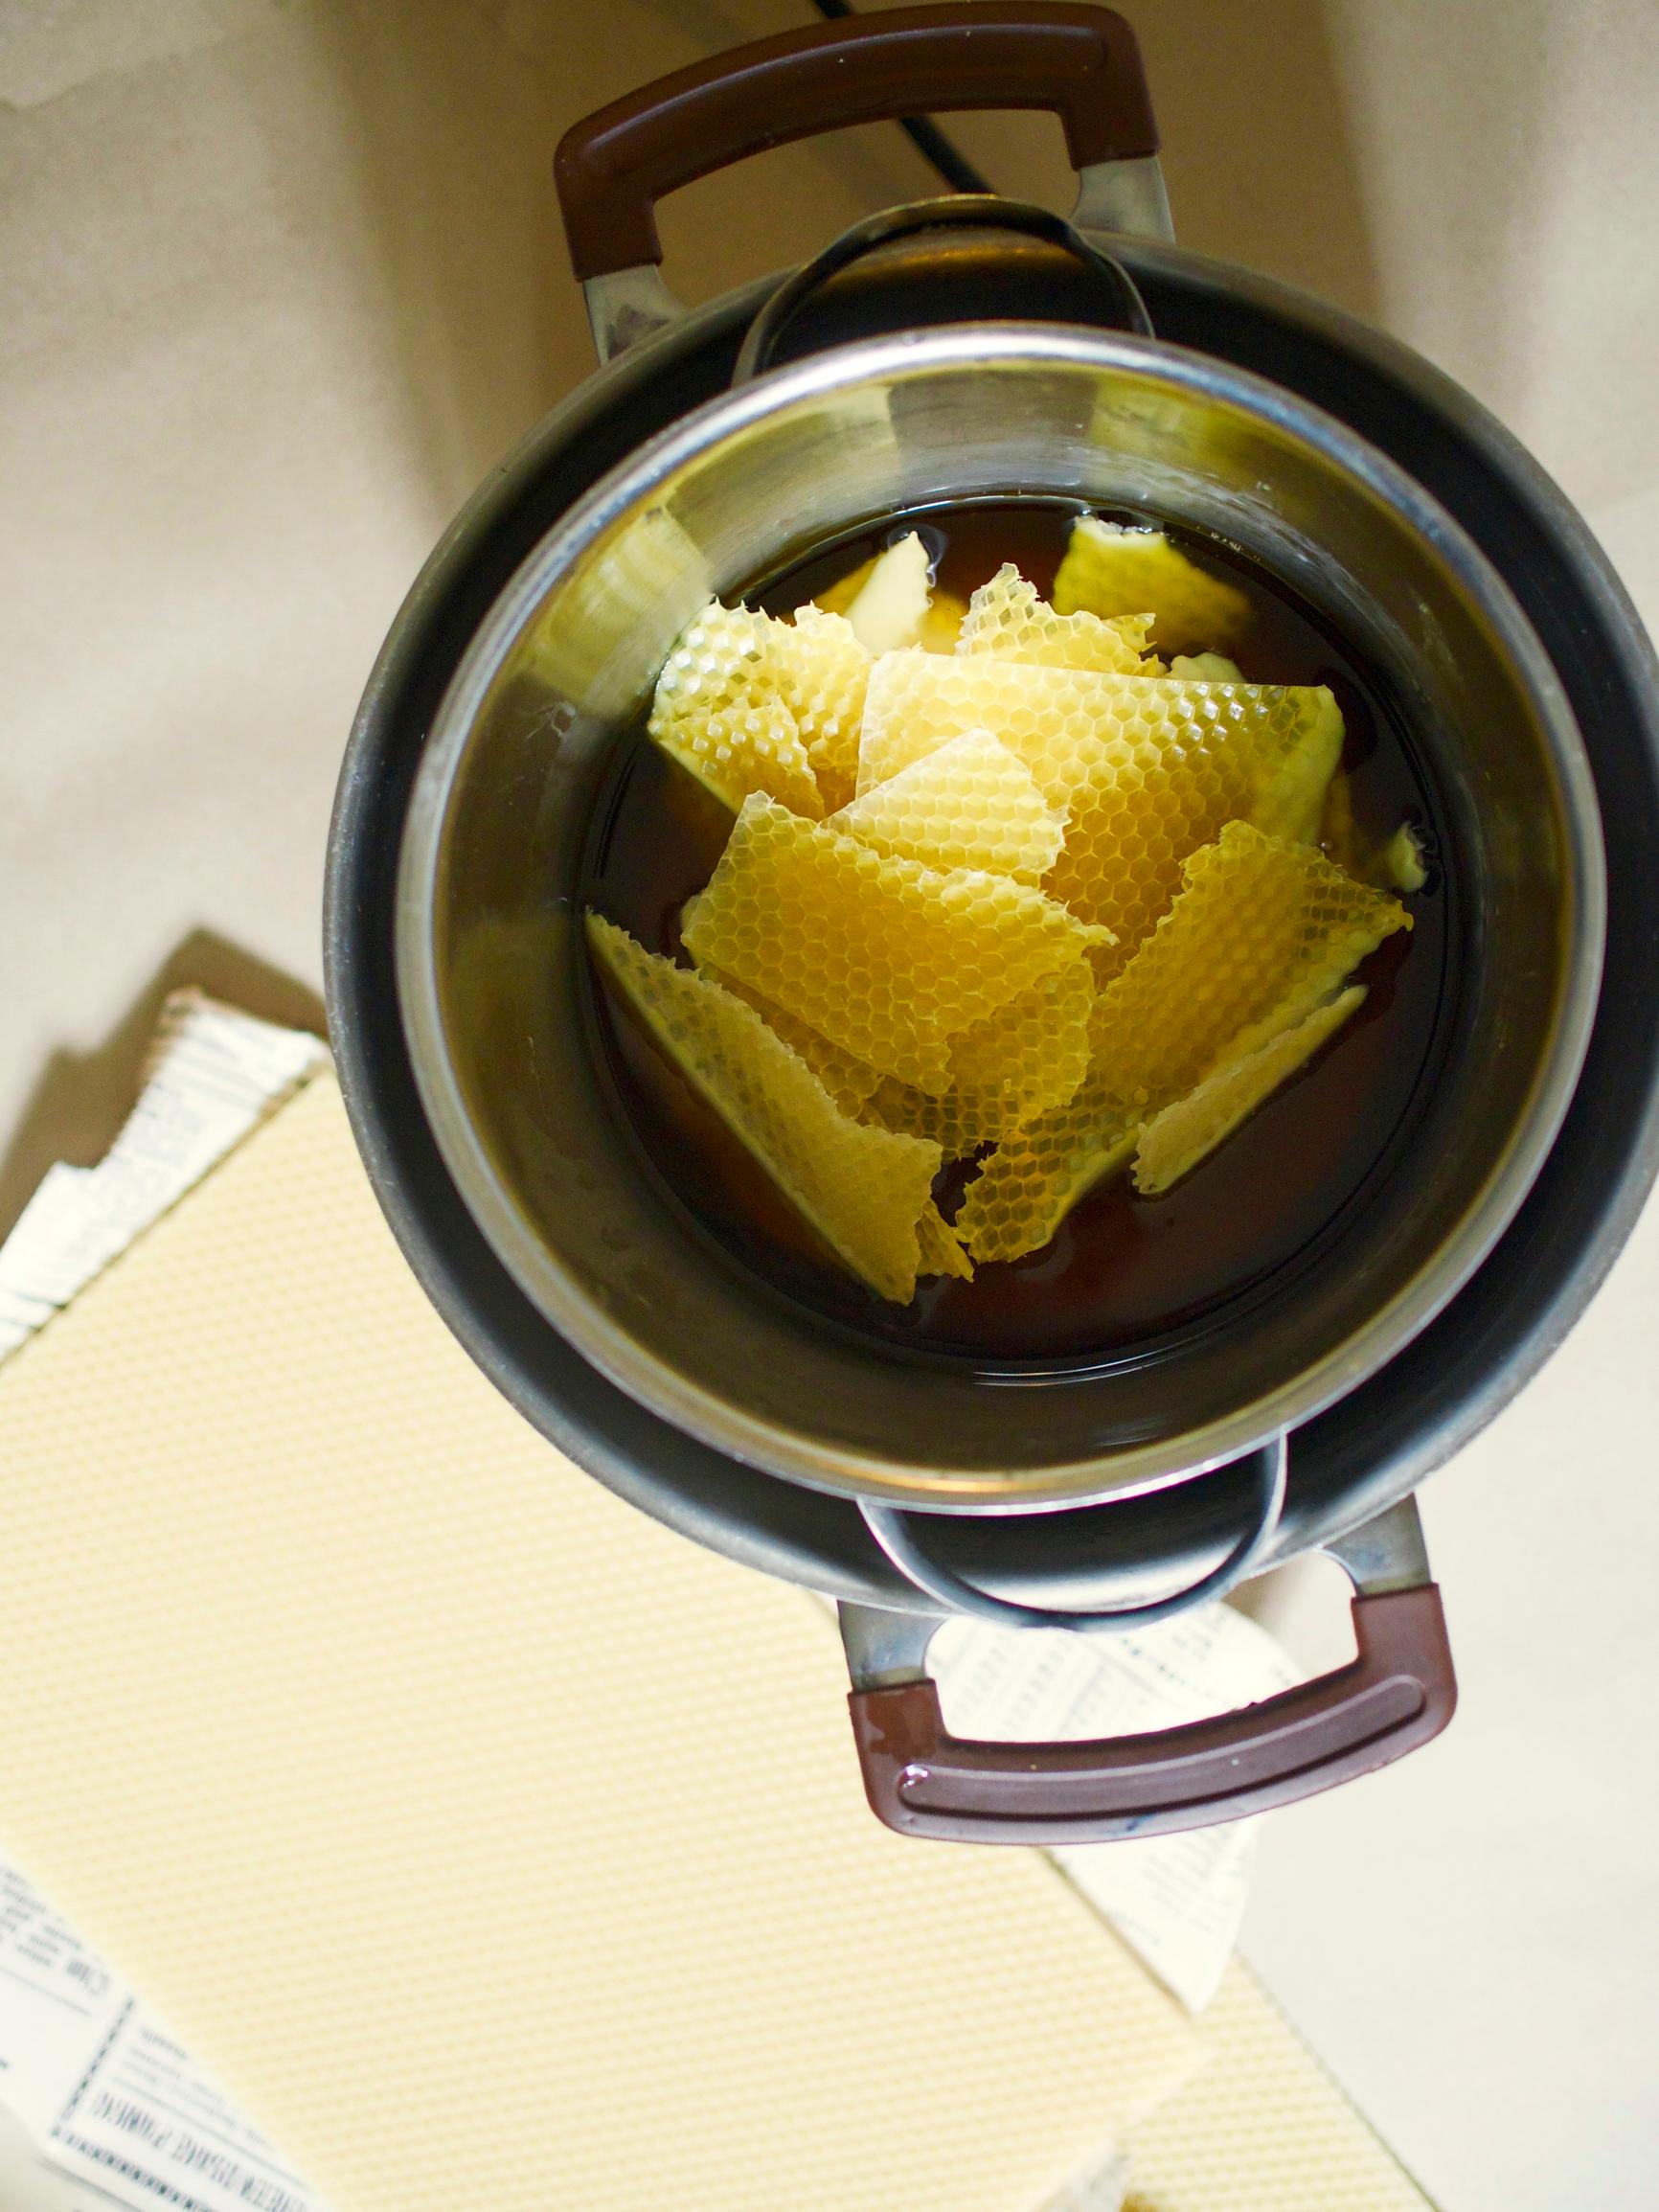
1. Melt the beeswax in a water bath. Beeswax melts at 65°C (149°F). Heat the wax to 75°C (167°F). Check the temperature with a thermometer.

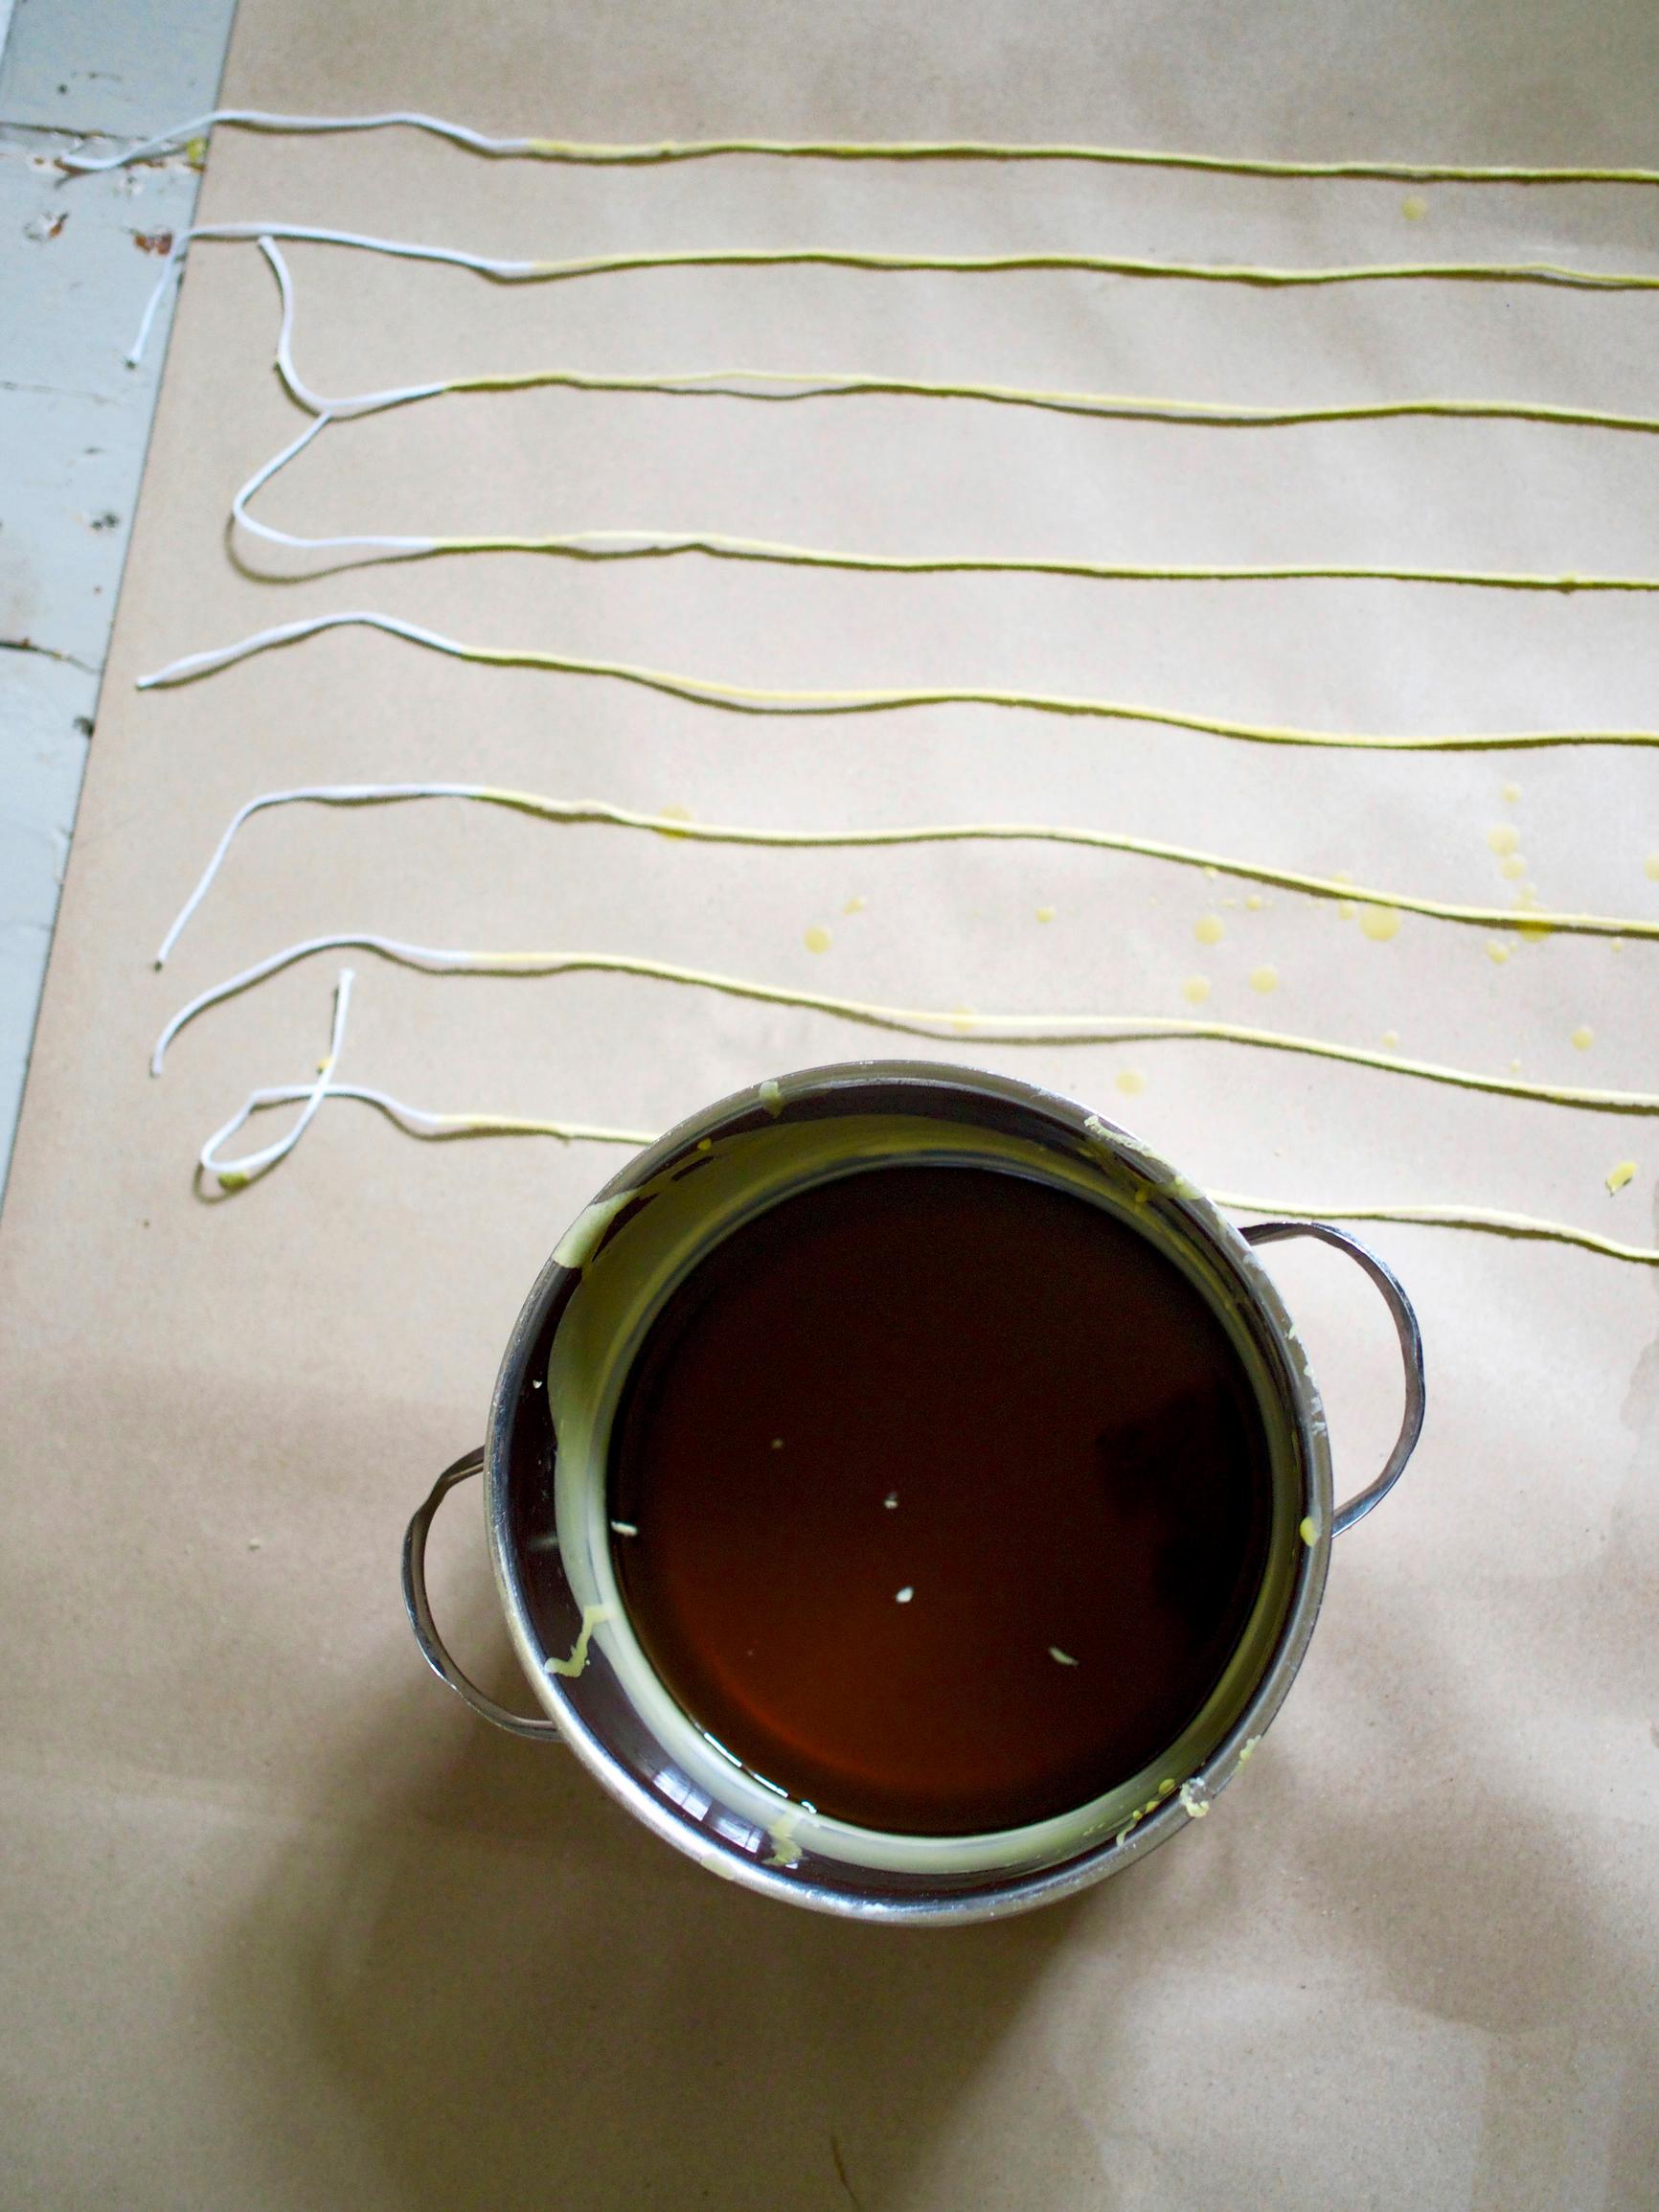
2. Cut the wicking into pieces about 40 cm (16”) long and prime them by dipping in the melted wax. Lift the wicks out and straighten them with your fingers. Careful—the wax is hot!

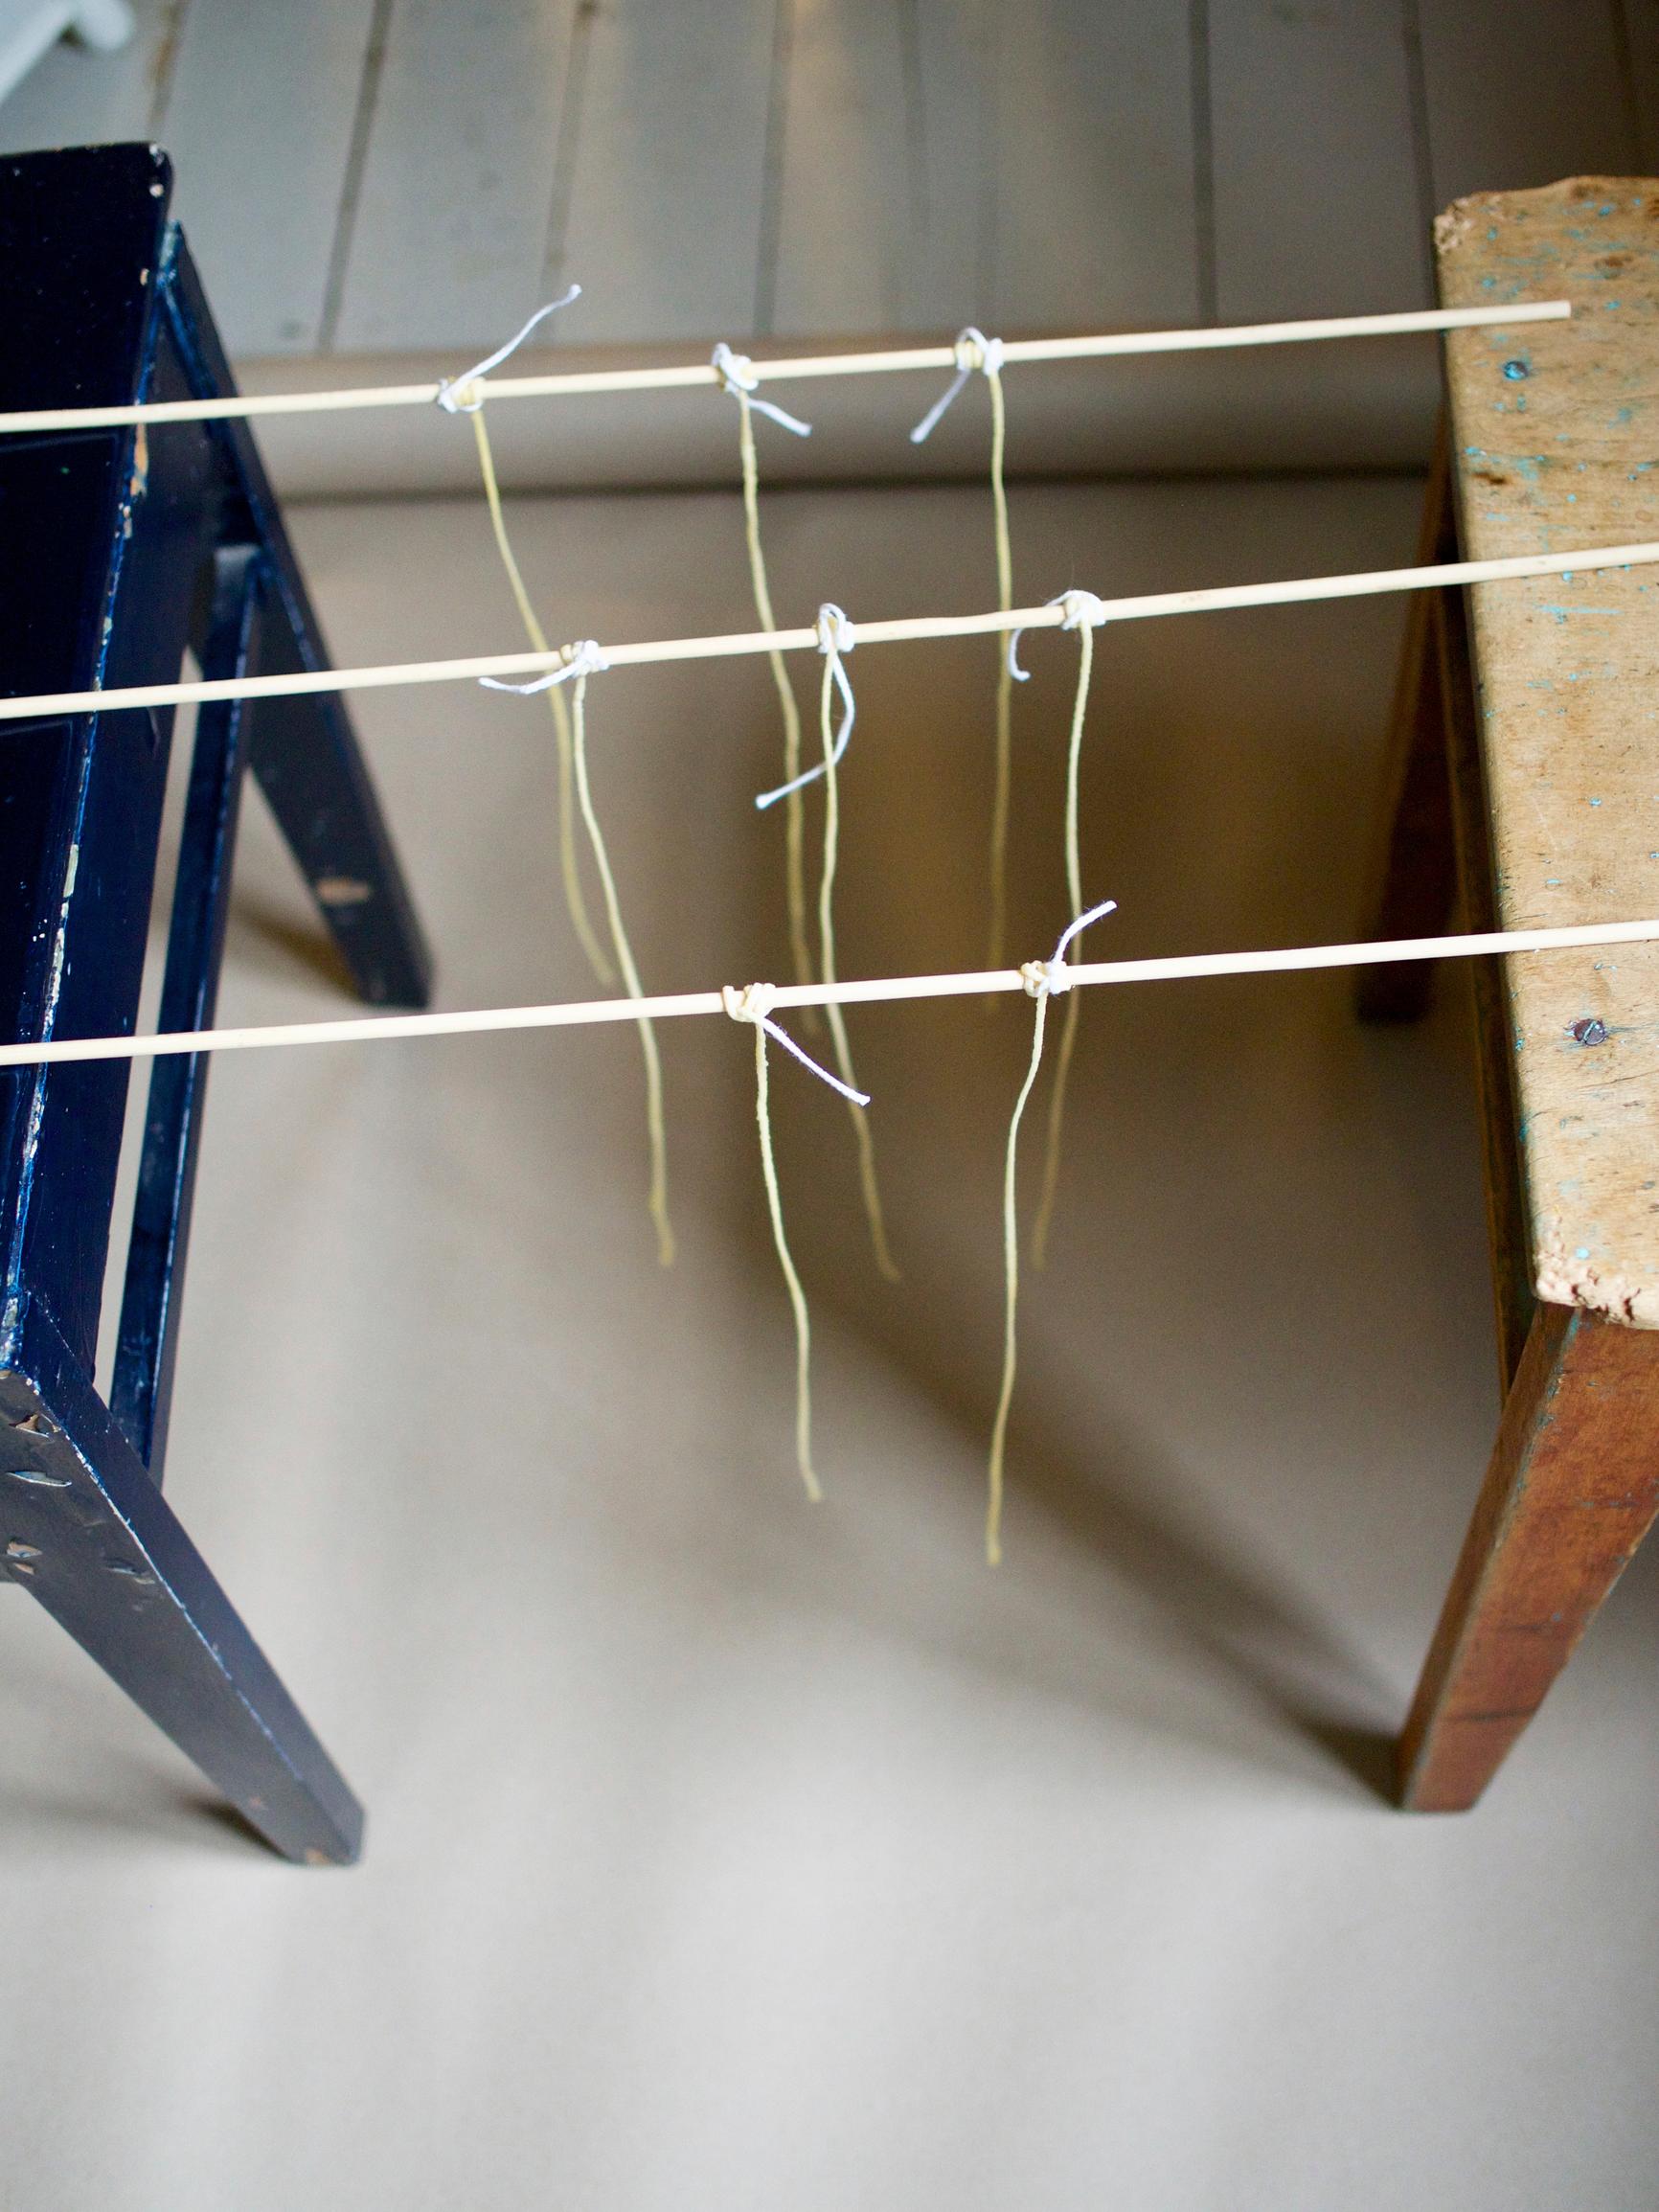
3. Tie the wicks to the sticks about 4 cm (1½”) apart, three wicks per stick. Rest the sticks across two chairs so the wicks hang freely toward the floor.

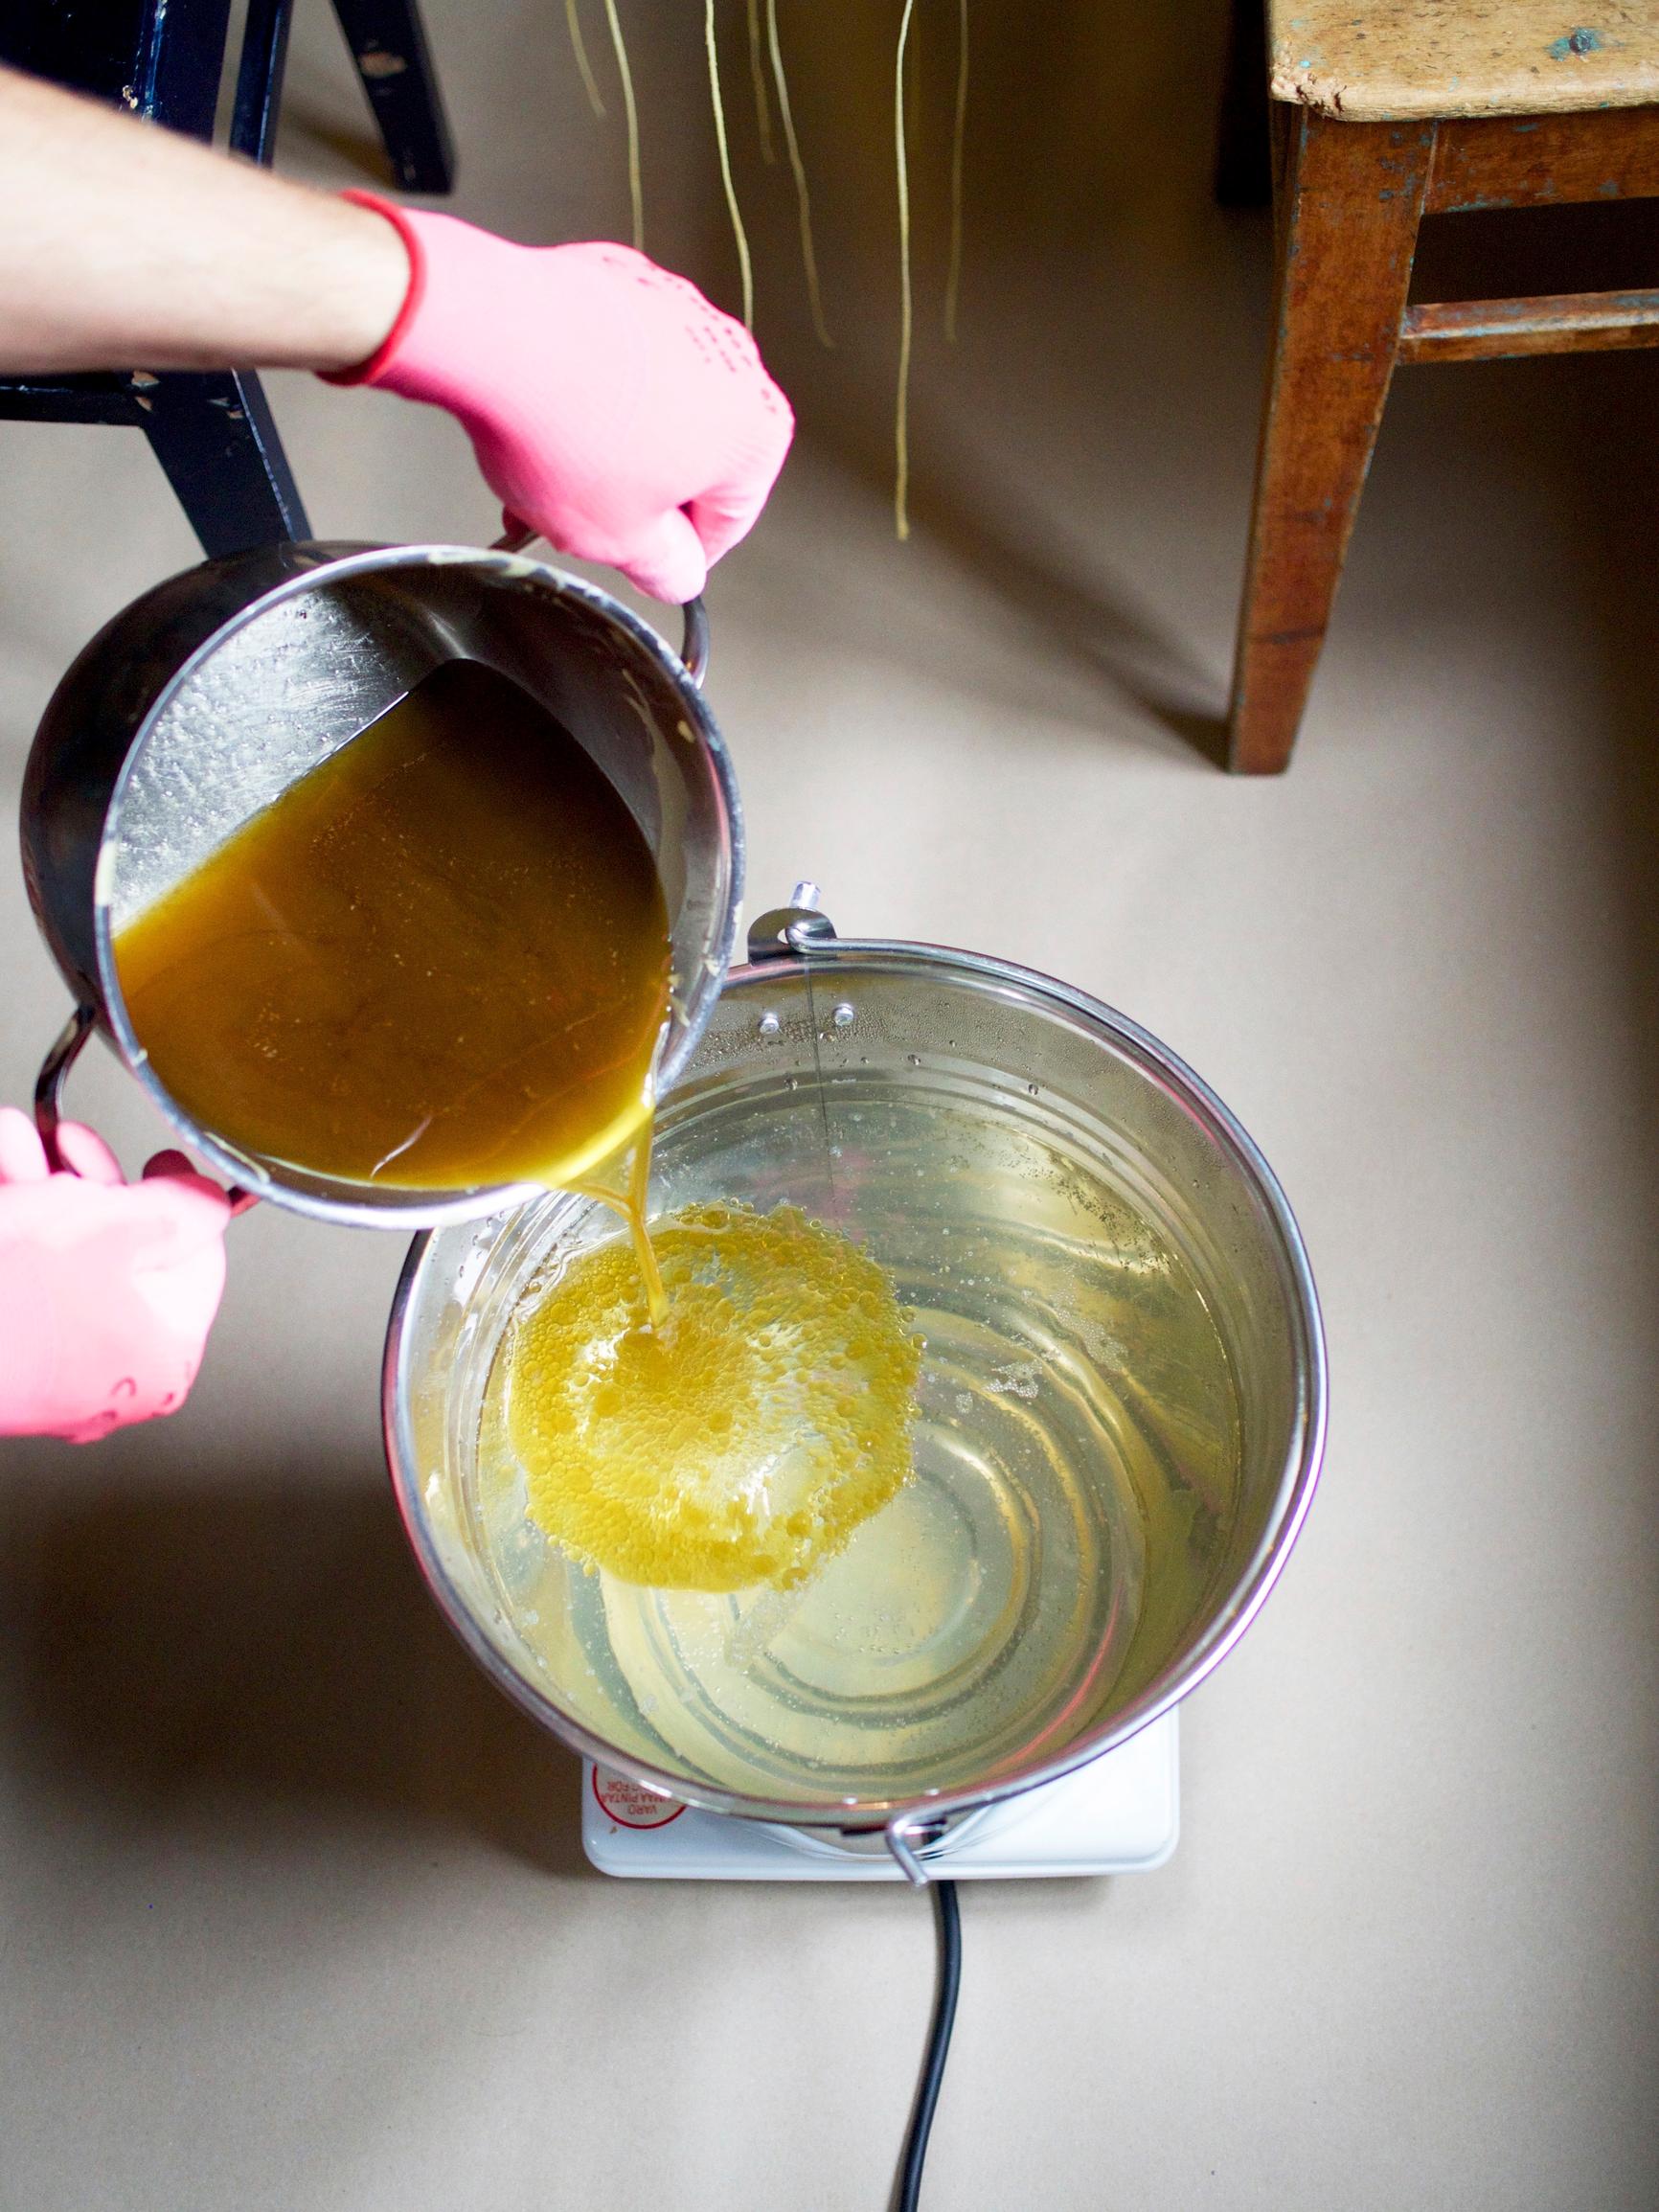
4. Heat the water in the large pot to 75°C (167°F). Pour hot water into the steel pail to a depth of about 25 cm (10”). Carefully pour a roughly 5 cm (2”) layer of melted wax on top of the water. The lighter wax will float on the surface. As long as both liquids are above 65°C (149°F), the wax will stay liquid. Add hot water as needed. Note: Never pour cold water on top of the wax!

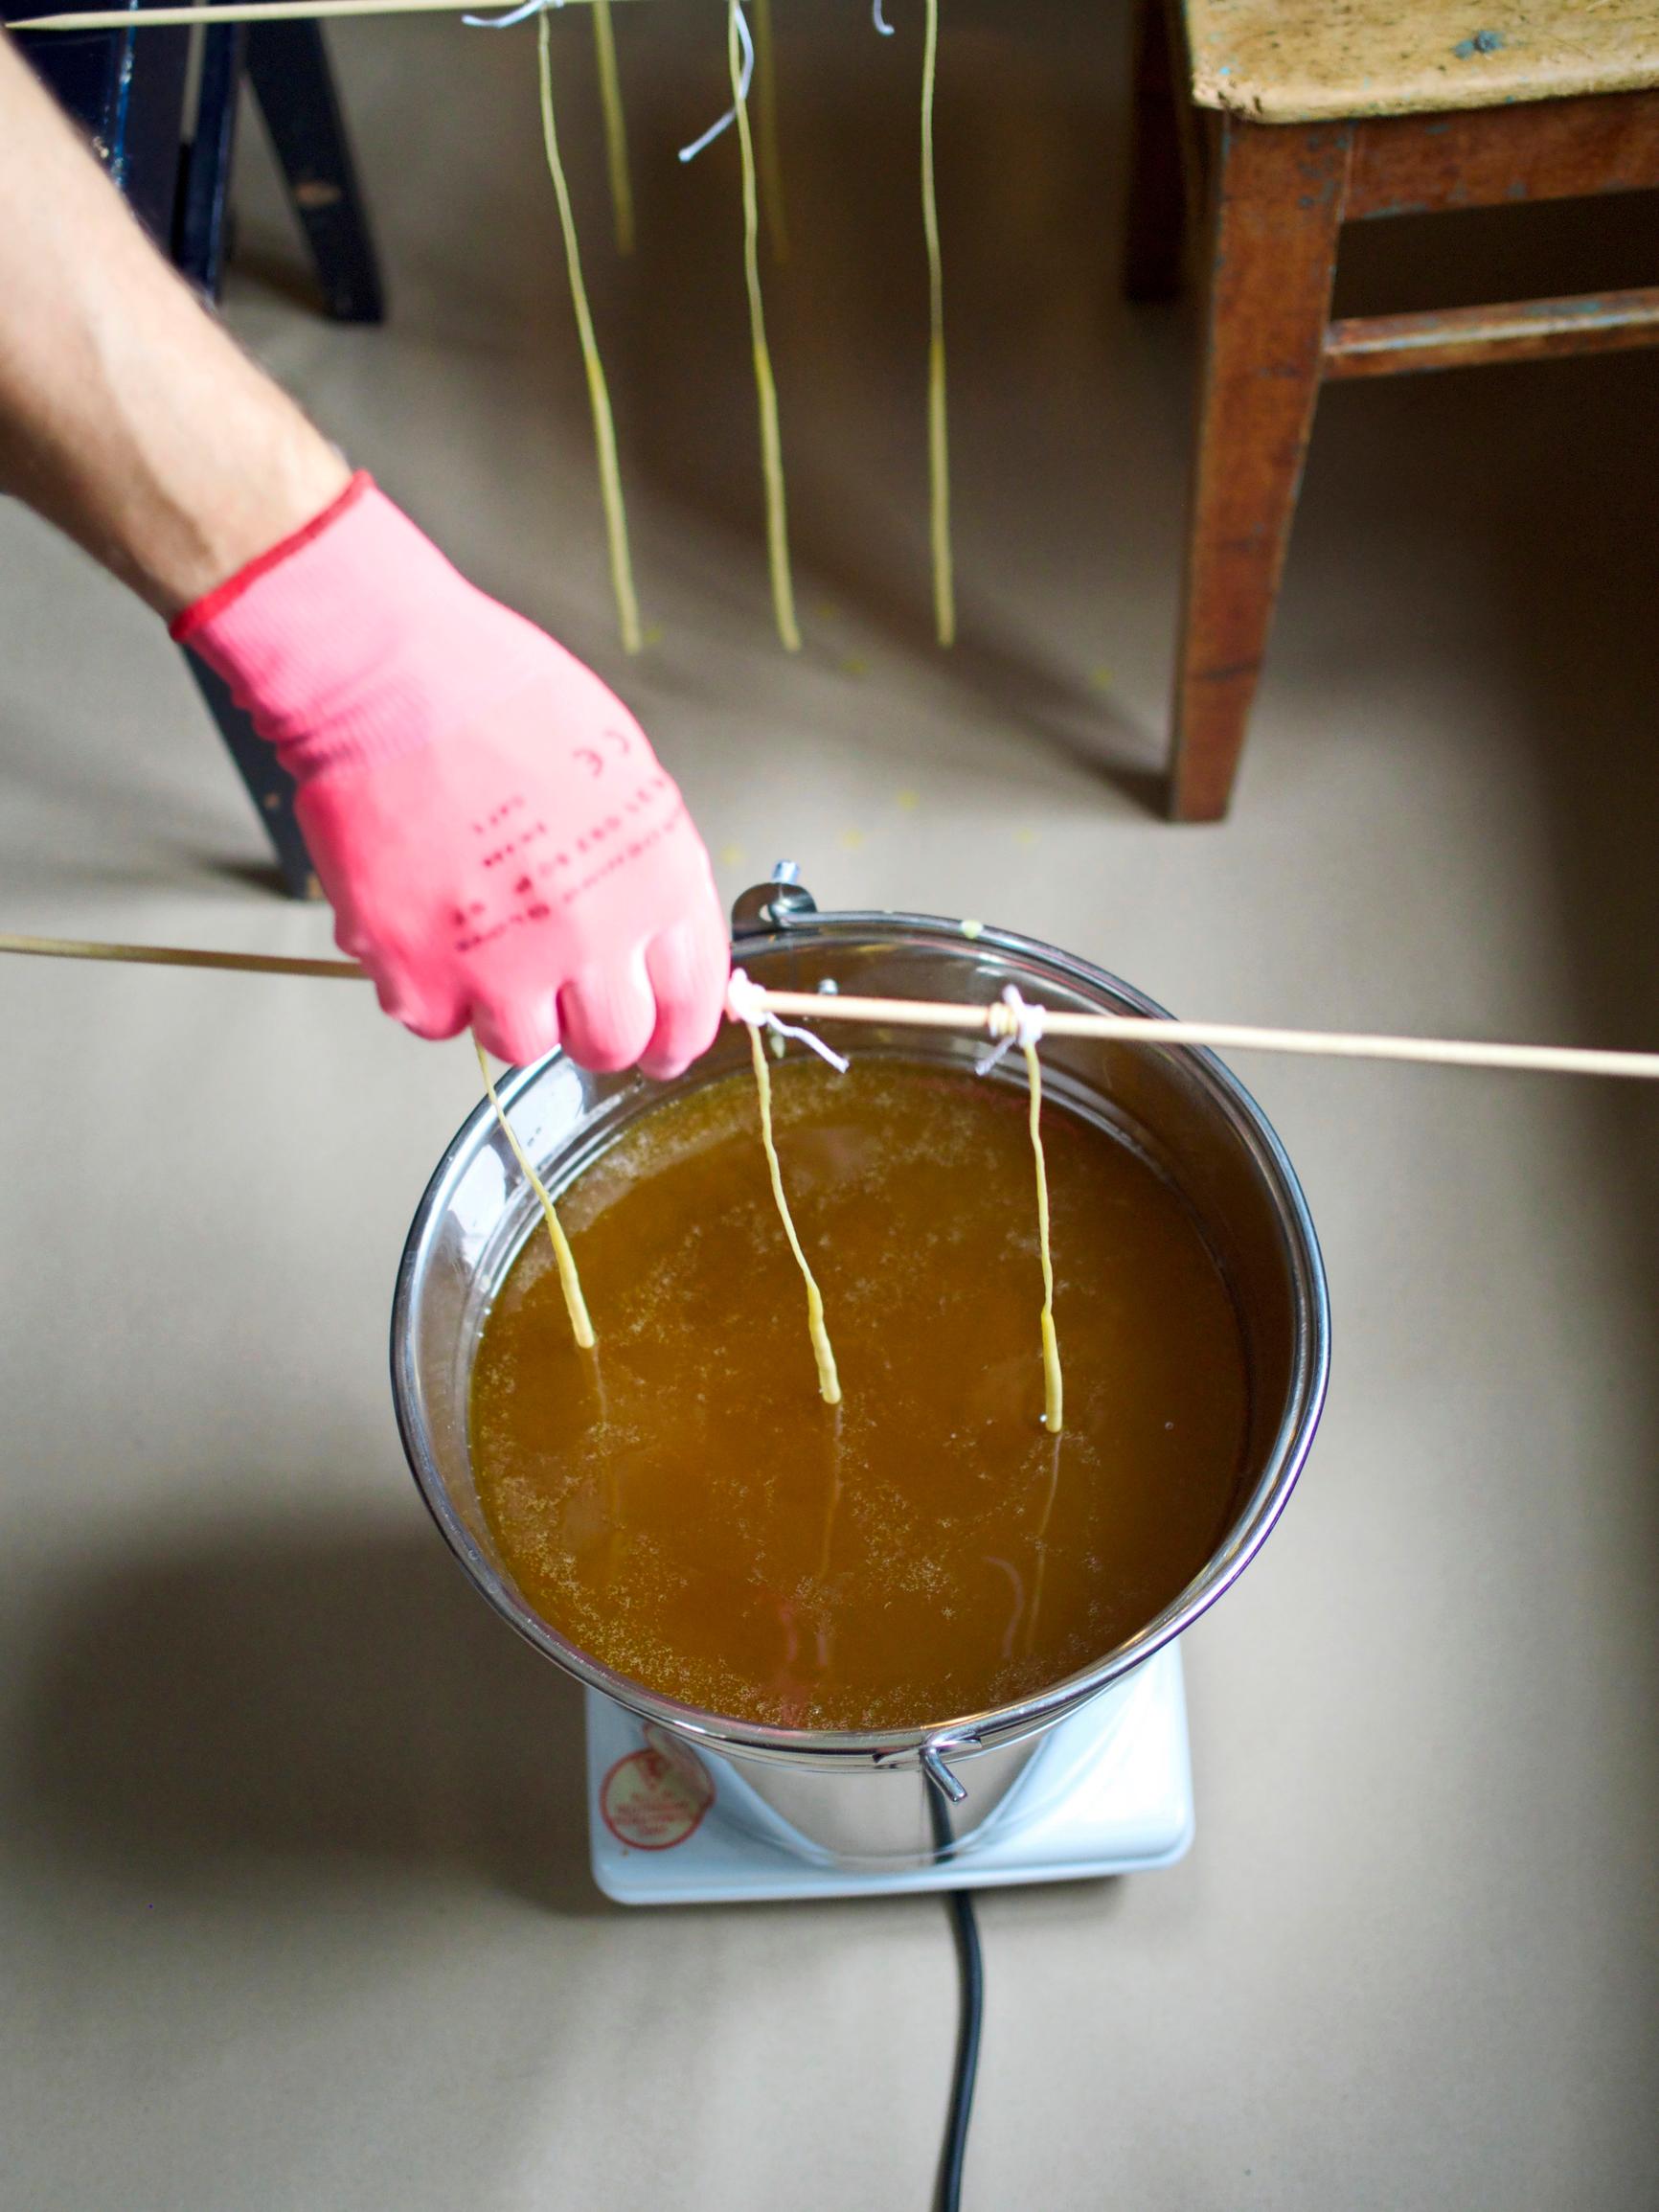
5. Dip the candles in the wax. Don’t forget your protective gloves. After the first few dips, you can still carefully straighten the wicks. Keep a calm, steady rhythm. Let the wax surface set for a moment between dips. The water mustn’t be too hot or it will melt the wax. Add more melted wax as needed. From time to time, trim off the little nub that forms at the bottom.

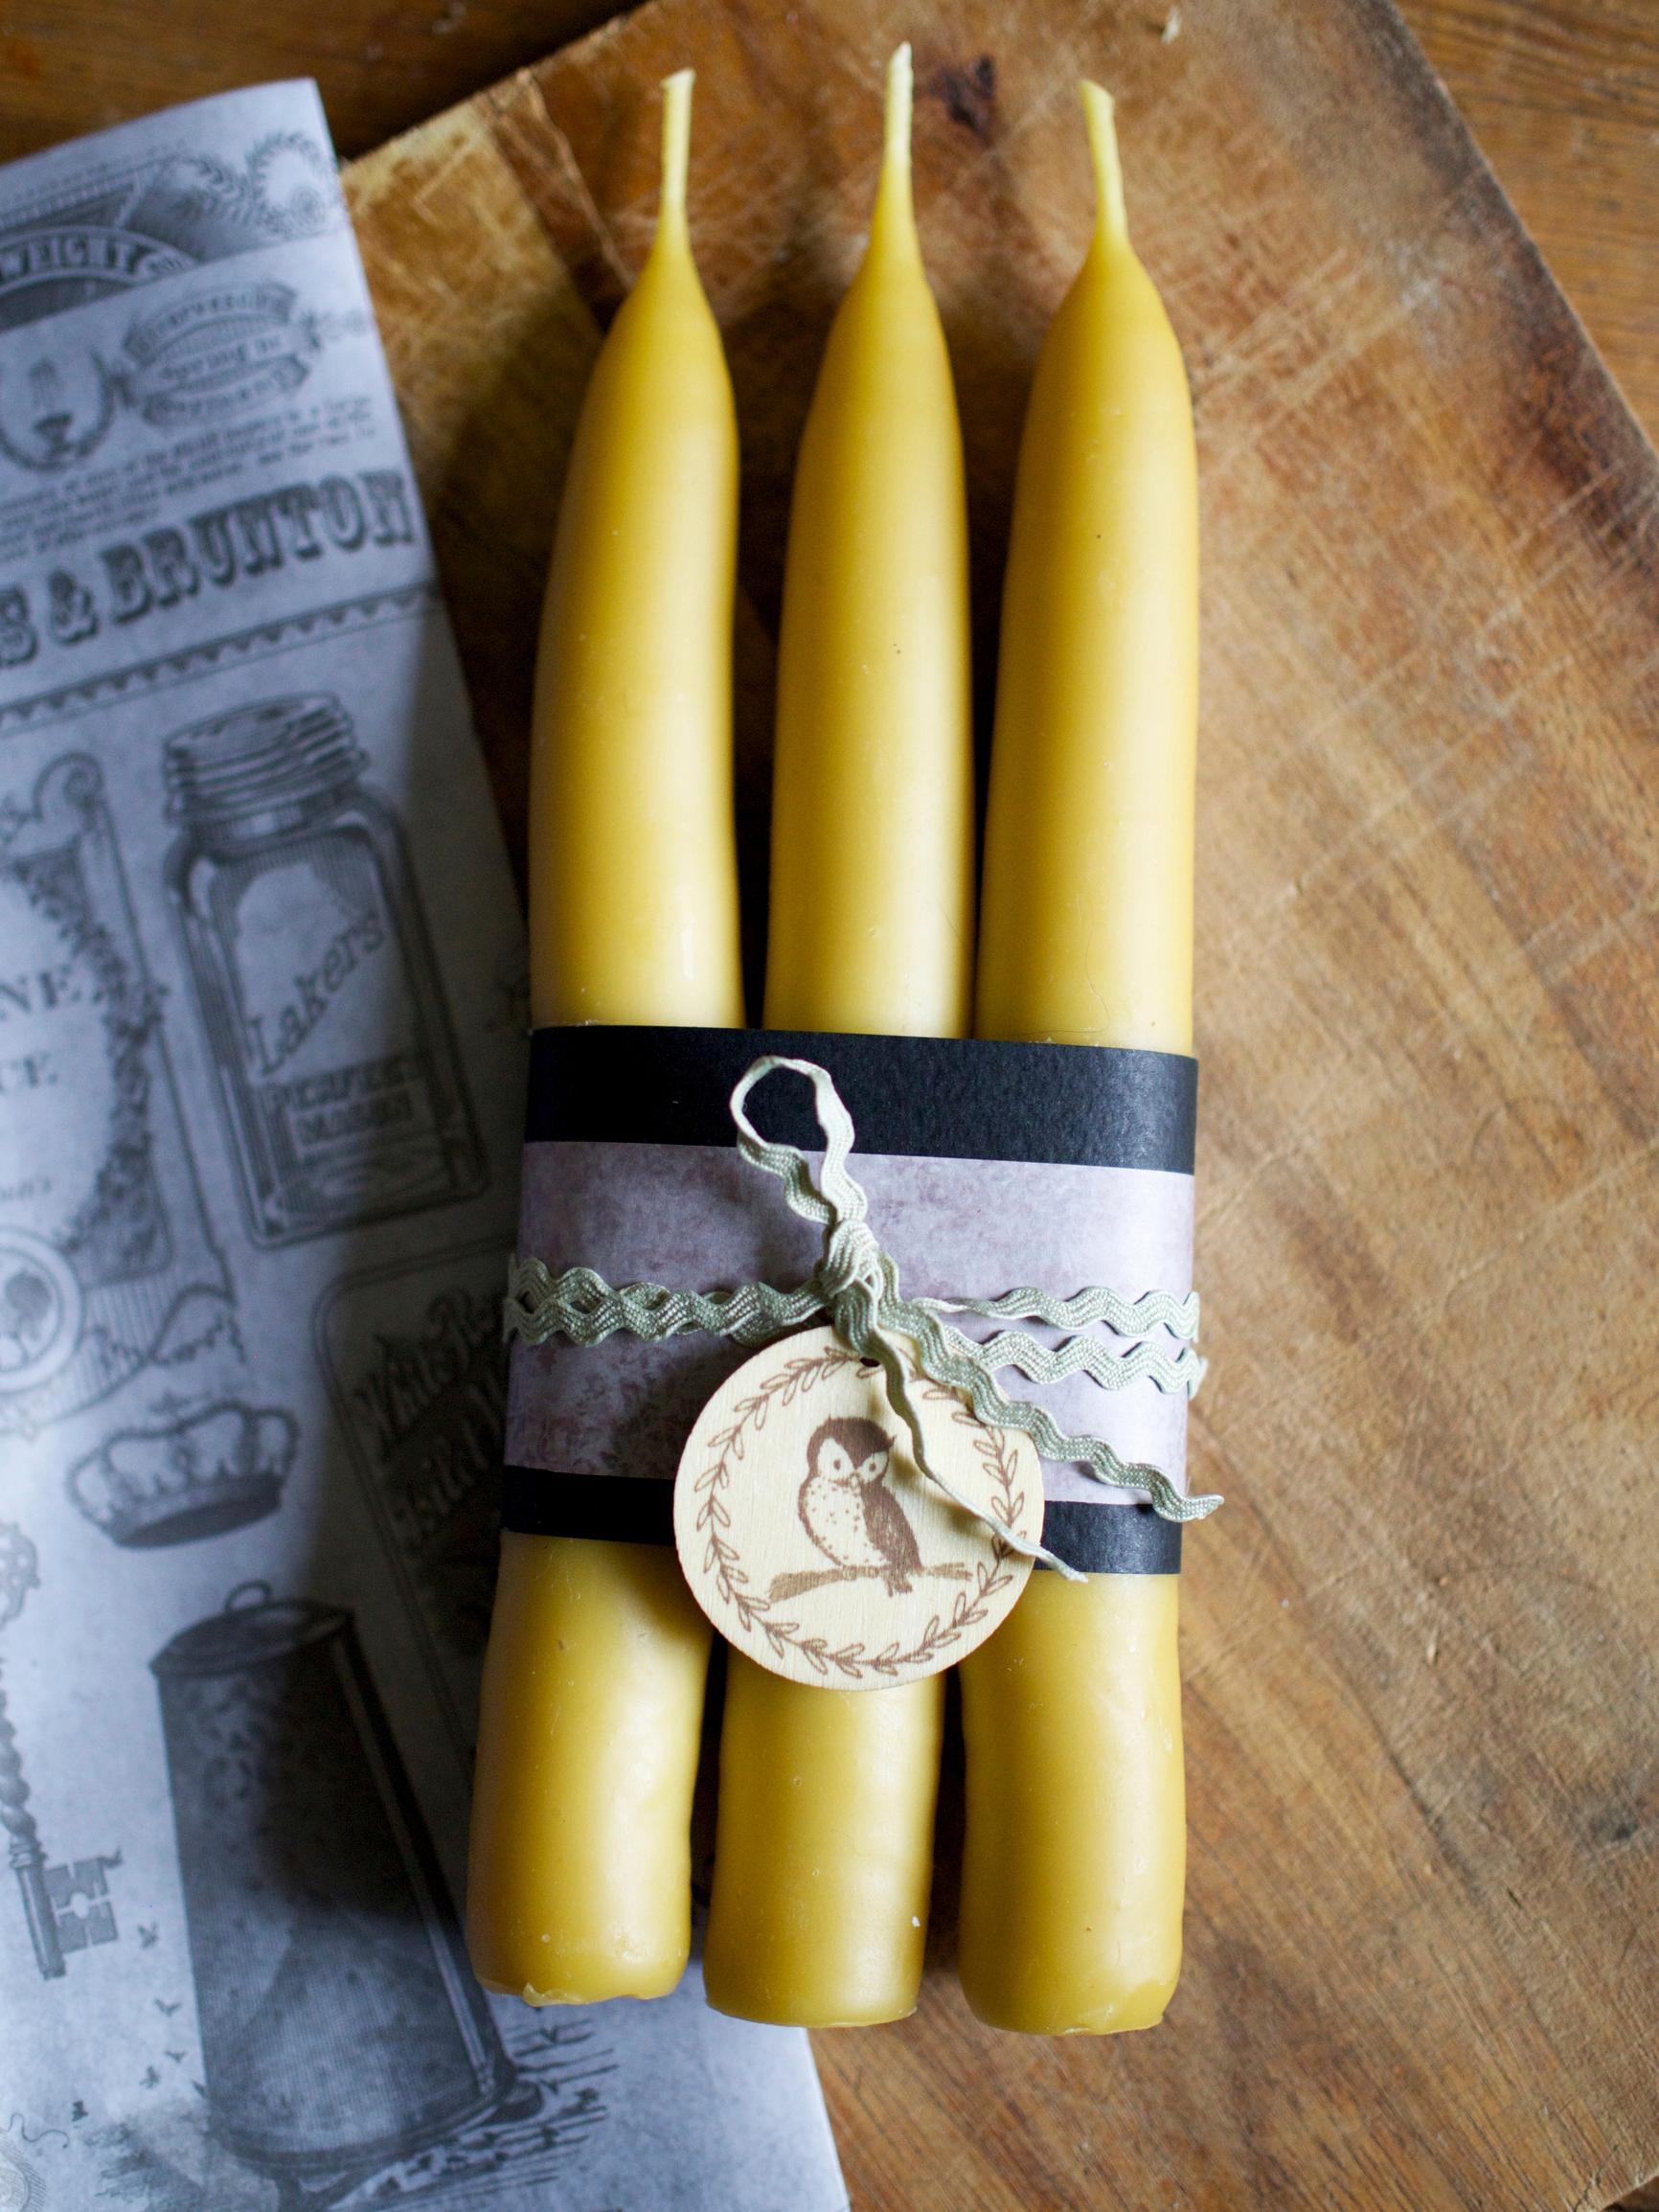
6. When the candles are the thickness you want, let them dry and cool. Unfasten the wicks from the sticks and trim them to about 2 cm (¾”). Level the bases with a knife. Wrap a cardboard band around the candles and decorate it as you like. A layer of cellophane finishes the package.
Tips!
- One beeswax sheet yields roughly one candle.
- If the wax catches fire despite all precautions, smother the flames with a lid or a blanket—never with water.
- Have fun with packaging: use raffia, glossy cut-outs, cardstock, chalkboard labels, small wooden ornaments, and silk or lace ribbons.

