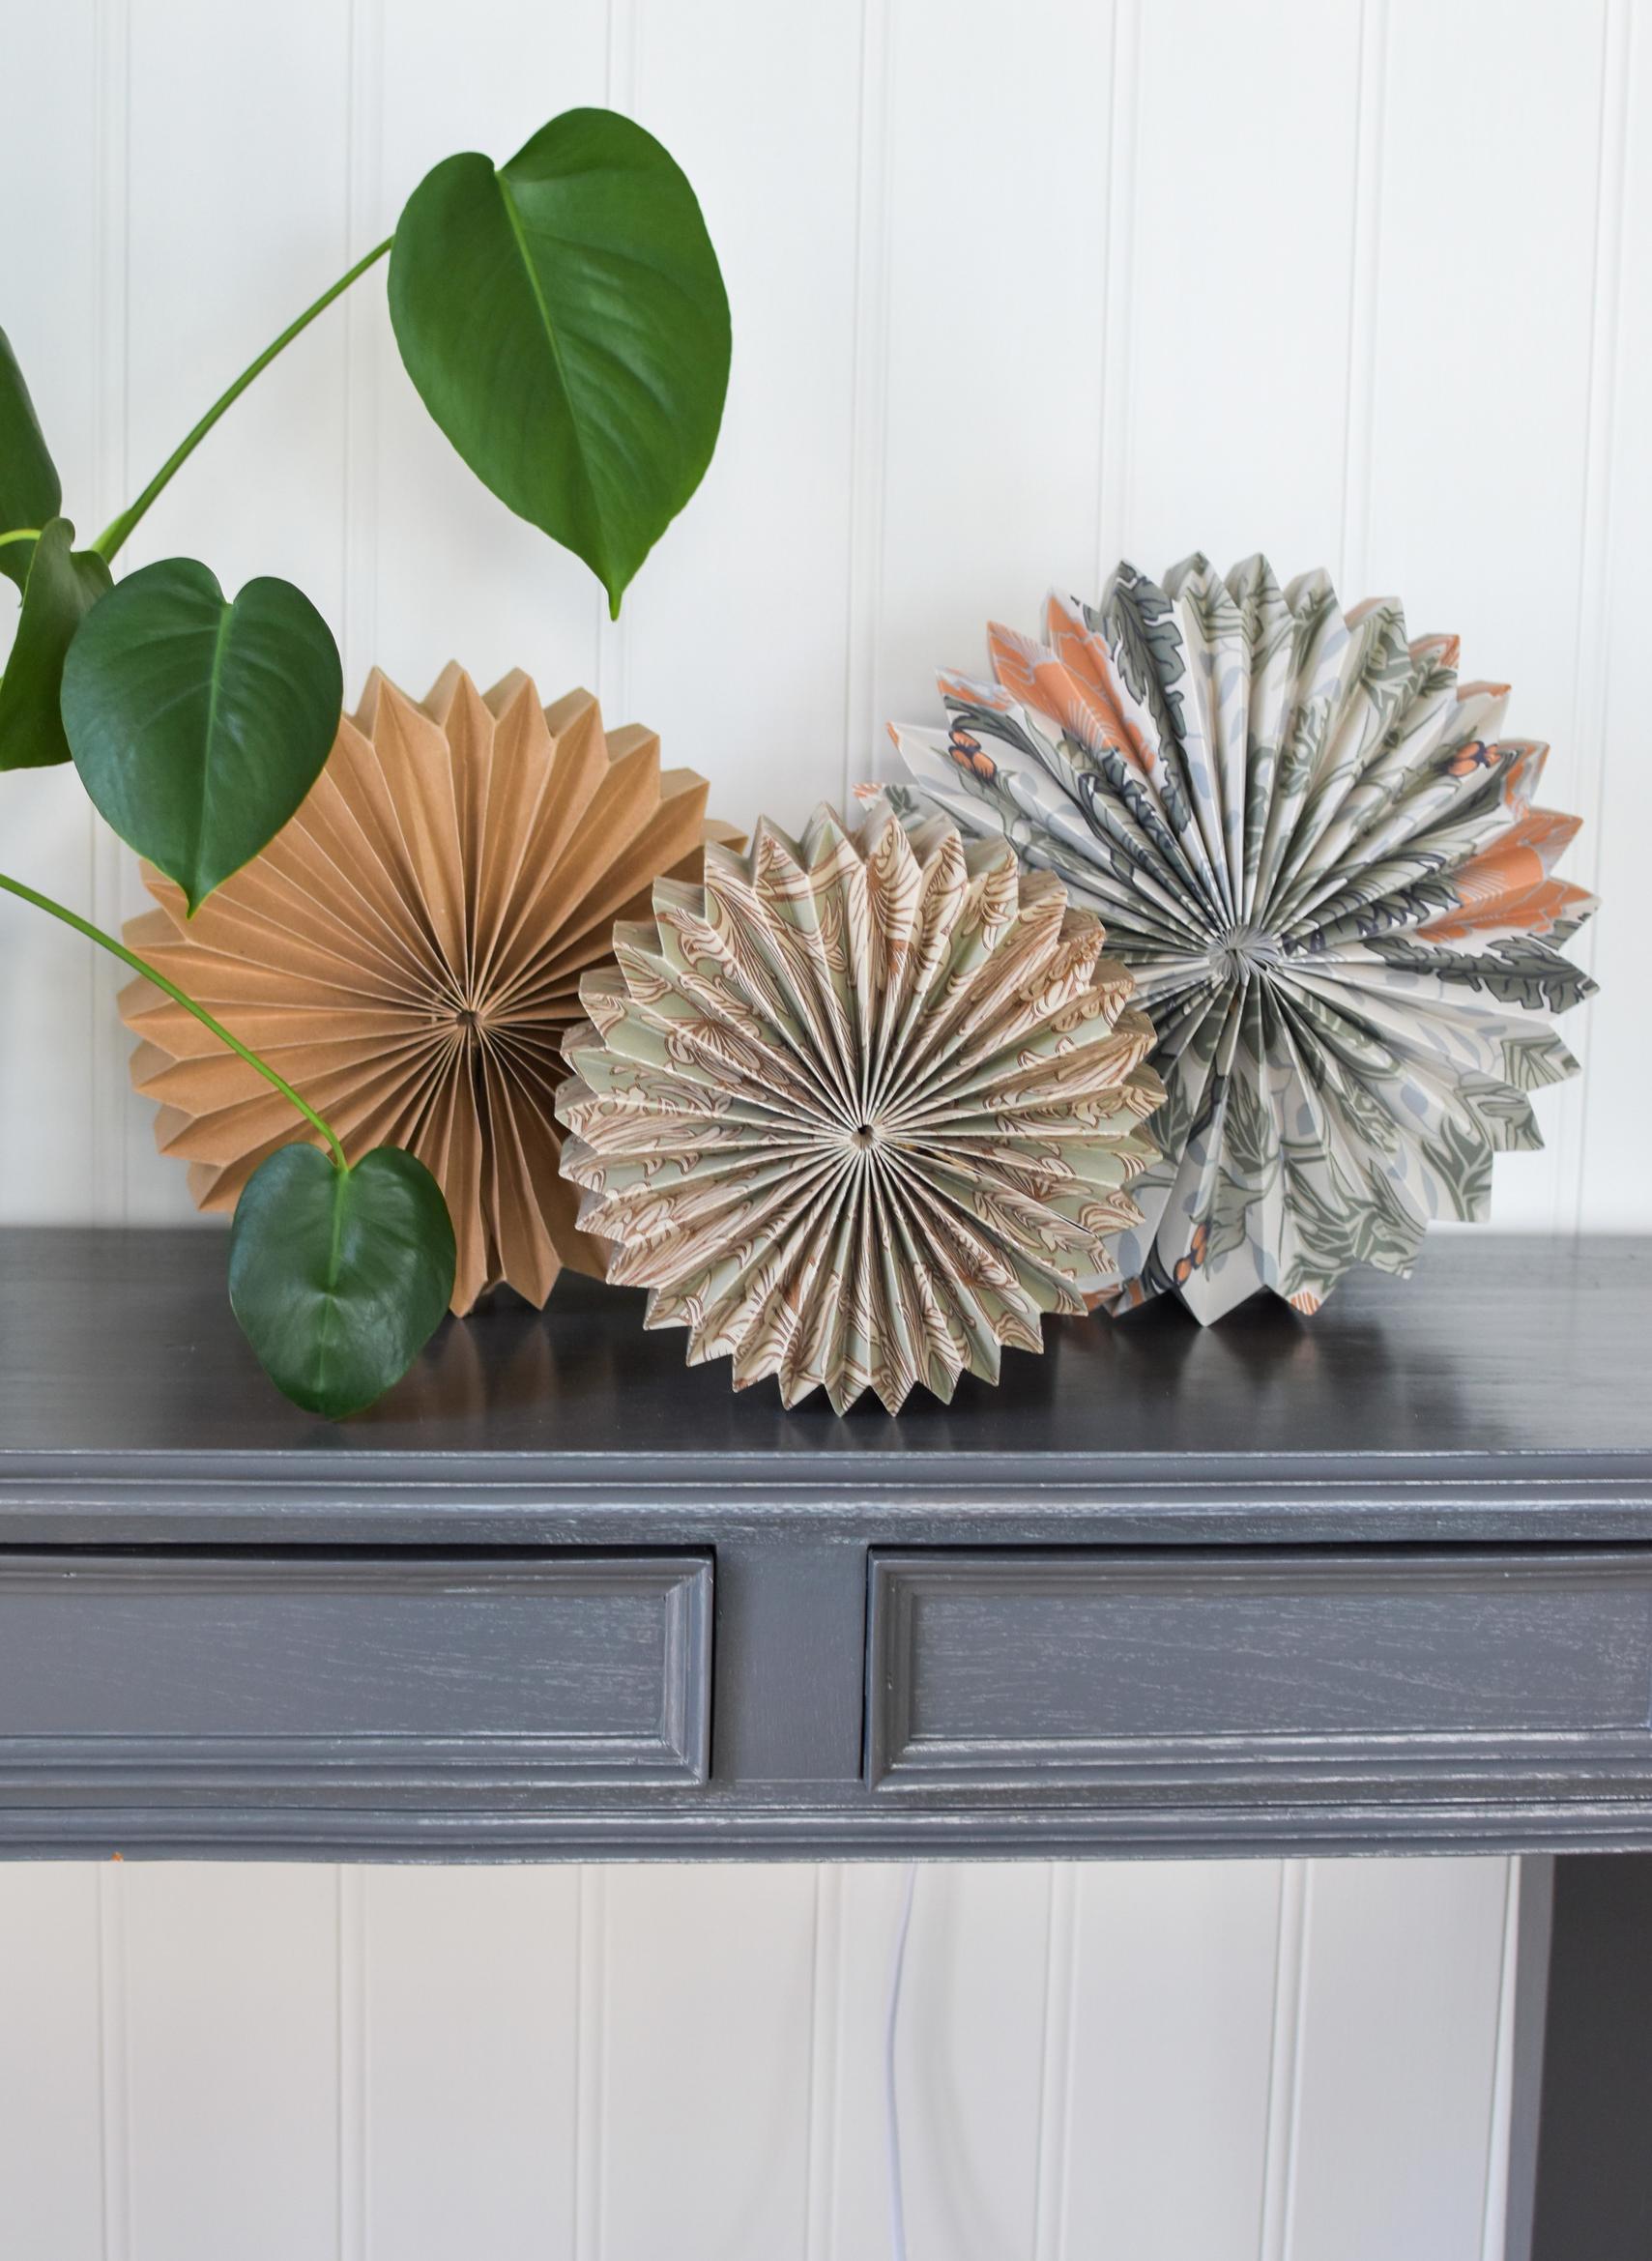
Create an atmospheric paper lamp with origami techniques
Craft a stunning decorative lamp using origami techniques with leftover wallpaper or any sturdy paper. Follow our step-by-step images to master the art of folding!
Materials needed for your paper lamp:
- Wallpaper or any sturdy paper
- Ruler
- Pencil and eraser
- Scissors
- Hole punch
- String
- Small binder clips
- Bone folder (optional)
Note:
The instructions provide measurements for three lamp heights: 19 cm, 22 cm, and 29 cm. The largest lamp is slightly rounder and accommodates a larger LED bulb. Precise folding is essential for a polished finish.


Step-by-step instructions for your paper lamp:
1. Cut a piece of paper to your desired lamp size: 115 × 25 cm for a small lamp, 140 × 29 cm for a medium lamp, or 170 × 37 cm for a large lamp.
2. Draw two parallel lines on the back of the paper, equidistant from the edges. For a small lamp, draw the lines 10 cm from the edge; for a medium lamp, 12 cm; and for a large lamp, 15 cm.


3. Fold the paper into 64 segments: First, fold it in half lengthwise, then fold each half in half again, and continue halving until you reach 64 segments. Sharpen all folds in both directions using a ruler or bone folder.


4. Fold one crease from the bottom upwards. Then, fold the corner so the bottom edge aligns with the vertical line (4a). Reinforce the lowest crease to form a triangle on the reverse side, as illustrated (4b).


5. Turn three folds upwards and fold the bottom edge against the line from the corner similarly. Reinforce the fold up to the lowest crease, as before.


6. Fold five creases upwards, then align the edge with the line, creating a similar triangular fold as previously.


7. When it becomes difficult to follow the line from the right side, flip the paper and continue from the back. Maintain the folding pattern, making a small corner fold every other layer.


8. Repeat the folding process on the opposite edge of the paper.


9. Now, the most challenging yet enjoyable part begins: shaping the lamp. Start at the short edge, folding one pleat at a time. Follow the folded lines. On the sides, fold every other crease outwards and every other crease inwards. From a top view, short folds are “mountains” and long folds are “valleys”.


10. Fold the entire paper, reinforcing the folds, and then unfold it.


11. Use a hole punch to create a hole in the center of each fold’s bottom.


12. Thread string through the holes on both sides and tie the ends.


13. Fasten the sides with small binder clips for easy bulb replacement.


14. Insert a non-heating LED bulb or light strip.

